The Ultimate ComfyUI Upscaling Workflow for Fabric/Clothes
This article walks through a four-stage ComfyUI upscaling workflow I designed specifically for fabrics. We’ll start from a small source (e.g., 612×408) and end with a crisp, realistic result by combining:
- Stage 1: RealWebPhoto upscaler (configurable 4×)
- Stage 2: Wan2.2 Low-Noise repaint with the KSampler (texture-preserving)
- Stage 3: Image Lucy Sharpen + a branch switch (choose Wan2.2 result or Stage-1 result)
- Stage 4: Ultimate SD Upscaler (2×) powered by SRPO + Turbo LoRA + Detail Daemon Sampler
Throughout, I’ll call out the exact settings that matter, why they matter, and when to deviate—especially when delicate fabric textures are at stake.
YouTube Tutorial:
Gain exclusive access to advanced ComfyUI workflows and resources by joining our community now!
Stage 1 — Initial Upscale with RealWebPhoto (Configurable 4×)
Goal: Create a clean, high-quality base with strong fabric micro-detail, without over-committing to final size.
Why RealWebPhoto? I tested dozens of upscalers across hundreds of images; RealWebPhoto consistently produced some of the best fabric detail and natural edge contrast. It’s particularly good at sweaters, knits, and woven bags that tend to look mushy after naive upscales.
Typical node group:
- Load Image (e.g., 612×408)
- Upscale Node → Model: RealWebPhoto
- Output Preview (compare against original)
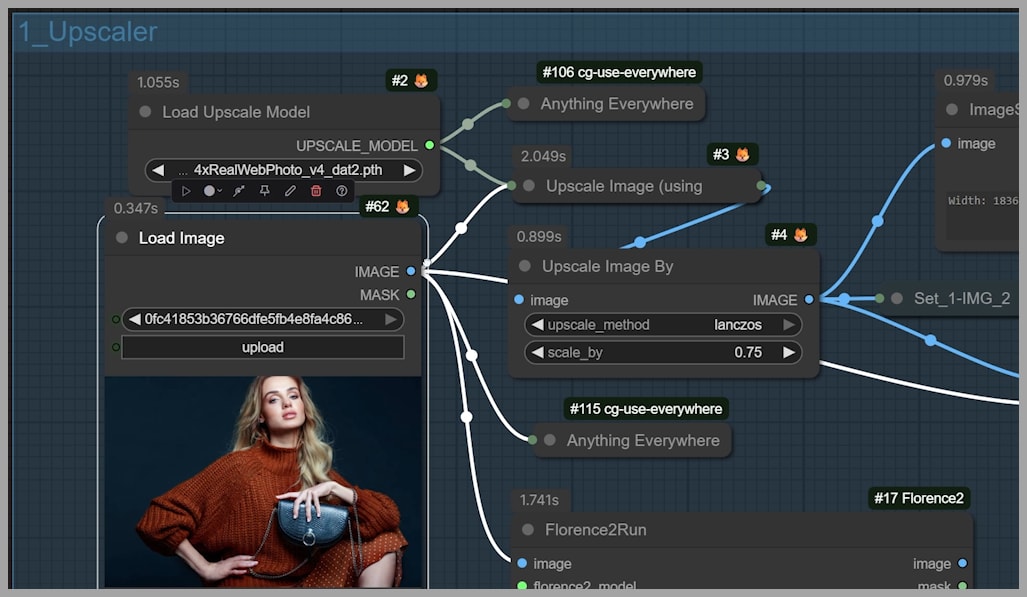
Key settings & tips:
scale_by:- If memory is tight or Stage 4 will also enlarge by 2×, consider 2×–3× here.
- What to look for:
- Inspect fabric edges (cuff seams, knit ribbing, bag straps) and micro-texture (weave pattern).
- If Stage-1 already looks superb, remember you can skip Wan2.2 in Stage 3’s branch switch later.
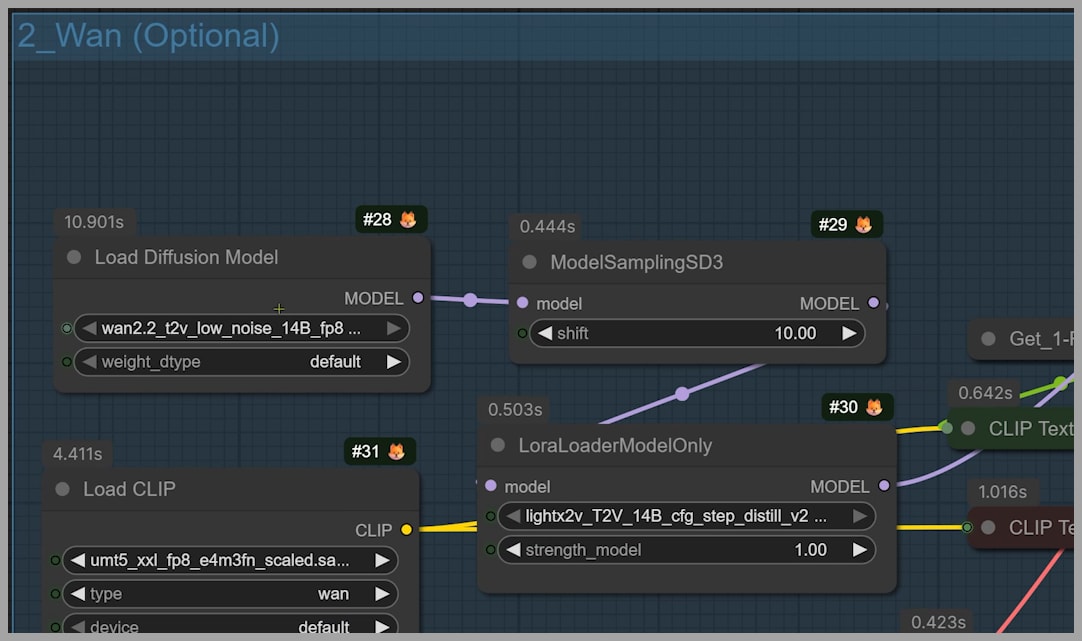
Stage 2 — Texture-Preserving Repaint with Wan2.2 Low-Noise
Goal: Clean artifacts and refine texture without overwriting good fabric detail.
Typical node group:
- Model Loader: Wan2.2 Low-Noise
- KSampler (denoise + scheduler)
- Output Preview
The two most important controls:
- Scheduler (KSampler):
- Best for preserving fabric:
exponential(top pick for upscaling—keeps original textile feel). - Also good:
kl_optimal(retains much of the original, but mixes in a bit of Wan2.2’s own texture). - If you want new texture: Try other schedulers—but expect larger changes to the fabric look.
- Best for preserving fabric:
denoise:- Use small values. On Wan2.2, even 0.10 can have a large impact.
- Start with 0.05–0.20 when you want to keep original weave/knit character.
When to use a different scheduler or higher denoise:
- If the source (especially AI-generated) has strange or plastic textures, deliberately switch to a less conservative scheduler and raise
denoiseslightly to replace the texture. Wan2.2 produces convincingly realistic textiles when asked to “take the wheel.”
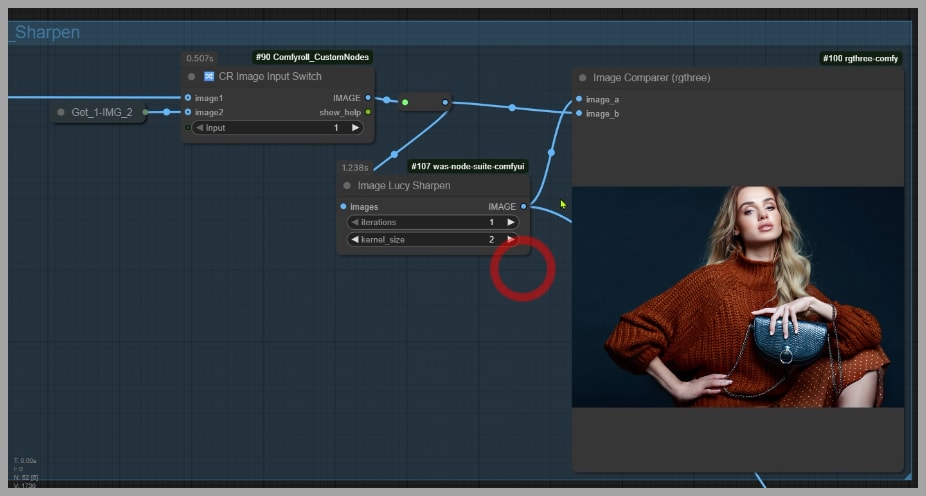
Stage 3 — Sharpen & Branch Selector (Lucy Sharpen + Use/Skip Wan2.2)
Goal: Add crispness and choose which branch (Wan2.2 or Stage-1) feeds the final upscale.
Typical node group:
- Image Lucy Sharpen (applied to the selected branch)
- Switch/Select Node (choose Wan2.2 output or Stage-1 output)
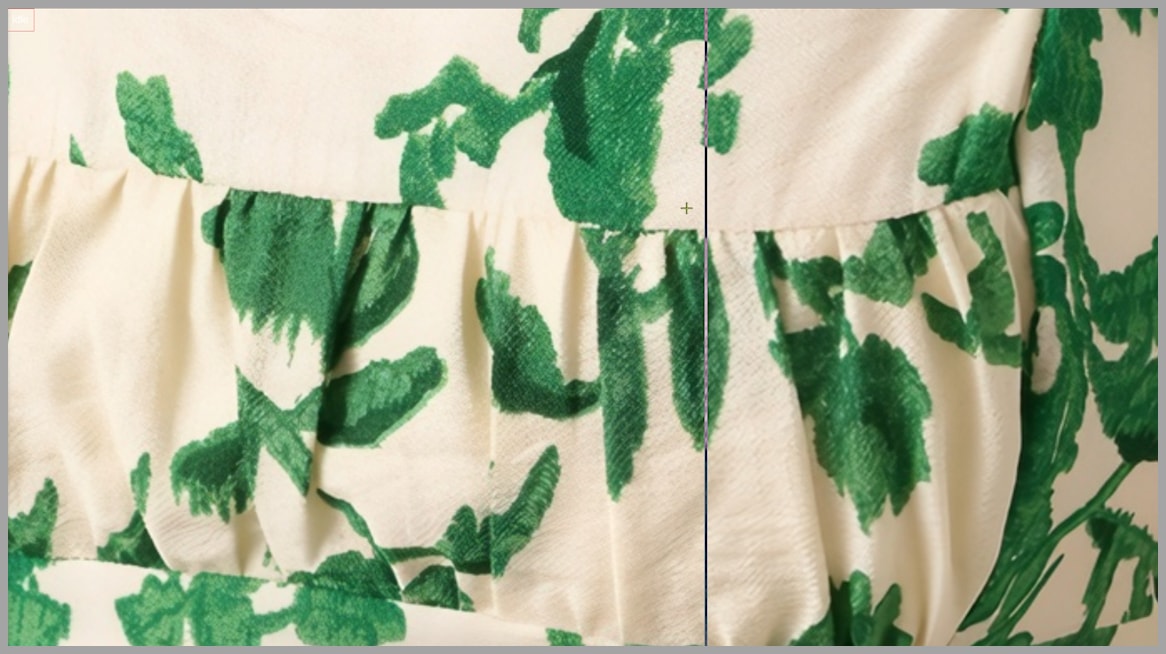
- Output Preview (side-by-side if possible)
Why the branch? Sometimes Wan2.2 doesn’t add more detail and can even harm delicate, already-great texture. I’ve seen this with a summer dress: RealWebPhoto added beautiful, fine weave; Wan2.2 failed to improve it and softened some micro-pattern.
How to decide which branch to send forward:
- Compare micro-details:
- Stitch lines, knit ribs, hem edges, lace patterns.
- If Wan2.2 looks cleaner and equally detailed (or better), keep the Wan2.2 branch.
- If Wan2.2 looks flatter or introduces blur/texture drift, skip it and route Stage-1 directly to Stage 4.
- Apply Lucy Sharpen conservatively:
- Start with mild settings. Over-sharpening creates halos along fabric boundaries.
- If halos appear, lower the amount/radius before moving on.
Simple decision rule:
“If Stage-1 already sings, don’t force a solo.” Favor the Stage-1 branch when Wan2.2 doesn’t clearly improve micro-texture.
Stage 4 — Final 2× with Ultimate SD Upscaler (SRPO + Turbo LoRA)
Goal: Enlarge by 2× and “lock in” realistic, fine-grained detail using a diffusion-powered upscaler.
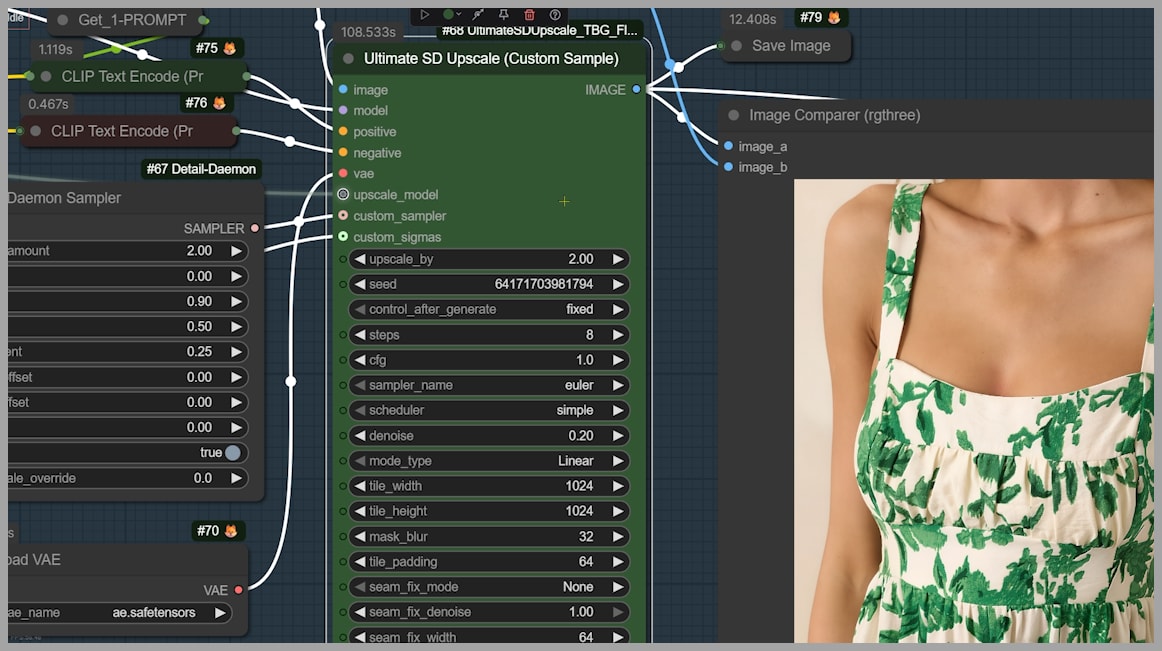
Typical node group:
- Ultimate SD Upscaler (set
upscale_by= 2) - Diffusion Model: SRPO (superb for realistic detail)
- Custom Sampler + Custom Sigmas (used instead of the KSampler’s settings)
- Turbo LoRA (requires a fixed step count)
- Detail Daemon Sampler (detail boost)
Critical settings:
- Scheduler:
- As in Stage 2,
exponentialandkl_optimalare the safest fabric-preserving choices. - If you’re okay with more texture change, experiment with others.
- As in Stage 2,
- Steps:Always set to
8here.- This is because of the Turbo LoRA. The pipeline expects 8 steps for the speed/quality balance and to avoid odd artifacts.
Memory/VRAM tip:
- If your GPU is limited, use GGUF variants of SRPO. They substantially reduce VRAM requirements with minimal quality loss for this use-case.