Fixing Pixel Drift and Preserving Image Quality When Using Qwen Edit
Qwen Edit is a powerful image editing model, but even the latest 2511 version still suffers from a well-known problem called pixel drift. Pixel drift means the edited output does not perfectly align with the input image. It may shift slightly, zoom in or out, or move by a few pixels. While the drift is small, it is noticeable and problematic when you need pixel-perfect editing.
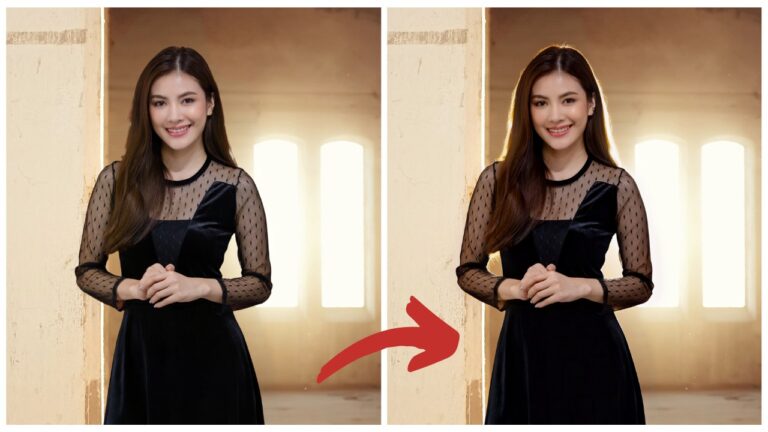
Even though version 2511 improves performance, one major issue remains: image quality degradation after editing. For example, when relighting a photo, the lighting result may look acceptable, but the final image quality is noticeably worse than the original.
Video Tutorial:
Gain exclusive access to advanced ComfyUI workflows and resources by joining our community now!
This tutorial shows how to:
- Reduce or eliminate pixel drift
- Restore lost details
- Handle both global and local editing scenarios
- Use ComfyUI workflow techniques to maintain alignment
Key Concept: Two Types of Editing
This guide covers two major use cases:
- Global Editing Editing the entire image (for example changing the whole background)
- Local Editing Editing only a selected part of the image (for example changing clothing color)
Different strategies are required for each scenario.
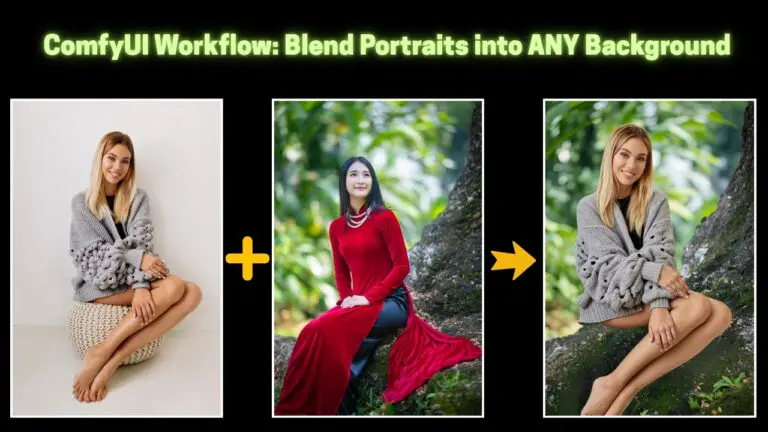
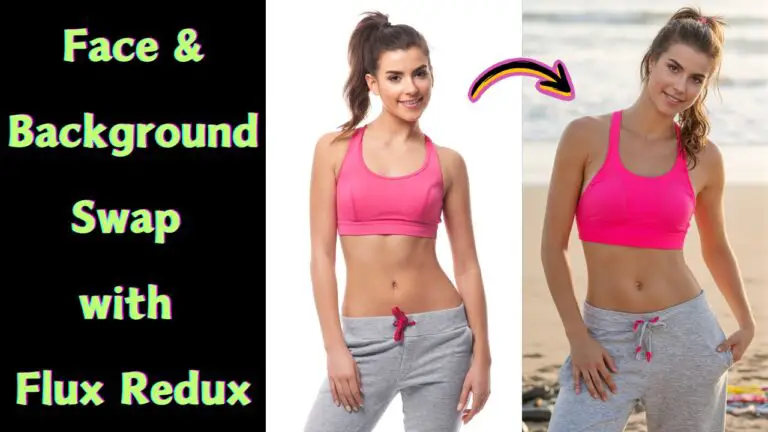
Part 1: Global Editing Without Pixel Drift
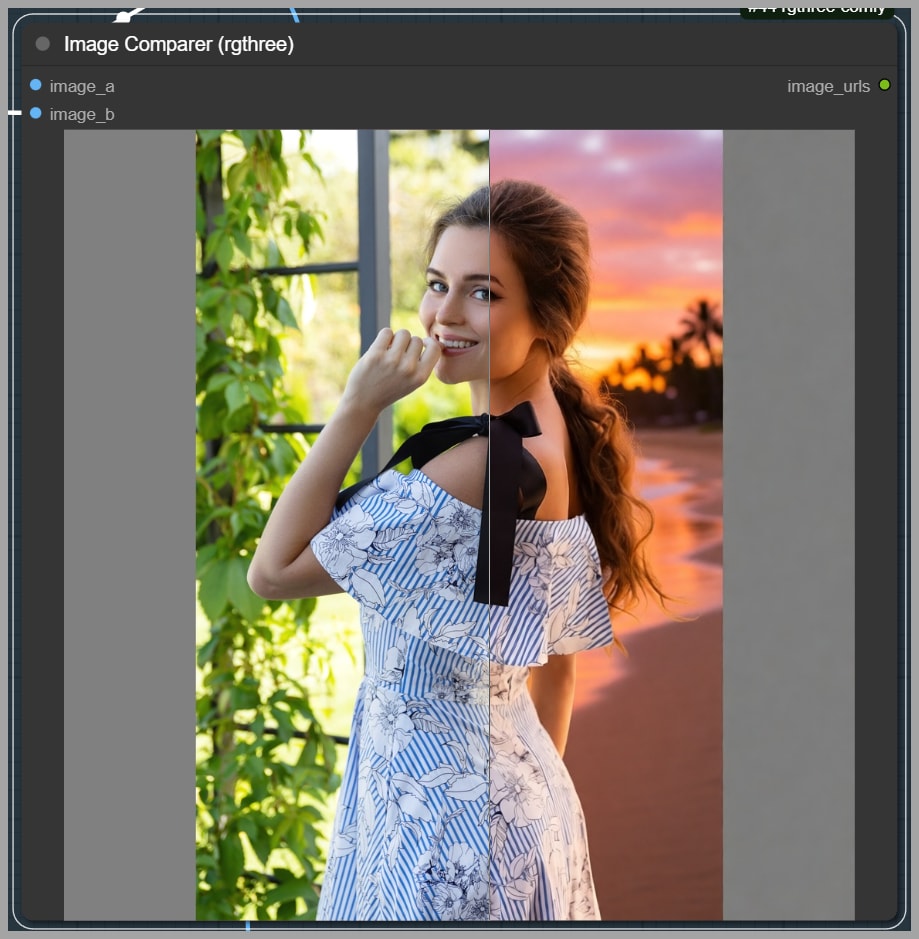
Global editing means the model modifies the whole image. A typical example would be changing the background to a sunset beach while keeping the subject intact.
Step 1 — Pad the Image to a Square
Use the Image Pad KJ node.
- Convert the image to a square format
- Example: original becomes 3000 × 3000
- Gray padding appears on unused sides
This ensures a uniform canvas for Qwen Edit.
Step 2 — Resize to Qwen-Friendly Resolution
Use Image Resize to scale the square image to something like 1024 × 1024.
Then:
- Send this resized image to the text encoder
- Include a prompt instruction telling Qwen Edit to keep the gray padding unchanged
This prevents unwanted distortion.

Step 3 — Generate the Edit
Run Qwen Edit. Result:
- No pixel shift
- Perfect alignment with original
- However, visible detail loss (face, clothing, textures degrade)
So the drift is fixed, but quality is not yet acceptable.
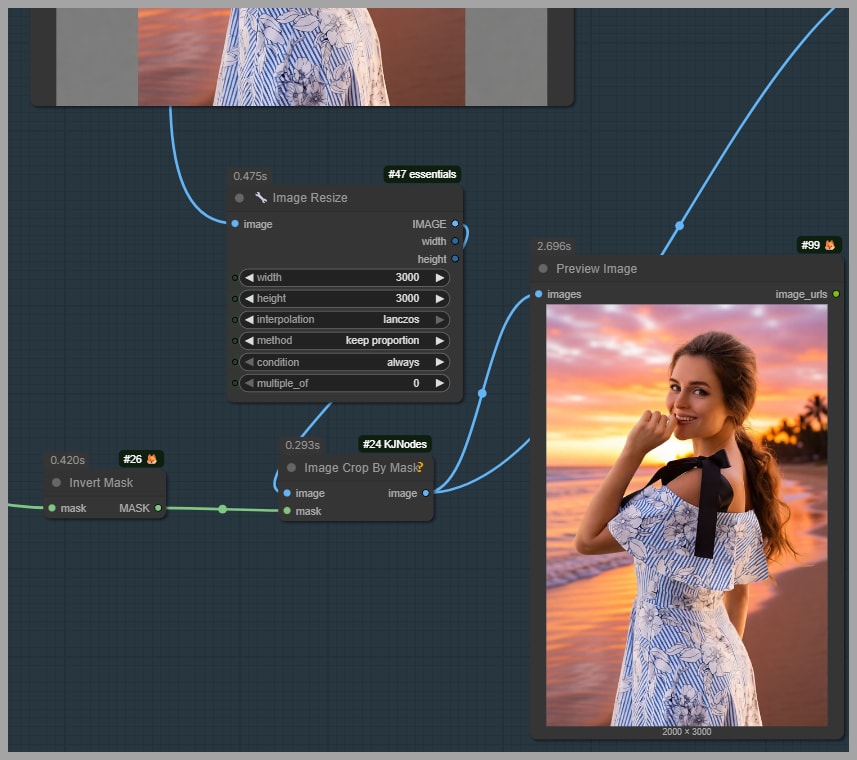
Step 4 — Restore Original Resolution
Resize the edited image back to 3000 × 3000 to match the padded image.
Step 5 — Remove the Padded Borders
Use Image Crop By Mask to remove gray padding.
Now you have a full-resolution edited image, aligned correctly. But detail quality is still weak, especially on the subject.
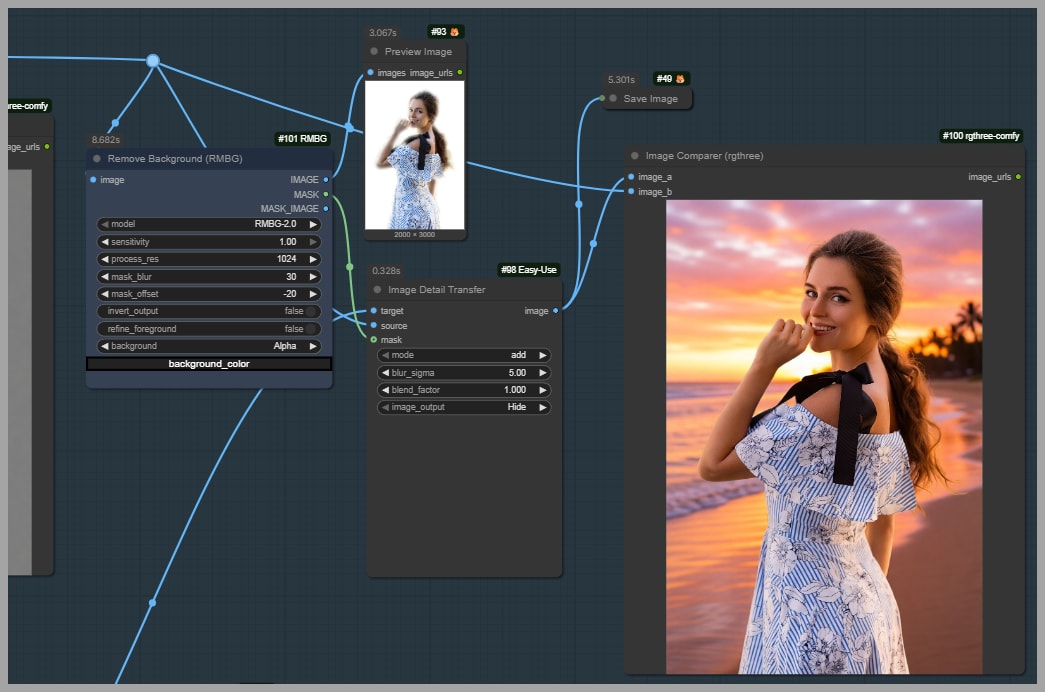
Step 6 — Restore Original Subject Detail
Since only the subject needs restored detail:
- Use Remove Background to isolate the subject
- Use Image Detail Transfer to transfer original detail back onto the edited output
Result:
- Background remains edited
- Subject recovers original high quality detail
- Pixel alignment remains perfect
This produces significantly better results than other tools such as Nano Banana Pro in this scenario.
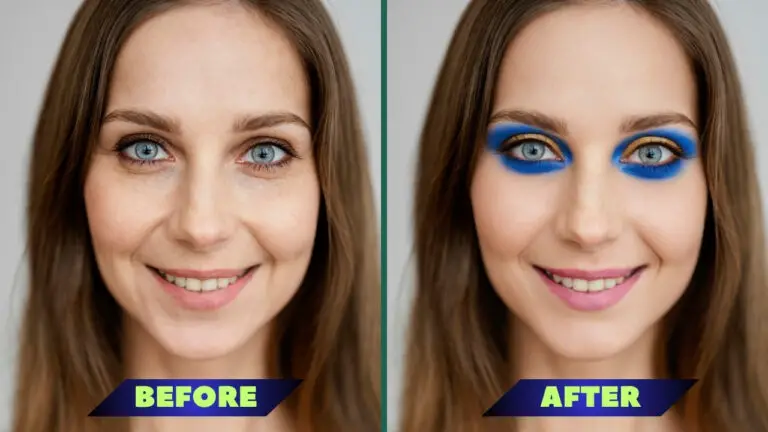
Part 2: Local Editing Without Pixel Drift
Local editing means modifying only a specific area, such as changing dress color while keeping the rest untouched.
You will generally work with:
- Manual mask painting
- Cropping
- Special stitching workflows
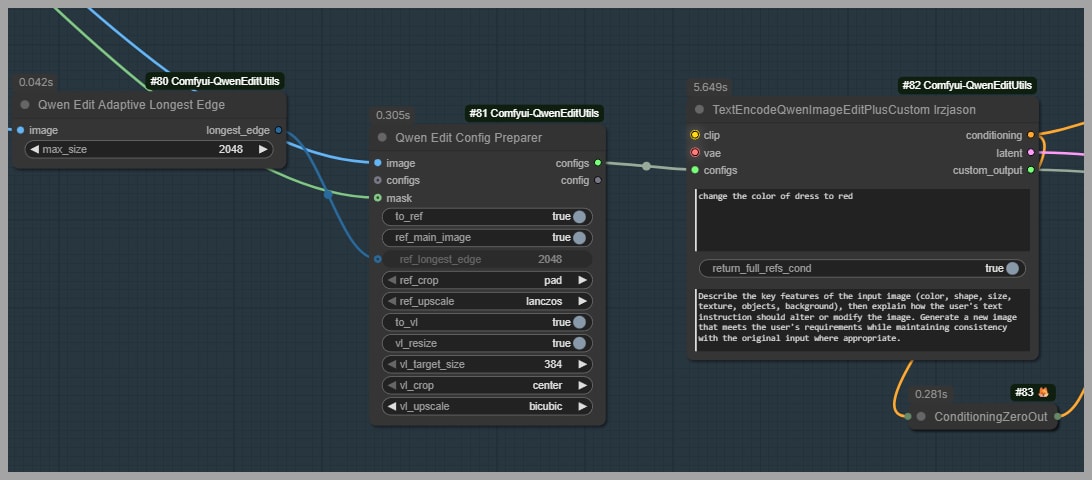
Method 1 — Using Qwen Edit Utils (Jason’s Pack)
This method uses specialized nodes to try to reduce drift. However, testing shows:
- Pixel drift still occurs
- Not ideal for precision editing
So while useful, it is not the best solution.
Method 2 — The Recommended Drift-Free Approach
Step 1 — Crop Using Inpaint Crop Node
Use Inpaint Crop to extract a 1024 × 1024 section based on your painted mask.
Important notes:
- The node adds some margin padding
- The final crop becomes exactly 1024 × 1024
- This fixed resolution prevents pixel drift during editing
Step 2 — Prepare Mask for Conditioning
Preview the cropped mask. Then feed this mask into Inpaint Model Conditioning to ensure:
- Only masked region is edited
- Areas outside remain untouched
- Edits stay contained
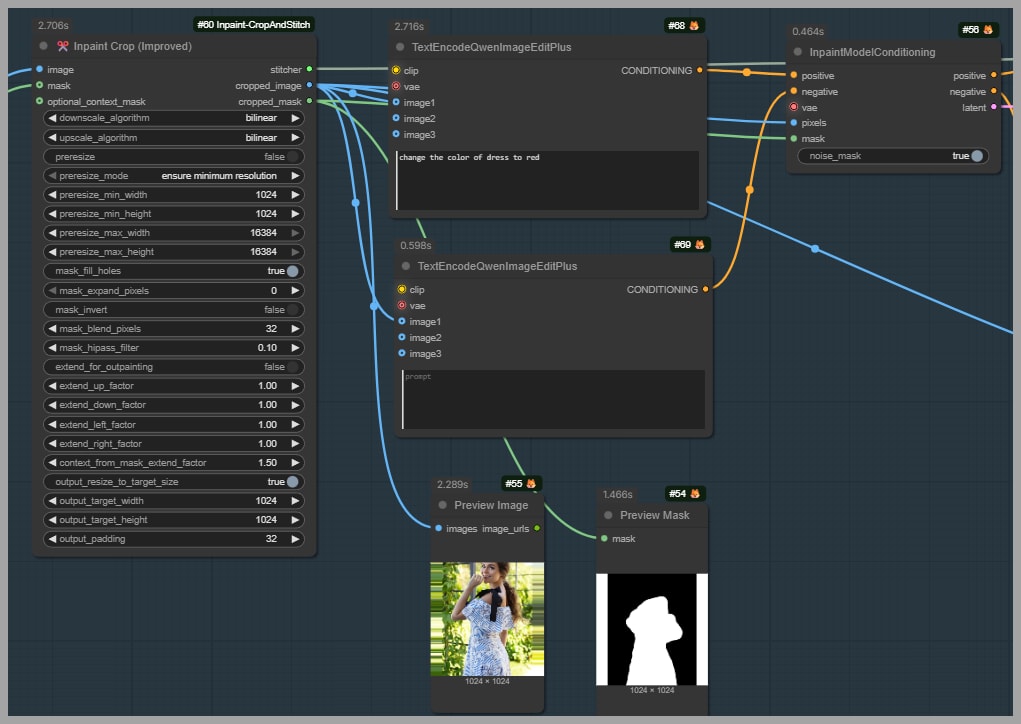
Step 3 — Run Qwen Edit on Cropped Image
Apply your edit (for example change dress color to red).
Result:
- No pixel drift
- The face and surrounding areas remain unaffected
- Alignment remains perfect
Step 4 — Stitch Back to Original Image
Use Inpaint Stitch to merge the edited region back into the full-resolution image.
This completes the drift-free local edit.
Issue: Loss of Fine Detail
Because:
- Original image might be 2000 × 3000
- Cropped edit is only 1024 × 1024
This downscaling removes detail. After stitching, the edited section may look lower quality than the original.

Fixing Lost Detail After Local Editing
To restore high quality:
- Add a high-resolution fix sampler or
- Upscale using SeedVR2 nodes then
- Feed the enhanced result into inpainted_image input in Inpaint Stitch
This restores detailed texture quality in the edited region.
Gain exclusive access to advanced ComfyUI workflows and resources by joining our community now!