Upscale Like a Pro: ControlNet-Enhanced Flux Model Workflow with GGUF for Low VRAM
Hey, everyone! Today, I’m excited to share a new ComfyUI workflow that I’ve put together, which uses the Flux model to upscale any image. In this article, we’ll walk through the setup, features, and a detailed step-by-step guide on how to use this workflow to achieve high-quality upscaling results.
If you are new to Flux models, feel free to check out the following articles to get started:
Introduction to the Workflow
The workflow leverages the Flux model to upscale images while maintaining details and sharpness, even at high magnification levels.
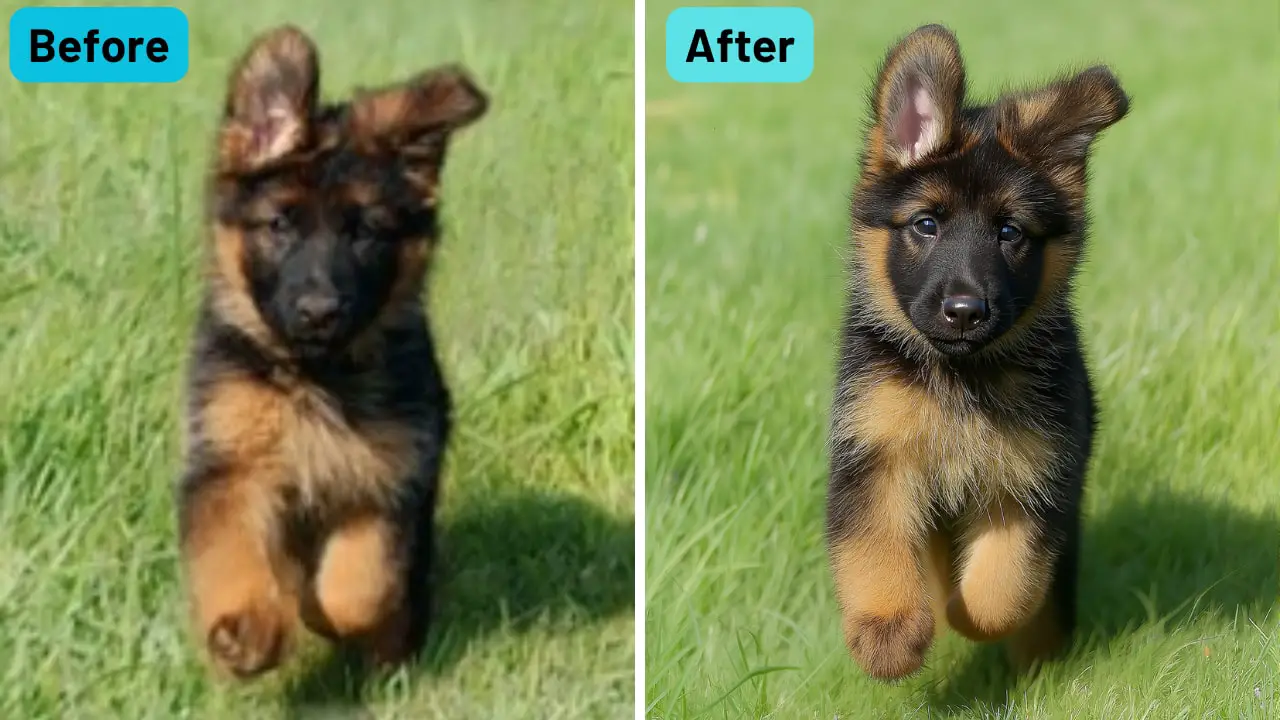
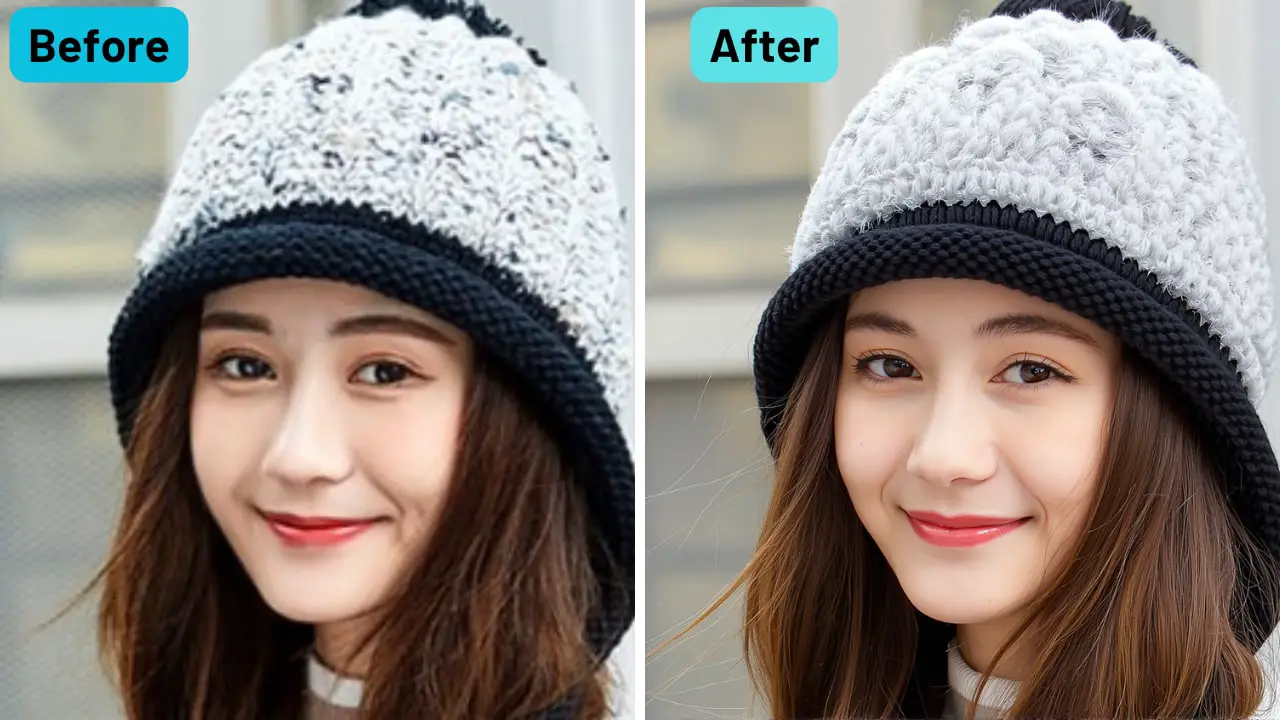
Demo:
It includes features such as support for low graphics memory and automated prompt generation using Florence2. Whether you’re working with high-end hardware or a more modest setup, this workflow is designed to adapt to your needs.
- Model Used: Flux model for upscaling
- Unique Features:
- Compatible with low VRAM systems using the quantized GGUF version.
- Integrated Florence2 for automated prompt generation.
- ControlNet support for enhanced detail retention.
Download this workflow: https://openart.ai/workflows/myaiforce/svOEmbK8C4zyJsCYmqnx
Let’s dive into how to set up and use this workflow in ComfyUI.
This workflow is featured in my YouTube tutorial, where I walk through each step in detail. You can watch the video to see a real-time demonstration and gain a deeper understanding of the key features and tips for best results.
Gain exclusive access to advanced ComfyUI workflows and resources by joining our community now!
Here’s a mind map illustrating all the premium workflows: https://myaiforce.com/mindmap
Run ComfyUI with Pre-Installed Models and Nodes: https://youtu.be/T4tUheyih5Q
Step 1: Setting Up the Workflow
Download the Required Files
The key element of this workflow is the ControlNet node, which uses the ControlNet Upscaler model developed by Jasper AI. Follow the steps below to download and set up the necessary files:
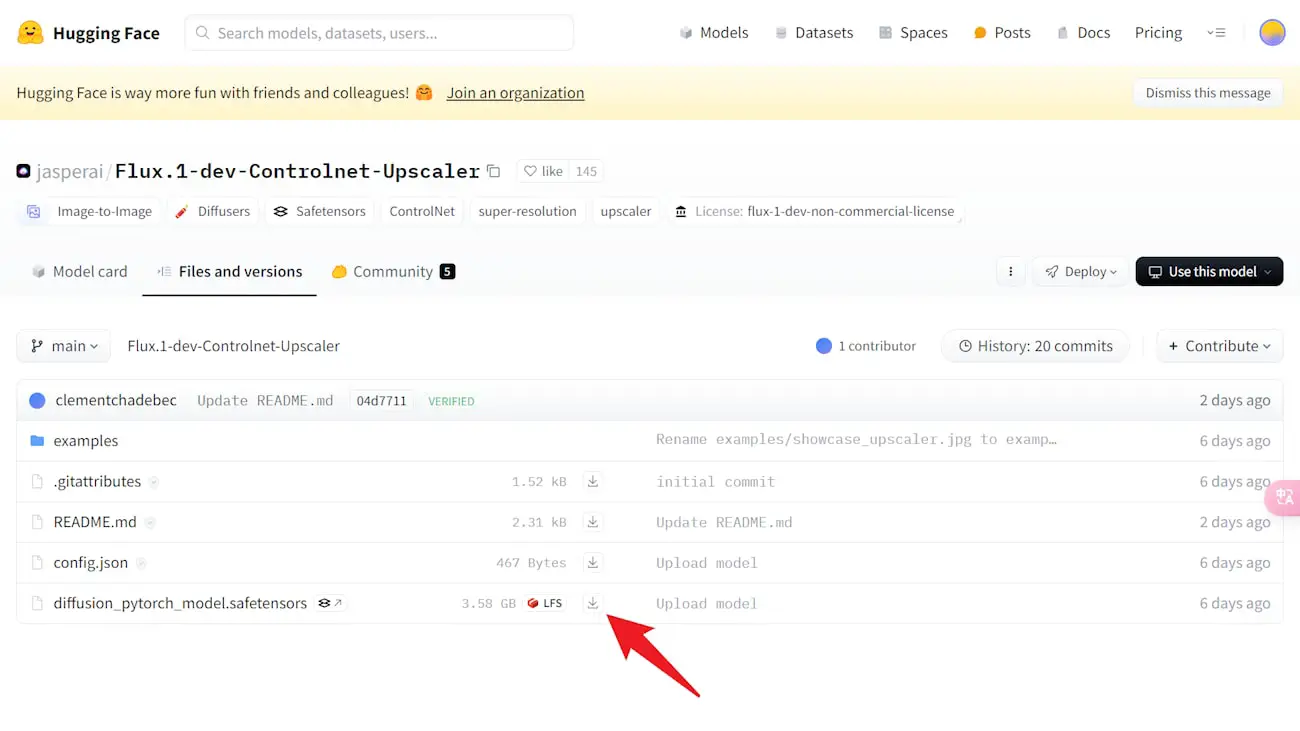
- Go to the HuggingFace page for the ControlNet Upscaler model.
- Download the file named
diffusion_pytorch_model.safetensors. - Rename the file to
Flux.1-dev-Controlnet-Upscaler.safetensors. - Move the renamed file to your ControlNet folder:
ComfyUI/models/controlnetAfter completing these steps, the ControlNet model should be ready to use in your ComfyUI workflow.
Step 2: Configuring the Workflow in ComfyUI
Once you have the necessary files, let’s walk through configuring and using the upscaling workflow.
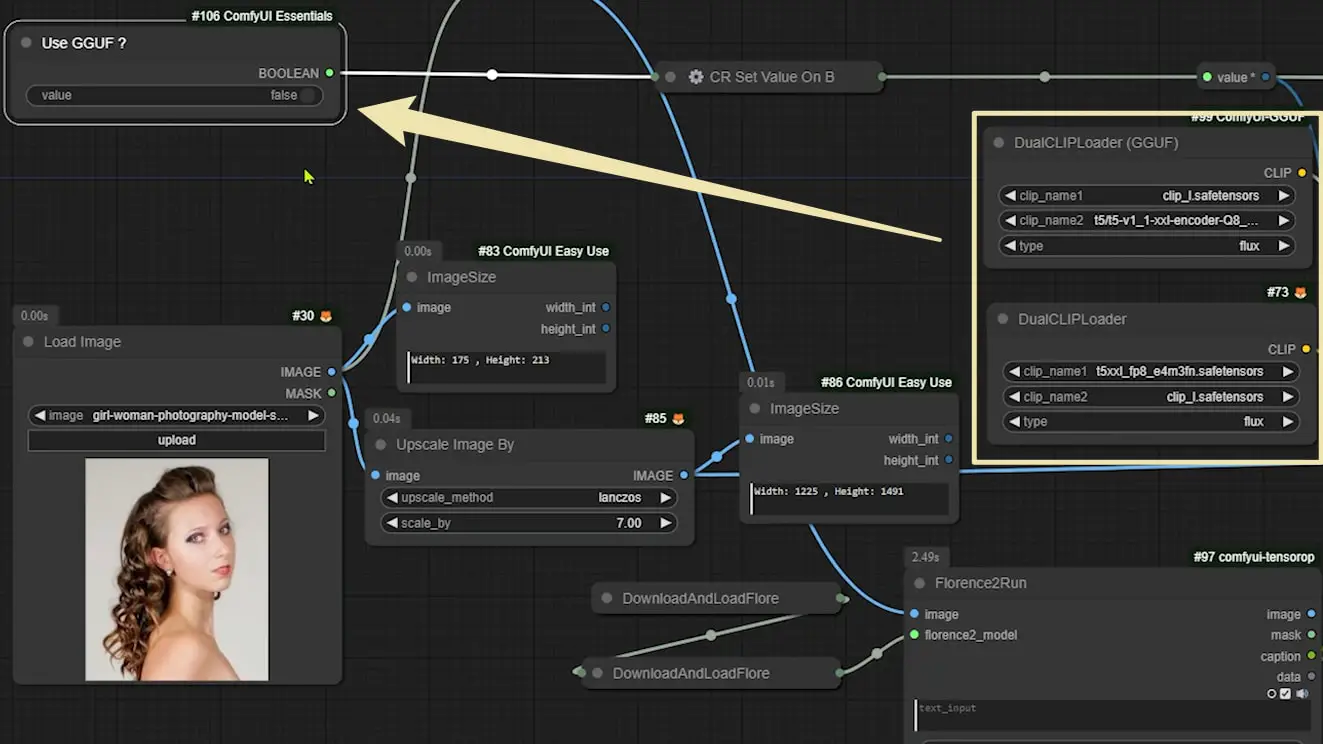
Upload the Image
- Upload the image that you want to upscale into ComfyUI.
- Depending on your hardware setup:
- If using the quantized version of the Flux model, toggle the button labeled to
True. - If using the standard model, leave this option set to
False.
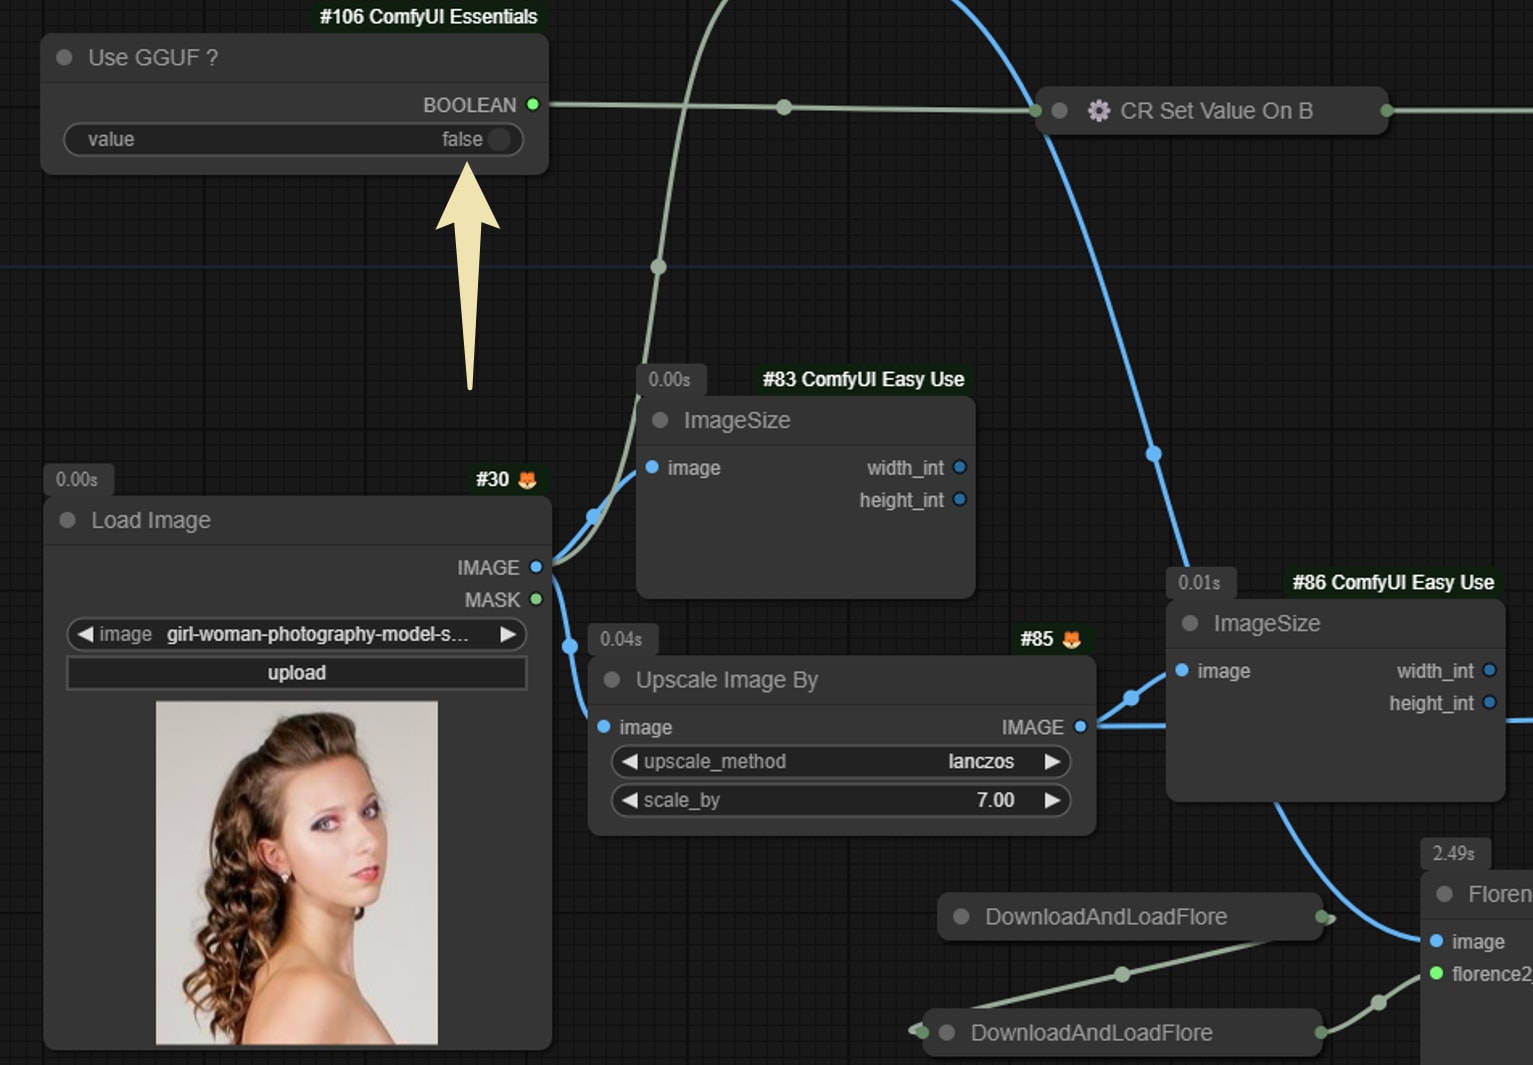
Set the Upscale Magnification
- Locate the
Image Sizenode, which displays the current dimensions of your image. - Go to the
Upscale Image Bynode and set your desired magnification value. For example:
- Setting a value of
7will upscale the image by 7x.
- Run the workflow. The
Image Sizenode on the right will display the new dimensions after upscaling.
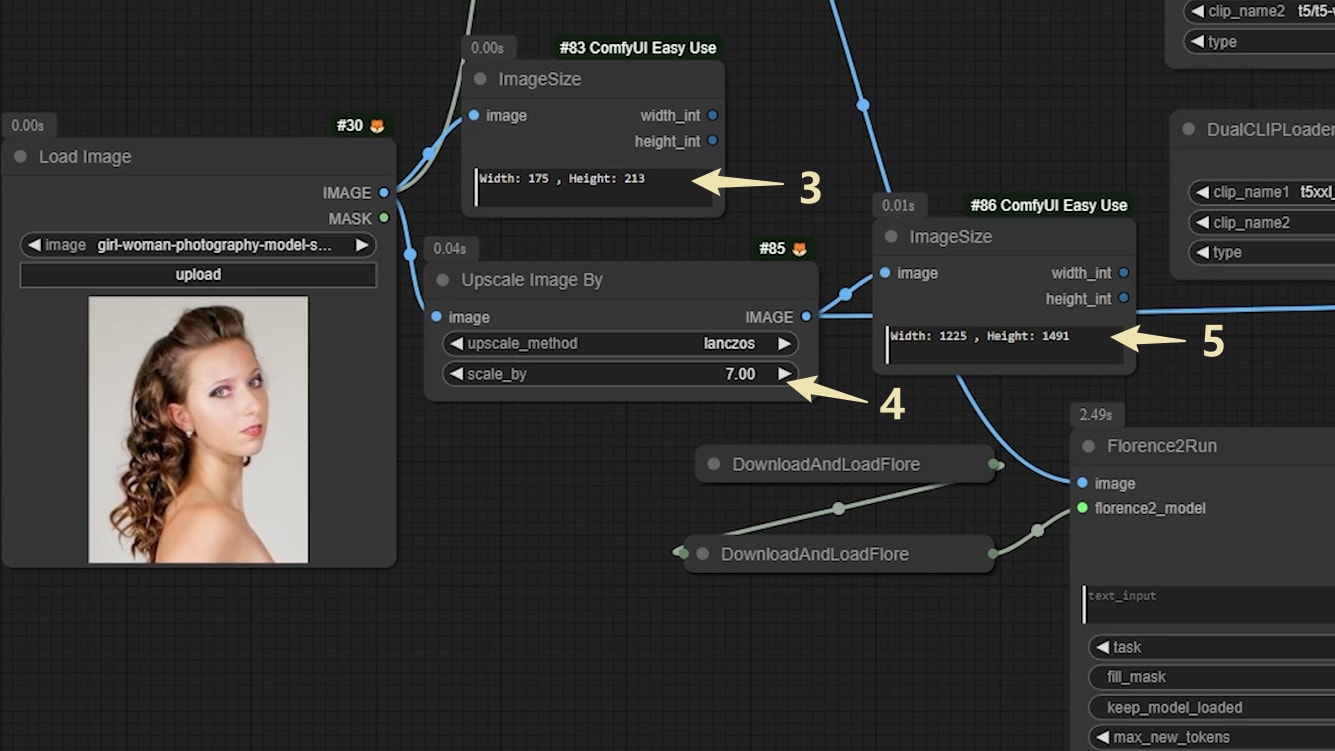
Troubleshooting Dimensions
If the new dimensions don’t match your expectations, you can cancel the current process and adjust the magnification value until you achieve the desired output size.
Step 3: ControlNet Configuration
This is where the ControlNet Upscaler model we downloaded earlier comes into play. Here’s how to fine-tune its settings:
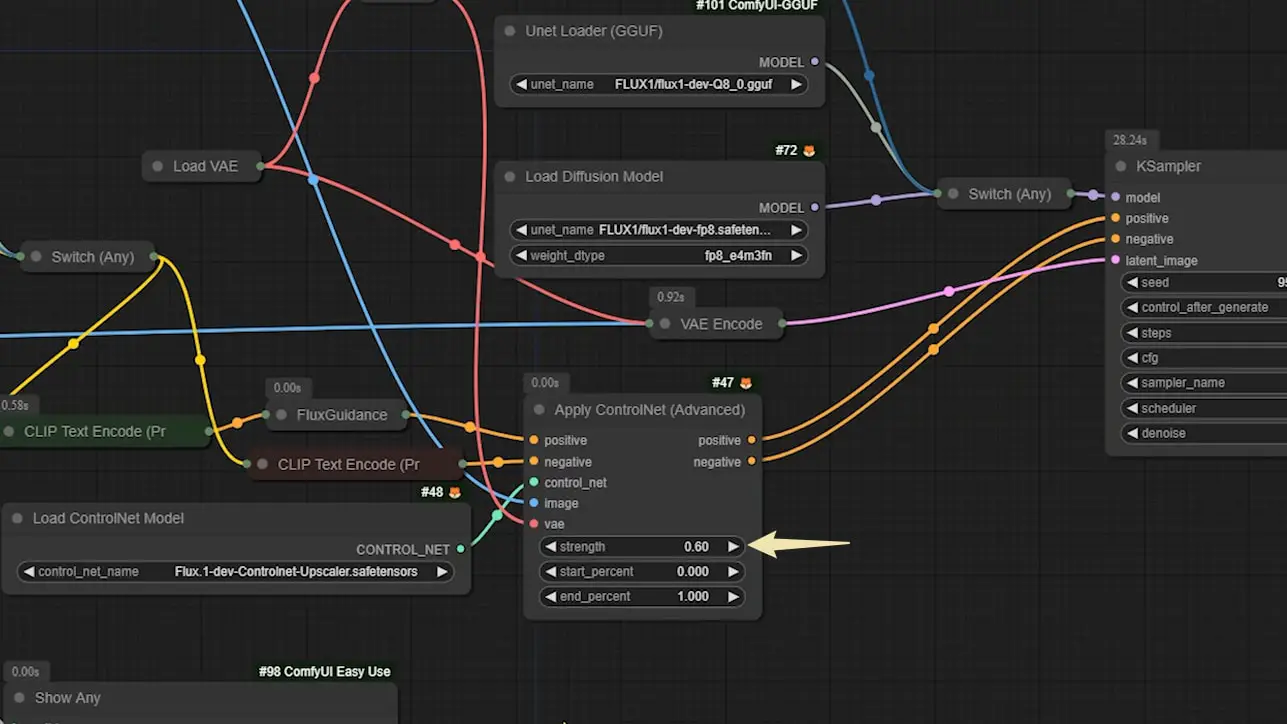
- Locate the ControlNet model node in the workflow.
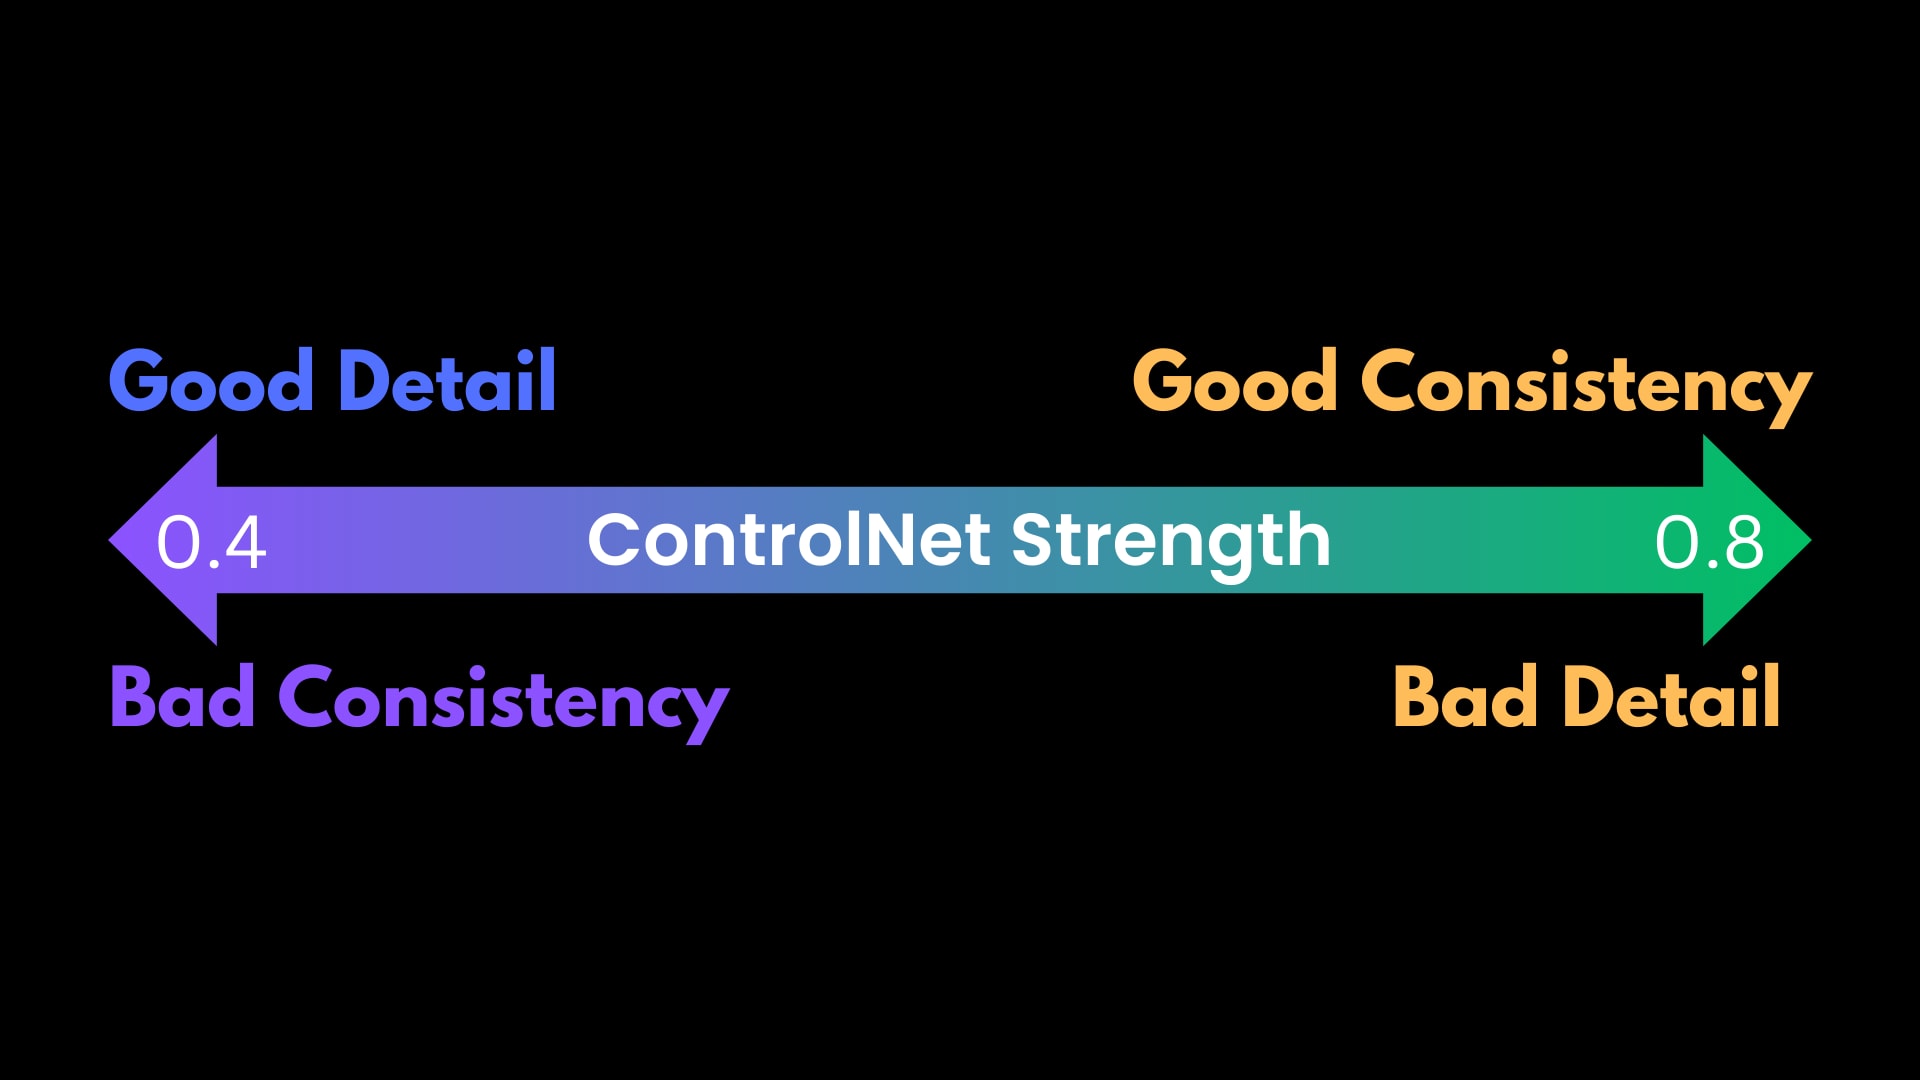
- Set the ControlNet strength between 0.4 and 0.8:
- A lower strength (e.g., 0.4) will result in a more noticeable transformation from the original image but may cause less distortion of details.
- A higher strength (e.g., 0.8) will keep the upscaled image closer to the original, but you might encounter more unwanted detail artifacts.
Choosing the Clip Loader Node
Depending on the Boolean value in the upper left corner of the workflow, ComfyUI will automatically select the appropriate node for loading the Clip files. If you experience issues with Clip configuration, double-check this value to ensure it aligns with your setup.
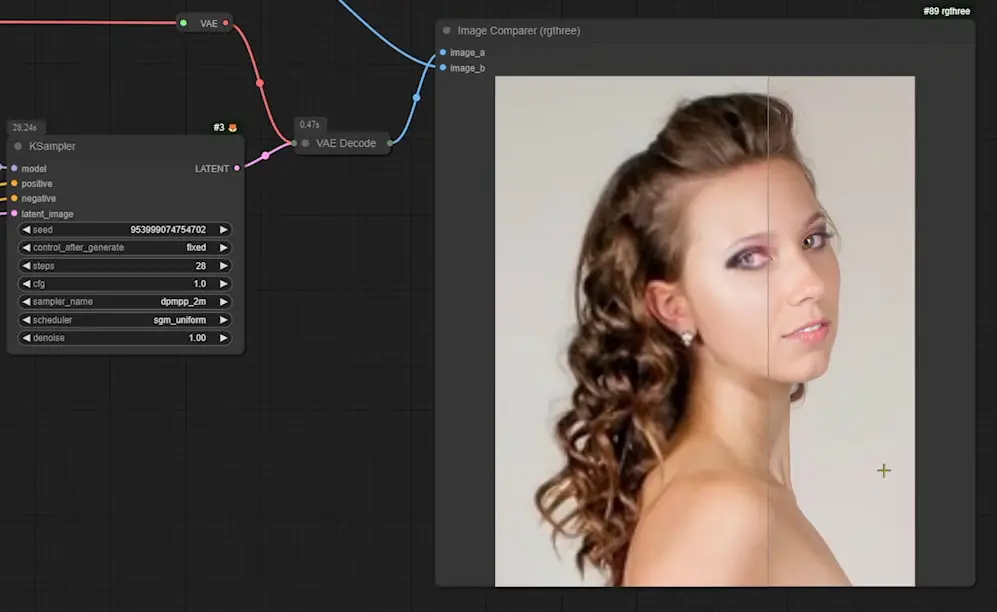
Step 4: Comparing Results
After running the workflow, the final node is an Image Comparer that displays a side-by-side view of the image before and after upscaling. This tool is extremely useful for evaluating the effectiveness of your settings and making further adjustments if needed.
Tips for Optimizing the Workflow
- If you notice that the details in your upscaled images are too sharp or too soft, adjust the ControlNet strength incrementally until you find the right balance.
- Experiment with different magnification values to see how the Flux model handles varying degrees of upscaling.
Conclusion
That’s it for this guide on using the ComfyUI workflow for upscaling images with the Flux model! By integrating ControlNet and leveraging low-memory quantization (GGUF), this workflow provides flexibility and high-quality results across a range of hardware configurations.
If you’re looking for more workflows using the Flux model, check out some of my previous articles for additional techniques and setups. For more free and interesting workflows, stay tuned and explore new possibilities with ComfyUI!
Happy upscaling!