Flux.1 Kontext vs GPT-4o: A Deep Dive into Image Editing Models and Their Capabilities
Hey everyone. Today, we’re diving into something exciting from Black Forest Lab: the Flux.1 Kontext models. These models have just dropped, and they’re designed to make image editing easier and more intuitive, simply by using text-based instructions.
For those who’ve been following along, you may recall a couple of months ago when I showed you the image editing capabilities in GPT-4o. Both of these systems can modify images, but after spending some time with the Flux.1 Kontext models, I’ve found them to be significantly better at maintaining character consistency.
In this video, we’re going to put the Flux.1 Kontext and GPT-4o side-by-side, comparing their results. You’ll get to see firsthand how well Flux.1 Kontext holds up. I’ll also share some tips and tricks for using these models in ComfyUI, so stick around.
Video Tutorial:
Gain exclusive access to advanced ComfyUI workflows and resources by joining our community now!
Here’s a mind map illustrating all the premium workflows: https://myaiforce.com/mindmap
Run ComfyUI with Pre-Installed Models and Nodes: https://youtu.be/T4tUheyih5Q
Setting Up Flux.1 Kontext in ComfyUI
Before we jump into the actual image comparisons, let’s get Flux.1 Kontext up and running in ComfyUI. First things first, make sure your ComfyUI is updated to the latest version (0.3.39). If you haven’t updated yet, do so now and restart ComfyUI afterward.
Once you’re back in ComfyUI, head over to the settings. There, click on “Users,” and then press the “Sign In/Sign Up” button.
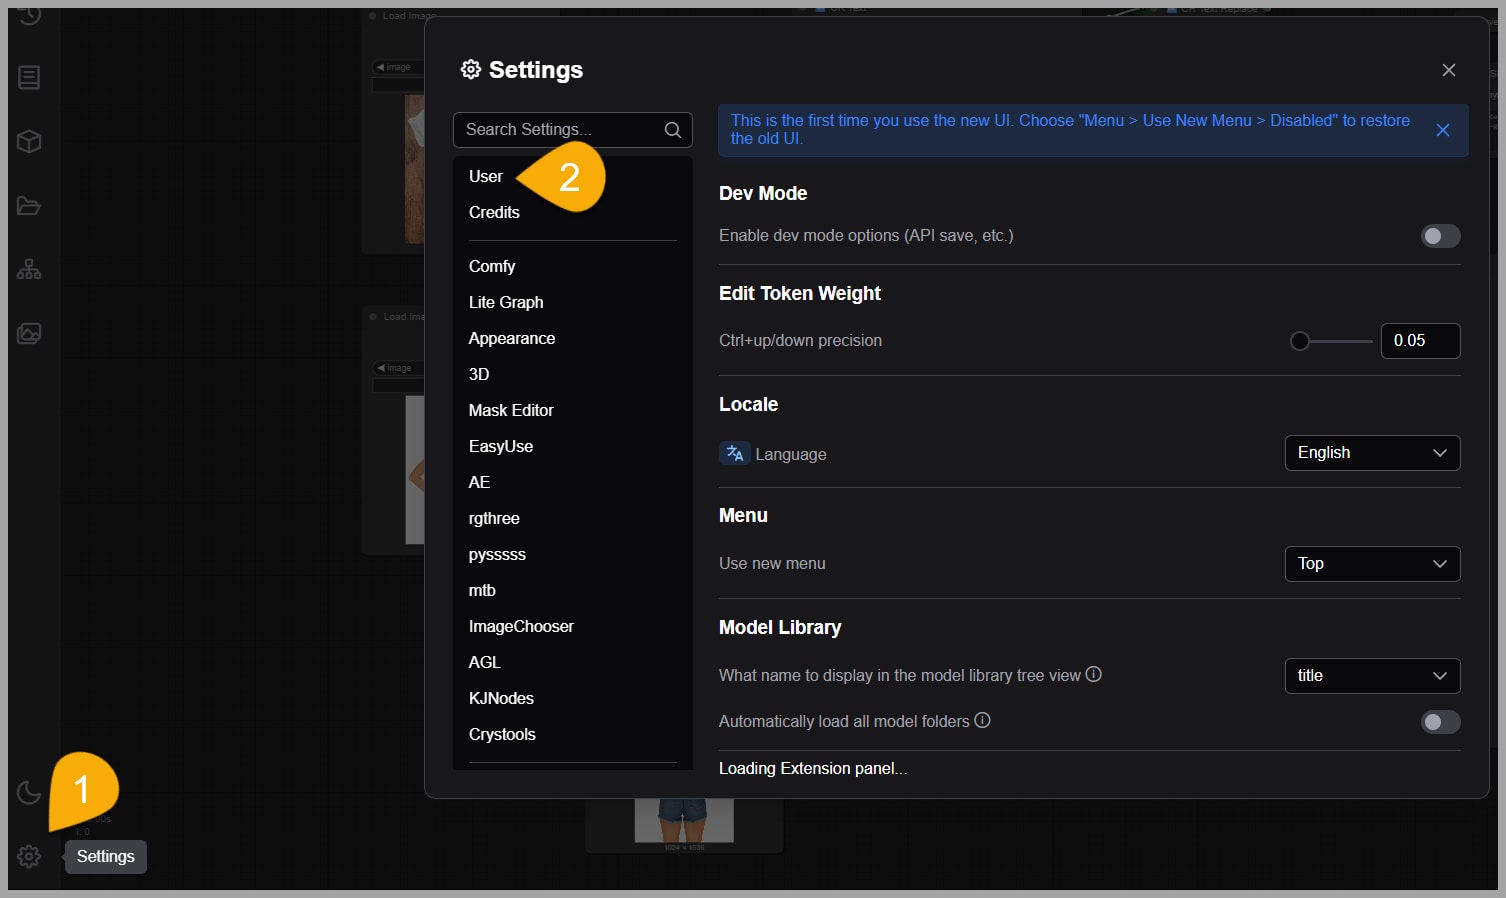
If this is your first time using the API service, I highly recommend logging in using an API key.
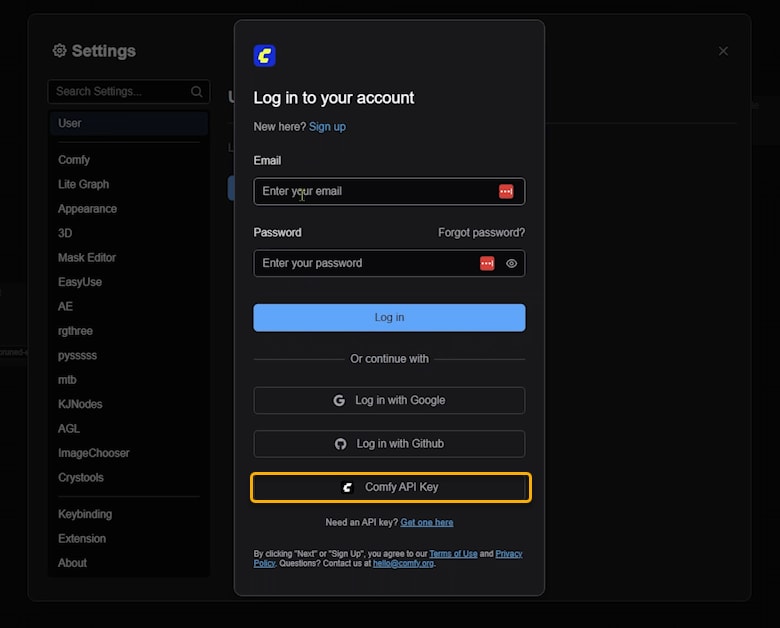
To do that, simply click on the “Get one here” link. You’ll be redirected to ComfyUI’s official website, where you can either log in with your Google account or create a new account using your email.
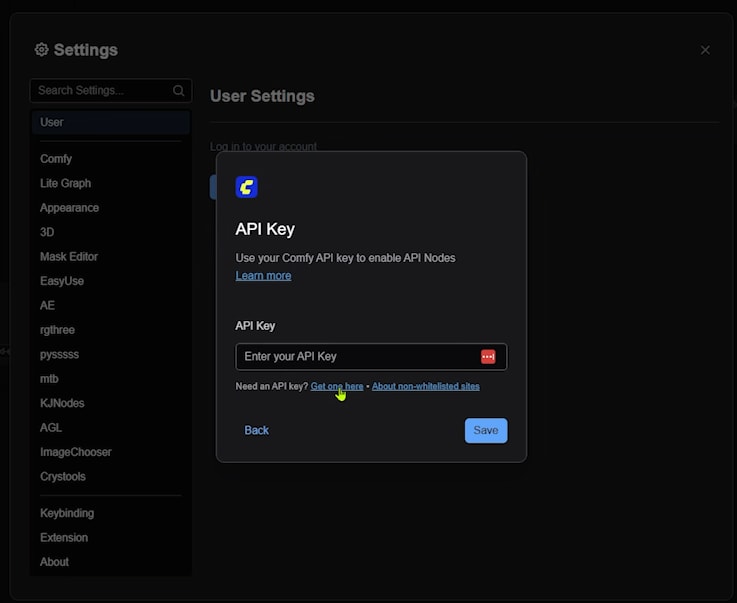
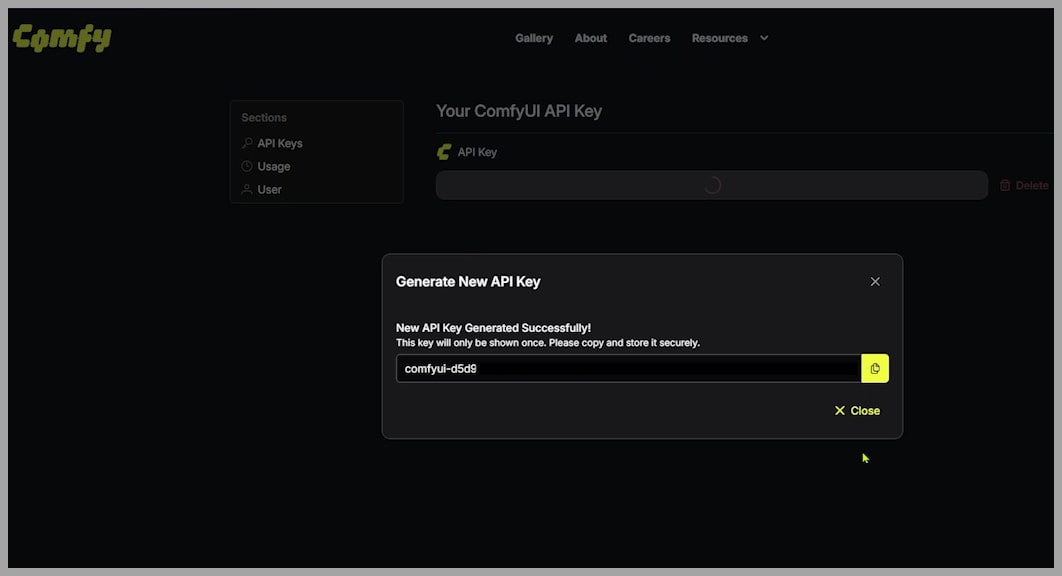
Once logged in, you’ll be taken to the page where you can generate your API key. You’ll need to click the “New” button, give your API key a name, and then click “Generate.” It’s important to note that you’ll only see the key once, so be sure to copy it and store it somewhere safe.
Once you have your API key, you’re all set! But before diving into image editing, make sure you have credits for the service.
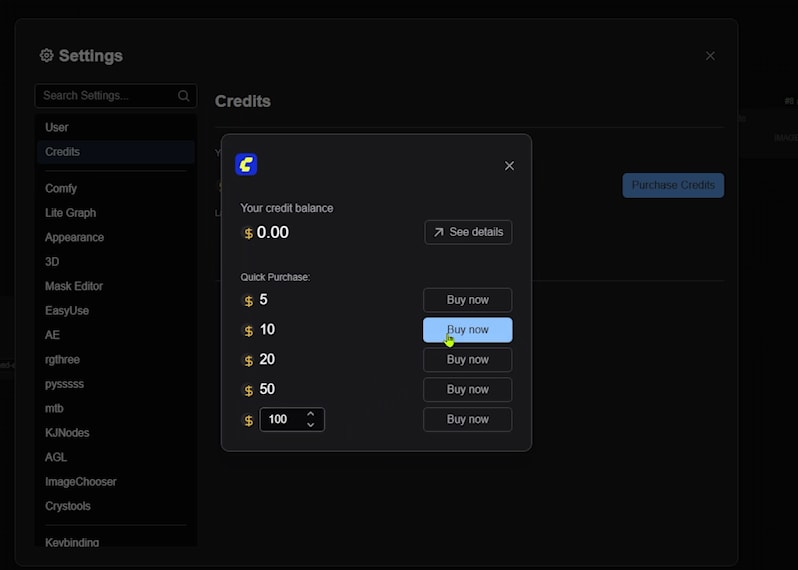
Flux.1 Kontext comes in two versions: Pro and Max. Pro service calls cost 4 cents each.
Using Flux.1 Kontext in ComfyUI
With your API key and credits in place, we can now start working with the Flux.1 Kontext models. The process is straightforward, and the best part is that it doesn’t even require your GPU for this specific task.
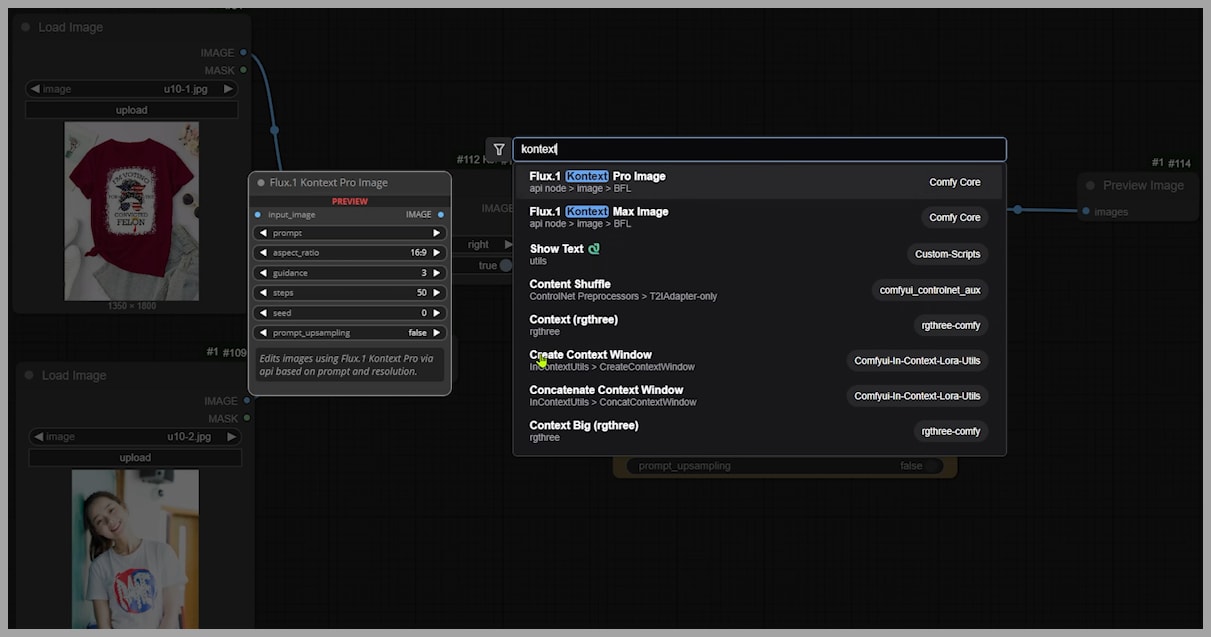
The primary node we’ll be using is called the ‘Flux.1 Kontext Pro Image’ node. You’ll also find a similar node for the Max version of the model, but unfortunately, that API service isn’t live yet.
To find the Flux nodes, just type ‘Kontext’ into ComfyUI’s search bar, and you should have no trouble locating them.
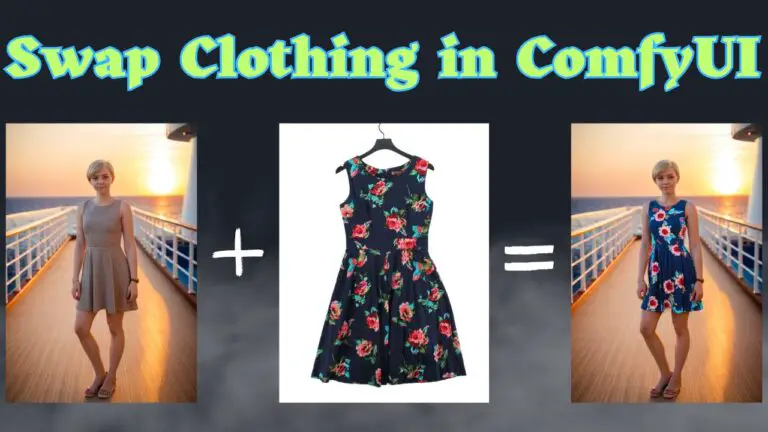
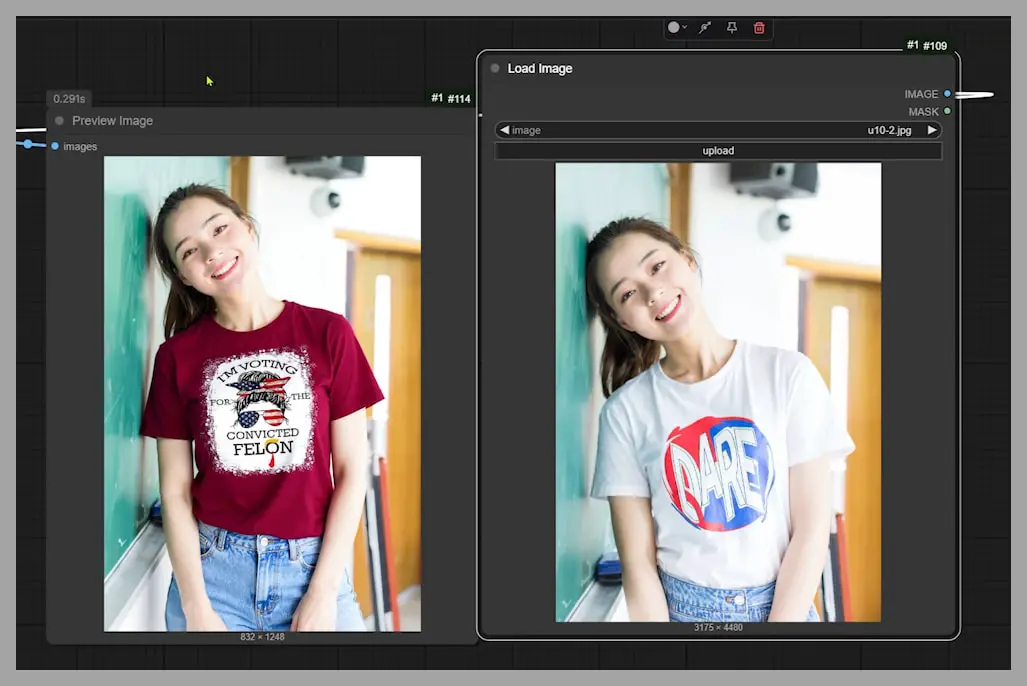
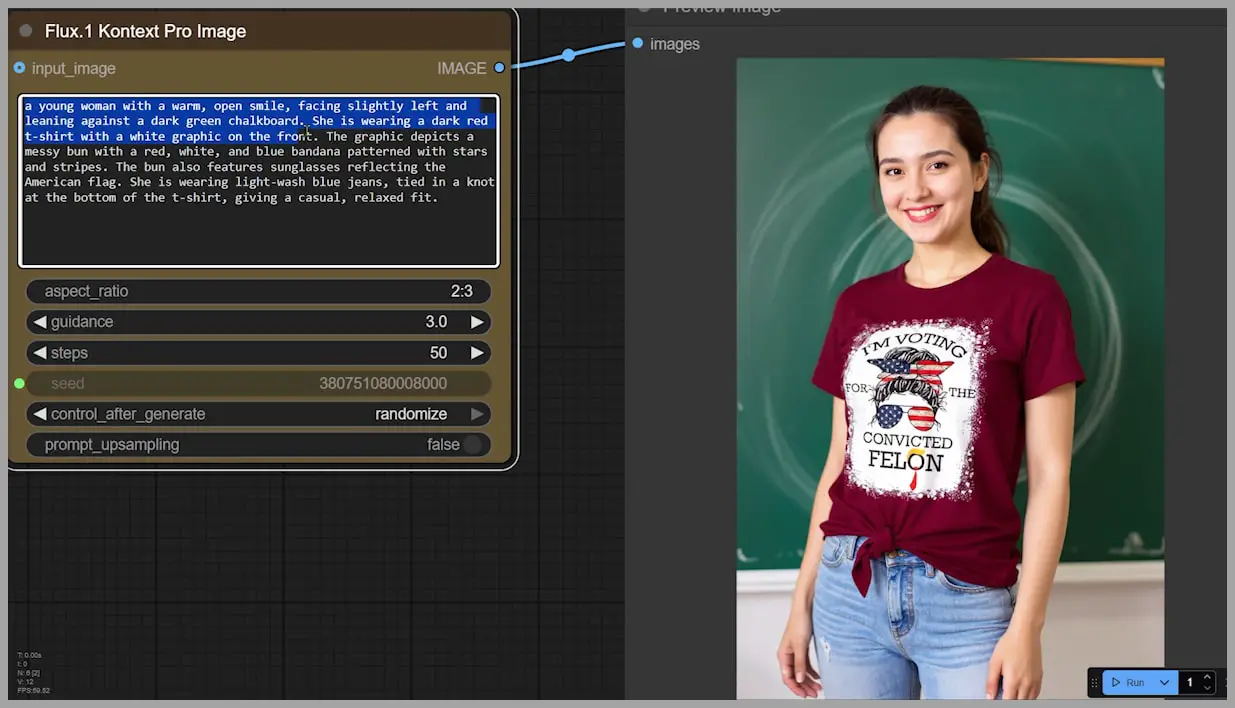
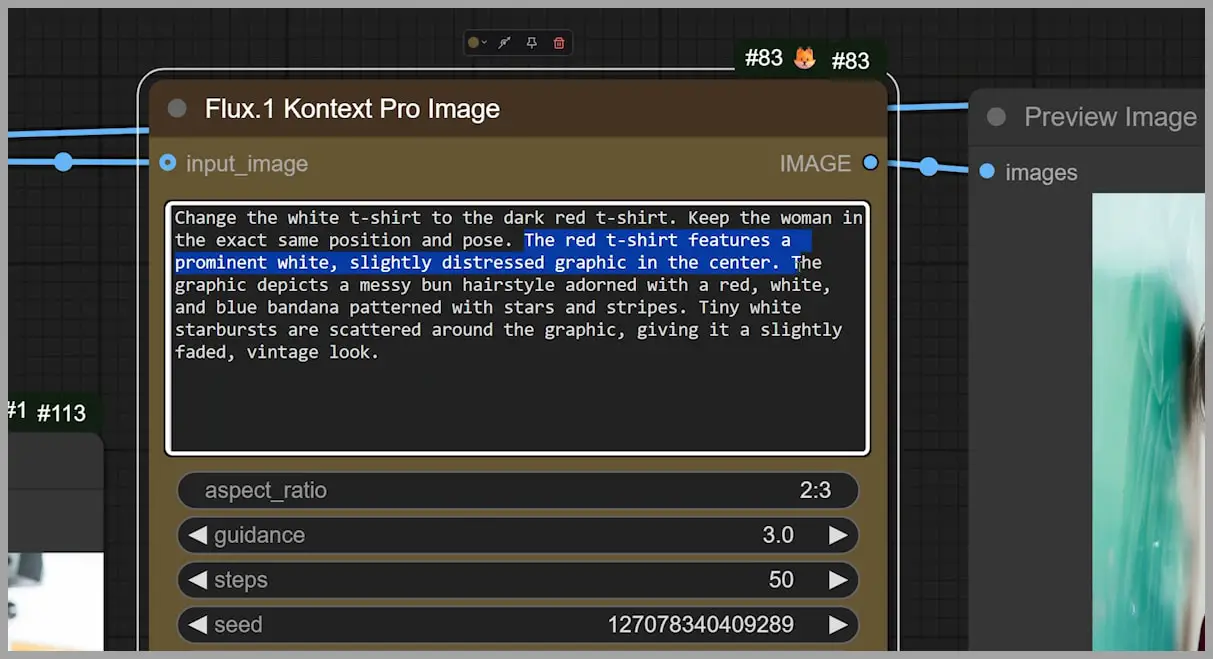
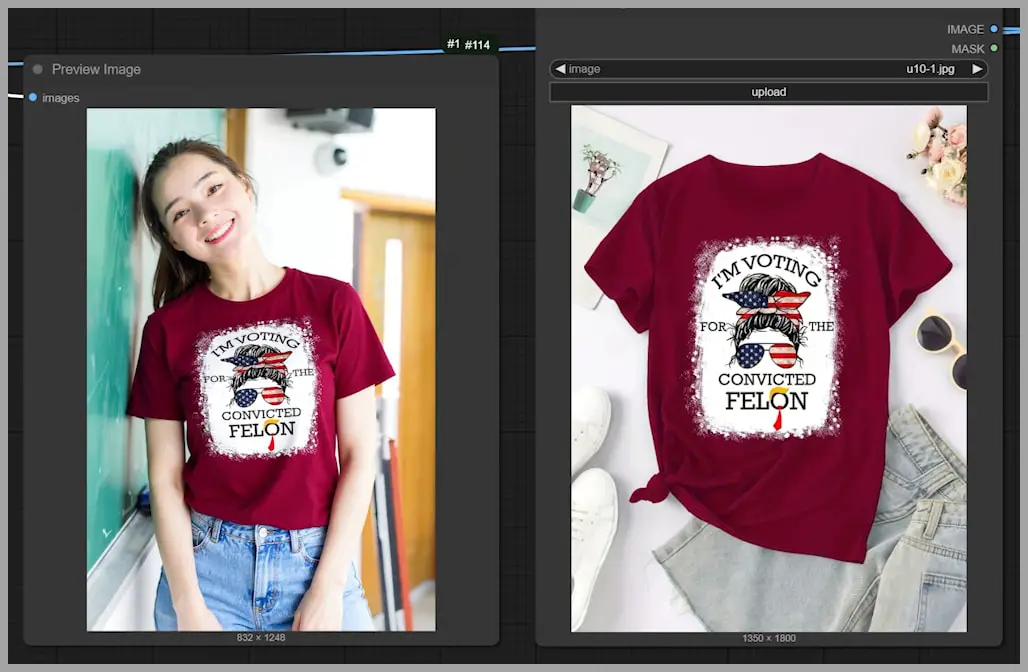
Let’s try something simple to get started: putting a dark red t-shirt onto a woman who’s currently wearing a white t-shirt. First, we use the ‘Image Concatenate’ node to combine the two images. This combined image is what we’ll use as input for the sampler.
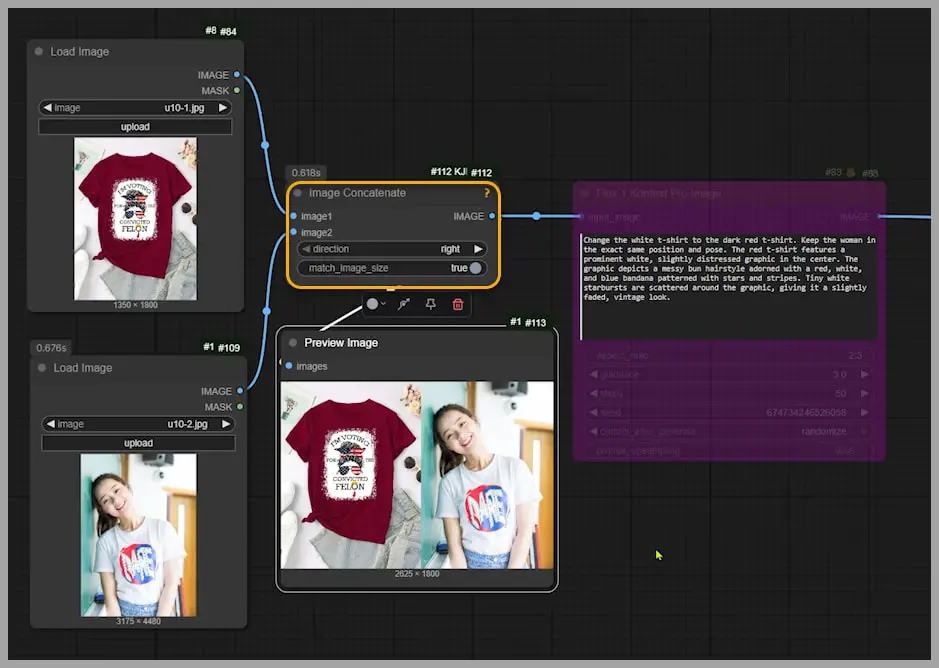
At this stage, you only need to tweak two things: the prompt (which describes what you want) and the aspect ratio.
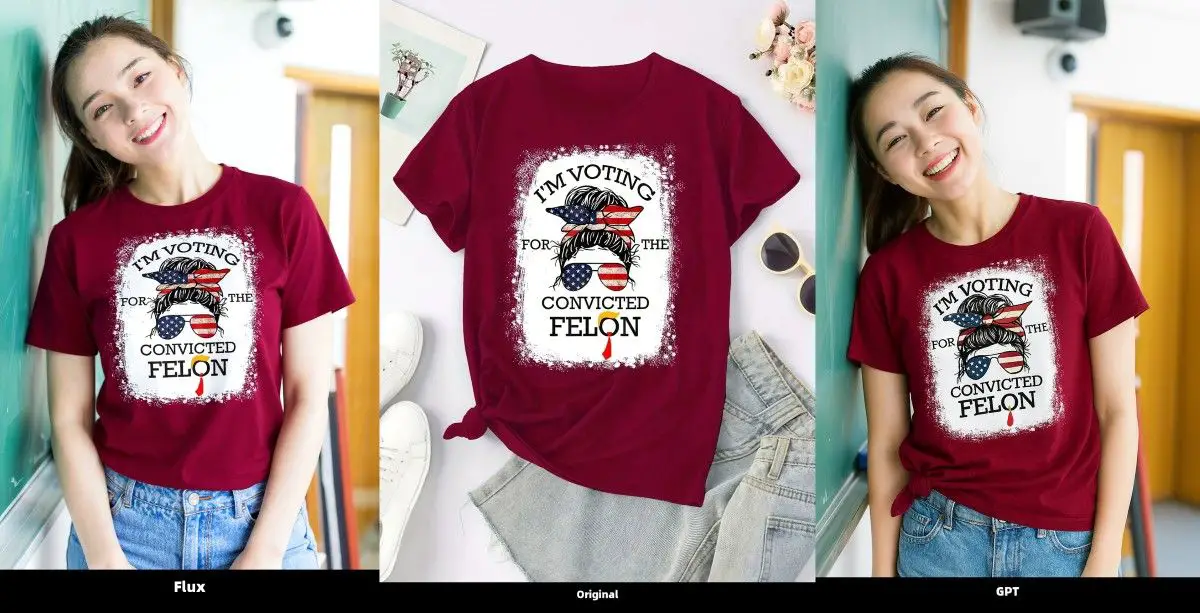
Once everything’s set, run the workflow. The output image is generated. Now, if we take a closer look at the results, the image quality isn’t fantastic (the resolution is 832×1248 pixels), but notice how the woman remains consistent in the edit. The red t-shirt pattern is even successfully copied over.
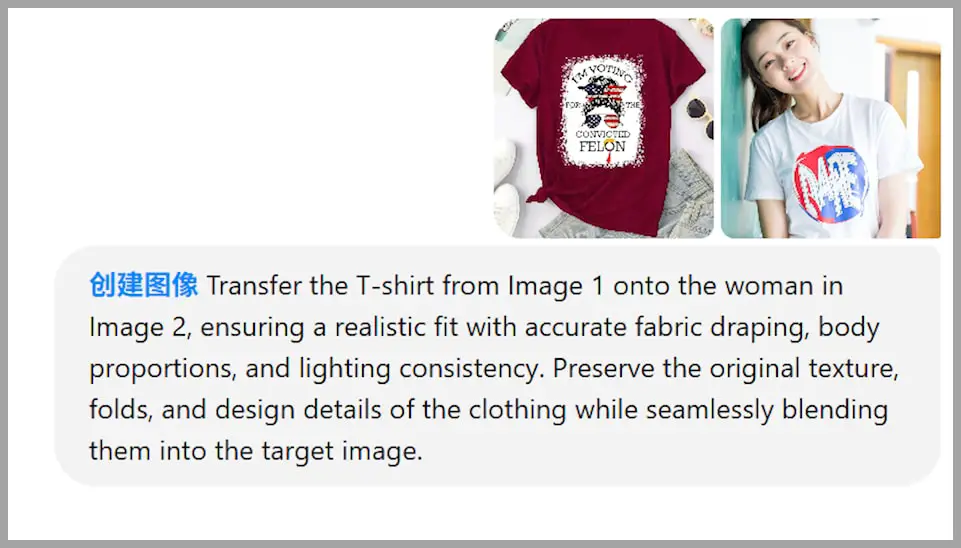
So, let’s compare that output with a similar result from GPT-4o. The image on the right shows GPT-4o’s output, and as you can see, the facial features aren’t as consistent, and the green leaf pattern on the letter ‘O’ has been lost. Flux.1 Kontext does a much better job of keeping the details intact.
Improving Prompt Writing for Flux.1 Kontext
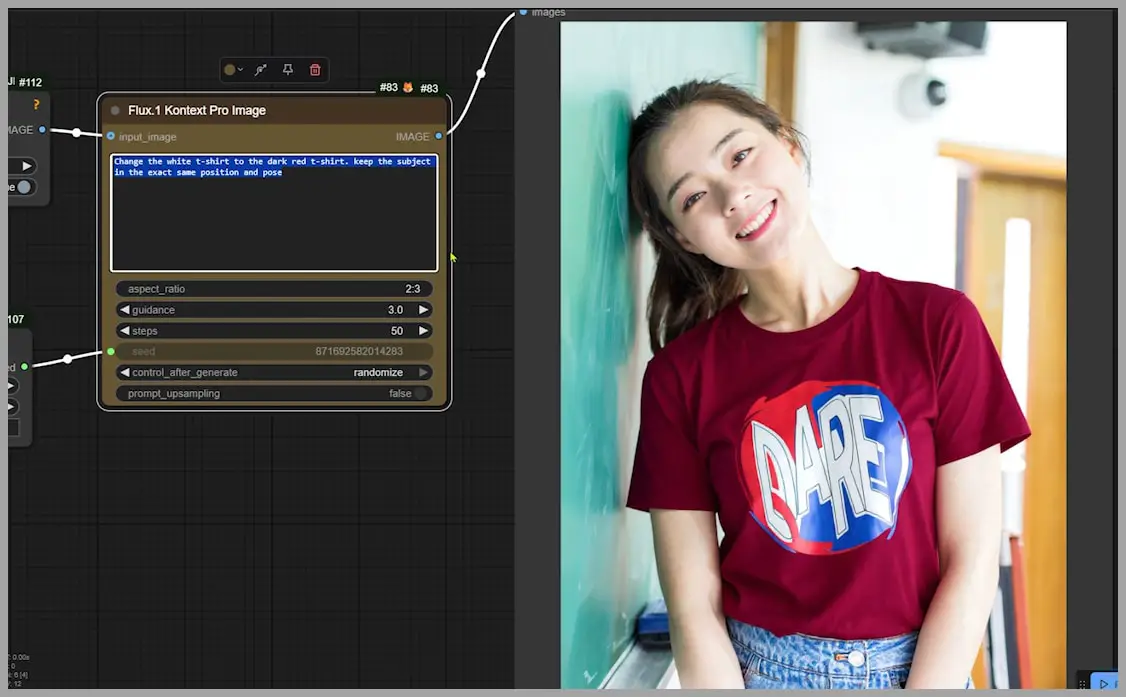
One thing I noticed while working with Flux.1 Kontext is that writing the perfect prompt can be tricky. In my first prompt, I detailed the woman’s pose, but the output didn’t maintain consistency.
Her pose and face weren’t the same, but the t-shirt pattern was consistent.
I adjusted my approach in the next prompt. I didn’t describe the pattern on the t-shirt this time. Instead, I asked Flux to keep her position and pose the same. Now, the woman’s t-shirt was red, but the pattern wasn’t change.
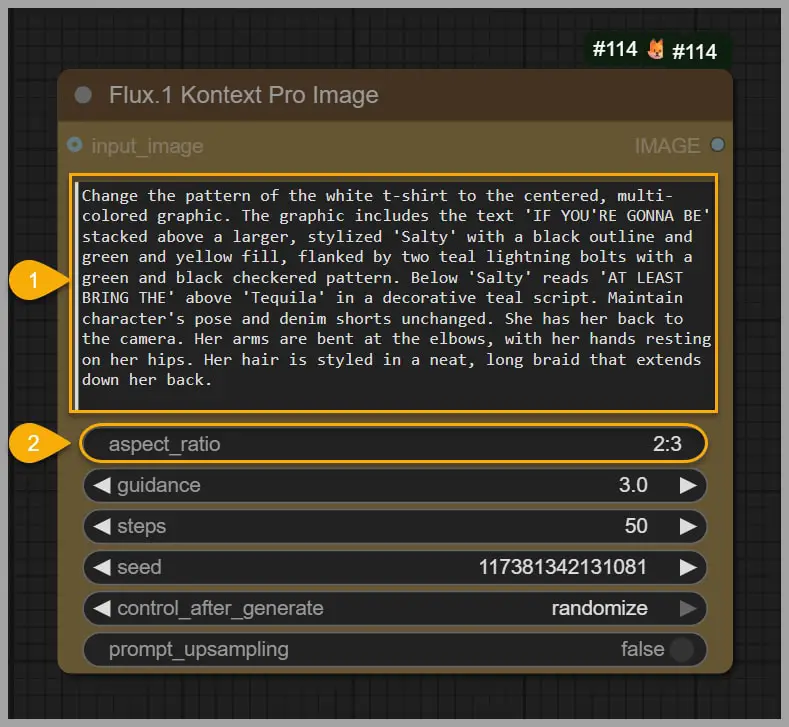
In a third attempt, I described the pattern in detail. While most of the printed words showed up in the output, the white graphic was missing.
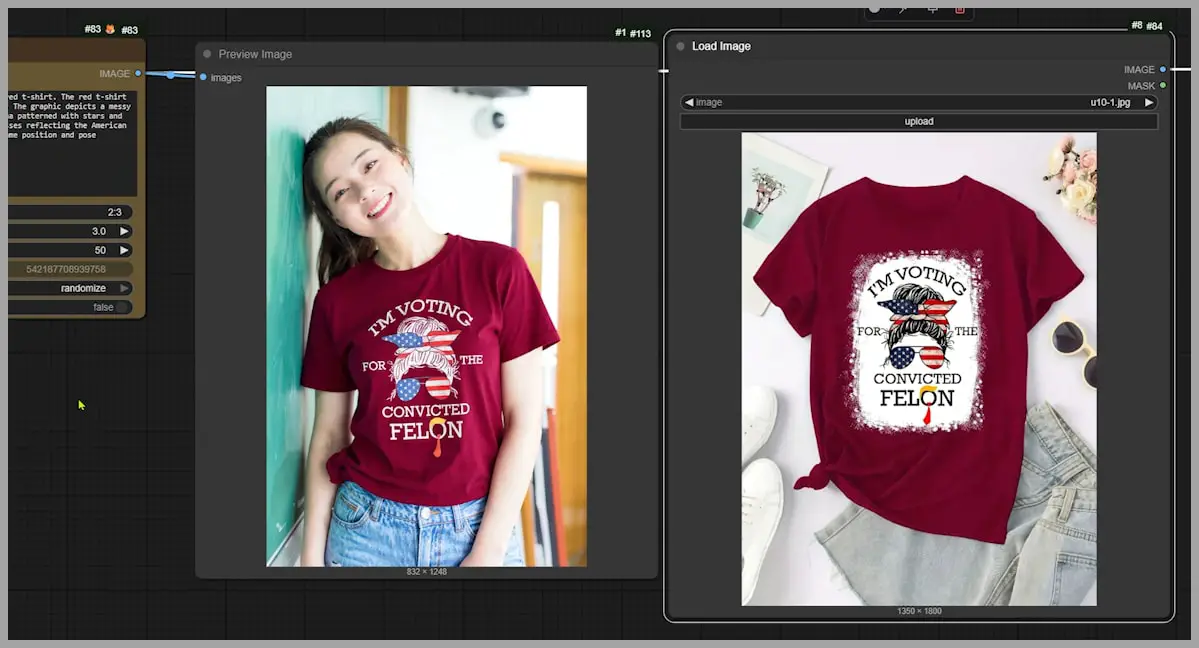
It turns out that simply mentioning ‘white graphic’ in the prompt wasn’t specific enough.
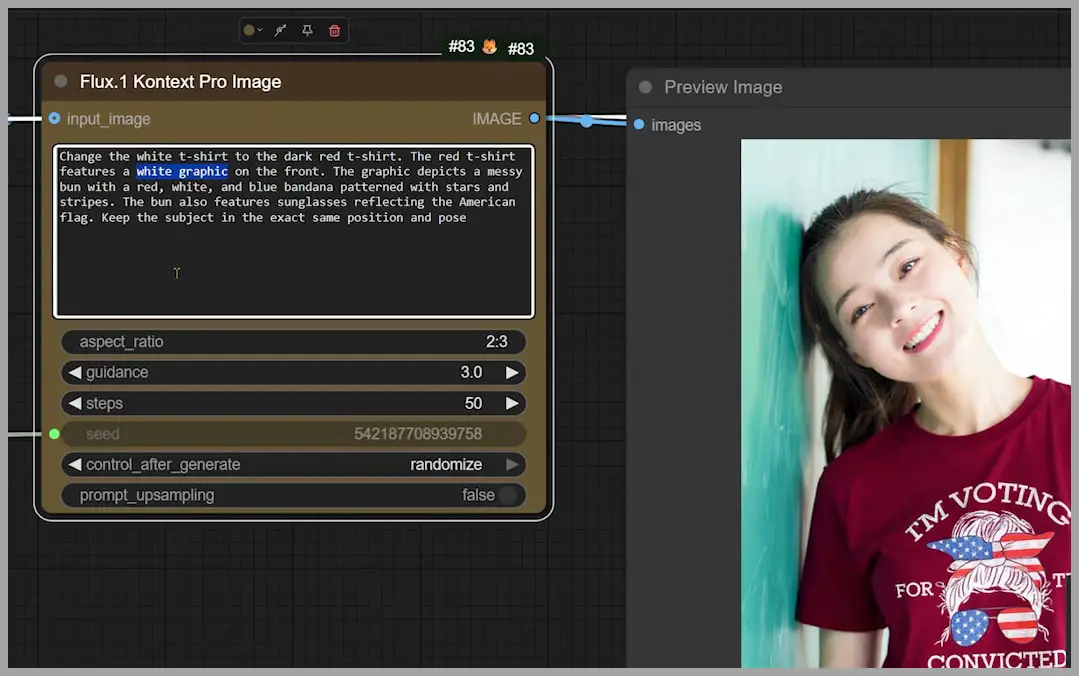
So, for the final version, I wrote a more detailed description of the white graphic, and the output looked pretty solid!
Comparing these different versions of the prompt, you can see that the model improved significantly with clearer instructions. This process, although time-consuming, leads to much better results compared to GPT-4o, where I don’t need to write as detailed prompts. In GPT-4o, I can simply mention “Image 1” and “Image 2” and refer to the input images.
Advanced Editing with Flux.1 Kontext
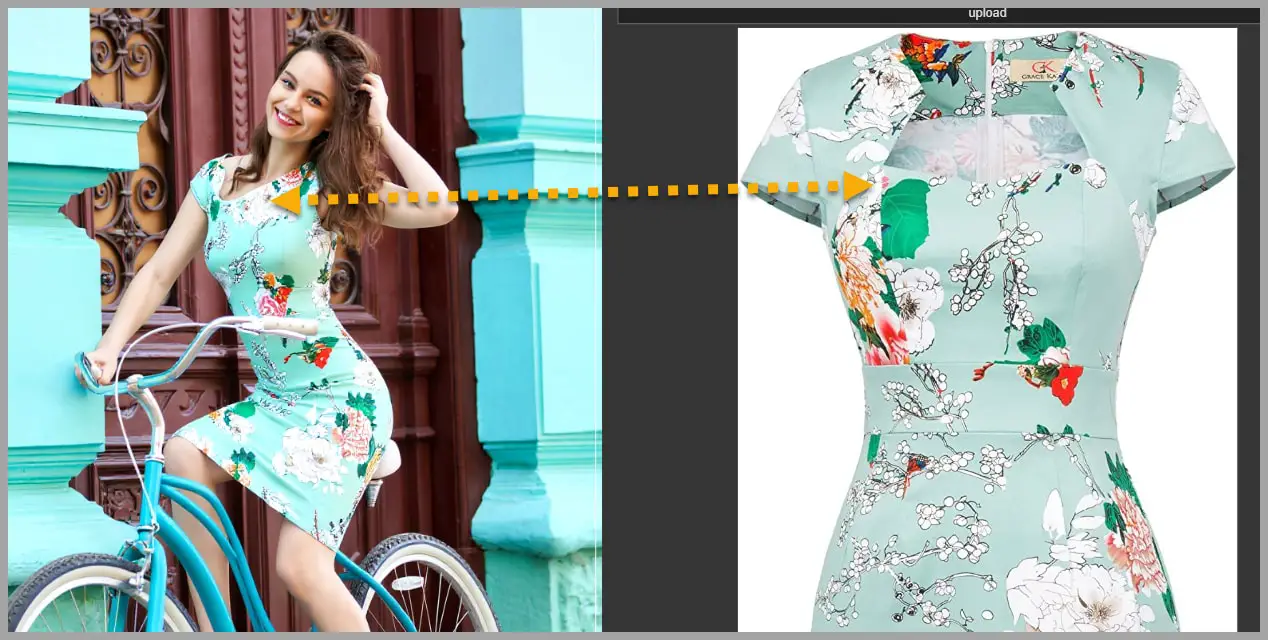
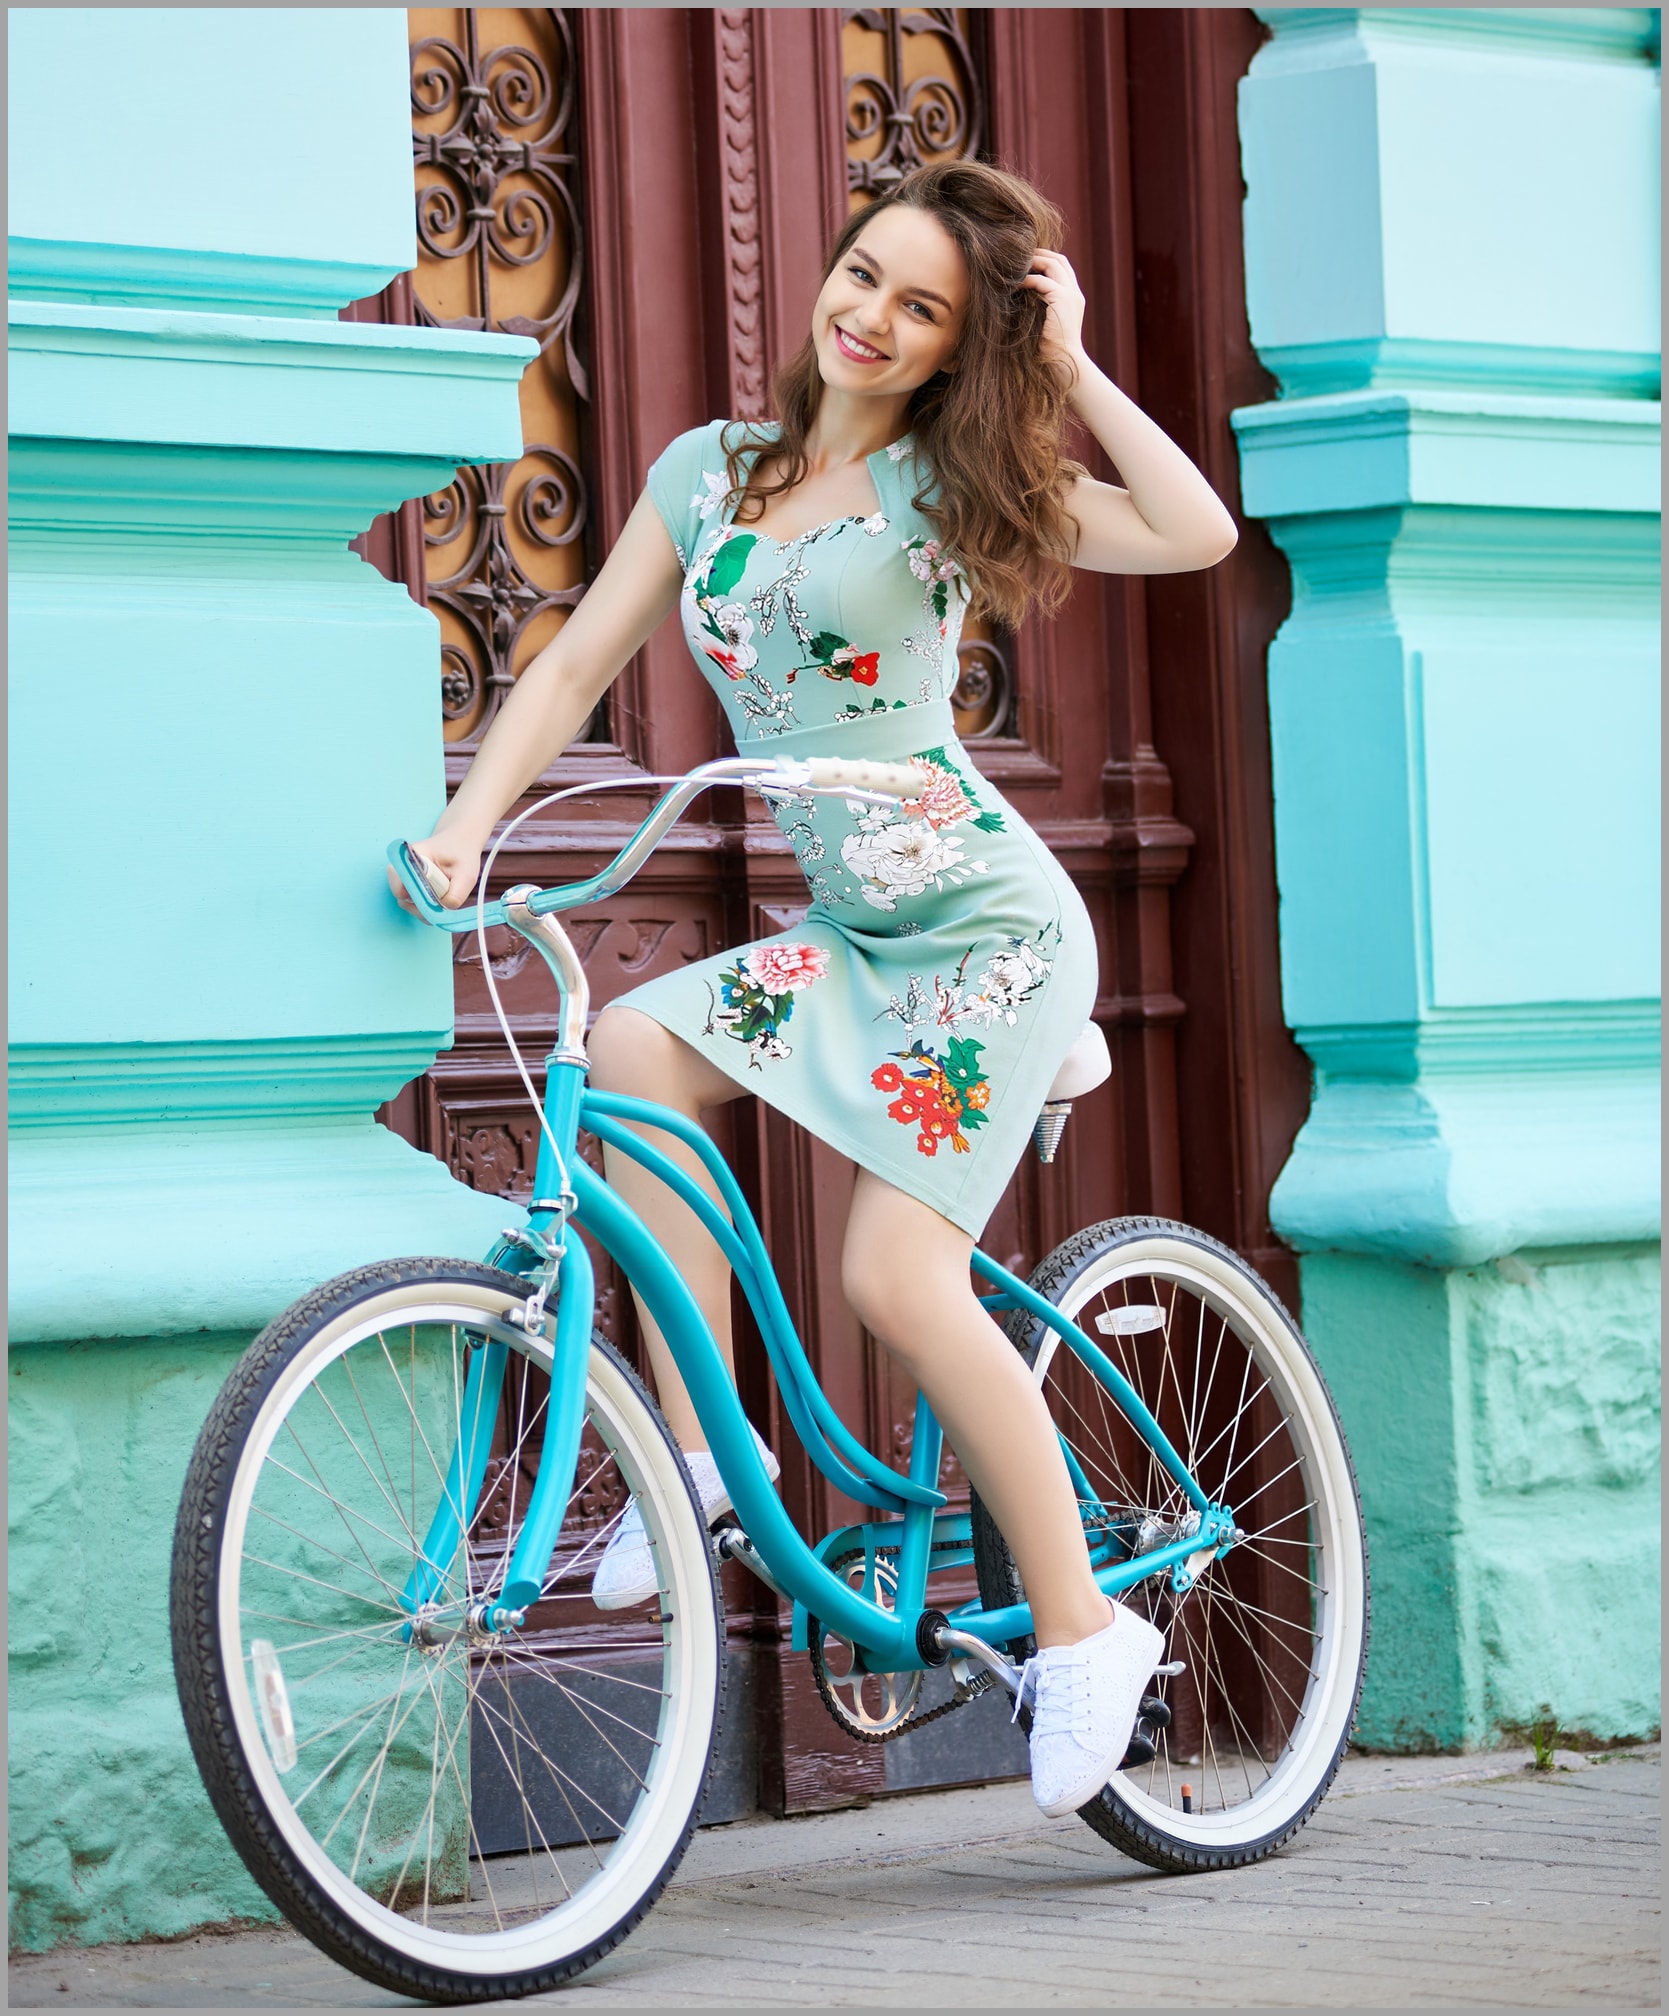
Now, let’s get a bit more advanced. We’ll use Flux.1 Kontext to try something harder: putting a dress on a woman who’s riding a bicycle. At first glance, you’ll see that Flux.1 Kontext does a better job than GPT-4o, maintaining the consistency of the woman’s pose.

However, if you zoom in and take a closer look, you’ll notice that the neckline of the dress is not exactly the same as the original dress.
In image editing, one-click magic doesn’t always give perfect results. In another video, I demonstrated a workflow where I took an image of a dress on a woman and used Photoshop to remove the bicycle handlebars splitting the dress, which would mess up how the dress gets reproduced in the final output.

After cleaning up the image in Photoshop, I ran it through ComfyUI again, and the result was much closer to what I wanted.
Additional Examples and Applications of Flux.1 Kontext
Flux.1 Kontext has many more applications beyond simple edits. Let’s look at some other examples where it really shines:
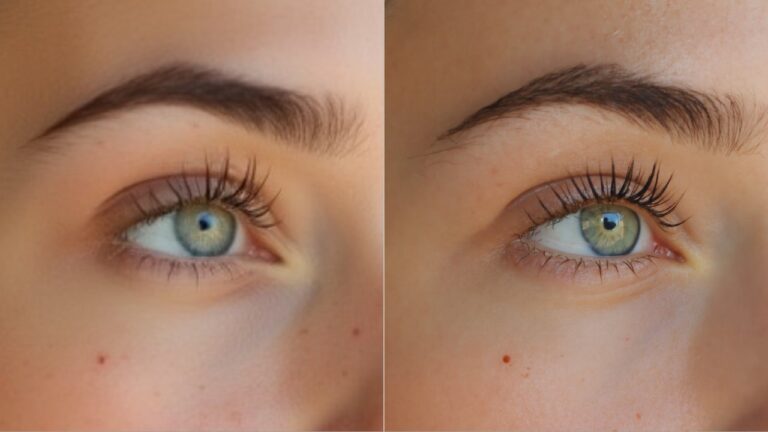
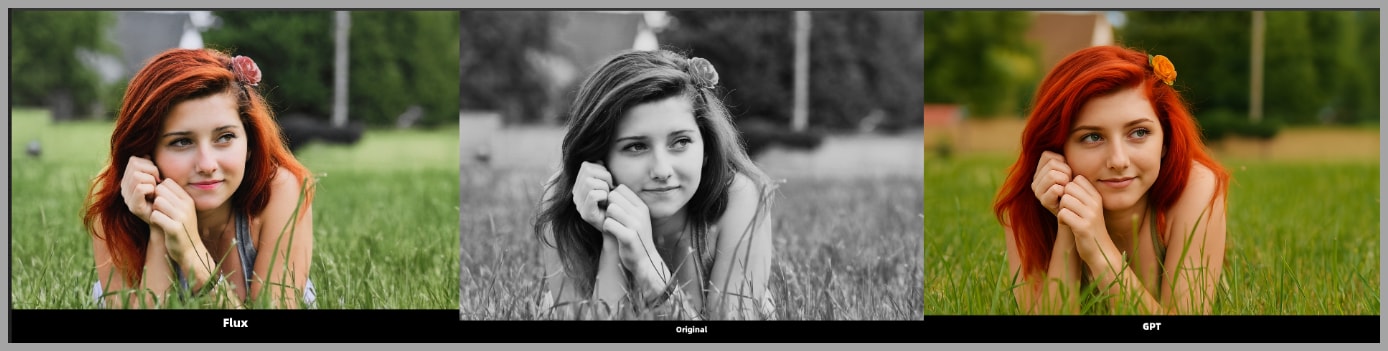
Consistency in Portraits: In this example, I started with a black-and-white image. The output from Flux had better face consistency and more natural skin tones than GPT-4o.
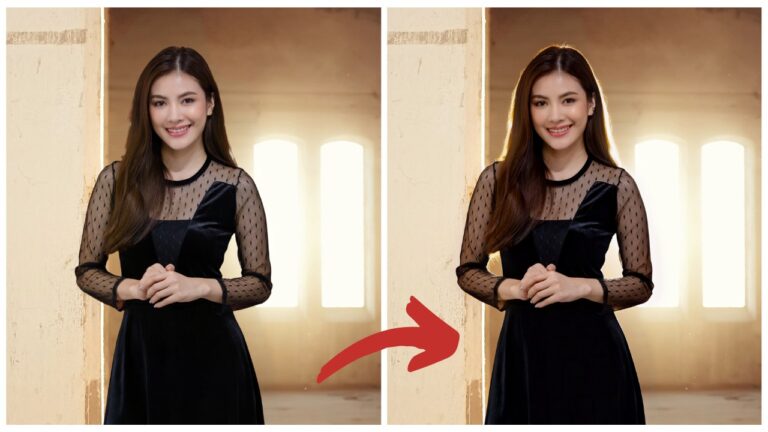
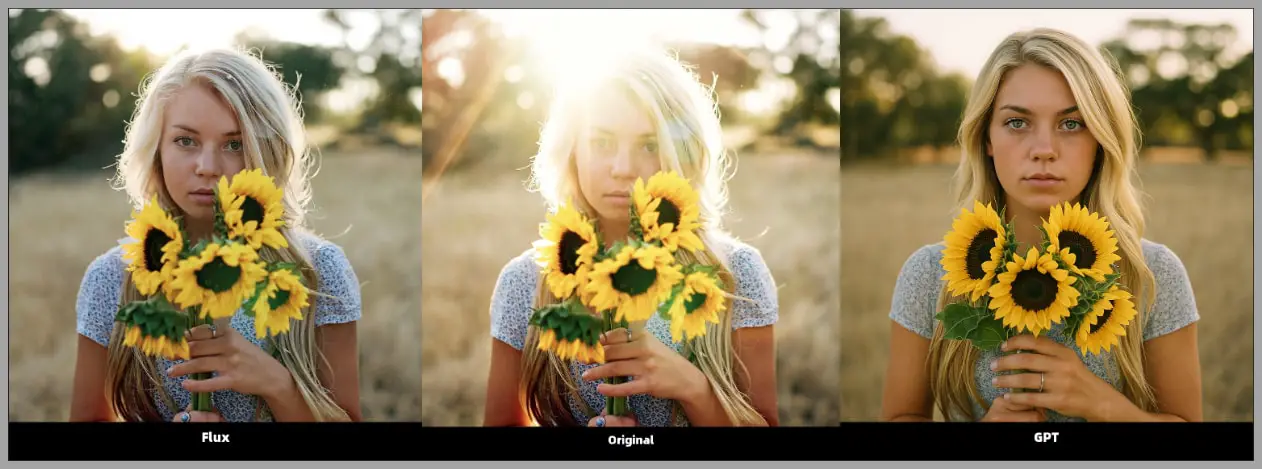
Lighting Adjustments: Flux.1 Kontext also excels at relighting images. For example, I had the AI adjust a portrait’s lighting to match certain highlights and shadows. The result was fantastic.
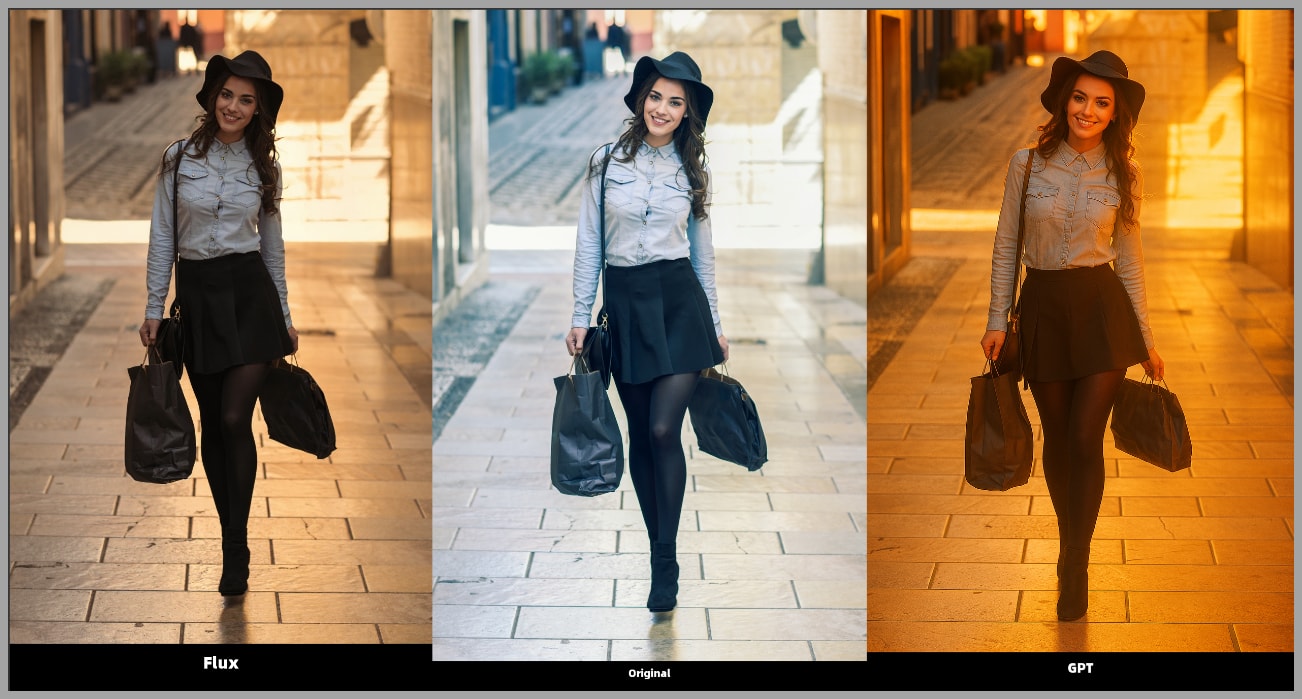
Backlighting Fixes: One image had too strong of a backlight, so I asked Flux to tone it down. The result was outstanding, with the lighting balanced beautifully.
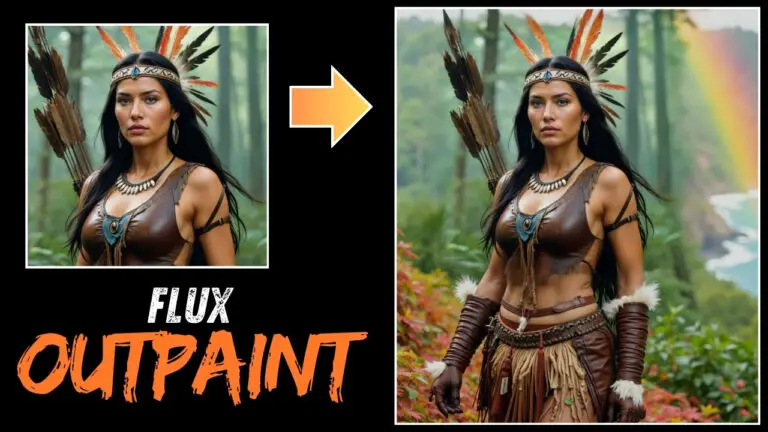
Low-Resolution Upscaling: Flux.1 Kontext can even upscale low-resolution images. The results are impressive, as the AI doesn’t just blow up the image; it enhances the details.
Flux.1 Kontext for Background Creation and Blending
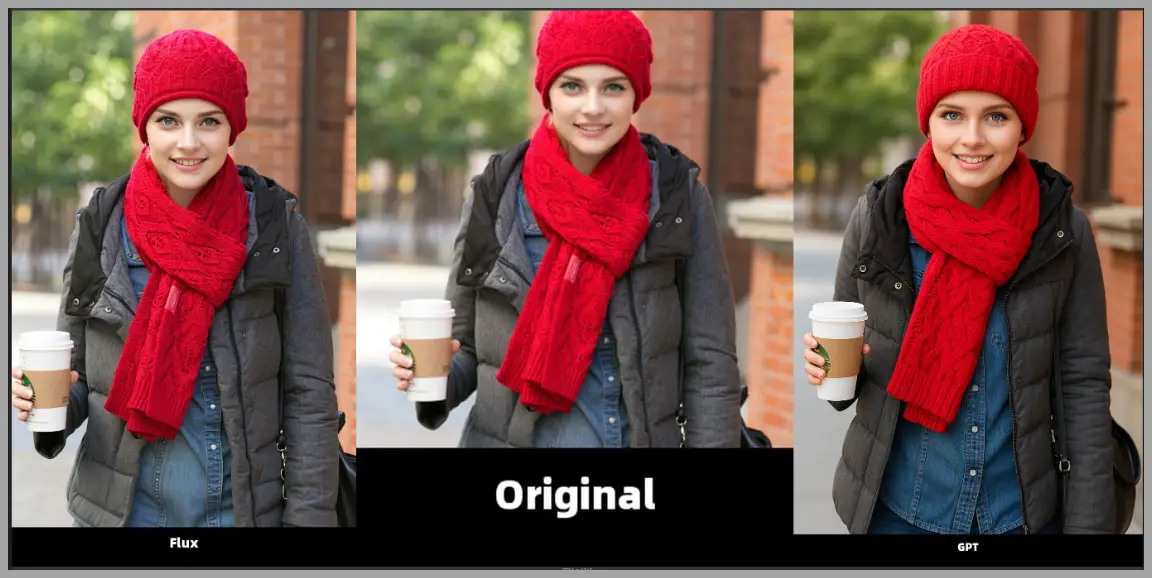
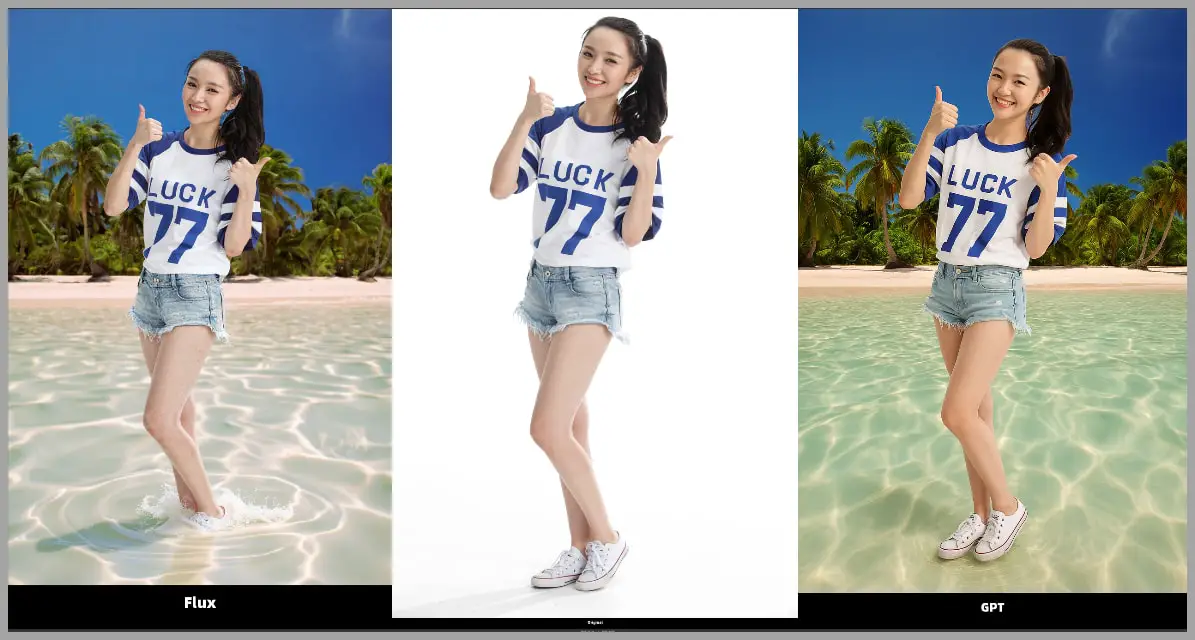
Flux.1 Kontext can do a lot more than edit portraits. It can also generate and modify backgrounds. For instance, I used it to create a new background for a portrait, and it did a stellar job blending the woman into the existing background, even placing her sneakers under the water, as requested.
Group Shots and Product Backgrounds
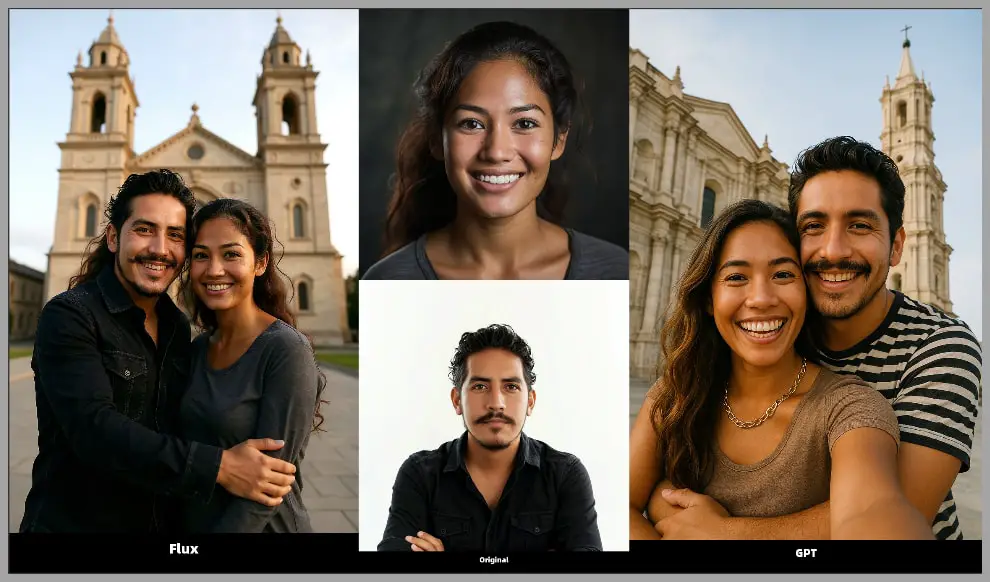
In group shots, Flux.1 Kontext maintained the same clothing style across multiple people in the image. Even when I didn’t specify details like the clothes, it kept everything consistent.
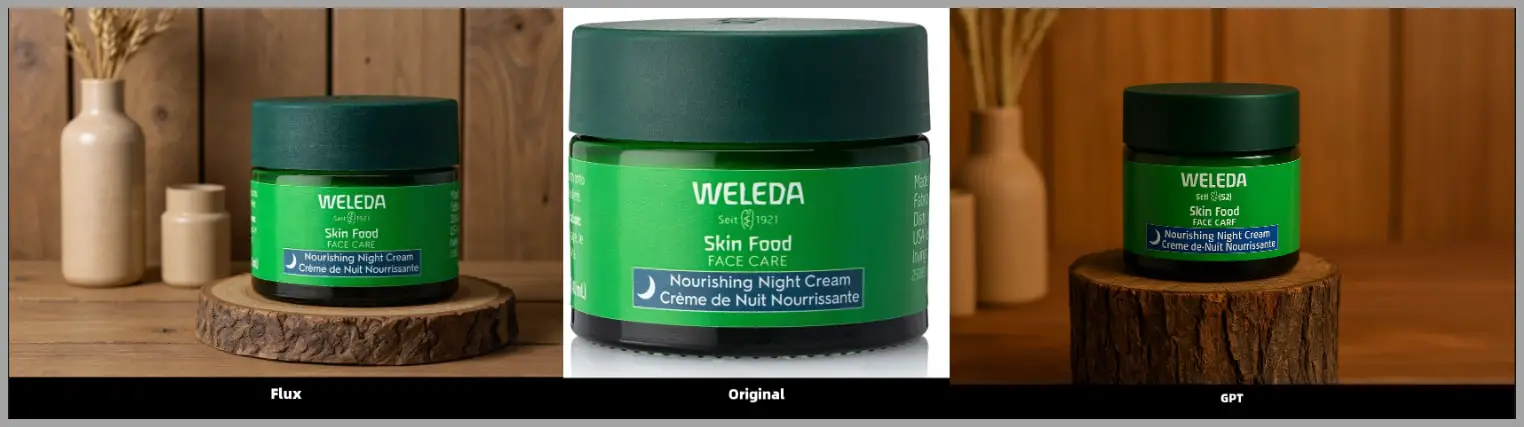
Additionally, when I asked for a background to be generated for a product, Flux nailed it! The font and text appeared just as I wanted them, while GPT-4o struggled to maintain the correct font style.
Conclusion
So there you have it! Flux.1 Kontext models are incredibly powerful, offering great consistency and accuracy in image editing. Sure, the process of writing prompts can be a bit more involved compared to GPT-4o, but the results speak for themselves. Whether you’re trying to edit individual portraits or create complex scenes, Flux.1 Kontext has you covered.
If you’re interested in exploring Flux.1 Kontext more, you can download the prompts and comparison images from the link below.