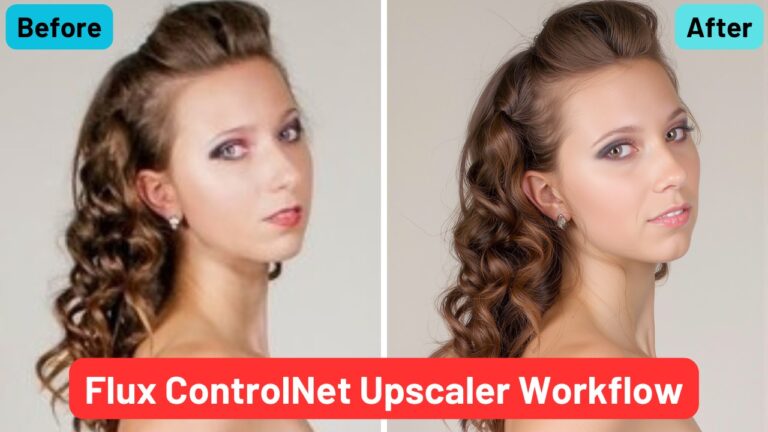
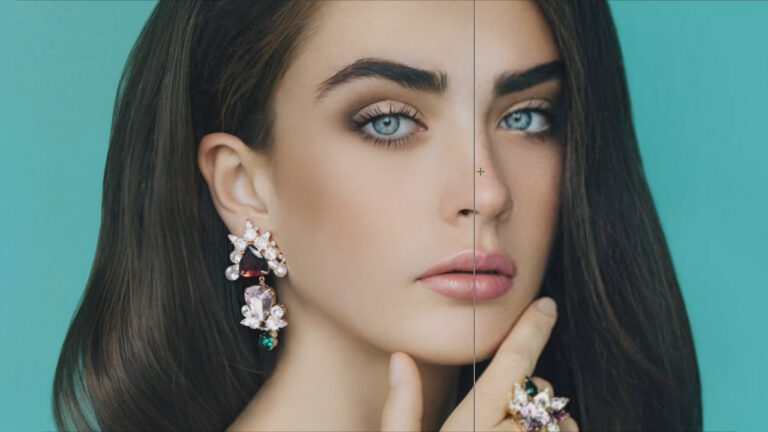
Giant 4K Head/Face Swaps with Qwen Edit! in ComfyUI: No Detail Loss
In this article, I will walk you through the process of swapping a face—or even an entire head—from a headshot onto an existing portrait using ComfyUI. Whether you want to do a simple face swap or fully integrate a new head onto a portrait, this guide will cover everything you need to know, from preparing your images to ensuring seamless results.
Overview of the Workflow
The process we’ll cover involves using ComfyUI, a powerful tool that allows us to edit images with ease. The key feature we’re focusing on today is the ability to swap a head or face between two images while maintaining high image quality and consistency.
The result will be a realistic portrait with a swapped head, without losing detail or introducing unwanted shifts in the final image. Let’s dive into the steps!
YouTube Tutorial:
Gain exclusive access to advanced ComfyUI workflows and resources by joining our community now!
Step 1: Preparing the Input Images
The first step in any image editing project is to ensure that you have the right images. In this case, we need two images: a headshot and a portrait.
Choosing the Right Images
The quality of the final output depends heavily on the images you select. You should aim to use high-resolution images where the lighting, angle, and head positioning of the face are as consistent as possible between the two. This will make the swapping process smoother and the final result more realistic.
Step 2: Using the “Image Crop by Mask and Resize” Node
Now that we have our input images, we need to crop the head area from the headshot to be used in the final portrait. This is where the “Image Crop By Mask and Resize” node comes in handy.
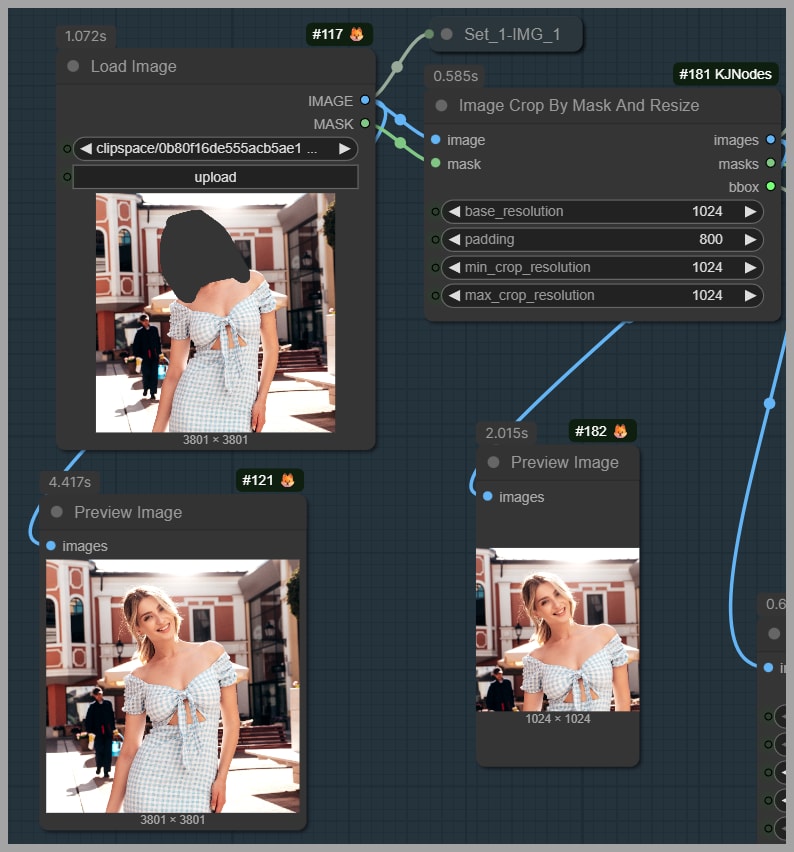
Setting the Correct Parameters
In this step, we set the crop area to a 1024×1024 pixel square. The key here is to ensure that the area we are cropping includes just the head and the immediate surrounding space, but not too much extra. The parameters I use are crucial for the final size and the detail we want to maintain.
The padding parameter is essential here. Padding refers to how much space is added around the head in the frame. If the padding is too small, the head might appear too large compared to the body in the portrait, leading to unnatural proportions.
Step 3: Masking and Preparing the Head for Inpainting
Once we’ve cropped the head, the next step is to mask the face area in preparation for inpainting, where the head will be added back into the portrait.
The Importance of Masking
Masking is a vital part of this workflow because it tells ComfyUI exactly where the model needs to focus its edits. We mask the head area so that the software knows to only work within this region.
Blockify Mask Node
To avoid any misinterpretations, I use the Blockify Mask node. This node helps modify the mask to prevent any smooth, circular mask shapes that might confuse the model into thinking the mask represents the hair, rather than the face. This ensures that the hair from the original headshot is correctly incorporated into the final portrait.
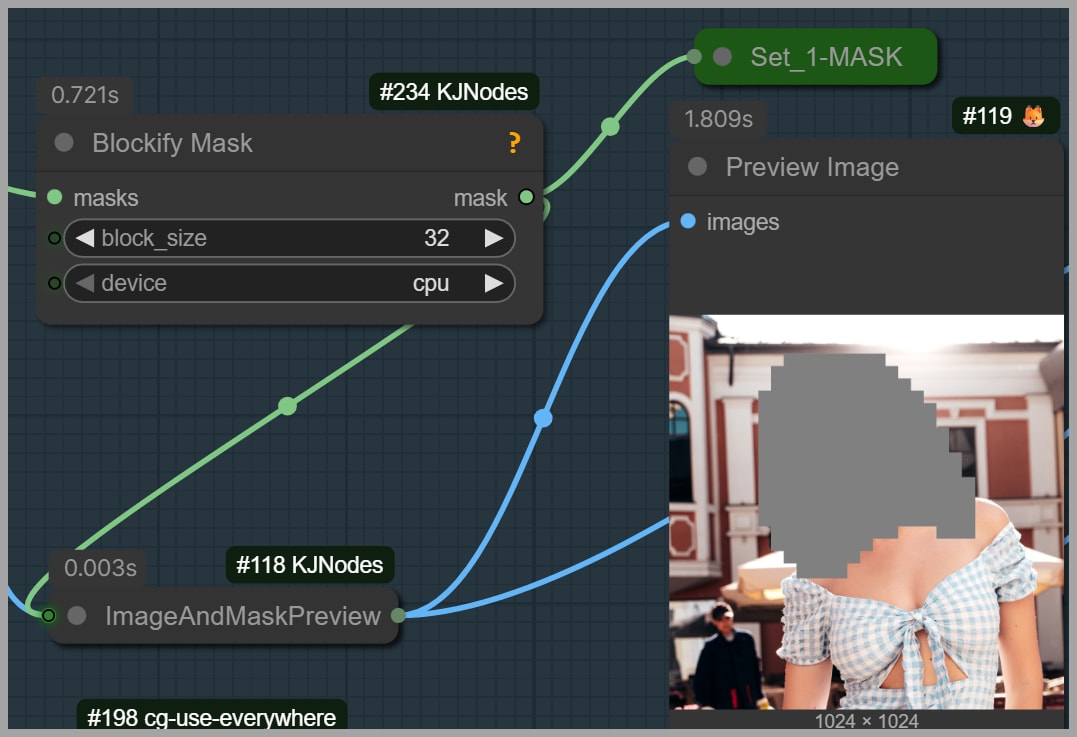
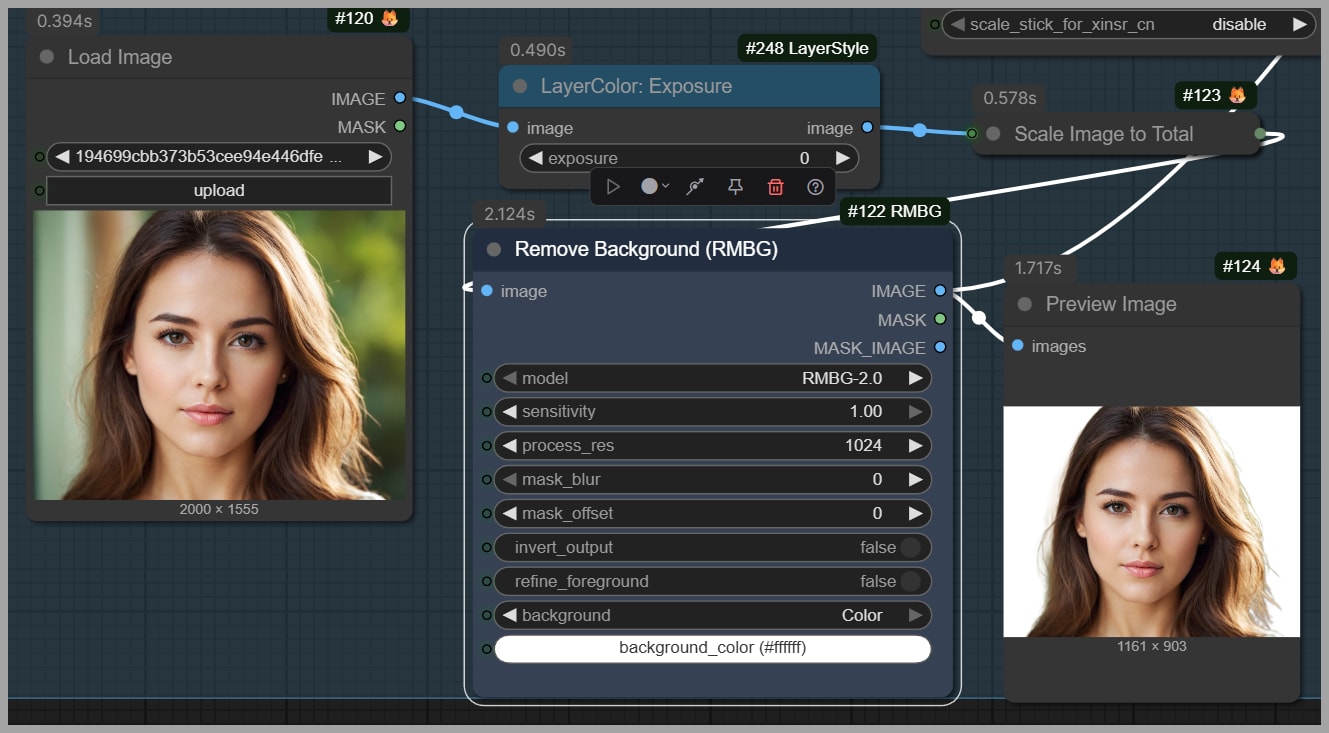
I also use “Remove Background (RMBG)” node to remove the background from the headshot. This keeps the model’s attention focused entirely on the head, which helps in creating a more consistent and realistic result.
Step 4: Using the DWPose Estimator for Better Accuracy
At this point, we need to ensure that the face we are inpainting is positioned correctly on the body in the portrait. This is where the DWPose Estimator node comes into play.
Enabling or Disabling Face Detection
The DWPose Estimator generates a pose skeleton image that guides the model in understanding how the head should fit on the body. In this case, I disabled the detect face option, as we don’t need to detect facial features such as a smiling mouth. However, if the woman in your portrait is smiling, enabling this option will ensure that the model generates an appropriately smiling face.

Step 5: Adjusting Brightness for Consistent Lighting
Lighting consistency is crucial when swapping faces or heads. If the lighting on the face in your headshot is very different from the lighting on the portrait, you might end up with an unrealistic-looking result.
Brightness Adjustment
To address this, you can use the “LayerColor: Exposure”. This node allows you to match the lighting between the headshot and the portrait, ensuring that the face and body lighting match seamlessly.
Step 6: Inpainting the Head into the Portrait
Now that we’ve prepared the images, the next step is to inpaint the head onto the portrait using the Qwen Edit model.
Preparing the Three Essential Inputs
For this step, we need three key images:
- The masked head image (with the gray patch),
- The pose skeleton image,
- The original headshot image.
These images are fed into the Qwen Edit model to guide the process of inpainting. The model will fill the gray area in the first image with the head from the second image, while referring to the pose in the third image for proper positioning.
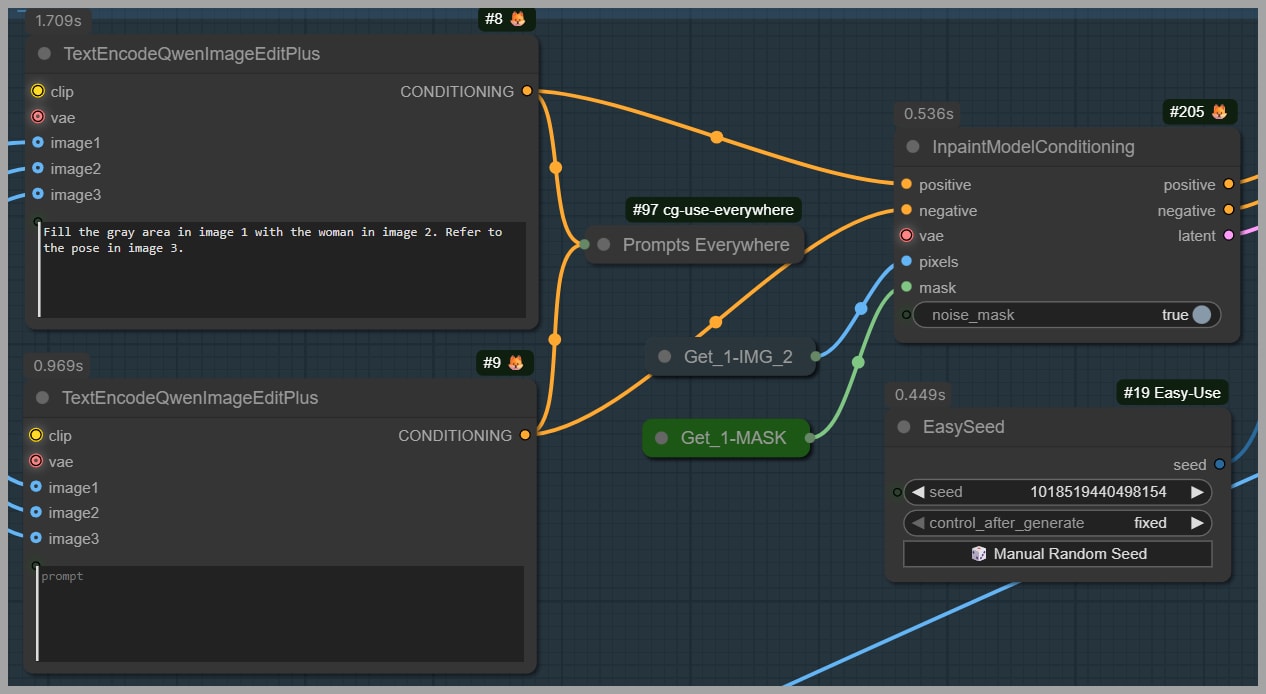
Using the Inpaint Model Conditioning Node
The Inpaint Model Conditioning node is used to ensure that only the head area is edited. This is crucial because we want to maintain the integrity of the original portrait—only the face or head should be modified.
Step 7: Enhancing the Image Quality with High-Res Fix
Once the head has been successfully swapped, we need to enhance the quality of the image to ensure that the details are sharp and the face looks natural.
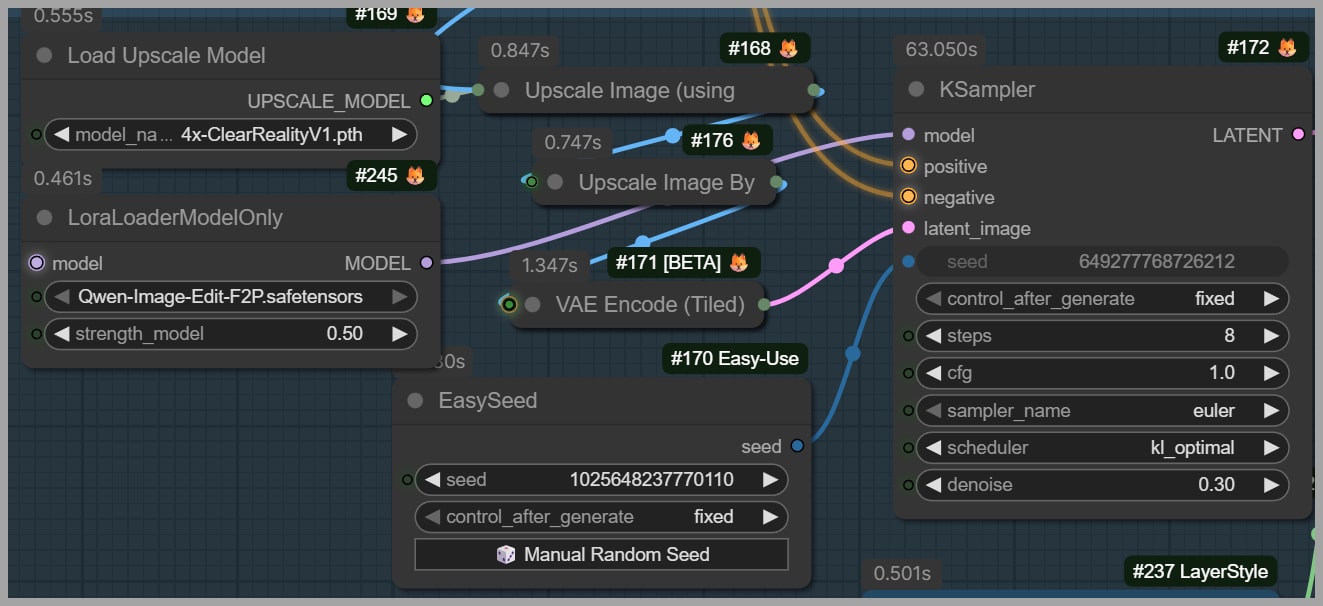
Applying a Face Consistency LoRA
To improve the face consistency, I use a Face Consistency LoRA, which ensures that the inpainted face matches the rest of the image in terms of detail and smoothness.
Fine-Tuning with the Scheduler and Denoising Strength
Additionally, I apply the kl_optimal scheduler and adjust the denoising strength to control the degree of change in the image. This helps fine-tune the inpainting process and ensures that the final result is as consistent and natural as possible.
Step 8: Seamlessly Blending the Head into the Portrait
Finally, the last step is to make sure that the head integrates smoothly with the portrait. I use a node that blurs the edges of the head area so that it blends seamlessly into the original image.
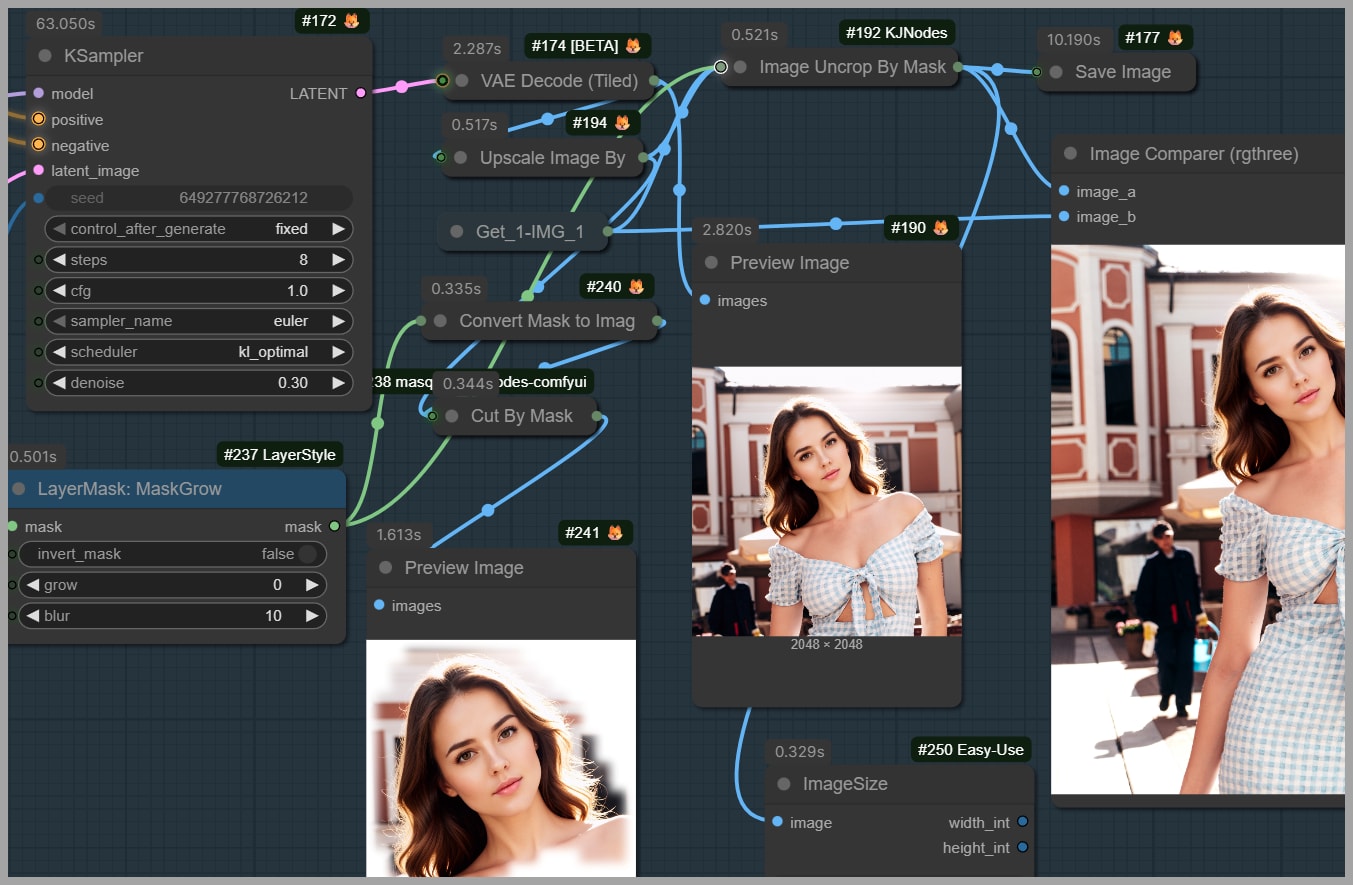
By the time this step is completed, the head swap will be nearly flawless, with no noticeable transition between the new head and the rest of the portrait.
Conclusion and Final Thoughts
That’s the complete process for swapping a head or face using the Qwen Edit model in ComfyUI. As you can see, with a bit of careful preparation and the right nodes, you can achieve high-quality face swaps without sacrificing detail or accuracy. The flexibility of ComfyUI makes this process both fun and rewarding.
If you’d like to try this workflow yourself, I encourage you to explore the tools I’ve used and experiment with your own images. You can even download the workflow by joining our community.
Gain exclusive access to advanced ComfyUI workflows and resources by joining our community now!