Crazy Detail on 8GB GPU: SeedVR2 + SRPO Upscaling Workflow
Do your AI-upscaled images suffer from unnaturally smooth, plastic-like skin? You’re not alone. Many upscaling workflows sacrifice realistic texture for resolution gains – but what if you could have both? In this guide, I’ll show you a powerful ComfyUI technique that combines SeedVR2 and SRPO to create stunningly lifelike skin details.
This innovative approach solves two critical problems:
- Eliminating the “waxy” skin effect common in AI upscaling
- Dramatically reducing VRAM requirements (works on 8GB GPUs!)
Through extensive testing, I’ve developed a two-stage workflow that outperforms traditional methods like SUPIR+SRPO. Let’s transform your upscaled portraits from synthetic to photorealistic!
A Revolutionary Two-Stage Upscaling Approach
The two-stage approach of combining SeedVR2 with SRPO offers a powerful solution to the common skin texture problem in AI upscaling. By leveraging these two models together, we can achieve the perfect balance between detail preservation and VRAM efficiency.
Stage 1: SeedVR2 for Initial Upscaling
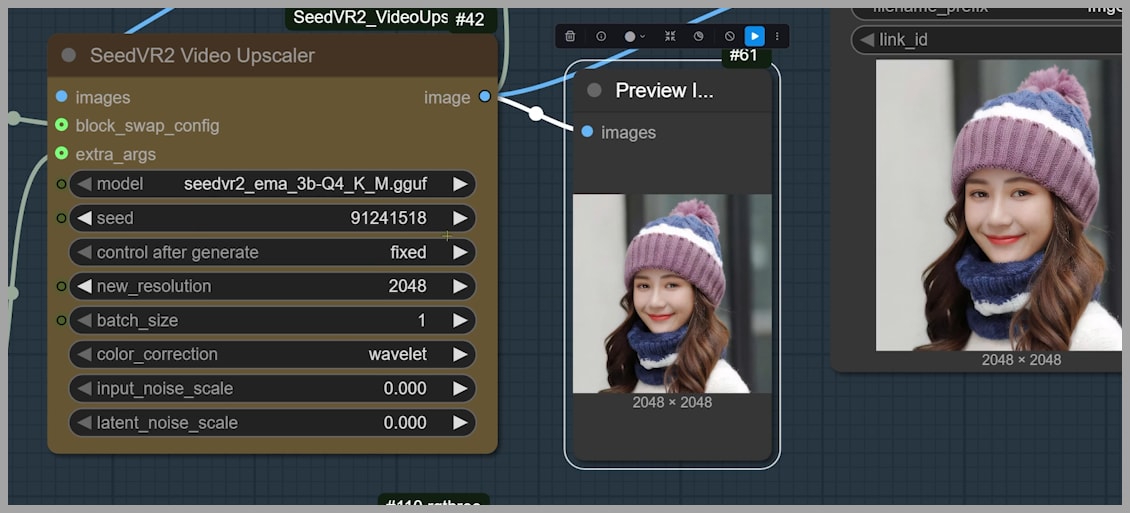
SeedVR2 excels at building a solid, dimensional base. When upscaling images, it provides a strong 3D feel and depth that other models often miss. The key here is the model’s ability to generate more natural, three-dimensional features in the image. SeedVR2 brings out the form of the face and the contours of skin in a way that creates a more lifelike appearance. When paired with the right settings, such as 2048×2048 resolution, SeedVR2 will provide a detailed image that forms the foundation for later refinement.
However, there’s a catch: SeedVR2, like many AI upscalers, can sometimes generate overly smooth or “perfect” skin, especially when it encounters images with relatively little texture. This is where the second stage, SRPO, comes in.
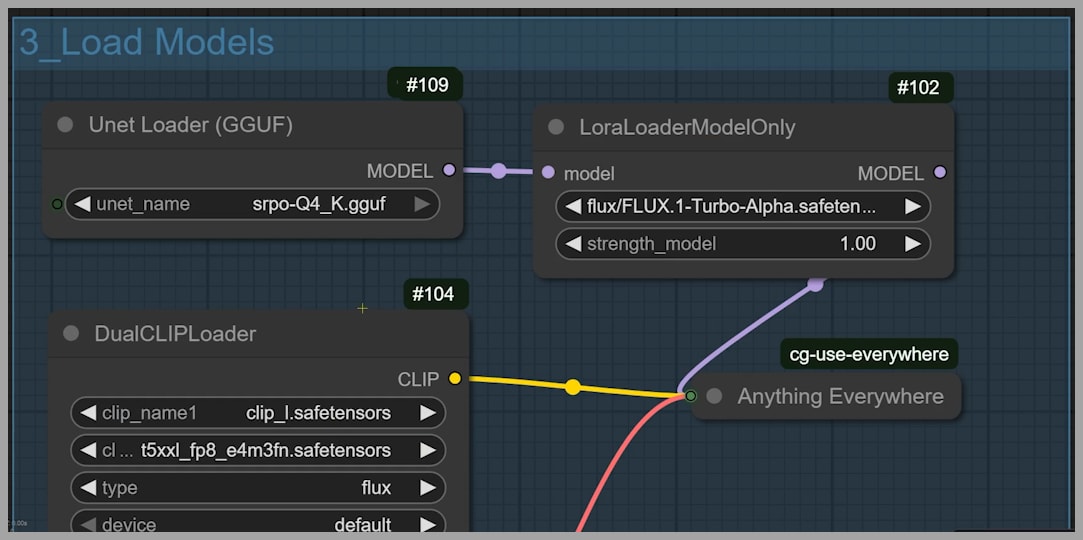
Stage 2: SRPO for Detail Refinement
After SeedVR2 has done its initial upscaling, SRPO takes over. The SRPO model refines the skin texture, eyes, and other small details by adding the finer elements that SeedVR2 may have missed, like pores, light reflections, and subtle imperfections that are key to creating a more natural look.
SRPO works particularly well when paired with GGUF (a variant of SRPO that is optimized to run efficiently with lower VRAM requirements). By using SRPO in this way, you can improve the quality of the upscaled image without pushing your hardware to its limits. The final result is skin that has realistic texture, eyes with natural detail, and small elements like eyelashes or facial lines that feel grounded and convincing.
This two-stage upscaling method enhances both the depth of the image and the detail within it, resulting in a portrait or scene that is not only clear and sharp but also highly realistic.
YouTube Tutorial:
Visual Results Comparison
To truly understand the effectiveness of the SeedVR2 + SRPO workflow, let’s look at some real-world examples. I’ve compared upscaled images using two different methods: SeedVR2 + SRPO and SUPIR + SRPO. The goal here is to showcase the improvements in skin texture, dimensionality, and fine details that come from using this specific combination.
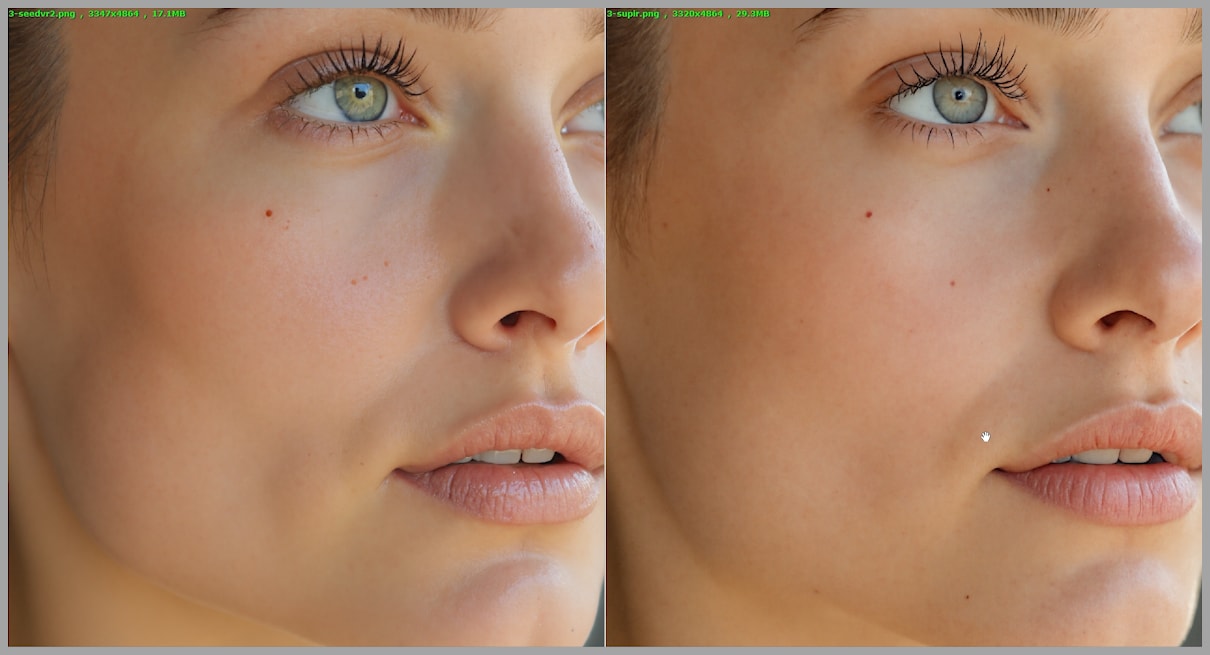
Case 1: Medium-Resolution Image (~832×1216)
In this case, the original image wasn’t very small, but it still allowed us to see the difference between the two workflows.
- SeedVR2 + SRPO (Left Image): Notice the skin texture here—it feels more three-dimensional and lifelike. The pores, subtle details, and skin imperfections are preserved, contributing to a more natural look. The eyes also have a more natural sheen, with light reflecting off the iris and eyelashes. The lips also look more authentic.
- SUPIR + SRPO (Right Image): While the skin is smoother and the image overall is clearer, the depth and texture are less pronounced. The eyes appear flatter, and the skin lacks the subtle realism seen on the left.

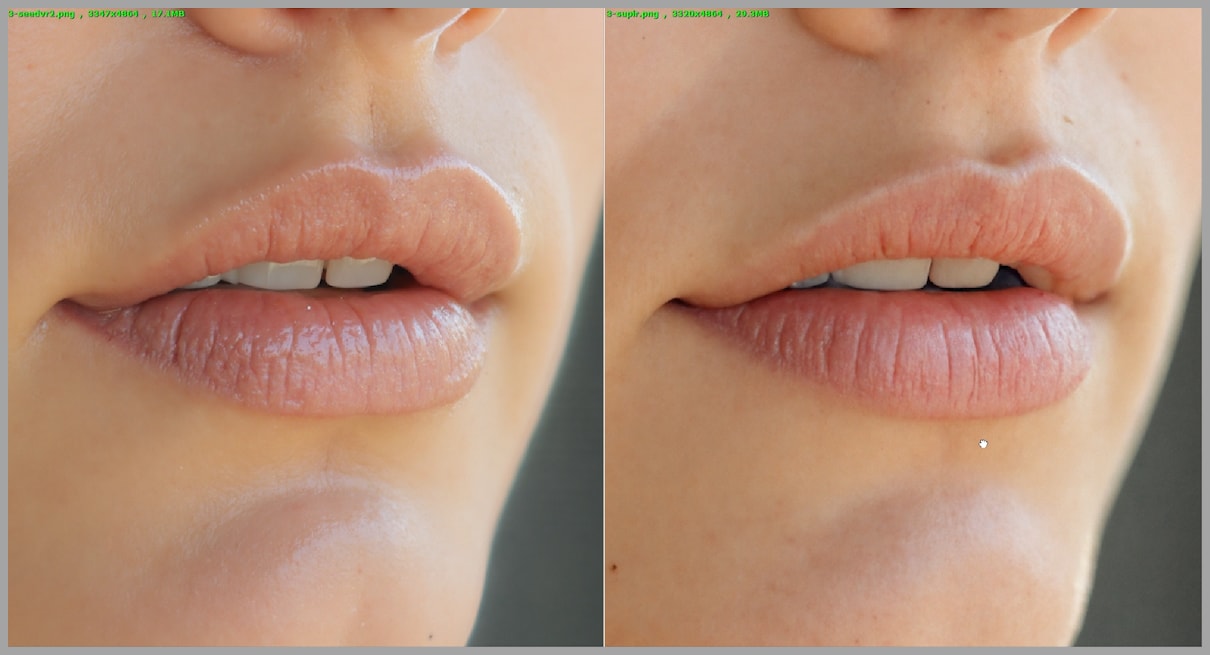
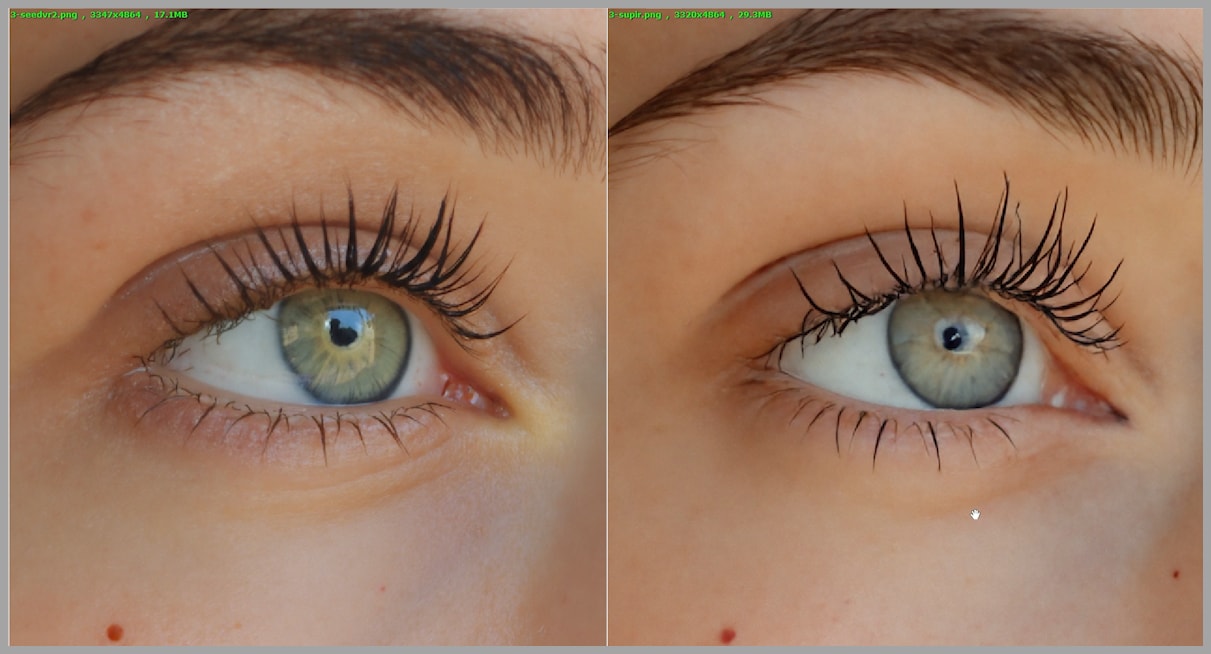
Zoom-In Analysis:
- Skin Texture: The SeedVR2 + SRPO version has a more believable skin texture. The pores are slightly more pronounced, adding depth, while the SUPIR version looks more like it has been airbrushed.
- Eyes & Lashes: The eyes in SeedVR2 are more detailed, with light catching the lashes in a way that feels natural. The SUPIR image has slightly fake-looking eyelashes and a duller iris.
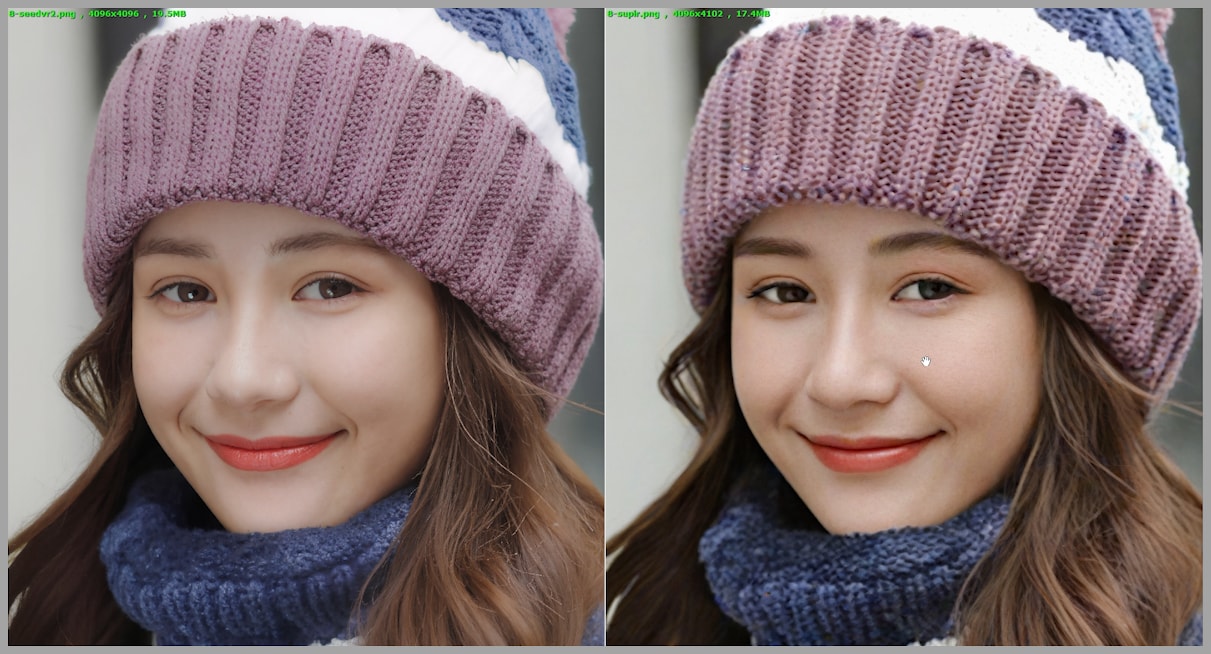
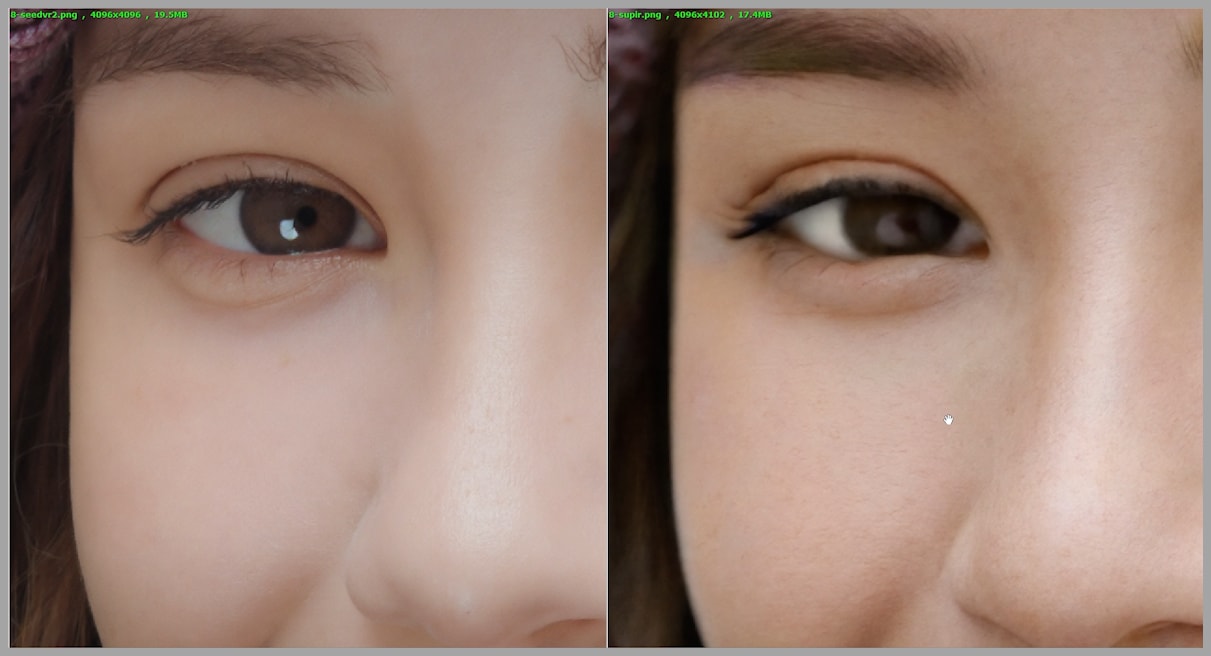
Case 2: Low-Resolution Image (~350×350)
In this example, we are dealing with a true super-resolution upscale from a very small source, which often leads to even more challenges in terms of texture and detail preservation.
- SeedVR2 + SRPO (Left Image): This version shows much more authentic detail, particularly in the eyes and skin. The skin texture is smoother compared to the medium-resolution image, but the details still appear realistic without the “waxiness” that can plague other models. The eyes look sharper, with less artifacting around the iris.
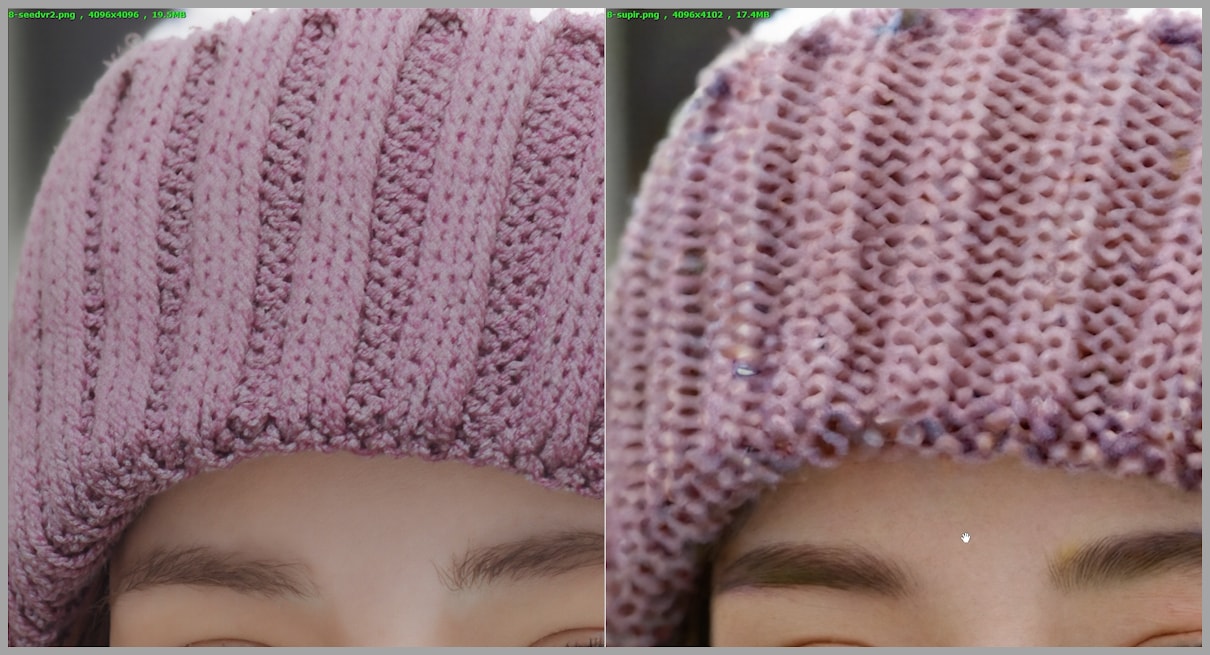
- SUPIR + SRPO (Right Image): The skin looks flatter in the SUPIR version, with less texture and fewer details. The hat and clothing details are less defined, and the face appears smoother, almost too perfect.
Zoom-In Analysis:
- Eyes: SeedVR2’s output has sharper, more nuanced eyes with better reflections and fewer artifacts. SUPIR’s result looks somewhat artificial, especially in the iris and pupil.
- Winter Hat: The finer details in the SeedVR2 image, like the weave of the winter hat, are more distinct and natural-looking. SUPIR struggles to maintain this level of clarity.
Overall, the SeedVR2 + SRPO workflow delivers more lifelike and detailed images across both resolution scales. Whether you’re working with a higher-resolution portrait or starting from a small low-res image, the improvements are visible in terms of both depth and texture.
Resources
The full workflow file for this process is available in our community. You can access it through the link below to replicate these steps on your own.
Gain exclusive access to advanced ComfyUI workflows and resources by joining our community now!