Generating Massive Ultra-High-Resolution Images in ComfyUI with Z Image Turbo
Creating extremely large, high-quality images in ComfyUI is no longer just a theoretical exercise. With the right combination of models and a carefully designed workflow, we can generate images exceeding 8K resolution while preserving fine details and avoiding GPU memory crashes.
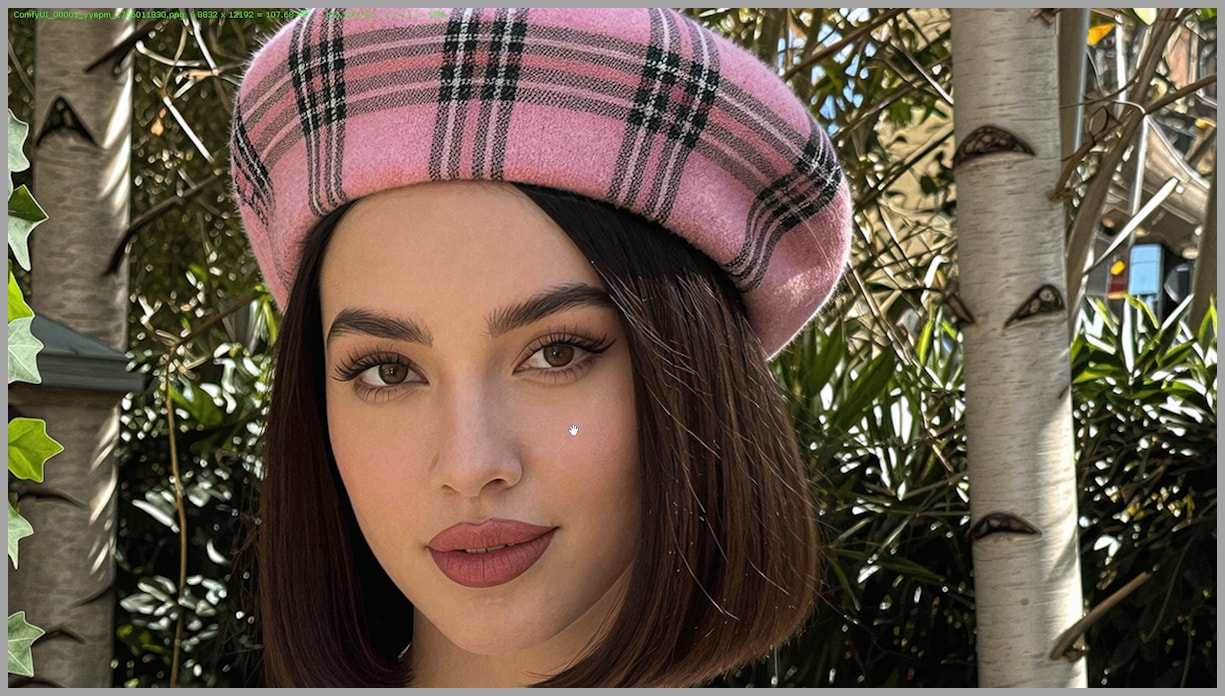
In this article, I’ll walk you through a practical workflow that uses Z Image Turbo, SeedVR2, and Ultimate SD Upscale to produce an image with a final resolution of 8832 × 12192 pixels—absolutely packed with detail.
Overview of the Full Workflow
This workflow is divided into three main groups, each with a clear responsibility:
- Group 1 generates the base image using Z Image Turbo.
- Groups 2 and 3 handle tiling, upscaling, and memory management using SeedVR2.
- The final group enhances fine details with a second upscale pass using Ultimate SD Upscale.
While the first group is relatively straightforward, the second and third groups form the core of the workflow. They are what make extreme resolutions possible without running into out-of-memory errors.
YouTube Tutorial:
Gain exclusive access to advanced ComfyUI workflows and resources by joining our community now!
Group 1 – Base Image Generation with Z Image Turbo
Group 1 is a standard text-to-image setup using the Z Image Turbo model. There’s nothing exotic here, but resolution choices matter.
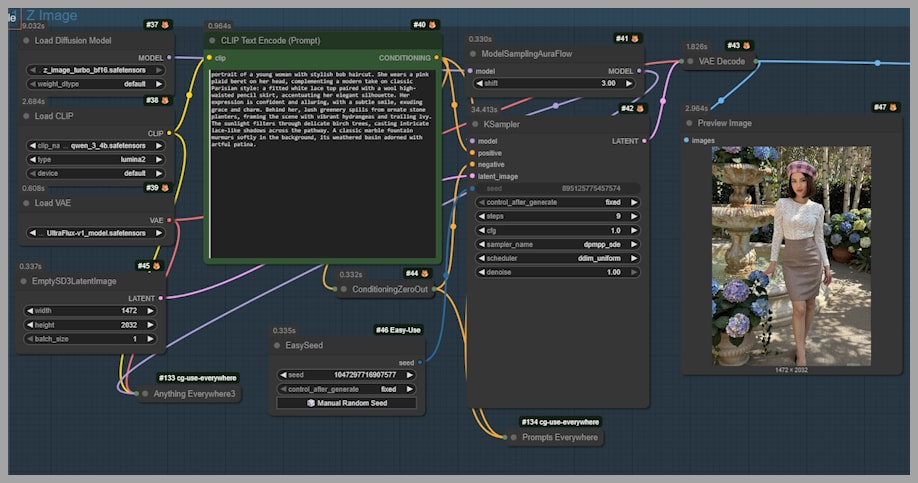
I recommend setting relatively high base resolutions, with one important rule:
- Do not exceed 2048 pixels on either side.
This gives Z Image Turbo enough spatial information to work with while keeping VRAM usage under control for later steps.
For samplers and schedulers, you can use your preferred options. I won’t go deep into that here, as sampler behavior has already been covered in detail in a previous article. The key point is that sampler choice at this stage is flexible and doesn’t make or break the workflow.
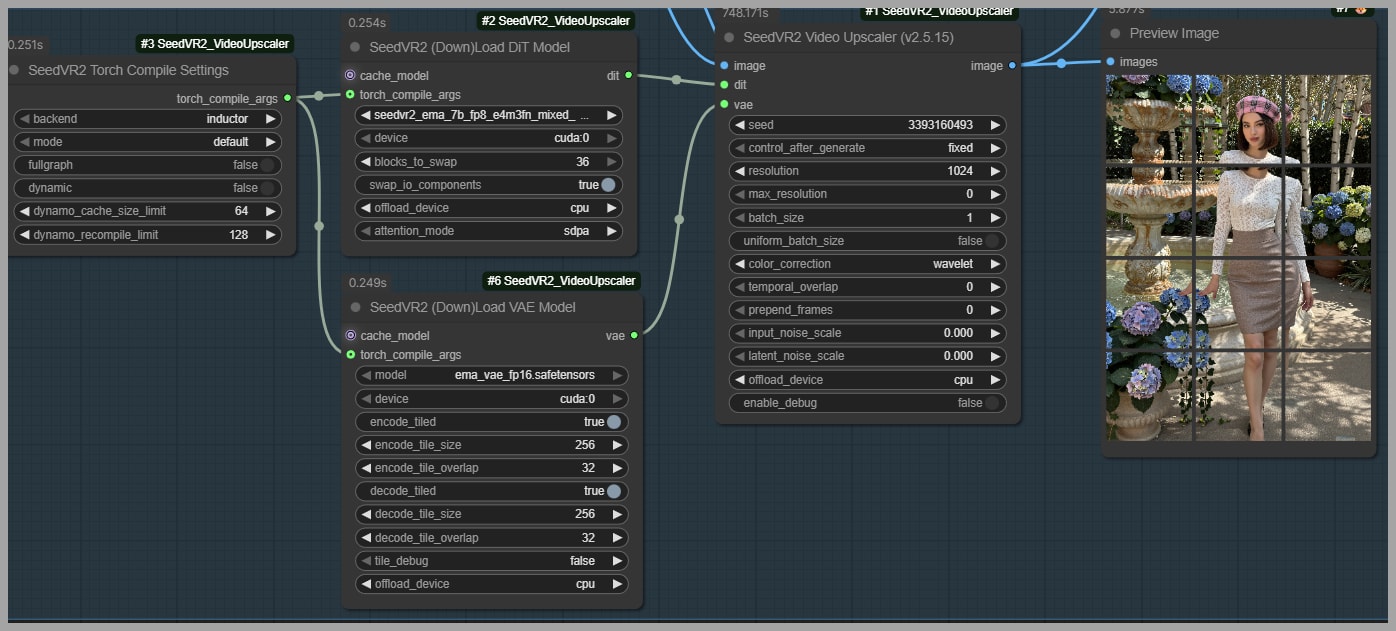
Groups 2 & 3 – Tiling, Upscaling, and Memory Management
This is where the real magic happens.
Why Manual Tiling Is Necessary
SeedVR2 already supports tiling during VAE encoding and decoding, and it even allows you to set tile sizes directly in the node. However, there’s an important limitation:
The actual upscaling step between encoding and decoding is not performed tile by tile.
This means that if you try to upscale a very large image directly—say, by 2× or more—you’re likely to hit an out-of-memory error, even with optimizations enabled.
To avoid this, we manually split the image into smaller tiles before sending it to SeedVR2.
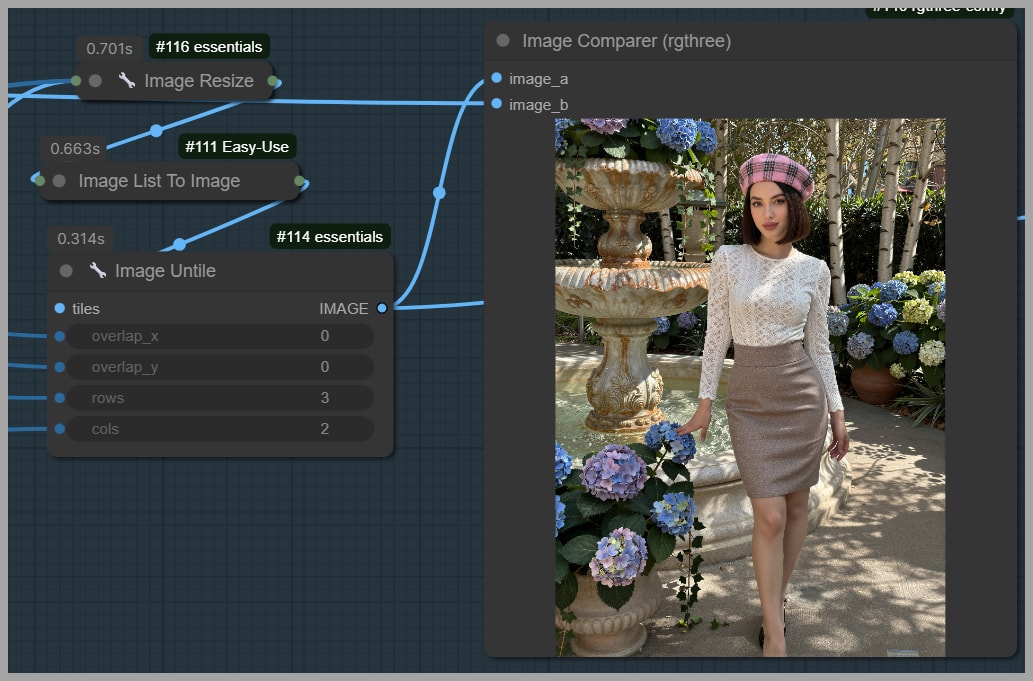
How the Tiling Works
In Group 2, the image is split into a grid:
- 4 rows × 3 columns, resulting in 12 tiles
- Each tile starts at approximately 1079 × 1117 pixels
- Tiles are then scaled down by a factor of 0.25, bringing them to about 270 × 279 pixels
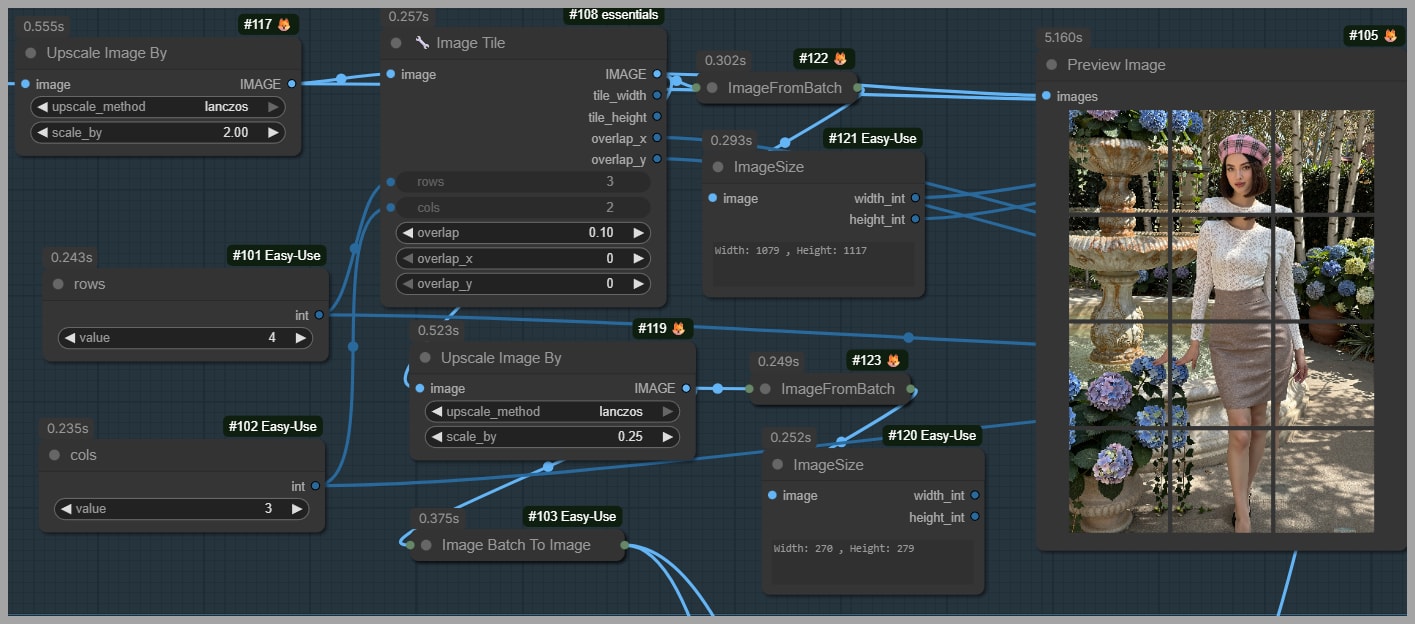
These smaller tiles are sent one by one into Group 3, where SeedVR2 upscales each tile by roughly 4×.
After upscaling, each tile is resized back to 1079 × 1171 pixels. This precise resizing is crucial—it ensures that all tiles can be stitched back together cleanly using the Image Untile node, without dimension mismatches or stitching errors.
Choosing the Right Grid Layout
Grid layout depends on your image orientation:
- Portrait images: 4 rows × 3 columns
- Landscape images: 3 rows × 4 columns
- Square images: 4 rows × 4 columns
A good rule of thumb is to:
- Adjust each tile to around 256 pixels on the shortest edge.
- Upscale by 4× to reach roughly 1024 pixels per tile.
This keeps VRAM usage manageable while still delivering strong visual improvements.
Performance and Optimization Considerations
Even with manual tiling, SeedVR2 can be demanding.
Memory-Saving Options in SeedVR2
To reduce VRAM usage during upscaling, you can:
- Switch to a smaller SeedVR2 model
- Enable “swap IO components”
- Set a reasonable “block to swap” value
However, even with these options enabled, extremely high target resolutions (for example, 4096 pixels) can still cause out-of-memory errors. That’s why manual tiling remains the safest and most reliable approach.
Final Group – Detail Enhancement with Ultimate SD Upscale
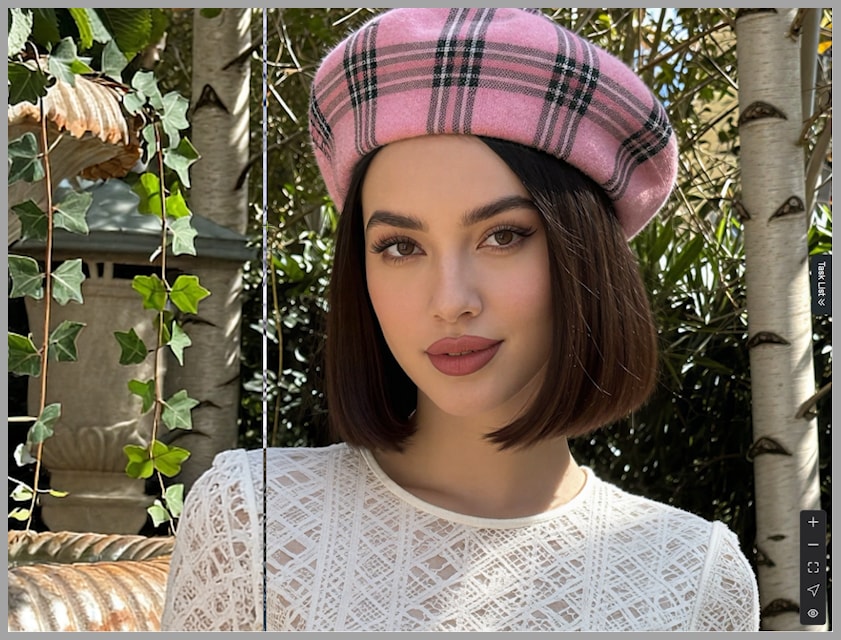
After SeedVR2 upscaling, the image reaches a resolution of approximately 2943 × 4064 pixels. At this stage, the image is sharper, but skin textures are still too smooth.
To fix this, the final group performs a second enhancement pass.
Adding Texture with SkinDiffDetail
First, the image is processed using the SkinDiffDetail model. Despite its name, this model doesn’t just improve skin—it also enhances:
- Fabric textures
- Subtle surface details
- Fine material variation
Final Upscaling with Ultimate SD Upscale
Next, the image is upscaled again—typically by 3×—and passed into the Ultimate SD Upscale node.
Key settings to keep in mind:
- Denoising strength should stay low The goal is to add fine texture, not to reshape the image.
- Avoid connecting the SkinDiffDetail model directly into the alternative Ultimate SD Upscale node that allows internal upscaling. In my testing, this setup tends to introduce artifacts.
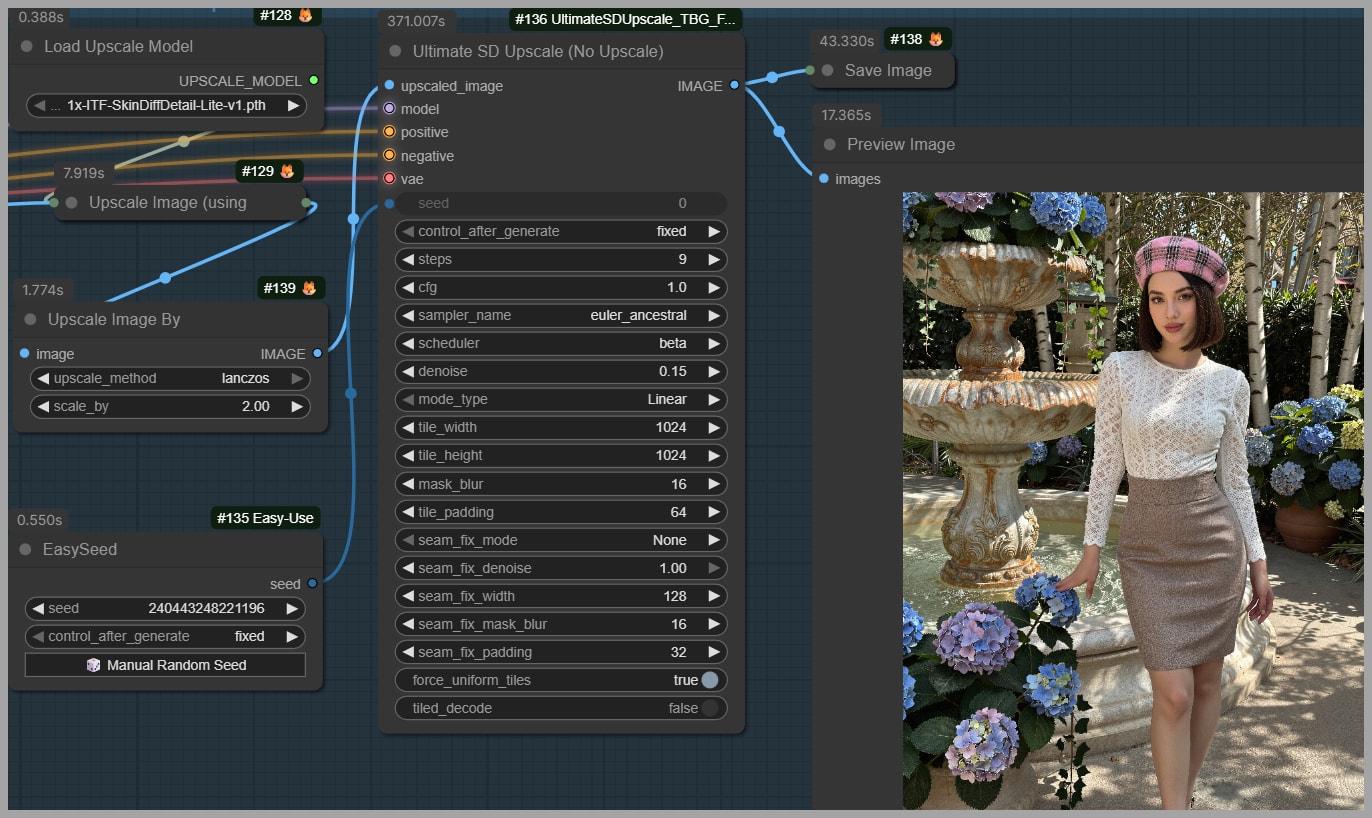
Sampler Choice for the Final Pass
For the final upscale, I chose Euler Ancestral.
It consistently produces:
- More polished details
- Cleaner textures
- A refined overall look
If you prefer rougher or less refined details, other samplers may work better, but Euler Ancestral is a solid default for high-resolution finishing.
Final Thoughts
If you’re interested in downloading and experimenting with this workflow yourself, you can find it in our community.
Gain exclusive access to advanced ComfyUI workflows and resources by joining our community now!
With the holidays approaching, I want to thank everyone who supports this work. Let’s look forward to even more powerful workflows and creative breakthroughs in the coming year.