Creating Massive 4K Images in ComfyUI with Wan 2.2
Hi creators! I recently used Alibaba’s open-source Wan model in ComfyUI to achieve something extraordinary: 4K+ images bursting with microscopic detail.
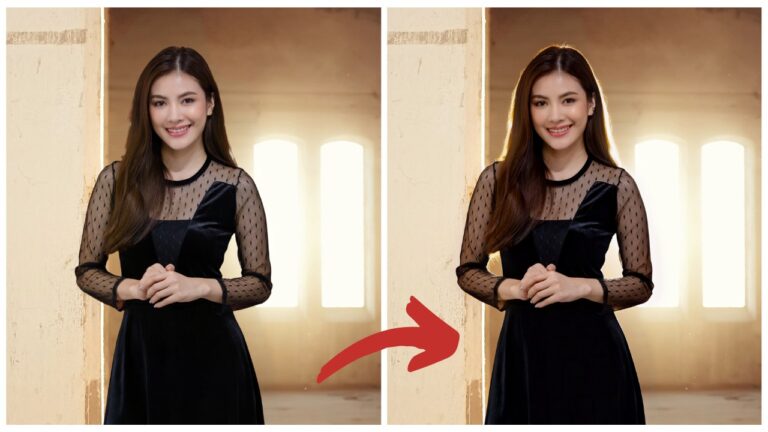
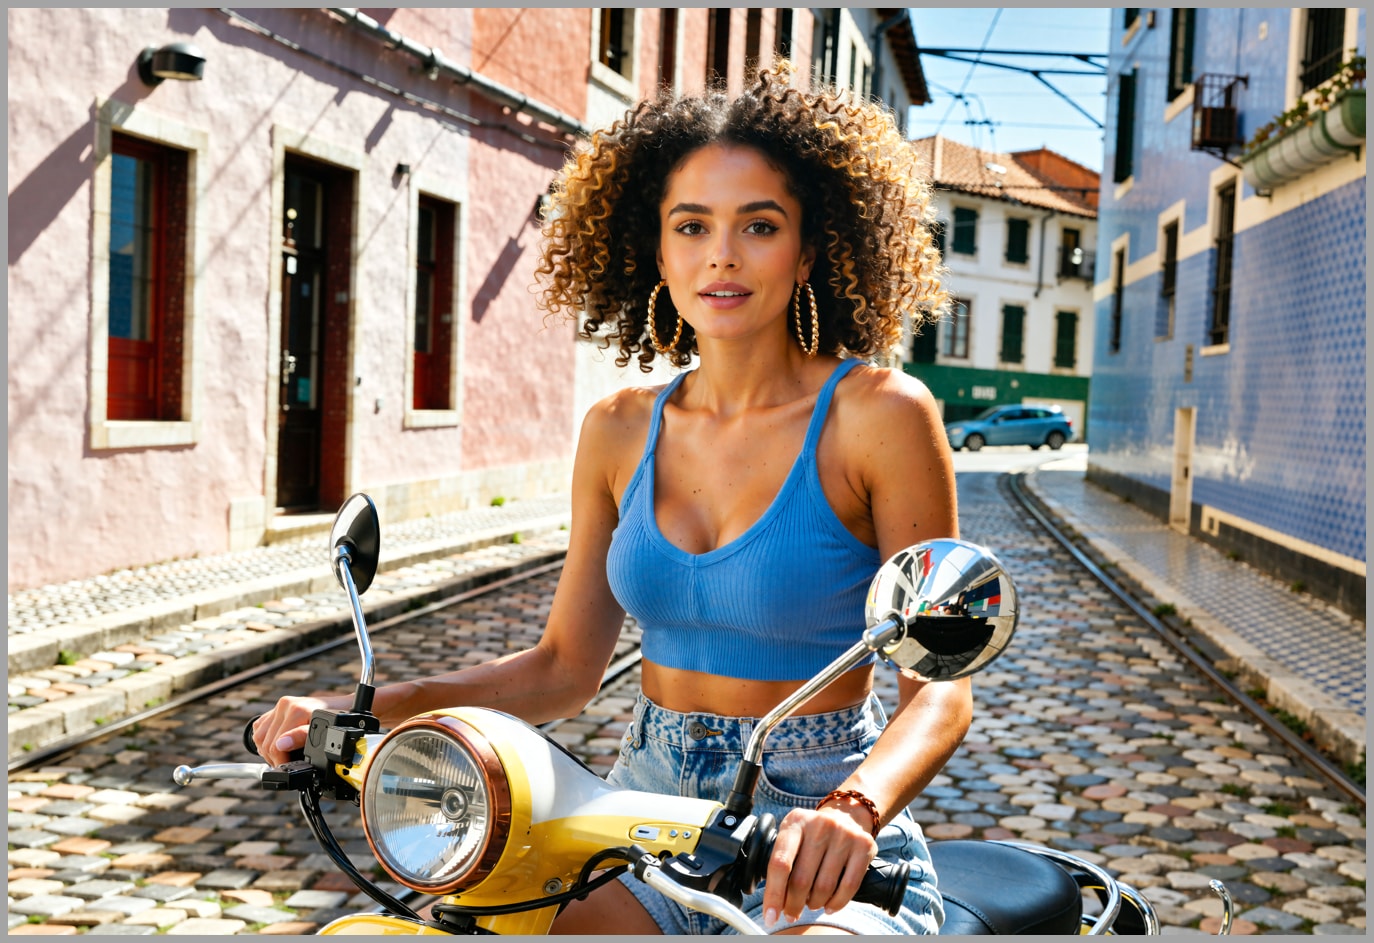
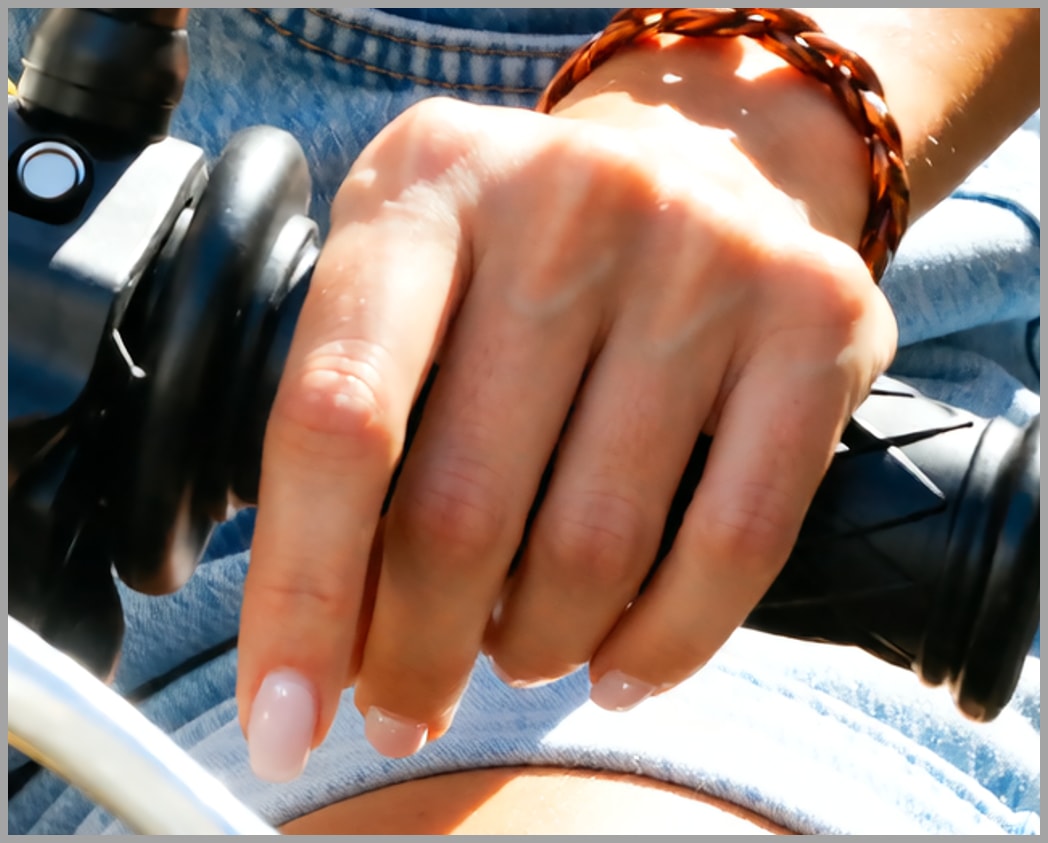
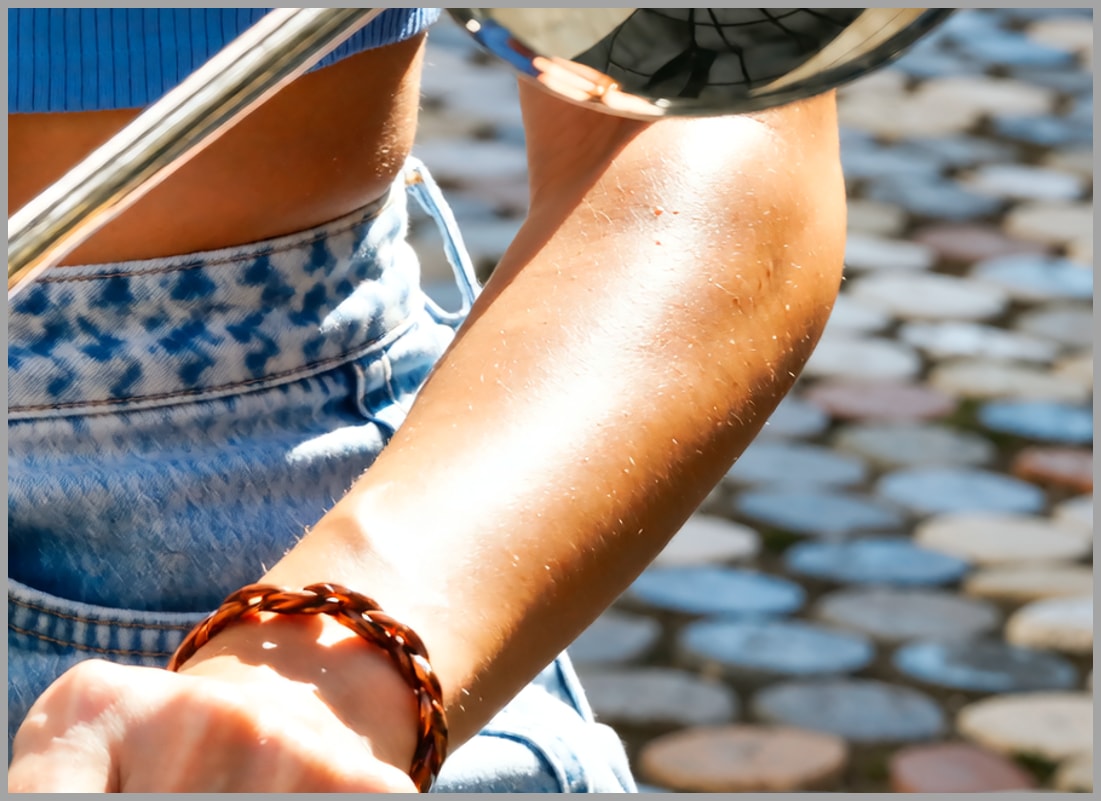
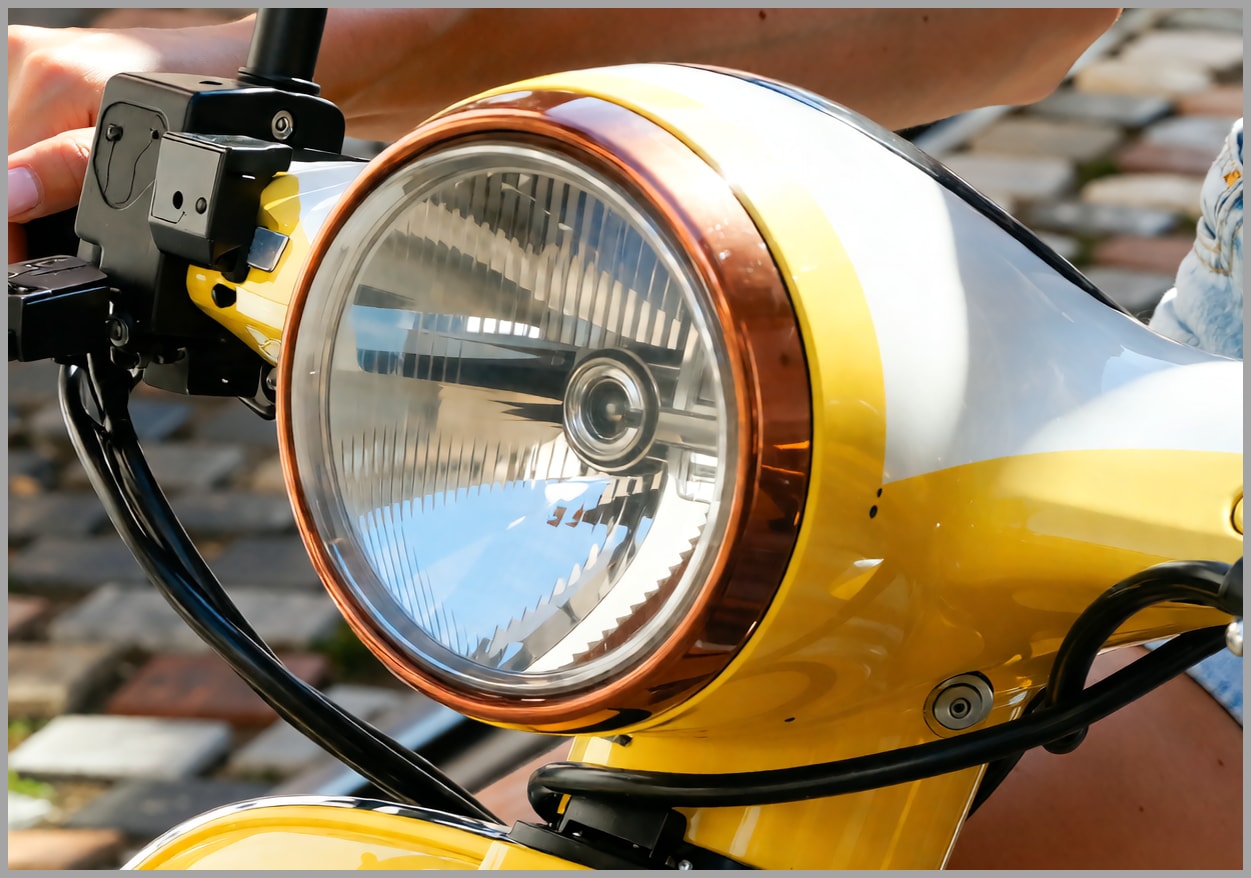
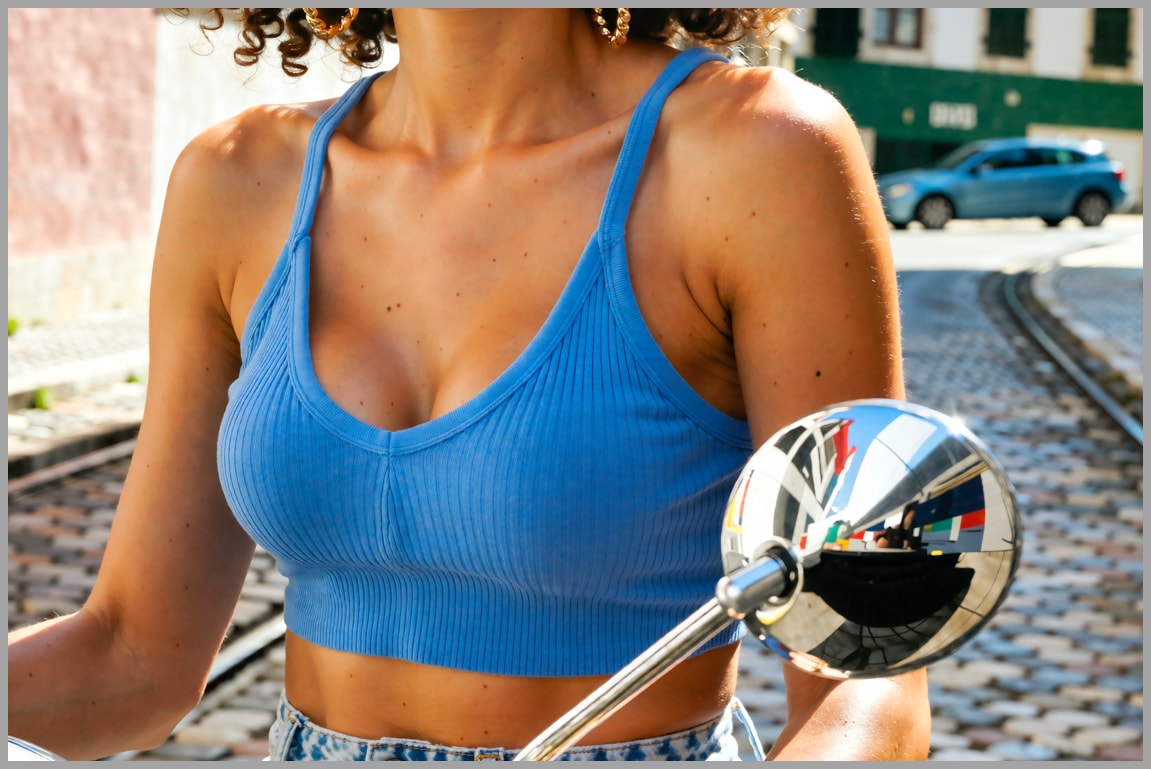
Check out this output: 4856×3328 pixels (larger than standard 4K!), capturing texture, fabric weave, skin pores, jewelry reflections, and facial features with photographic precision.

One tradeoff? Generating these monsters demands massive VRAM. For example:
- No tiled upscaling = huge VRAM load
- 24GB handles standard 4K, but I used 48GB (via cloud platform RunningHub (note the “Run Plus” mode).
Video Tutorial:
Gain exclusive access to advanced ComfyUI workflows and resources by joining our community now!
Here’s a mind map illustrating all the premium workflows: https://myaiforce.com/mindmap
Run ComfyUI with Pre-Installed Models and Nodes: https://youtu.be/T4tUheyih5Q
The Core Workflow: 4 Key Stages
The process splits cleanly into node groups evolving from sketch to masterpiece:
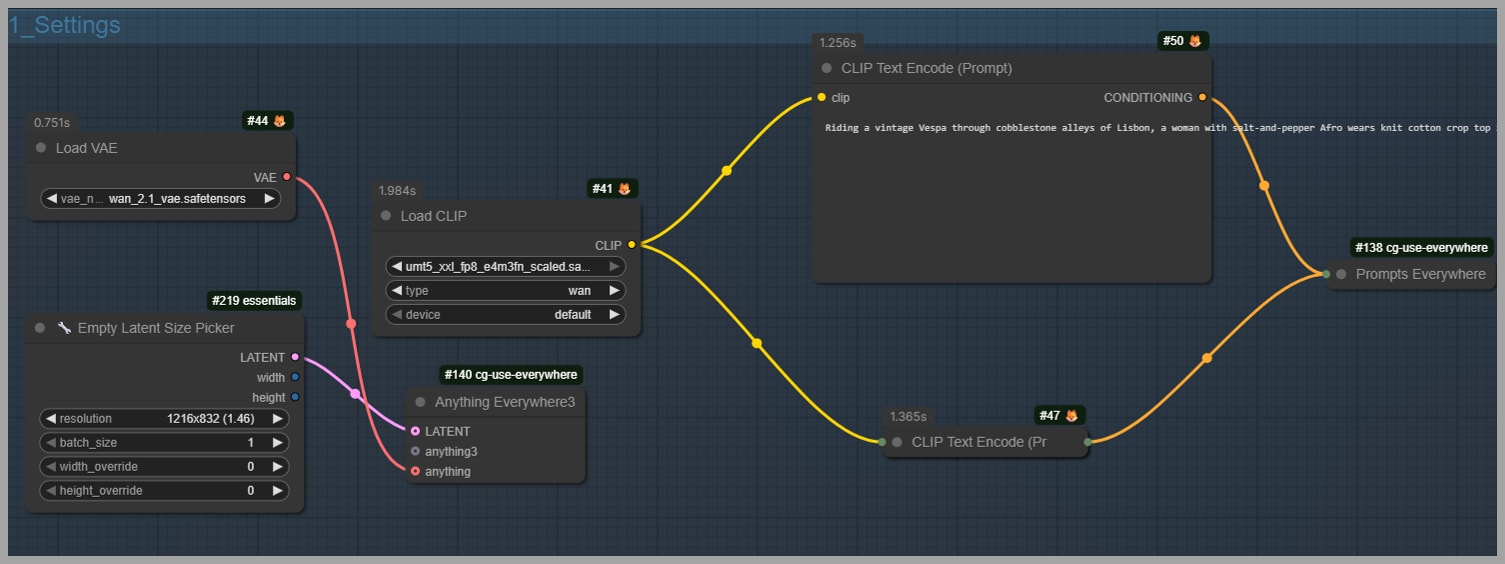
Group 1: Setting the Foundation
This is your canvas prep station:
- Define starting dimensions before scaling (“empty latent node” → 1216×832)
- Insert prompt here. Note: We execute two consecutive upscales later.
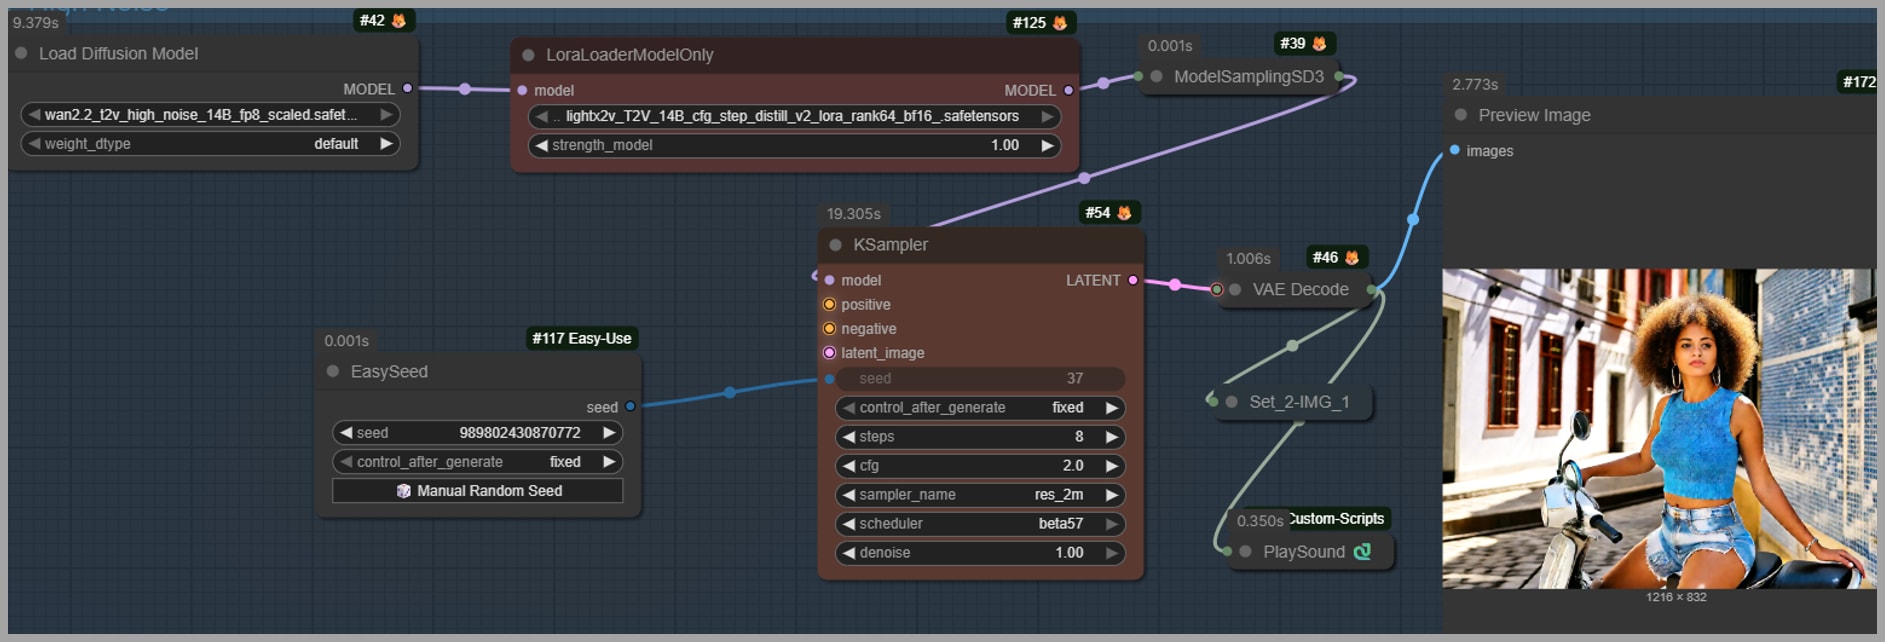
Group 2: Establishing the Scene
High noise expert does layout rough drafts: Human poses emerge with core composition, but artifacts (extra limbs/grain texture) are common. Fixes are simple: just hit “regenerate“!
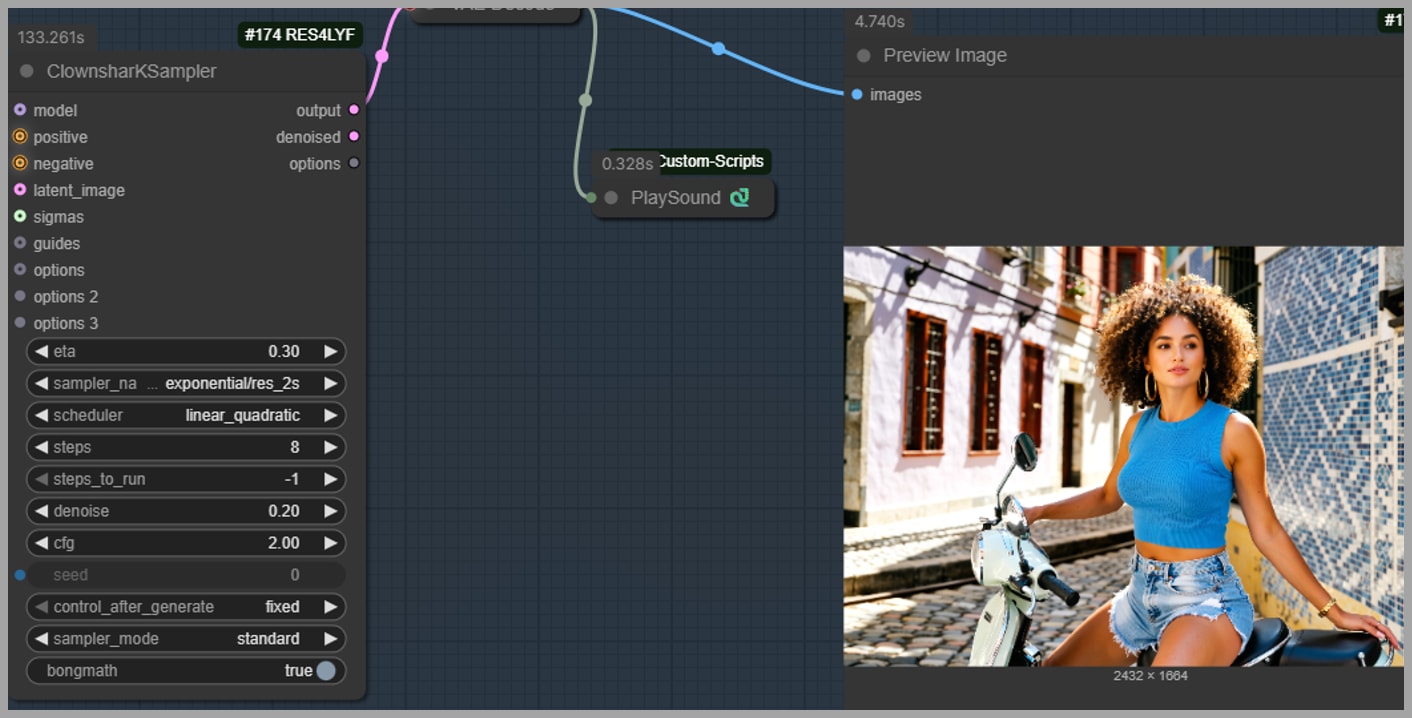
Group 3: Adding Detail & First Upscale
Low-noise expert drives texture polish: After sampler passes:
- Images double in size (to 2432×1664)
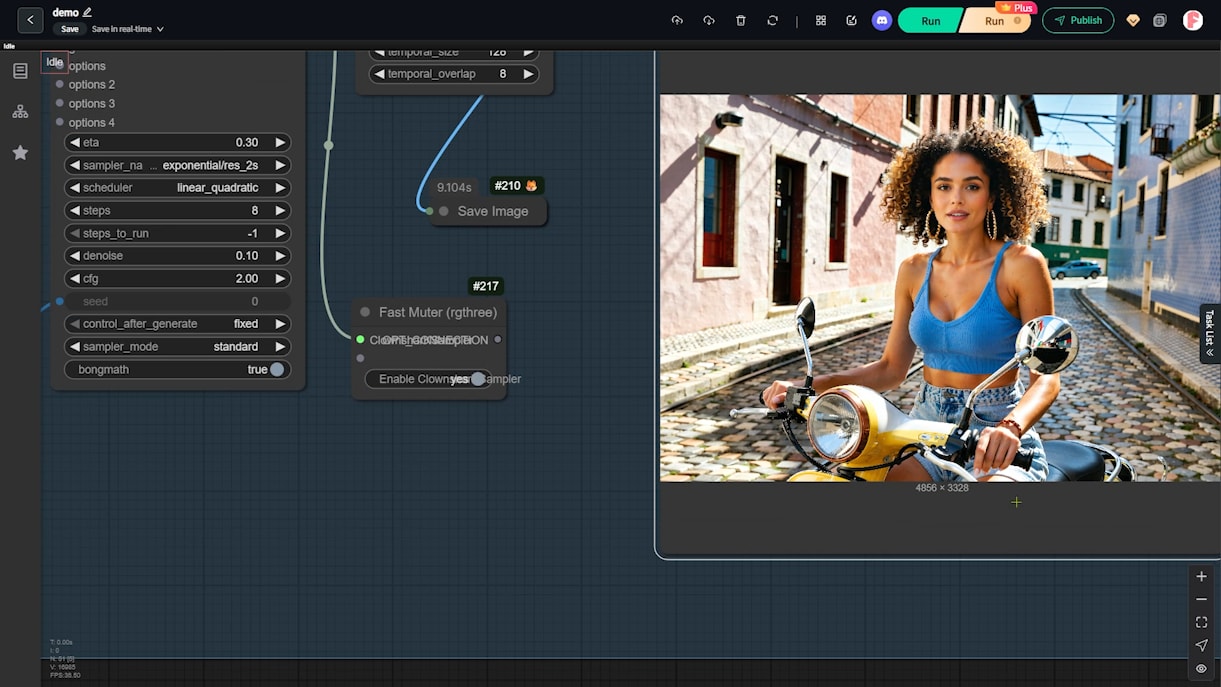
- Detailed features solidify Key Tool: Clown Shark sampler + low ETA ensure crisp realistic output
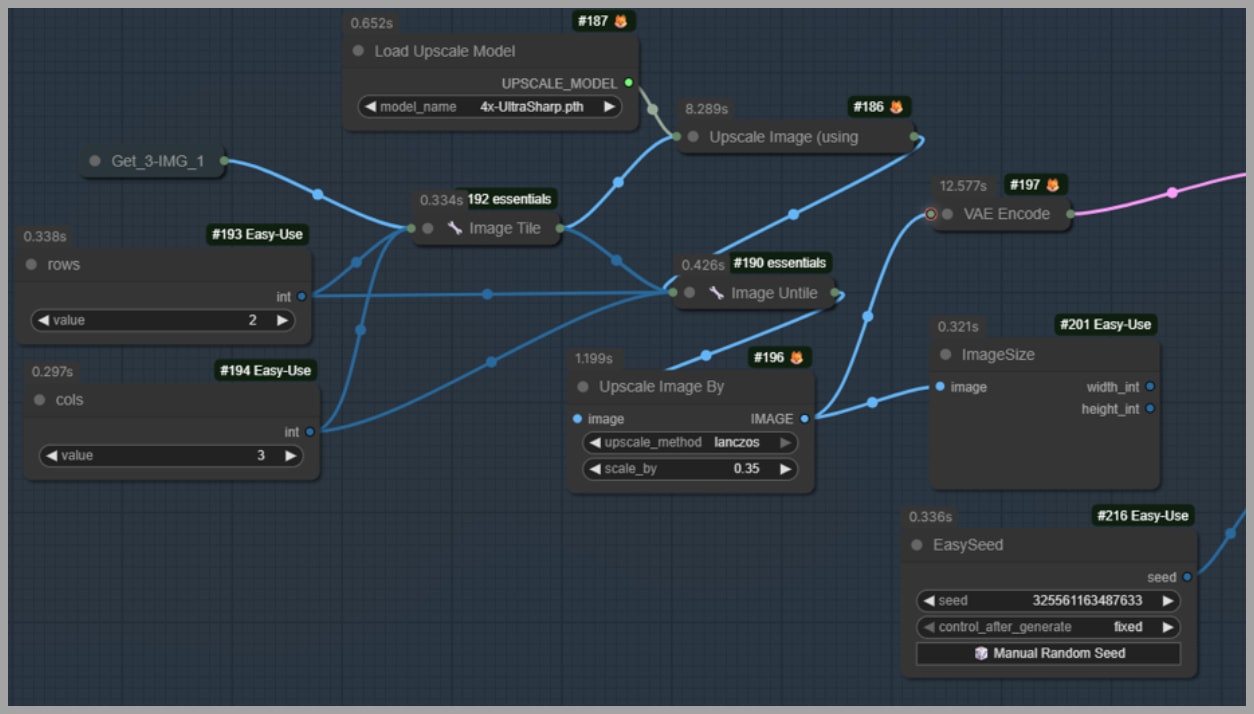
Group 4: Final Upscale & Output
Massive images are tiled to manage VRAM → This slicing/stitching workflow is critical:
- Images sliced → scaled x4 (prevents memory crashes!)
- Output dimensions set in preview node (critical: avoid >4000px glitches!)
Essential Technical Insights
Customize your workflow with these advanced controls:
Wan’s Two-Expert Design & Turbo LoRAs
Unlike Flux models, Wan employs specialized teamwork models:
| Phase | Expert | Function |
|---|---|---|
| Early Stage | High-noise | Sketch scene layout (works in just 8 steps!) |
| Refinement | Low-noise | Add textures/details (another 8 steps) |
LoRA Boosters:
- Act like “Turbo” modes for Flux
- Accelerate generation without quality loss
- Switch to GGUF versions for weaker GPUs

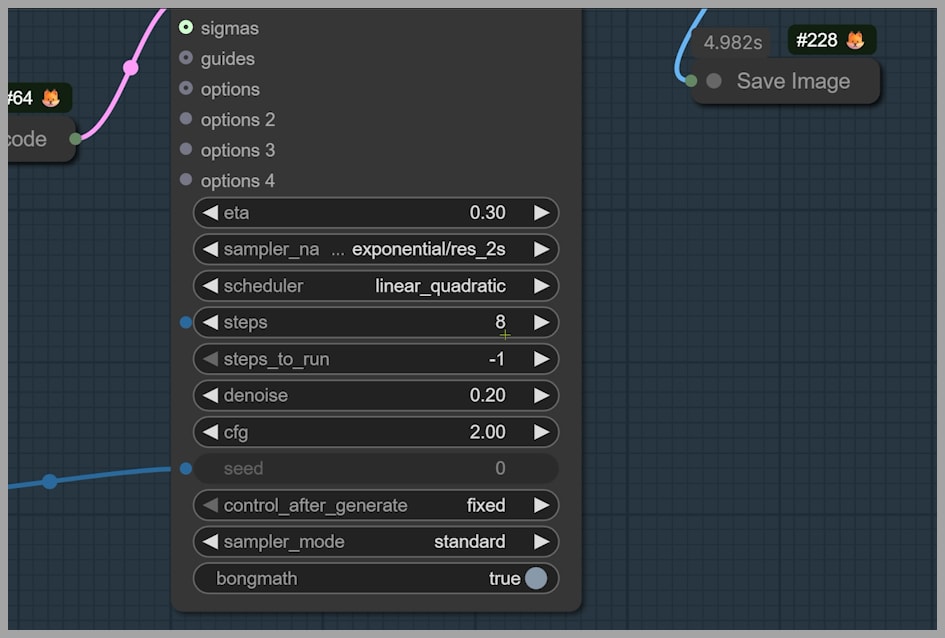
Critical Sampler Settings
(Optimizing detail generation without sacrificing speed)
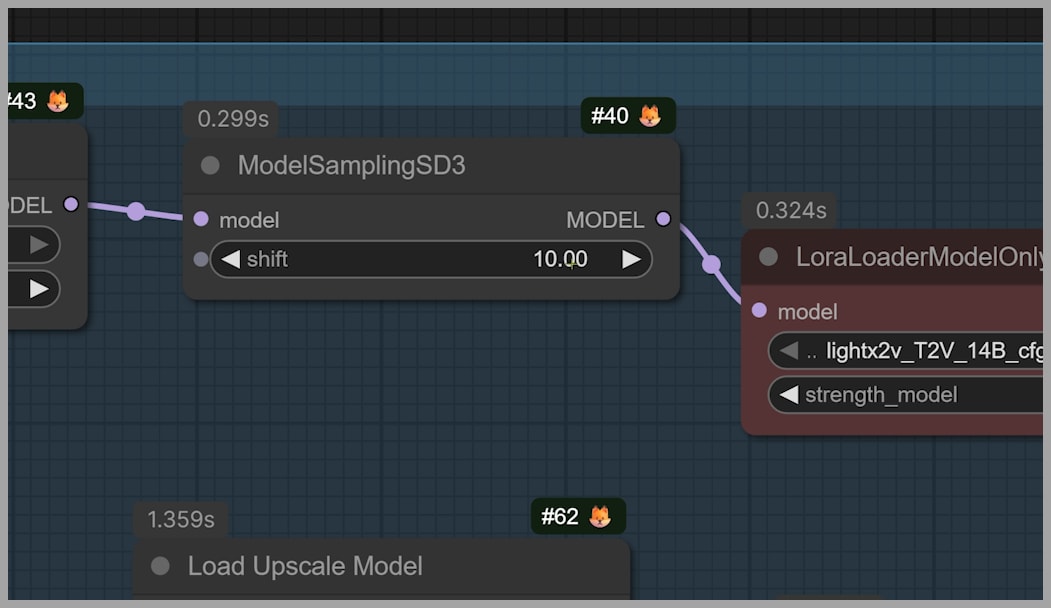
Shift = 10: The Efficiency Secret In the ModelSamplingSD3 node, override default shift=1 with shift=10. This forces samplers to lock structures early – achieving quality in 8 steps instead of 20-30.
Clown Shark Sampler & Eta Control Used in Group 3 for:
- Speed + structural stability
- Hyper-detailing via bongmath algorithm
ETA Values Demystified:
| Value | Effect | Best For |
|---|---|---|
| 0.0 | Minimal smoothing | Experimental runs |
| 0.3 | Natural detail boost | Realism (sweet spot) |
| >0.5 | Cartoonish effect | Stylized art |
res_2m: The Final Touch In Group 2, res_2m (Refined Exponential Multi-step Solver) delivers:
- Stability at huge resolutions
- Efficiency (2nd-order math)
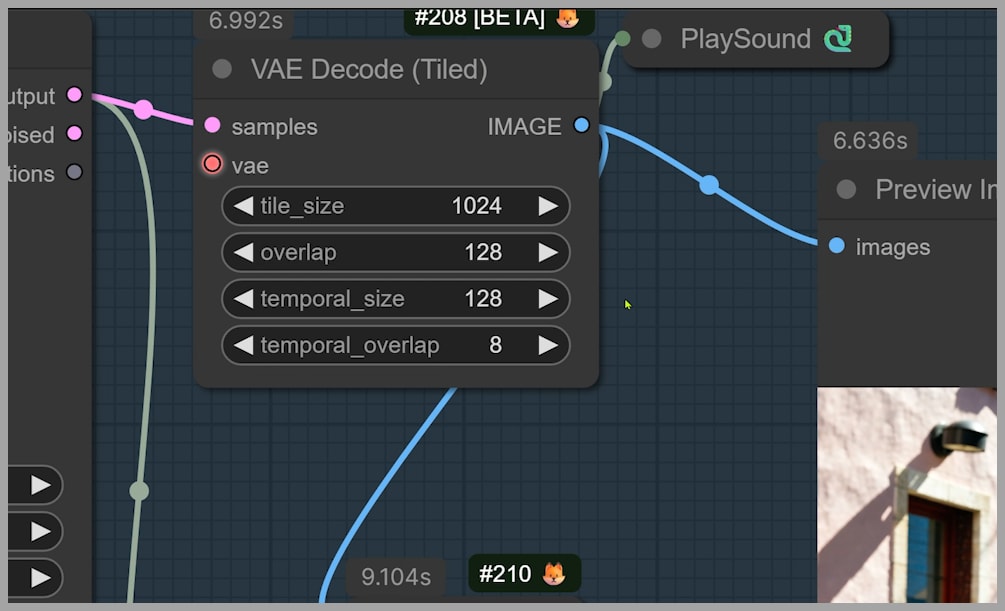
Mastering Tiled Upscaling
(The VRAM-Saving Technique for Giant Images)
Why Tile? Direct 4x upscaling crashes GPUs! Solution:
- Slice: Split image into grid (e.g., 2×3 tiles)
- Process: Upscale each tile independently
- Stitch: Reassemble seamlessly
Glitch Prevention: When exceeding 4000px:
tile_size: 512 → 1024
Following values: 64 → 128
Regenerate!
Consistency Secret: Processing the image as a “whole” during sampling prevents:
- Mismatched textures between tiles
- Visible seams or lighting shifts
Conclusion & Resources
You’ve now unlocked Wan 2.2’s potential for gallery-quality 4K+ art in ComfyUI! Remember:
- Two-expert models + LoRAs = Speed without compromise
- Shift=10 + Clown Shark = Detail explosion in 8 steps
- Tiled upscaling = Your VRAM’s best friend
Ready to experiment?
- Join our community and try it free for 7 days to get the workflow: https://myaiforce.com/pg
- Test on RunningHub (pre-installed nodes/models): https://www.runninghub.ai/?inviteCode=rh-v1241
- Register using the affiliate link above and get 1000 credits—you can generate dozens of images for free!
- Pros:
- Preloaded with most models and nodes, ready to use right away.
- Very affordable pricing.
- 90 series GPUs, 24/48GB VRAM
- Cons:
- Shared GPU resources.
- No caching means workflows run from scratch each time.
- Pros: