Midjourney Free Alternative: 7 Types of Flux Models You Need to Know
In a previous article, I compared the Flux models with Midjourney, breaking down their strengths and performance across various dimensions. For a detailed comparison, you can check it out here. This article focuses on guiding you through the installation, deployment, and use of the 7 Flux models across different platforms.
What is Flux?
Flux is a groundbreaking large model developed by Black Forest Studio, a group formed by former core members of Stability AI. Despite being relatively new, it has quickly gained a strong reputation for its exceptional image quality and technical prowess.

Why is Flux So Popular?
The answer is simple: the image quality is outstanding. While Stability AI’s SD3 Medium version features 2 billion training parameters and their highest model has 8 billion, Flux leaps ahead with a staggering 12 billion parameters across 3 distinct models. This translates to a massive 22GB per model, underscoring the power and capabilities of Flux.
The three models officially launched by Black Forest Studio include:
- PRO Version (API access only)
- Dev Version (Open-source)
- Schnell Version (Accelerated open-source)
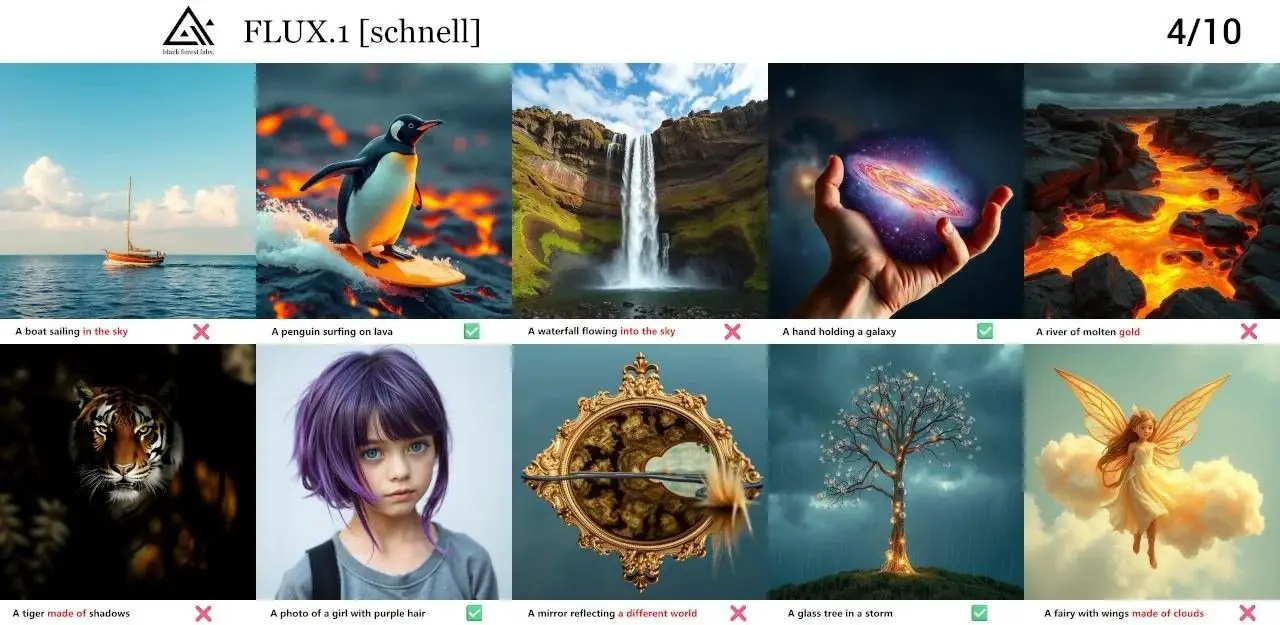
The PRO version offers the highest quality images, while the dev and schnell versions are accessible to the broader community. Of these, the schnell version is optimized to generate high-quality images in fewer steps, making it the fastest option among the open-source variants.
Key Advantages of the Flux Model
- Unmatched Image Quality: Flux delivers photorealistic images that can blur the lines between real and generated content. It can produce textures with stunning depth, and when combined with tools like Runway Gen-3, you can achieve cinematic-quality visuals.

- Enhanced Hand Rendering: For artists and designers, the Flux model addresses one of the persistent challenges in AI-generated imagery: hands. Though not perfect, the model’s ability to generate realistic hands, whether for humans or animated characters, is currently among the best available.

- Flexible Font Generation: Need to generate custom typography or creative posters? Flux excels at font generation, allowing users to create polished designs with the right prompts.

- Versatile Style Adaptation: With its extensive training parameters, Flux can handle a broad range of artistic styles and complex visual concepts, making it ideal for varied creative projects.
- Resolution Flexibility: Flux can operate seamlessly across different resolutions, from 0.1 to 2.0 megapixels. Additionally, it supports both SD1.5 and SDXL embeddings natively, without the need for separate negative prompts.
Gain exclusive access to advanced ComfyUI workflows and resources by joining our community now!
Here’s a mind map illustrating all the premium workflows: https://myaiforce.com/mindmap
Run ComfyUI with Pre-Installed Models and Nodes: https://youtu.be/T4tUheyih5Q
Overview of the 7 Flux Models
Currently, the Flux model lineup includes:
- Pro
- Dev FP16
- Dev FP8
- Schnell FP16
- Schnell FP8
- GGUF
- NF4
Choosing the Right Model
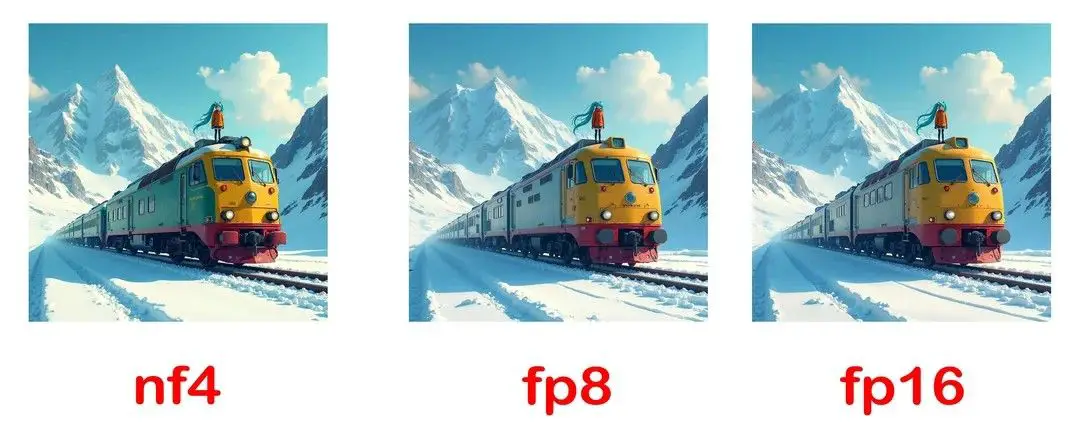
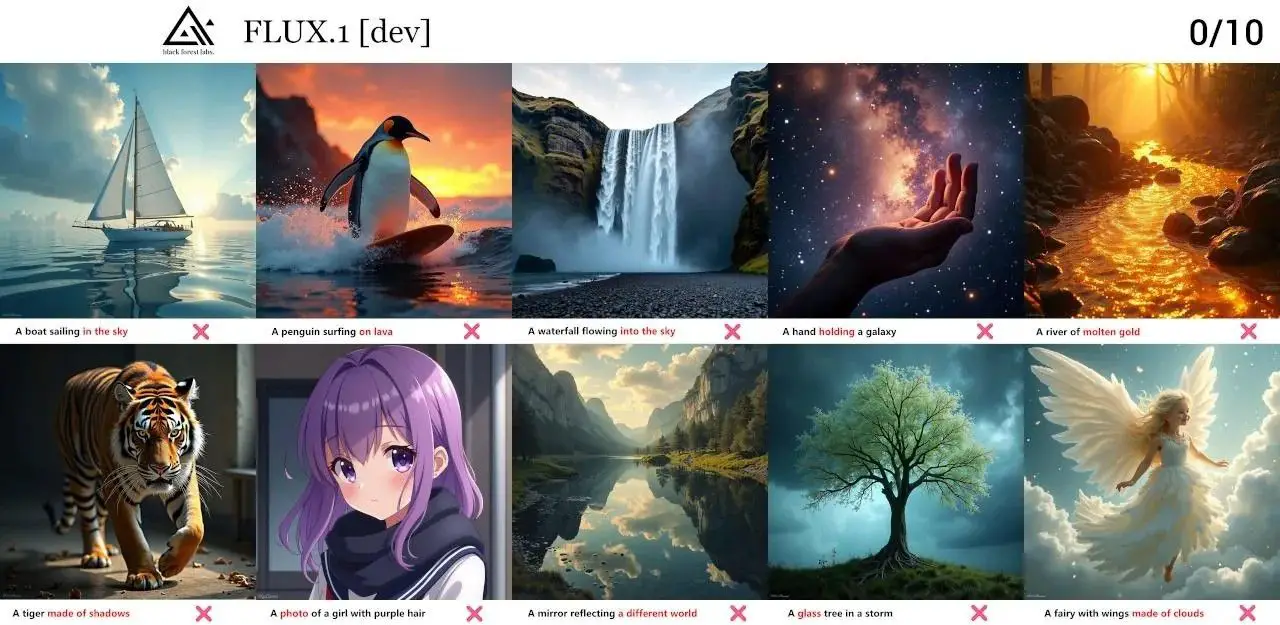
For most users, the Dev FP16 model offers the best quality. However, it is resource-intensive and demands a high-end GPU, such as an NVIDIA RTX 4090. If your hardware can’t handle this, consider using the FP8 version, which is half the size (11GB) and delivers nearly the same quality. The FP8 model is faster and more memory-efficient, but for the finest details, FP16 is still superior.
Schnell Models
The schnell models are optimized for speed, generating images in 4 to 8 steps compared to the 20 steps typical of the Dev version. While the output quality is slightly reduced, the faster processing can be beneficial for rapid iterations.
GGUF and NF4 Models
If even FP8 is too demanding, you can opt for the GGUF or NF4 versions, which are specifically optimized for lower memory consumption.
- GGUF Version: Available in variants from Q2 to Q8, catering to different GPU capacities. Users with 6GB of GPU memory can run up to Q4 models, while 8GB cards can handle Q5 and above.
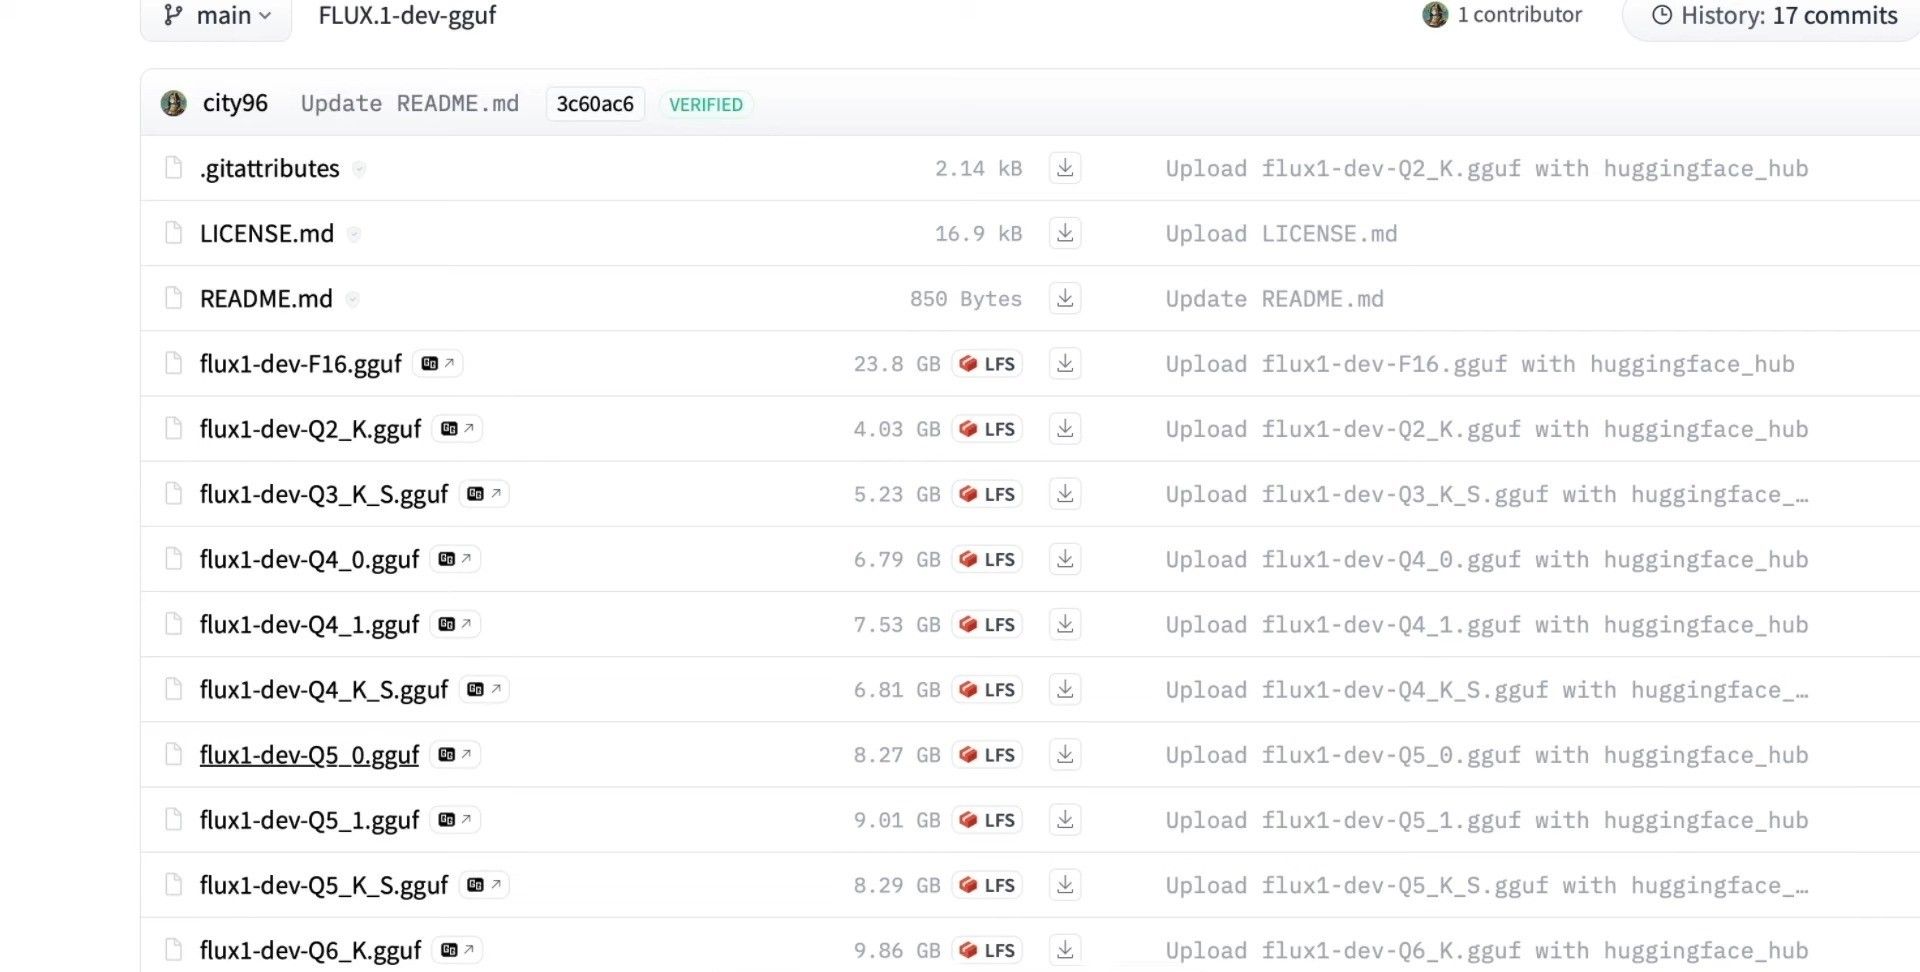
- NF4 Version: This model integrates CLIP, VAE, and T5 text encoders directly, resulting in a larger size (11.22GB) but only requires 8GB of GPU memory to run. While not as detailed as GGUF Q8, NF4 offers solid performance with reduced memory requirements.
How to Install and Deploy the Flux Model
Setting Up Flux on WebUI Forge
- Download Forge: Visit the WebUI Forge GitHub page and download the latest version.
- Add Flux Models: Place the Flux model in the
modelsdirectory within Forge. - Launch Forge: Run
run.batto initialize the setup. The first run might take up to 30 minutes to install all necessary components.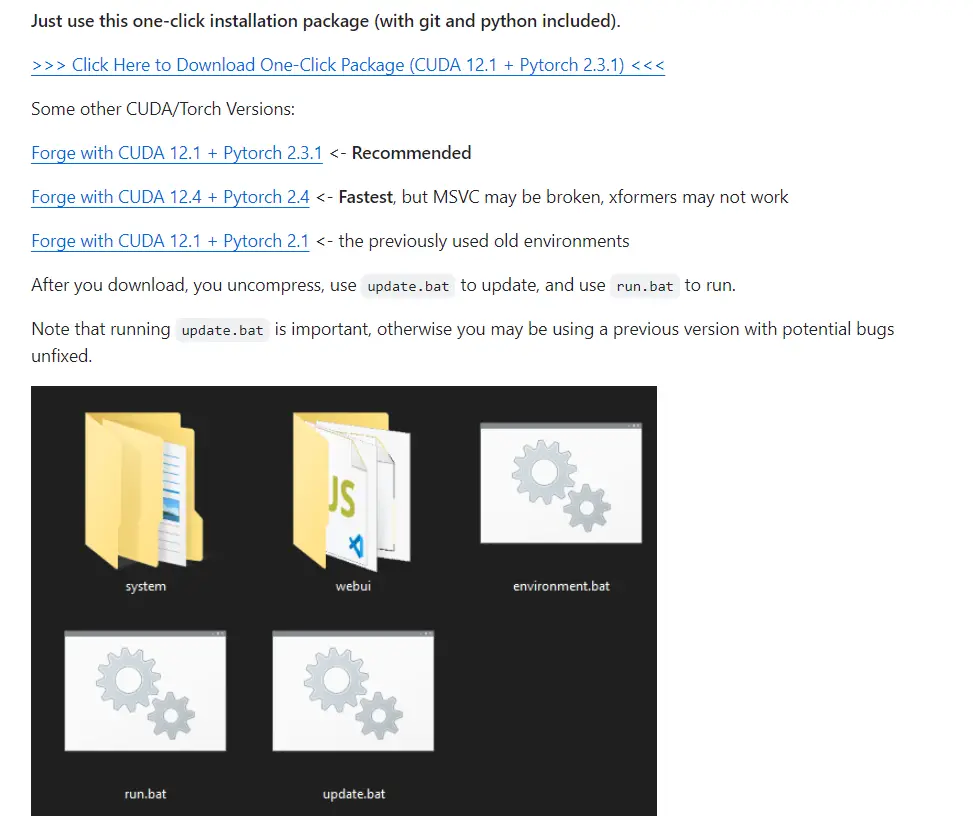
- Select Flux Mode: Once on the Forge interface, select the NF4 model. Recommended settings:
- Sampler:
Euler - Schedule Type:
Simple - CFG Scale:
3.5
- Sampler:
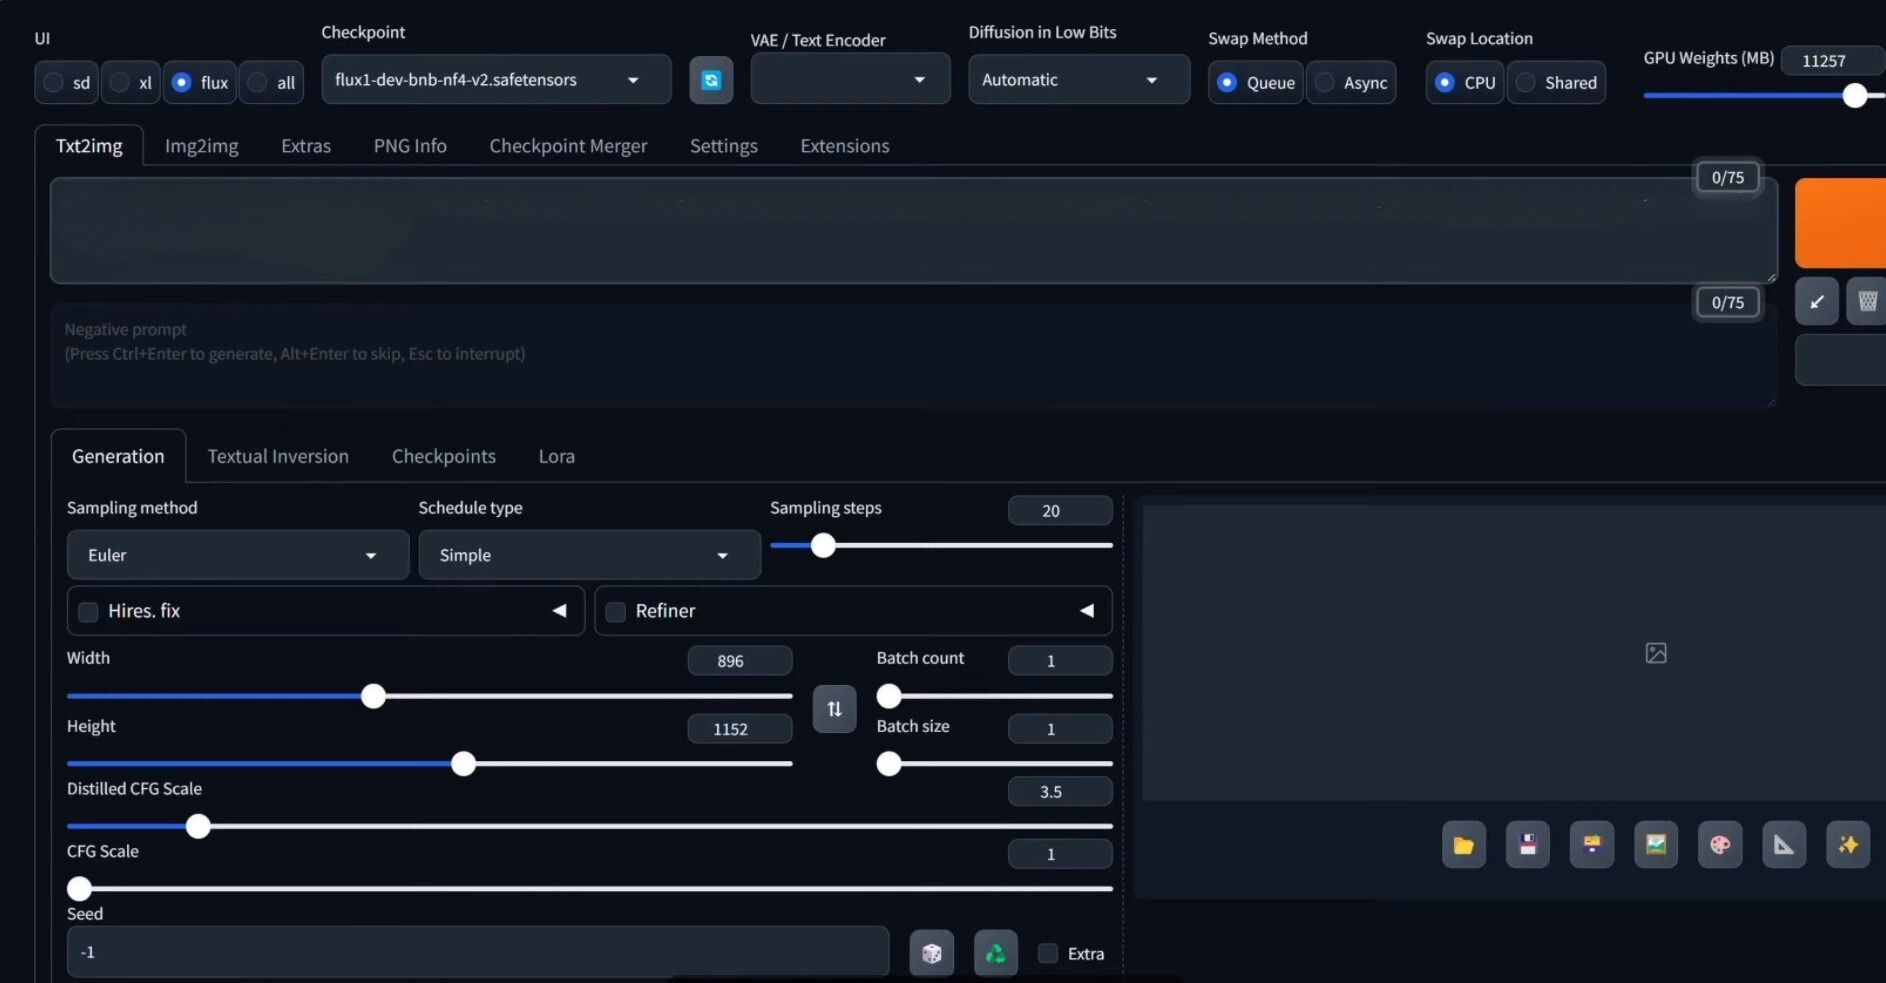
With this setup, you should be able to generate high-quality images using Flux without negative prompts, as the model already embeds these within its architecture.
Using Flux with ComfyUI
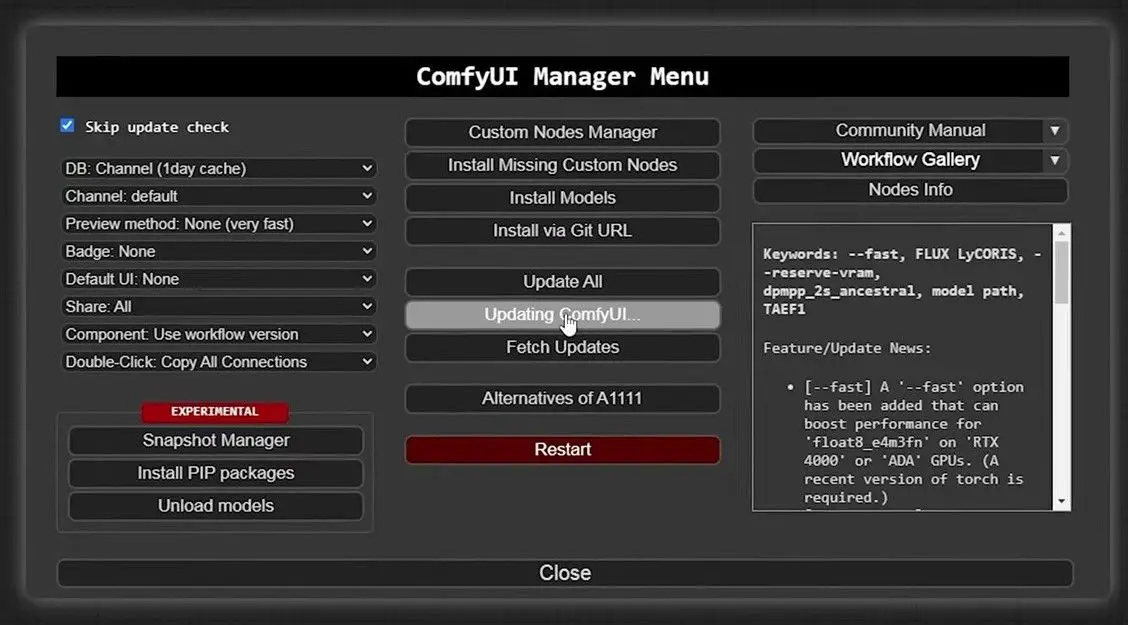
- Upgrade ComfyUI: Ensure ComfyUI is updated to the latest version.
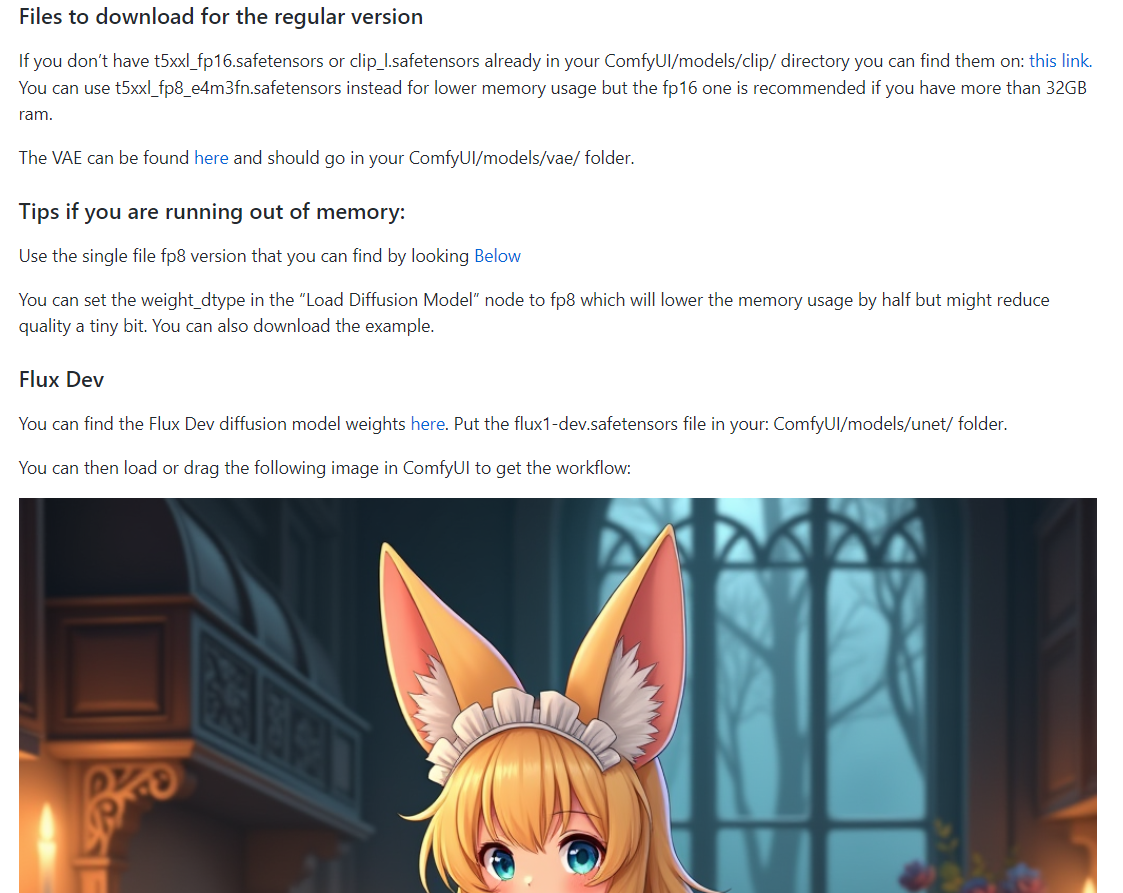
- Download and Install the Required Models: Follow the detailed instructions available here for installing the base models and importing workflows.
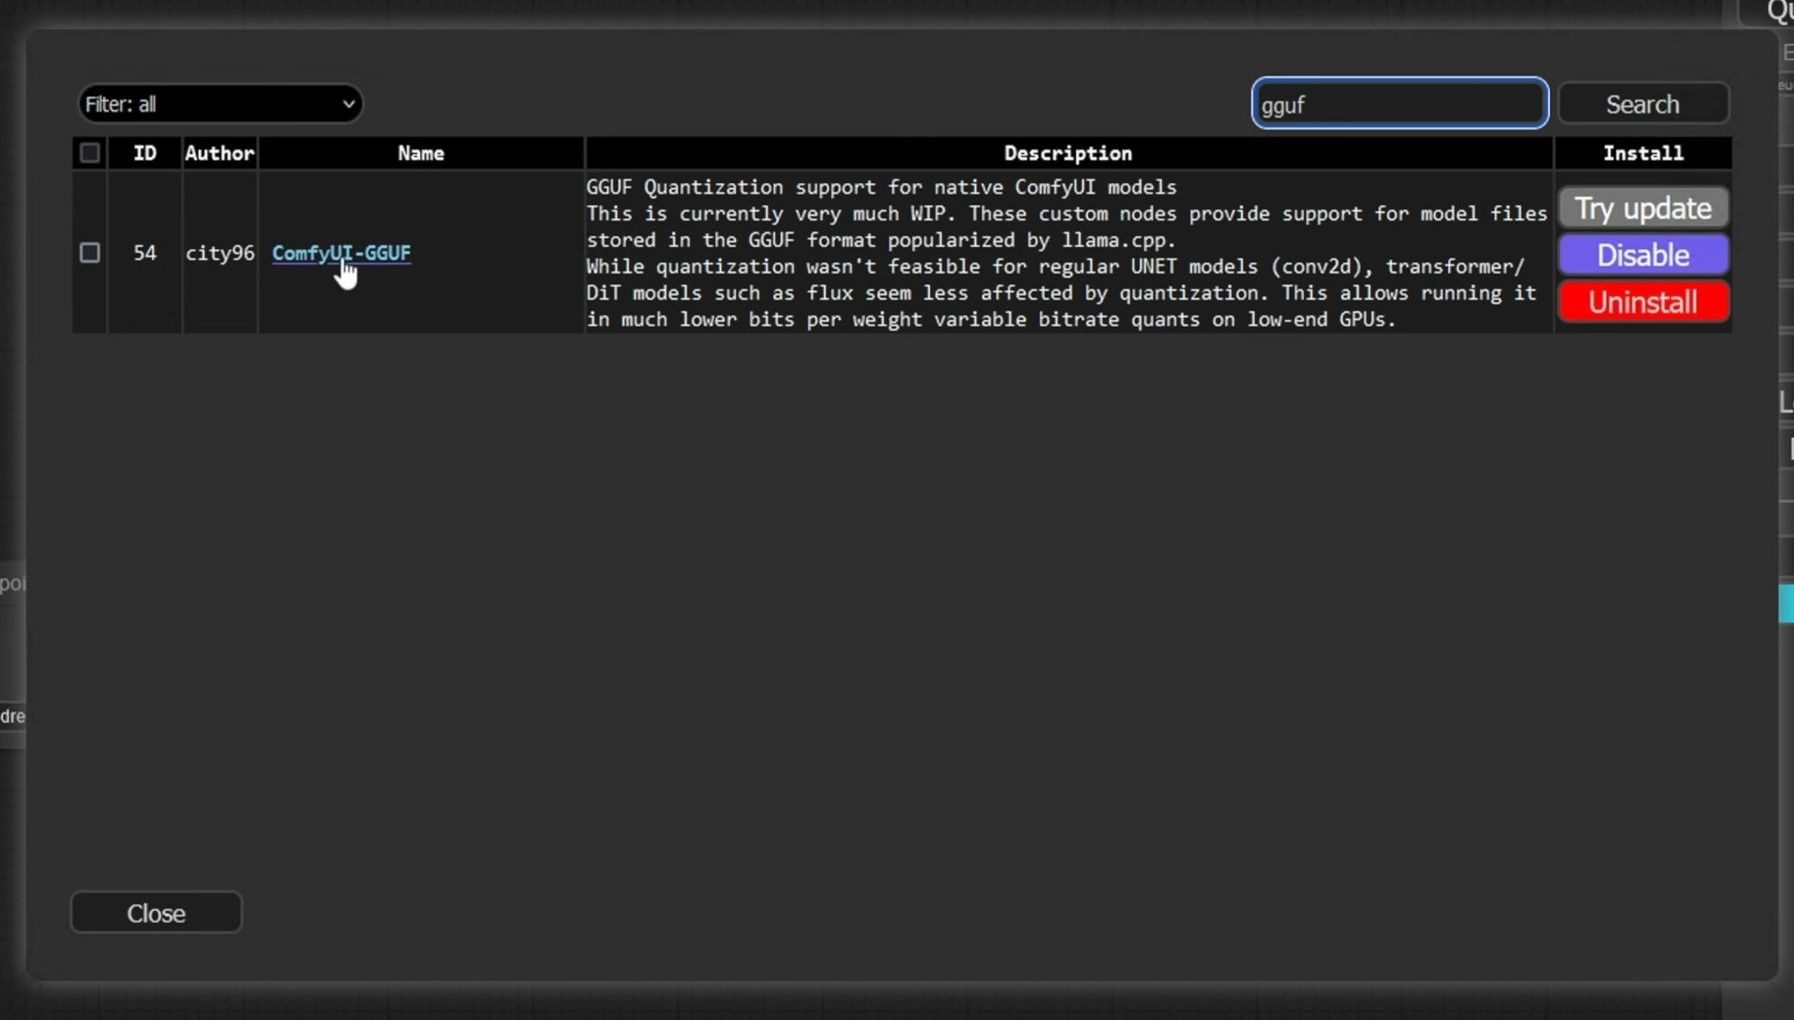
- Additional Plugins for GGUF and NF4 Models:
- GGUF: Install the required node package from the GitHub repository.
- NF4: Install the plugin from this repository.
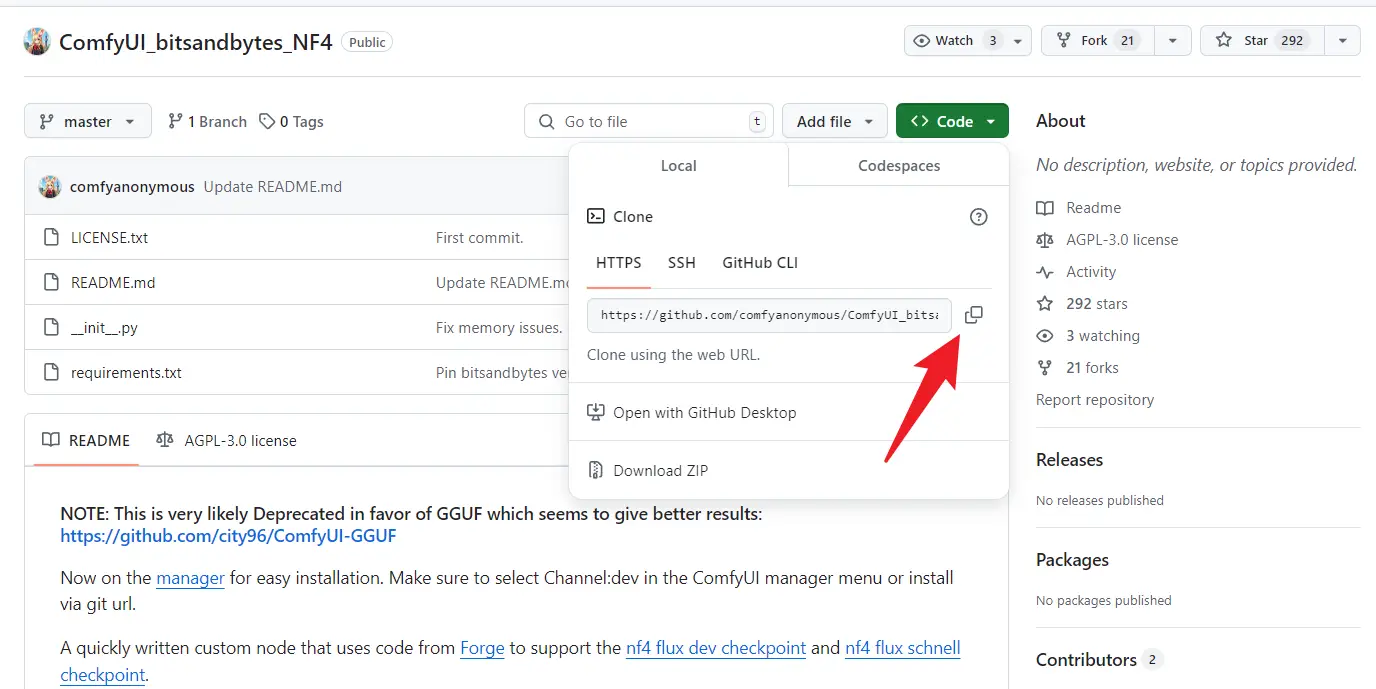
- GGUF: Install the required node package from the GitHub repository.
Configuring the Workflow
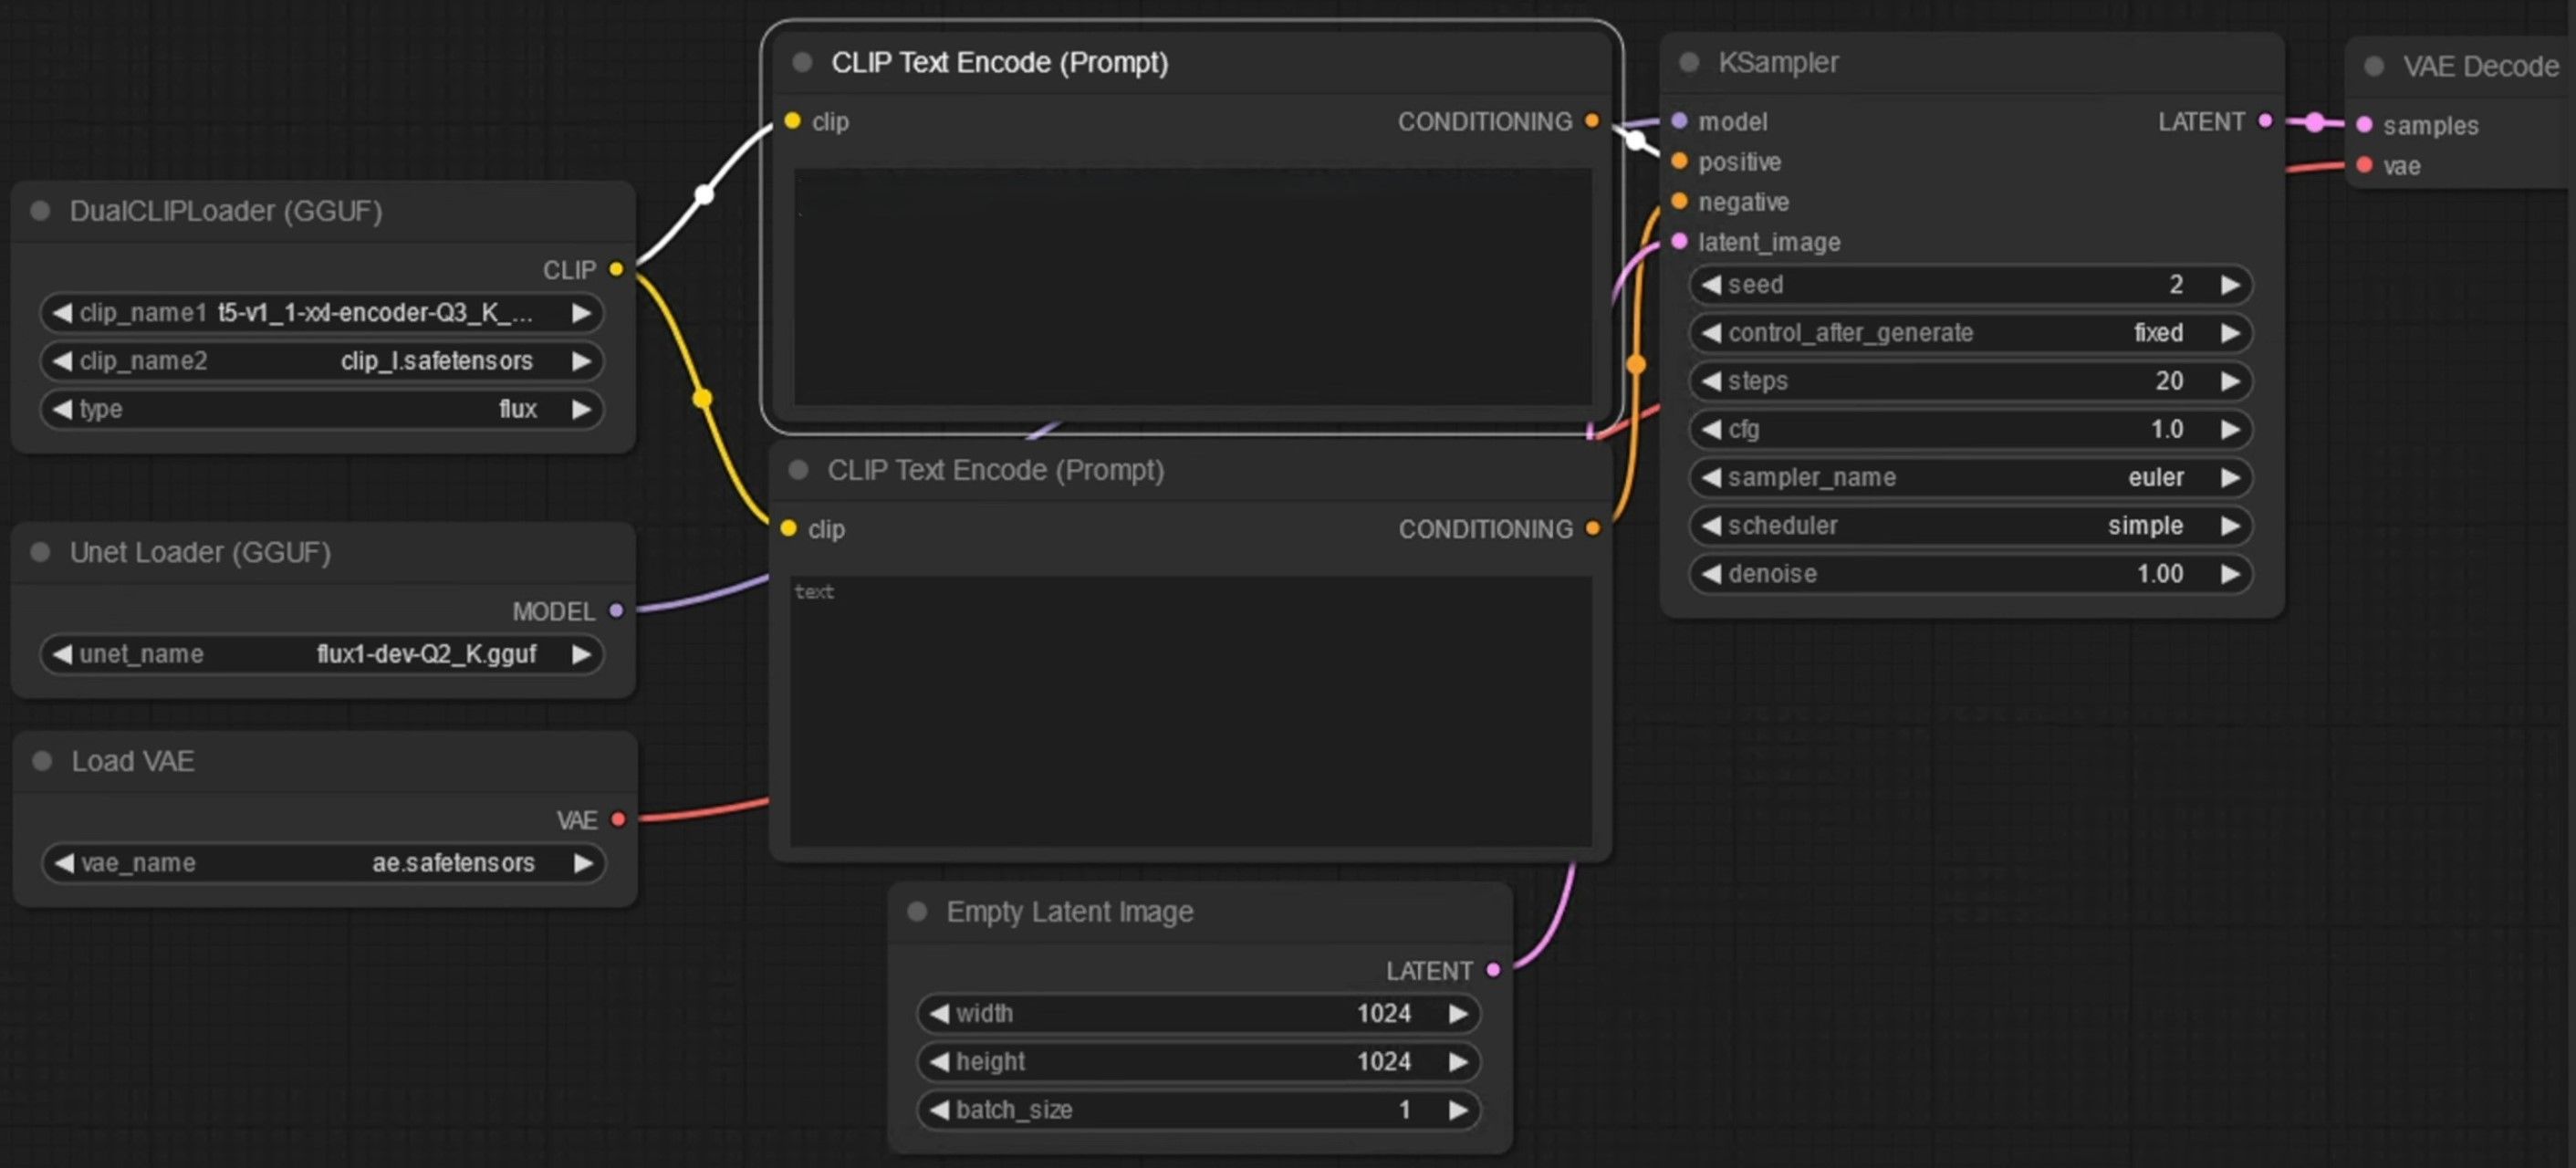
For GGUF models, you’ll need to:
- Download the GGUF file from HuggingFace and place it in the
ComfyUI/models/unetdirectory. - Use the DualCLIPLoader to manage the CLIP files, including
clip_I.safetensors.
- Download the T5-XXL Clip file and place it in the
ComfyUI/models/clipdirectory.
For NF4, a specialized loader (CheckpointLoaderNF4) is required, and since the model includes CLIP and VAE, additional nodes aren’t necessary.
Final Thoughts
Flux has quickly positioned itself as a leading alternative to Midjourney, offering exceptional flexibility and quality for artists and developers. However, it has its limitations—such as limited ControlNet compatibility and high hardware requirements. Despite these challenges, Flux is poised for continued growth, with an expanding ecosystem of fine-tune models and LoRAs.

For more hands-on tutorials, check out my YouTube playlist.
By understanding the strengths of each Flux model and configuring them correctly, you can unlock new levels of creative potential in your AI-generated artwork.


