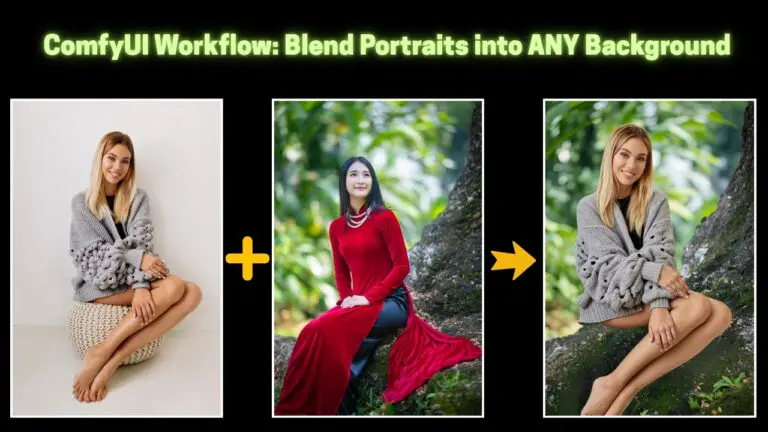
ACE Plus + Redux: Copy/Paste Reality Between Images in ComfyUI Like Magic
Welcome back, creators! If you’ve read my last two articles, you already know how ACE Plus revolutionizes image editing by preserving intricate details during inpainting. Today, we’re taking that power further. I’ve crafted a specialized ComfyUI workflow that merges ACE Plus with Redux—a dynamic duo that lets you copy and blend objects, faces, or even entire outfits between images with uncanny realism.
Practical Applications
Let’s explore how this workflow solves real-world creative challenges. I’ll walk through three scenarios I demonstrated earlier, showing how ACE Plus and Redux collaborate to deliver jaw-dropping results.
Let’s cut to the chase—what can this workflow actually do? Buckle up for some visual storytelling.
Object Copying
Scenario: A woman holds her hand out, palm upturned—like she’s waiting for a coffee. But her hand is empty.

The Magic:
With this workflow, we drop a ceramic mug into her palm.
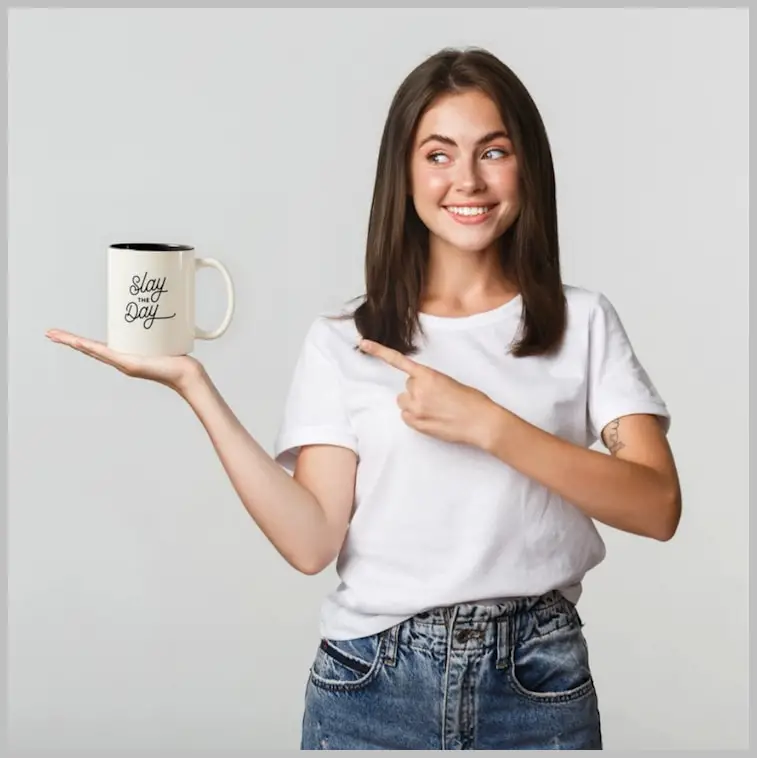
Result: Compare the added mug to the original reference. They’re twins—same handle curve, same glossy finish, same shadow angle.
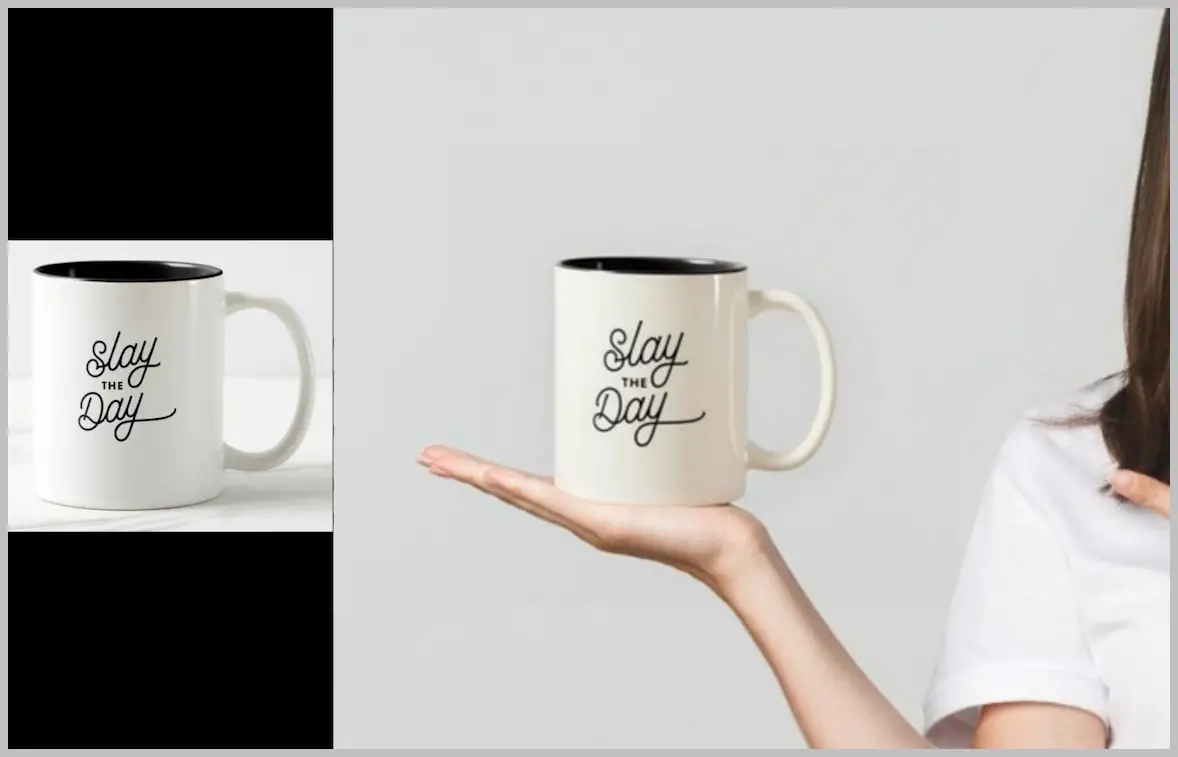
Why It Matters: This isn’t just plopping an object into a scene. It’s about context-aware replication, where the mug adapts to the scene’s lighting and perspective like it belonged there all along.
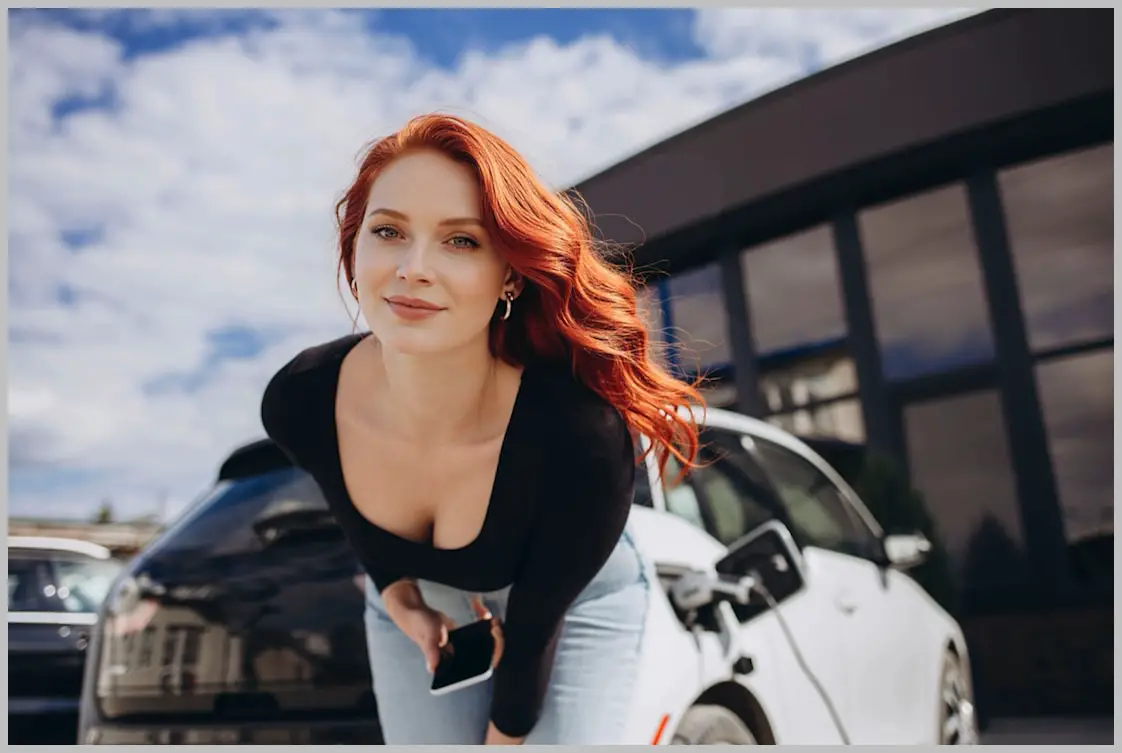
Face Swapping
Scenario: A striking portrait of a red-haired woman. Nearby, another woman leans against a white car, her face turned away.
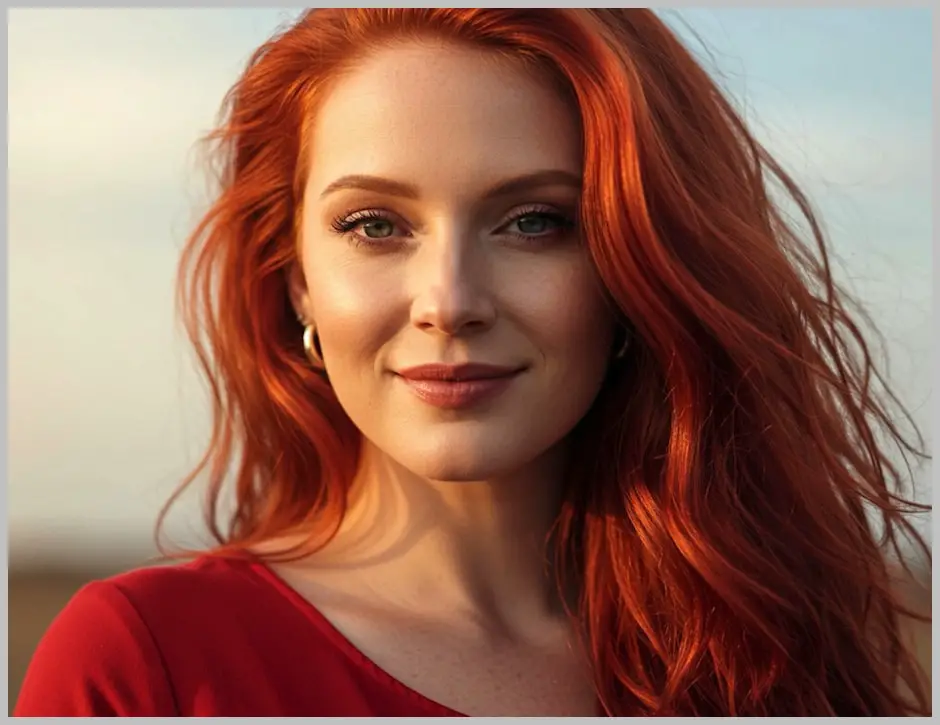

The Magic:
- Swap the redhead’s face onto the car model’s body.
- Result: The transplanted face looks unnervingly natural. Her expression matches the body’s posture, and her skin tones harmonize with the car’s metallic sheen.
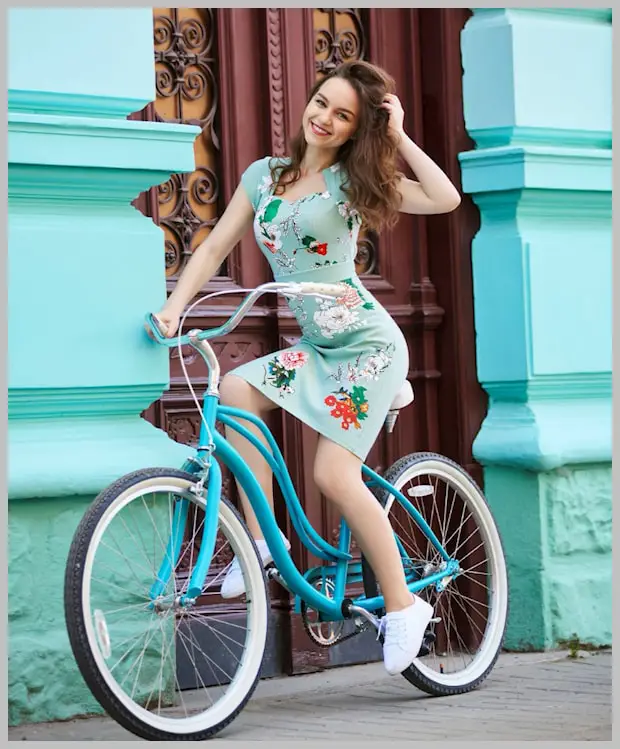
Virtual Fashion Try-Ons
Scenario: Two images—one with a floral dress, another with a woman in basic attire.

The Magic:
- Steal the dress from the first image and digitally “dress” the second model.
- Result: The floral patterns wrap perfectly around her curves. Spot the difference? Compare it to the original dress—the trim and fabric folds are pixel-perfect matches.
Level Up: Test it with patterned t-shirts.

After the swap, the stripes or logos align as if they were screen-printed directly onto the new shirt.

What’s Next: These examples are just the appetizer. In the next section, we’ll dissect exactly how to recreate these results step-by-step—masks, nodes, and all. Ready to geek out?
Video Tutorial:
Gain exclusive access to advanced ComfyUI workflows and resources by joining our community now!
Here’s a mind map illustrating all the premium workflows: https://myaiforce.com/mindmap
Run ComfyUI with Pre-Installed Models and Nodes: https://youtu.be/T4tUheyih5Q
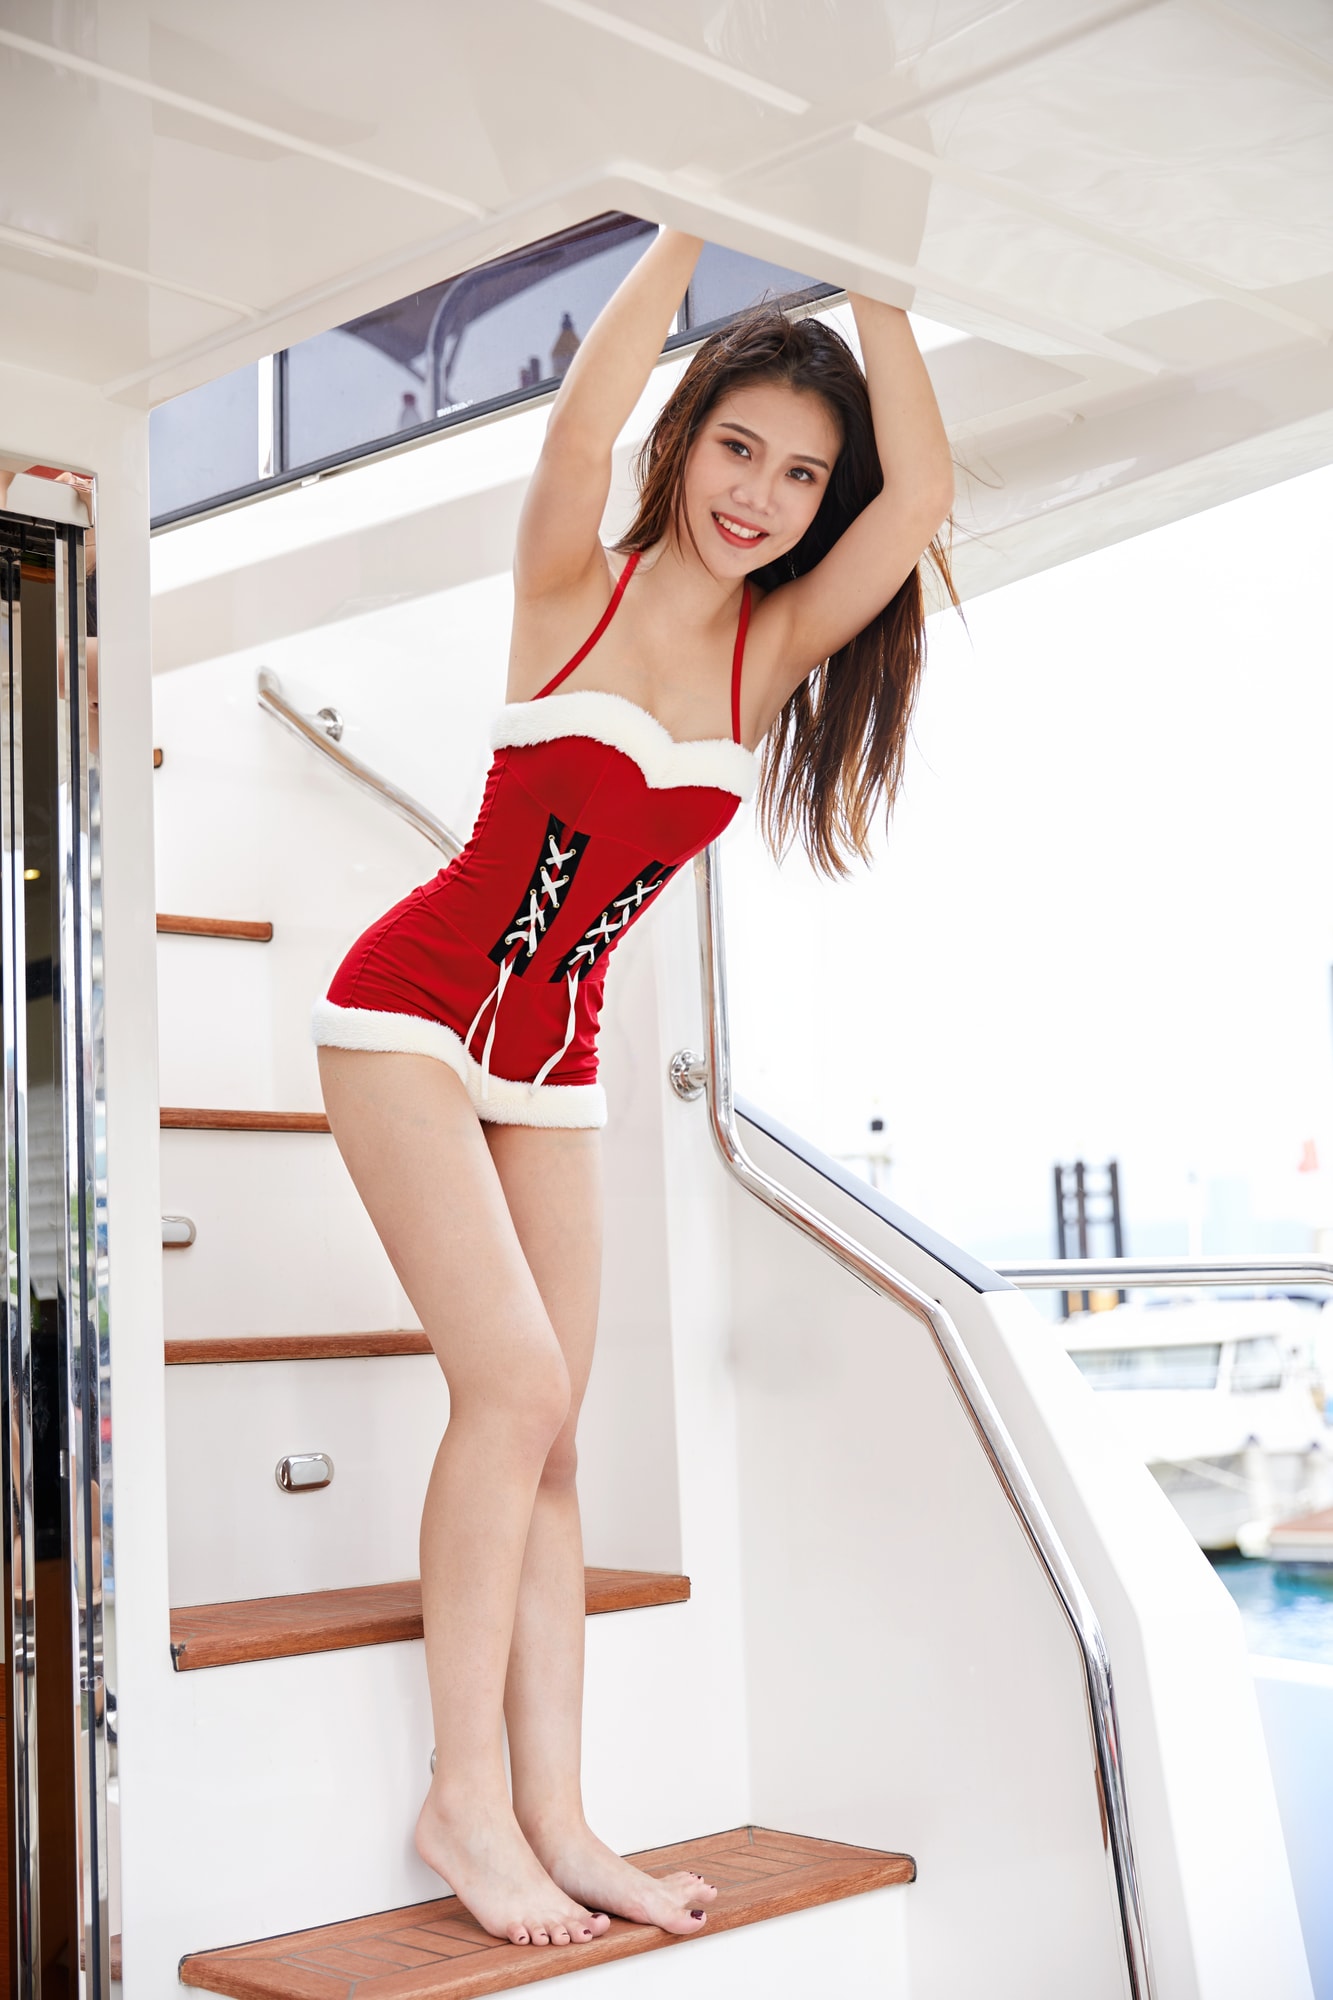
Task Preview
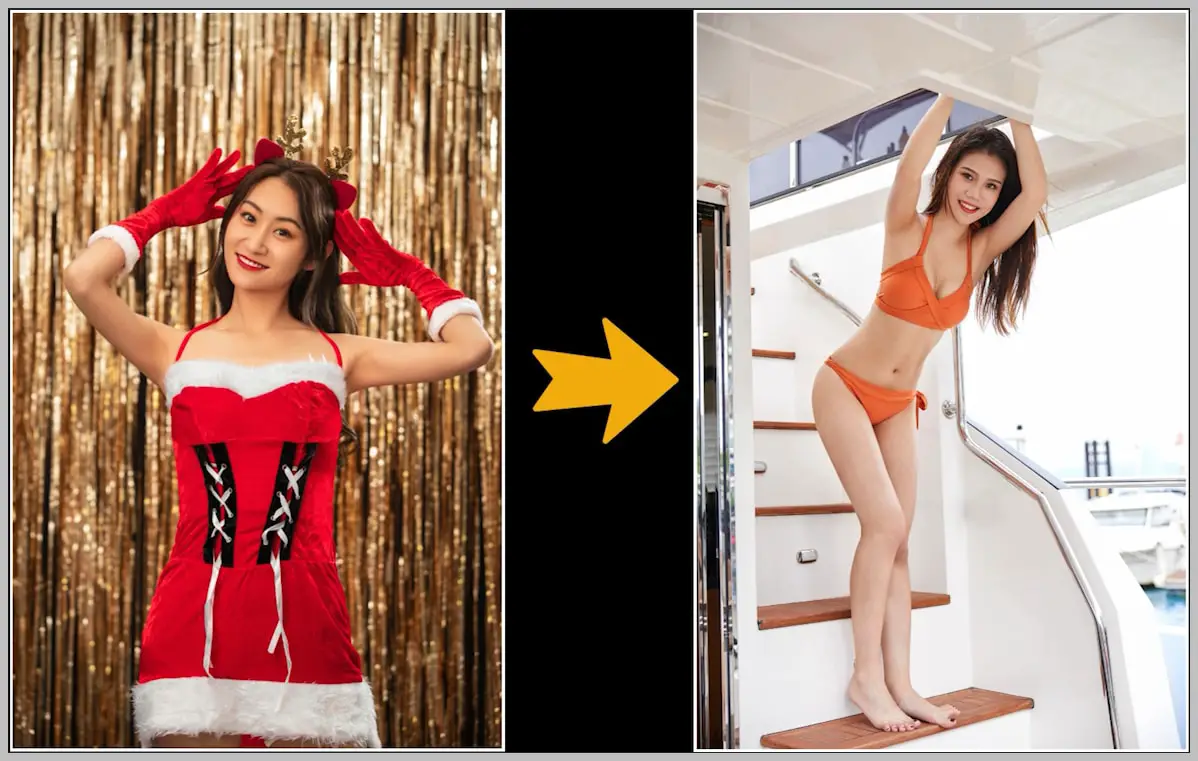
Ready to turn theory into action? Let’s tackle a fun challenge: transplanting a cozy Christmas corset from one image onto a woman on a yacht.
Trust me—this is way simpler than it sounds. Follow along, and I’ll guide you through every click!
The Setup:
- Upload Your Duo:
- Image 1: The Christmas corset.
- Image 2: The shivering yachting woman.
- Node Groups? No Sweat:
- The workflow has five node groups, but we’re only using the first two for this task.
- Hit “Run”:
- With images loaded and nodes primed, click “Run” to fire up the workflow.
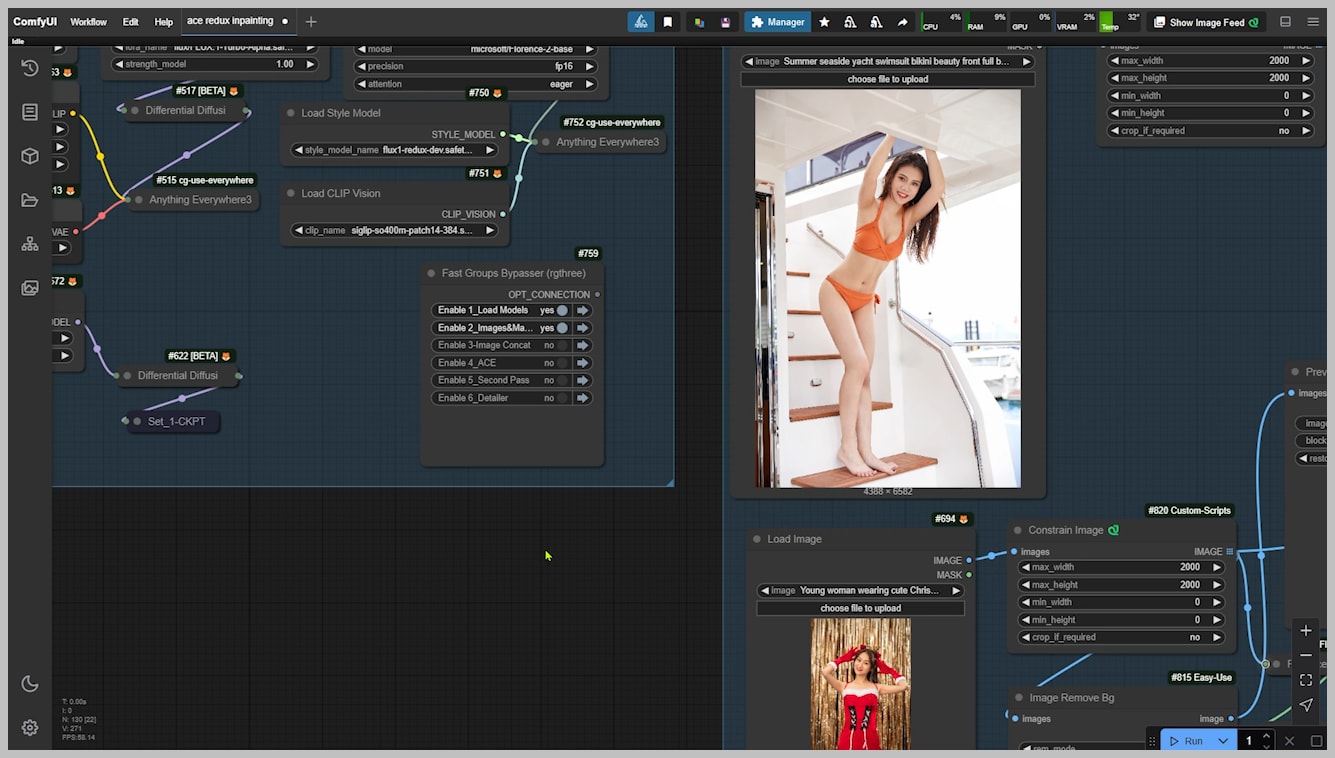
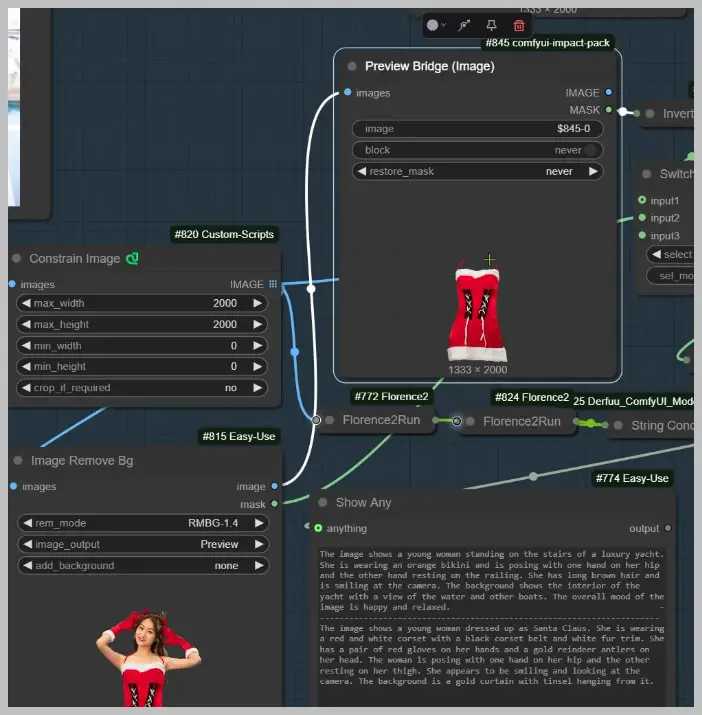
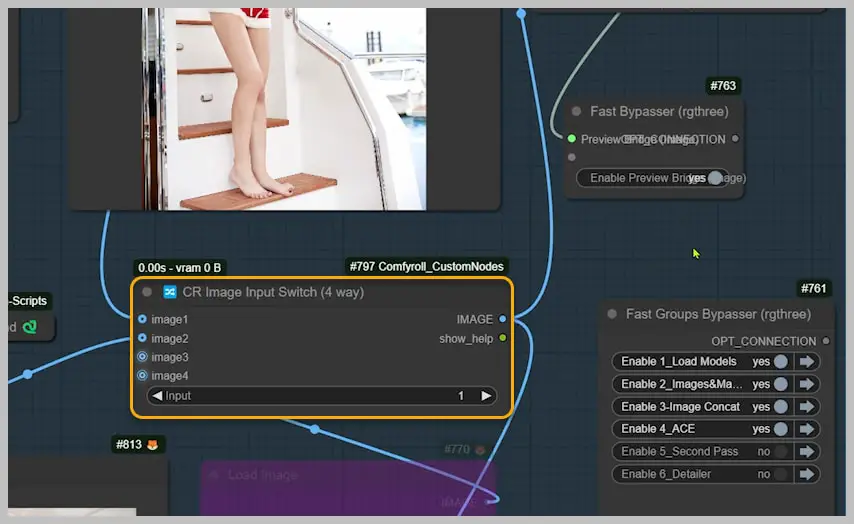
Mask Creation with Preview Bridge
Time to get hands-on! Let’s define exactly where that cozy Christmas corset will appear on our yachting adventurer.
Step 1: Paint the Corset Zone
- Open the Mask Editor:
- Right-click the Preview Bridge node → Select Open Mask Editor.
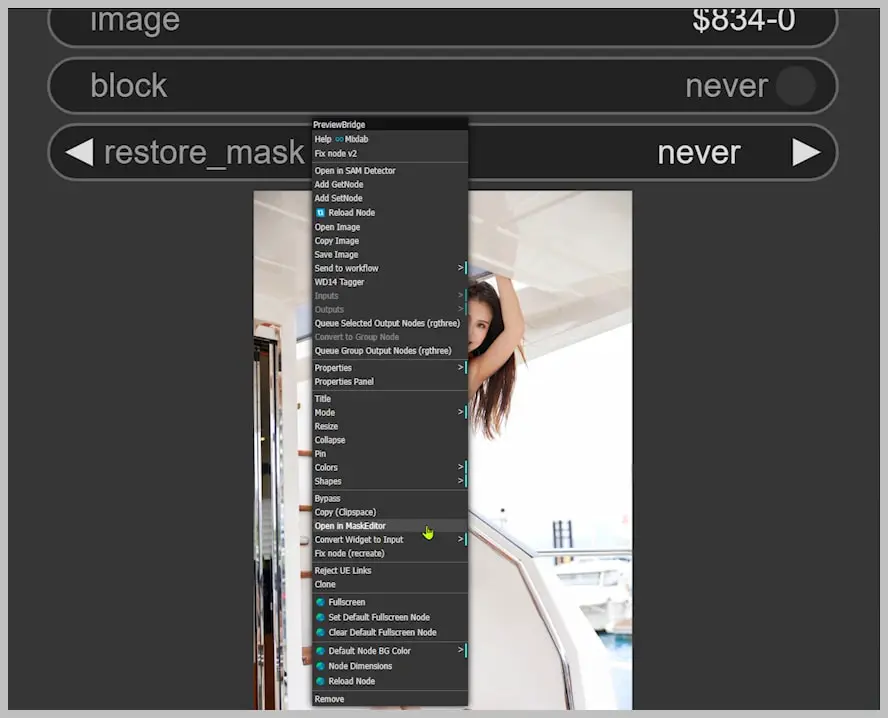
- Scribble the Area:
- Use your mouse or tablet to roughly paint over where the corset should go.
- Run the Workflow Again:
- Hit “Run” to lock in your initial mask.
Check Your Work:
- Head to the “Preview Image” node. This shows your mask:
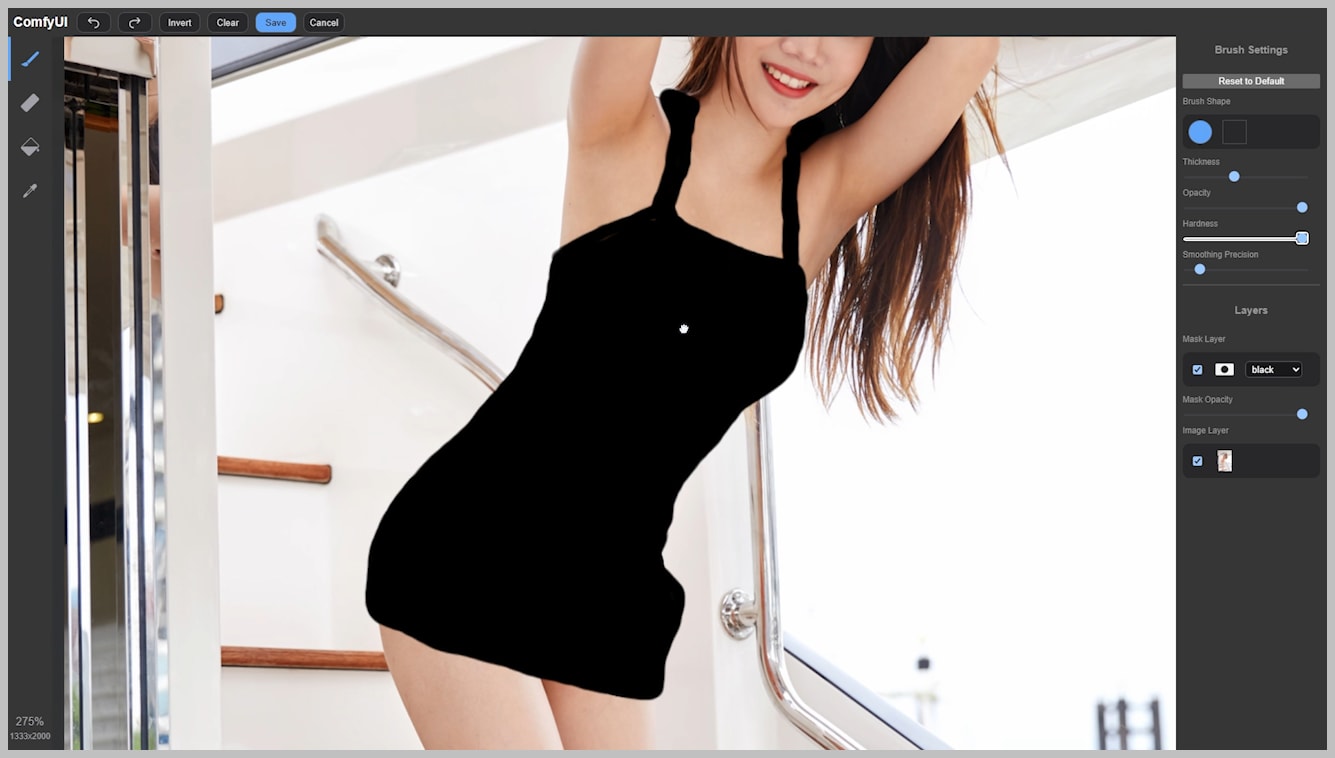
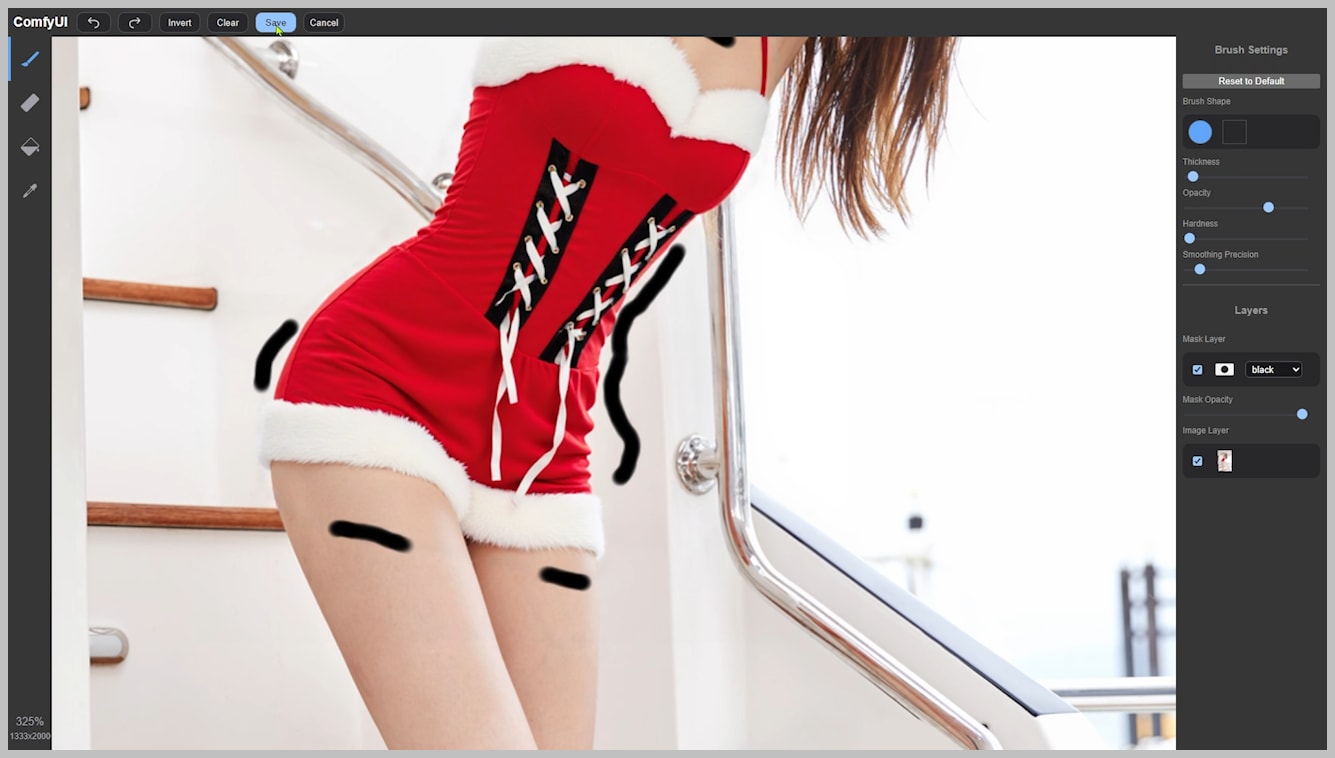
Step 2: Trim the Corset
Problem: The Image Remove Bg node already deleted the background, but it grabbed extra bits around the corset.
Fix It:
- Open the Mask Editor in another Preview Bridge node.
- Delete the Junk:
- Use the eraser tool to wipe away everything except the corset. Focus on clean edges!
- Run the Workflow Again:
- This updates the mask with your refinements.
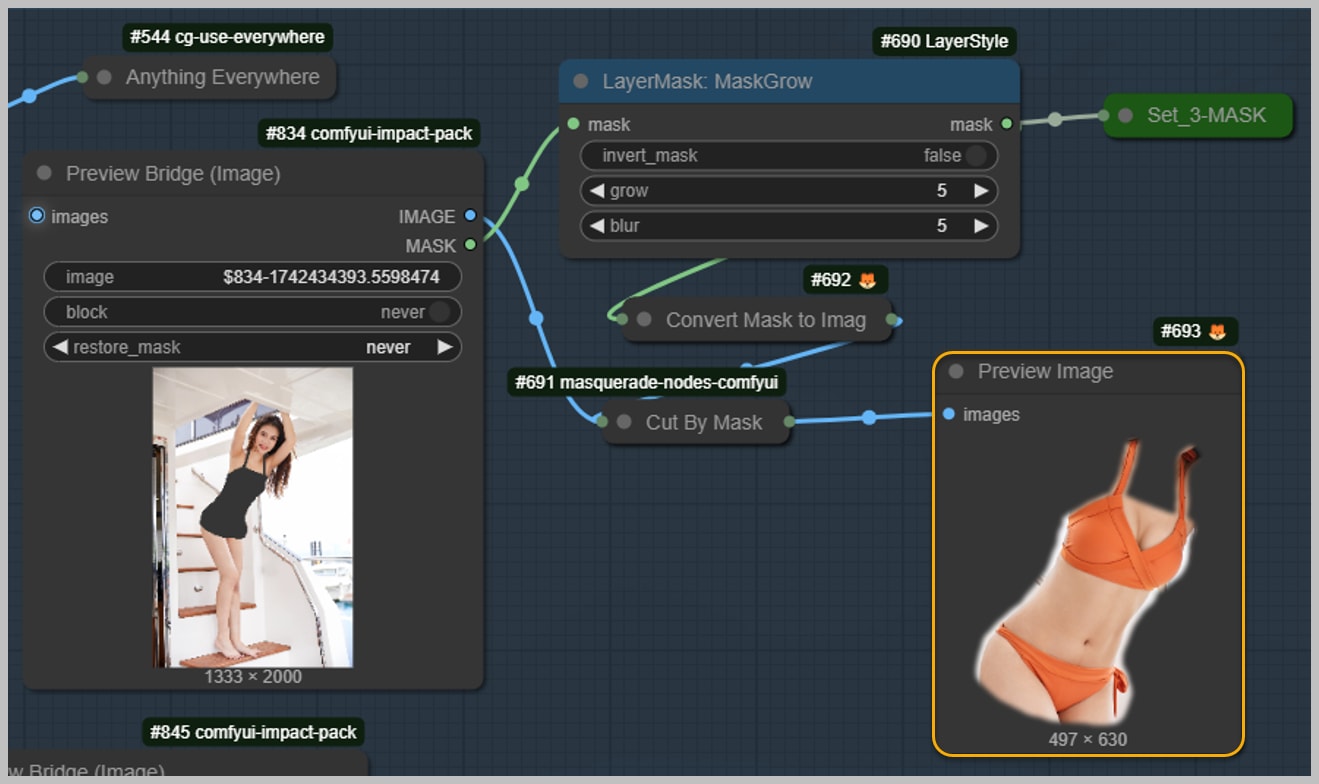
Step 3: Choose Your Mask
The Final Check:
- Open the “Preview Image” node again. Now you’ll see two options via the “Switch Any” node:
- Option 1: Your hand-refined corset mask.
- Option 2: The raw mask from Image Remove Bg.
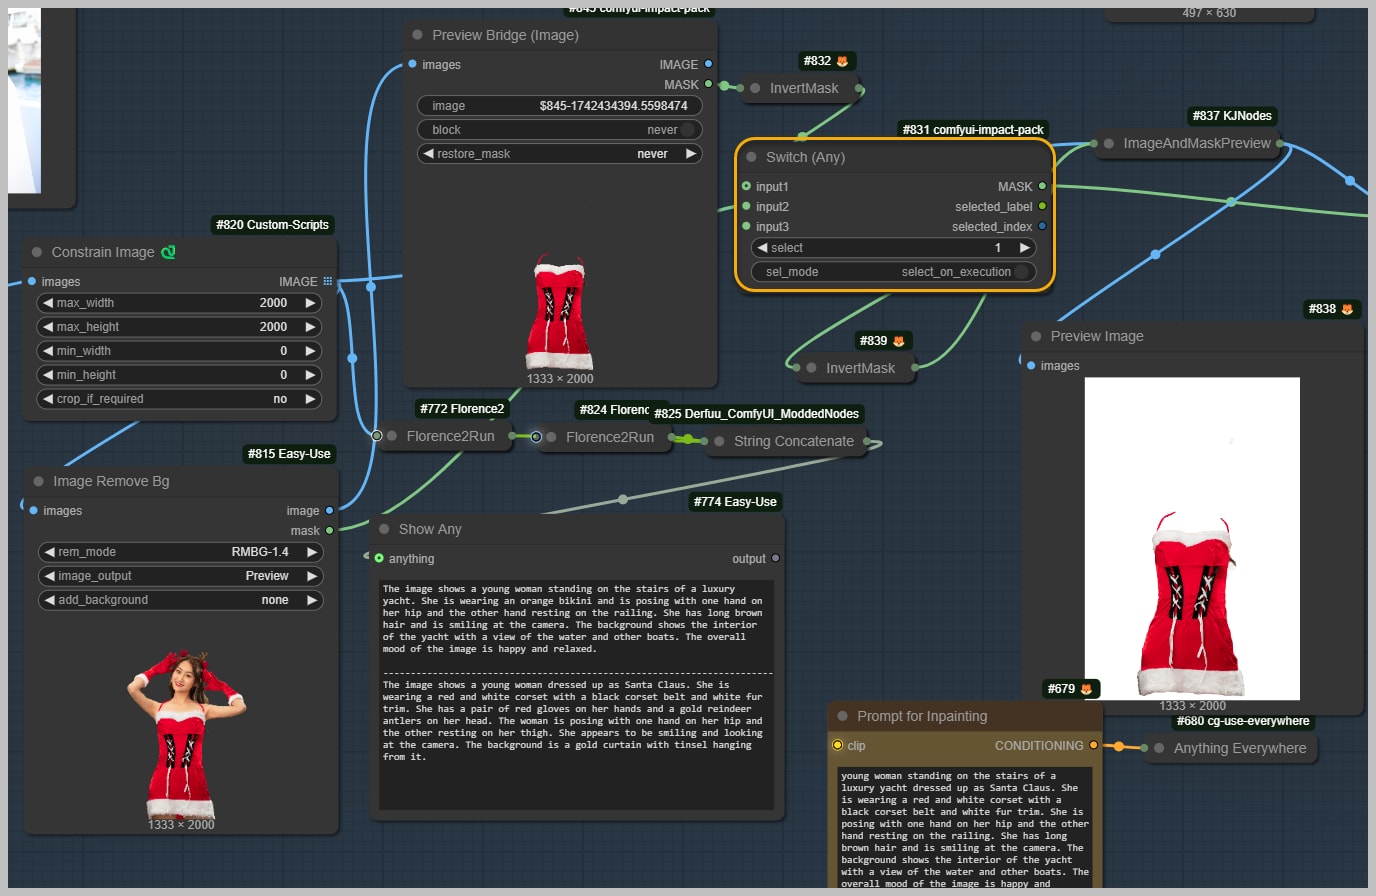
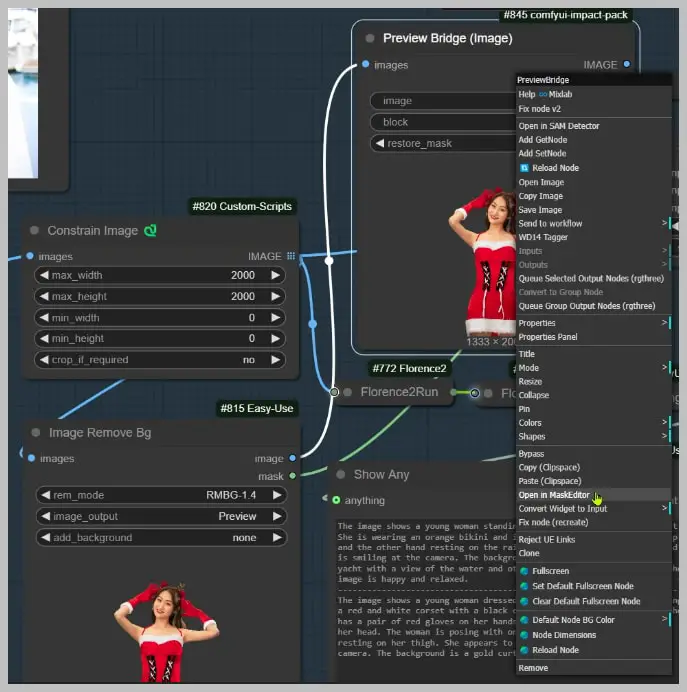
Prompt Generation with Florence Nodes
Time to give our workflow some creative direction! Let’s harness the Florence nodes to craft prompts that guide the AI—without overcomplicating things.
Step 1: Peek at Auto-Generated Prompts
- What’s Happening: The two Florence nodes automatically analyze your uploaded images and suggest prompts.
- Why Bother? These aren’t commands—they’re inspiration.
Step 2: Write Your Custom Prompt
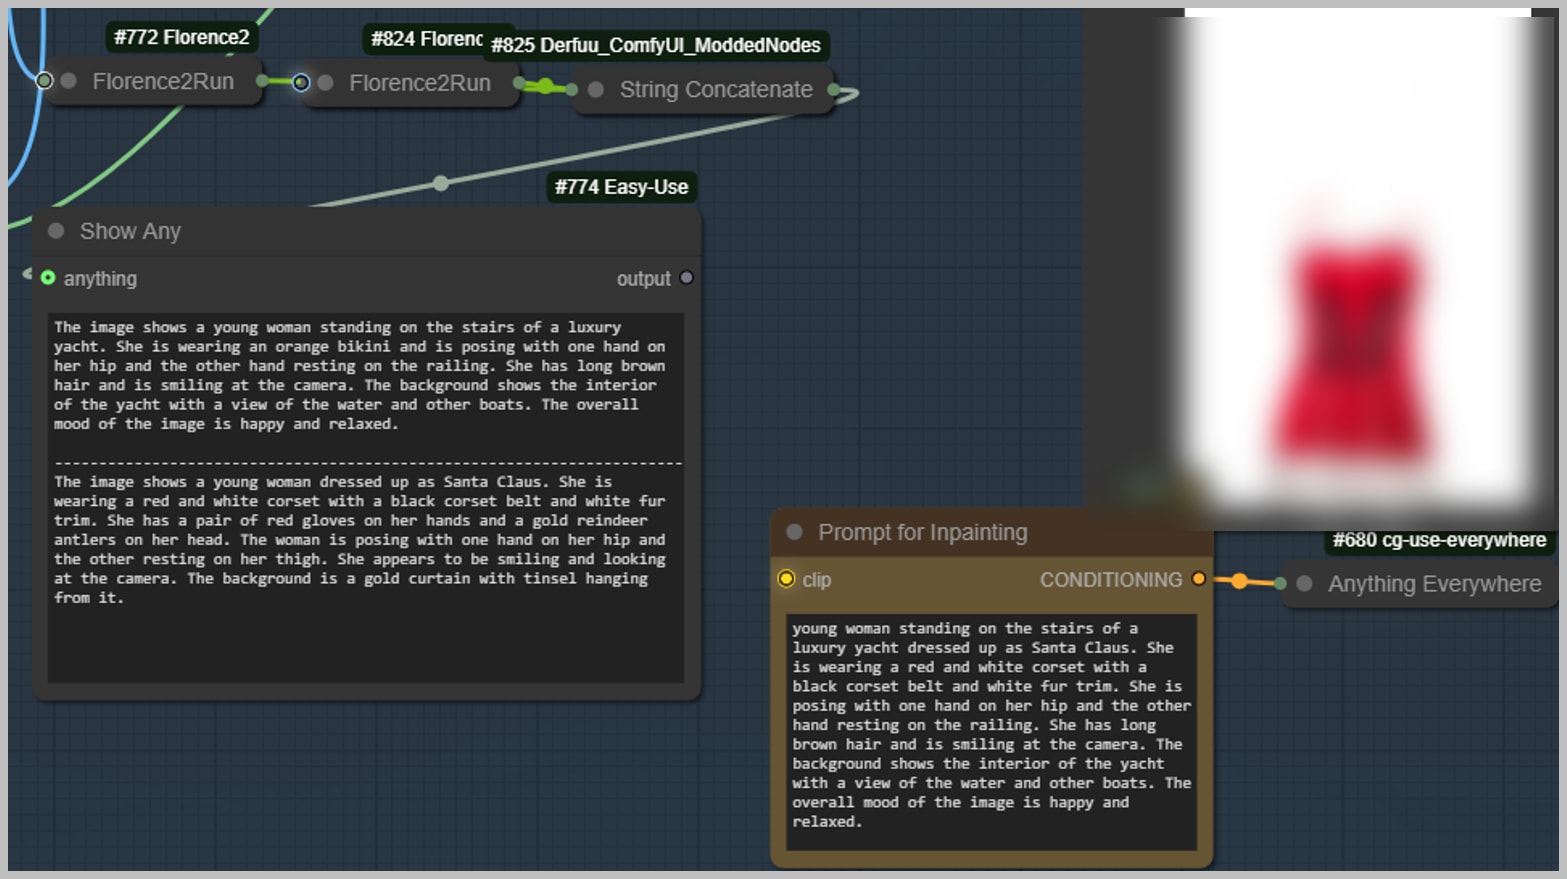
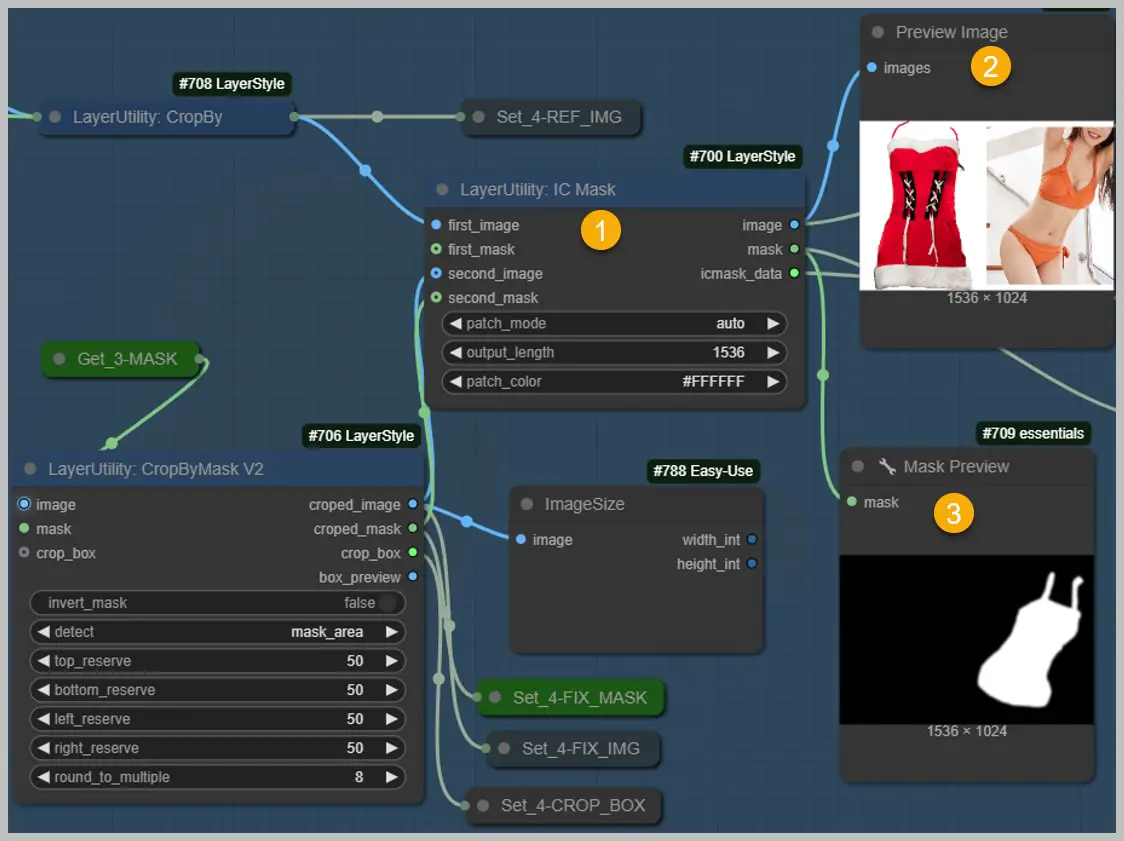
Image Stitching and Inpainting Prep
- The IC Mask Node merges the two images, creating a seamless composite.
- A Preview Image displays the blended version, showing the corset positioned on the yachting woman.
- The mask dictates exactly where inpainting will occur.
Dynamic Generation with Dual KSamplers
Time to meet your new creative partners: KSampler 1 and KSampler 2. These twins work differently—and that’s their superpower.
KSampler 1:
- Model: Default GGUF Flux model (turbocharged with a speed-boosting LoRA).
- Special Sauce: Paired with ACE Plus subject LoRA for object consistency.
- Best For: Clothing, accessories, or full-body edits.
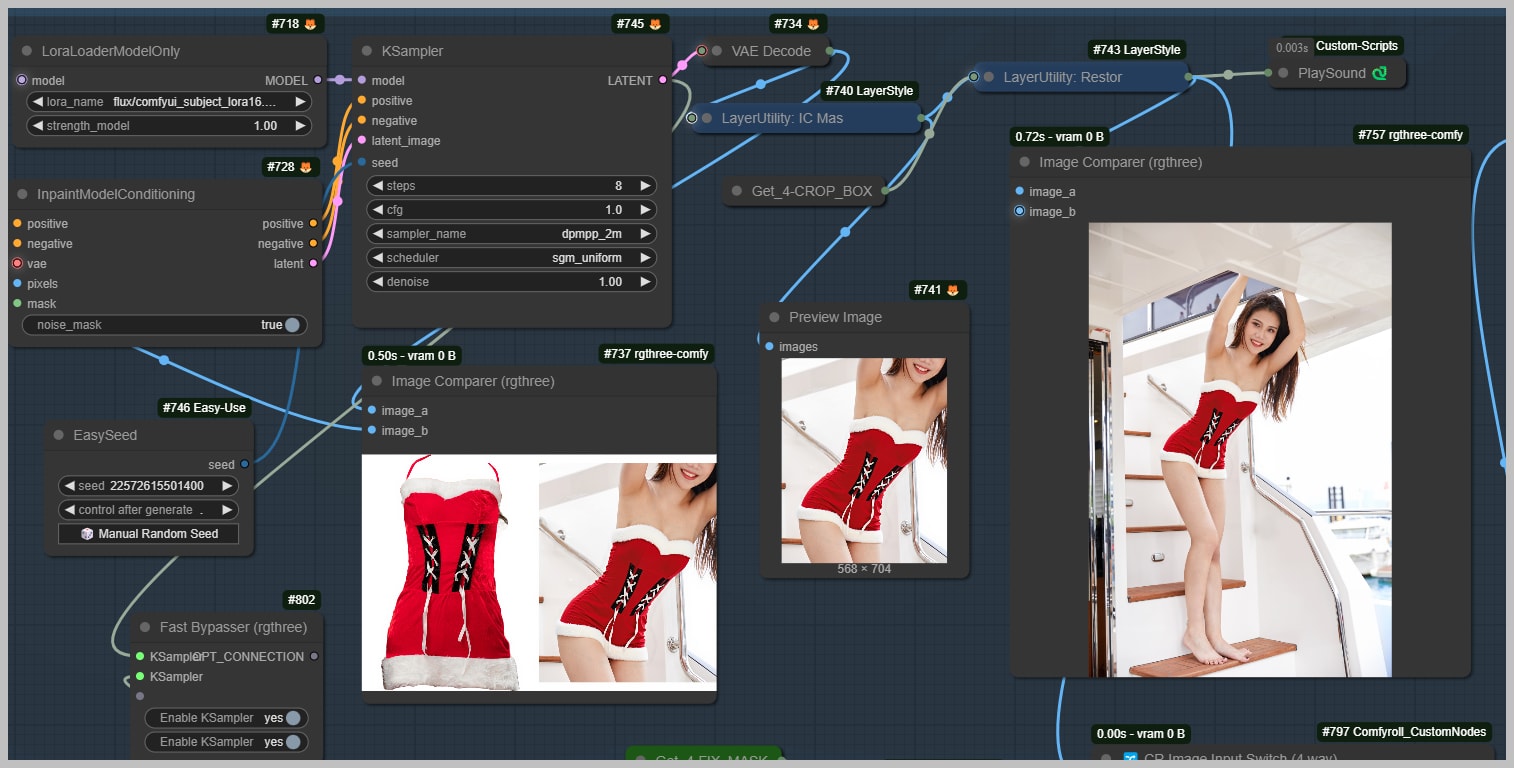
KSampler 2:
- Model: Standard Flux model (we’re using PixelWave for this demo).
- Special Sauce: No ACE Plus—raw power for experimental variations.
- Toggle Control: Don’t need two versions? Flip the Fast Bypasser node to disable KSampler 2.
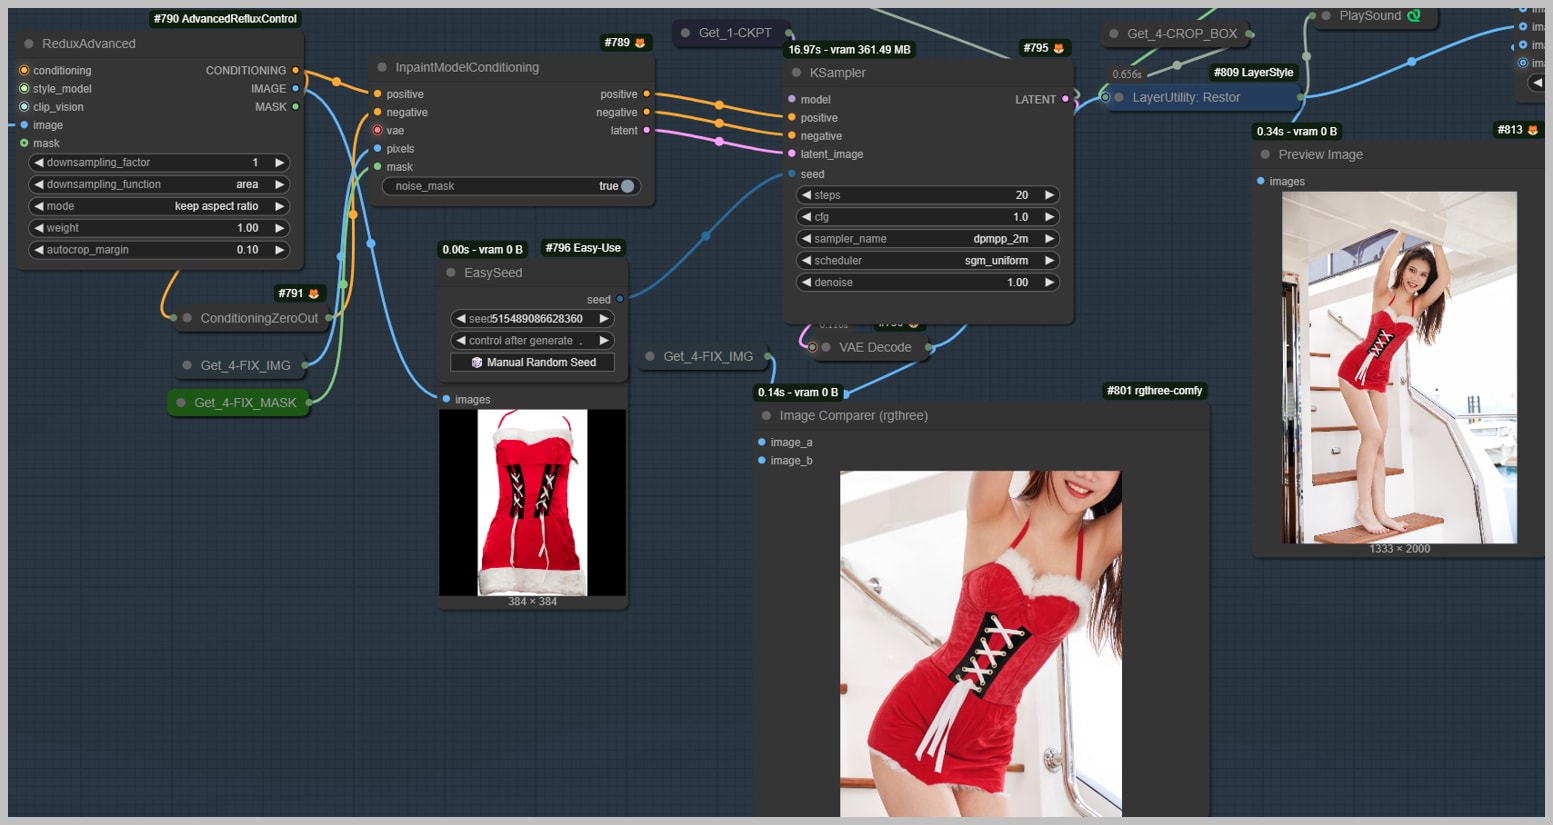
Hybrid Magic: Combining KSampler Strengths
What if you could cherry-pick the best parts of both generated versions? Let me show you how I turned two flawed outputs into a flawless result—and why flexibility is your ultimate superpower.
The Problem:
- KSampler 1 Output: Corset base looked perfect, but red straps vanished.
- KSampler 2 Output: Straps were spot-on, but the corset shape warped.
The Fix: Manual Blending in 3 Steps
- Steal the Straps: Isolate KSampler 2’s red straps using Photoshop (or free tools like Photopea).
- Layer Them onto KSampler 1’s Base: Align straps with the corset’s structure.
- Touch Up Seams: Use a soft brush to blend edges and shadows for a natural look.
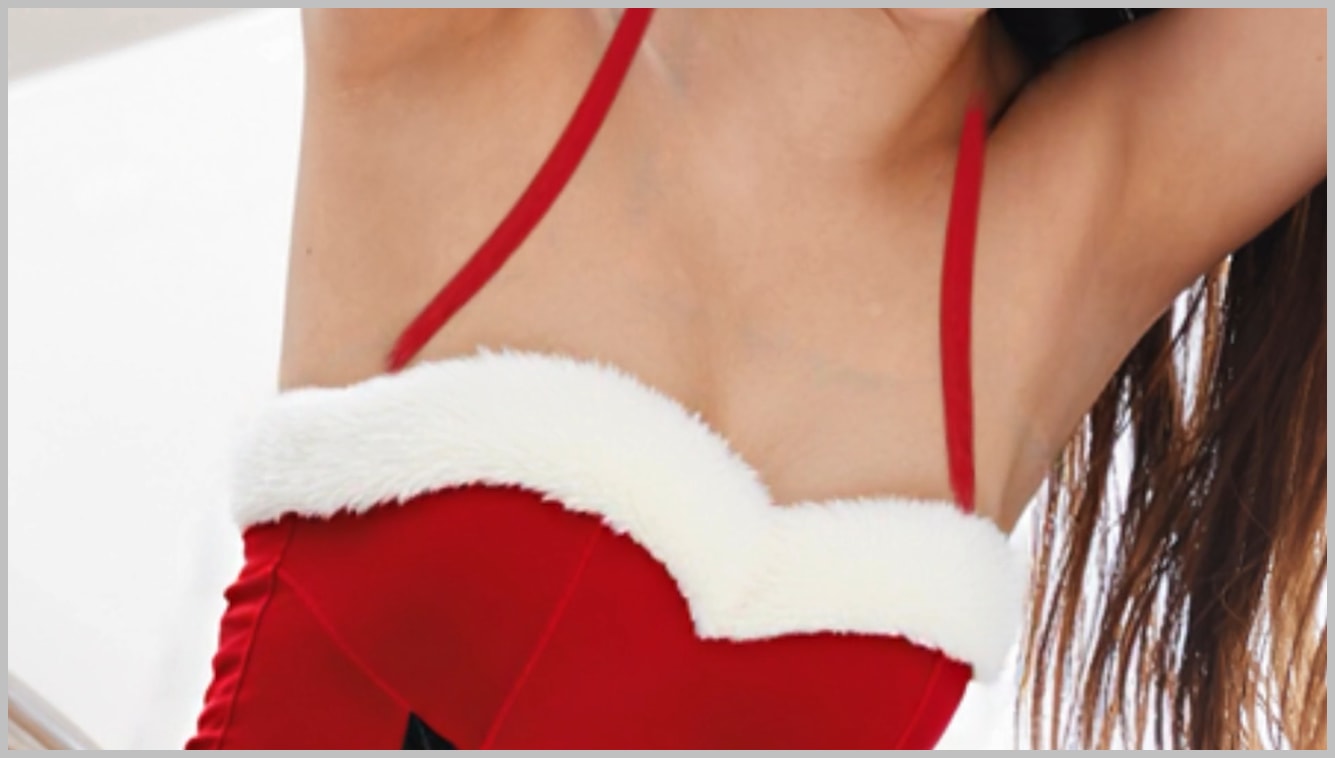
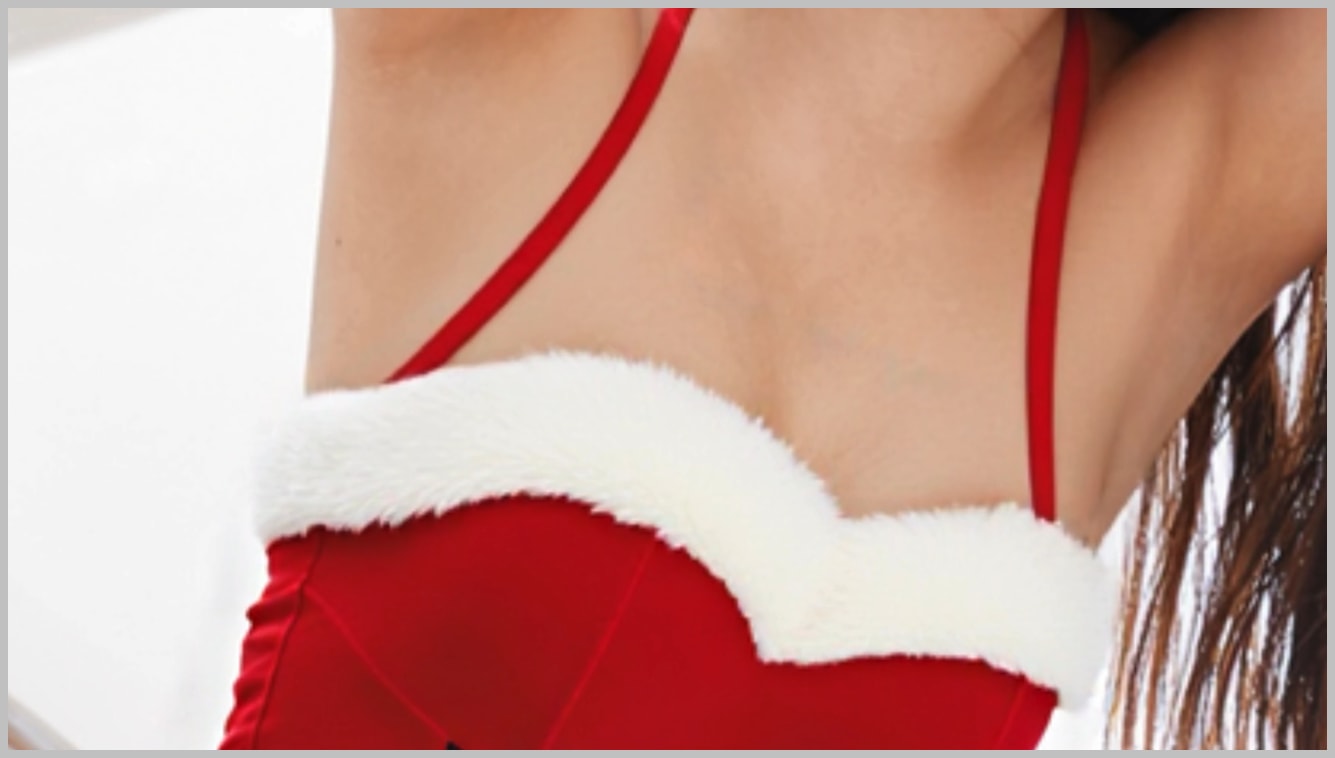
Pixel-Perfect Polish: Iterative Refinement
Even the best AI outputs need a human touch. Let’s zap those last rough edges and turn “almost there” into “nailed it!”
Step 1: Target the Glitches
- Switch Your Base Image:
- Use the Image Switch Node to select which version (KSampler 1 or 2) you’re refining.
- Problem Area: Those jagged edges near the corset’s thigh zone.
- Paint the Fix Zone:
- Open the Preview Bridge Node → Mask Editor.
- Scribble over the rough edges (no need for precision yet).
- Pro Tip: Slightly overlap into “good” areas to help blending.
Step 2: Run and Review
- Hit “Run”: The workflow regenerates just the masked area.
Advanced Tips and Creative Problem-Solving
Sometimes, the biggest creative wins come from bending the rules. Let’s dissect a nightmare scenario I faced earlier—and how I hacked it into submission.
Tackling Complex Obstructions
The Challenge: A portrait where a bike handlebar splits a dress into two disjointed halves. ACE Plus struggled to restore the dress because the handlebar “confused” its understanding of the clothing structure.

The Hack:
- Remove the Obstruction:
- Yanked the handlebar out using Photoshop (or any quick masking tool).
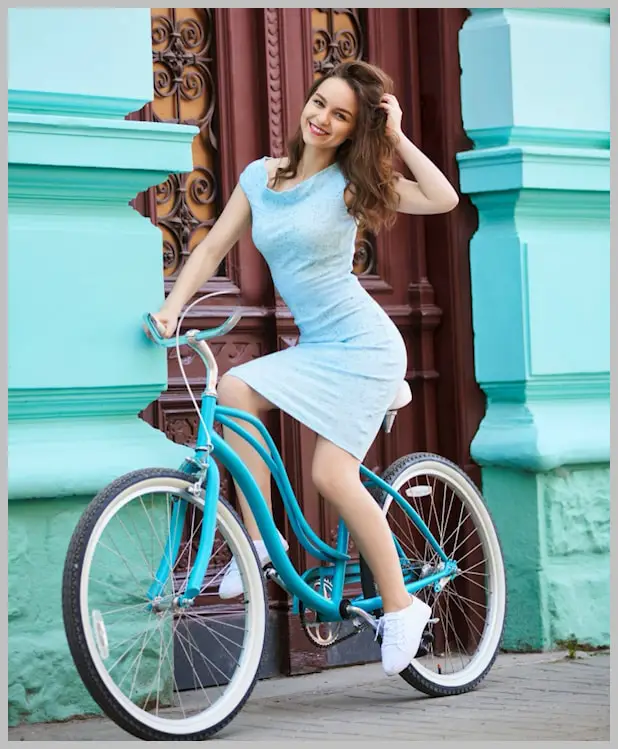
- Fed the “handlebar-free” image into ComfyUI.
- Yanked the handlebar out using Photoshop (or any quick masking tool).
- ACE Plus Inpainting Rounds:
- Ran 3-4 inpainting passes to rebuild the dress. Each pass refined details like fabric folds and patterns.

- Reintroduce the Handlebar:
- Exported the restored dress, then added the handlebar back outside ComfyUI for final polish.

Result: A seamless dress that looked uninterrupted, even with the handlebar layered on top.
Key Takeaway: When obstructions break AI logic, simplify the problem—even if it means stepping outside ComfyUI temporarily.
Conclusion
With ACE Plus and Redux in your ComfyUI toolkit, you’re not just editing images—you’re bending reality. Whether you’re crafting flawless virtual try-ons, fixing “impossible” obstructions, or inventing entirely new looks, this workflow turns creative hurdles into playgrounds. So go ahead: experiment fearlessly, remix outputs like a mad scientist, and share your wildest creations. The only limit? Your imagination. Now get out there and make magic!