Your Portrait + Any Background: ACE Plus & Redux Make Them One in ComfyUI
Introduction to Advanced Scene Integration
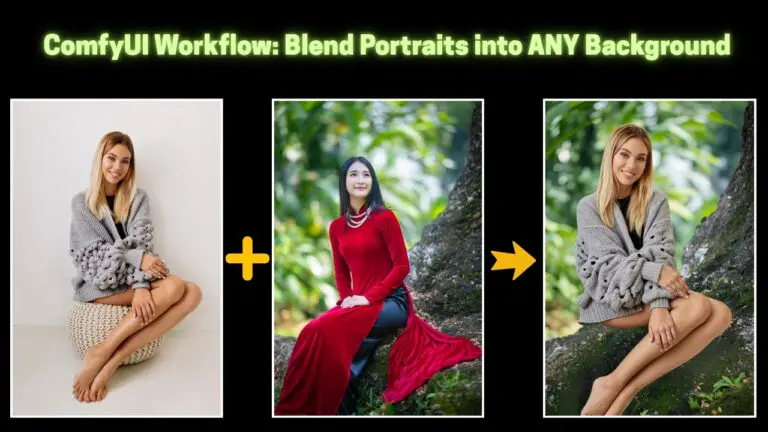
Blending Reality and Imagination in ComfyUI
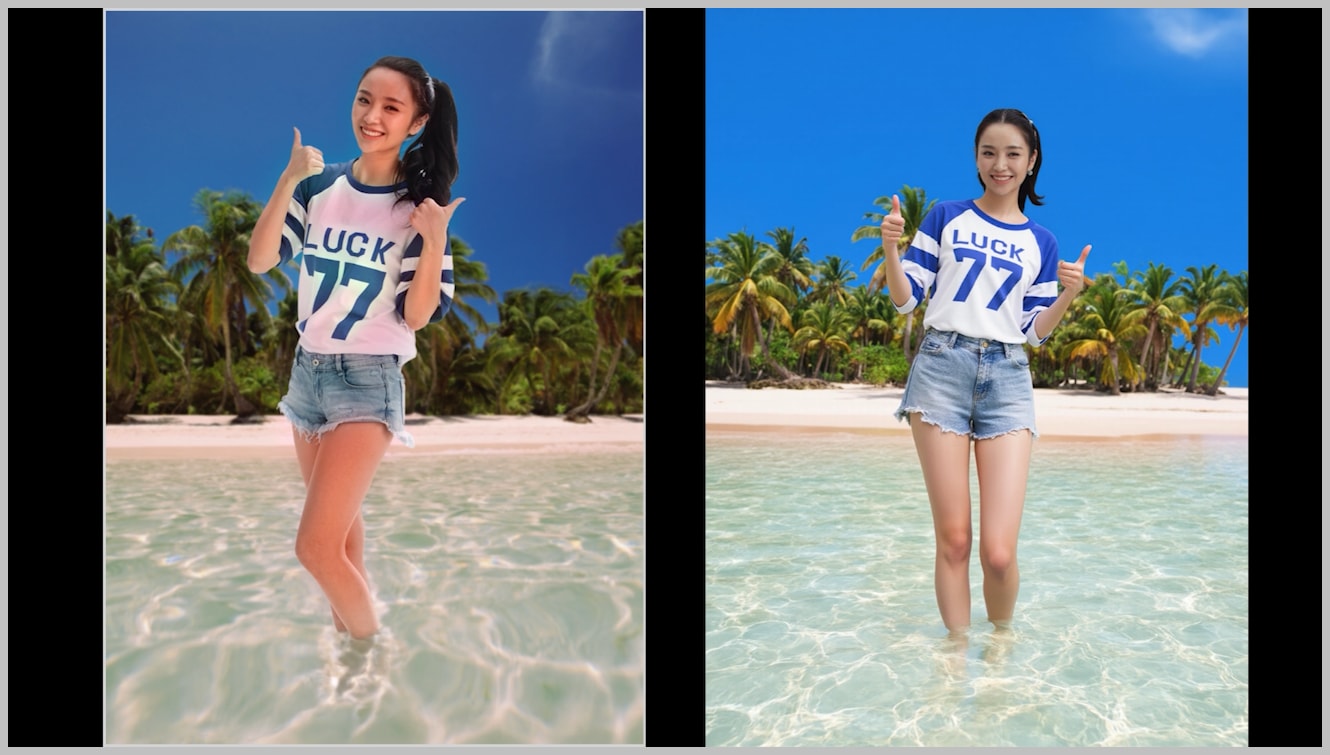
Imagine dropping your portrait subject into any environment – whether a tropical beach at sunset or a cyberpunk cityscape – while preserving their identity and creating seamless interactions with the scene.
This article introduces a game-changing workflow that transforms basic background swaps into context-aware integrations, where subjects appear to belong in their new surroundings.
The Evolution from Basic Swaps
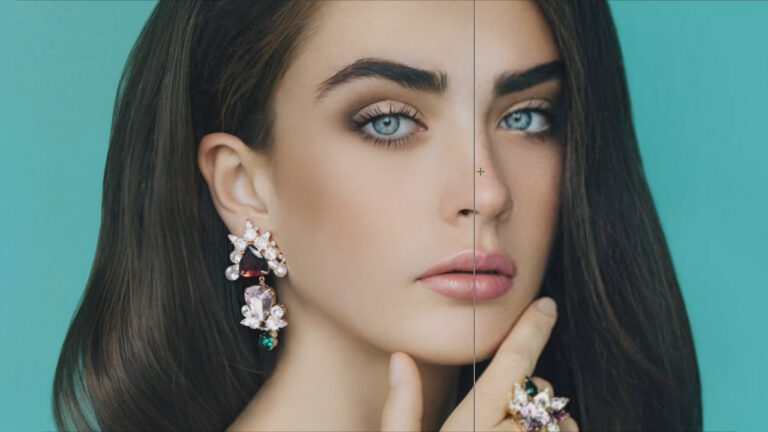
Building on our previous ACE Plus portrait work (where we achieved 99% face similarity), this workflow solves three critical challenges:
- Environmental Sync: Matching subject lighting/shadows to the new scene
- Contextual Interaction: Creating natural contact points (e.g., feet in water)
- Identity Preservation: Maintaining facial features and clothing details
Ready to turn disjointed elements into cohesive visual stories? Let’s first understand the workflow’s two-stage philosophy before diving into the node groups.
Workflow Overview: Two-Stage Transformation Process
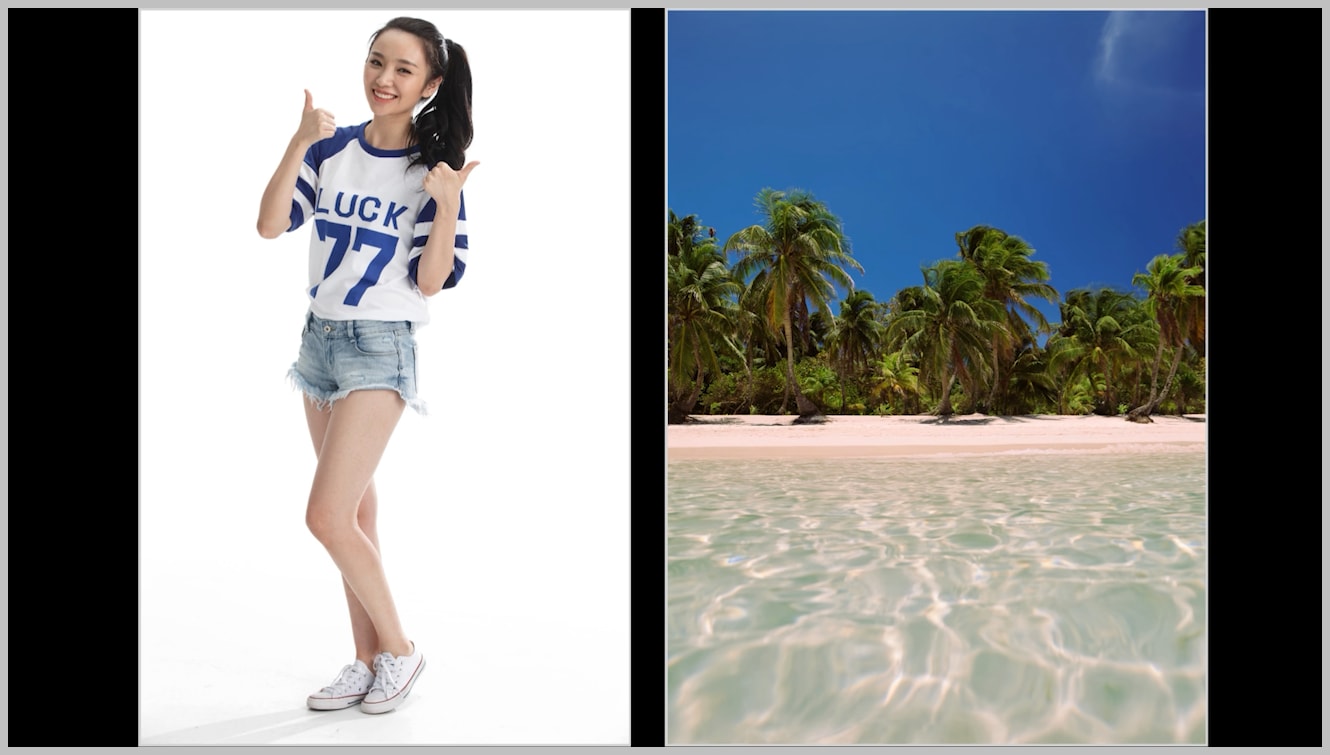
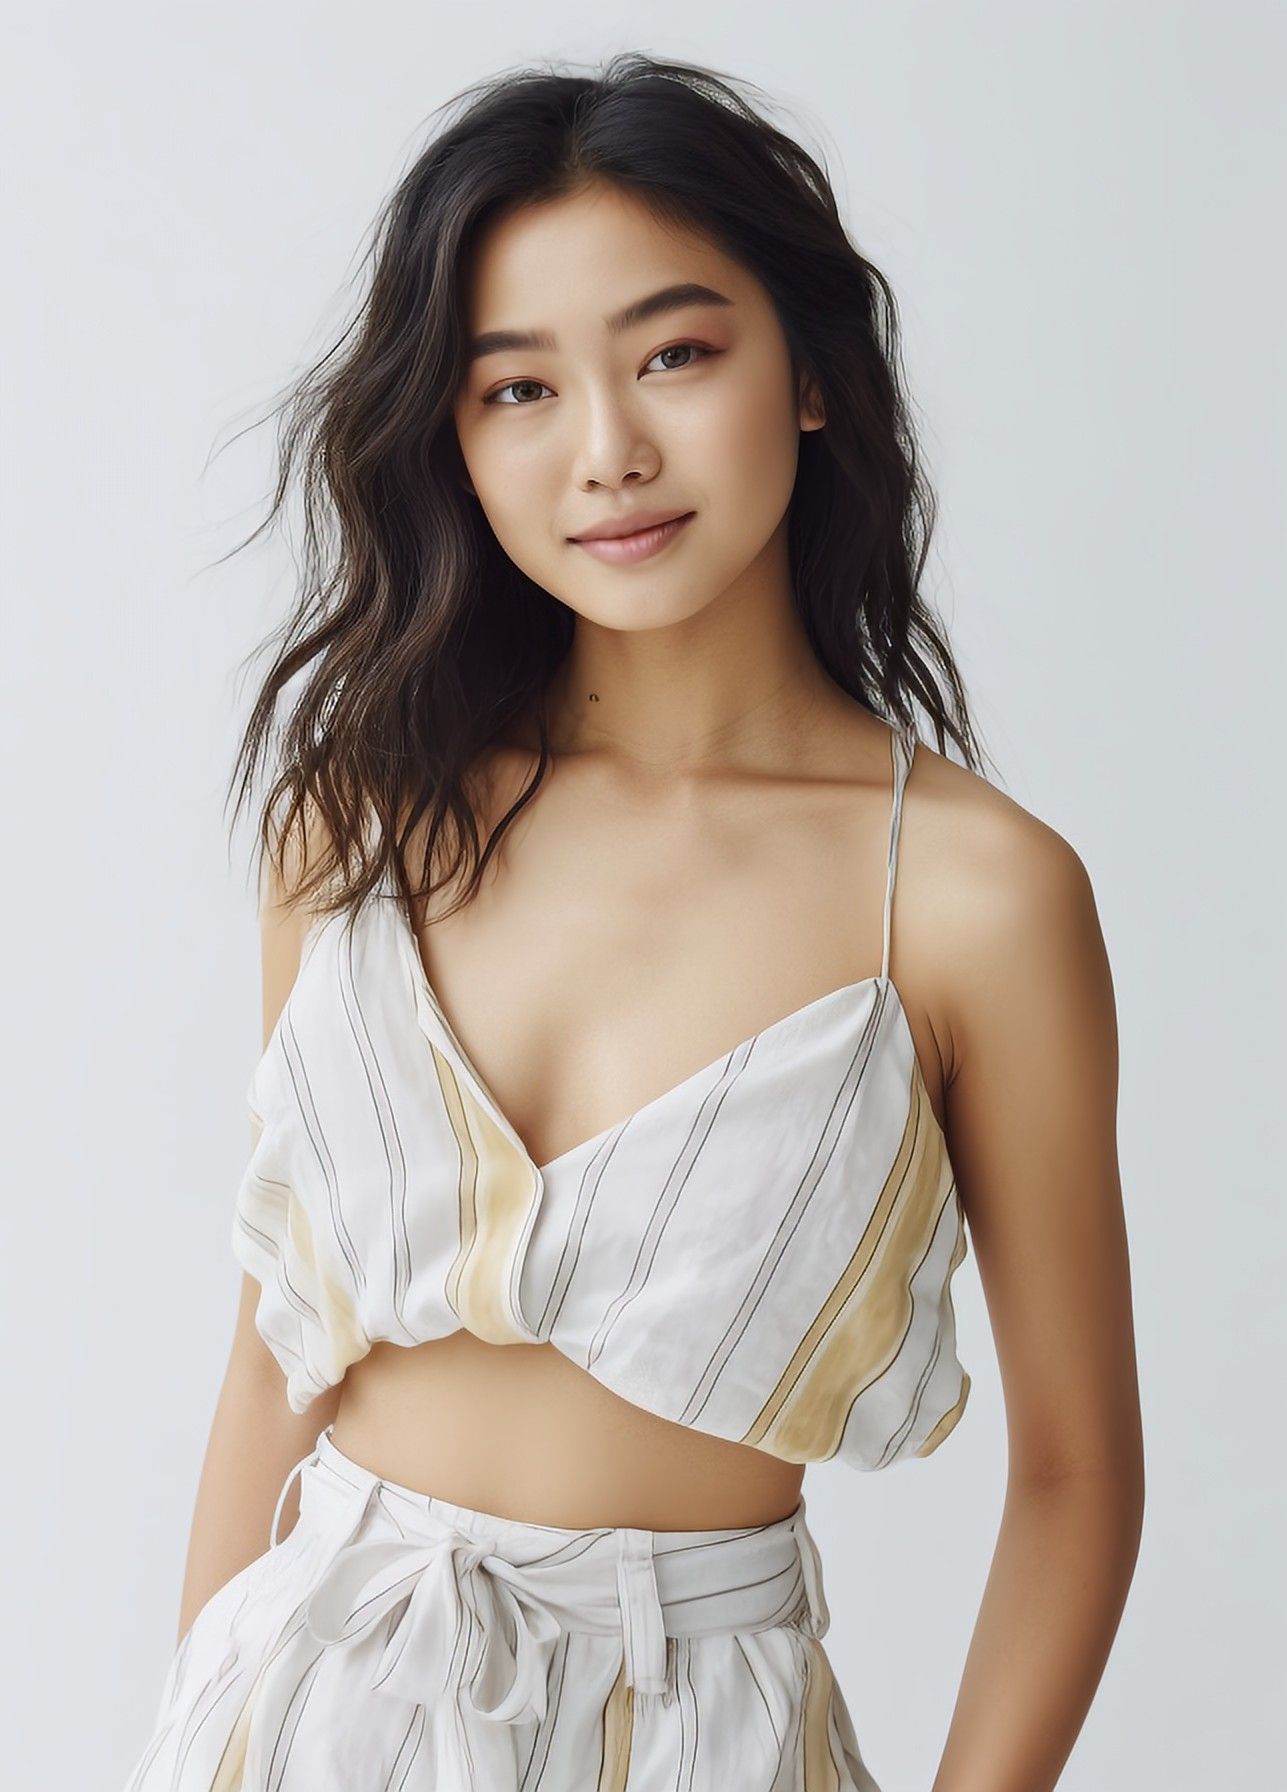
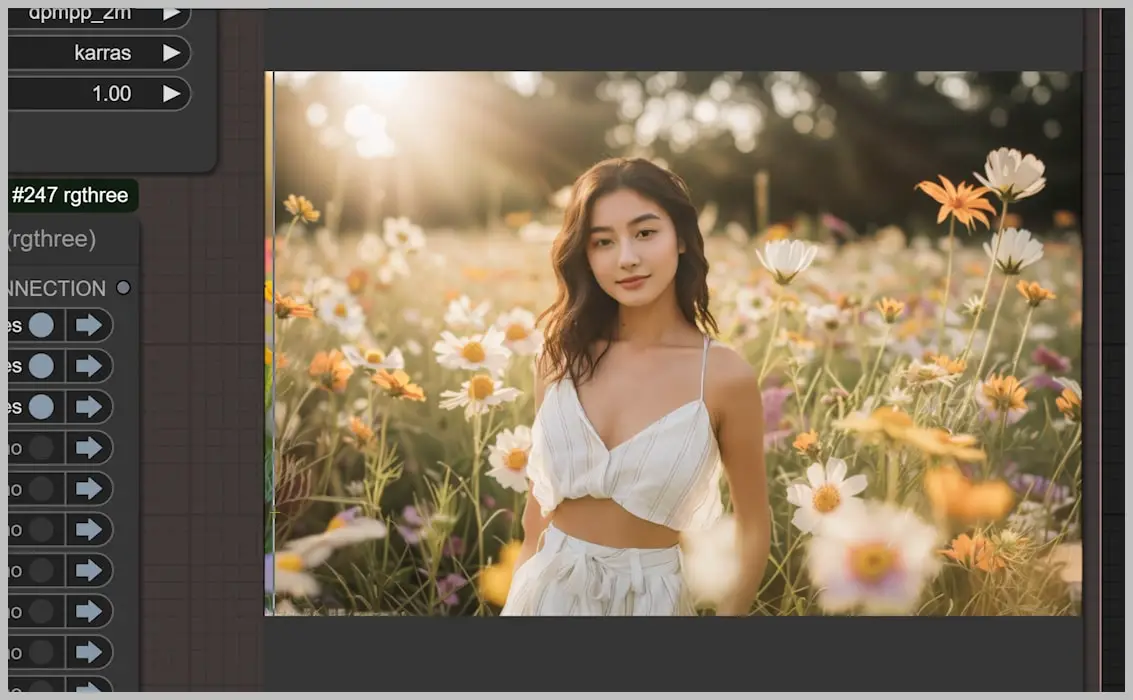
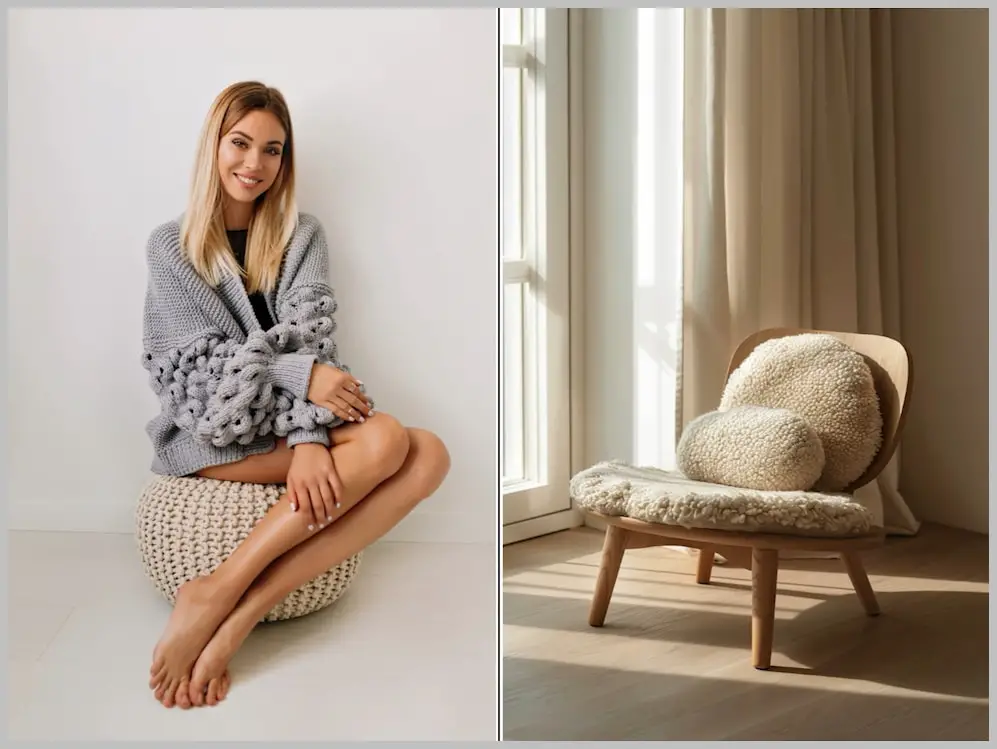
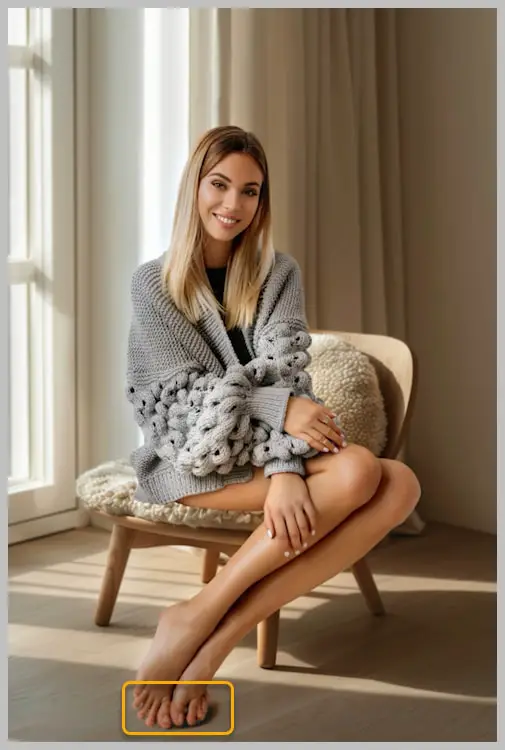
Uploaded Portrait:
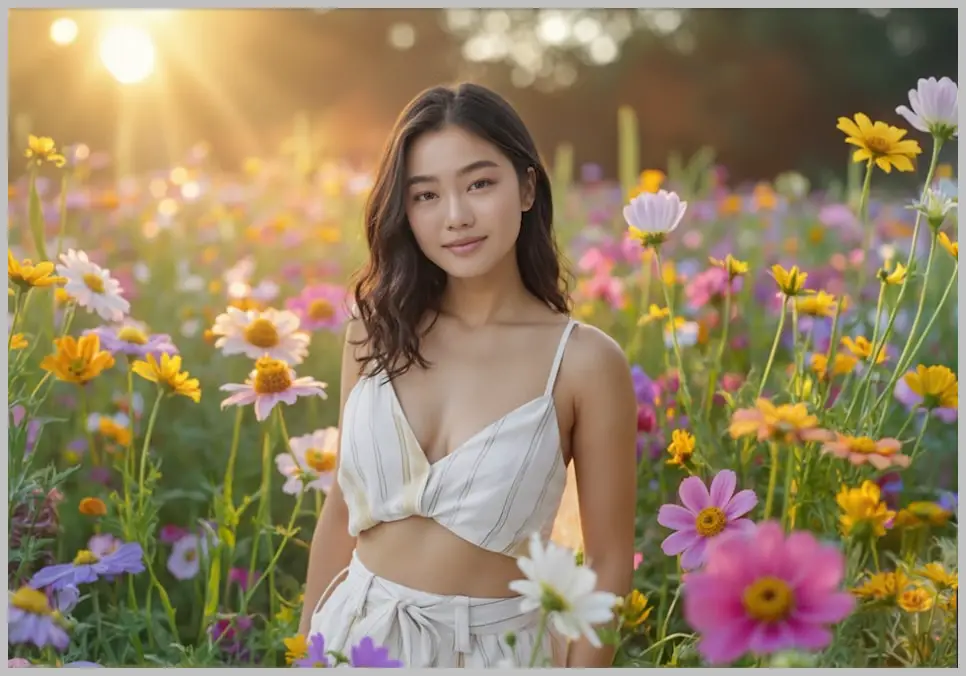
Uploaded background:

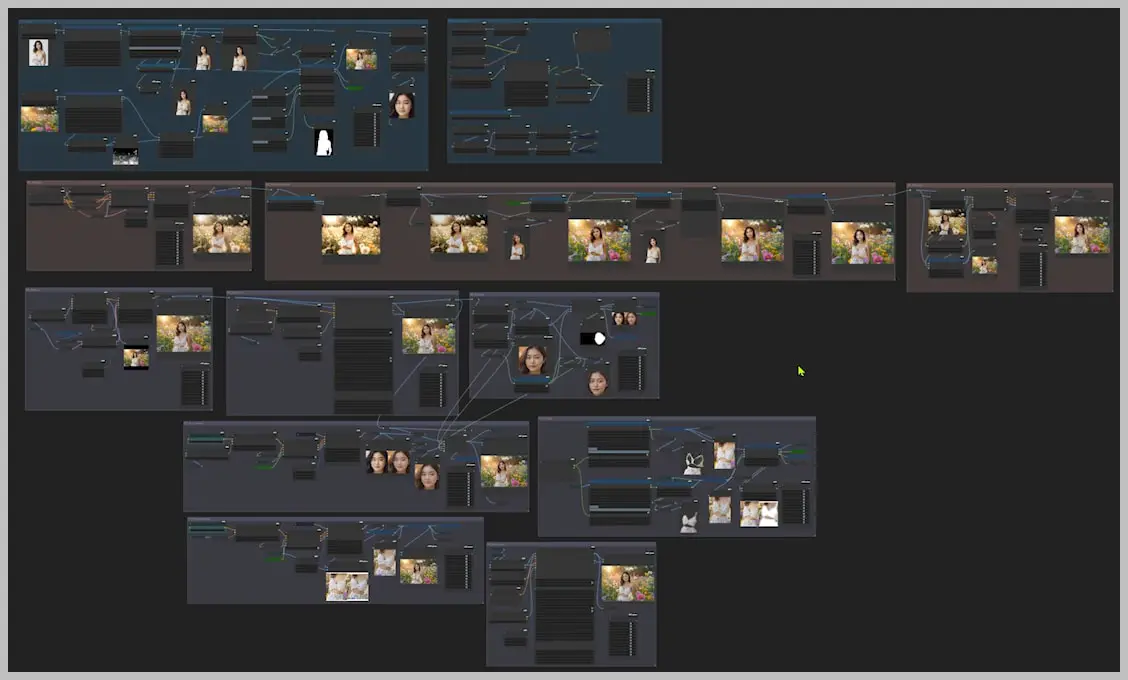
12 Groups? Only 5 Are Essential!
Don’t let the node count scare you – by Group 5, your subject is naturally placed in the scene. The remaining groups are optional tweaks for perfectionists.
Core Setup (Groups 1-5)
- Positions subject perfectly
- Matches lighting/shadows
- Fixes obvious issues (e.g., awkward limbs)
- Restores details like facial clarity
- Result: A “ready-to-post” integration
Optional Polish (Groups 6-12)
- Groups 6-9: Redux tweaks textures/poses + ACE face locking
- Groups 10-12: Fixes clothing glitches & hands
- Pro Tip: “Only use these if flaws bother you!”
Ready to begin? Let’s start with Node Group 1.
Video Tutorial:
Gain exclusive access to advanced ComfyUI workflows and resources by joining our community now!
Here’s a mind map illustrating all the premium workflows: https://myaiforce.com/mindmap
Run ComfyUI with Pre-Installed Models and Nodes: https://youtu.be/T4tUheyih5Q
Node Group 1: Subject Positioning & Depth Blur
Where Your Workflow Begins
Goal: Place your subject in the scene with natural background blending.
3 Key Steps
- Clean Workspace Setup
- Disable all groups except 1 & 2
- Upload portrait + background images
- Automatic Depth Blur
- The ProPostDepthMapBlur node (your secret weapon) creates background bokeh based on spatial relationships
- Result: Instant depth realism without manual masking

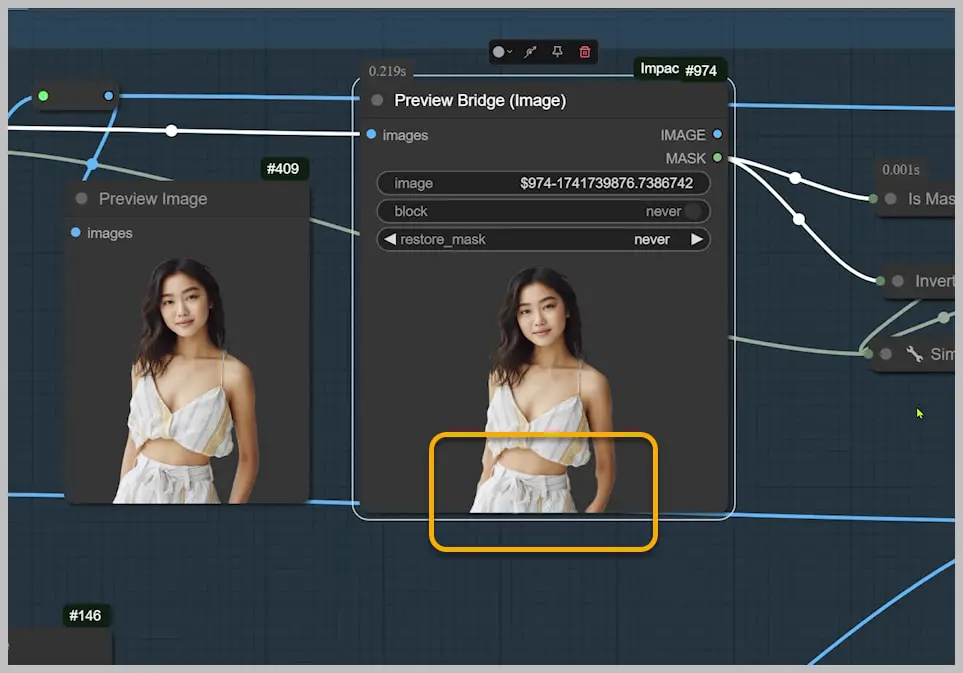
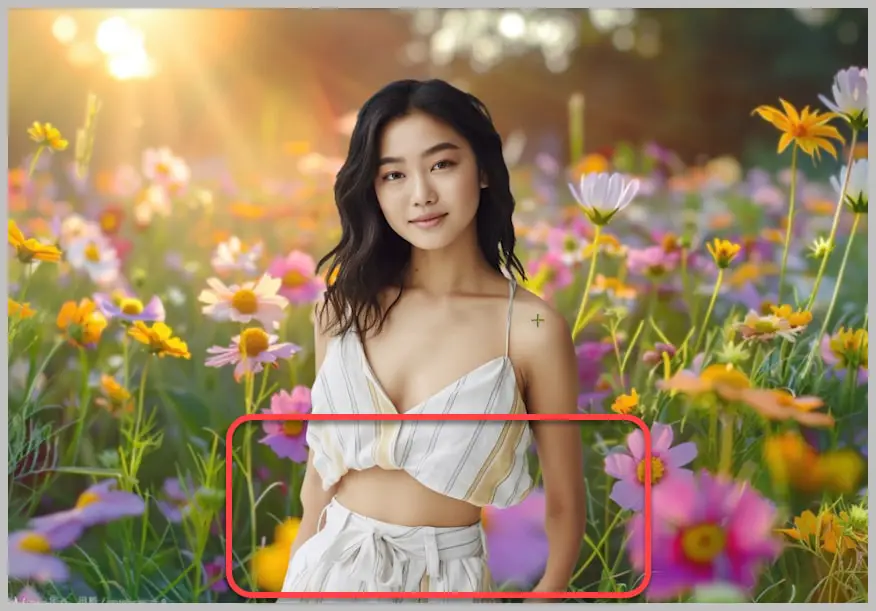
- Surgical Edits
- Use the Preview Bridge node’s magic eraser:
- Delete problematic areas (e.g., forearm section)
- Watch background elements peek through (like flowers in our demo)
- Use the Preview Bridge node’s magic eraser:
Node Group 2: Powerhouse Model Loading & ACE Plus Setup
Your Workflow’s Engine Room
Goal: Load essential tools fast while prepping for face/clothing swaps.
3 Key Components
- TeaCache Turbo Boost
- Caches frequent operations like a racing pit crew
- Result: faster rendering vs standard loading
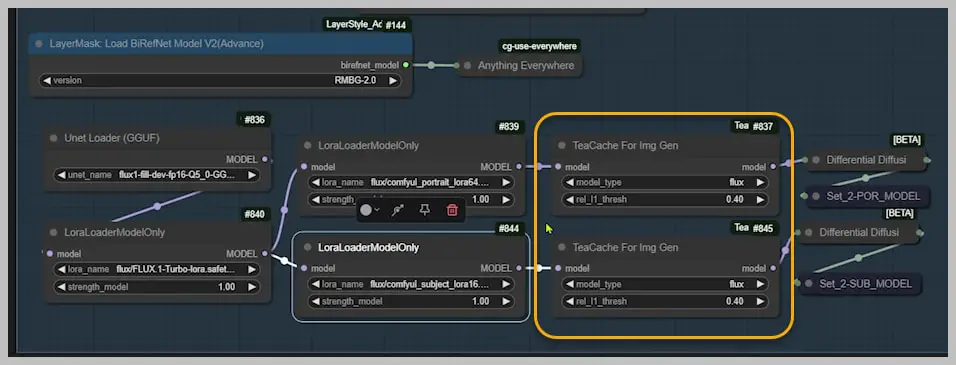
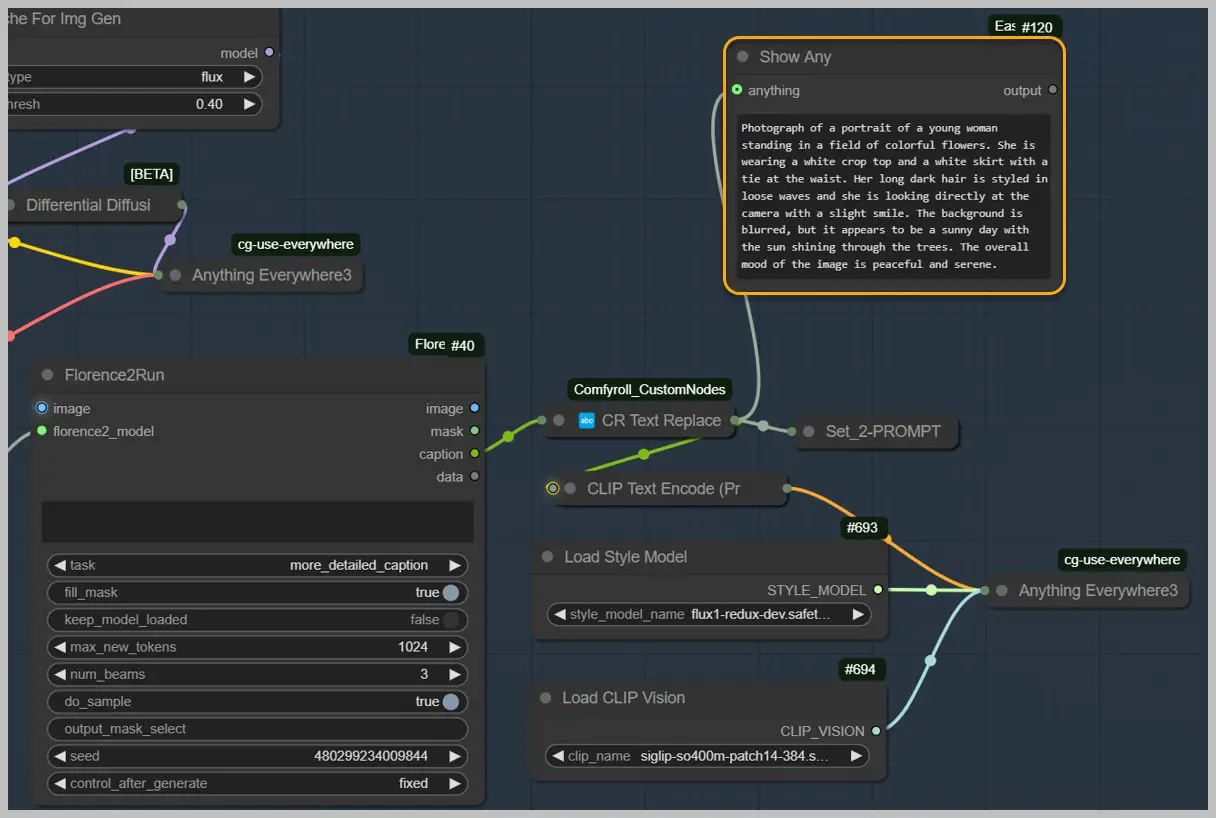
- Florence2Run Auto-Pilot
- Generates scene-specific prompts automatically
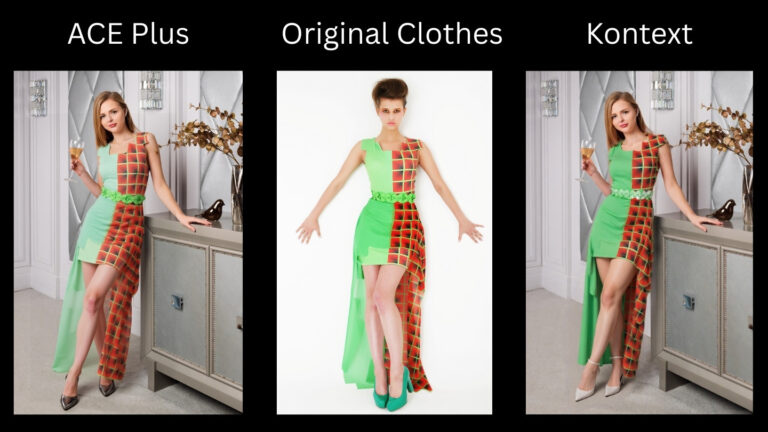
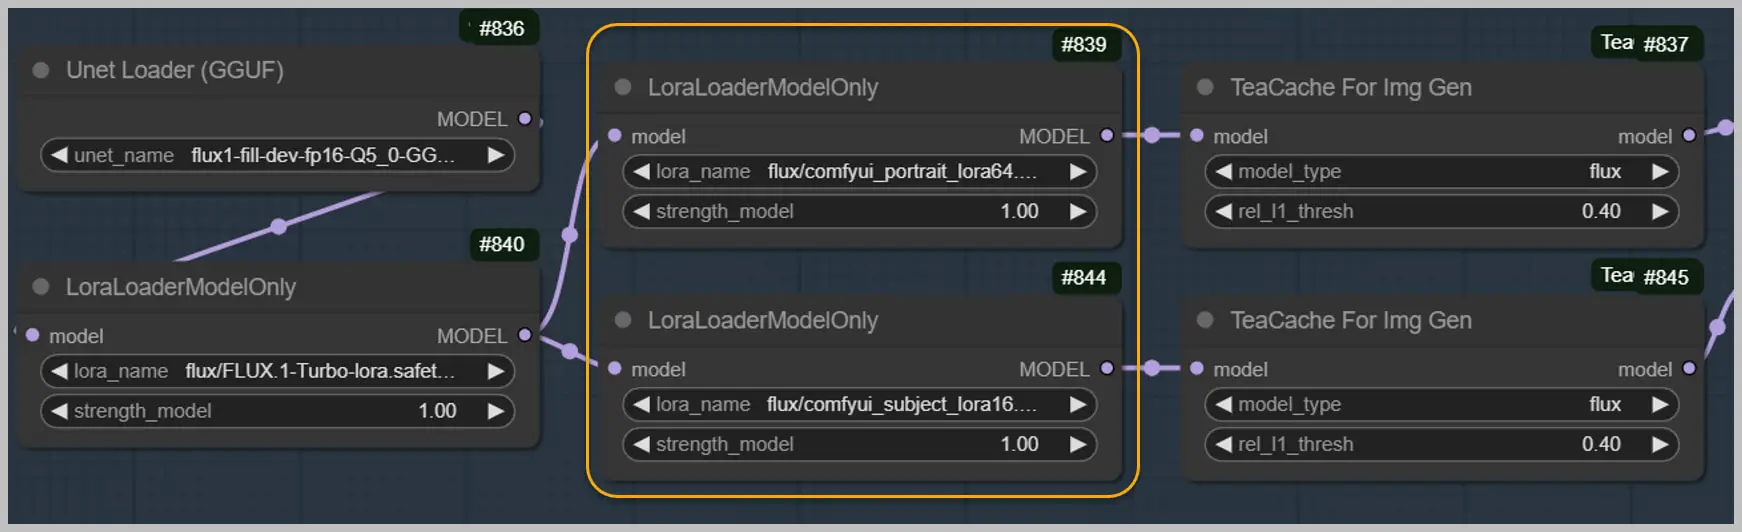
- Dual ACE Plus LoRAs
- Top LoRA: Face swap specialist (preserves identity)
- Bottom LoRA: Outfit change master (my testing shows superior clothing edits)
Why This Combo Rocks
- TeaCache handles speed → You focus on creative choices
- Florence2Run eliminates prompt-guessing → Faster iterations
- Dual LoRAs prevent “jack-of-all-trades” model compromises
Node Group 3: Dynamic Lighting Overhaul
Where Your Scene Gets Its Mood
Goal: Transform flat lighting into dramatic environmental ambiance using IC-Light.
The Magic & The Reality
- Run the Workflow →
- Instantly adds directional lighting (e.g., backlight mimicking sunset windows)
- Expected Trade-Offs →
- Details get fuzzy (we fix this in Group 4)
- Colors temporarily dull (part of the process)
Node Group 4: Detail Resurrection Squad
Fixing IC-Light’s Fuzzy Side Effects
Goal: Recover crisp details while preserving IC-Light’s dramatic lighting.
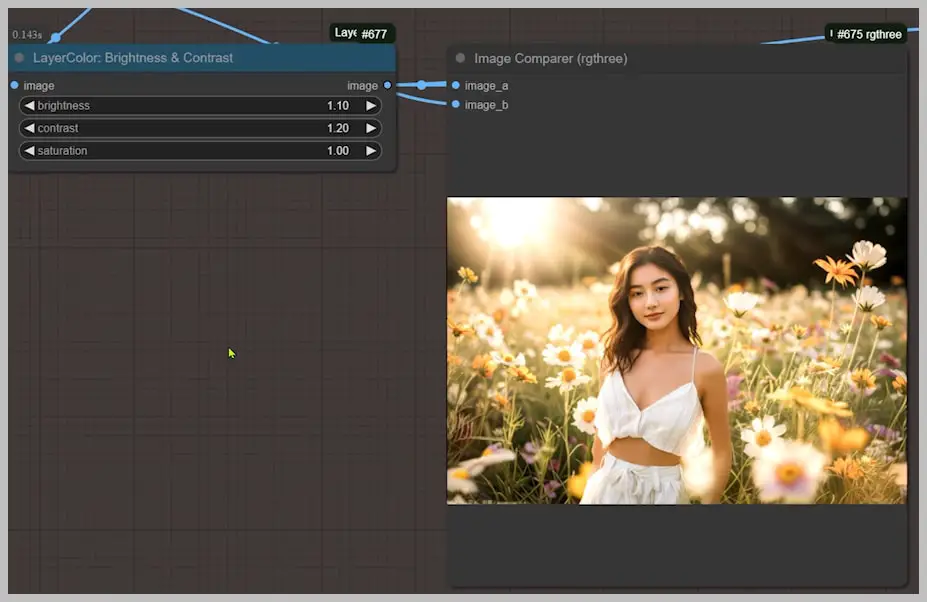
3-Step Cleanup Process
- Contrast Rescue Mission
- Salvages lighting details IC-Light muted
- Background Time Machine
- Reintroduces original background elements
- Secret Sauce: Detail Transfer
- Image Detail Transfer Node:
- Start at blur_sigma=5
- Bump to higher if artifacts exist
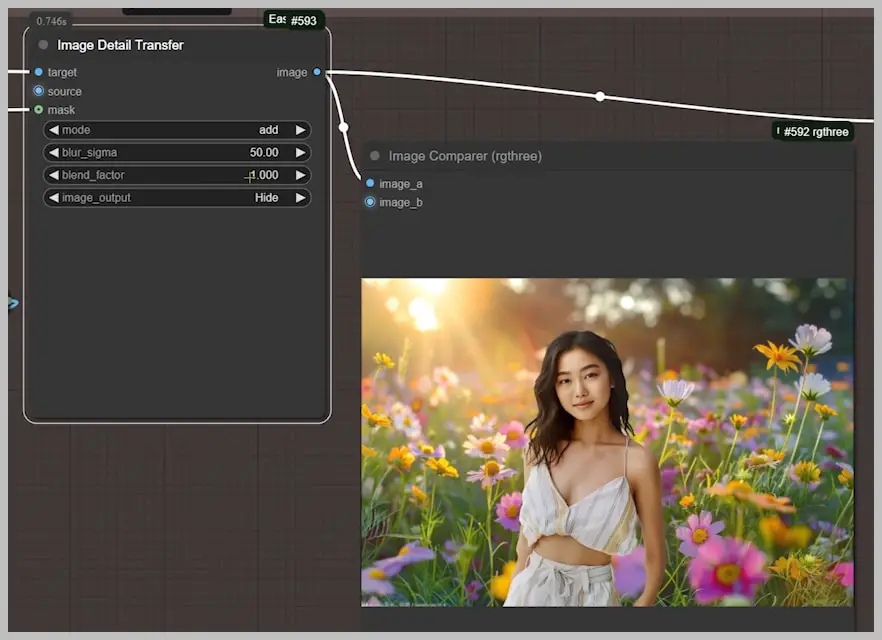
- Image Detail Transfer Node:
Node Group 5: Shadow Sculpting & Environmental Anchoring
Where Your Subject ‘Lands’ in the Scene
Goal: Fix awkward details and generate realistic shadows that ground your subject.
3-Step Shadow Crafting
- Fast Bypasser Prep
- Temporarily disable KSampler
- Run workflow
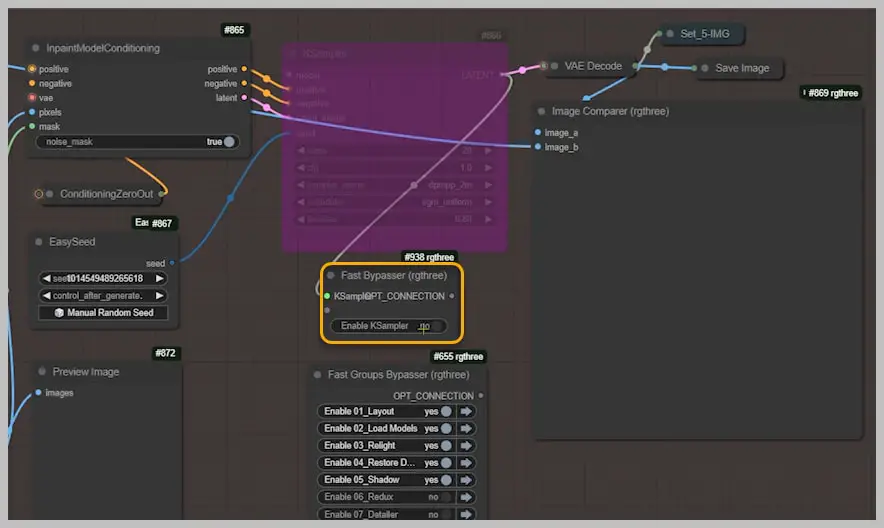
- Magic Marker Masking
- Paint problem areas (e.g., jagged arm edges)
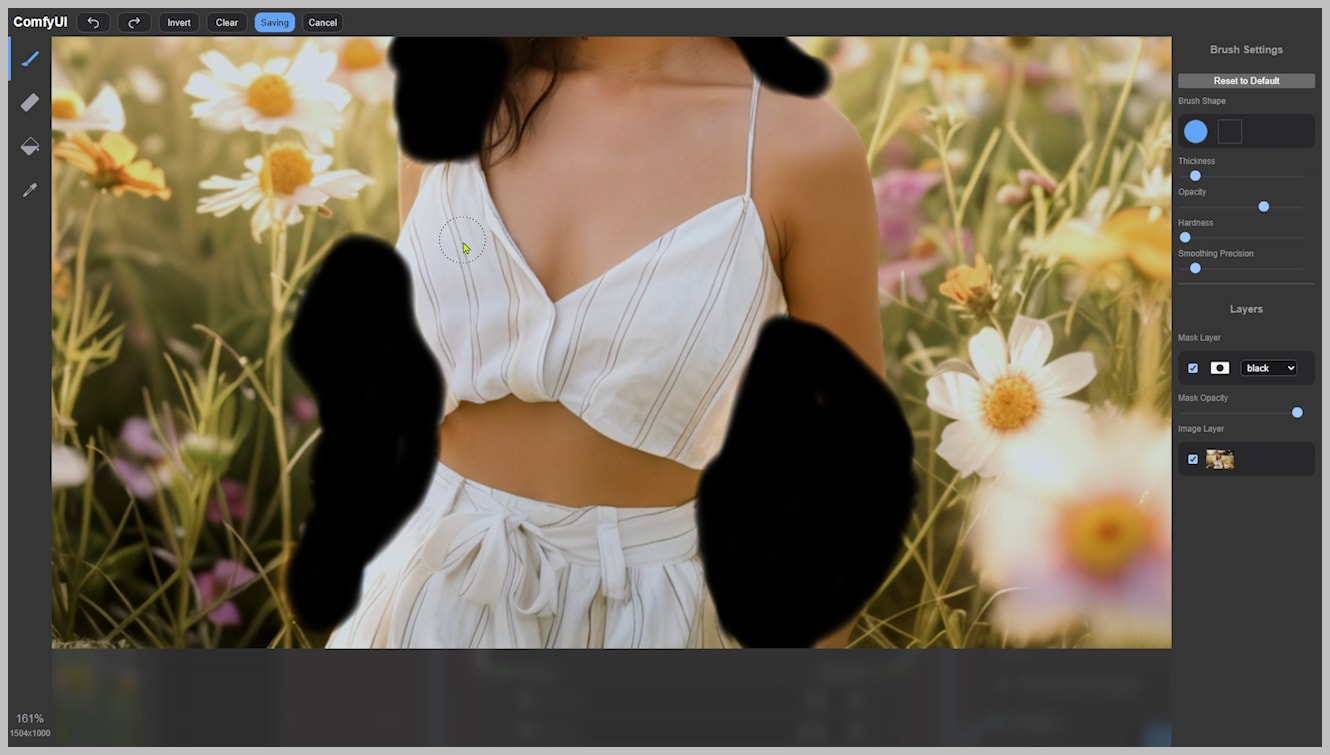
- Detail Generation
- Reactivate KSampler → Automatic detail rendering
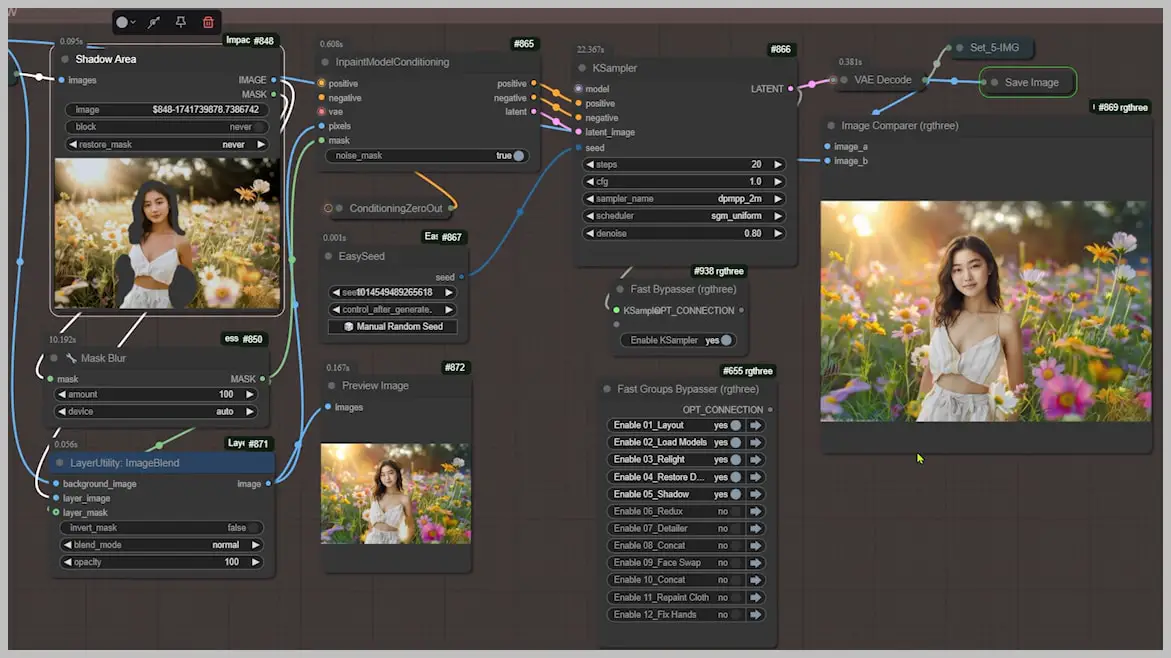
Real-World Results
- Arm Edge Fix: Blends forearm seamlessly into floral background
- Floor Shadow: Adds weight to feet (no “floating” effect)
- Hair Highlights: Backlight wraps naturally around strands
Node Group 6: Redux Repainting Revolution
Precision Control for Scene Reinvention
Two Critical Choices:
1. Redux Reference Image Selection
- Option A: Group 1 Output (Original Layout)
- Use Case: Reset to initial positioning
- Risk: Loses shadow/lighting work from Groups 3-5
- Option B: Group 5 Output (Shadow-Enhanced Image)
- Transcript Directive: “Always pick Option B” for realistic lighting continuity
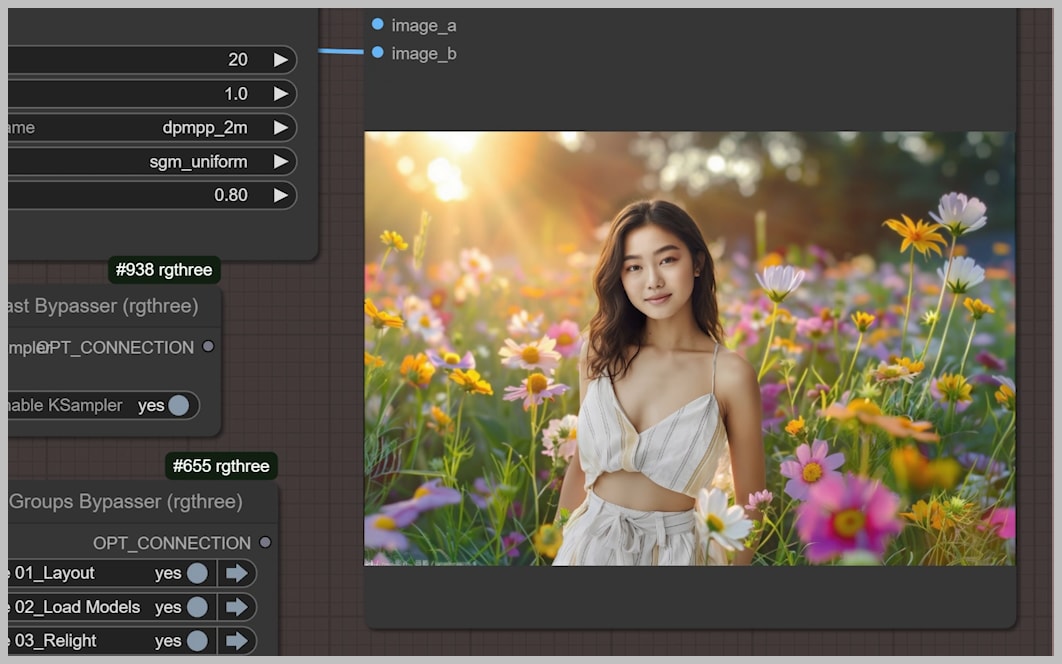
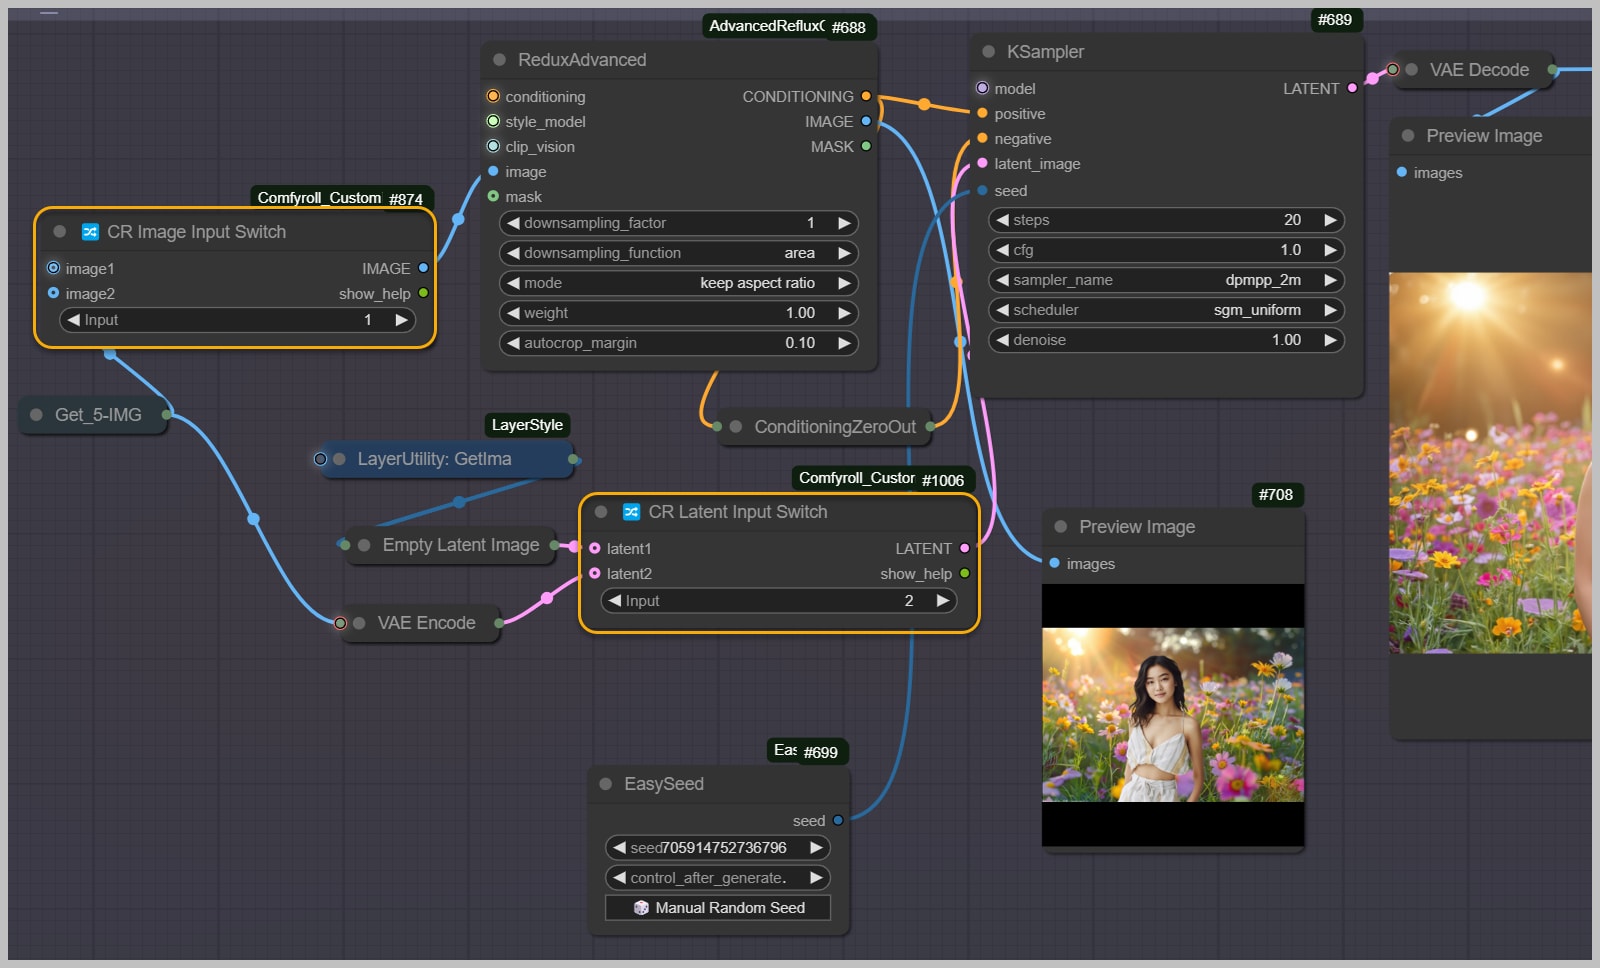
2. KSampler Latent Image Options
- Path 1: Empty Latent Image
- Denoising Strength: 1.0 (Total reinvention)
- Effect: Drastic pose/background changes (e.g., sitting → standing)
- Path 2: Group 5 Image
- Denoising Strength: 0.3-0.7 (Controlled tweaks)
- Effect: Preserves composition while refining textures/edges
Workflow Walkthrough
- Test Path 1 (Empty Latent):
- Set denoising=1 → Run workflow
- Result: Radical transformation (e.g., beach → neon cityscape)
- Switch to Path 2 (Group 5 Image):
- Set denoising=0.5 → Rerun
- Result: Keeps 90% of prior work but:
- Fixes lighting gradients
- Sharpens eroded details
- Trade-off: Face distortions occur (fixed in Group 7)
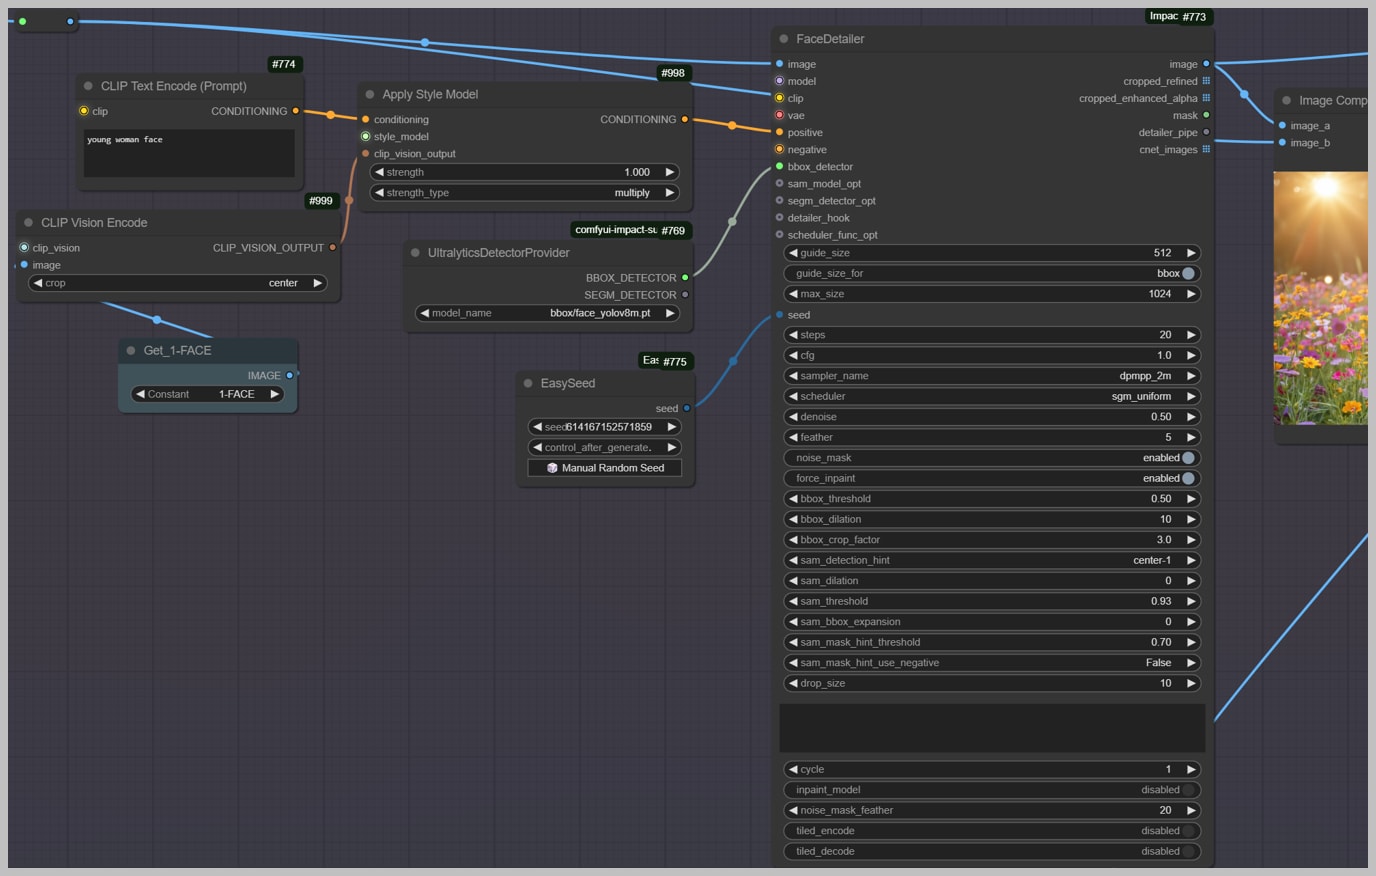
Node Group 7: Facial Fidelity Rescue Squad
Re-Anchoring Faces to Source Likeness
Goal: Fix Redux-induced facial distortions while preserving environmental lighting.
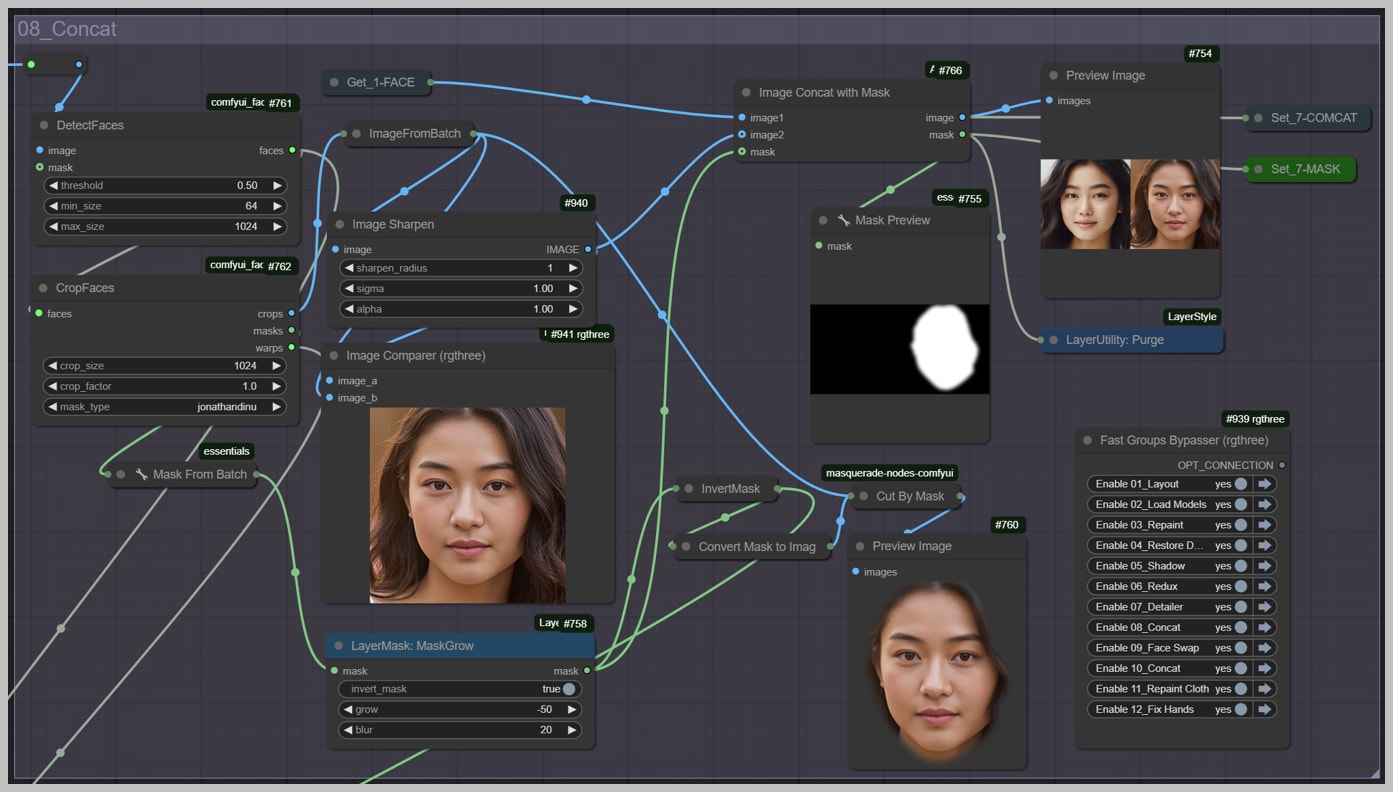
Node Group 8: Face Fusion Control Center
Seamless Original/Generated Face Hybrids
Goal: Merge the source portrait’s face with Redux-adjusted features without seams or style breaks.
3-Step Merge Protocol
- Surgical Stitching
- Combines:
- Original face (Group 1)
- Redux-adjusted face (Group 7)
- Combines:
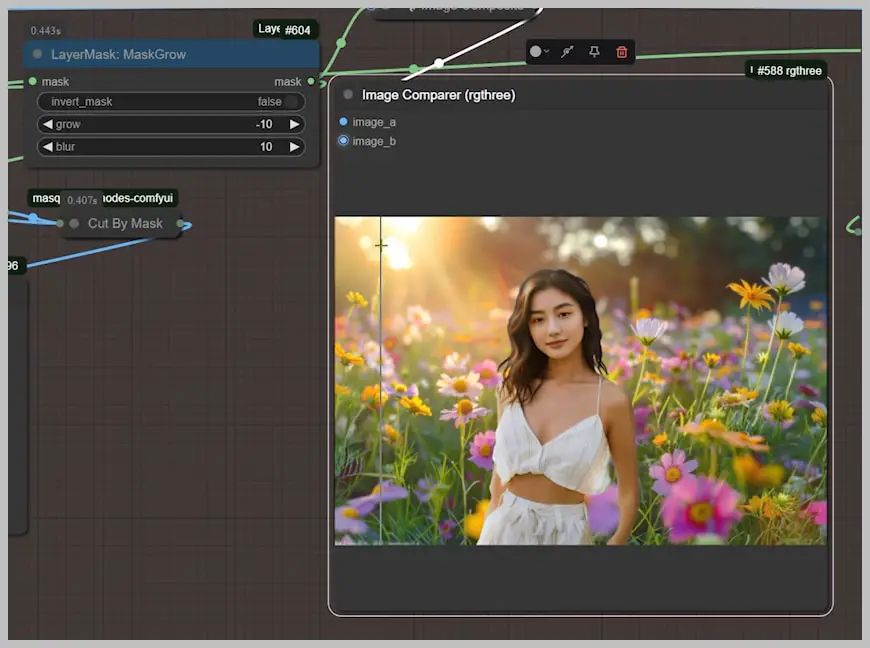
- Precision Mask Growing
- MaskGrow Node: Pro Tip: “Expand mask 20% beyond face edges – but don’t swallow the neck!”
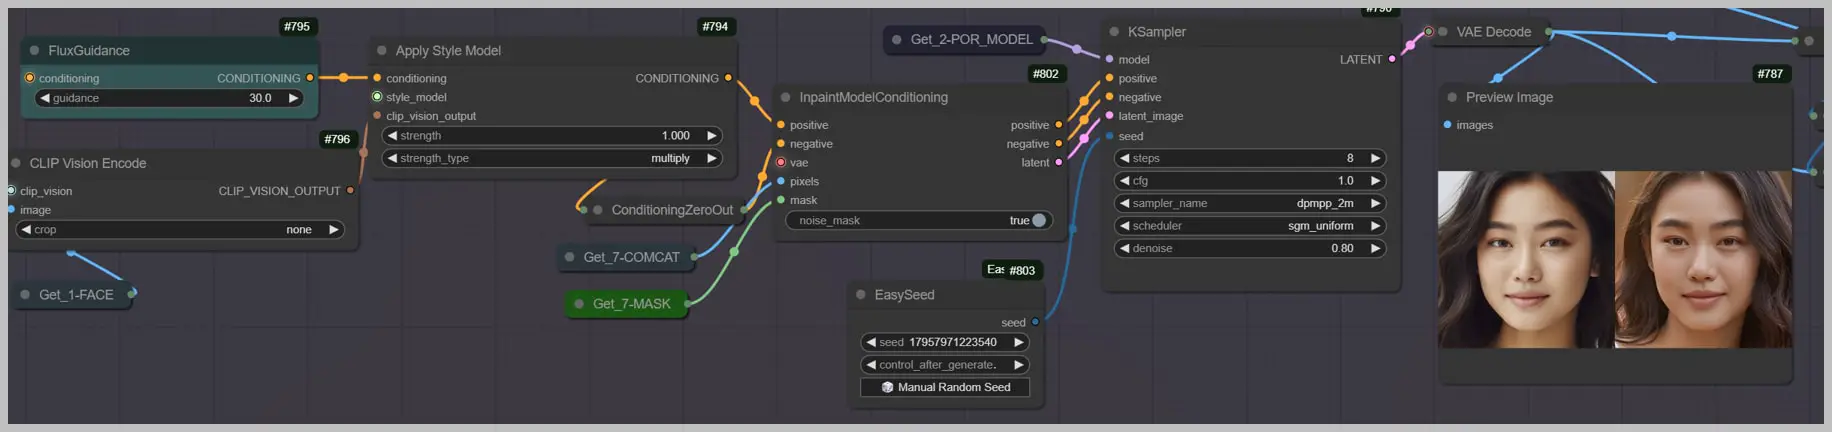
Node Group 9: ACE-Powered Identity Lock
Final Face Swap with Environmental Harmony
Goal: Swap faces while maintaining 99% source likeness and scene-appropriate lighting.
3-Step ACE Protocol
- Fill Model Activation
- Paired with ACE Portrait LoRA
- Default:
denoising_strength=0.8(ideal lighting balance)
- Nuclear Option
- Set
denoising_strength=1when:- Facial features drift (<95% similarity)
- Eyes/nose lose definition
- Set
- Seed Roulette
- Hit “Manual Random Seed” 3-5 times → higher success rate in trials
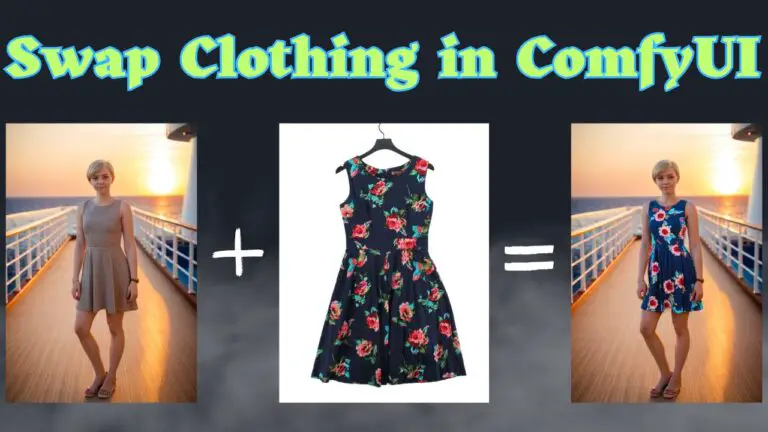
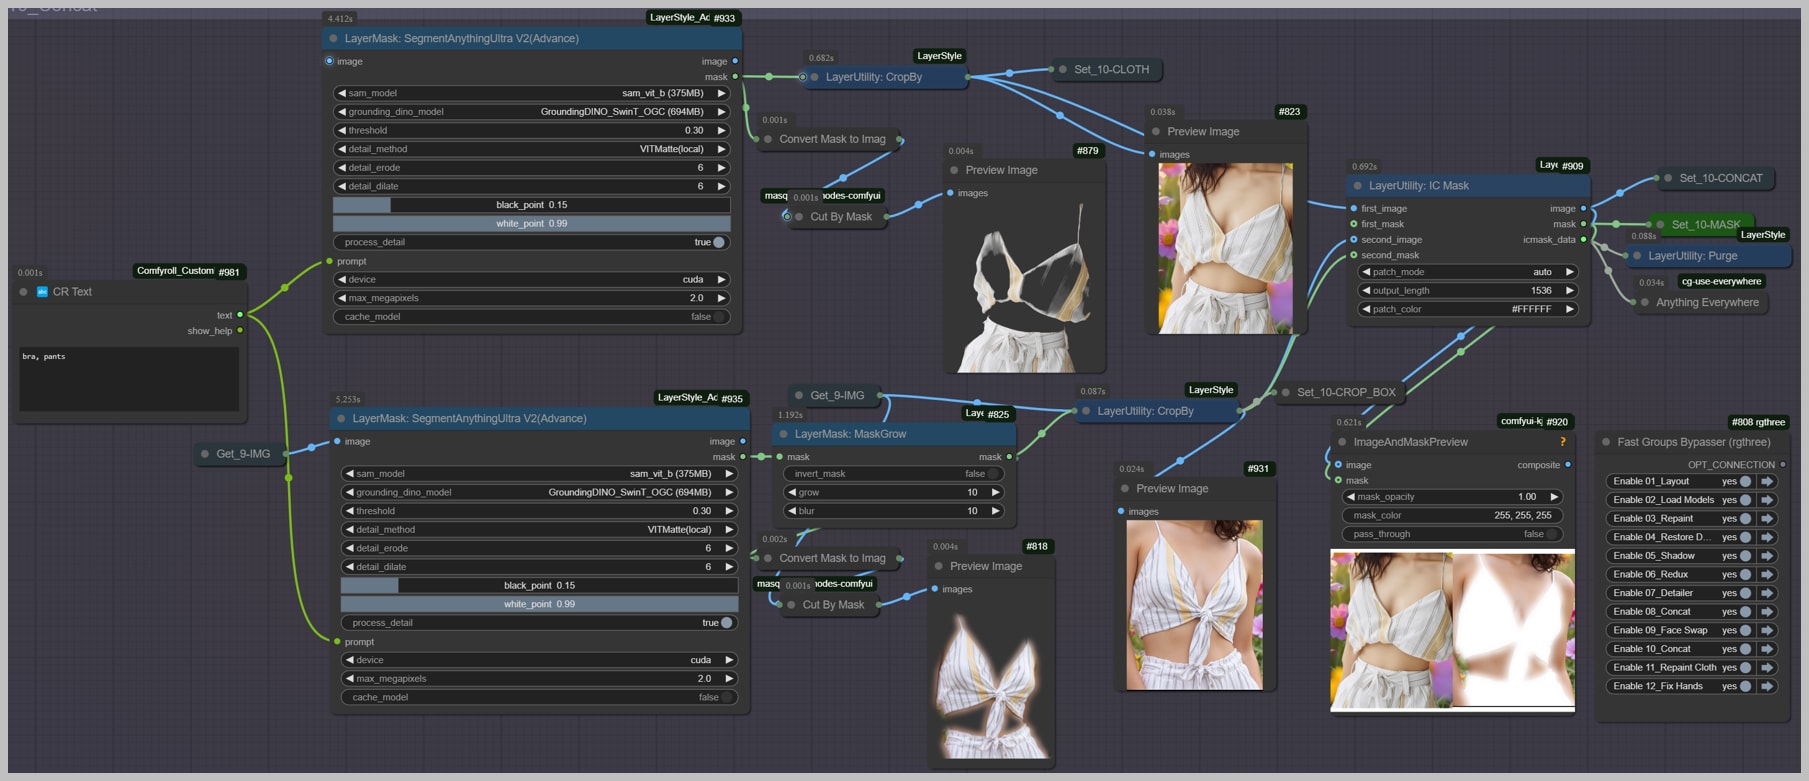
Node Group 10: SAM-Powered Garment Extraction
Precision Clothing Isolation for Style Integrity
Goal: Create pixel-perfect clothing masks while retaining original garment essence.
3-Step Garment Capture
- Outfit Verbal Blueprint
- Input detailed description:
- “Red cotton t-shirt with ‘Vintage’ white text”
- “Distressed jeans, knee rips, 90s wash”
- Critical: Mention logos/textures → SAM uses these as anchors
- Input detailed description:
- SAM-Powered Mask Generation
Segment Anything Modelnodes:
- Stitching
- Stitching clothing images using
IC Masknode:
- Stitching clothing images using
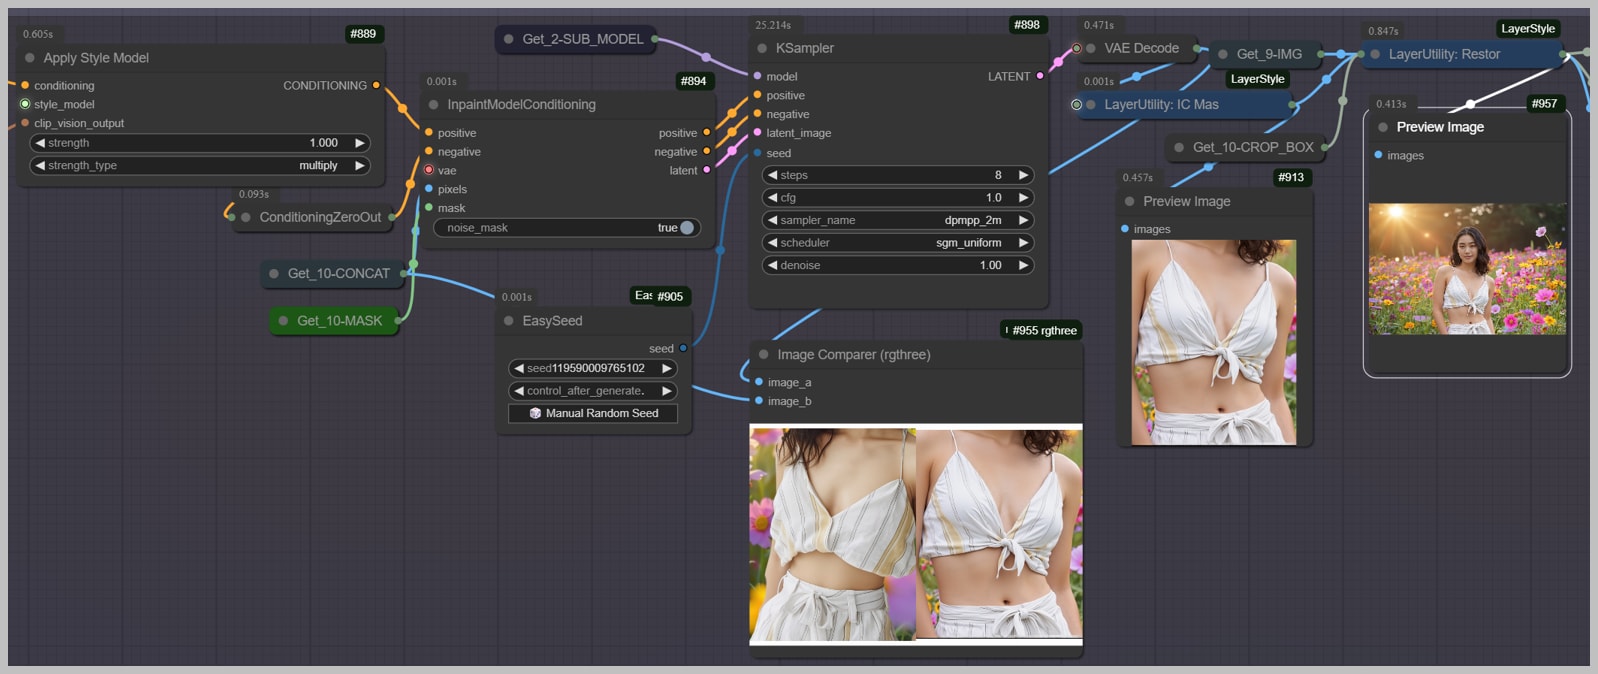
Node Group 11: Clothing Transplant & Final Match Check
Where Repainted Clothes Meet Original Precision
Goal: Blend repainted clothing seamlessly using the same crop/paste technique from face swaps.
3 Simple Steps
- Run Workflow →
- Generates repainted clothing based on Group 10’s mask
- Crop & Paste:
- Isolate repainted area → Paste onto original image
- Uses same method as Group 9’s face swap
- Compare Results:
- Toggle comparison node → See near-perfect clothing match
Node Group 12: Fix Hands
Optional hand refinement for images requiring detailed appendage correction.
Conclusion
This workflow transforms intimidating scene integrations into a logical, two-stage journey. Whether you prioritize speed (stopping at Group 5) or perfection (unleashing Groups 6-12), you’ll maintain face/clothing authenticity while achieving seamless environmental harmony. Follow for more ACE Plus deep dives – next week, we’re reinventing portrait lighting without a single camera!