Swap Faces with LoRA in ComfyUI for Super High Similarity (ComfyUI ADetailer Guide)
In a previous piece, I explored how to use the Adetailer extension and your own trained LoRA to swap faces for a person in images in A1111. Building on that knowledge, this article will delve into achieving a similar task in ComfyUI, enhancing the realism and fidelity of face swaps.
For those who love diving into Stable Diffusion with video content, you’re invited to check out the engaging video tutorial that complements this article:
Gain exclusive access to advanced ComfyUI workflows and resources by joining our community now!
Preparation
Ensure you have a trained LoRA model ready. If you’re unfamiliar with training LoRA, revisit how to train a LoRA for a comprehensive guide.
The purpose here is singular: to utilize the LoRA to create a face with high resemblance to the subject and seamlessly integrate it onto any body, achieving true AI-enhanced photography.
Installing the Necessary Custom Nodes
Before we dive in, installation of two essential custom nodes in ComfyUI is required:
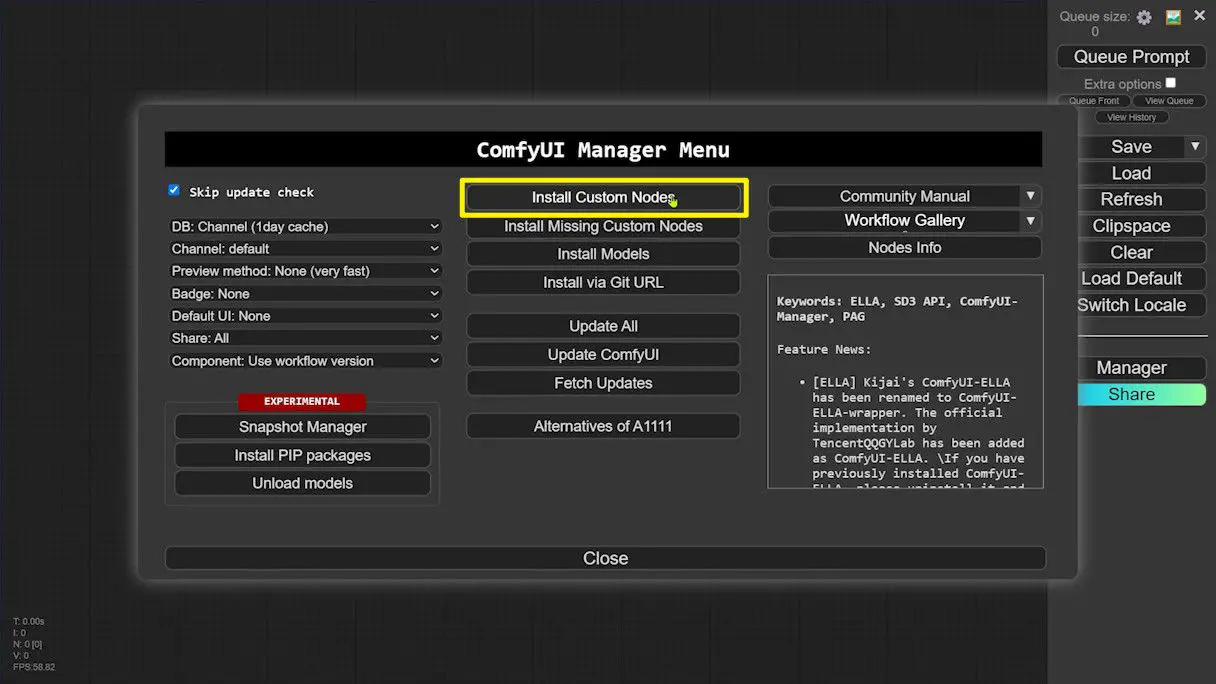
1️⃣Navigate to ComfyUI and access the ComfyUI Manager.
2️⃣Select the “Install Custom Nodes” button.
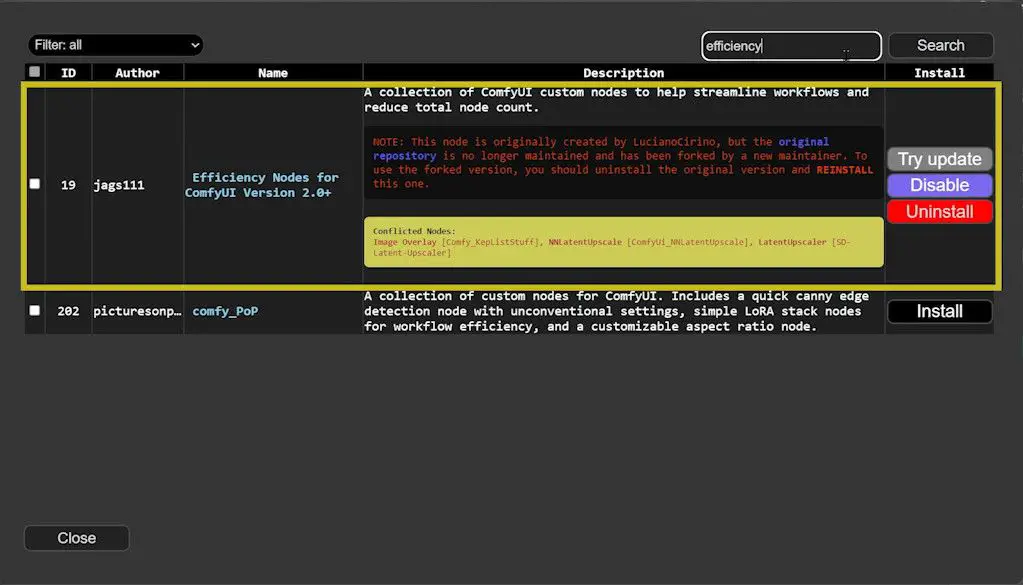
3️⃣Search for and install the “Efficiency Nodes”.
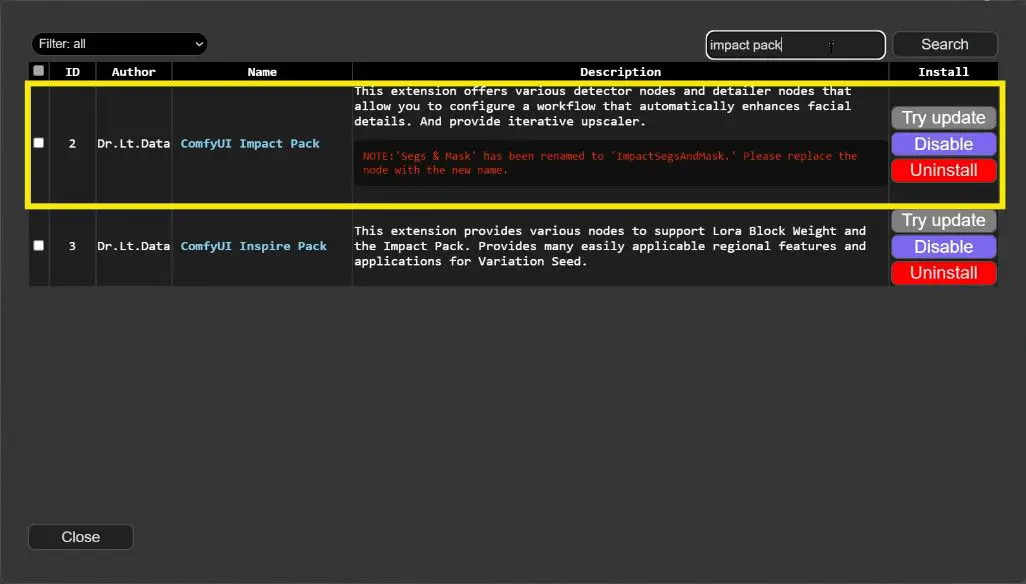
4️⃣Continue your search for “ComfyUI Impact Pack” and install it.
5️⃣Restart ComfyUI to ensure all nodes are fully integrated.
Build the Base Workflow
Setup Workflow
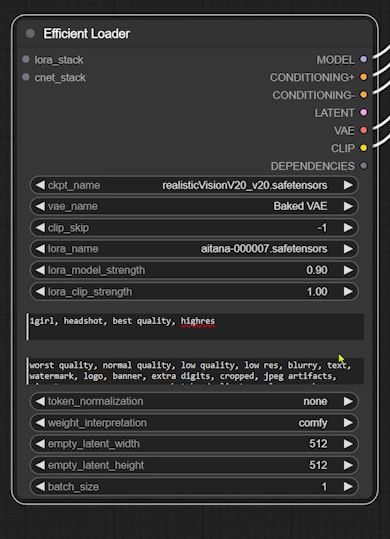
1️⃣Open the search bar, type “eff.”, and select “Eff. Loader SDXL” — this node facilitates loading checkpoints, VAEs, prompts, and setting image sizes.
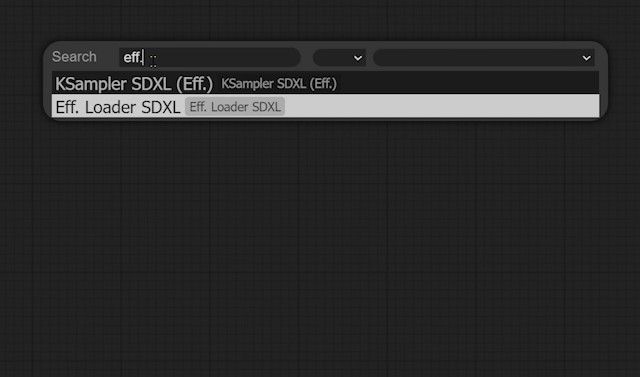

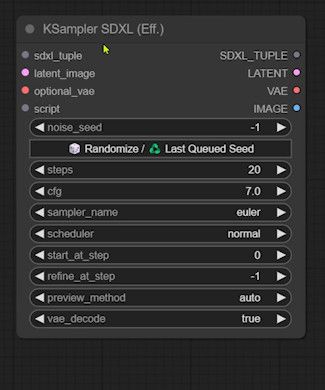
2️⃣Re-open the search bar, type “eff.” again, and choose “KSampler SDXL” as your KSampler.
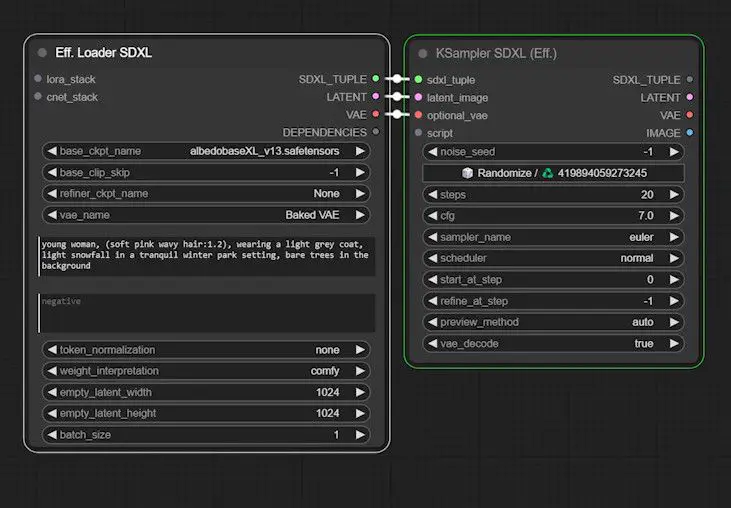
3️⃣Connect these nodes and configure the checkpoint and prompt appropriately.
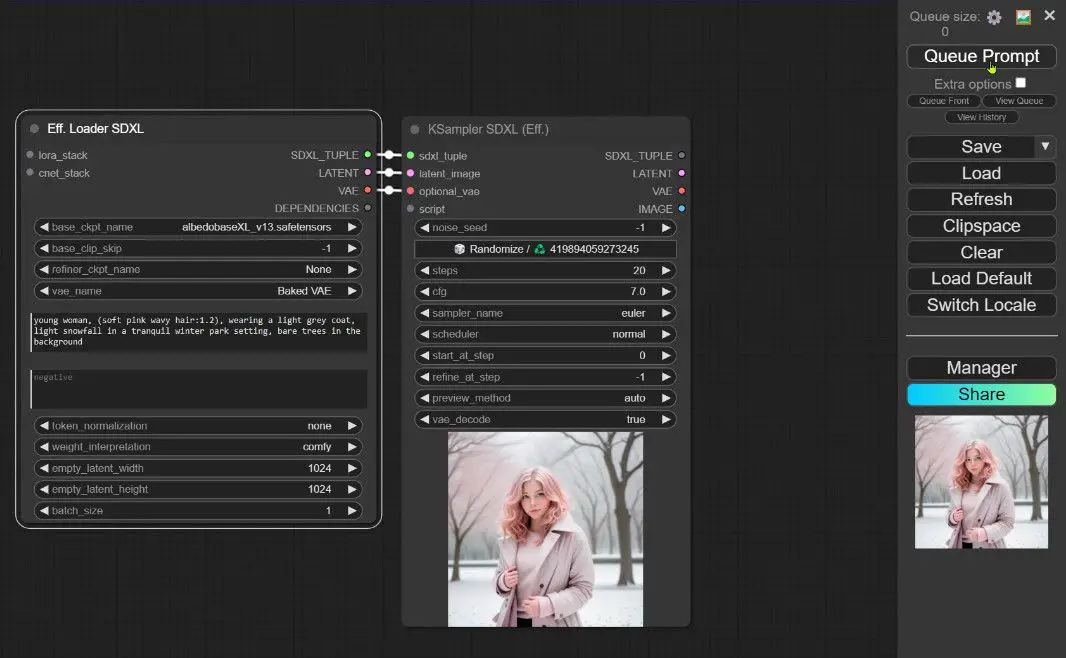
Run and Test the Image
4️⃣Execute the workflow and examine the generated image for accuracy.
Add the Face Swap Module
Face Detection and Segmentation
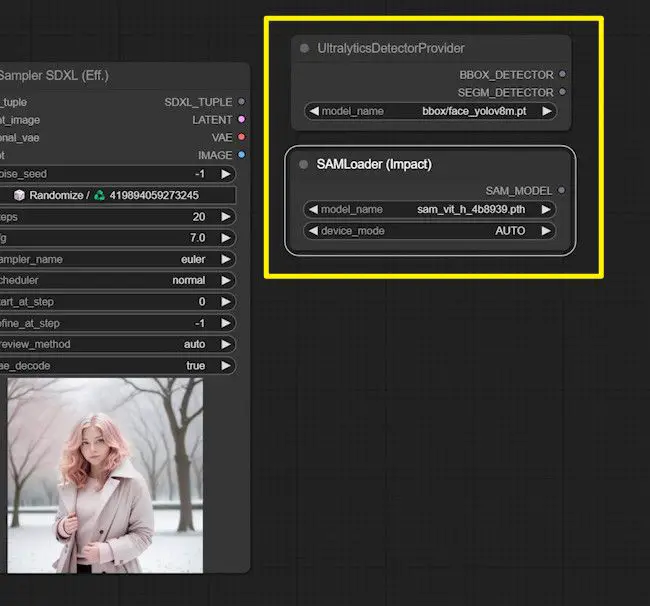
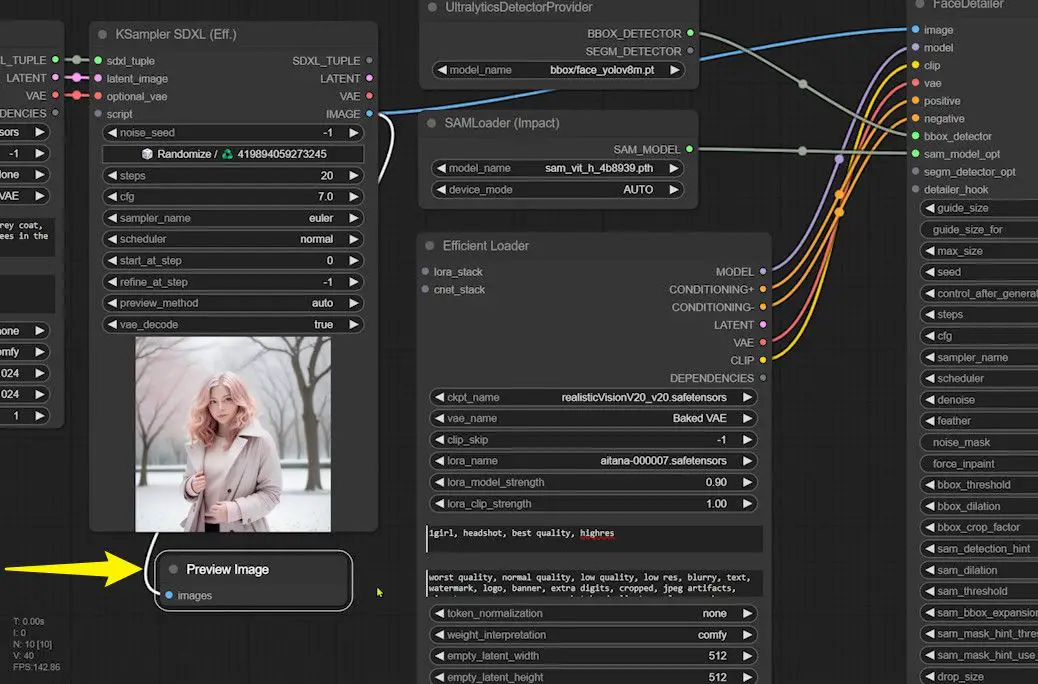
1️⃣Open the search bar, type “ultra”, and select “UltralysticsDetectorProvider”, which offers models for detecting faces, hands, and bodies. Choose the model “bbox/face_yolov8m” for superior face detection.
2️⃣For image segmentation, search “samloader” and select “SAMLoader”, opting for the model containing the letter “h” for best performance.
Implementing a Face Swap
With the models ready, integrate a face swap capability:
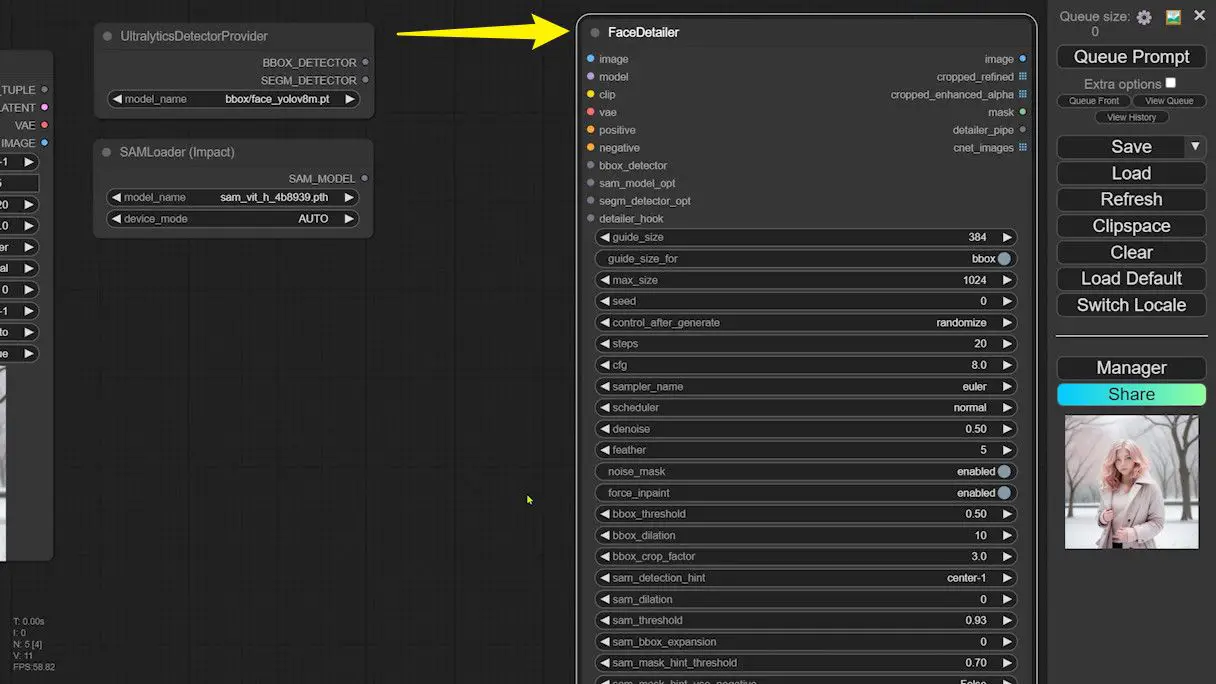
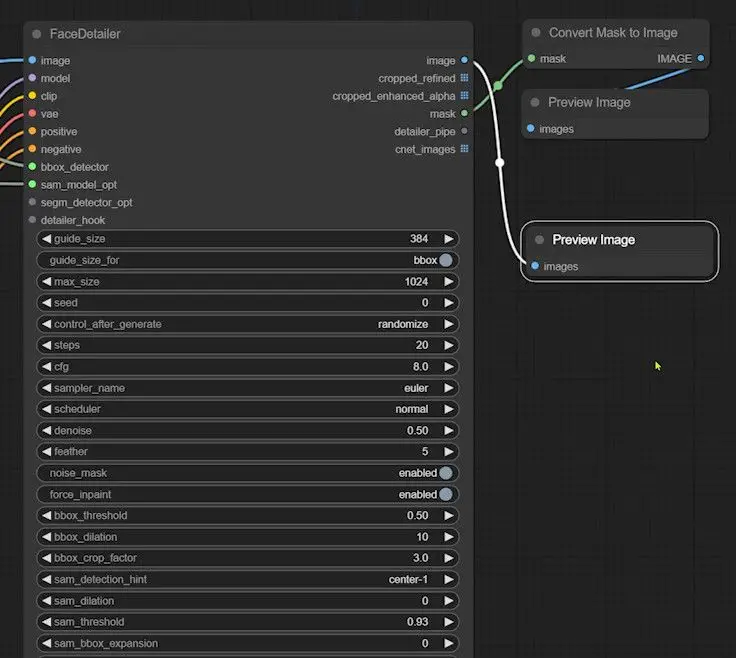
3️⃣Search for and add the “FaceDetailer” node, akin to the Adetailer in A1111.
4️⃣To facilitate using separate checkpoints and prompts, add another efficient loader compatible with SD1.5.
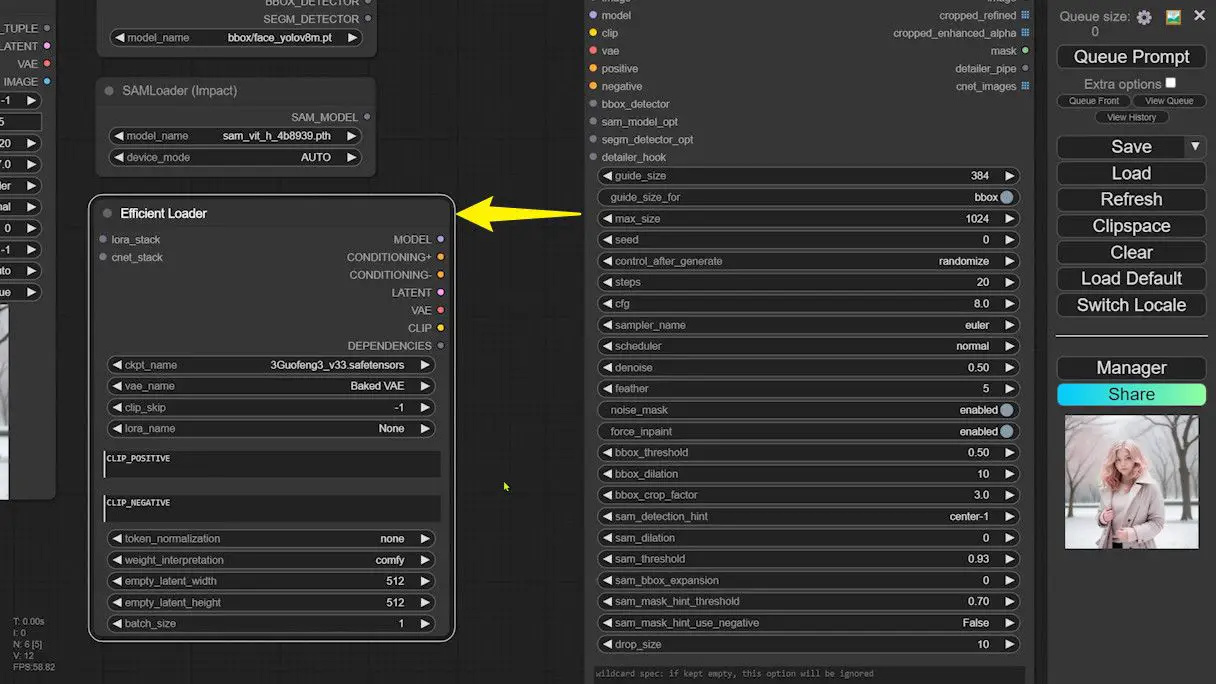
5️⃣Connect the image output from KSampler to the “FaceDetailer” input. Ensure “FaceDetailer” uses a different checkpoint by connecting it to the model output of the efficient loader. Connect all relevant face-handling nodes.
Setup and Preview
6️⃣Configure the necessary checkpoints and LoRAs for the FaceDetailer.
7️⃣Introduce a preview image node at the output of “FaceDetailer”.
8️⃣Attach a “Convert Mask to Image” node to the corresponding “mask” port.
9️⃣Position another preview image node to observe the processed face mask.
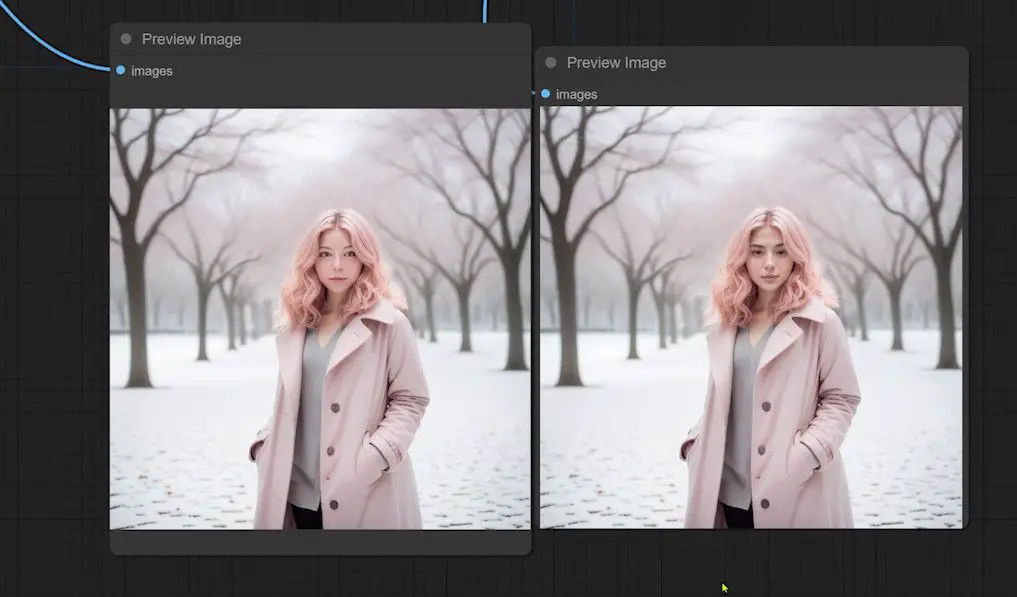
10. Place a Preview Image node at the KSampler Image Output of SDXL to compare before-and-after effects.
Finally, initiate the “Queue Prompt” and await your results.
Adjustments and Optimizations
Should any discrepancies arise in the face swap, modify “FaceDetailer” settings—like increasing “feather” for smoother transitions or adjusting “bbox_crop_factor” for better cropping.
Conclusion
This tutorial equips you with the essentials for executing sophisticated face swaps using LoRA in ComfyUI. As you embark on your AI photography journey, leverage these techniques for enhanced realism. If this guide proves useful, please like, follow, and stay tuned for more insights.