Easy Background Replacement Using Flux ControlNet Depth Model
Welcome back, creative minds! In this article, we’ll dive into a new and simplified workflow for replacing backgrounds using the Flux ControlNet Depth model. This approach is a more streamlined version of my previous background-changing method, which was based on the Flux model. Although the old workflow was powerful, it was quite complex and ran slowly. Today, we’ll explore a faster and easier alternative.
You’re also invited to check out the engaging video tutorial that complements this article:
Gain exclusive access to advanced ComfyUI workflows and resources by joining our community now!
Here’s a mind map illustrating all the premium workflows: https://myaiforce.com/mindmap
Run ComfyUI with Pre-Installed Models and Nodes: https://youtu.be/T4tUheyih5Q
What’s New in the Flux ControlNet Depth Model?
The biggest advantage of this new ControlNet model, developed by Jasper AI, is its compatibility with existing SDXL ControlNet nodes and samplers. You don’t need to install extra nodes, making it simpler to integrate into your current setup.
Key Benefits:
- Simpler Setup: No need for additional nodes.
- Improved Speed: Optimized node structure reduces processing time.
- Greater Flexibility: Works seamlessly with different background types.
Model Download
Before starting, download the Flux ControlNet Depth model from HuggingFace.
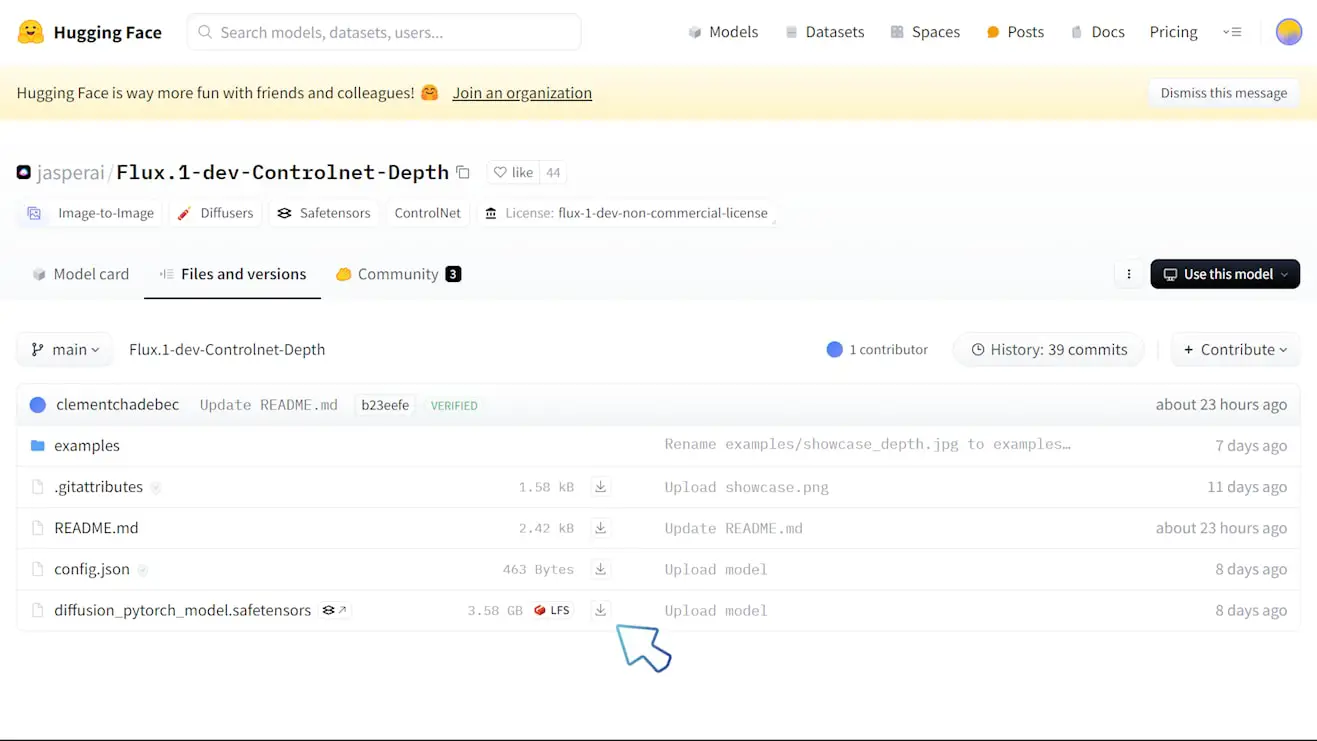
Once downloaded:
- Rename the file to
Flux.1-dev-Controlnet-Depth.safetensors. - Move it to your ControlNet model folder:
ComfyUI/models/controlnet.
If you encounter missing nodes, simply install them to ensure everything works smoothly.
Workflow Overview
This new workflow comprises three main groups:
- Image Scaling and Background Removal
- Depth Map Generation and Background Creation
- Replacing the Modified Subject with the Original One
With around 30 nodes, the workflow runs much faster. For example, on a 3090 GPU, it generates an image in roughly 1 minute. Using Hyper LoRA for 8-step image generation can speed up the process even further!
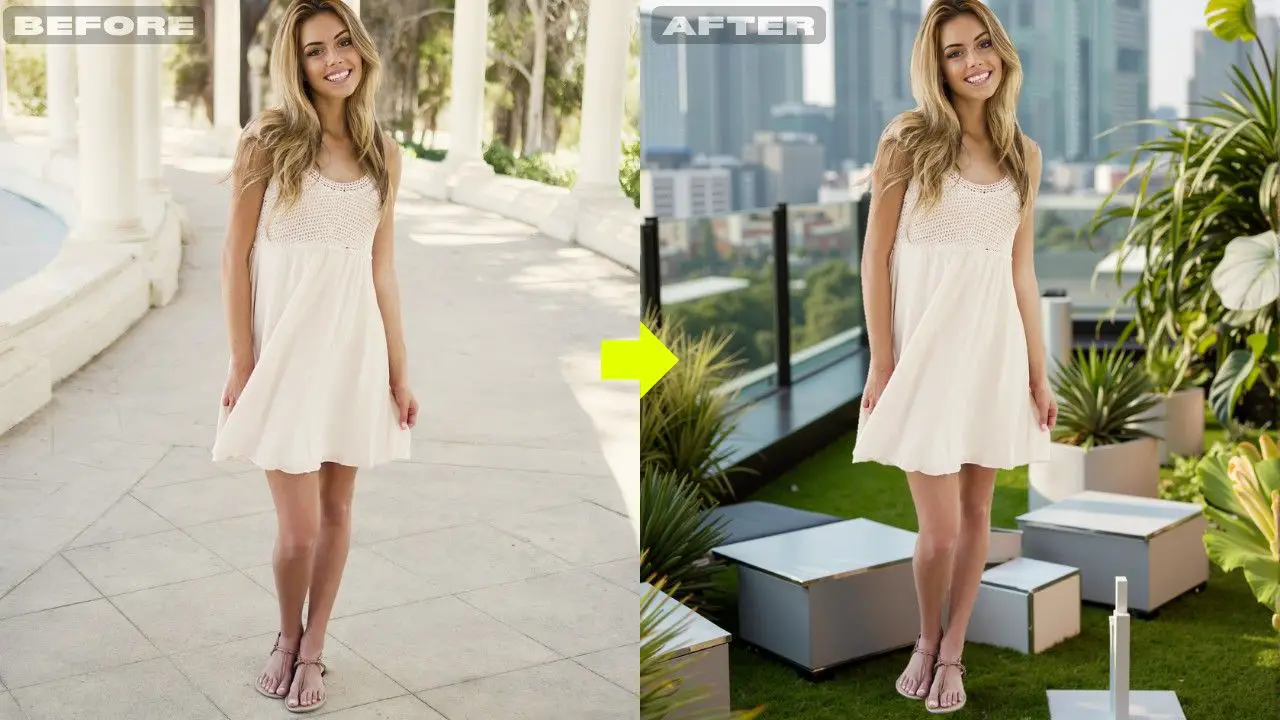
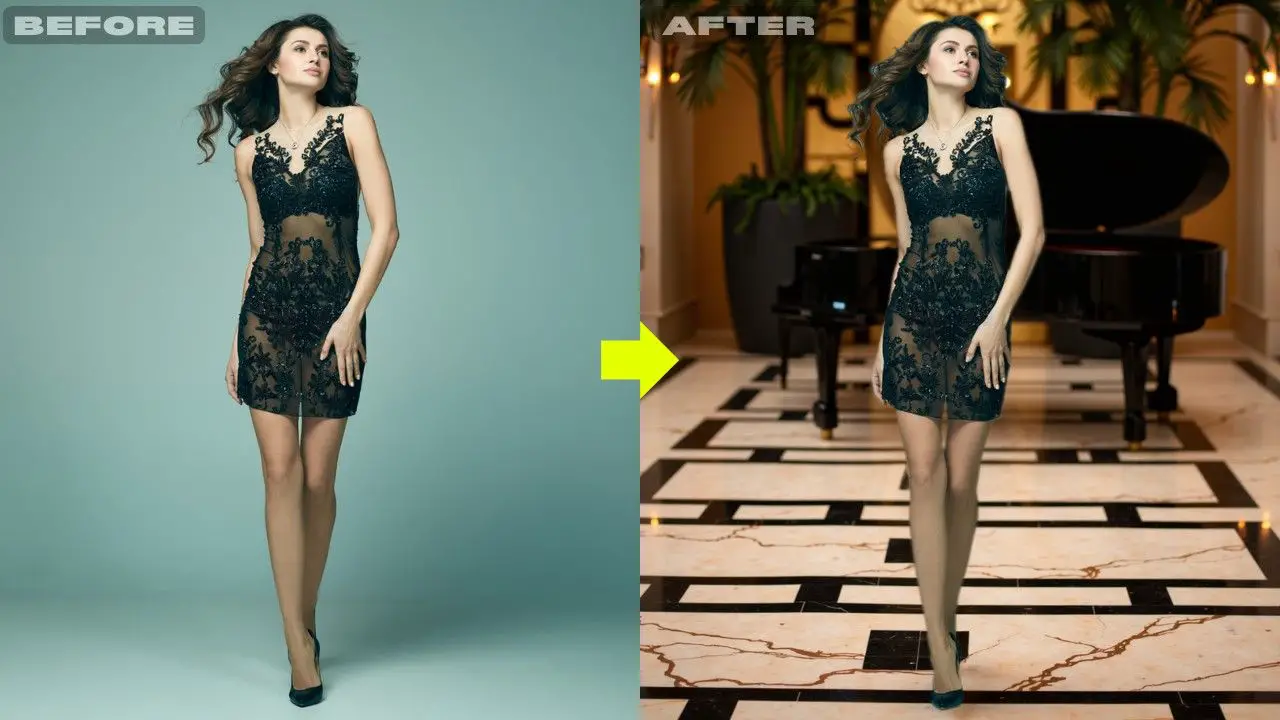
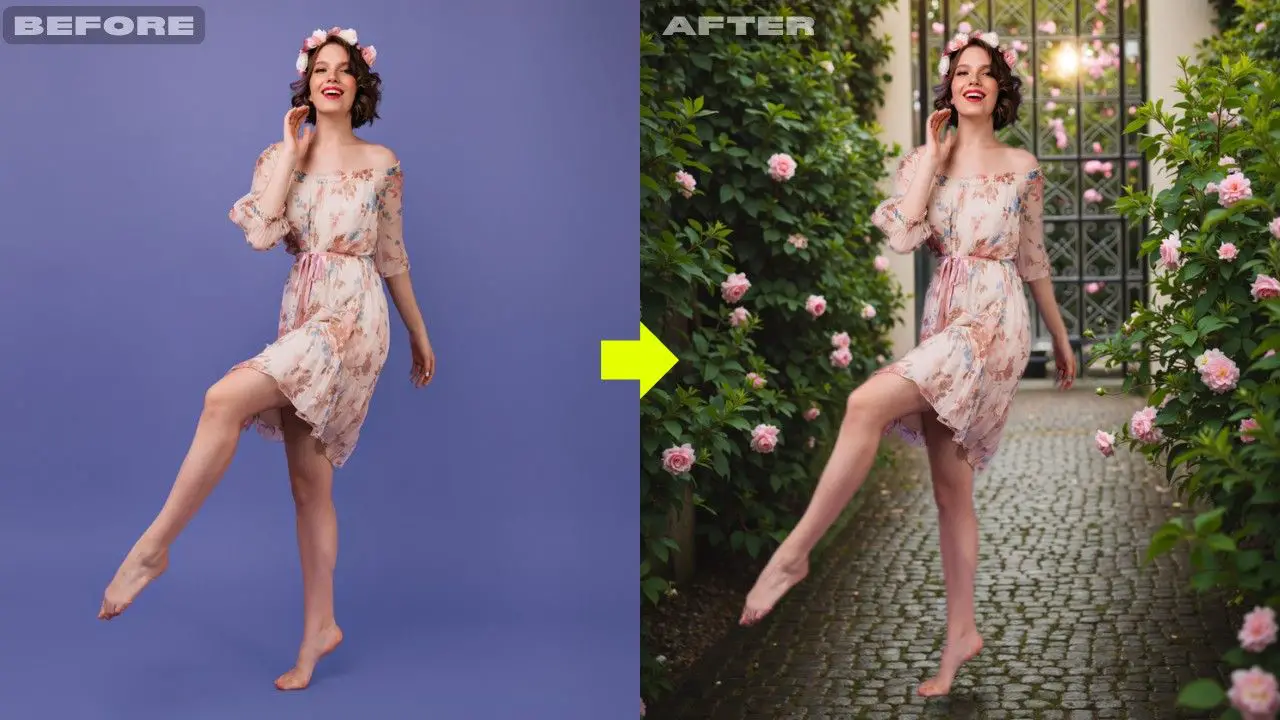
Let’s first look at the original images and the images with the background replaced using this workflow:
Workflow Download
You can find the download link for the complete workflow here. Make sure to have the ControlNet Depth model in place before using it.
Let’s go through each group step-by-step.
Group 1: Image Scaling and Background Removal
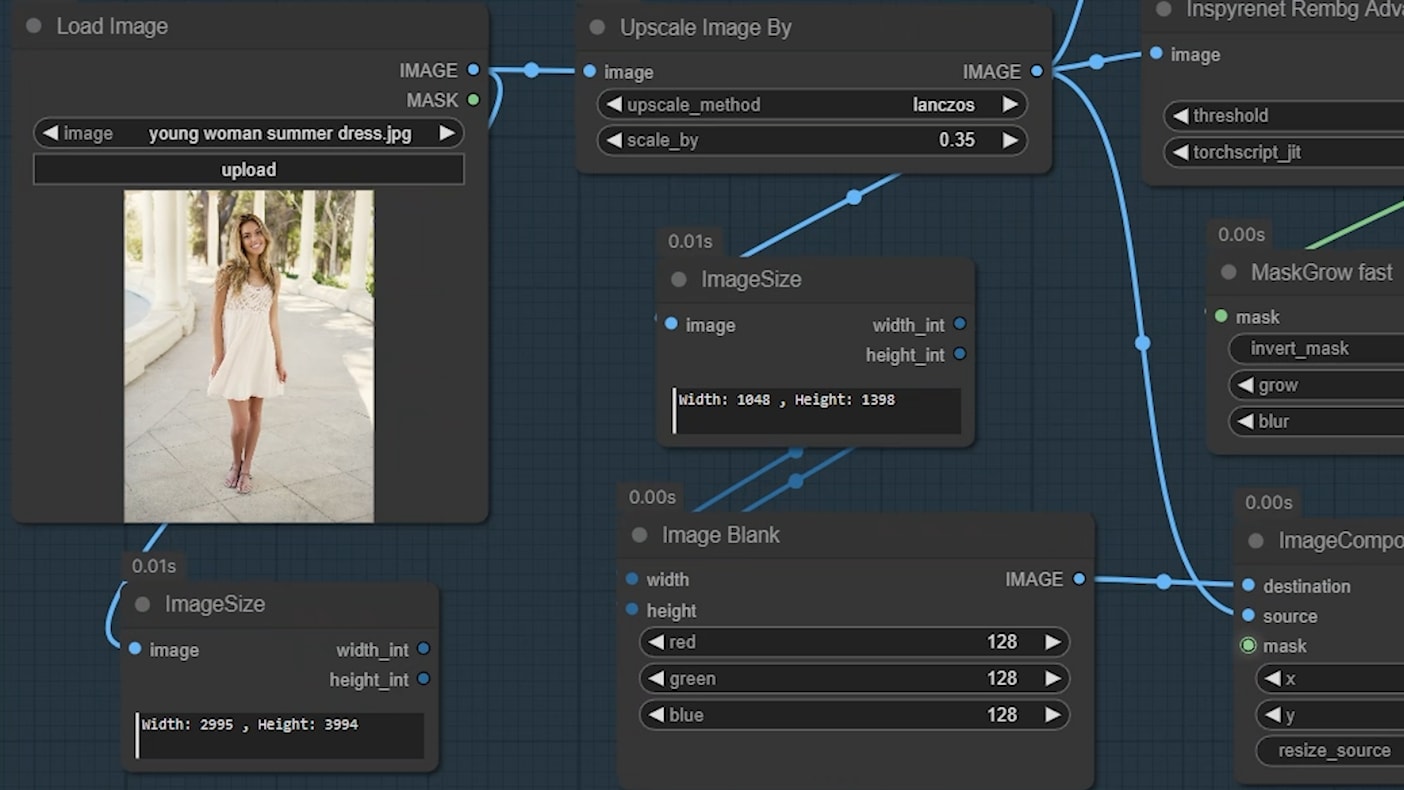
Step 1: Resizing the Image
The original image I uploaded was 2995 x 3994 pixels—much too large for the intended background. This could overload the GPU, so we need to downscale it.
- Use the ‘Upscale Image By’ node and set the scaling factor to 0.35, reducing the dimensions to 1048 x 1398 pixels.
Step 2: Using the ‘Anything Everywhere’ Node
- This node allows for cleaner connections between image inputs, avoiding cluttered node setups.
- The downsized image is linked to the ‘image_b’ port of the ‘Image Comparer’ node.
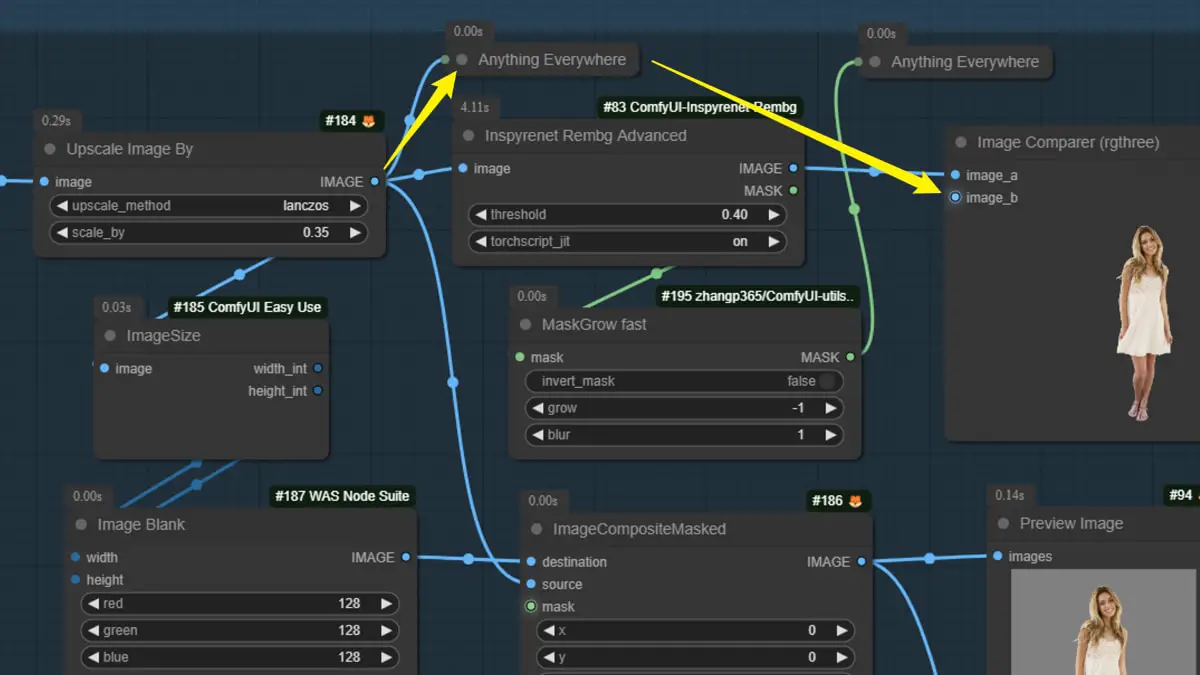
Step 3: Removing the Background
To isolate the subject:
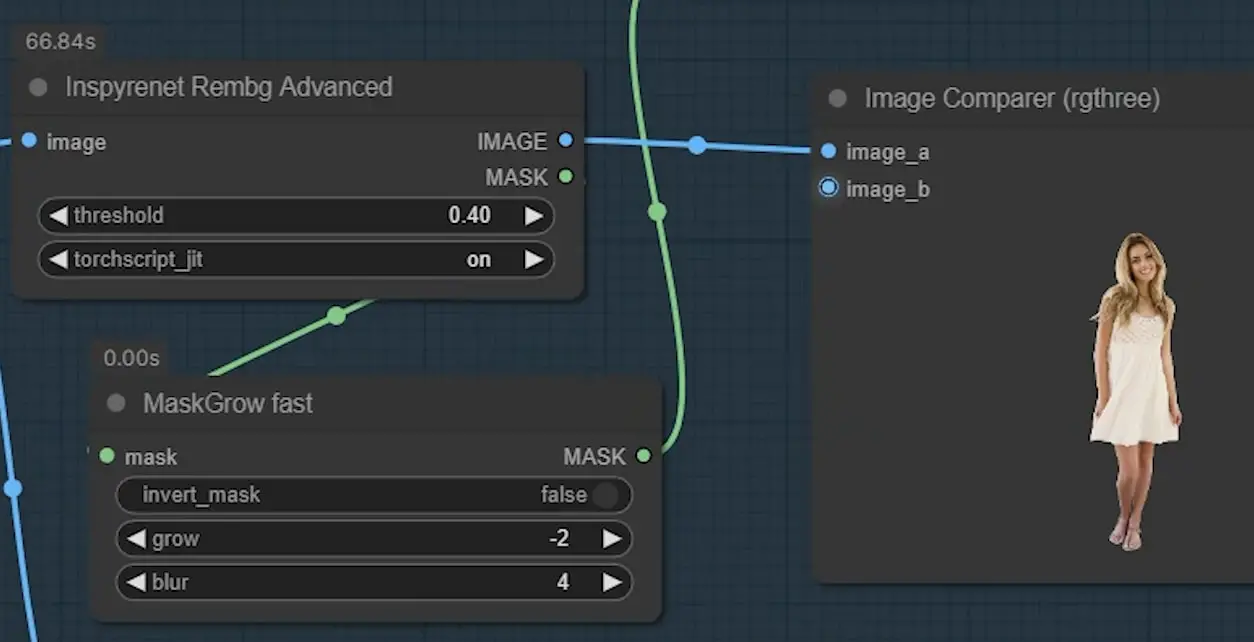
- Use the ‘Inspyrenet’ node to remove the original background.
- Adjust the threshold value depending on your image. Higher values will eliminate more of the background.
- This node also generates a mask, which will be useful for compositing later.
Step 4: Creating and Applying a Grey Background
- Use an ‘Image Blank’ node to generate a grey background.
- Set the RGB values for red, green, and blue to 128 each.
- Composite the masked subject onto the grey background using the ‘Image Composite Masked’ node.
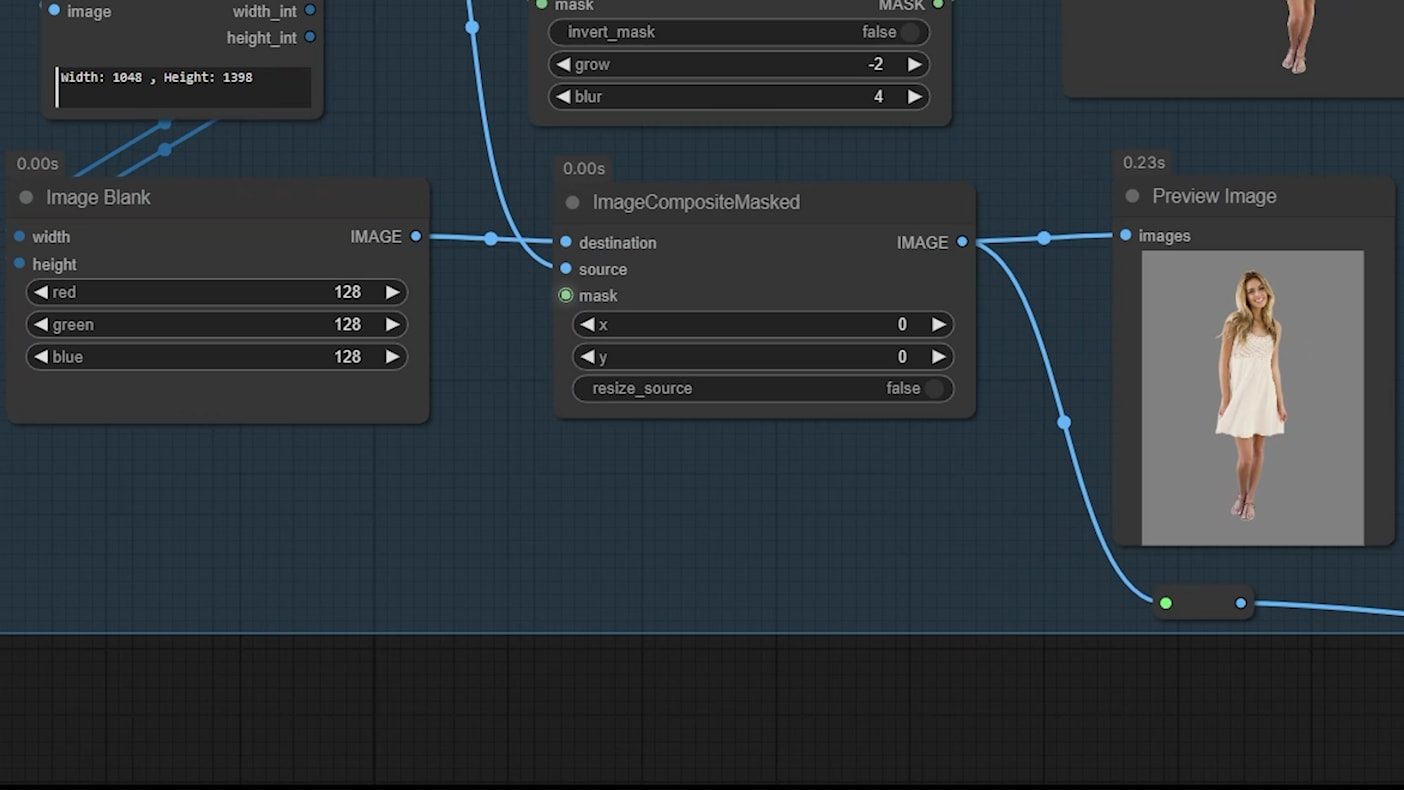
Fixing Rough Edges
- Often, a white border or rough edges appear around the subject. To refine:
- Use the ‘Mask Grow Fast’ node.
- Set a negative ‘grow’ value to remove the white edges.
- Adjust the ‘blur’ value to smooth out transitions.
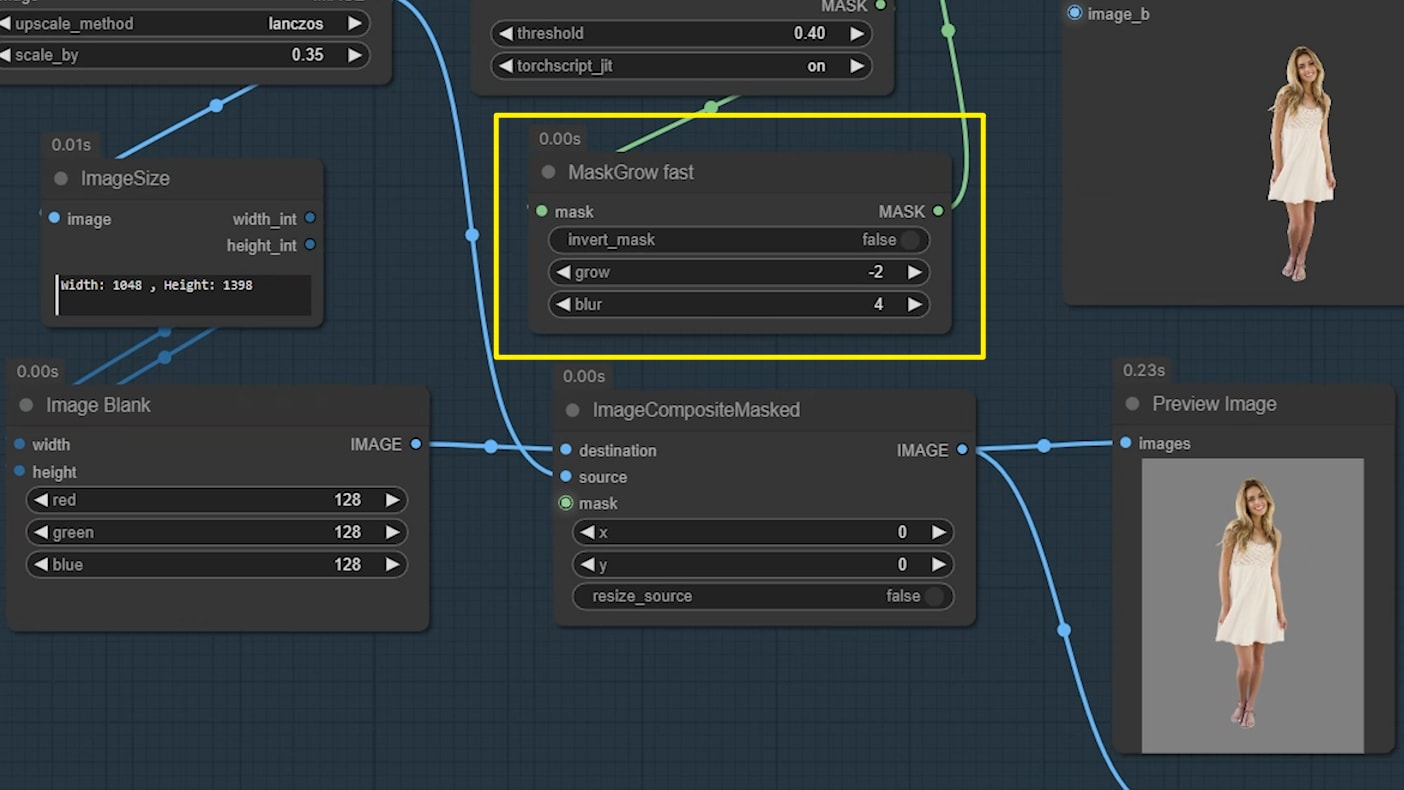
This completes the first group. The subject is now cleanly isolated on a grey background. Let’s move to the second group.
Group 2: Depth Map Generation and Background Creation
Step 1: Using the Flux ControlNet Depth Model
In this part, we’ll generate a depth map from the grey background image of the subject. The depth map will guide the ControlNet in maintaining the basic outline of the subject while creating a new background.
- Choose between the fp8 version or the GGUF version (if you’re low on VRAM).
- Write a prompt that matches the lighting in your original image.
- For example, if your image has soft sunset lighting, avoid using harsh midday light in your prompt.
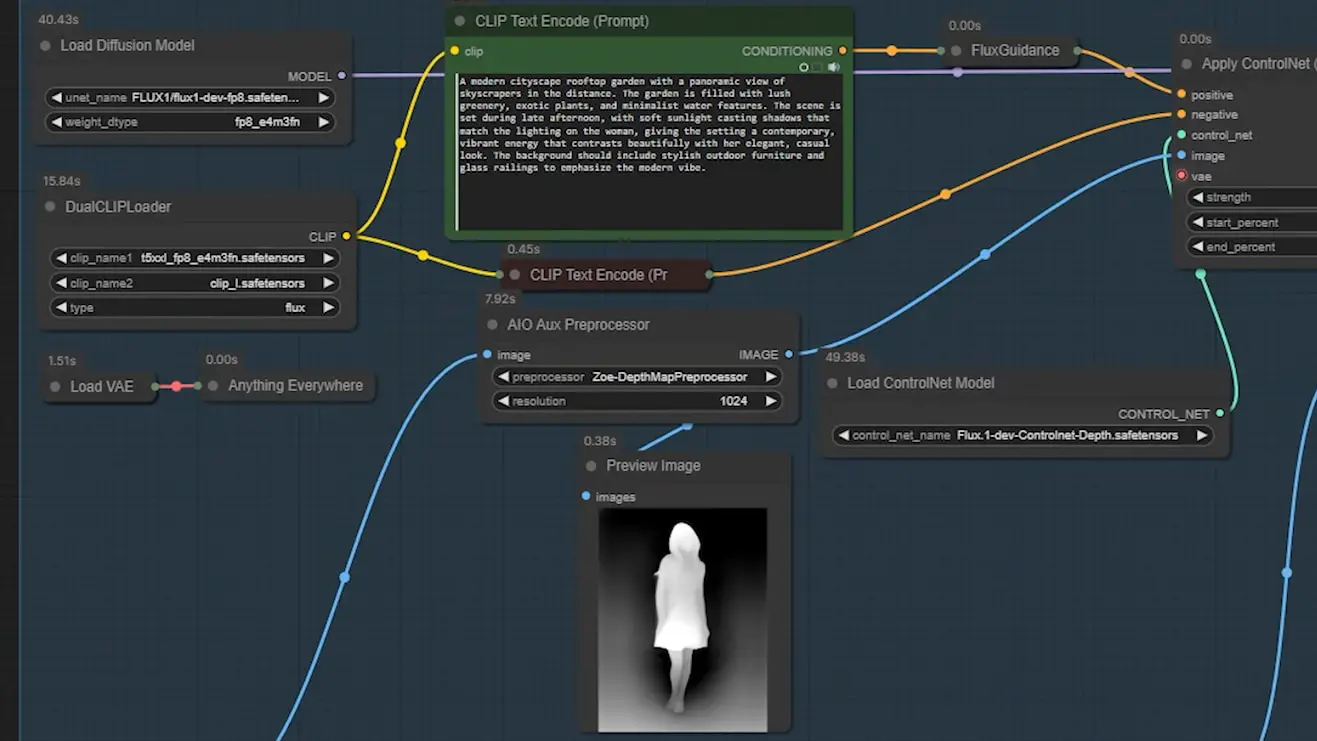
Step 2: Generating the Depth Map
- Apply the ‘AIO Aux’ preprocessor to the grey background image.
- Use the generated depth map to instruct ControlNet on where to place the subject’s outline.
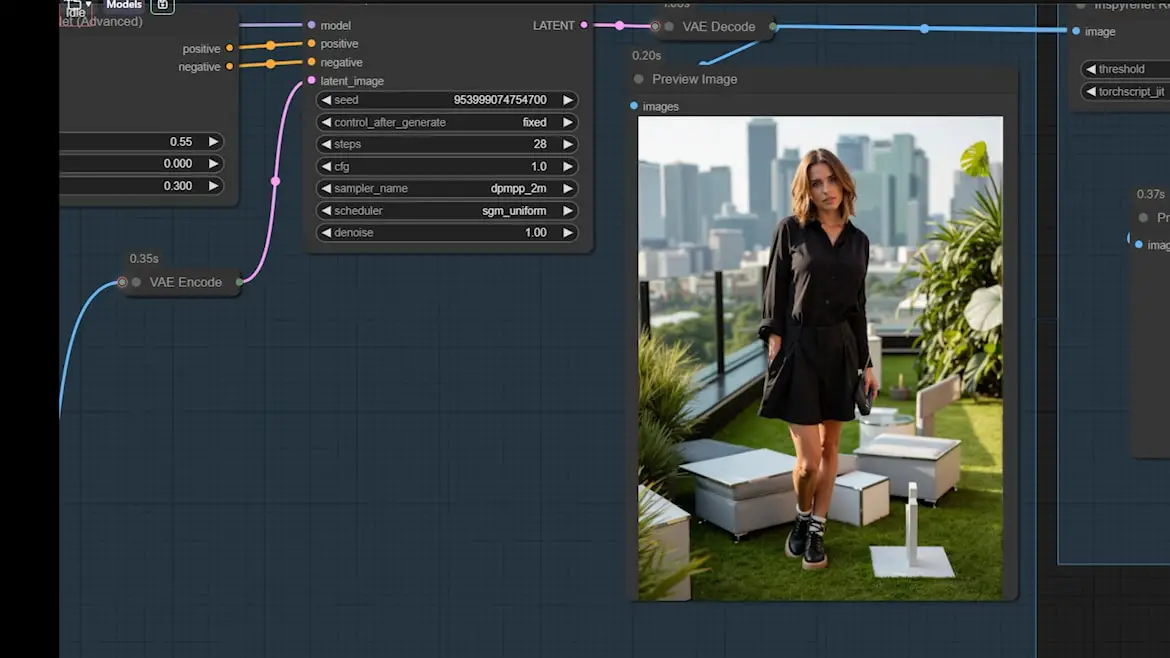
Tips for Sharper Backgrounds
The backgrounds created by Flux can appear slightly blurry. If you need sharper results, consider using a LoRA model for fine-tuning. This technique is covered in more detail in a previous article.
Group 3: Subject Replacement
Now that we have the new background, we need to place the original subject back into the image.
Step 1: Removing the Modified Subject
The main node here is the ‘Big Lama Remover’. It removes the subject from the generated background, creating an empty space where we’ll paste the original subject.
- Use the ‘Inspyrenet’ node again to create a mask for the removal process.
- Lower the threshold value to ensure the subject is completely erased.
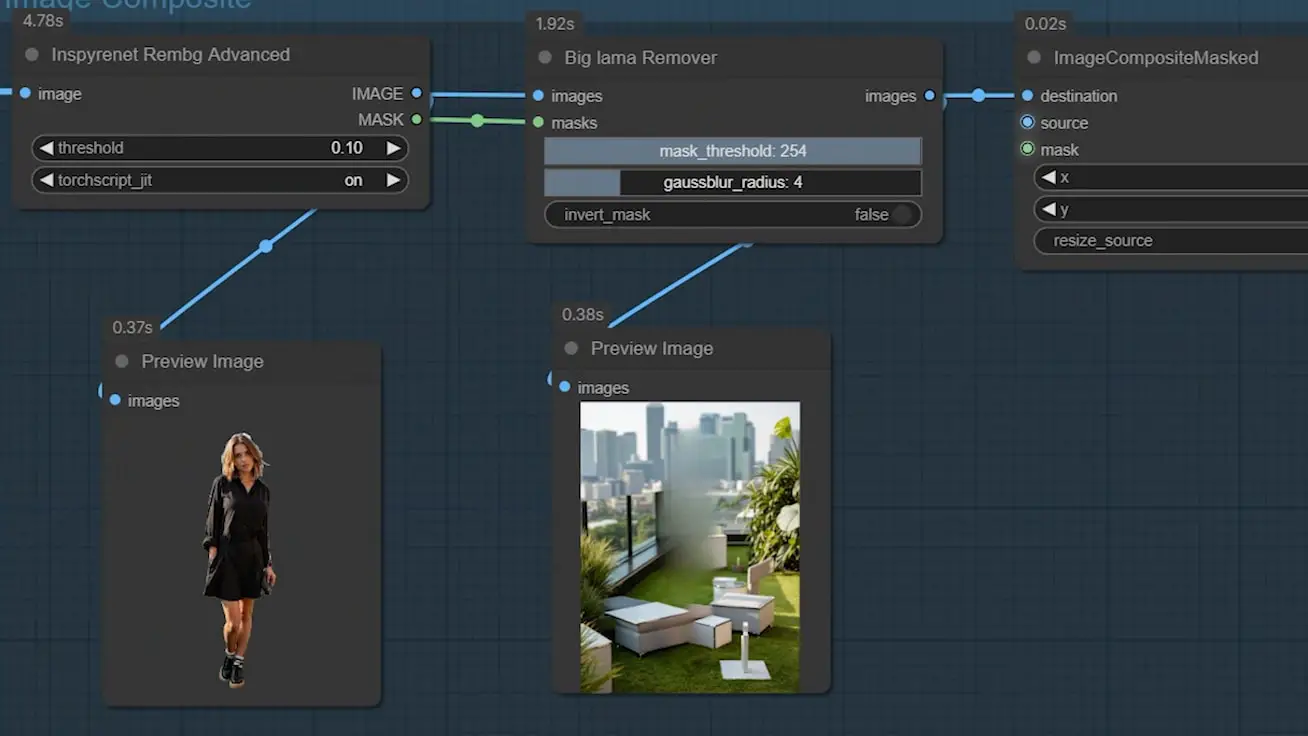
Step 2: Pasting the Original Subject
- Use the ‘ImageCompositeMasked’ node to blend the original subject into the new background.
- This will ensure that the edges blend naturally with the surrounding environment.

And that’s it! The background replacement is complete, and the result looks much cleaner and more professional.
Final Thoughts
This workflow offers a faster and more streamlined approach to background replacement using the Flux ControlNet Depth model. It’s simpler than the previous method but still delivers impressive results. I’m already working on an upgraded version with even more advanced features—stay tuned for updates!