One Headshot to Infinite Portraits: 100% Face Consistency in ComfyUI with Qwen Edit
Keeping a character’s face perfectly consistent is one of the hardest parts of working with AI images and videos. Small changes in angle, expression, lighting, or proportion can break the illusion and make your “character” feel like a different person.
In this article, I’ll walk you through two practical ComfyUI workflows that give you near 100% face consistency using:
- Qwen Image Edit
- Lightning LoRAs
- FaceDetailer
- SeedVR2 upscaling
You’ll see how to:
- Turn one headshot into many new portraits
- Combine multiple reference images (face + outfit + pose)
- Fix faces after generation for maximum consistency and detail
- Upscale your final image without losing the face you worked so hard to keep
YouTube Tutorial:
One Headshot to Infinite Portraits
The core idea of this article is simple:
Start from a single headshot and generate as many new portraits as you want—while keeping the face identical.
You might change:
- Outfit
- Background
- Lighting
- Pose (to some degree)
- Hairstyle (with a trick you’ll see later)
But throughout all of that, the face remains the same character.
We’ll first look at a more advanced workflow that uses multiple images as references (face + dress pose + skeleton), then circle back to a simpler one-headshot-only workflow.
Face Consistency with Multiple Image Inputs
Before we dive into nodes and settings, let’s understand the advanced use case.
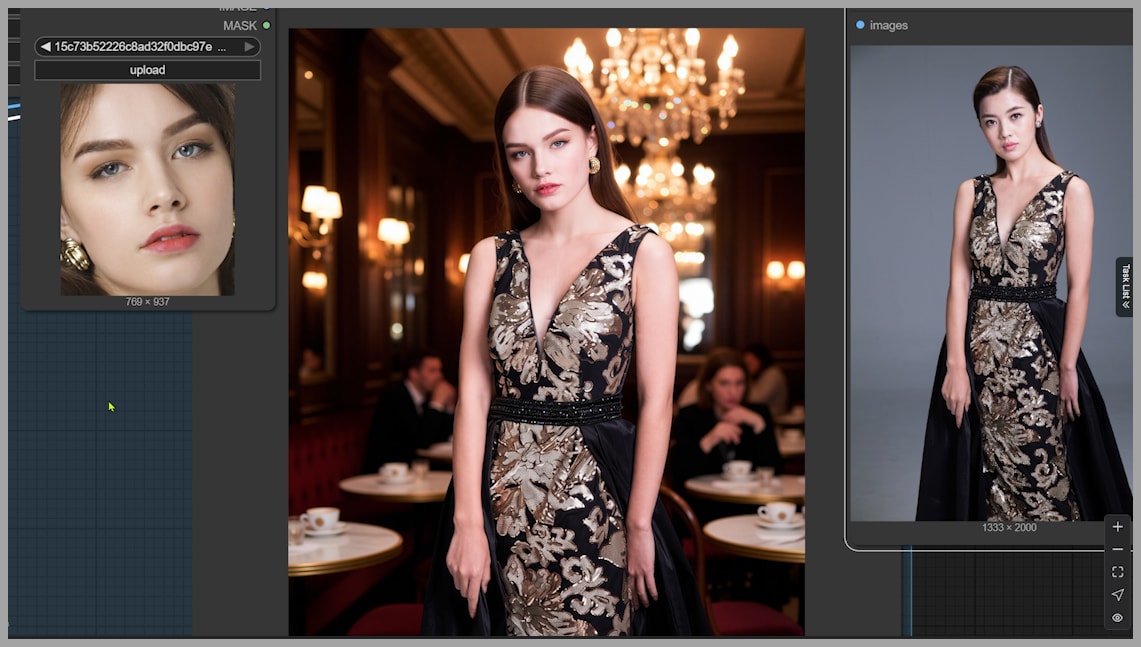
Imagine you have:
- A close-up of a woman’s face (your main identity reference)
- A full-body portrait of another woman in a specific dress and pose
- A pose skeleton image (to guide proportions and posture)
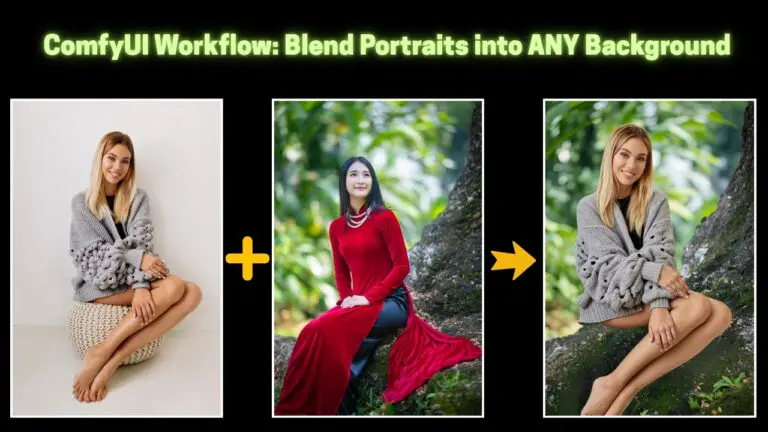
Your goal:
Take the face from image 1, put it on the body and dress from image 2, optionally guided by the pose in image 3, and generate a new background described in your prompt.
With the workflow I’ll describe, you can get:
- The same face as in the close-up
- The same dress and pose as the full-body reference
- A new scene customized through text prompts
- Face angle and proportions matching your references
This is where Qwen Image Edit shines—especially when combined with Lightning LoRAs and a face refinement pass.
Qwen Edit and Lightning LoRA Setup
Let’s start with the building blocks of Workflow 1 (the multi-input workflow).
Core Model: Qwen Image Edit
The main engine behind these edits is the Qwen Image Edit model. It’s especially good at:
- Editing specific regions
- Following multi-image instructions
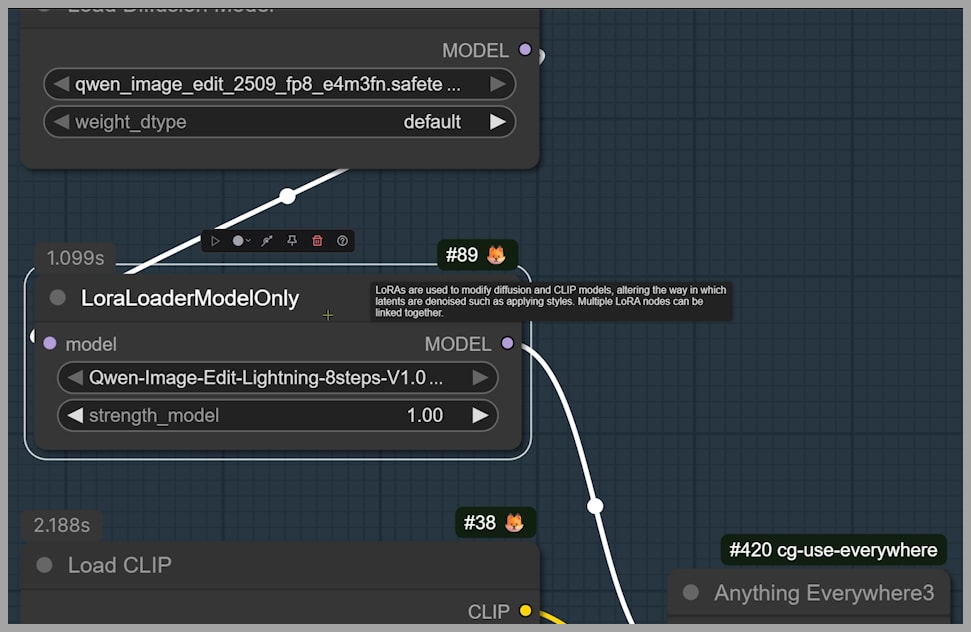
Lightning LoRA Choice: 8-step vs 4-step
Qwen Edit works great with Lightning LoRAs. In this article’s workflow, we specifically use:
- An 8-step Lightning LoRA
- Optionally a 4-step LoRA if you want faster generation
Trade-off:
- 8-step → more steps, potentially cleaner and more stable results
- 4-step → fewer steps, faster, slightly more volatile
If you’re just testing ideas quickly, start with 4-step. For final-quality outputs, you can switch to 8-step.
Reference Images & Pose Control
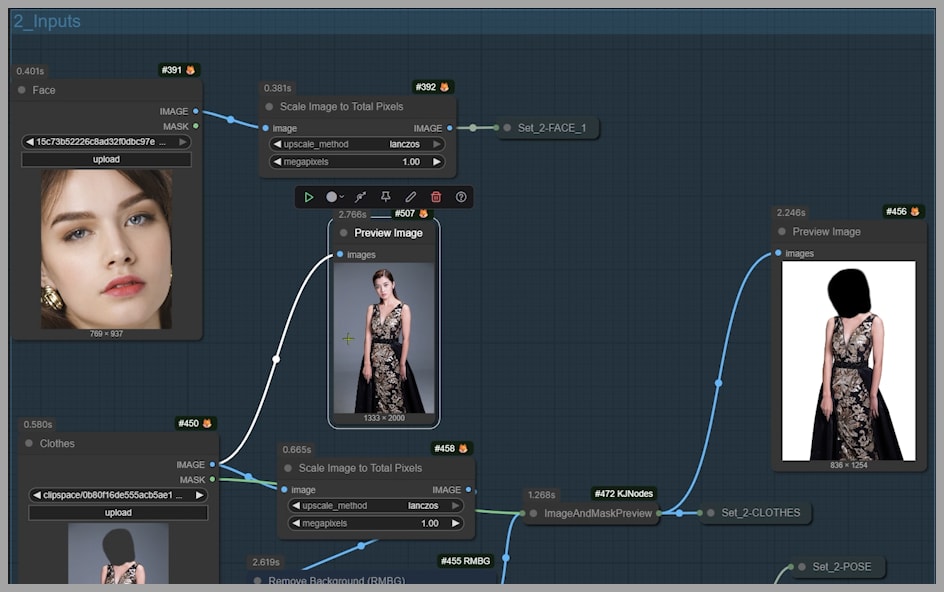
This workflow relies on three images to tell Qwen exactly what you want.
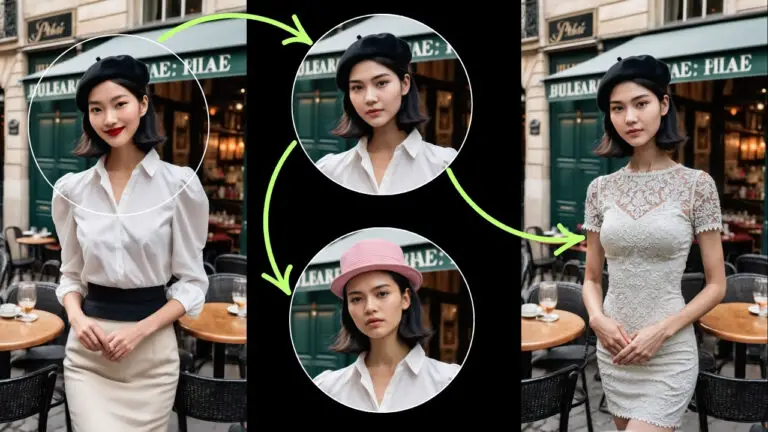
Image 1 – Face Close-Up
- A tightly cropped face image of the target person
- Hair may or may not be visible
- This is your identity reference
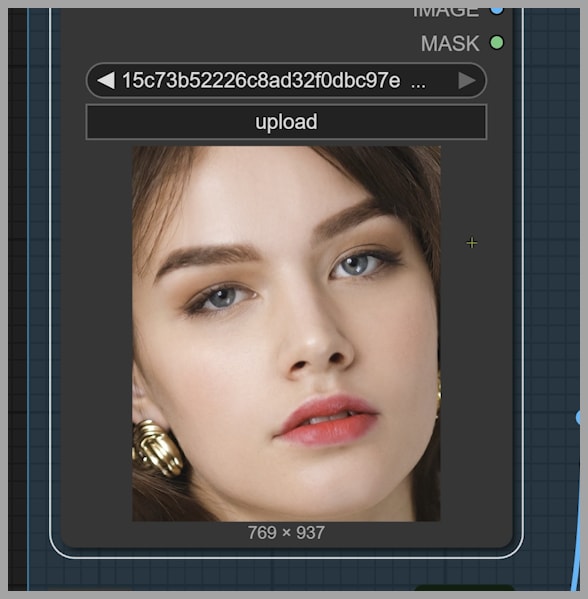
You could also use a more standard headshot, not just a face-only crop. Both work—just keep in mind that the angle and expression from this image strongly influence the final result.

Image 2 – Full-Body Dress & Pose (with Color Patch)
The second image is:
- A full-body portrait of a woman wearing the desired dress
- In the pose you want
- But with the head area covered by a solid color patch
Why the color patch?
Because we want Qwen Edit to replace that area with the face from Image 1.
The rest of this image (dress, body, pose) remains as a structural and stylistic guide.
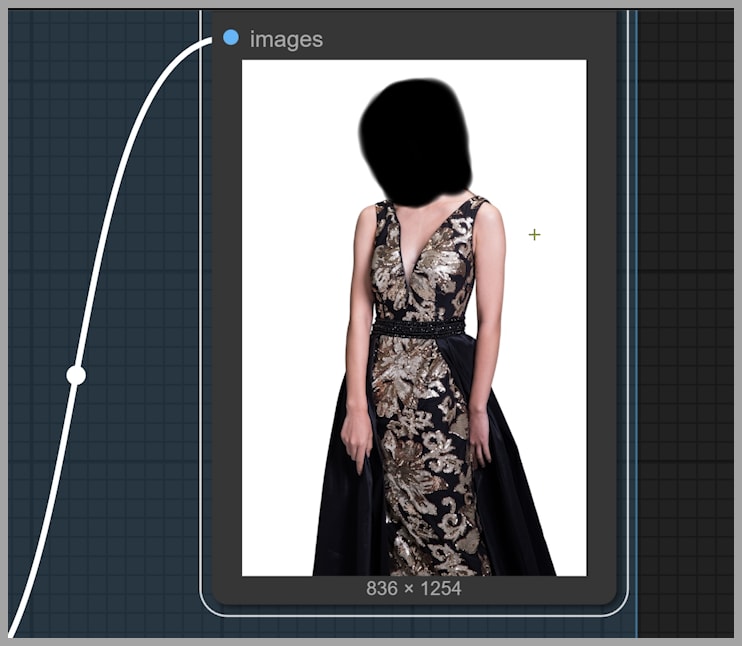
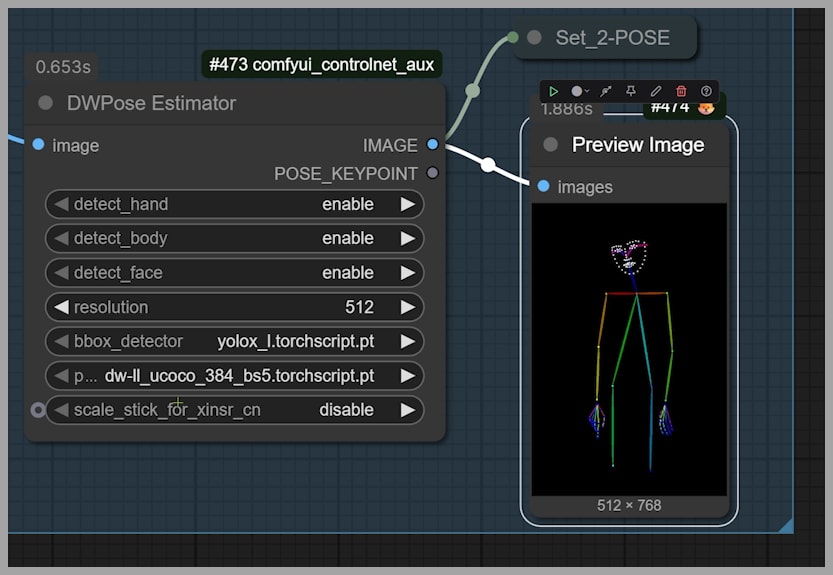
Image 3 – Pose Skeleton
The third image is a pose skeleton:
- Helps Qwen understand proportions and pose alignment
- Useful when you want to avoid weird head-to-body proportions
There’s also a useful tweak:
- If the proportions look off in your result, try disabling the “detect face” option in the pose step. Sometimes removing automatic face detection lets the pose guide behave more predictably.
Structure Prompts for Qwen Edit
The prompt in this workflow is split into two distinct parts.
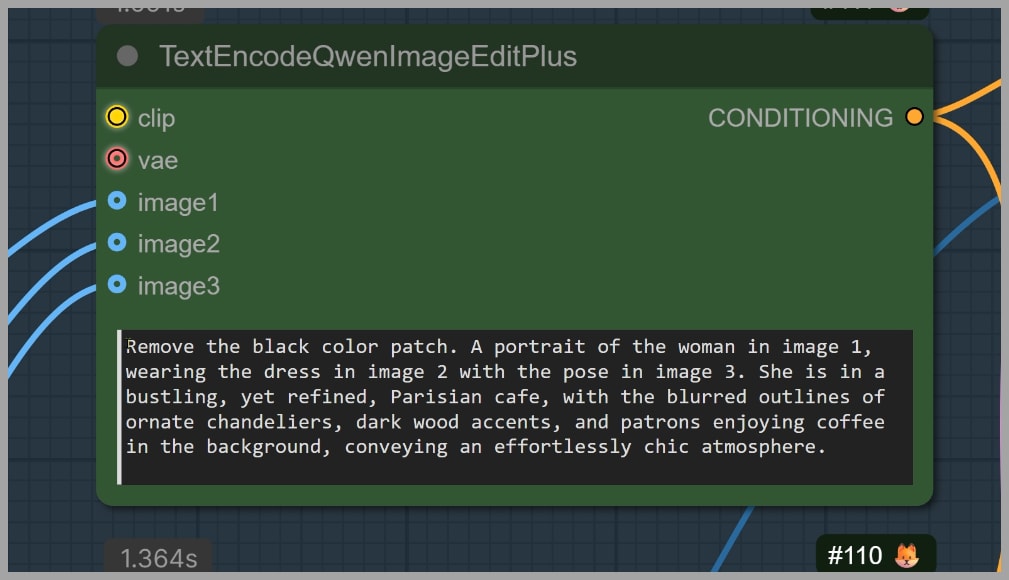
Part 1 – Instruction Prompt
The first part is a stable instruction string that tells Qwen how to combine the images, for example:
“Remove the black color patch. A portrait of the woman in image 1, wearing the dress in image 2 with the pose in image 3.”
Key points:
- “Remove the black color patch” instructs the model to fill in that area.
- The rest tells Qwen how to merge the three references:
- Face from image 1
- Dress/body from image 2
- Pose from image 3
You generally don’t need to change this part. Treat it like a reusable template.
Part 2 – Background & Scene Description (Your Creative Zone)
The second part of the prompt is where you describe the environment, such as:
- “Standing in a sunny field with soft golden-hour lighting”
- “In a modern city street at night with neon reflections”
- “Studio portrait with soft bokeh lights in the background”
This is the part you’ll change every time you want a new mood or setting.
Think of it as: Part 1 → What to combine Part 2 → Where and how to present it
Face Consistency LoRA Strength
In this workflow, we also use a special LoRA for face consistency, but with a low strength:
- LoRA strength ≈ 0.2
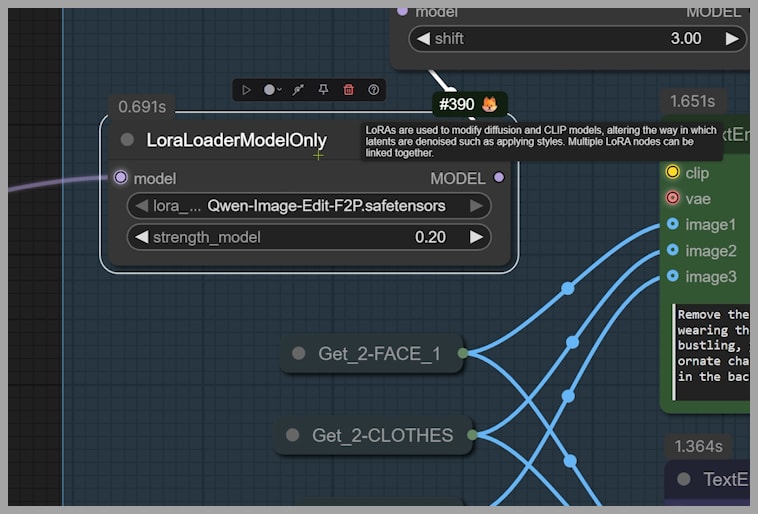
Why so low?
Because we’re going to refine the face even further in the FaceDetailer step. This LoRA’s job here is to nudge the generation toward consistent identity, without over-baking it.
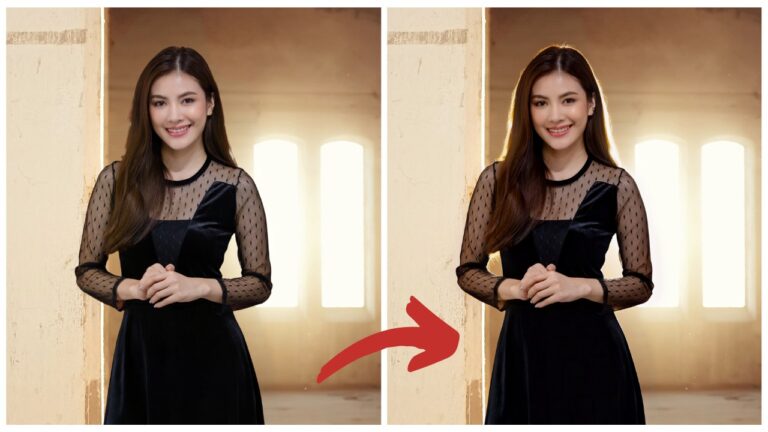
Refining Faces with FaceDetailer Pass
Once Qwen generates the base image, it’s time to lock in and polish the face.
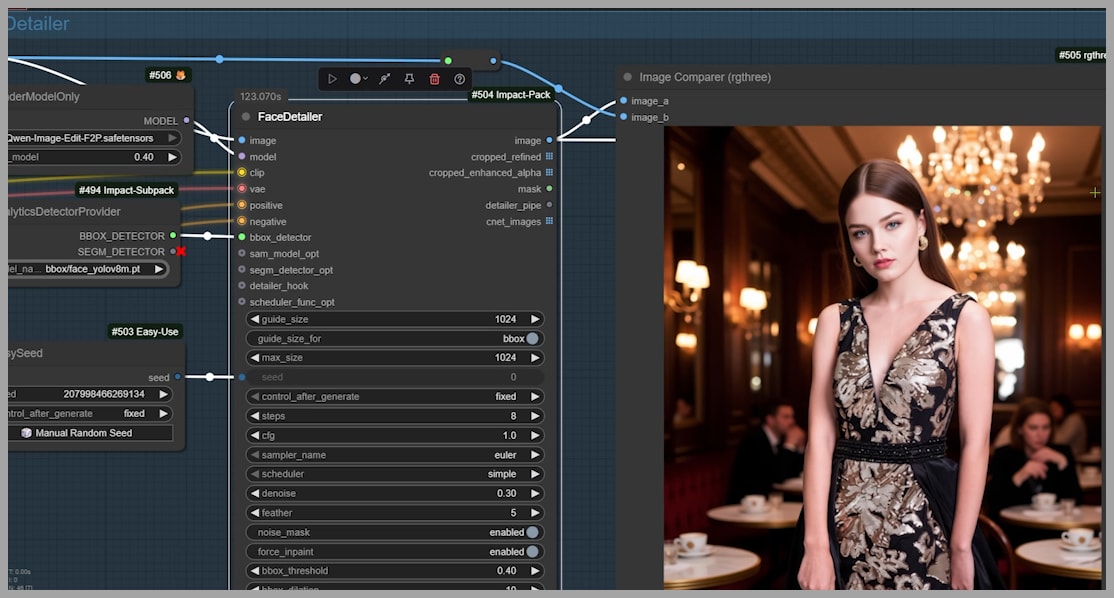
What FaceDetailer Does
The FaceDetailer node:
- Detects the face region in the image
- Crops around that area
- Runs an enhancement pass on just the face
- Pastes the improved face back into the final image
This helps:
- Correct small inconsistencies
- Sharpen details (eyes, lips, skin texture)
- Strengthen identity
Tuning LoRA Strength & Denoise
Two key parameters you’ll probably tweak:
- LoRA strength
- Denoise strength
Some guidelines:
- If the face is drifting away from the original → increase LoRA strength slightly
- If the face is overcooked or too stylized → lower LoRA strength
- If you want stronger corrections (bigger changes to the face) → raise denoise
- If you want subtle refinements only → lower denoise
Don’t be afraid to experiment a bit—this pass is where you can really dial in the “100% consistent yet beautiful” balance.
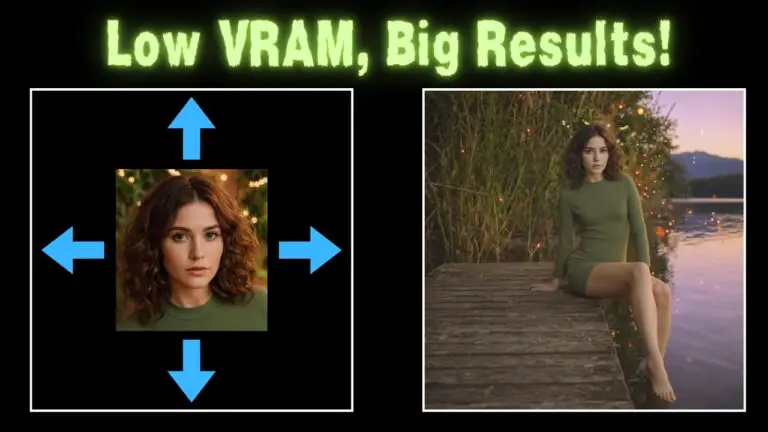
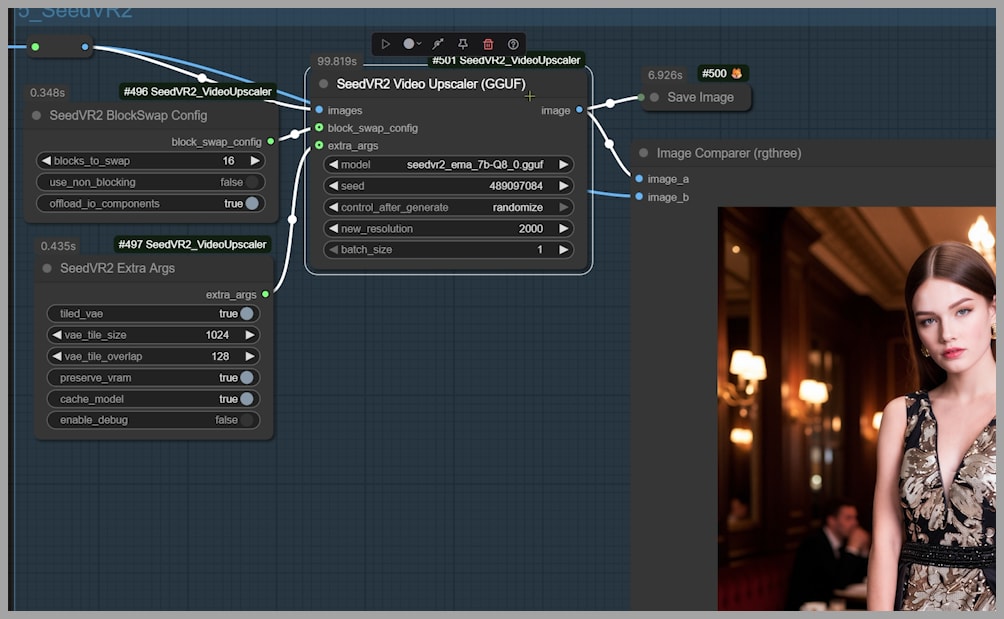
SeedVR2 Upscale
After the face is looking great, it’s time to make the entire image look crisper and higher-res.
Why Use SeedVR2
The final step is an upscale pass using SeedVR2:
- Increases resolution
- Enhances overall clarity
- Preserves the detailed face you just refined
Upscaling at the end avoids working at huge resolutions throughout the workflow, which keeps everything more efficient.
Conclusion
By combining Qwen Edit, Lightning LoRAs, FaceDetailer, and SeedVR2, you can generate portraits that keep facial identity perfectly consistent across countless variations. These two workflows let you mix multiple reference images or create new portraits from a single headshot with reliable control. Once you master them, expanding into character sheets, stylized portraits, or full narrative sequences becomes effortless.