Mastering Flux.2 Klein: Enhancing Consistency and Creativity in ComfyUI
Hello everyone! Today, I want to show you a few powerful nodes that can make the Flux 2 Klein model significantly more consistent while helping you achieve more creative results.
If you have ever struggled with image-to-image editing where the subject completely changes poses or the composition drifts too far from the original, this guide is for you. Let’s get started!
YouTube Tutorial:
Gain exclusive access to advanced ComfyUI workflows and resources by joining our community now!
1. Introduction: The Quest for Consistency
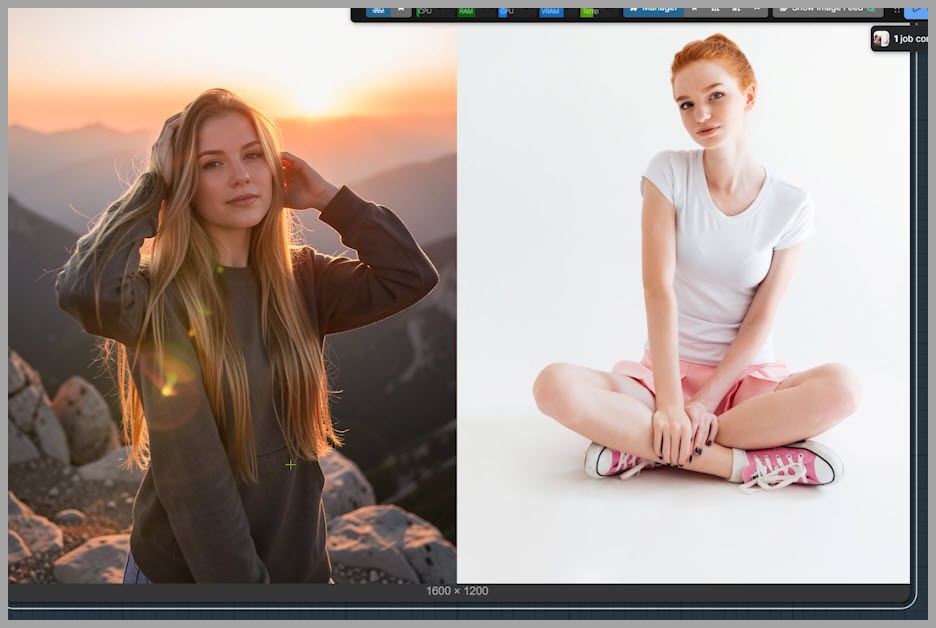
For this walkthrough, we are starting with a specific portrait image. We are going to edit it using the FP8 version of the Flux 2 Klein model.
Note: If your GPU memory is limited, you can easily swap this out for the GGUF versions instead.

My Goal
The objective is simple but precise. I want to:
- Change the subject’s hairstyle to long hair.
- Have her touch her hair with one hand.
- Change the environment to a sunrise on a mountaintop.
- Crucially: Keep the head angle and the position of her other hand exactly the same as the original.
2. The Standard Workflow and Its Limitations
We begin with the standard workflow recommended by the ComfyUI team. The only modification I’ve made is adding an Image Resize node, allowing us to adjust the width and height (e.g., setting them to 2048).
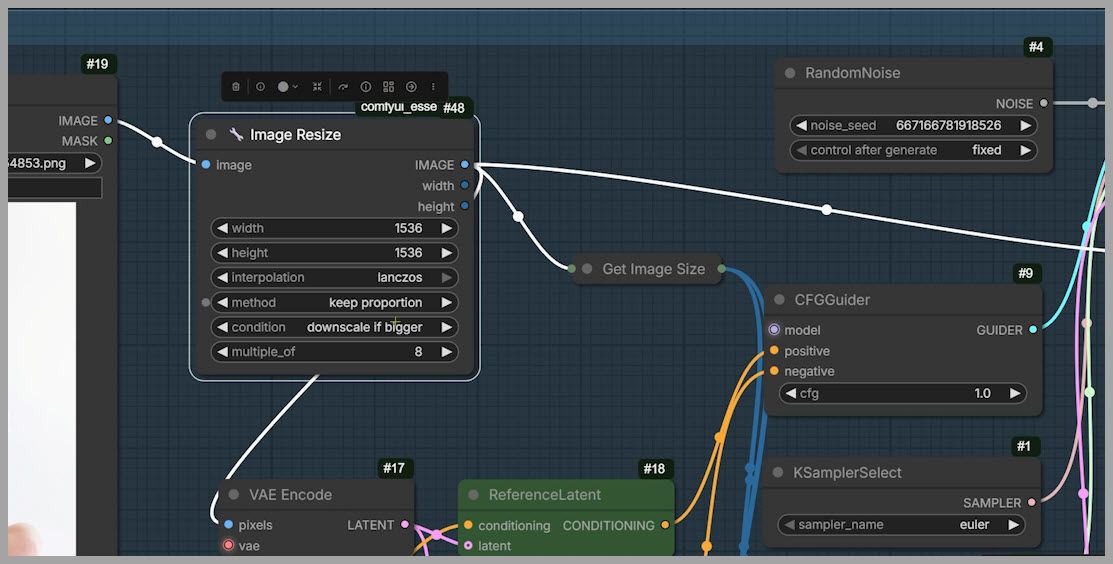
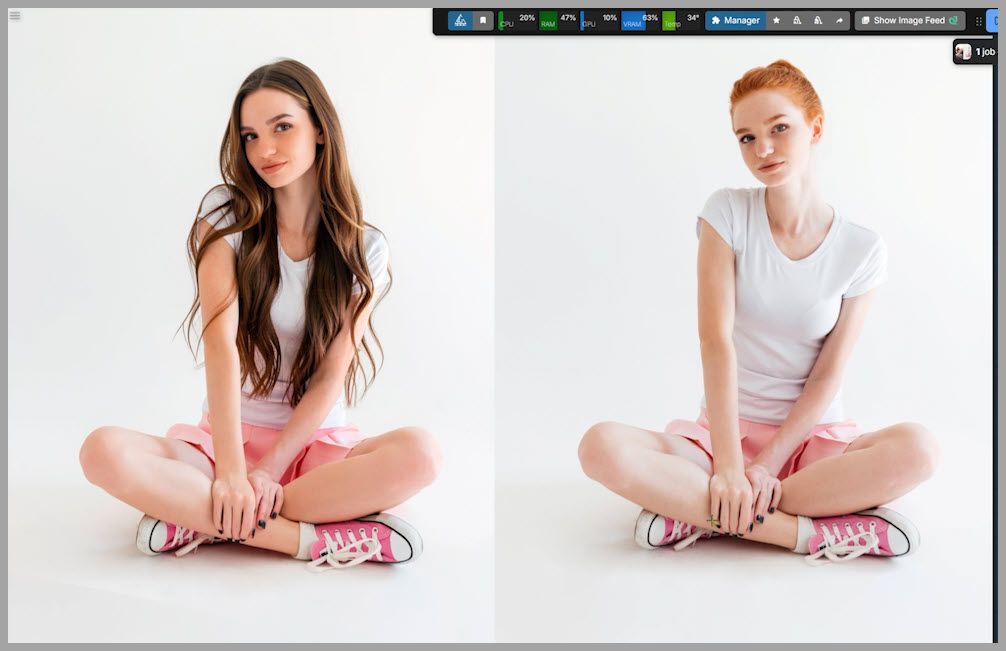
The Problem with the Standard Approach
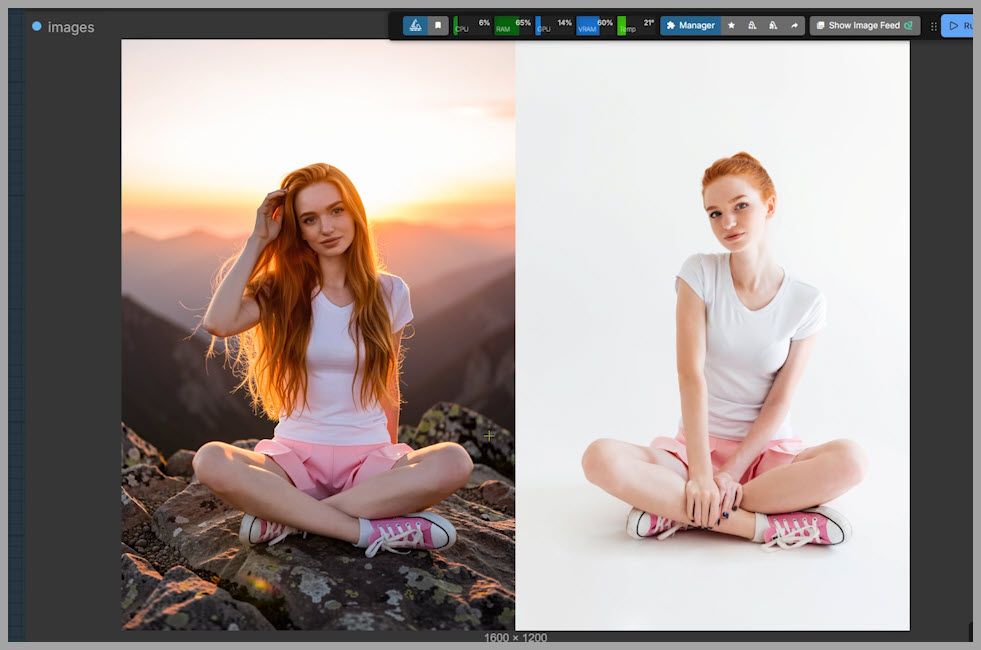
When we run this standard workflow, the output is often “close,” but the consistency is lacking.
- Head Angle: The subject’s head often shifts.
- Limb Position: The resting hand might move. In my test, her left hand (originally resting on her calf) ended up hidden between her legs.
The “Prompt Engineering” Fix?
You might try to fix this by making the prompt more specific, adding phrases like “while keeping the other hand unchanged.” While this improves consistency slightly, it rarely matches the original perfectly. The head angle might still be off, and anatomical details can get lost. You could try changing the seed and re-running, but that turns your workflow into a slot machine—purely luck-based and time-consuming.
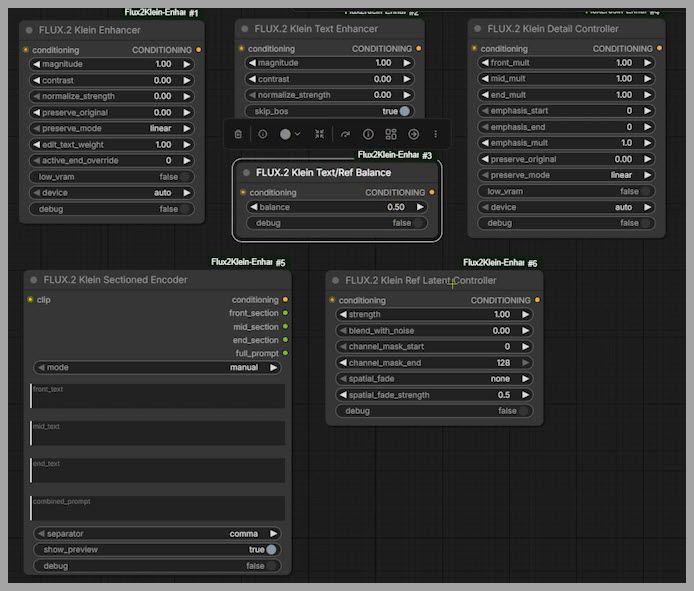
3. The Solution: Flux2 Klein Enhancer
To solve this deterministic chaos, I recommend a specific node pack called Flux2 Klein Enhancer (available on GitHub).
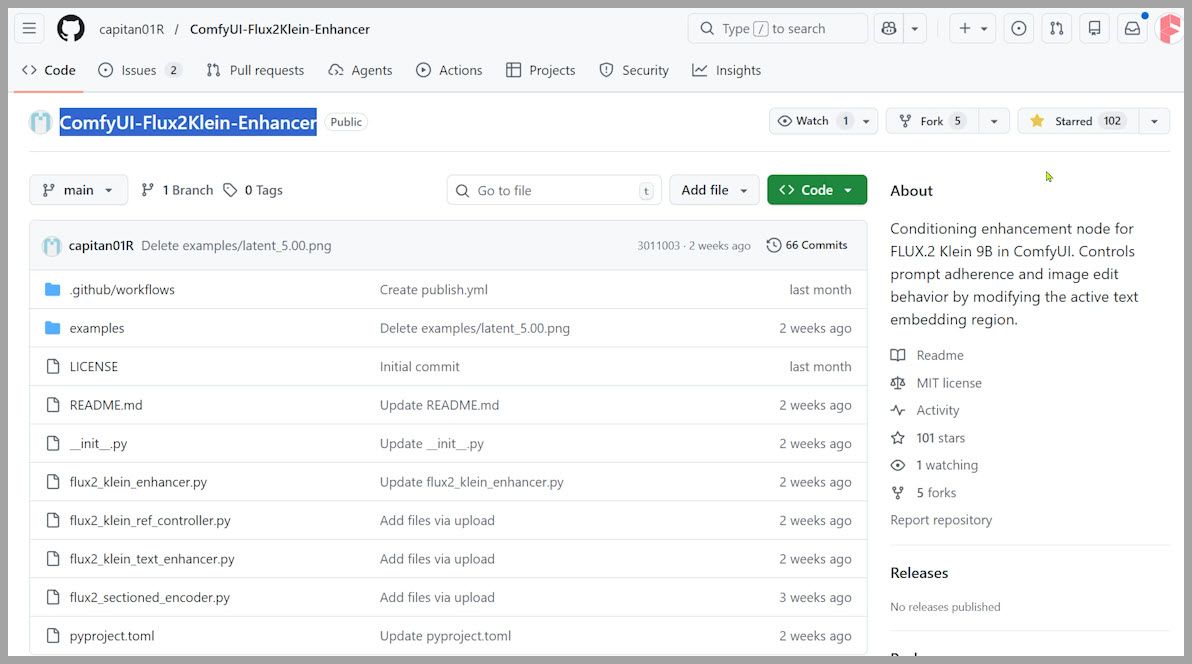
While the pack includes six nodes, I have found that only three of them are essential for easy, high-quality results. Let’s break down how to use them in a real ComfyUI workflow.
4. Workflow Structure: The 4-Group Setup
To keep things organized, I’ve set up a workflow with four distinct groups:
- Model Loading: This loads all necessary models so other groups can reuse them efficiently.
- Standard Setup: The baseline workflow we discussed above.
- Enhanced Setup: Adds our new consistency nodes.
- Detail Control: For precision editing.
Let’s focus on Group 3, which adds two specific nodes right before the CFG Guider node.

5. Deep Dive: The Ref Latent Controller
The first node we need to master is the Ref Latent Controller.
This node has many parameters, but don’t get overwhelmed. The most critical parameter is Strength.
Strength = 0
The node ignores the reference image entirely. If you run this, you will likely get a completely different person, pose, and clothes. You might even see anatomical glitches (like an extra arm).
Troubleshooting Anatomy
If you see weird anatomy (extra limbs), a simple fix is to increase the steps. Raising the steps to 8 usually fixes these structure issues.
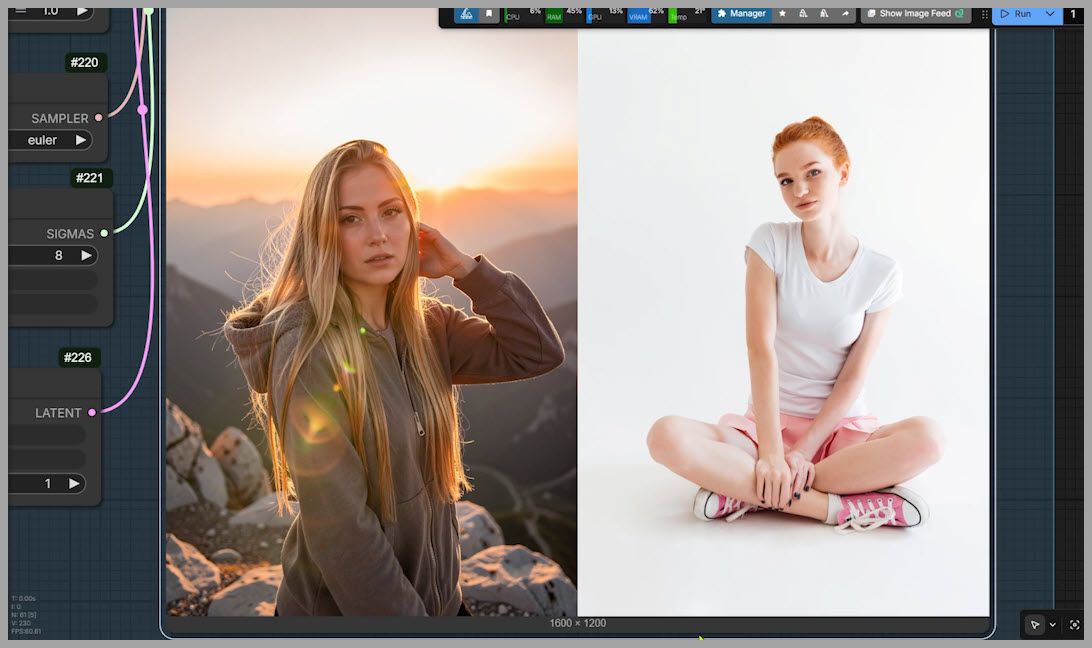
High Strength (e.g., 2.1)
To keep the output pose close to the original, we need a higher value. Setting the strength to 2.1 usually aligns the face angle and overall composition much closer to the original image.
6. Fine-Tuning with Text/Ref Balance
Now, let’s connect the second node: Text/Ref Balance. This node is incredibly user-friendly as it effectively has only one parameter: Balance.
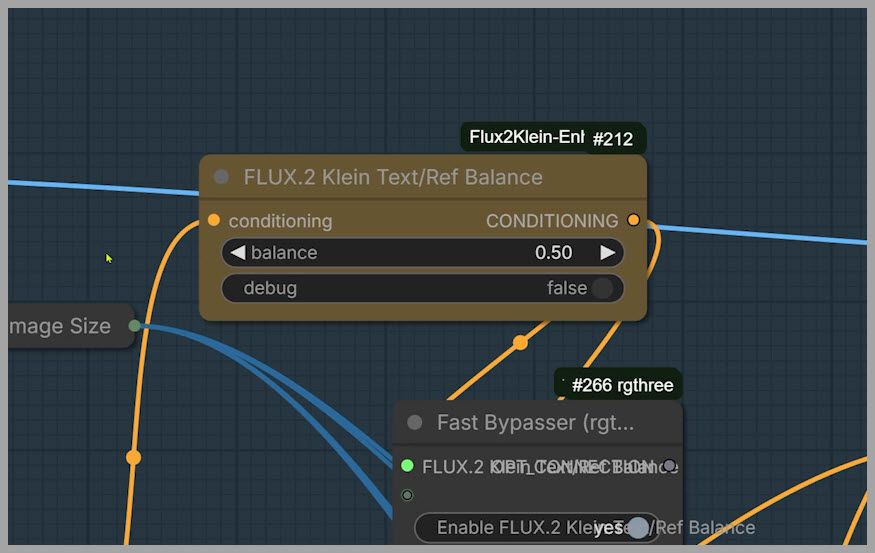
Understanding the Balance Value (0 to 1)
- 1.0: The reference image is ignored (similar to Strength 0 on the controller).
- Low Value (e.g., 0.1): This pushes for high consistency with the reference image.
The “Hand” Problem
When we set the balance to 0.1 combined with our controller settings, you might notice the hands start looking distorted again.
- The Fix: Unlike the previous step where we increased steps, here we want to reduce the sampling steps.
- Result: Lowering the steps to 4 often clears up the hand rendering issues immediately.
By combining the Ref Latent Controller and Text Ref Balance, you can lock in the pose while still allowing for creative changes.

7. Precision Editing with the Detail Controller
Finally, let’s look at the third useful node in the pack: the Detail Controller. This is perfect when you want to change specific parts of the image based on your text prompt.
We focus on two multipliers here:
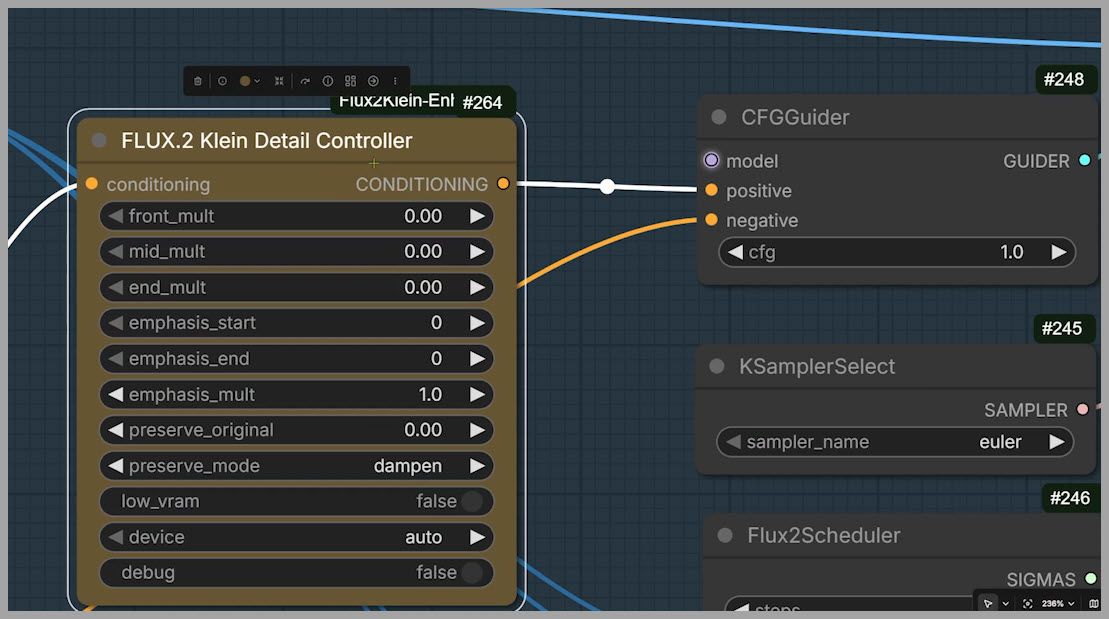
1. Front Multiplier (The “What”)
“Front” refers to the first 25% of the active tokens in your prompt.
- Example Prompt: “Change her hairstyle to long hair…” is at the start.
- Action: If we set the Front Multiplier to 2, the model aggressively applies the “long hair” change while leaving the rest of the image alone.
2. Middle Multiplier (The “Action”)
“Middle” controls the middle 50% of the active tokens.
- Example Prompt: “…touch her hair with one hand…” is usually in the middle of the prompt structure.
- Action: By setting the Middle Multiplier to 0.25, we can subtly guide the action.
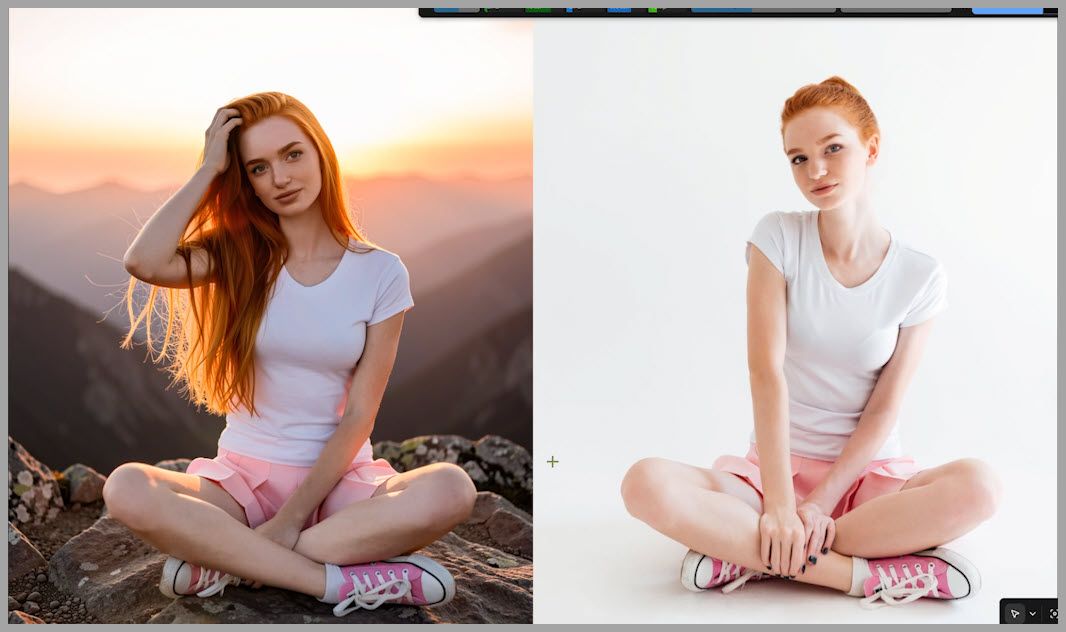
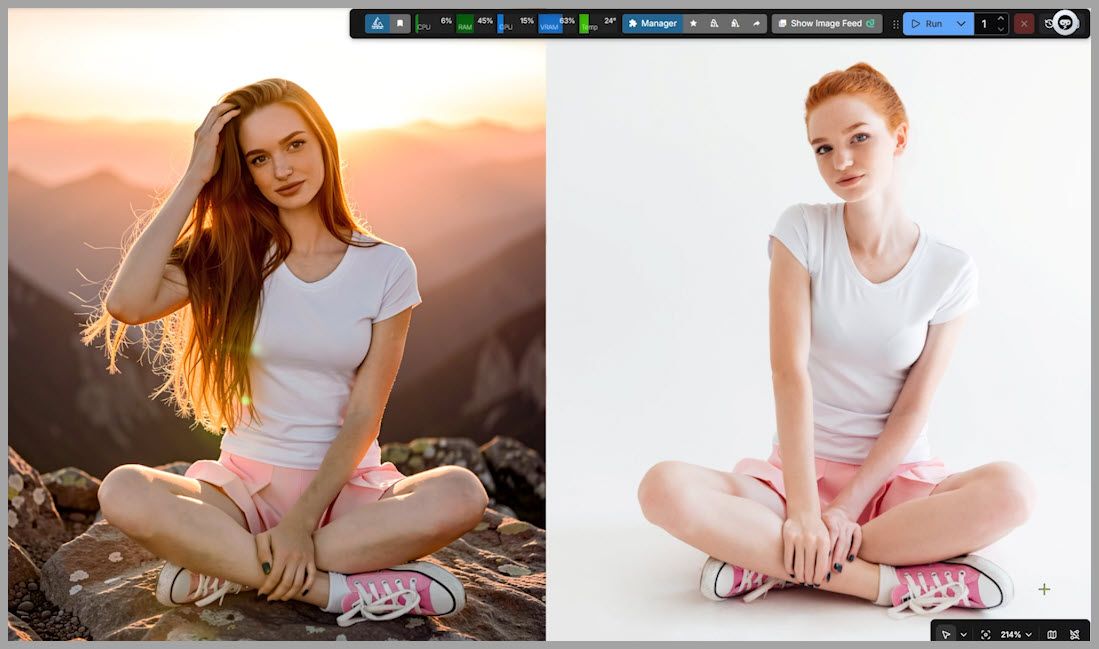
The Final Result
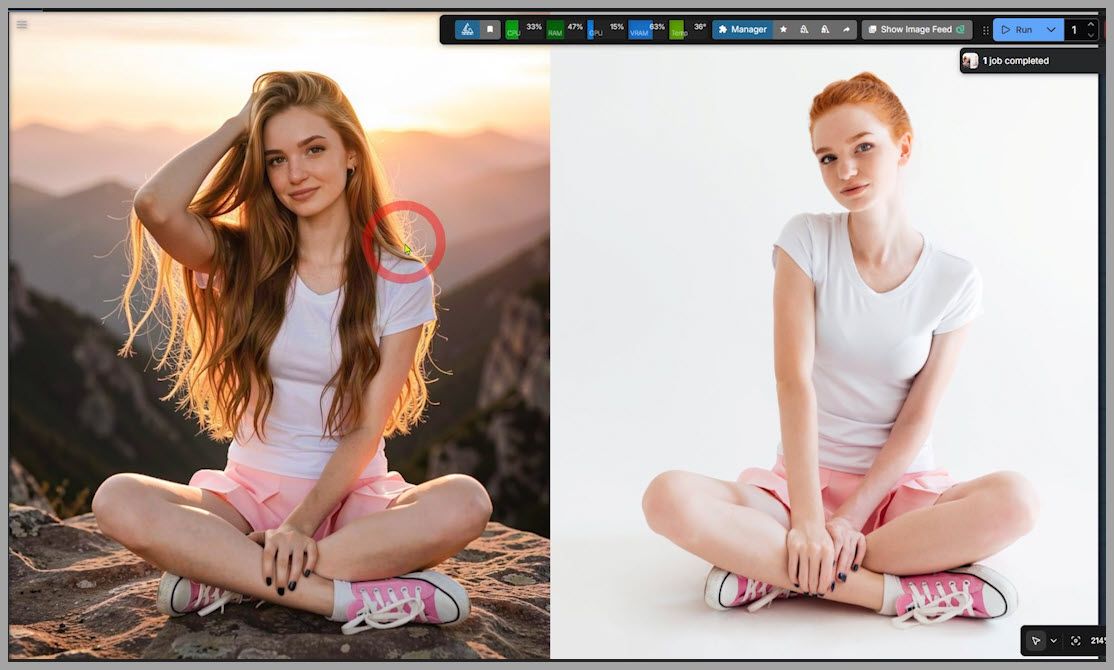
With Front Multiplier at 2 and Middle Multiplier at 0.25, we achieve our perfect result:
- She has long hair.
- She is touching her hair.
- The background is a sunrise on a mountaintop.
- Most importantly: Her original pose and the position of her resting hand remain completely faithful to the original image.
8. Conclusion
That wraps up our deep dive into the Flux 2 Klein consistency workflow!
By moving beyond the standard workflow and utilizing the Ref Latent Controller, Text Ref Balance, and Detail Controller, you stop relying on luck and start editing with intention.
If you want to try this yourself, I highly recommend downloading the workflow and experimenting with the multiplier values to see how they affect your specific prompts. Happy creating!