Flux | How to Control Image Layout and Background Sharpness Using Prompts and LoRA
Hello, everyone! Today, I’m excited to share some key techniques I’ve learned while experimenting with the Flux model. Over the past few days, I’ve generated about 500 images, tweaking prompts and LoRA to see how different prompt structures can control image layout and background sharpness. In this article, I’ll walk you through these techniques and show how you can use them in your own image generation projects.
Let’s dive in!
You’re also invited to check out the engaging video tutorial that complements this article:
Gain exclusive access to advanced ComfyUI workflows and resources by joining our community now!
Here’s a mind map illustrating all the premium workflows: https://myaiforce.com/mindmap
Run ComfyUI with Pre-Installed Models and Nodes: https://youtu.be/T4tUheyih5Q
1. Controlling Layout with Prompt Structure
One of the most effective ways to control image layout is by adjusting how you describe the scene in your prompt. Specifically, the level of detail you provide and the order of your descriptions significantly impact both the size of the subject in the frame and the sharpness of the background.
Example 1: Subject Takes Priority
Consider the following prompt:
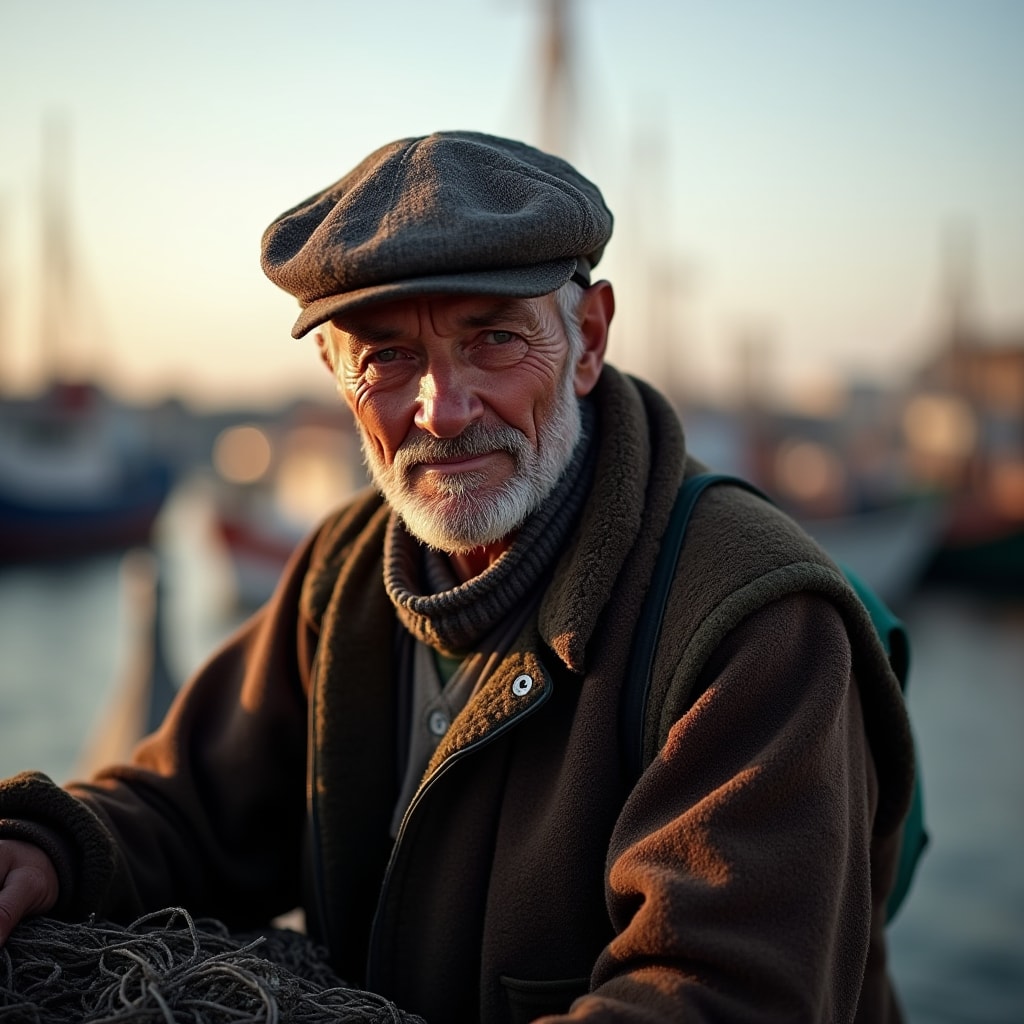
A fisherman wearing a worn cap and a thick sweater, net slung over his shoulder, face weathered by the sea; a lively harbor at dawn.
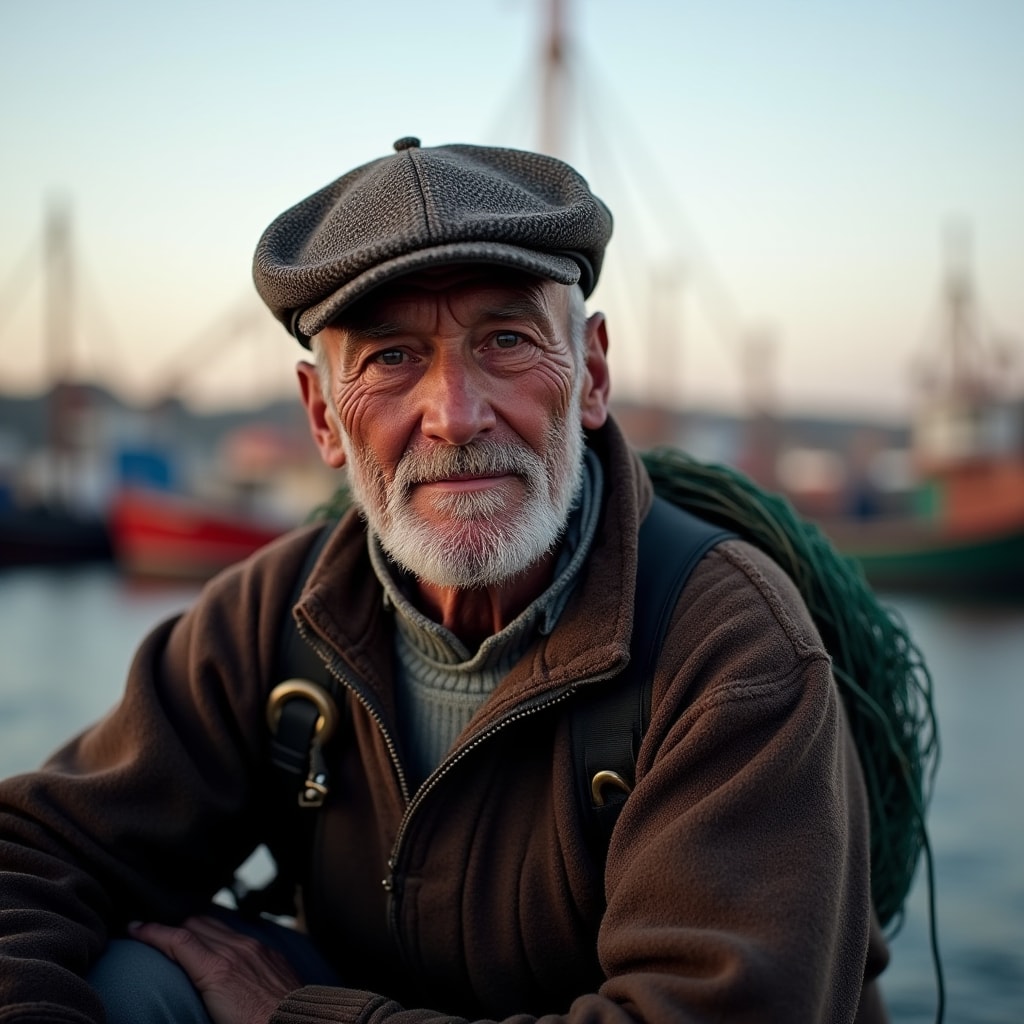
In this example, most of the detail is given to the fisherman, with only a brief mention of the harbor. As a result, the image generated focuses primarily on the fisherman, who dominates the frame, while the background (the harbor) is blurry and less detailed.
Example 2: Background Takes Priority
Now, let’s shift the focus to the background. Modify the prompt like this:
A lively harbor at dawn, with fishing boats rocking in the water, seagulls circling overhead; a fisherman in the distance, wearing a worn cap and sweater, net slung over his shoulder.

Here, the detailed description of the harbor takes precedence. The image generated will focus more on the harbor, making it sharper, while the fisherman appears smaller and farther away in the frame. By simply switching the order and focus of the descriptions, we can achieve drastically different results.
Key Takeaway
By changing the order of descriptions and level of detail for each element in your prompt, you can control which part of the image takes center stage and how sharp the background appears.
2. How Content Affects Background Sharpness
The sharpness of the background in an image is influenced not only by the level of detail in your prompt but also by the content of the background itself. From my experiments with the Flux model, I’ve found that it behaves almost like a smart photographer, automatically adjusting the level of blur based on what is described in the prompt.
Let’s explore this with a few examples, which demonstrate how prompt wording impacts the focus and clarity of the background.
Example 1: Highly Detailed Background, Blurred Subject
Take the following prompt:
A snowy alpine village nestled among towering peaks with snow-capped mountains, smoke rising from cozy chalets, skiers carving paths down pristine slopes; evergreen trees dusted with fresh snow, the crisp air filled with laughter and the aroma of hot cocoa; a snowboarder adjusting his goggles, breath forming clouds in the cold air, eyes reflecting excitement.
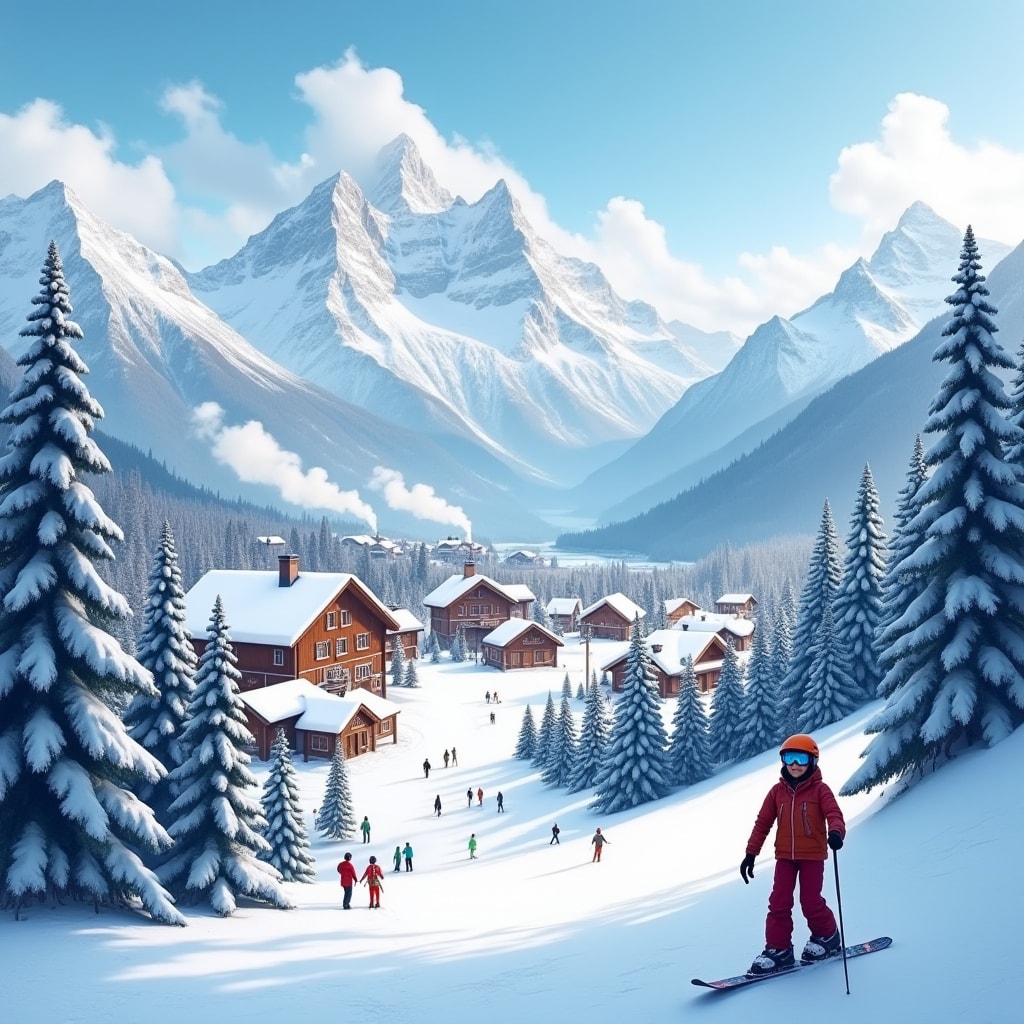
In this prompt, most of the words focus on the landscape—the alpine village, mountains, and evergreen trees. Since the landscape is described in such detail, the resulting image makes the background large and very sharp. The snowboarder, on the other hand, appears quite small and distant. Even though his actions are mentioned, they aren’t well-captured because he occupies very little of the image.
This demonstrates how the amount of detail given to the background compared to the subject directly affects the clarity and size of each element in the frame. The more descriptive your background, the sharper and more prominent it becomes.
Example 2: Bringing the Subject into Focus with a Simple Tweak
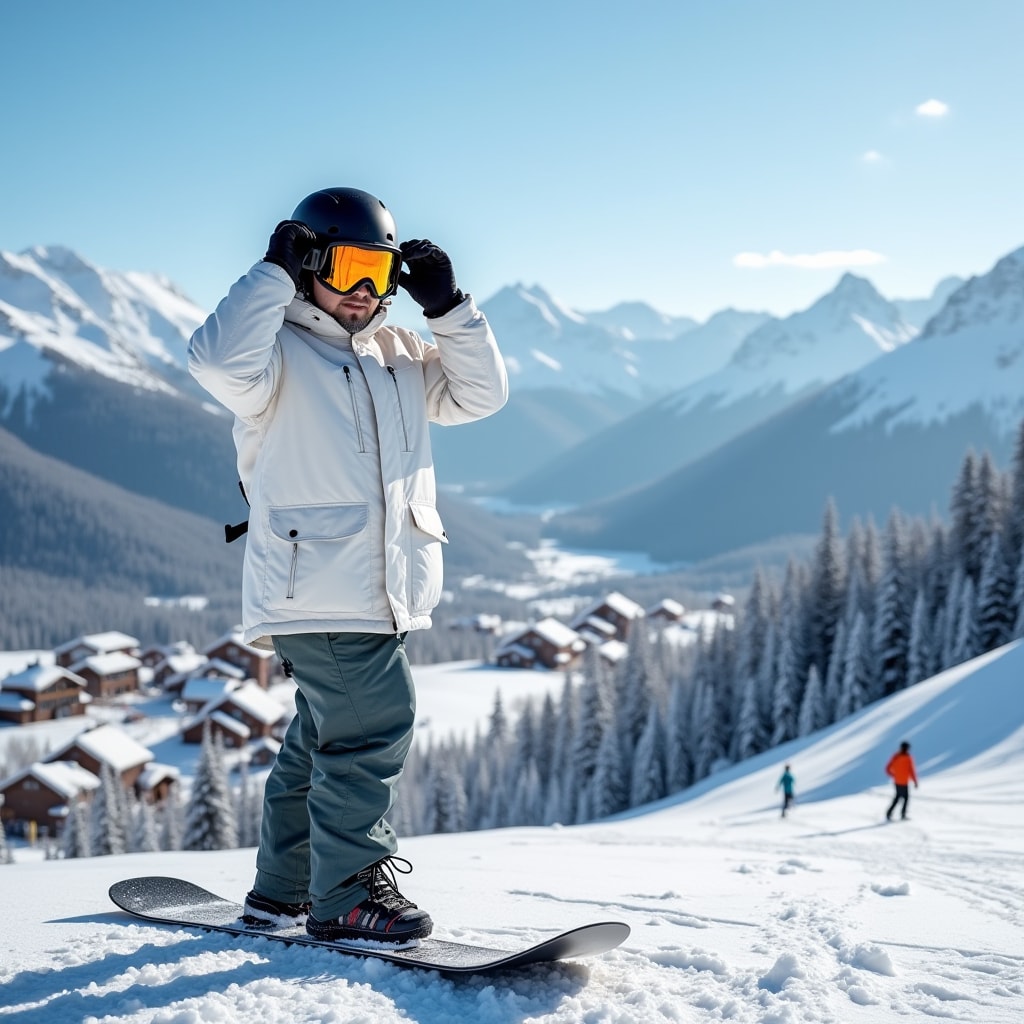
Now, let’s tweak the original prompt by adding the phrase “a closeup shot of” before the snowboarder:
A snowy alpine village nestled among towering peaks with snow-capped mountains, smoke rising from cozy chalets, skiers carving paths down pristine slopes; evergreen trees dusted with fresh snow, the crisp air filled with laughter and the aroma of hot cocoa; a closeup shot of a snowboarder adjusting their goggles, breath forming clouds in the cold air, eyes reflecting excitement.

With this small adjustment, the image changes dramatically. The snowboarder is now much larger and takes up more of the frame. The background remains sharp, but the snowboarder now becomes the main focus, occupying the foreground. However, even though the snowboarder is more prominent, the specific action of him adjusting his goggles is still not fully captured.
This brings up an important point: adding “closeup” increases the size of the subject but doesn’t necessarily make every detail of the subject’s action stand out, especially if the background is still relatively detailed.
Example 3: Reducing Background Detail to Highlight the Action
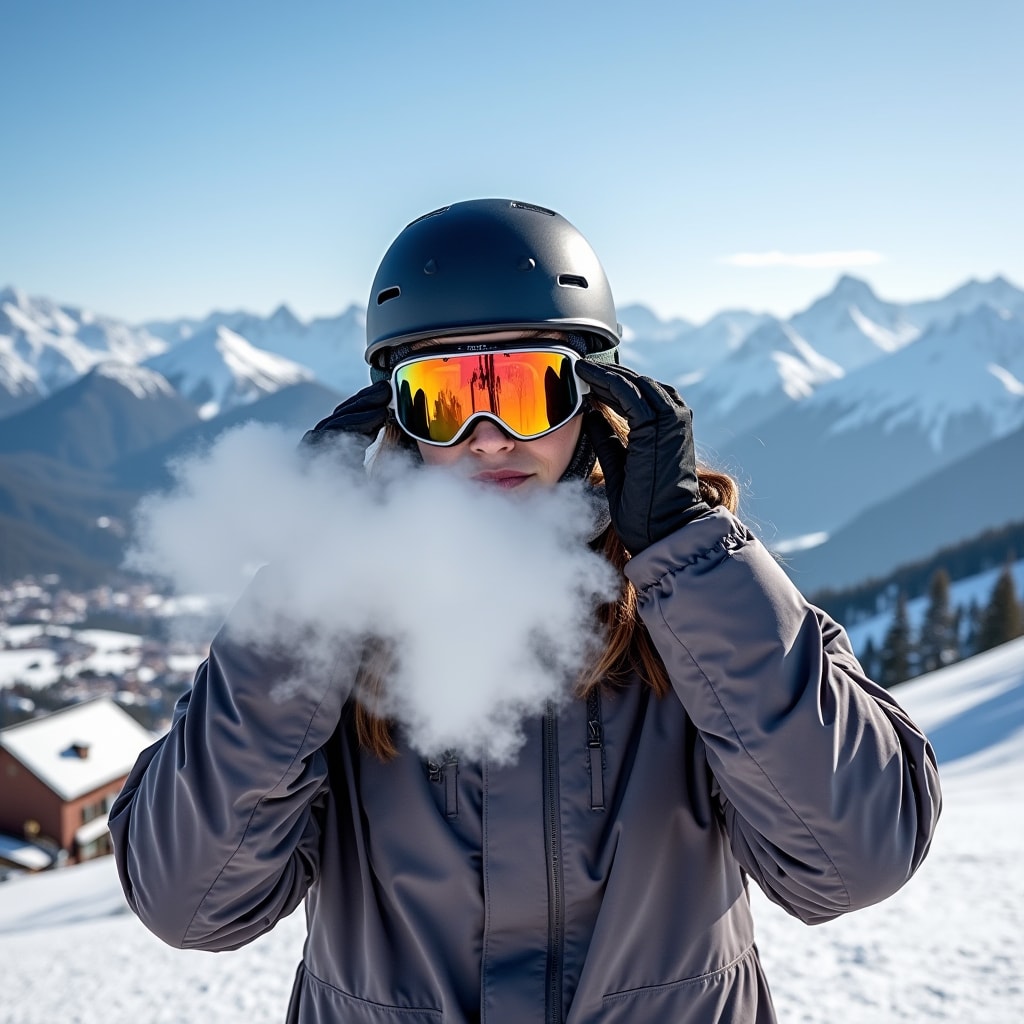
Let’s try another modification—this time by reducing the description of the background:
a snowy alpine village; a snowboarder adjusting their goggles, breath forming clouds in the cold air, eyes reflecting excitement
In this prompt, we’ve significantly cut back on the background details, focusing more on the snowboarder’s actions. As a result, the generated image shows the snowboarder much more clearly, even capturing the specific motion of him adjusting his goggles. The layout has shifted from a distant half-body shot to a closer, more detailed full-body shot.
However, there’s a trade-off: the background has become much blurrier since it is no longer described in detail. The balance between subject and background sharpness is affected by how much attention is given to each in the prompt.
Example 4: Changing Subject Order for Different Layouts
Let’s take the experiment further by placing the snowboarder at the beginning of the prompt:
a snowboarder adjusting their goggles, breath forming clouds in the cold air, eyes reflecting excitement; a snowy alpine village
With this version, the snowboarder’s details are the primary focus of the image. He is large in the frame, and all aspects of his description—from his breath forming clouds to the excitement in his eyes—are clearly depicted. Meanwhile, the background is barely visible, heavily blurred, and takes up very little of the image.
Comparing the Results
By comparing the images generated from these different prompts, you can see how the order of the content and the amount of detail directly affect the sharpness of the background and the size of the subject.
- In the first example, the snowboarder is far away and small, while the background is sharp and detailed.
- In the second example, the snowboarder is larger, but his actions are still hard to see.
- In the third example, we clearly see the snowboarder adjusting his goggles, but the background becomes blurry.
- In the fourth example, the snowboarder dominates the frame, with the background becoming almost an afterthought.
The way you structure your prompt and the sequence of descriptions play a huge role in controlling both subject size and background sharpness.
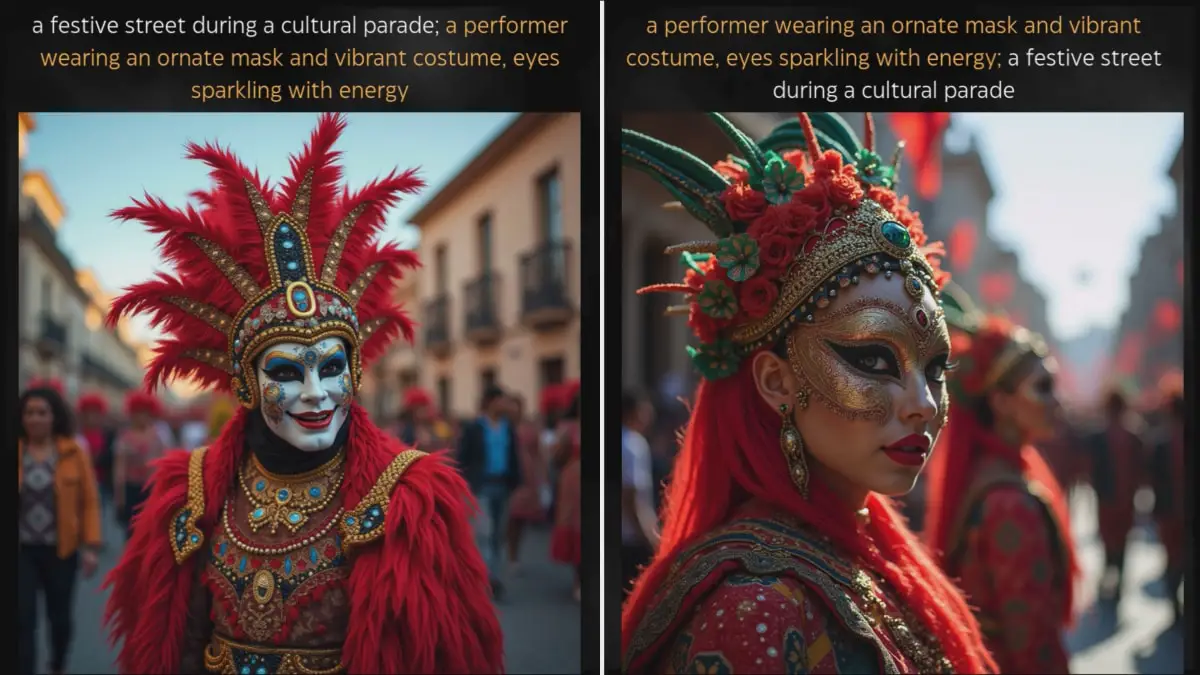
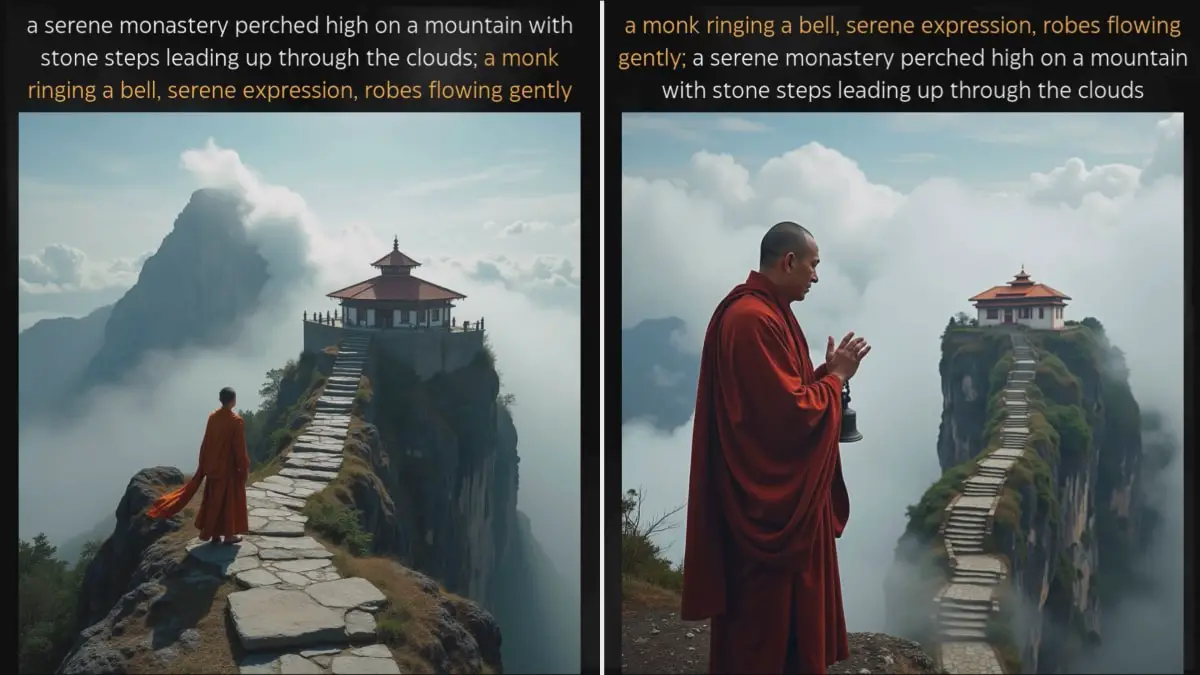
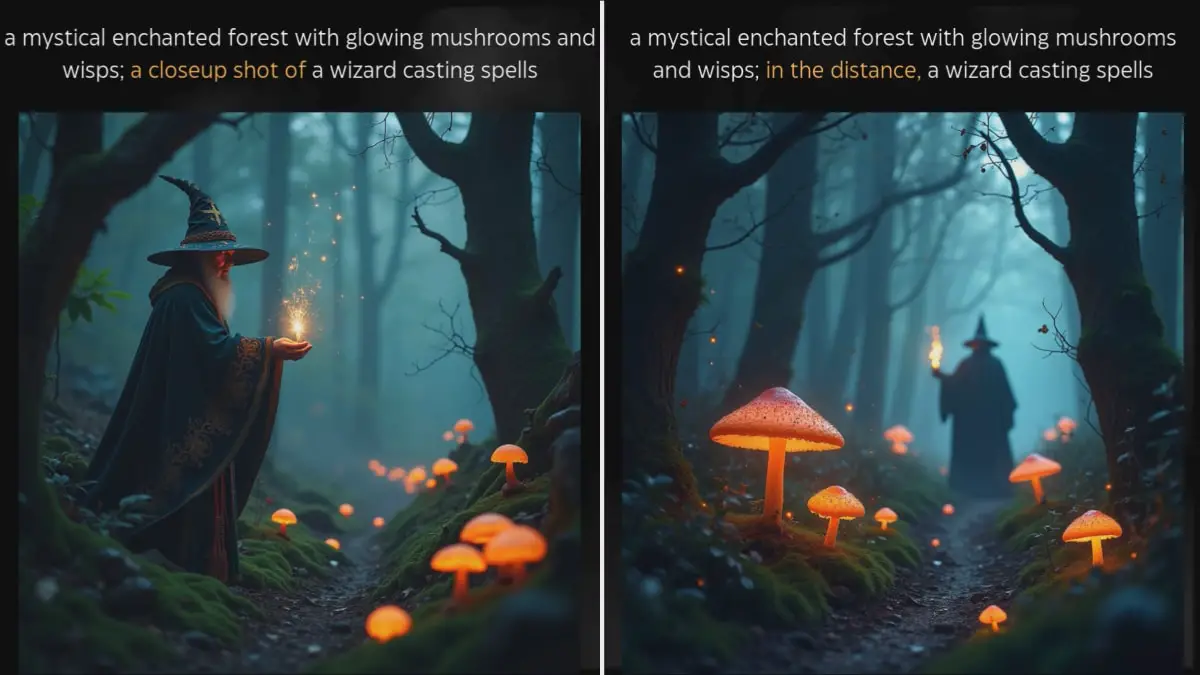
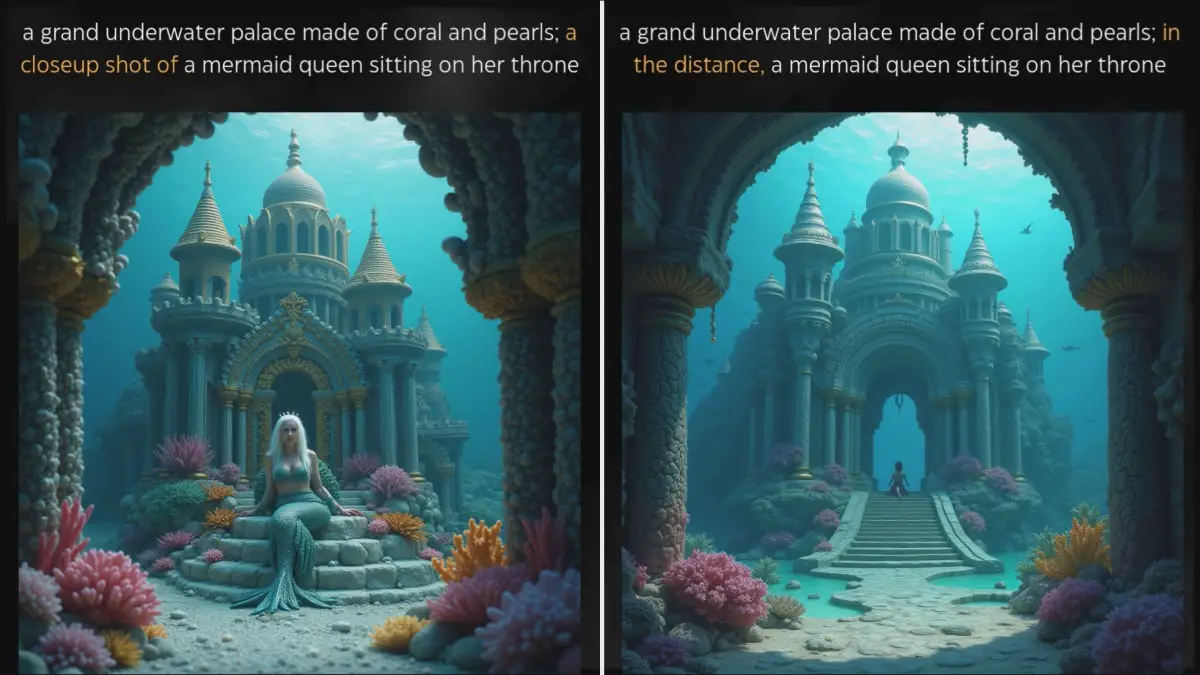
This difference might seem pretty obvious, so let’s look at a few more pairs of images. Notice how the order of the content still has a big impact on the overall layout?
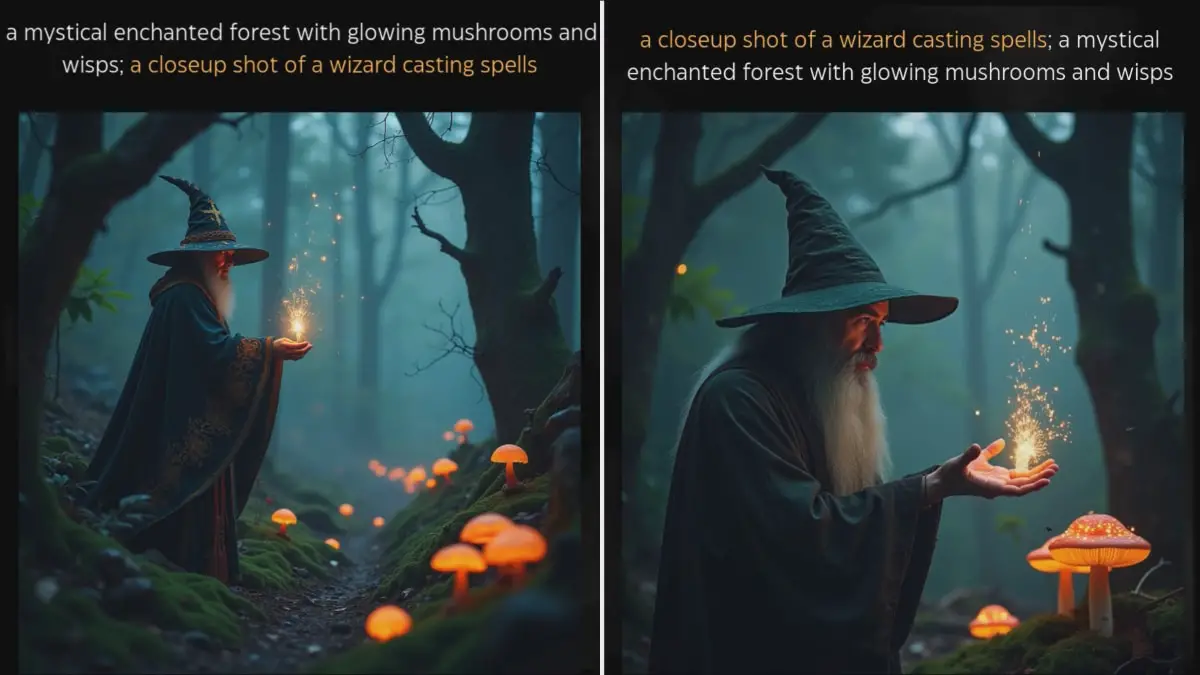
Keywords that Make a Difference
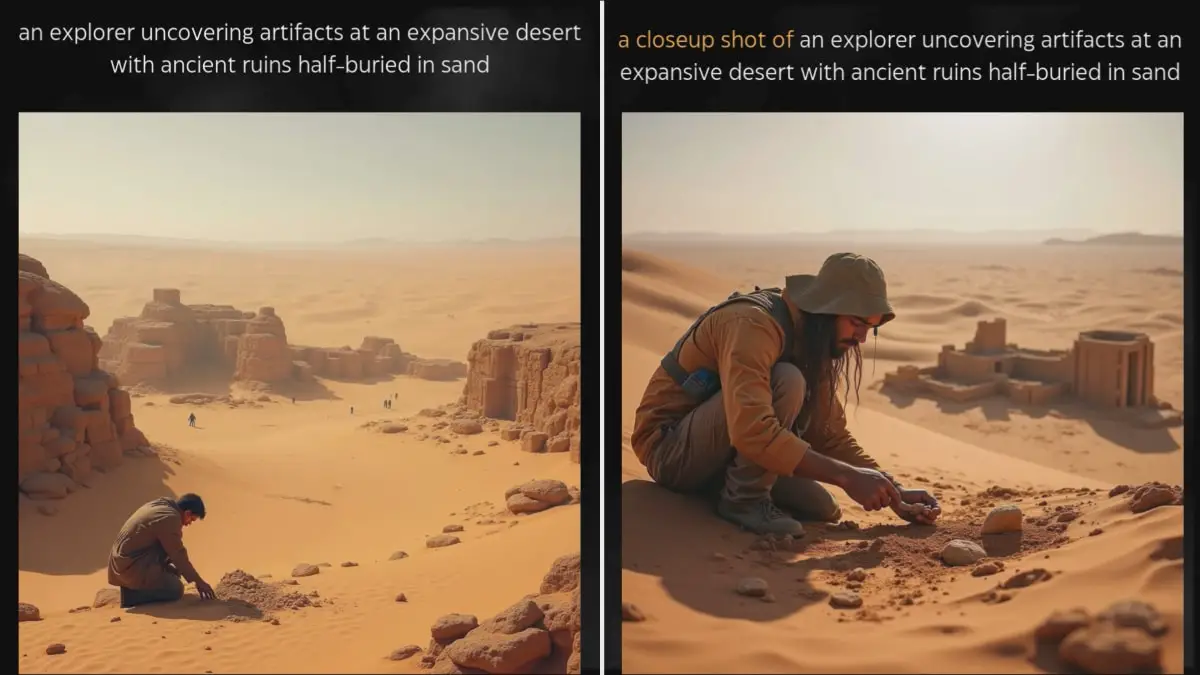
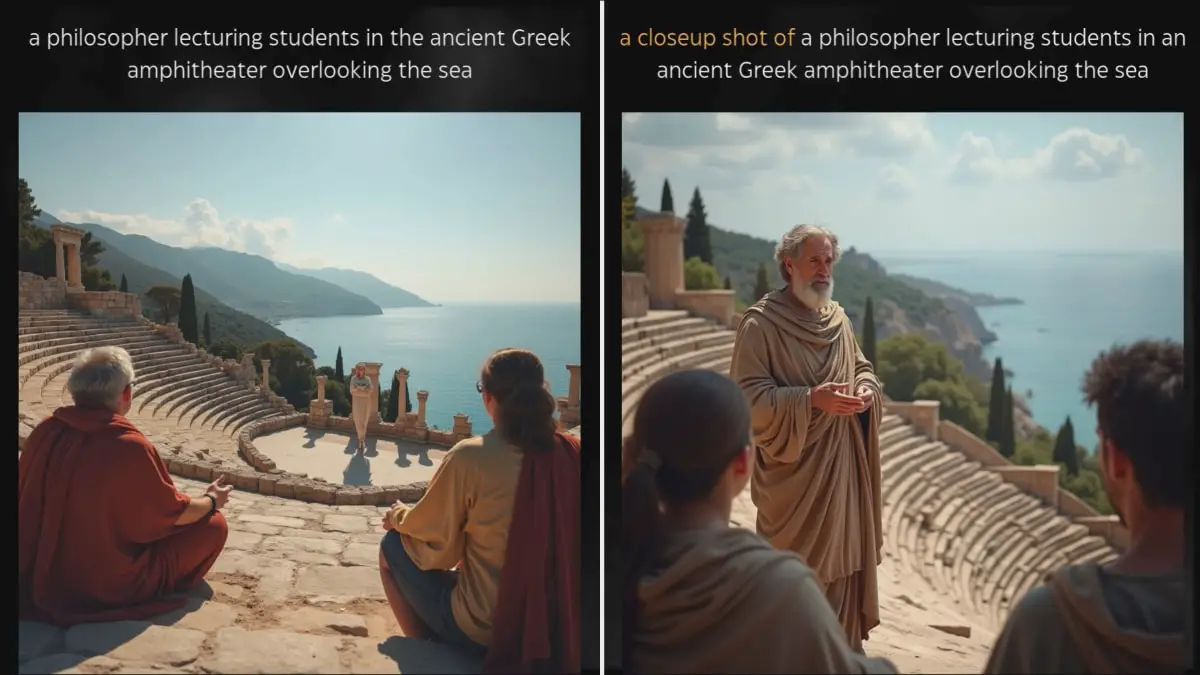
Throughout these examples, one keyword that made a huge difference is “closeup shot of.” It’s a powerful tool for bringing your subject into focus, and using it can significantly alter the image composition. Similarly, using phrases like “in the distance” or “foreground” can also adjust the focus between the subject and the background. These phrases allow you to fine-tune the perspective and balance in the generated image.
Key Takeaway
The content of your prompt directly influences how sharp or blurry the background becomes. When you add more detailed descriptions of the background, the background will become sharper and larger. If you want the subject to dominate the frame, reducing the background detail or bringing the subject to the beginning of the prompt will shift the focus.
3. Adjusting Layout with Keywords
Certain keywords in your prompts can also directly control how much space the subject occupies and how sharp the background appears. These keywords act as commands that shift the focus of the image.
Closeup shot of
Brings the subject into focus, making them larger and more detailed, while the background becomes blurred.
In the distance
Moves the subject further away, allowing the background to become more prominent and sharper.
Bird’s eye view of
Changes the perspective to a higher, more distant viewpoint, capturing more of the background and reducing the prominence of the subject.
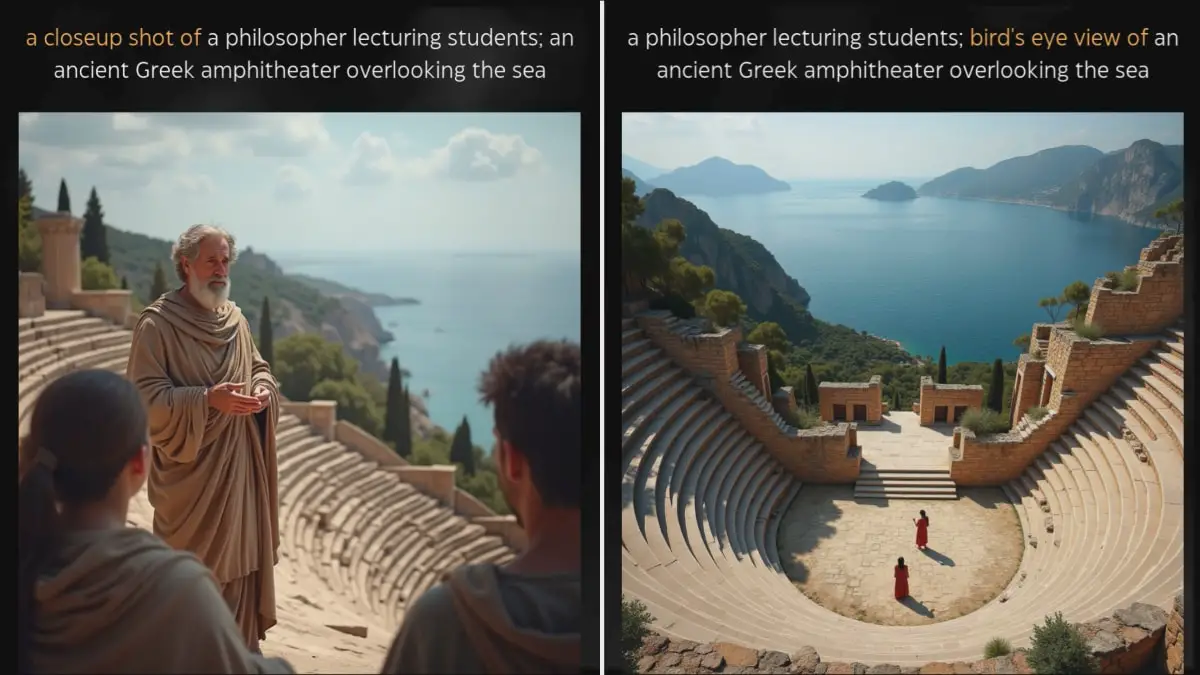
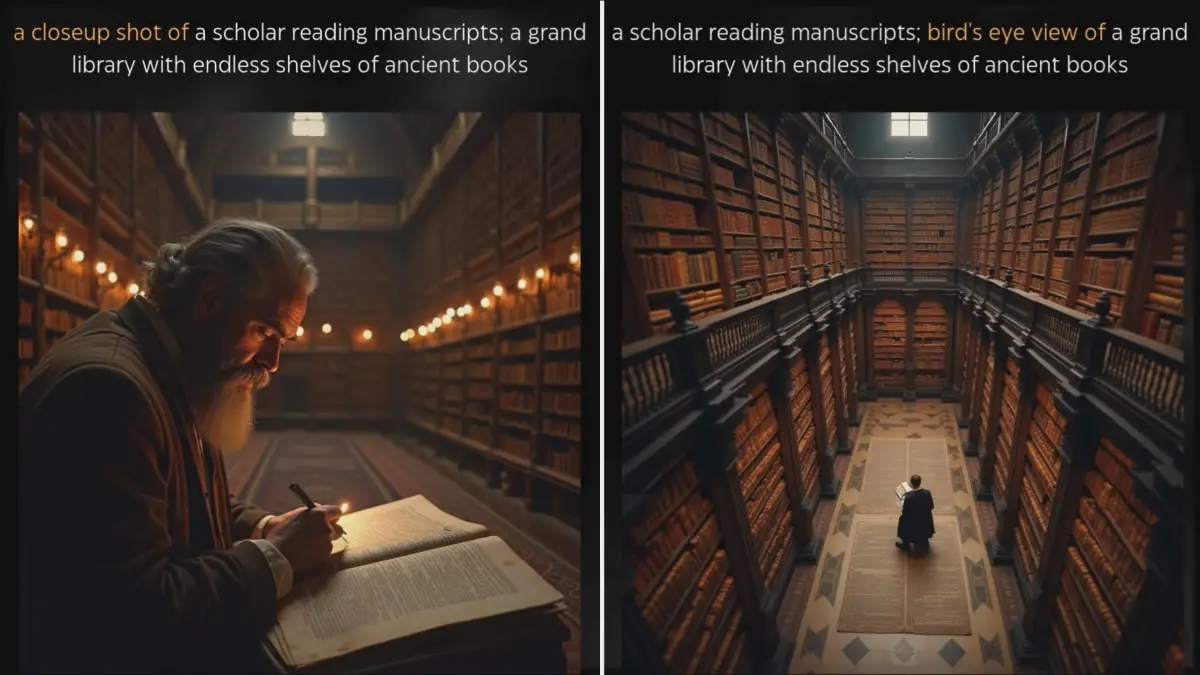
These keywords provide you with powerful control over the layout of your generated images, making it easier to create the specific visual effects you want.
4. Controlling Background Sharpness with LoRA
When generating images with the Flux model, a common challenge arises: as the subject occupies more space in the frame, the background tends to become too blurry. This can be problematic, especially when the background plays a crucial role in setting the scene or enhancing the overall mood of the image.
For example, take a look at these images:
So, how can you maintain both a sharp subject and a clear, detailed background?
One option is to add more detail to the background in your prompt. However, writing out long, complex prompts every time isn’t always ideal, especially if you want to maintain a balance between a detailed subject and a clear background without overloading the prompt.
Enter LoRA: A More Efficient Solution
A more efficient way to control background sharpness, without relying solely on the prompt, is to use LoRA (Low-Rank Adaptation). LoRA allows you to fine-tune the model’s behavior, particularly how much blur is applied to the background, without compromising the subject’s size or focus.
How LoRA Works
LoRA is essentially a lightweight modification that can adapt pre-trained models to your specific needs, in this case, to reduce background blur. It’s particularly useful when the standard output from a model like Flux doesn’t give you enough control over background clarity.
Here’s how you can use LoRA in your workflow.
Setting Up LoRA in ComfyUI
To simplify the process, I’ve set up a custom workflow for you in ComfyUI. You can download the workflow and the anti-blur Flux loRA here.
Workflow Overview
On the left side of the workflow, you’ll find a standard Flux model setup, but with an added node for LoRA to manage background blur. Below are the steps to set up and use LoRA effectively:
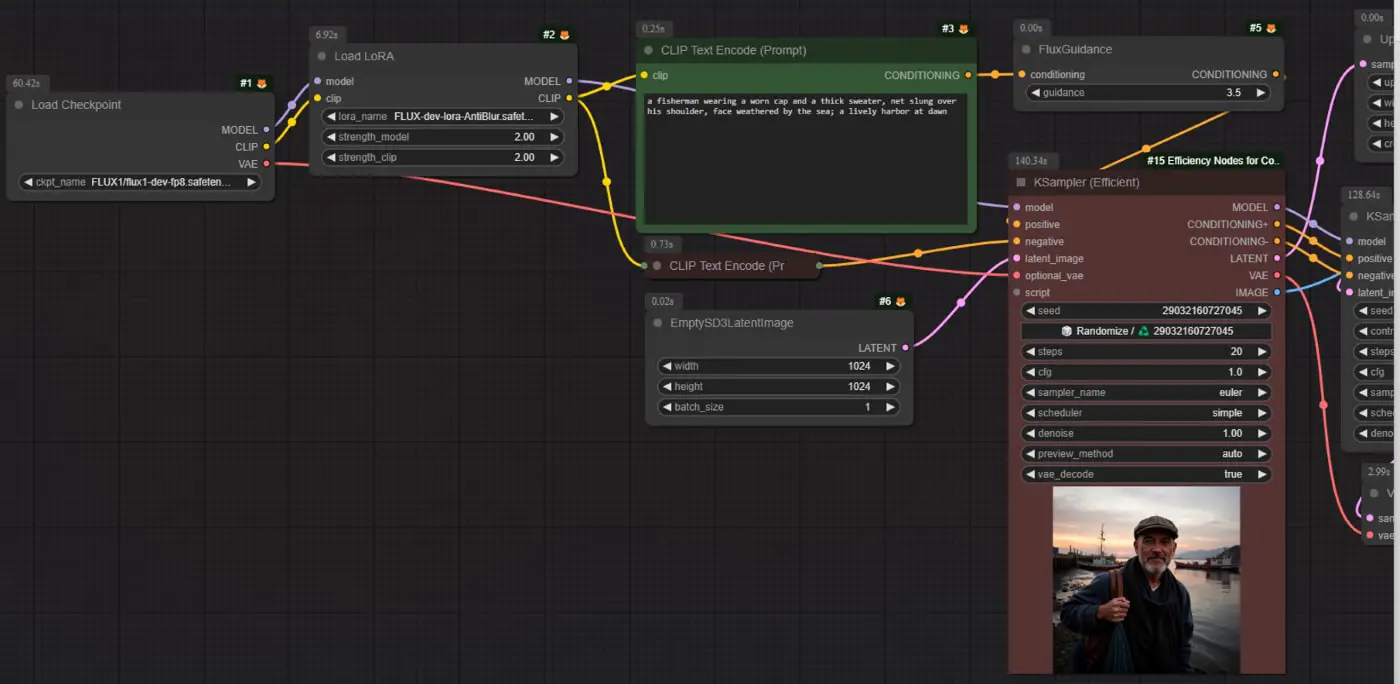
- Load the LoRA node: In the pre-configured ComfyUI workflow, you’ll see the Flux model as the base model. However, I’ve added a LoRA node specifically designed to reduce background blur. You can adjust the strength of LoRA based on your needs. For demonstration purposes, I’ve set the LoRA strength to its maximum value of 2, but you can tweak this setting to find the right balance for your images.
- Using a more efficient KSampler: Instead of using the traditional KSampler (which is a standard sampling method in Stable Diffusion workflows), I’ve opted for a more efficient KSampler. This helps streamline the process and produce cleaner results while working with LoRA.
High-Res Fix Workflow
On the right side of the workflow, we handle the high-res fix to further improve the sharpness and quality of the final image:
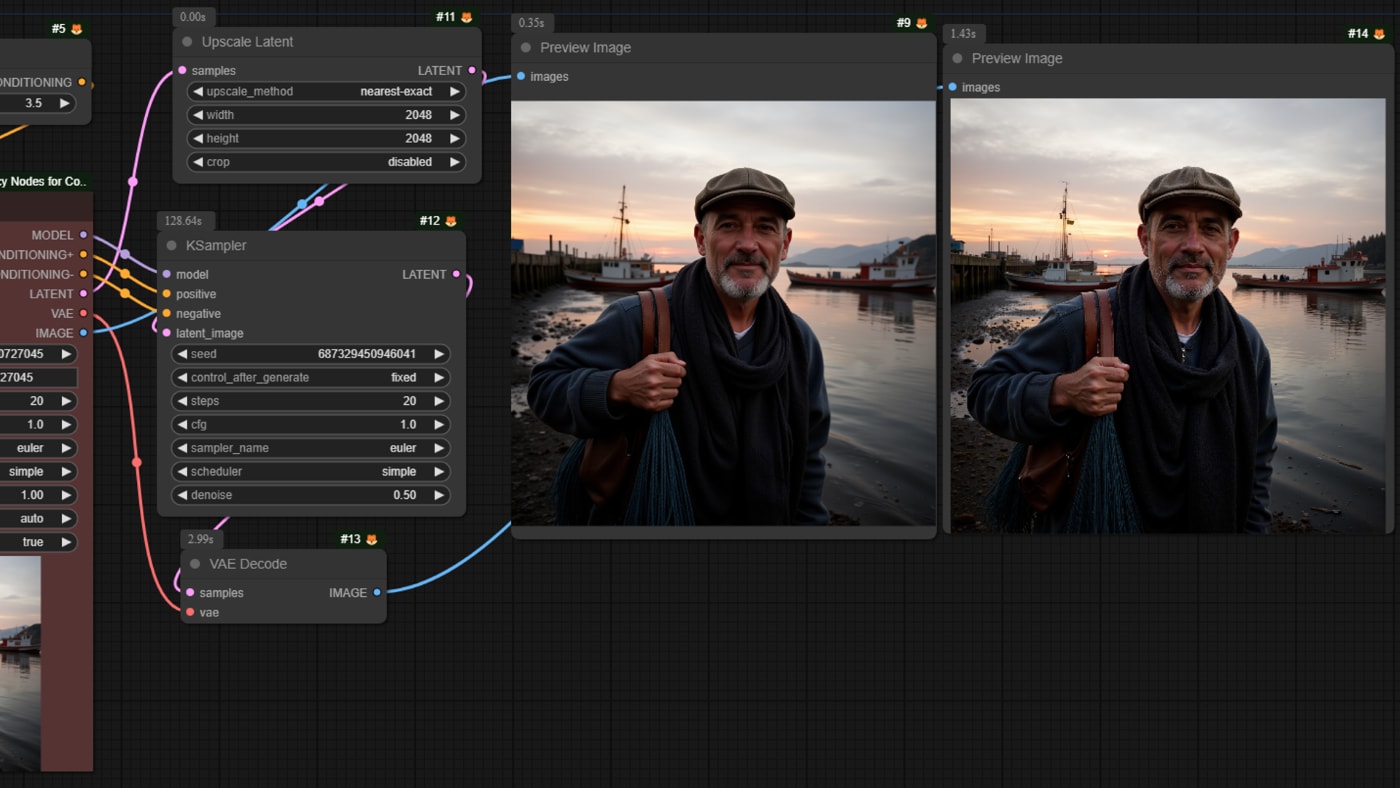
- First, we use the Upscale Latent node to increase the resolution of the image, enhancing its overall clarity and sharpness.
- Then, we apply image-to-image repainting to refine the image further, ensuring that any remaining blur is minimized, especially in the background.
Side-by-Side Comparison: LoRA vs. No LoRA
Now, let’s compare a set of images generated with and without LoRA:
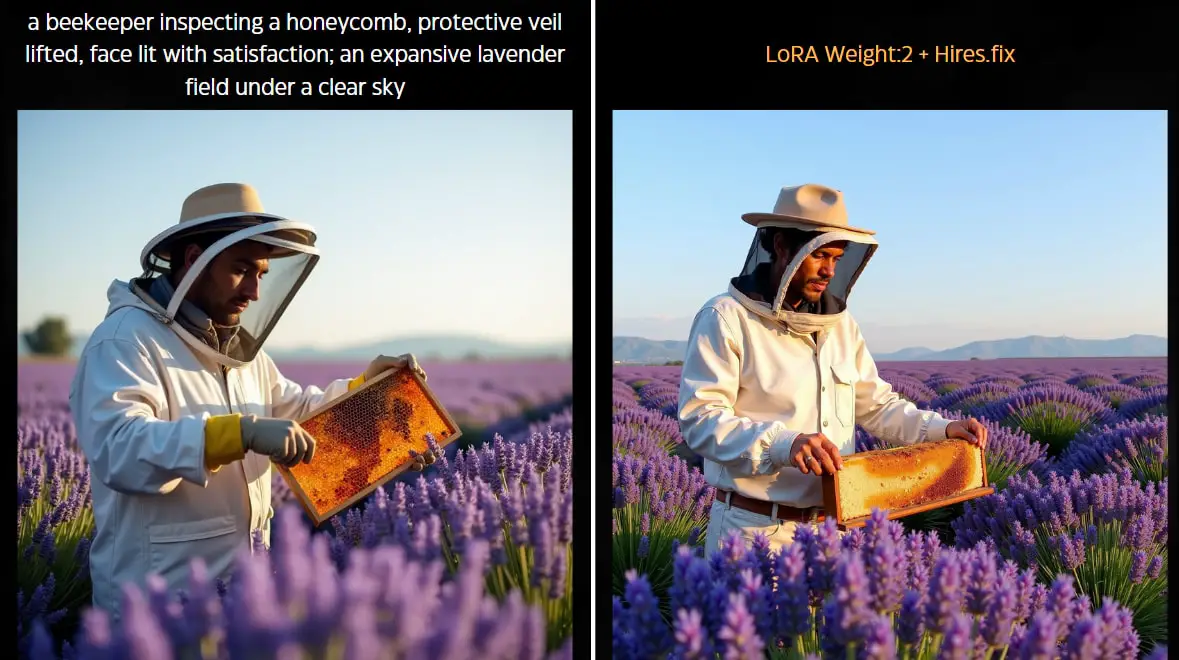
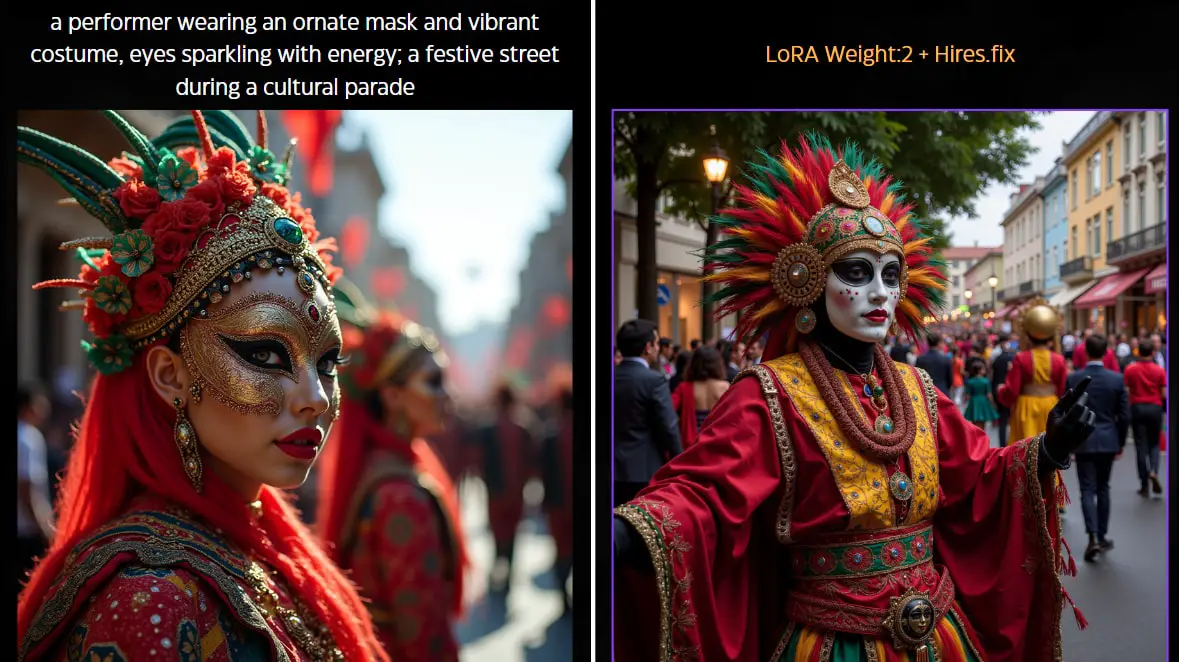
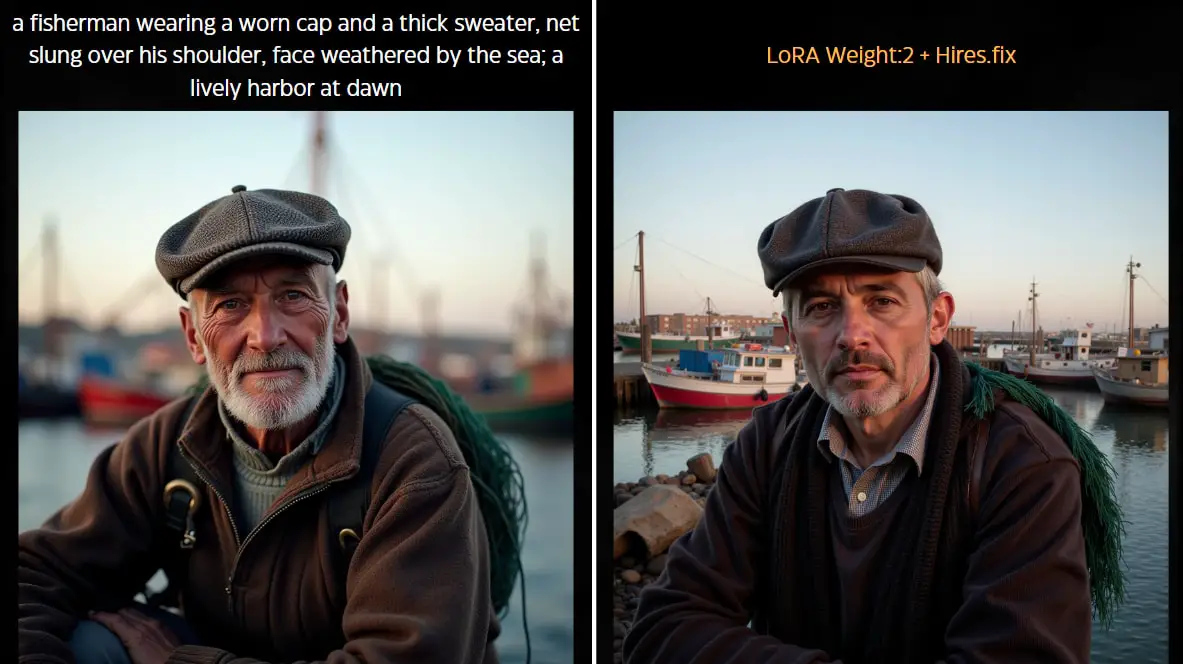
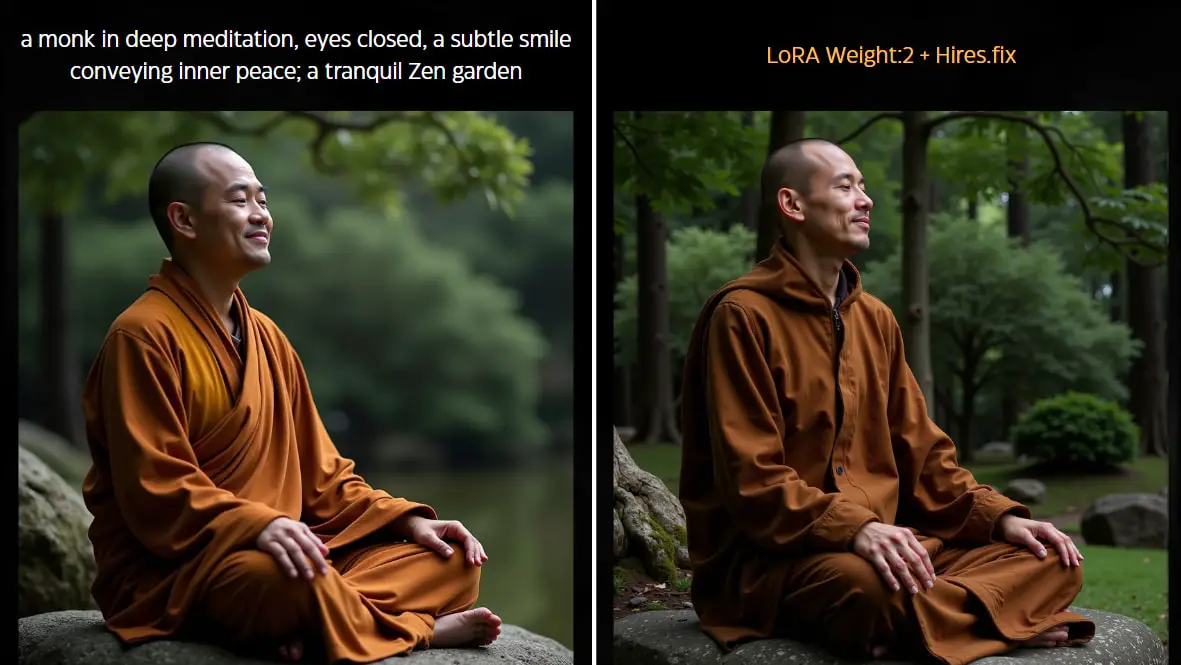
- The first image was generated using the Flux model without LoRA. As you’ll notice, while the subject is clear and occupies a large portion of the frame, the background is quite blurry.
- The second image was generated with LoRA applied. Here, the background is much sharper, even though the subject still occupies a similar amount of space in the frame. LoRA allows for a more detailed background without compromising the clarity of the subject.
By applying LoRA alongside the high-res fix, the result is a sharper, more defined background. This solution provides a practical and efficient way to overcome the common issue of background blur when using Flux or similar models.
Customizing LoRA Strength
One of the advantages of using LoRA is that you can customize its strength to suit your specific needs. If you find that the background is still too blurry or too sharp, adjusting the LoRA node’s strength will give you finer control. This flexibility allows you to generate images that strike the perfect balance between subject focus and background detail.
Try applying LoRA to your next image generation project, and see the difference it makes!
Conclusion
To summarize, here are the key techniques to control the layout and sharpness in your Stable Diffusion images:
- Adjust the level of detail in your prompt to control the size of the subject and the sharpness of the background.
- Change the order of descriptions to shift the focus between the subject and the background.
- Use keywords like “closeup shot of” or “in the distance” to fine-tune the layout and perspective.
- If the background becomes too blurry when focusing on the subject, use LoRA to sharpen the background without sacrificing subject size.
With these techniques, you’ll have much more control over the composition of your images, allowing you to create the exact visual style you’re aiming for.
I hope you found these techniques helpful! Now it’s your turn to experiment with prompts and see what you can create. Happy generating!