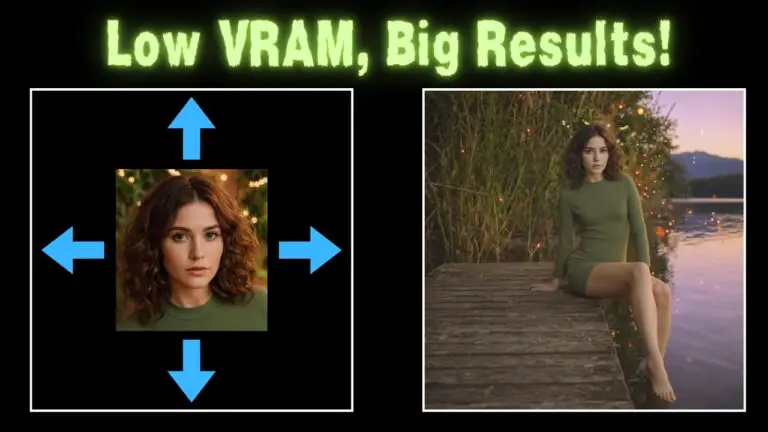
Enhanced High-Freedom ComfyUI Face Swapping Workflow: FaceDetailer + InstantID + IP-Adapter
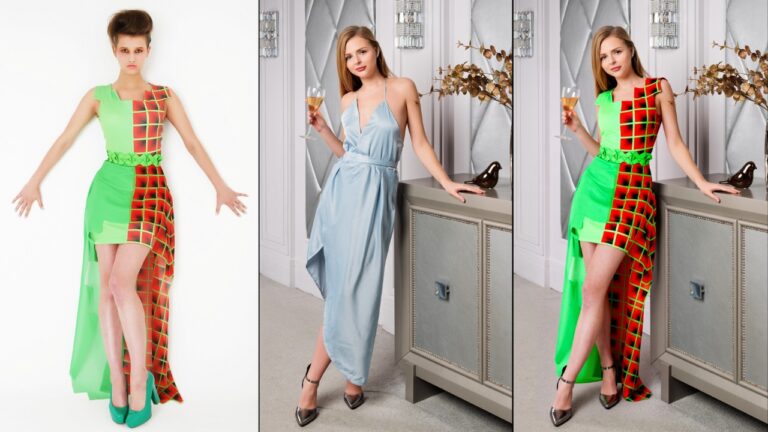
A common hurdle encountered with ComfyUI’s InstantID for face swapping lies in its tendency to maintain the composition of the original reference image, irrespective of discrepancies with the user’s input.
For instance, if a user uploads a headshot while requesting a full body depiction, the output frustratingly remains a mere headshot, ignoring the intended composition.
This issue also arises when attempting to generate a full-body image from a half-body shot; the result stubbornly stays a half-body shot.

To address this limitation, I’ve devised an innovative workflow that adapts the face in the reference image to any photo, liberating us from the constraints of the original composition.
This method significantly enhances creative flexibility and ensures that the resulting image aligns more closely with the user’s actual requirements.
Let’s delve into the implementation details of this revamped workflow.
For those who love diving into Stable Diffusion with video content, you’re invited to check out the engaging video tutorial that complements this article:
Gain exclusive access to advanced ComfyUI workflows and resources by joining our community now!
Constructing a Basic Workflow
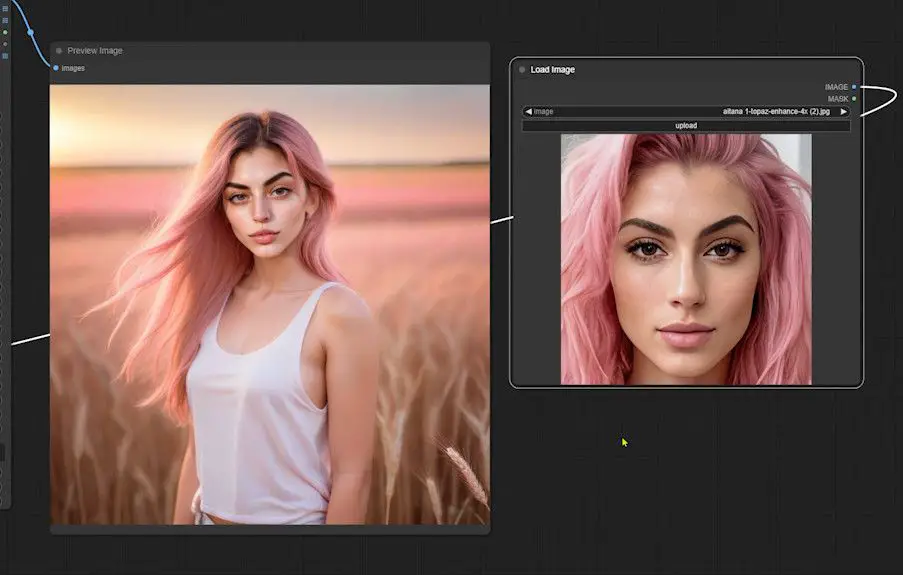
Initially, use SDXL to create a portrait photo. This photo serves as the foundation for the face-swapping process, which can also employ images from Midjourney or your own photographs, offering versatile options.
Generating a Portrait Photo
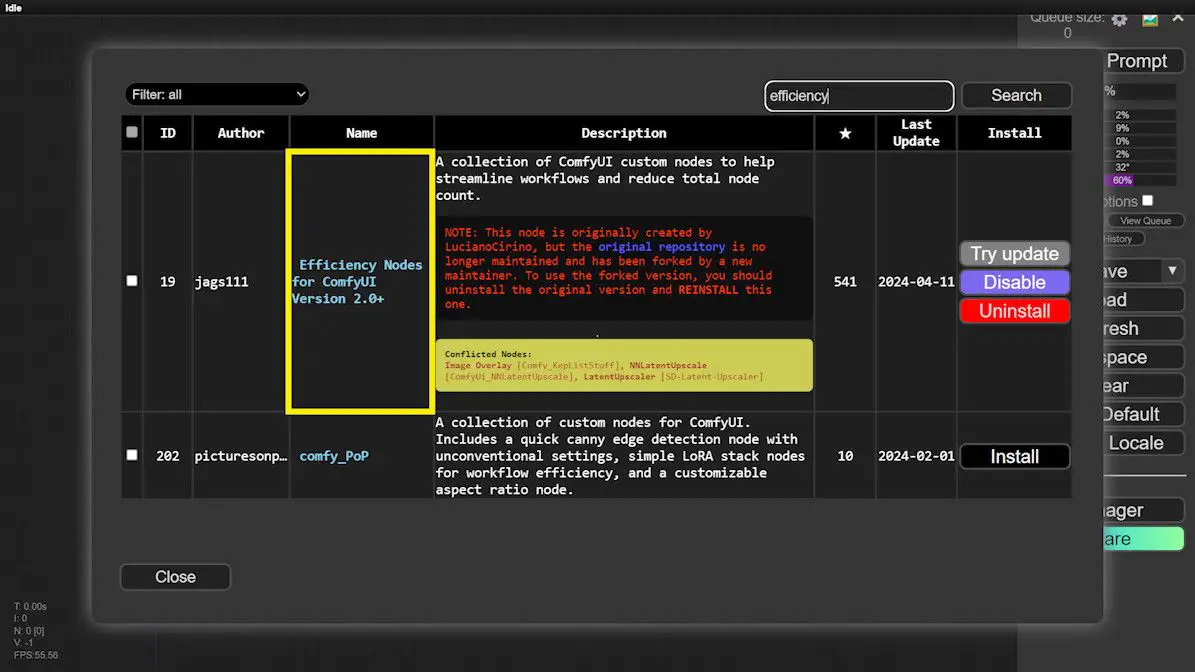
1️⃣ Preparation: Ensure the ‘Efficiency Nodes’ are active in your ComfyUI Manager.
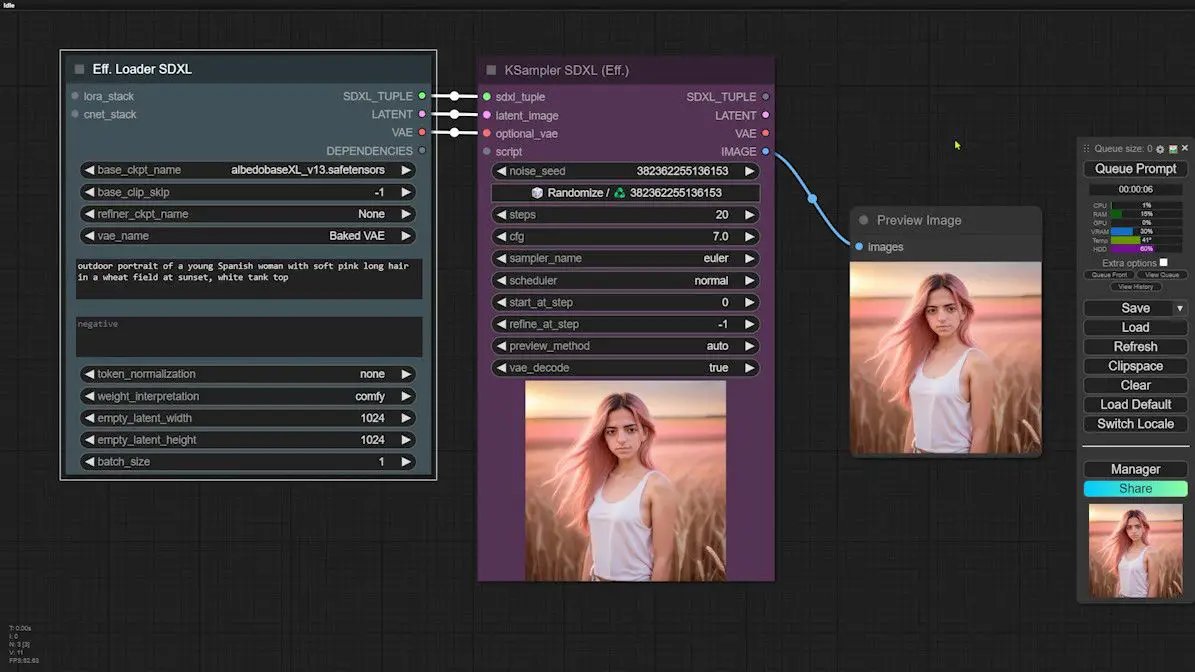
2️⃣ Setup SDXL Nodes:
- Activate SDXL’s ‘Efficiency Loader’ along with the ‘KSampler’.
- Link these nodes, choose a checkpoint, and input your prompt.
- Execute the base workflow to generate a portrait photo.
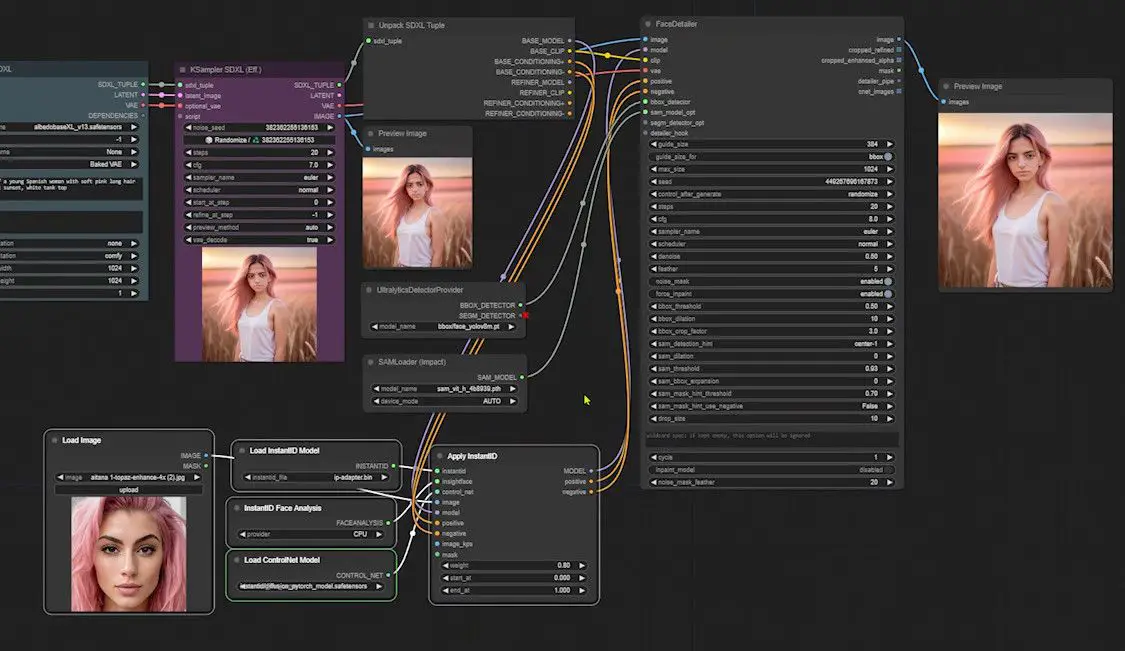
Face Swap Operation
3️⃣ Load Required Nodes:
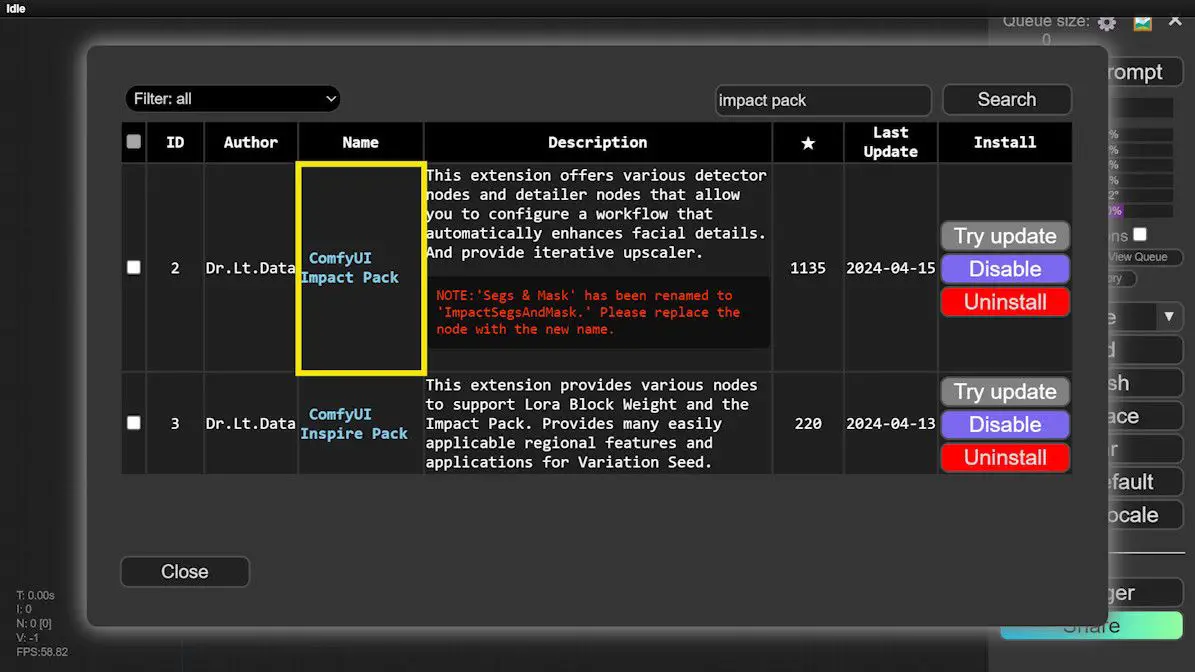
- Confirm that the Impact Pack node package is installed in your ComfyUI Manager.
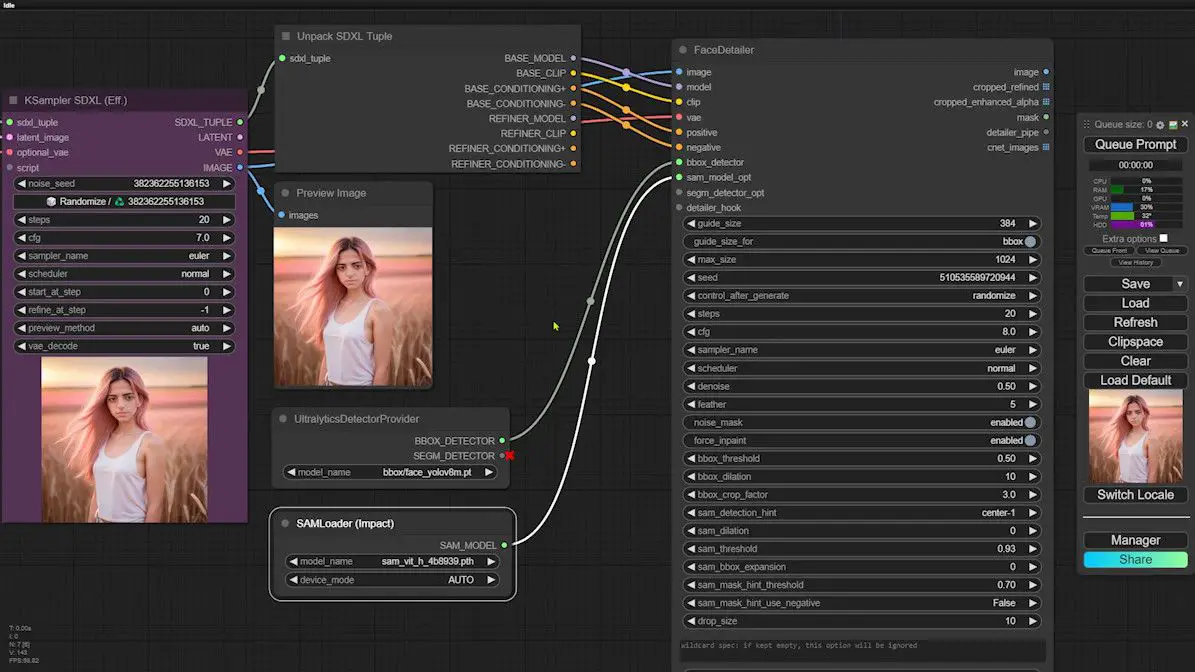
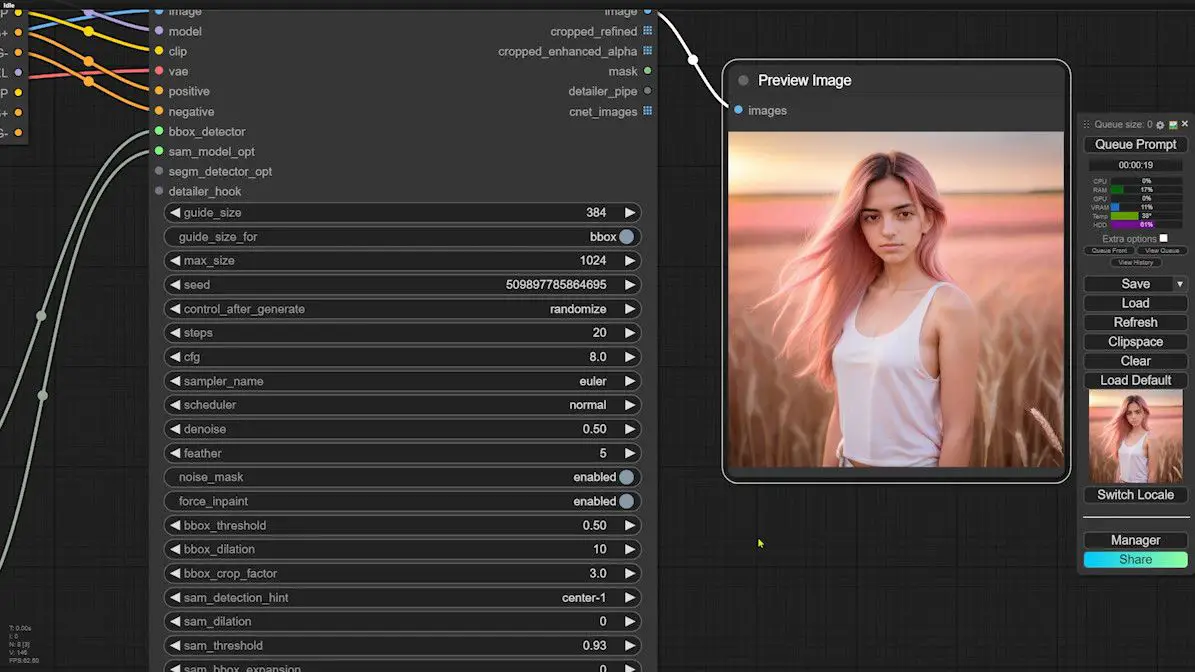
- Integrate FaceDetailer, a node that excels in repainting faces by automatically recognizing and refining face regions.
- Incorporate nodes for detecting face regions and segmenting the face, enhancing the accuracy of facial feature processing.
- Connect these nodes and verify their linkage by using the “Queue Prompt” button.
For additional guidance, refer to my previous tutorial on using LoRA and FaceDetailer for similar face swapping tasks here.
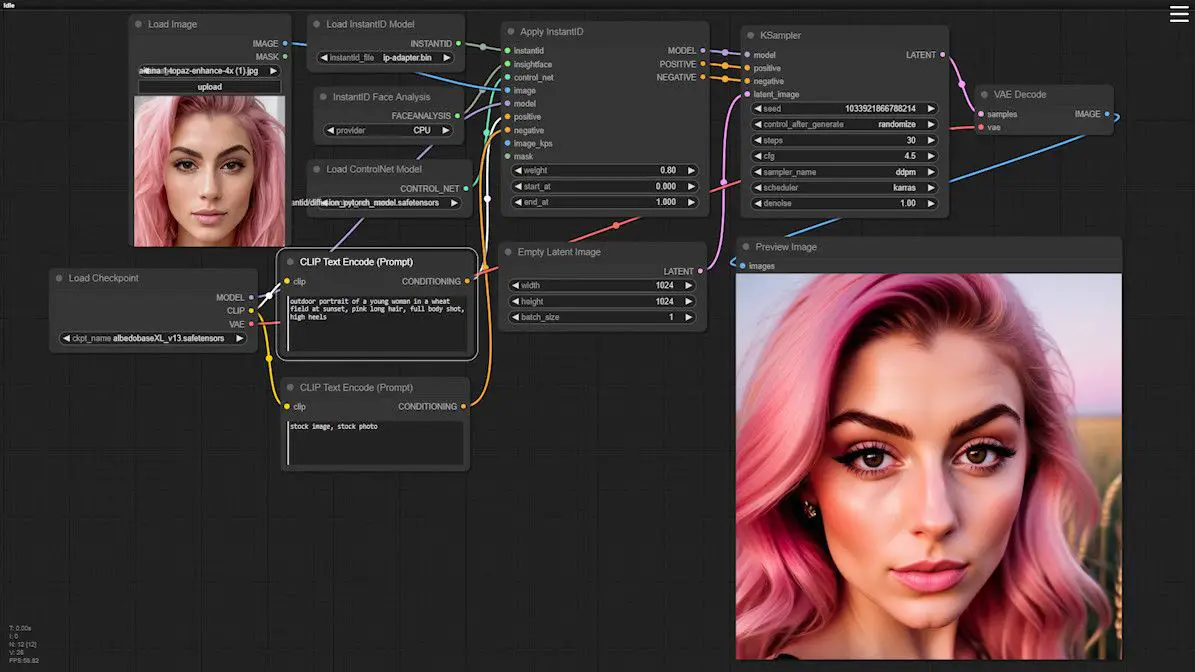
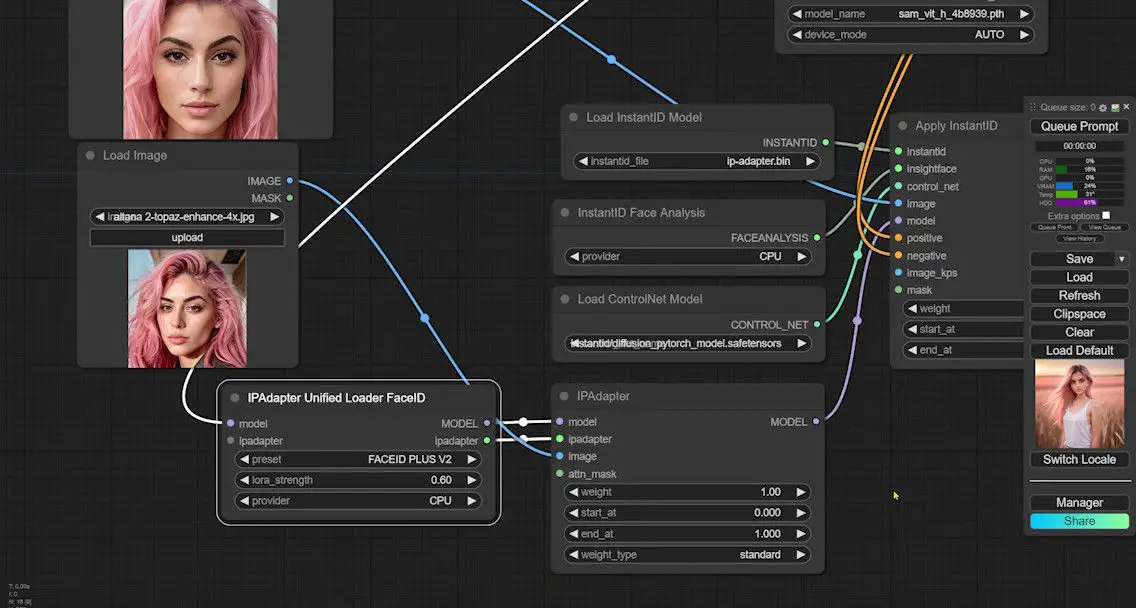
Integrating and Configuring InstantID for Face Swapping
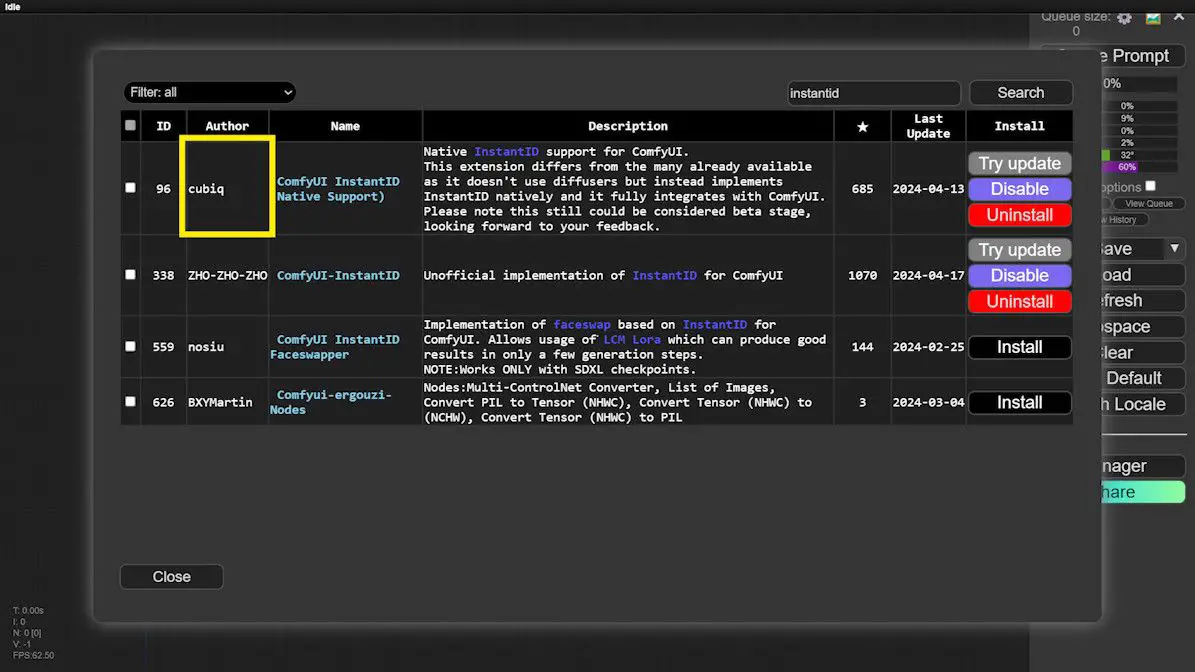
Step 1: Install and Configure InstantID
1️⃣ Install InstantID: Ensure the InstantID node developed by cubiq is installed within your ComfyUI Manager.
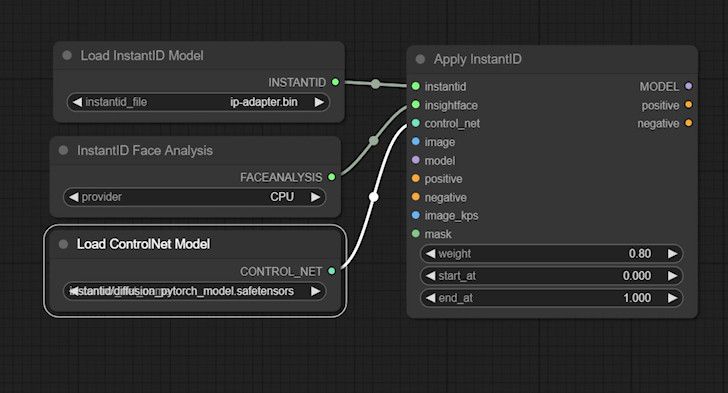
2️⃣ Configure Node:
- Select and add the
Apply InstantIDnode to your setup. - Link the model input port of
InstantIDand incorporate the required model. - Include the
insightfacemodel for enhanced facial feature recognition. - Attach a
ControlNetnode to bolster InstantID functionality.
Step 2: Prepare the Reference Image
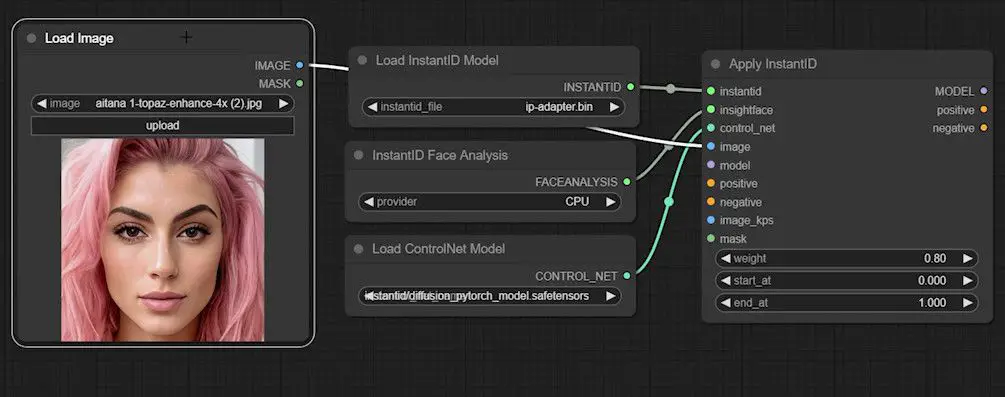
3️⃣ Upload a Reference Image:
- Choose a suitable reference image, like an AI Influencer’s face from Instagram, intended for facial replacement in your portrait.
- Ensure the image is correctly linked to the node setup.
Step 3: Adjust Parameters and Connections
4️⃣ Connect Node:
- Link the model and prompt from the SDXL Tuple node to InstantID.
5️⃣ Connect Output Port:
- Confirm that the output port of InstantID seamlessly connects to the input port of FaceDetailer.
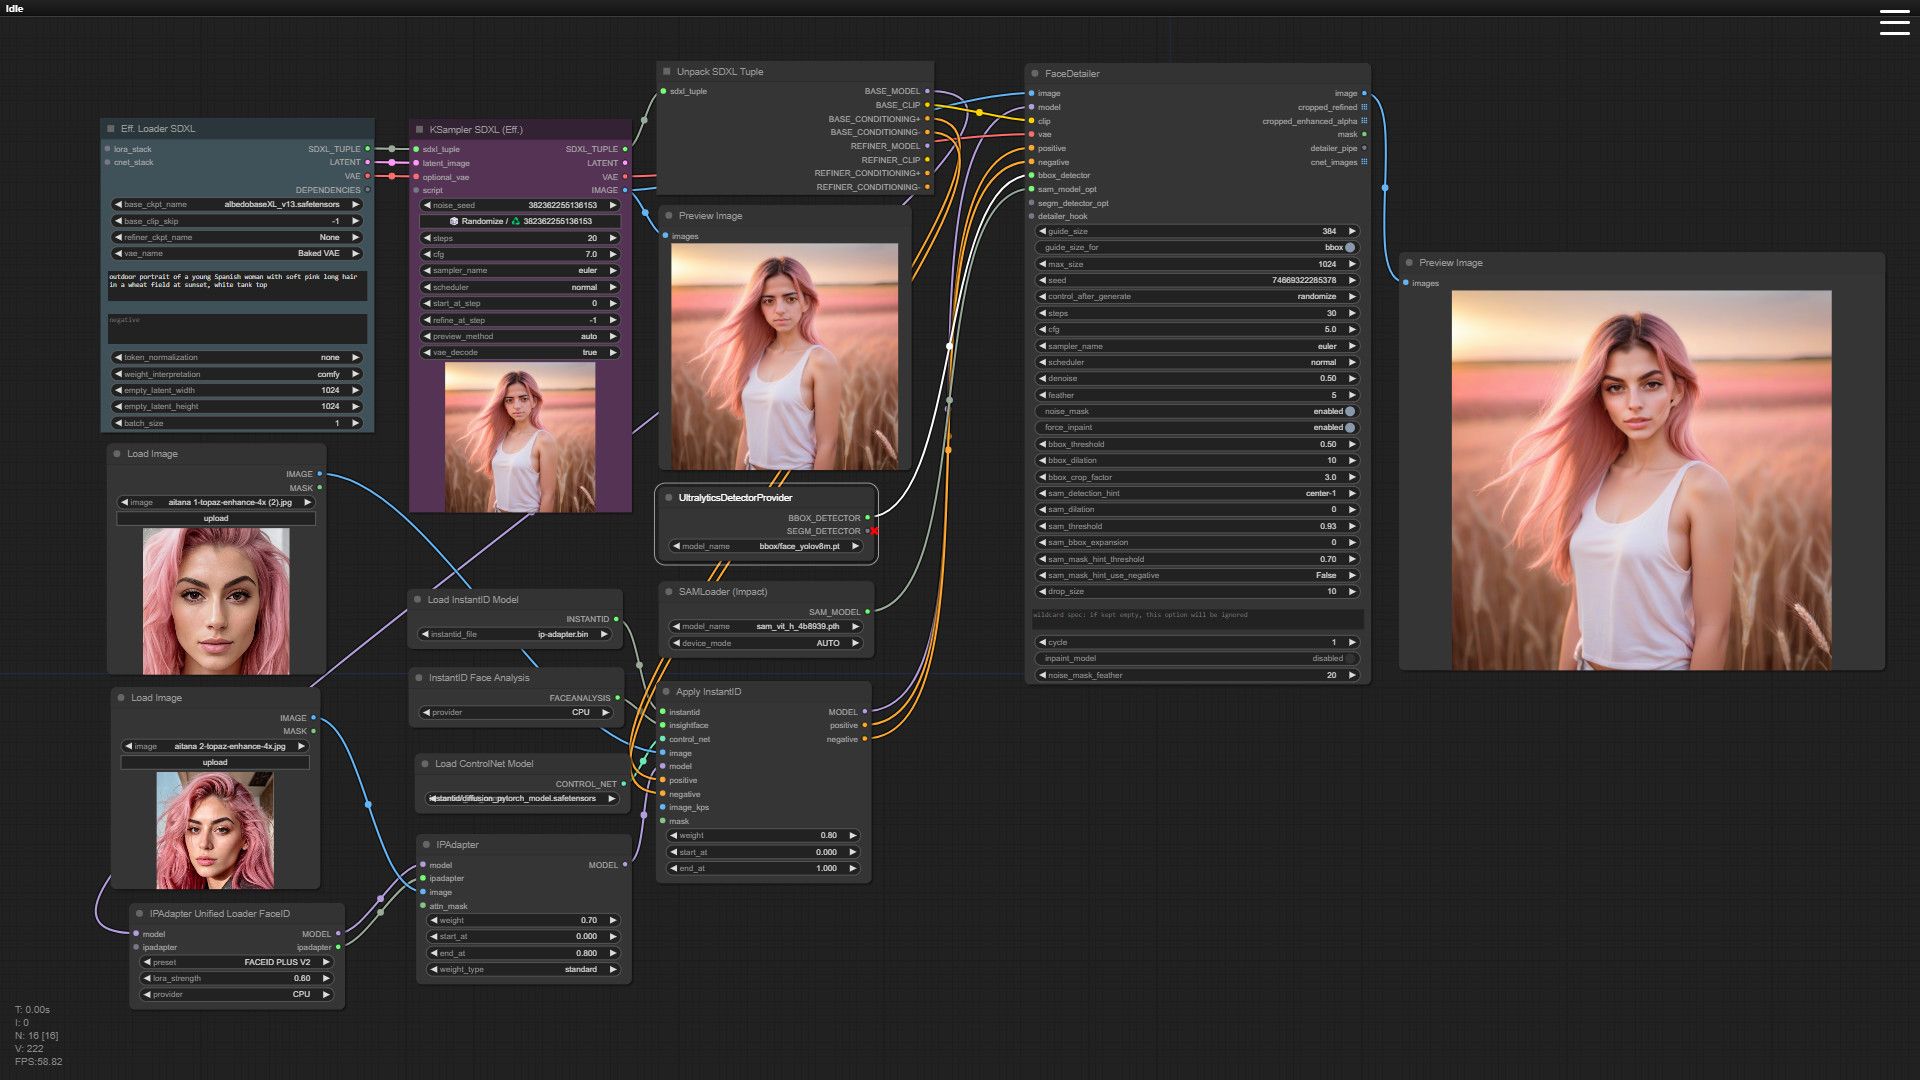
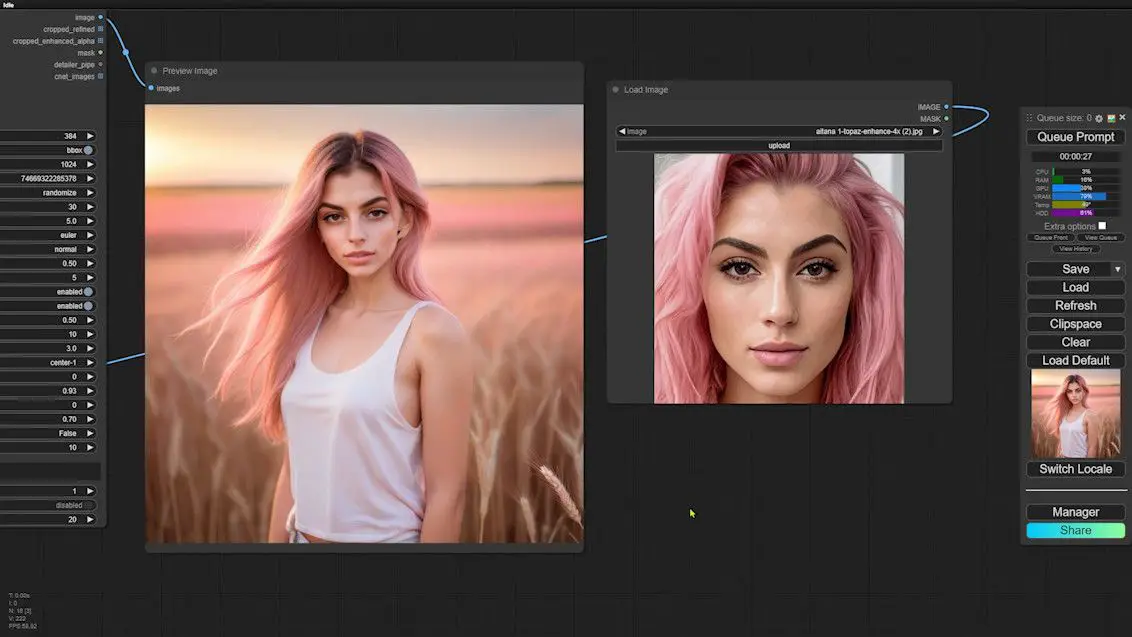
Initiating the Face Swap Operation
6️⃣ Execute the Face Swap:
- Ensure all connections are accurately set before initiating the face swap operation.
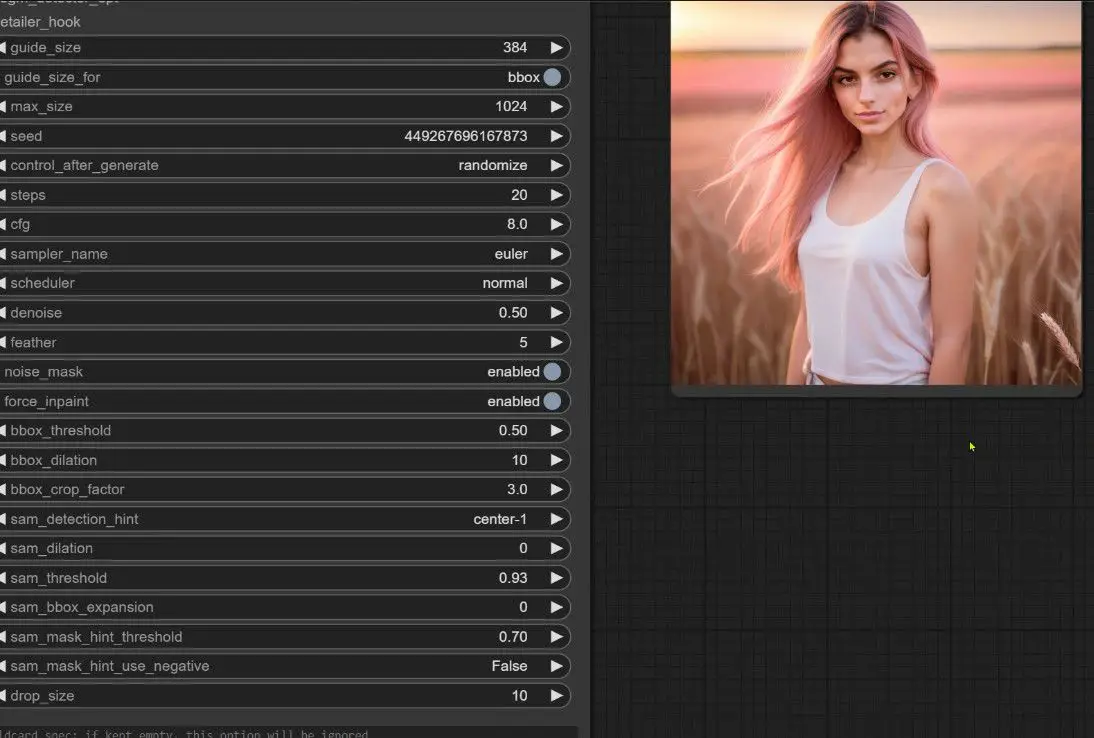
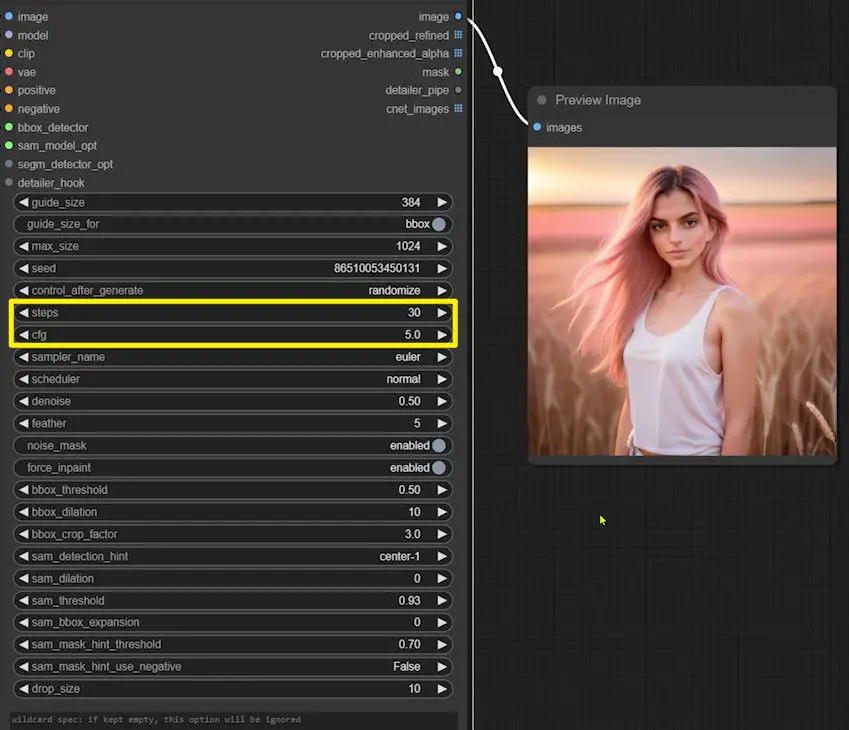
- Carefully observe the resulting image. If you notice any overfitting—where the output too closely mimics the input without the desired alterations—adjust the configuration slightly. Reduce the cfg to minimize overfitting and increase the step count to refine the transformation process. Generate the image once more after these adjustments.
Compare the initial face reference image with the post-swap output. If the similarity between the two images feels off, this may signal a need for further enhancement.
Integrating an IP-Adapter is often a strategic move to improve the resemblance in such scenarios. Let’s proceed to add the IP-Adapter to our workflow.
Enhancing Similarity with IP-Adapter
Step 1: Install and Configure IP-Adapter
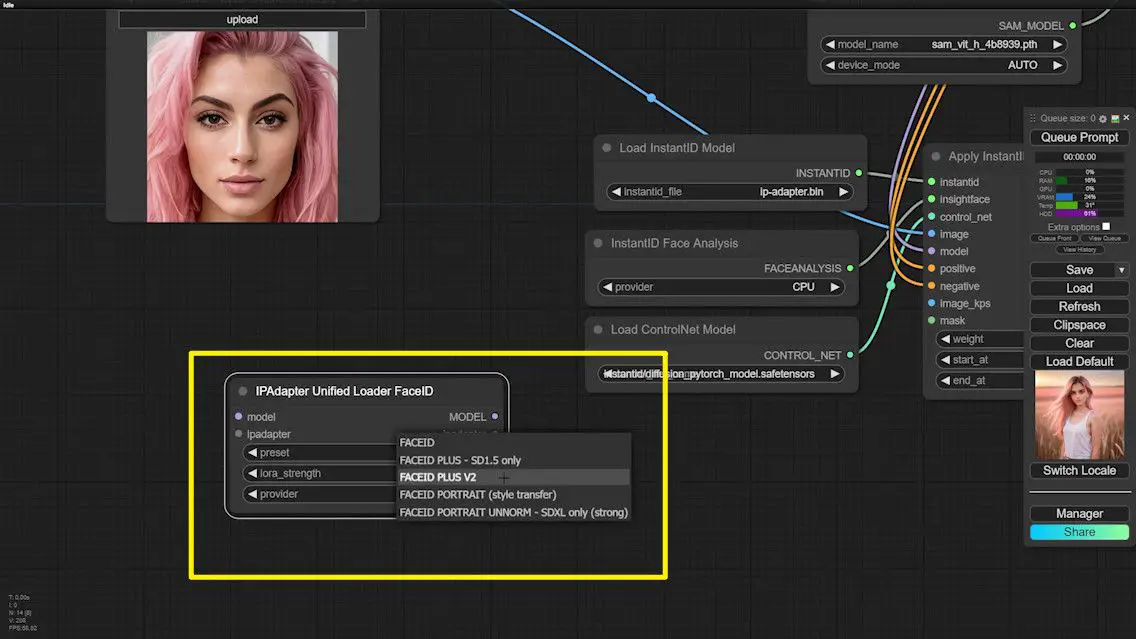
1️⃣ Select the IP-Adapter Node:
- Locate and select the “FaceID” IP-Adapter in ComfyUI.
- If unavailable, verify that the “ComfyUI IP-Adapter Plus” is installed and update to the latest version.
2️⃣ Configure IP-Adapter FaceID Model:
- Choose the “FaceID PLUS V2” presets, and the model will auto-configure based on your selection (SD1.5 or SDXL).
3️⃣ Connect the IP-Adapter:
- Establish a connection from the main IP-Adapter node to the Unified Loader.
- Link the model input of the Unified Loader to the model output of the SDXL Tuple.
- Connect the model output of the IP-Adapter to the model input of InstantID.
- Additionally, attach the image input port either directly to the reference image used in InstantID or to a dedicated node designed for loading images.
Step 2: Execute, Evaluate, and Optimize the Face Swap
4️⃣ Run the Face Swap Operation:
- With the setup complete, initiate the face swap process once more to observe the enhancements made by the IP-Adapter.
- Carefully compare the initial reference image with the newly generated face swap image to assess the improvement in similarity.
5️⃣ Adjust Parameters to Minimize Overfitting:
- Should you notice any overfitting, fine-tune the settings. Decrease the weights and reduce the number of end steps in the IP-Adapter node to achieve a more natural look.
- Conversely, if the similarity appears diminished post-adjustment, incrementally increase the weights to restore detail without compromising the authenticity of the output.
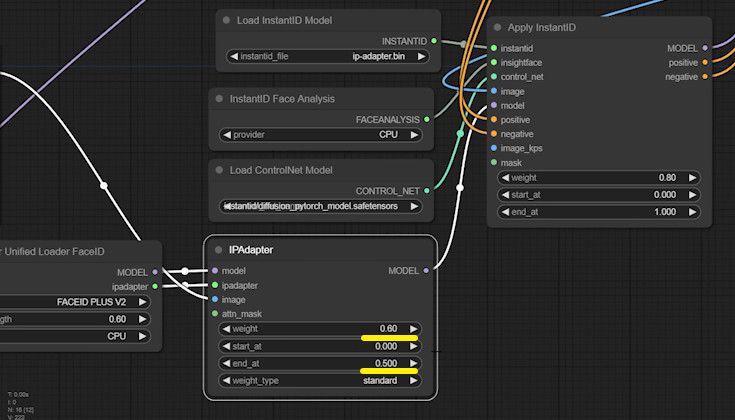
6️⃣ Further Optimization:
- If the similarity still doesn’t meet your expectations, further refine the weight settings of both the InstantID and IP-Adapter to dial in the desired outcome.
- Address specific detail issues, such as anomalies in ears or forehead appearance. These can be rectified either by using inpaint techniques or by tweaking the parameters dedicated to facial areas within the FaceDetailer node.

Advanced Optimization Tips for Enhanced Similarity
If achieving a higher level of similarity in your face swaps is paramount, you may want to explore the option of training a LoRA for a specific person. I have compiled a comprehensive tutorial on utilizing a trained LoRA for face swapping in ComfyUI, which can significantly elevate the precision and likeness of your results.
By following the steps outlined in the tutorial, you can master the technique of fine-tuning your face swaps to achieve an exceptionally high degree of similarity.
This approach allows for meticulous adjustments, ensuring that the final image not only meets but exceeds your expectations in terms of quality and fidelity.
Thank you for engaging with this guide. I trust these insights prove beneficial to you.
Stay tuned for more tutorials that will help you refine your skills and achieve professional-grade results in your projects!