Face Swapping Showdown: Flux PuLID, InstantID, and EcomID Compared and Perfected
Hello, friends! Wei here. Today, we’re going to explore and compare 3 popular face replacement techniques: Flux-based PuLID, SDXL-based InstantID, and the latest SDXL-based EcomID.
You can download the workflow for free: https://openart.ai/workflows/myaiforce/2ATyK62dutoPVCevX8o5
Each of these methods has its own strengths, but none are currently capable of reaching a perfect 100% face match. To address this, I’ve developed a workflow that claims to achieve 100% face similarity with recent optimizations, including a high-res fix. In this article, I’ll break down each step of this workflow so that you can follow along and try it yourself.
Now, let’s get started by examining the setup and configuration of the workflow. Feel free to check the video tutorial:
Workflow Overview
In the workflow, I’ve set up an organized structure for comparing the three face-swapping methods side by side. Here’s a quick breakdown of how it’s set up:
- Basic Settings: On the left side of the workflow, you’ll find the general settings where you can adjust the image size, select the checkpoint, and input your prompt.
- Routing with Nodes: Once configured, these settings pass through nodes like “Bus Node” and “Anything Everywhere,” which then connect to the node groups for each of the face-swapping techniques (PuLID, InstantID, EcomID). This setup keeps the workflow organized and easy to manage.
- Seed Consistency: I’ve added a “Seed Everywhere” node to ensure each technique is using the exact same seed, providing a fair and consistent basis for comparison.
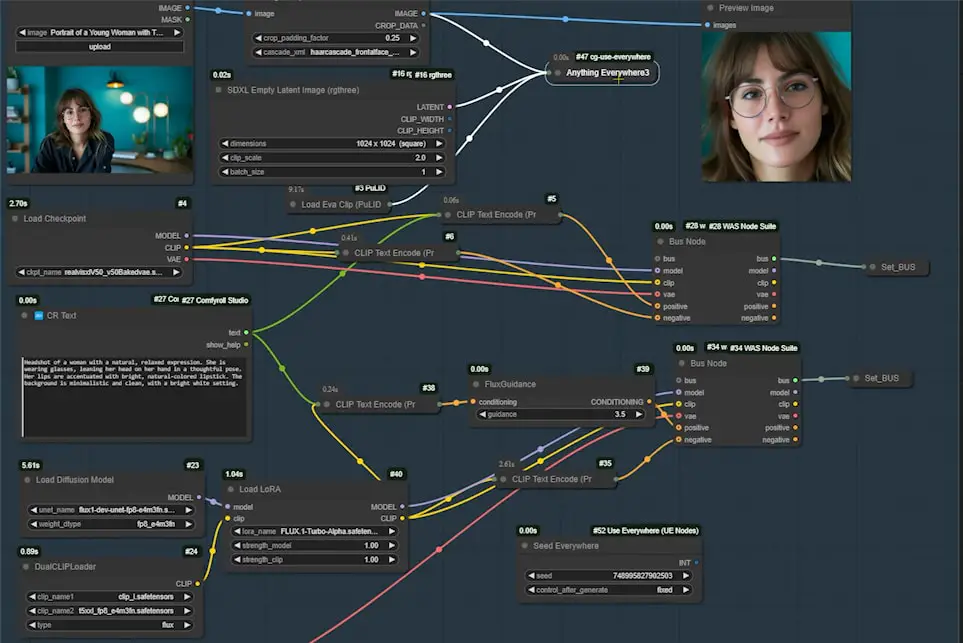
Face Swapping Methods
Now, let’s dive into each face-swapping node group in detail.
- EcomID: This is the most complex setup of the three. It loads both InstantID and PuLID while using its own unique ControlNet model.
- InstantID and Flux-based PuLID: These are simpler configurations but still highly effective. I recommend exploring these node groups on your own within the workflow.
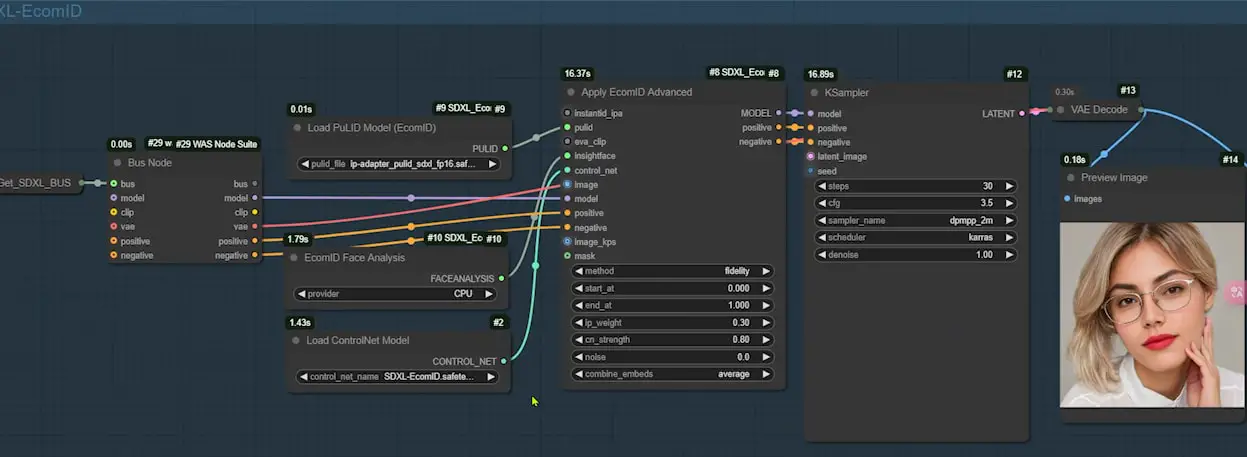
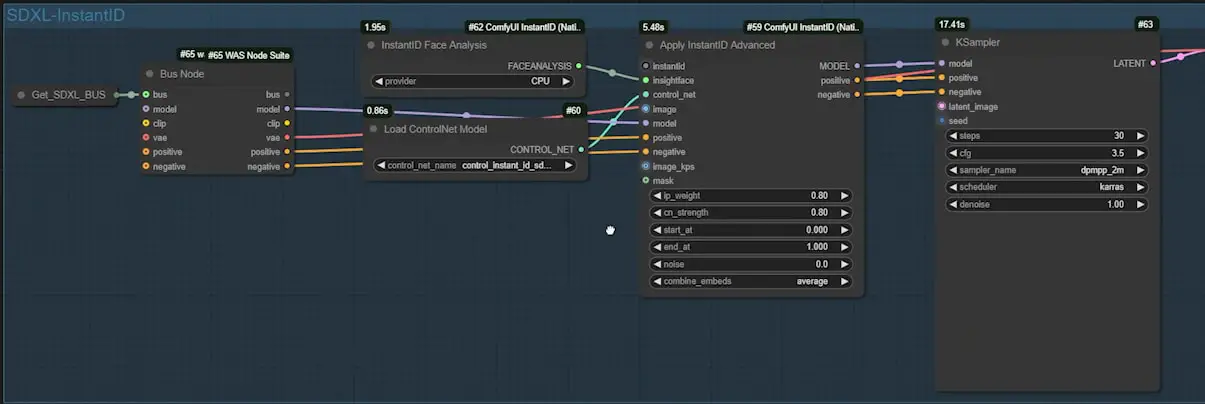
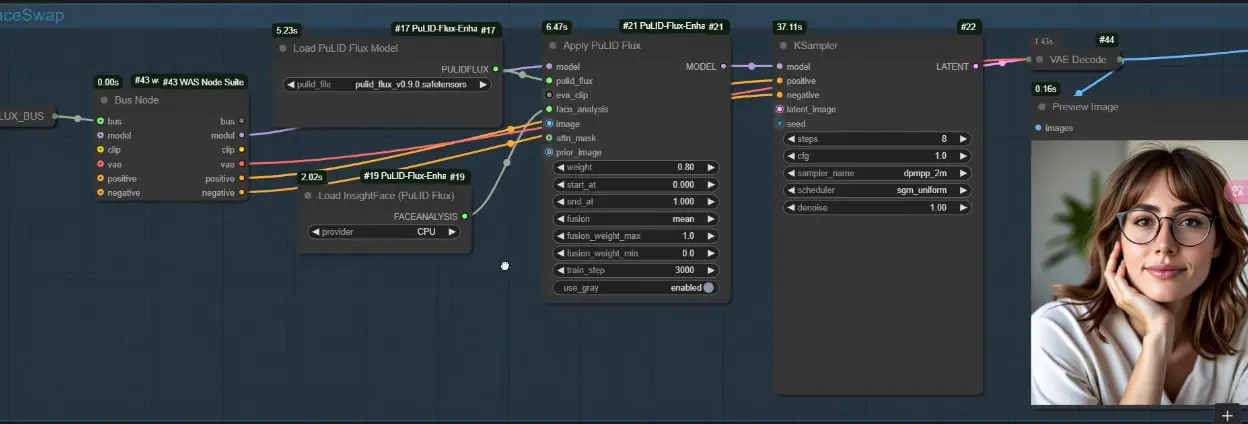
Image Comparison
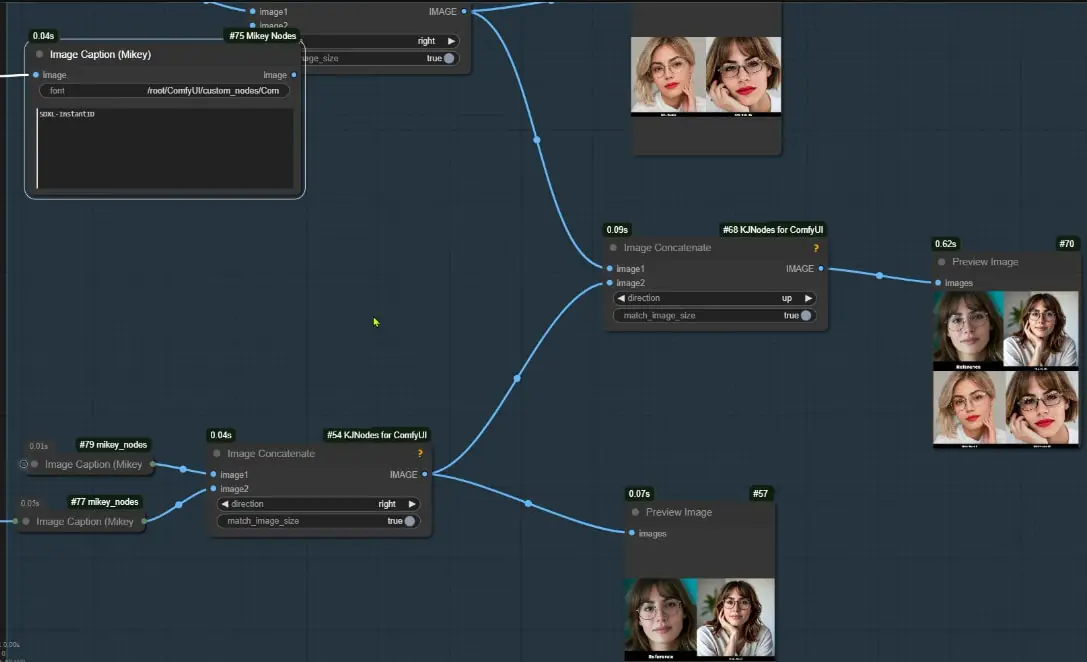
At the far right of the workflow, a node group stitches together images generated by each technique and compares them to the original reference image. I’ve included captions for these images using the “Image Caption” node, which requires a path to a TTF font file. Otherwise, the node will produce an error.
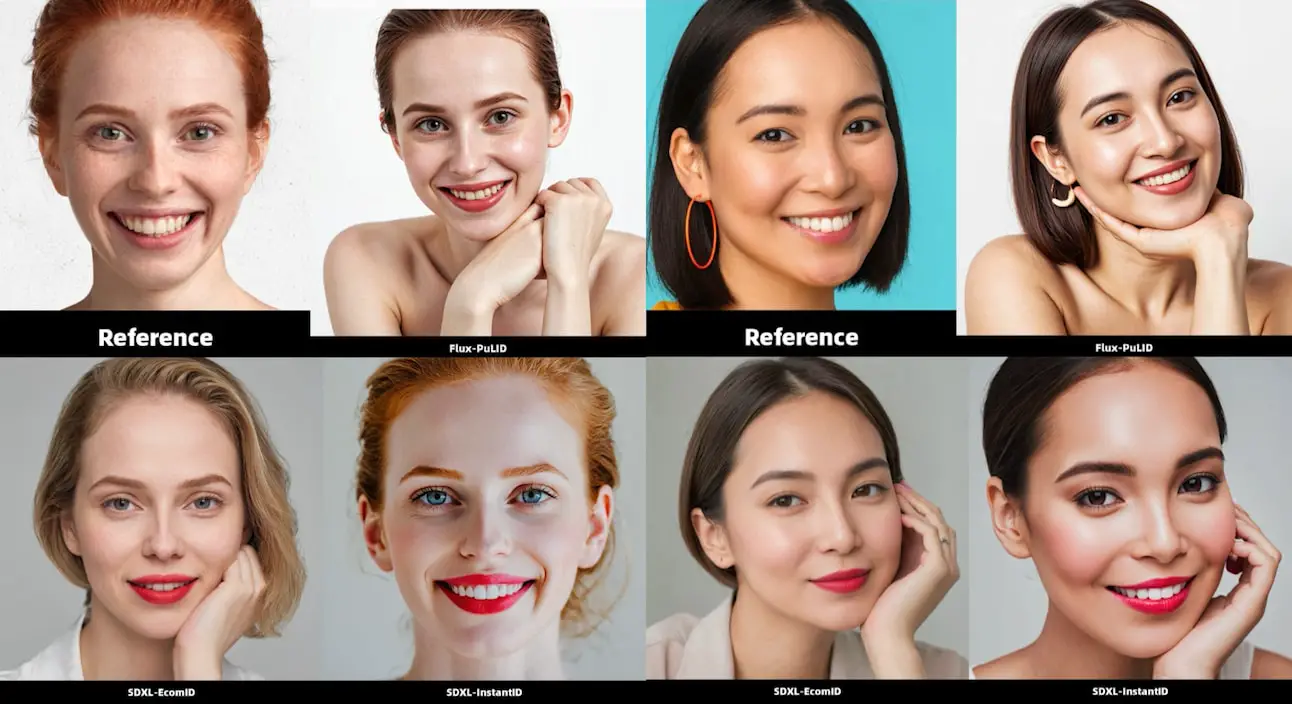
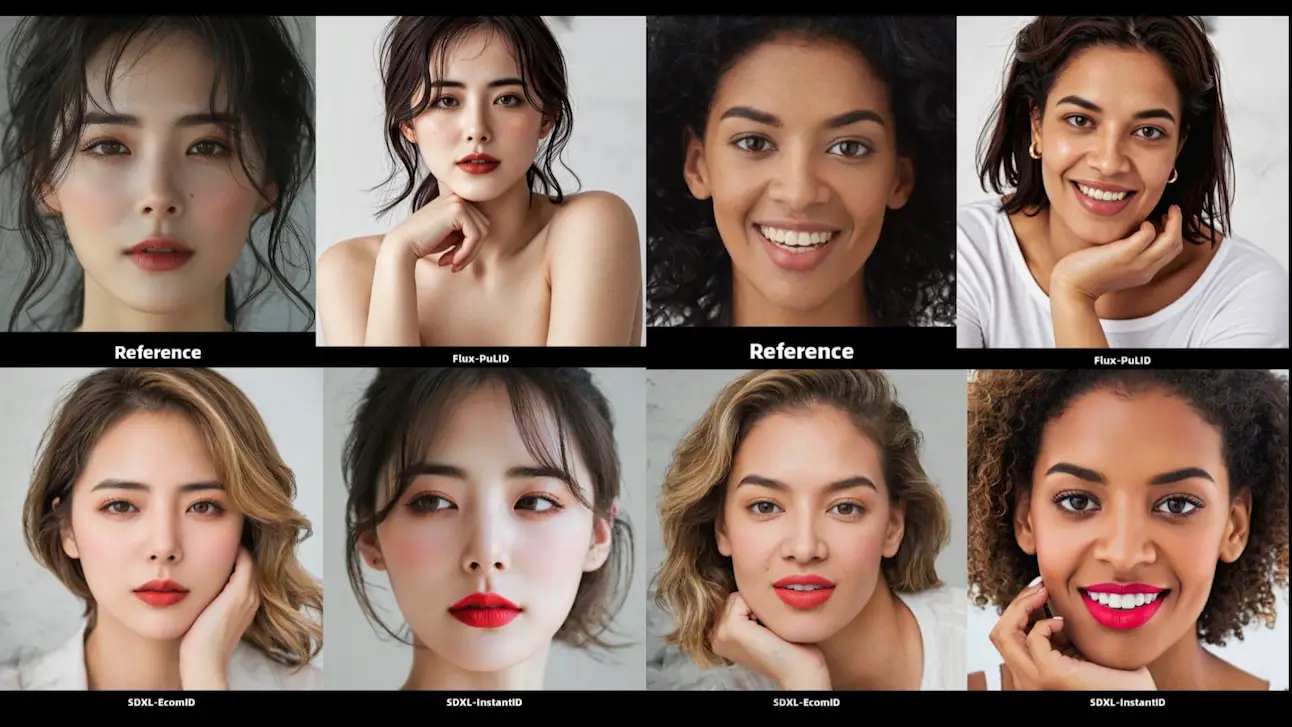
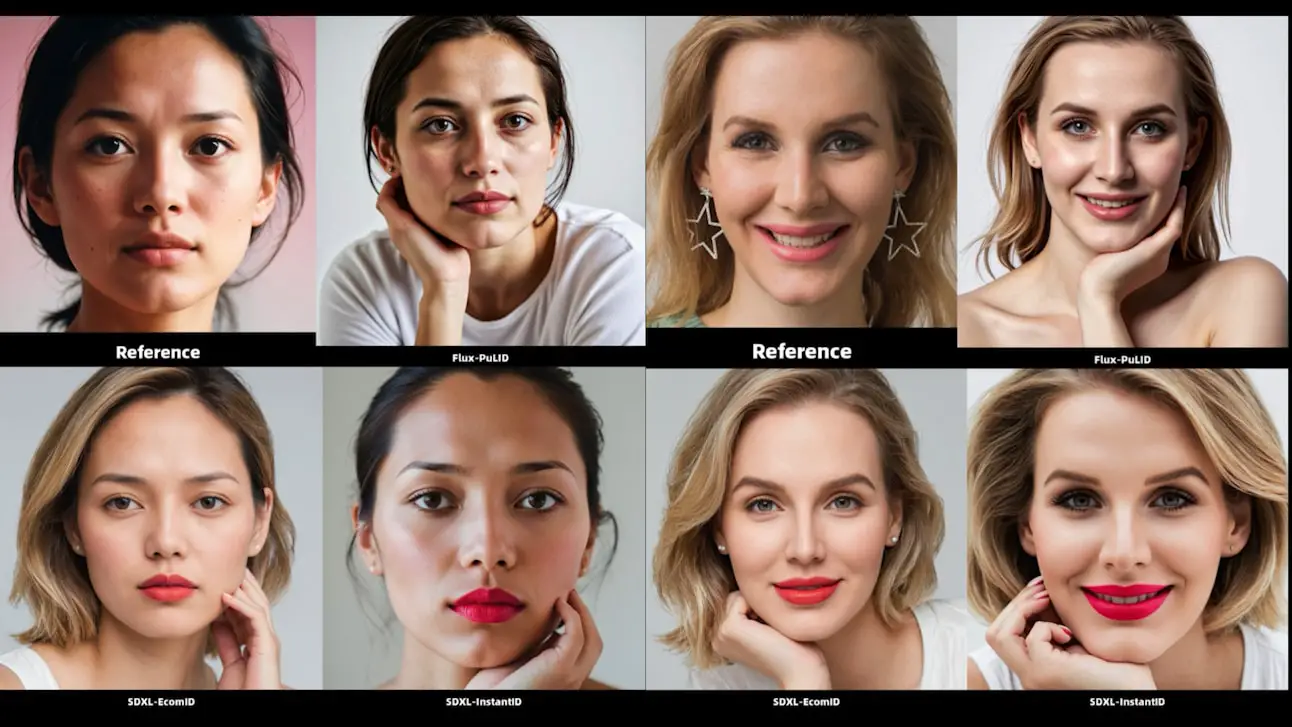
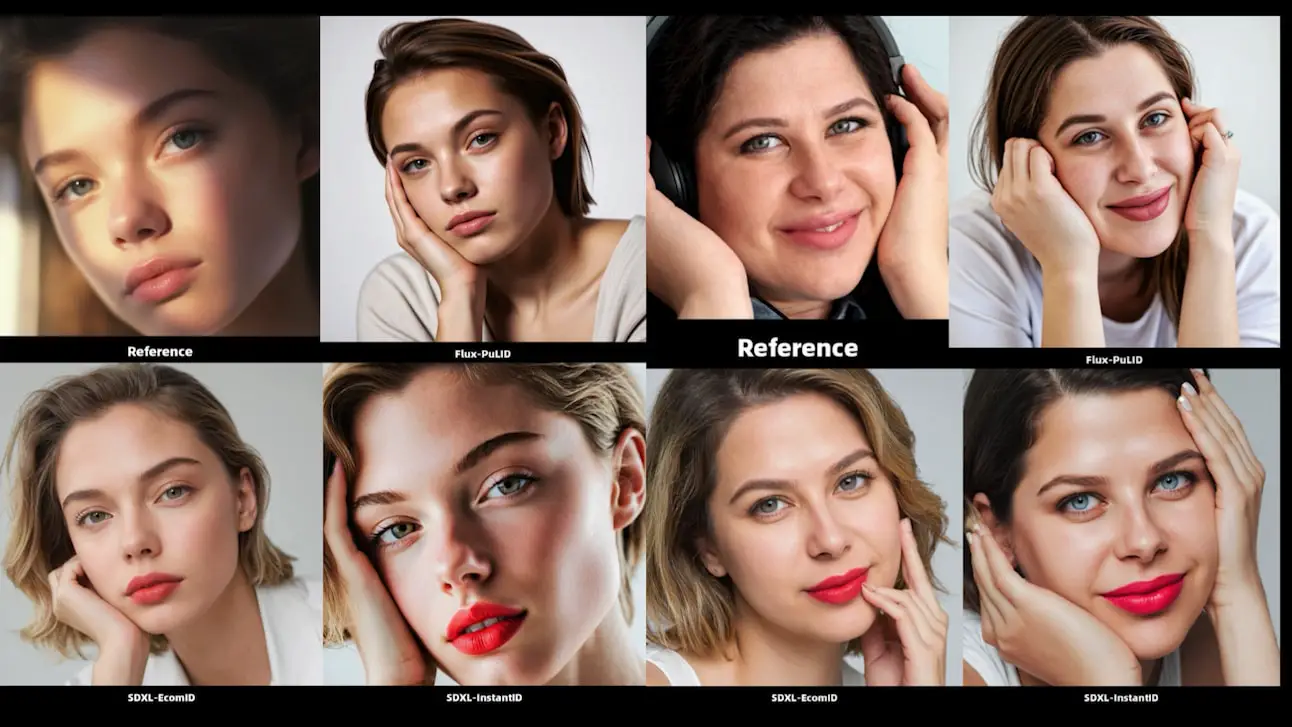
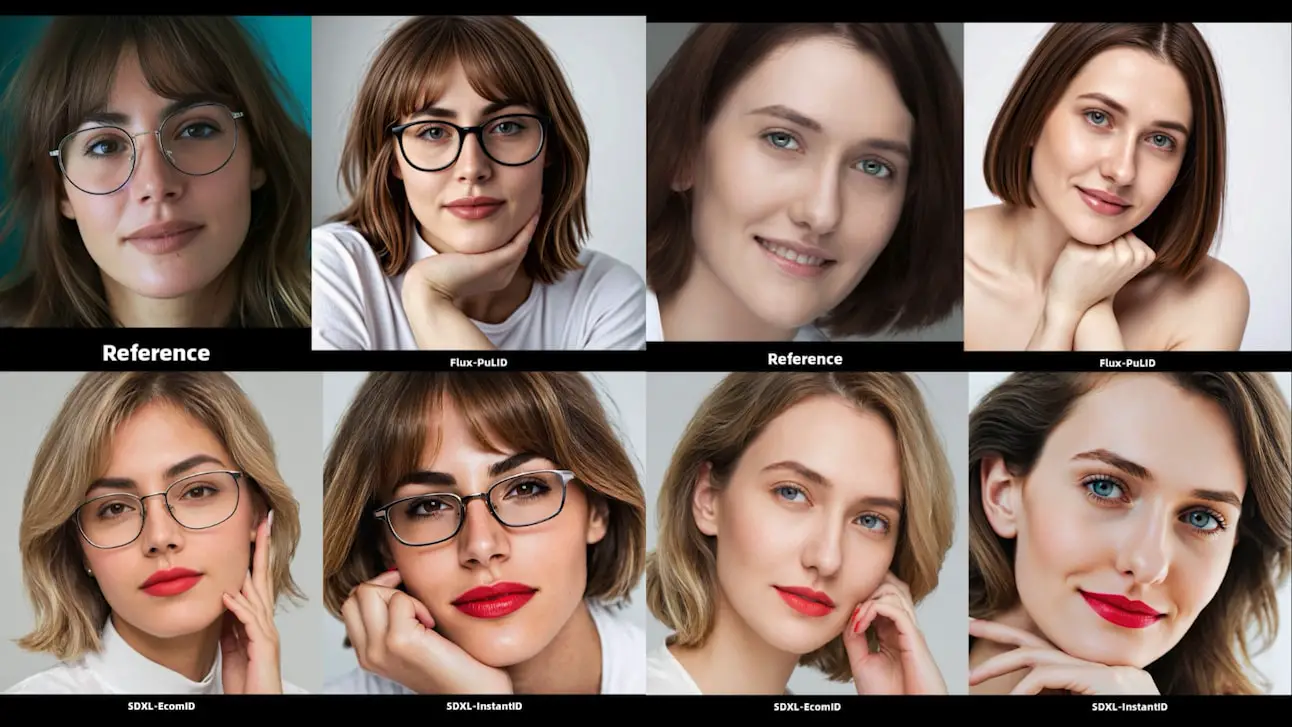
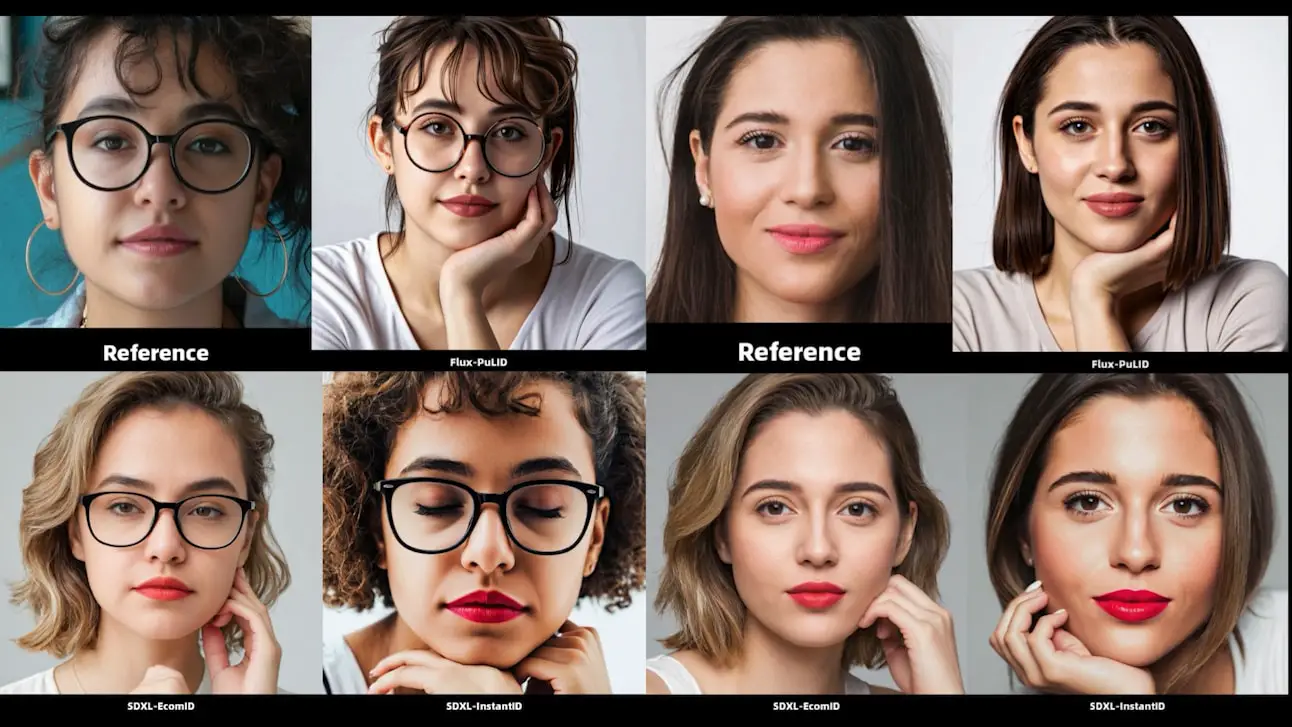
Step-by-Step Workflow Breakdown for Perfect Face Matching
Now, let’s walk through each part of the optimized workflow that I developed to improve face similarity and tackle common issues like neck seams and unwanted artifacts.
1. Initial Setup and Masking
- Upload Your Image: Begin by uploading your reference image and entering your prompts.
- Face Isolation: Use the “PersonMaskUltra” node to isolate the face. By default, only the face is masked, but you can enable additional options if you want to include hair or other elements.
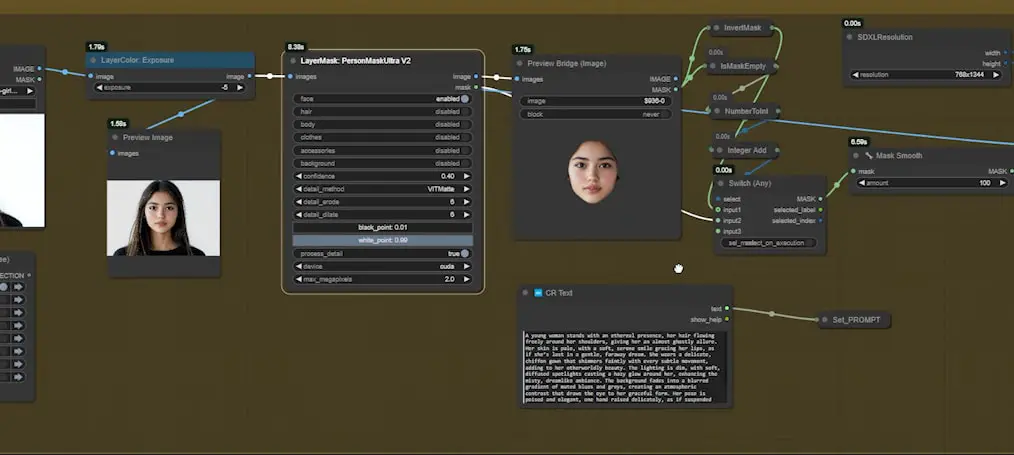
- Mask Refinement: Open the Mask Editor to refine the mask around the face area. Paint a generous area around the face to avoid visible seams when SDXL fills in the background.
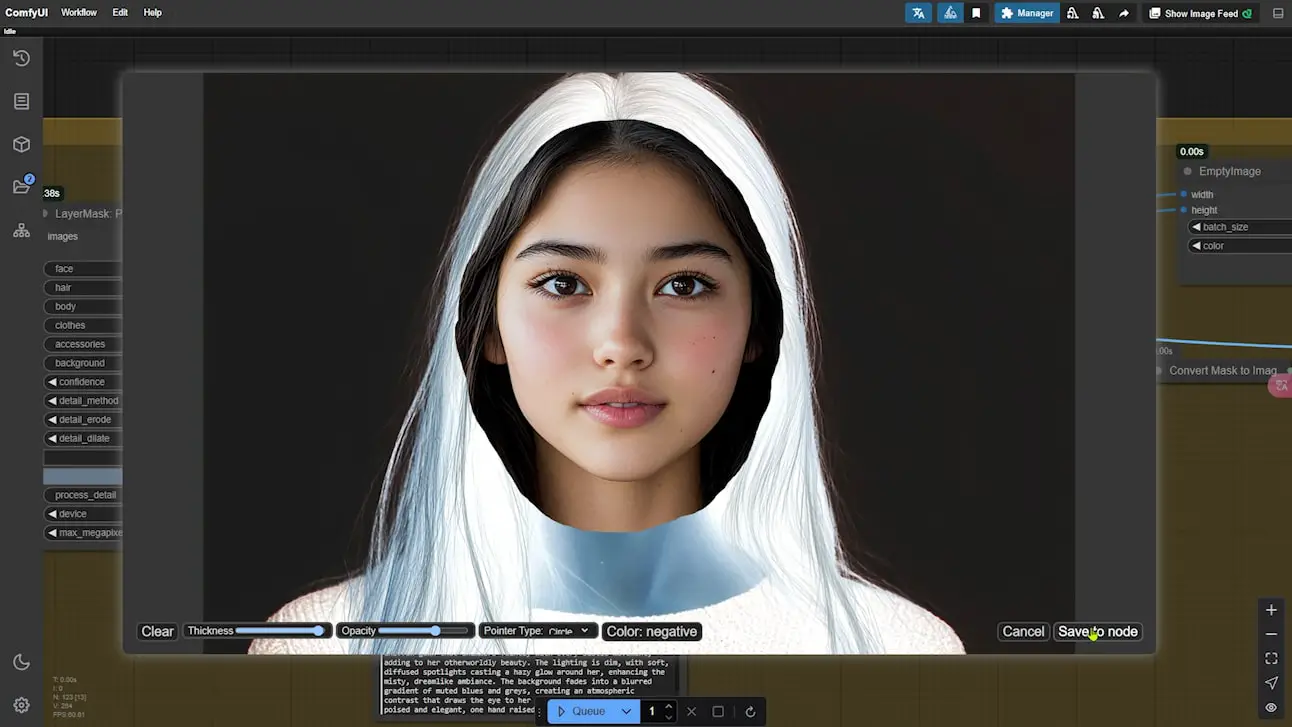
Tip: Avoid including pixels from the actual background in the mask. Keeping only the face area in the mask helps maintain detail.
- Mask Smoothing: Use the “Mask Smooth” node to soften mask edges, which allows SDXL to blend the face with the background smoothly.
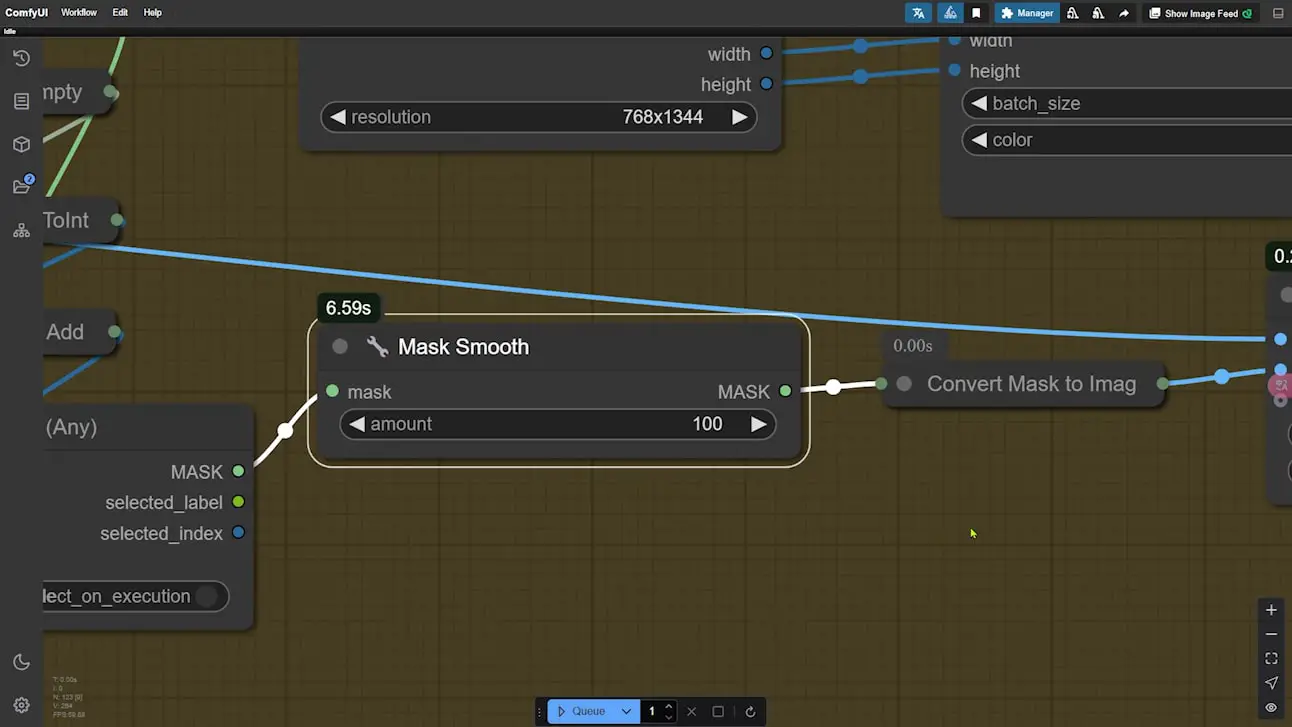
2. Basic Composition with SDXL
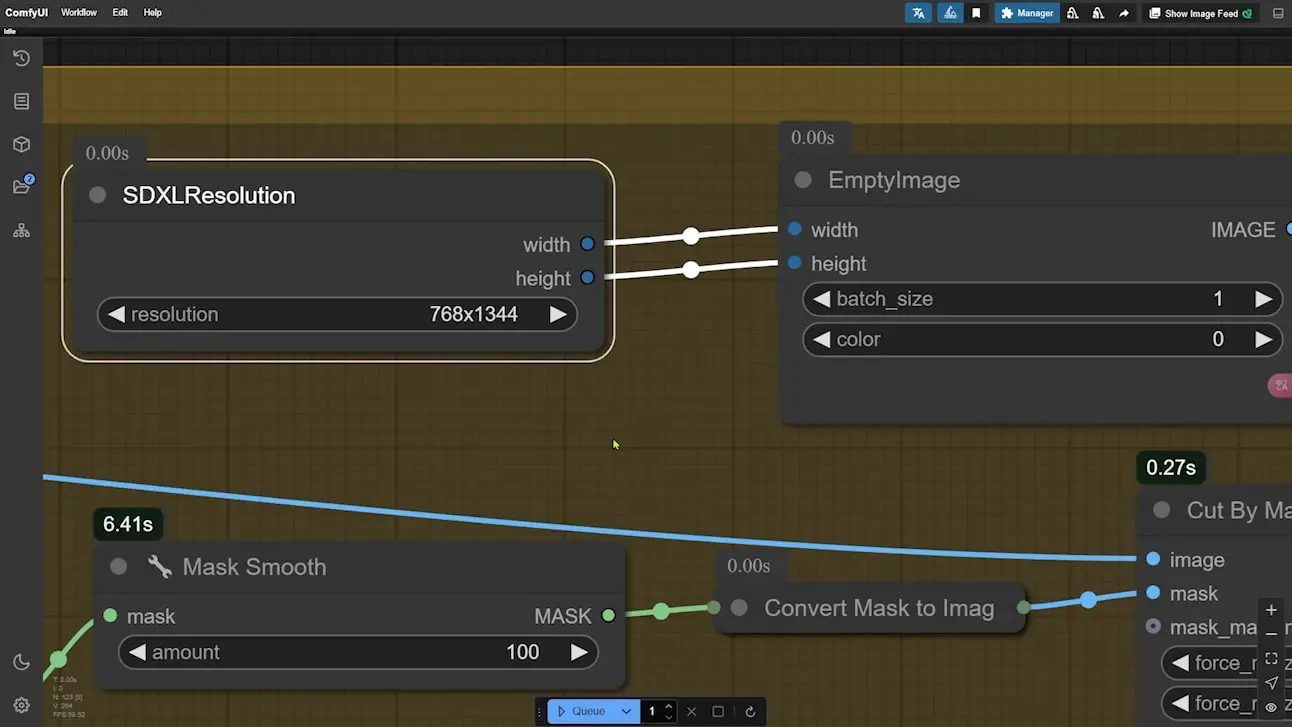
- Set Resolution: In the “SDXL Resolution” node, set the canvas size to 768×1344 for a full-body portrait. You can crop later if needed.
- Positioning the Face: Use the “ImageBlend” node to control the face’s position, size, and angle within the image. Adjust the X and Y percentages, scale, and rotation to fit the frame naturally.
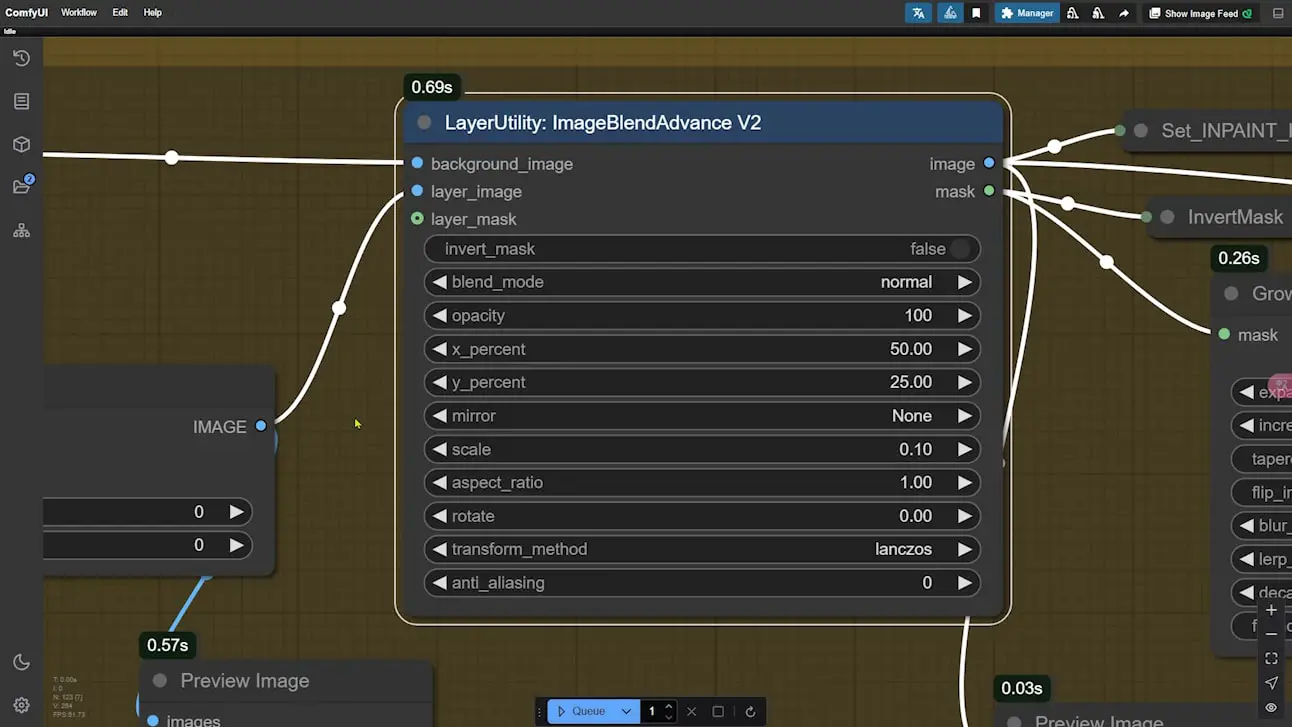
- Initial Composition with SDXL: Run the workflow to generate a base composition using the SDXL Lightning model. At this stage, SDXL fills in the black background areas.
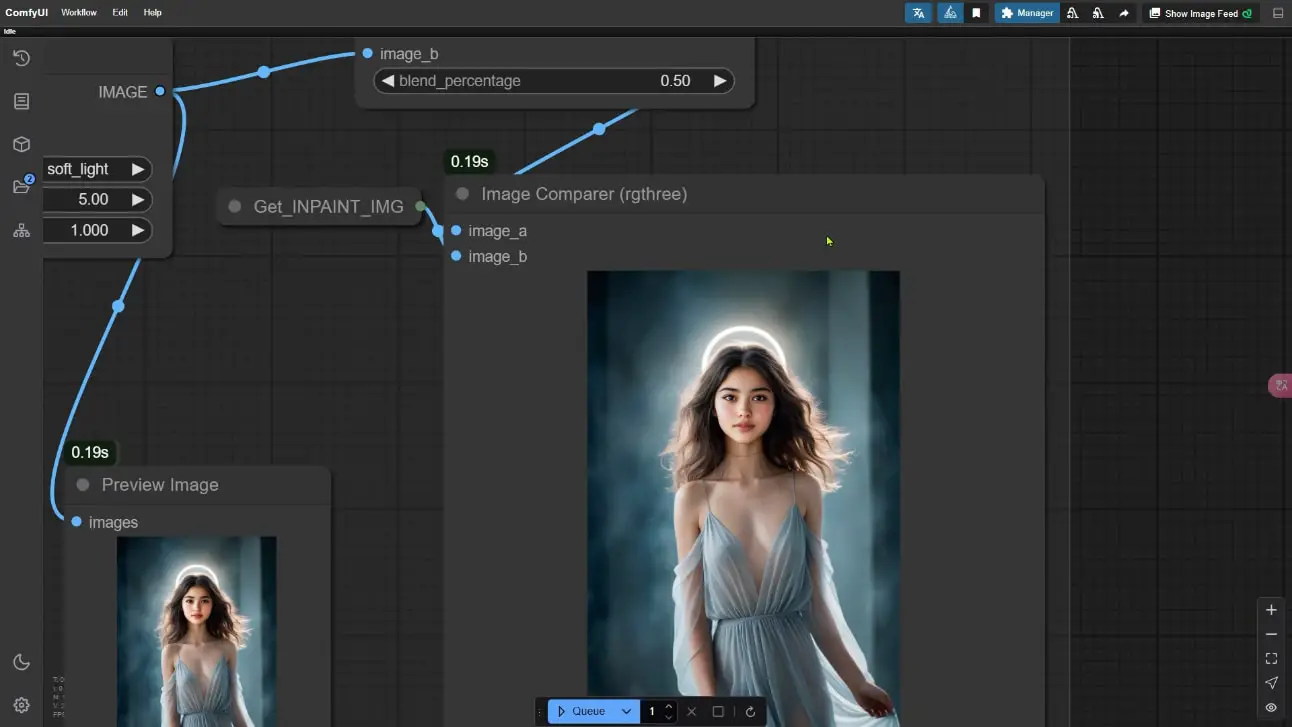
Note: You may notice visible seams or other imperfections at this stage. Don’t worry—we’ll address these in the next steps.
3. Tackling Common Artifacts and Enhancing Detail
Seam and Artifact Correction with Flux
- Expand Mask for Neck Area: Start the node group on the right to extend the mask slightly beyond the neck area. Adjust “expand” and “blur_radius” settings so the seam around the neck is included without affecting the face.
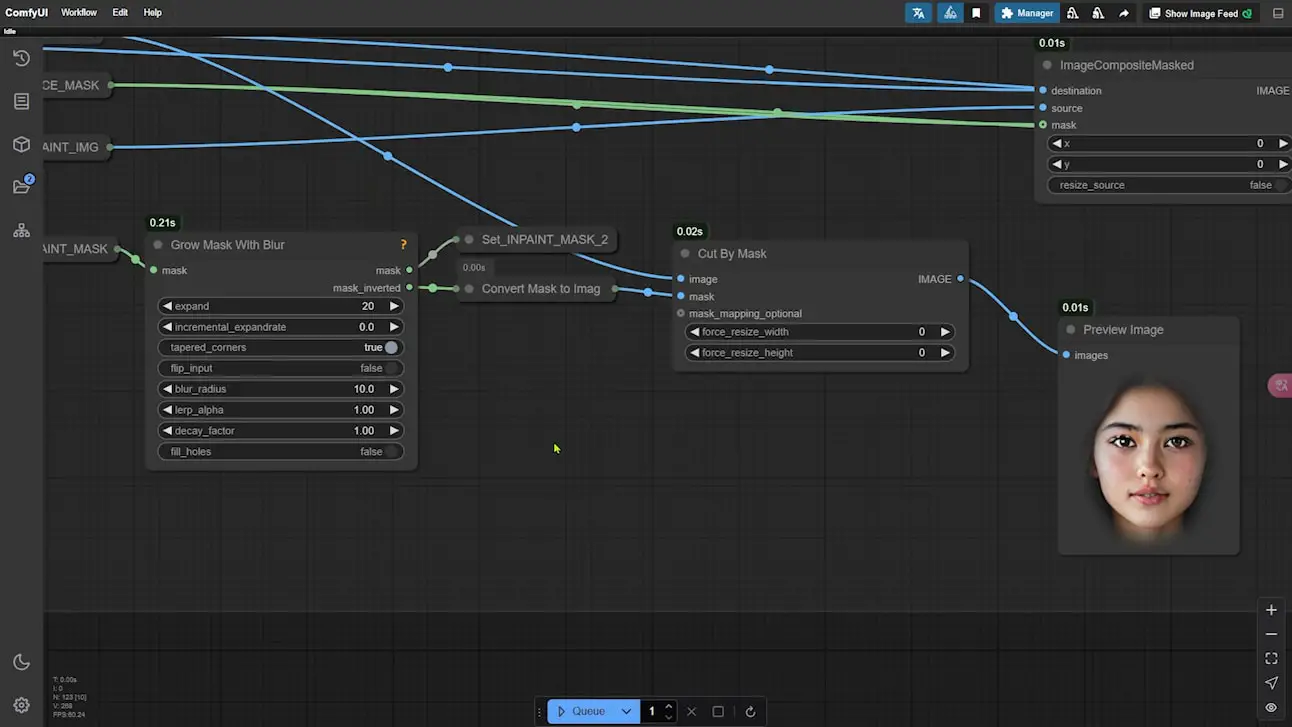
- Apply Flux Model for Seam Cleanup: Use the Flux-based PixelWave model with Turbo LoRA, which processes the image efficiently in 8 steps, to fix the neck seam and other artifacts.
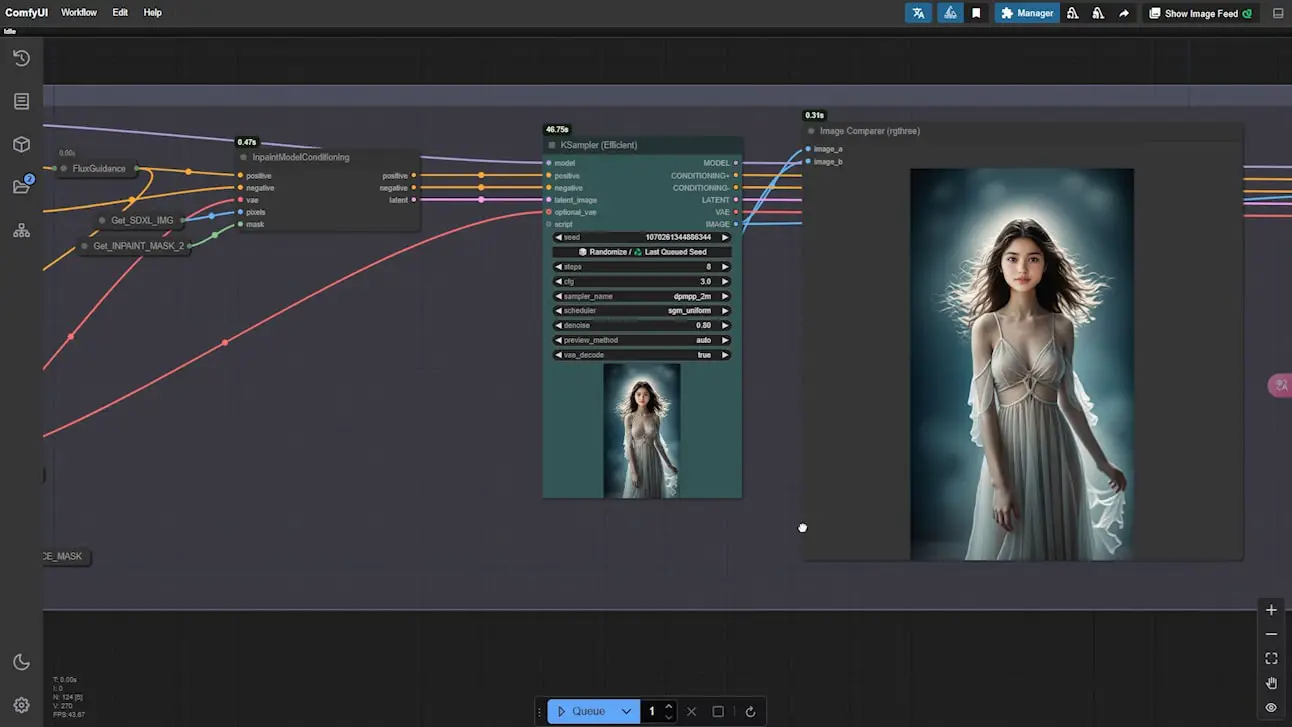
Repainting for Additional Corrections
- Second Repainting Pass: Activate another node group for an additional repainting pass. This step helps fix any remaining artifacts, such as distorted details in the hand or clothing.
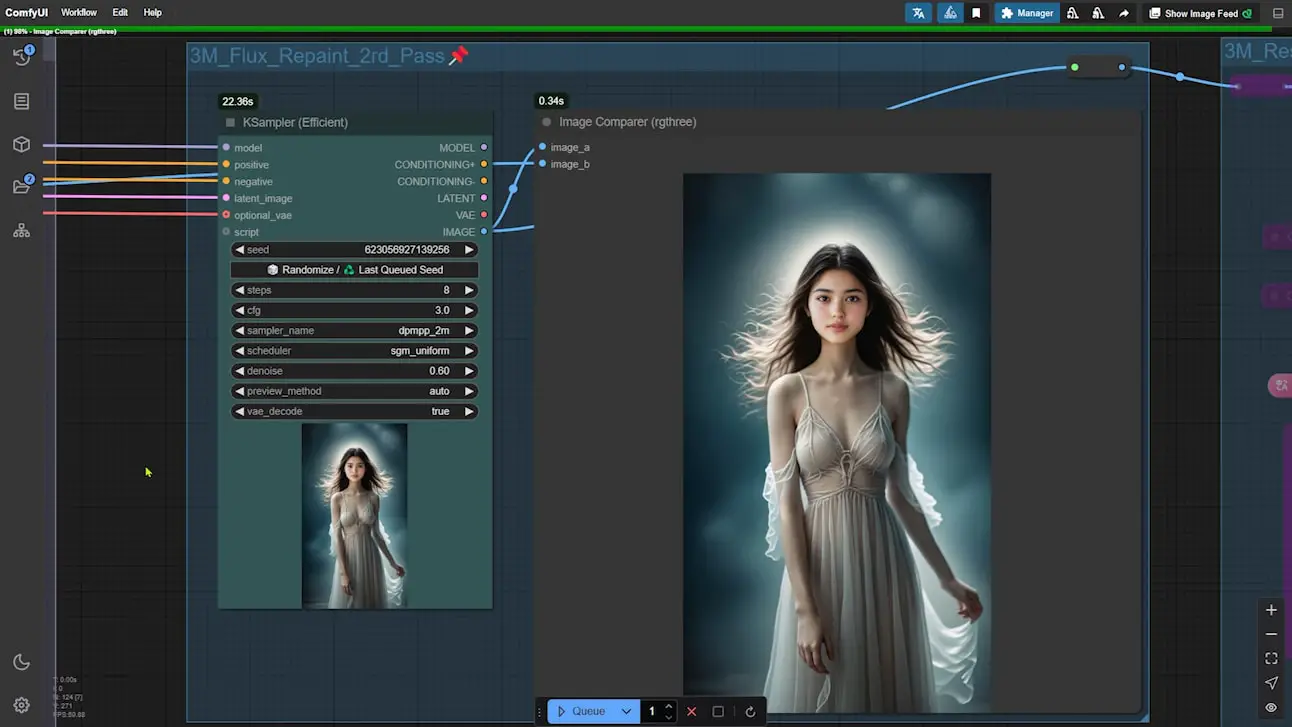
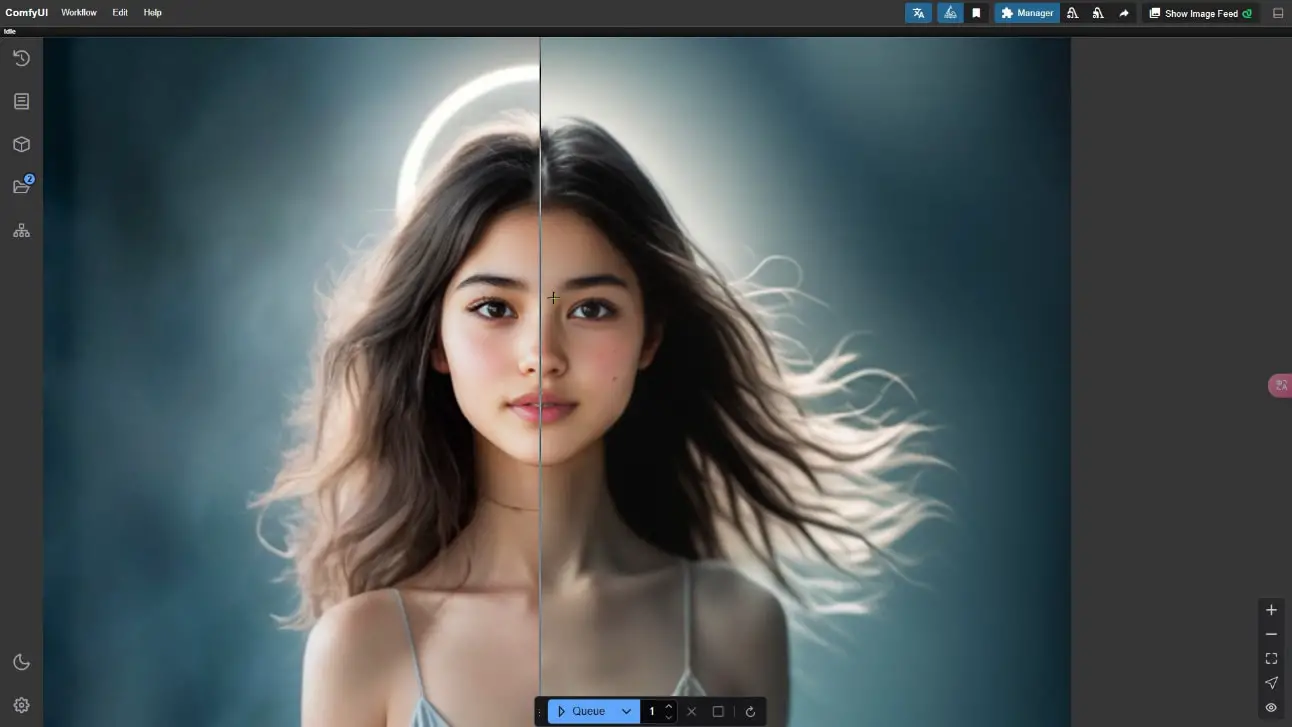
- Restore Facial Details: After repainting, facial details may appear slightly blurred. A dedicated node group restores fine details, especially around the eyes, mouth, and skin texture.
4. Final Touches and Upscaling
Hand Detail Refinement
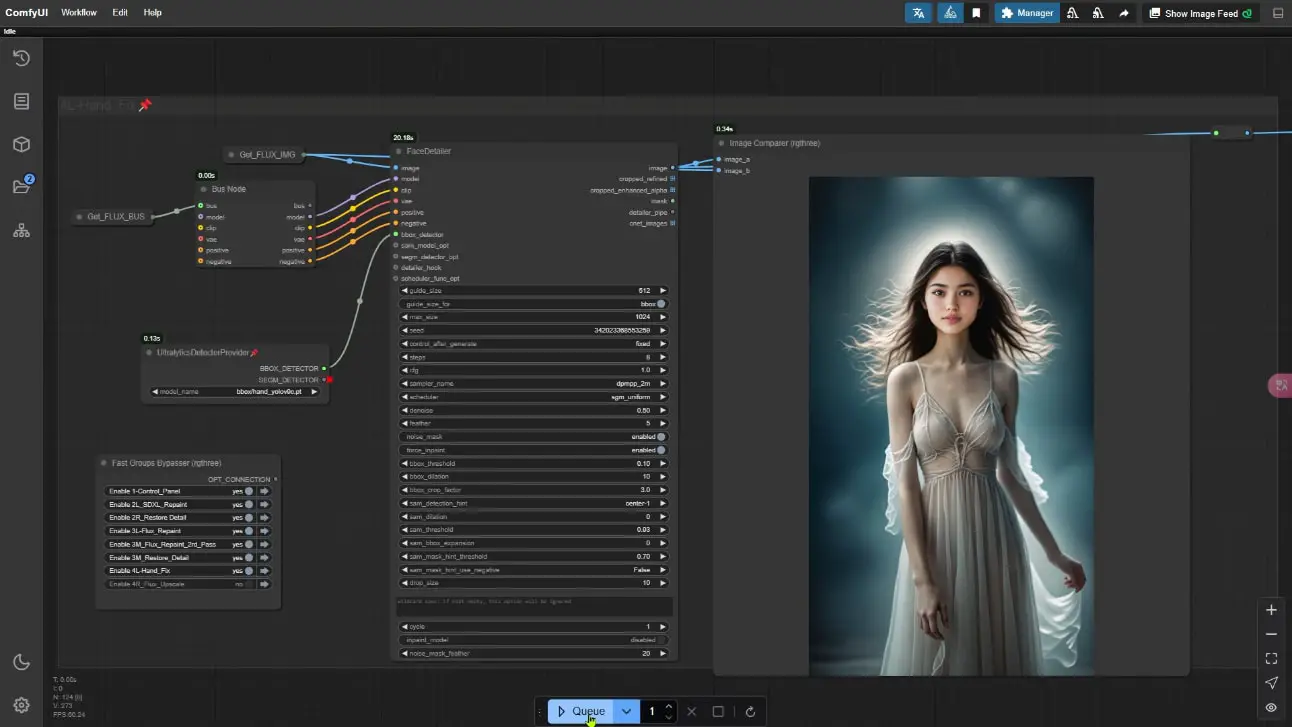
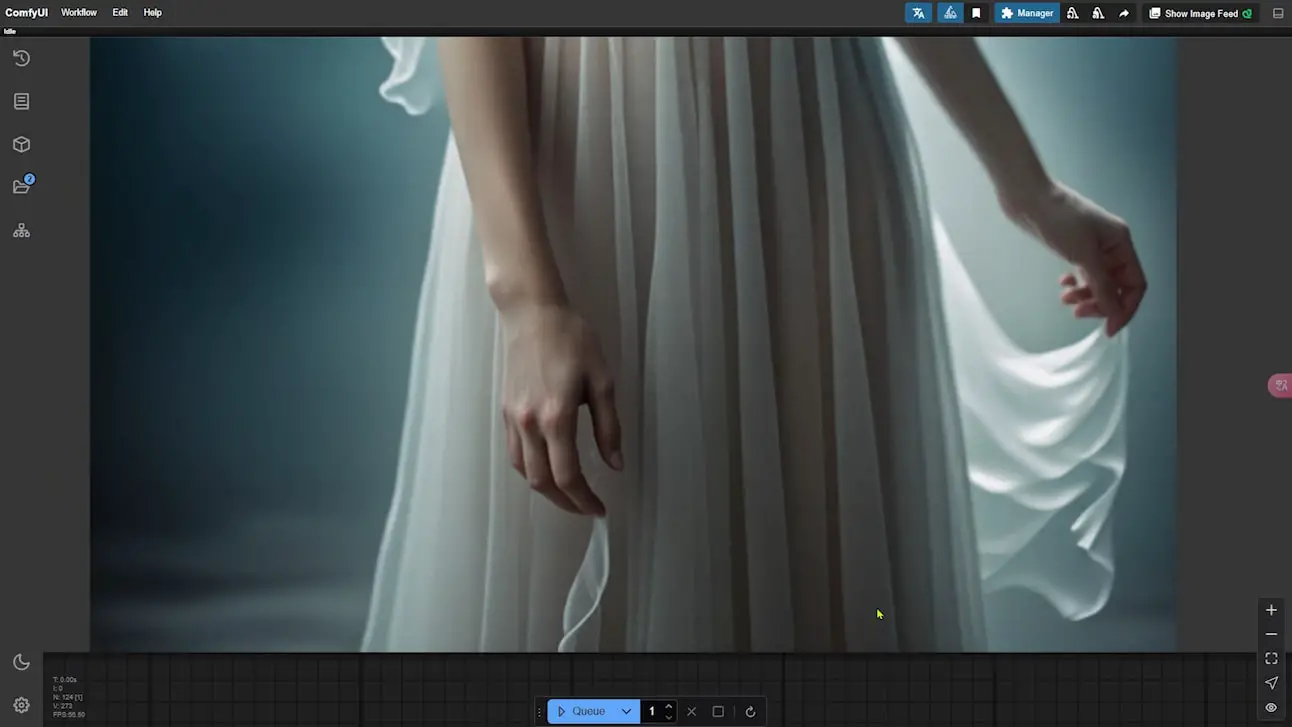
- Hand Repair: Use a specific node group to enhance hand details. This step ensures realistic detail, even down to veins if desired.
Upscaling for a High-Resolution Finish
- Two-Stage Upscale: For the final upscale, use a 4x model for the face, then downscale by half to double the resolution. This approach preserves high detail in facial features.
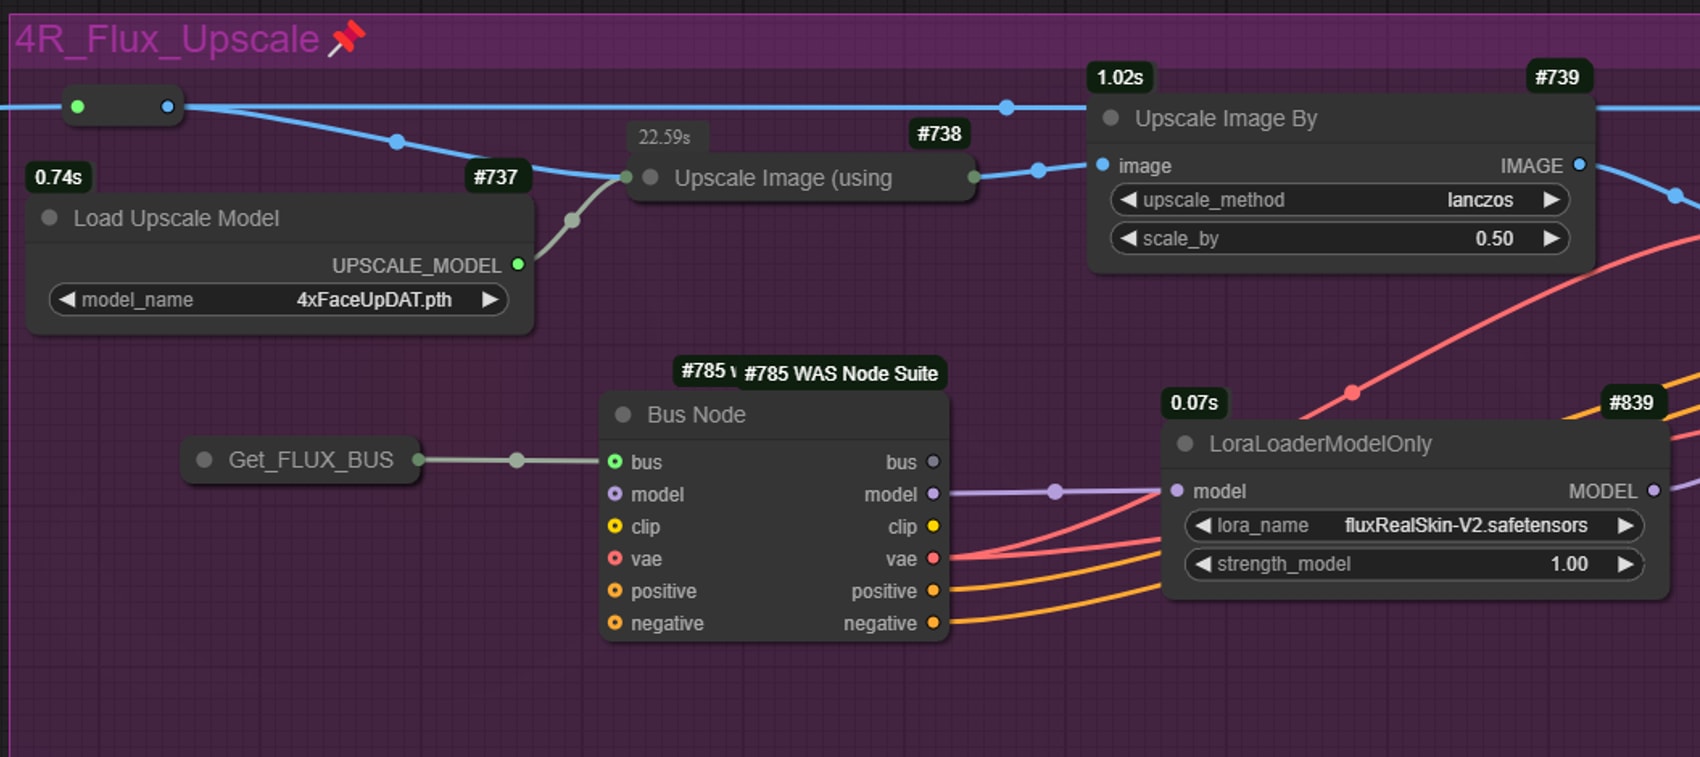
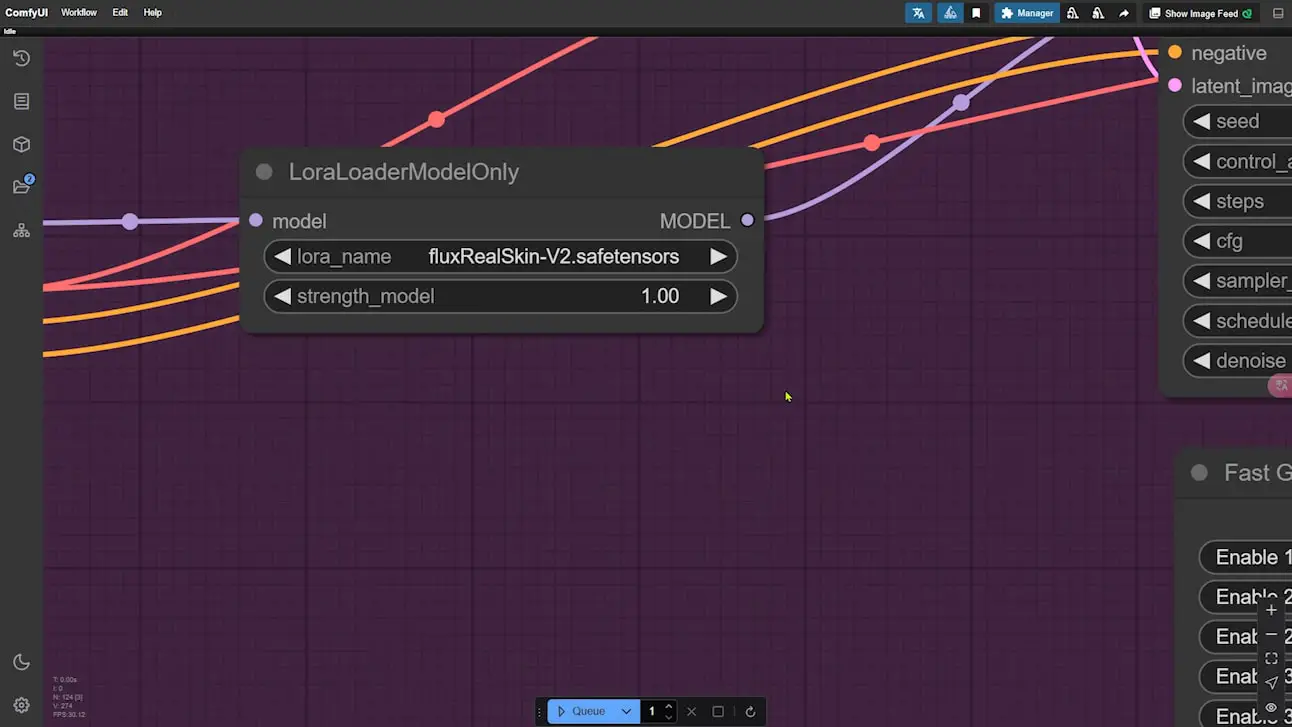
- Texture and Detail with LoRA: Add a LoRA for additional skin texture and clarity.
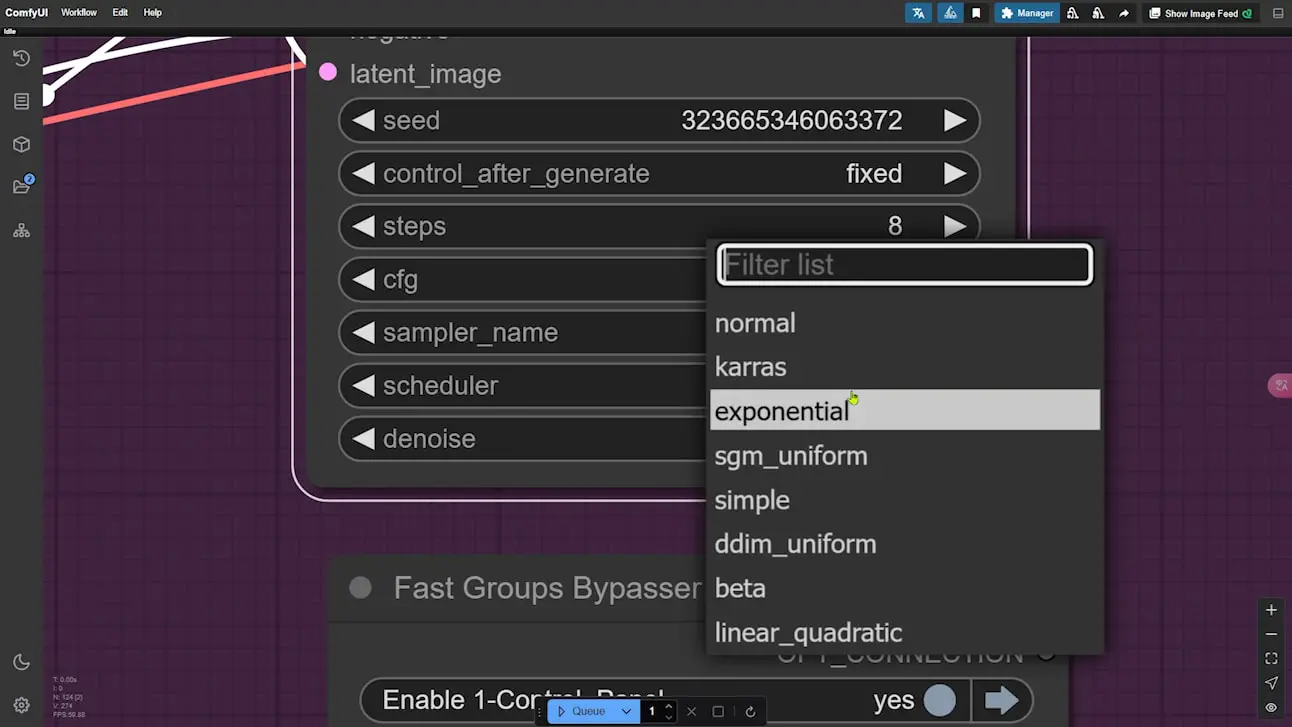
- Set Sampler Scheduler: Ensure the scheduler in the sampler is set to “exponential” to maintain consistency in facial features during upscaling.
5. Comparing Results
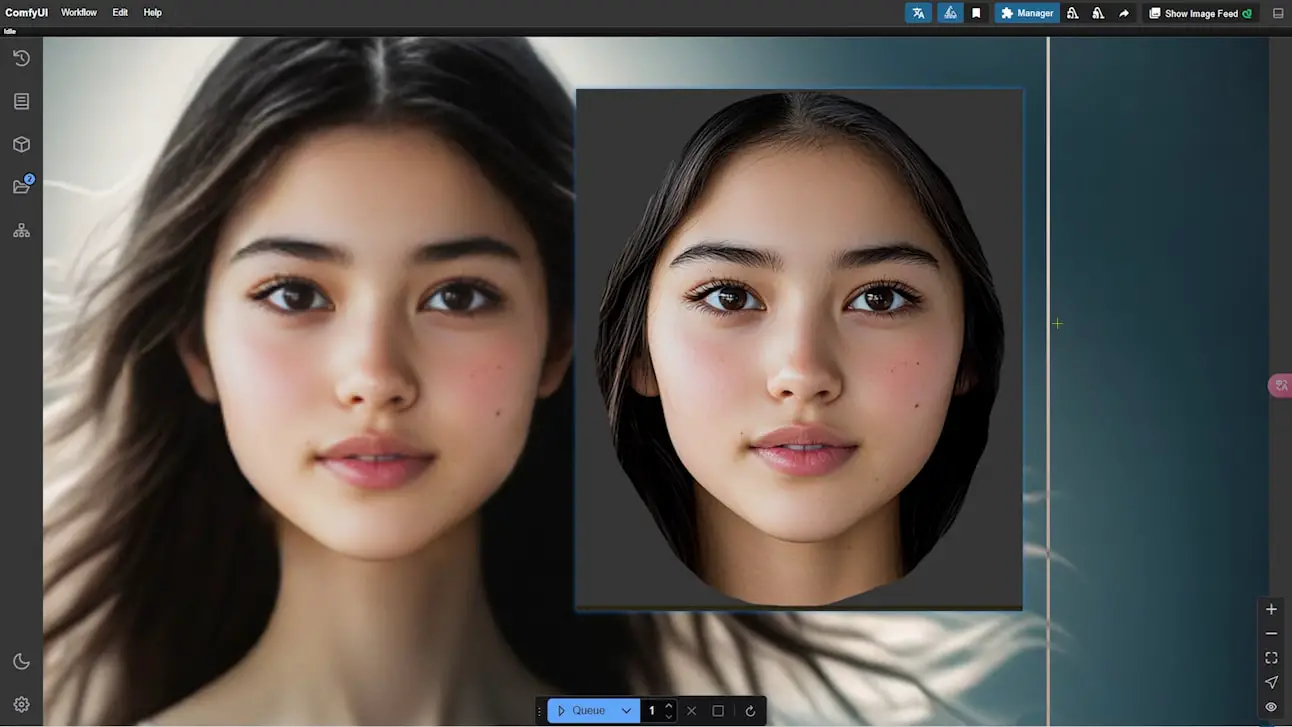
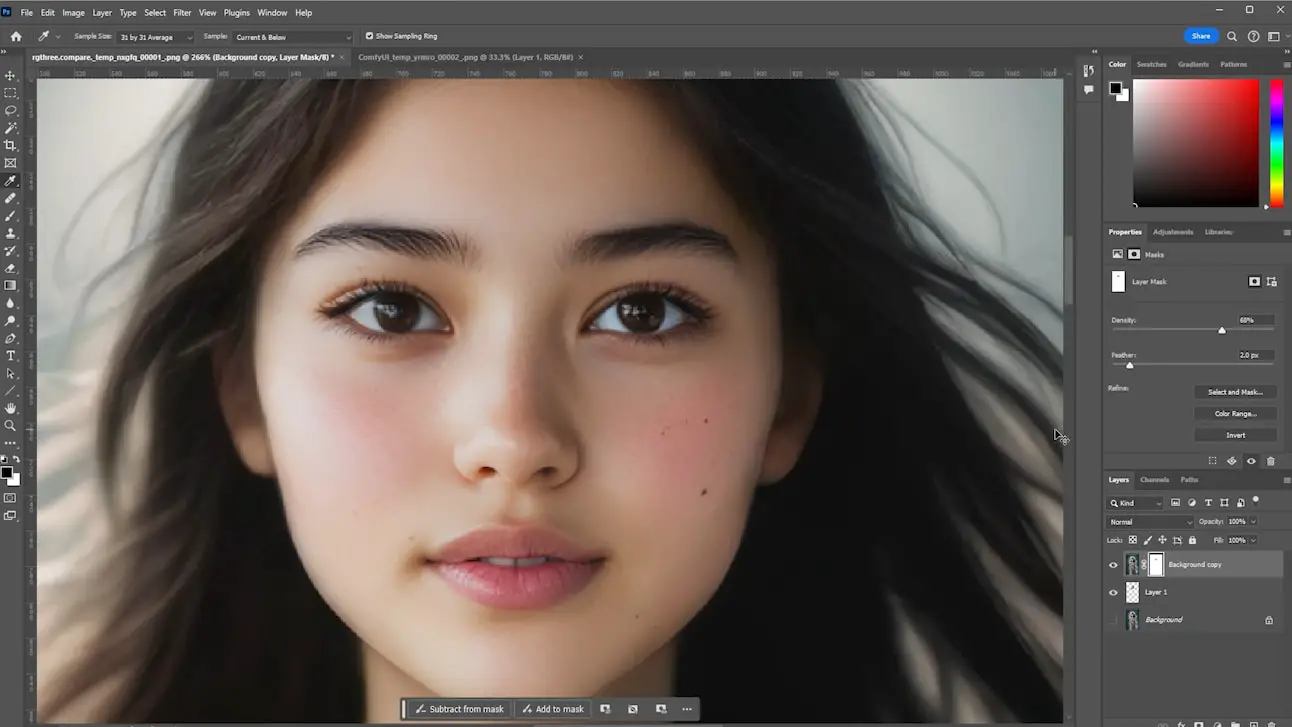
Finally, compare your output with the original reference image. The workflow should yield a face that matches the original’s likeness closely, with sharp detail and refined texture. If minor adjustments are needed, consider blending the image in Photoshop for a final polish.
Gain exclusive access to advanced ComfyUI workflows and resources by joining our community now!
Conclusion and Future Optimizations
This workflow is designed to get you as close as possible to a perfect face match with detailed control over common issues. I’ve received feedback on how the results could be further improved, and I’m continually working on optimizing this approach. If you have suggestions, I’d love to hear them, as I plan to keep refining and exploring new techniques to enhance the quality of face replacement with ComfyUI.
Thank you for following along, and happy experimenting!
Gain exclusive access to advanced ComfyUI workflows and resources by joining our Patreon now!
Here’s a mind map illustrating all the premium workflows: https://myaiforce.com/mindmap
Run ComfyUI with Pre-Installed Models and Nodes: https://youtu.be/T4tUheyih5Q

