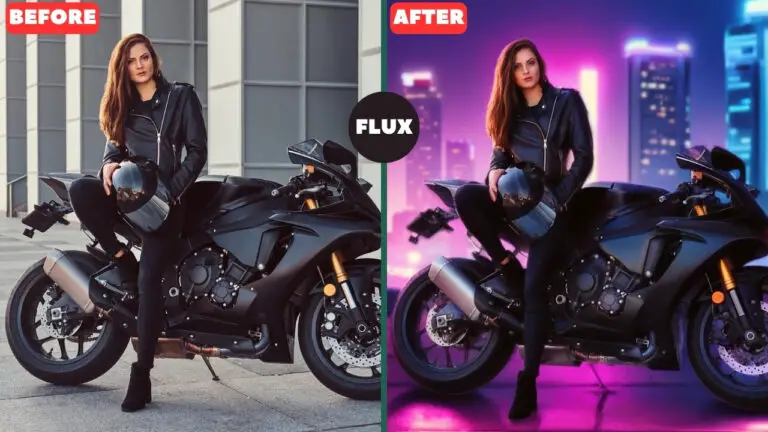
8GB VRAM? No Problem! Nunchaku’s Flux Breakthrough Makes ComfyUI Blazing Fast
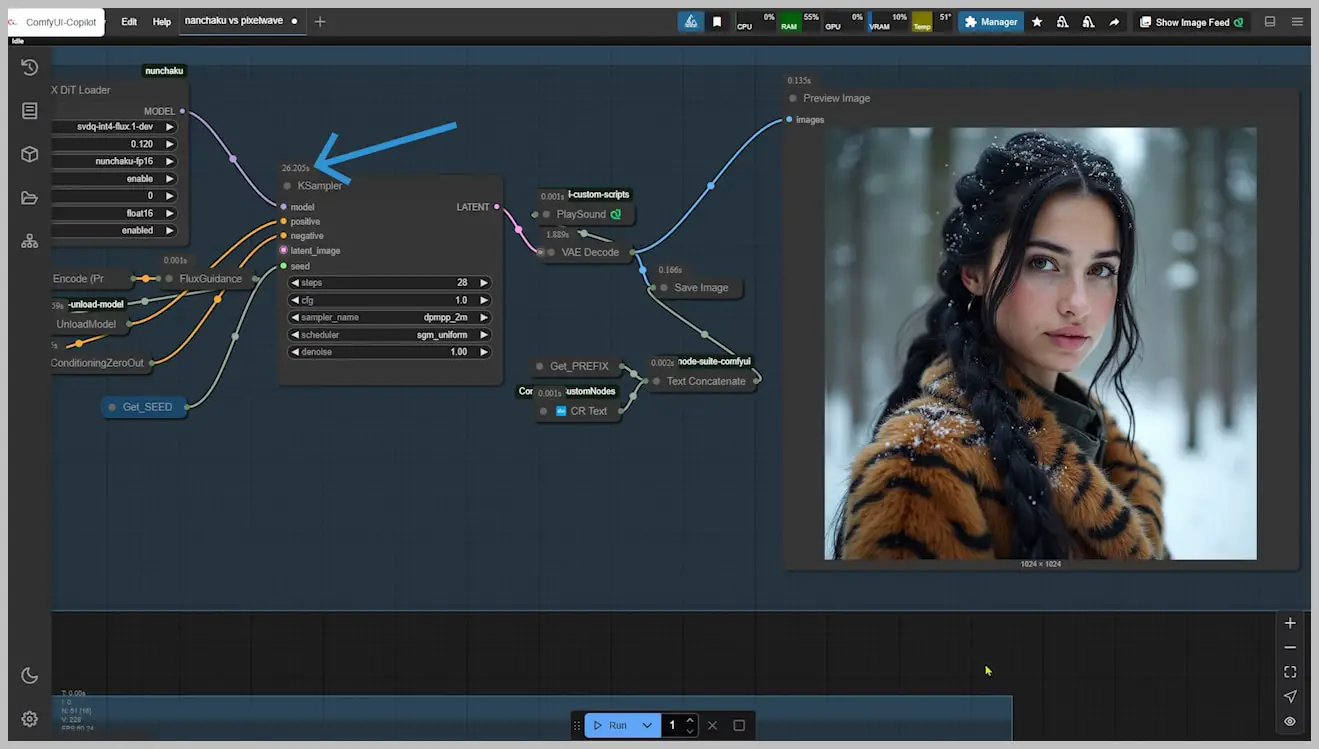
Nunchaku isn’t just another Flux model accelerator—it’s a paradigm shift. While testing on a modest Tesla T4 (16GB VRAM), I watched it generate 1024×1024 images in 26 seconds while using under 8GB VRAM—peaking at just 33% utilization. This isn’t brute-force speed; it’s surgical efficiency.
The implications are staggering:
- Mid-range GPUs (like a 12GB RTX 3060) will outperform these results
- High-end cards (RTX 4090) could achieve single-digit render times
- Quality remains uncompromised—fine details and textures stay razor-sharp
This is just the baseline. As we’ll explore, Nunchaku’s real magic lies in its optimized workflow and ControlNet compatibility—tools that transform rapid generation into intelligent rapid generation.
Video Tutorial:
Gain exclusive access to advanced ComfyUI workflows and resources by joining our community now!
Here’s a mind map illustrating all the premium workflows: https://myaiforce.com/mindmap
Run ComfyUI with Pre-Installed Models and Nodes: https://youtu.be/T4tUheyih5Q
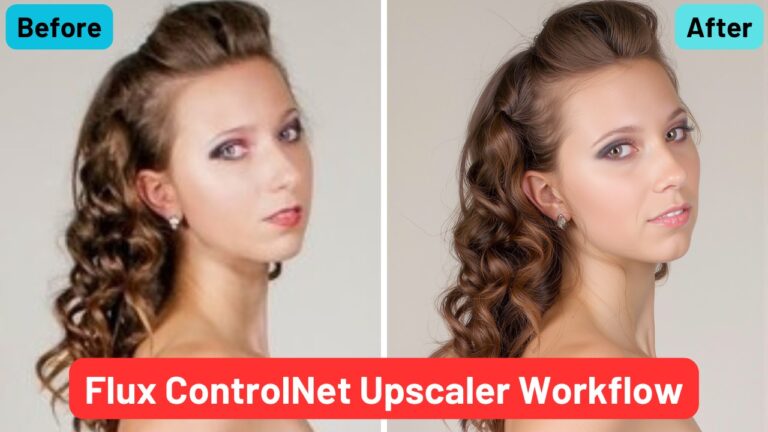
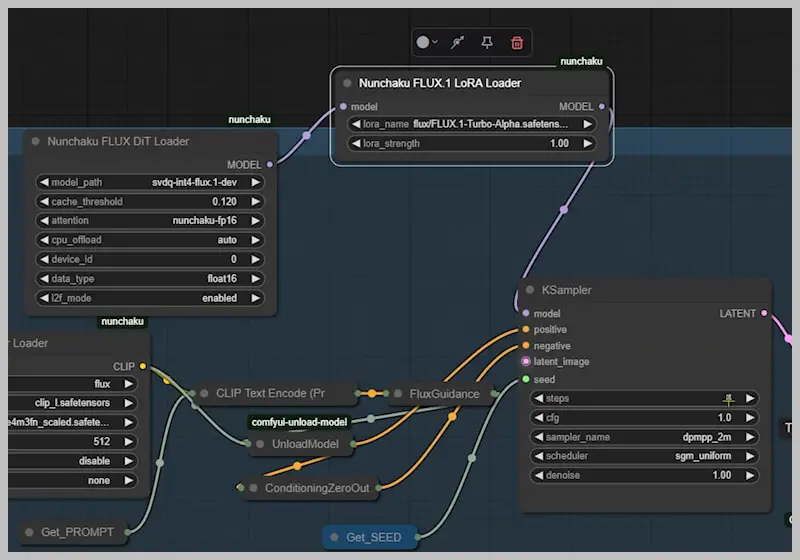
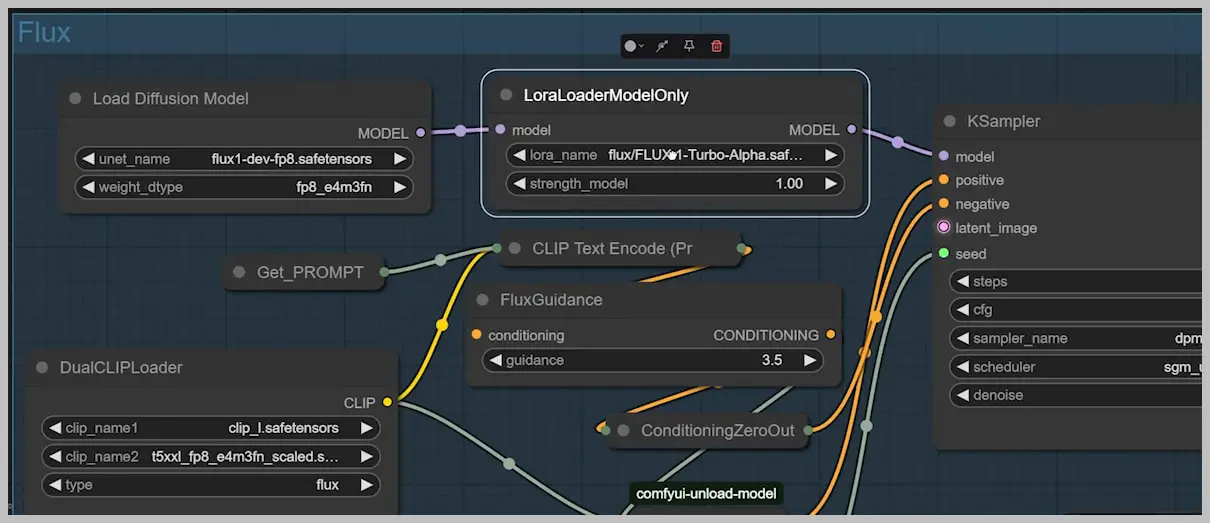
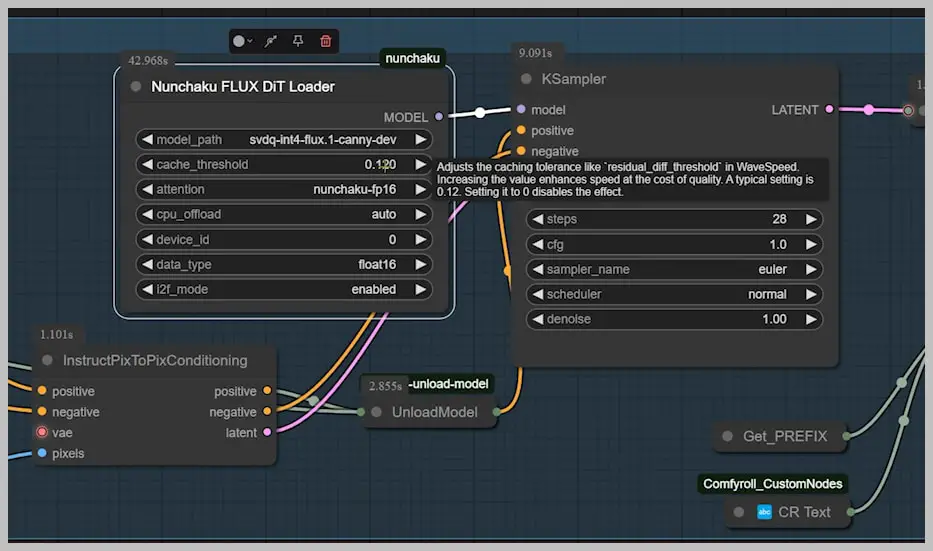
The Nunchaku Workflow Demystified
Nunchaku supercharges ComfyUI with two specialized nodes:
- Flux DiT Loader – The engine driving the speed revolution
- Text Encoder Loader – Optimized for precision (though Dual Clip Loader works in a pinch)
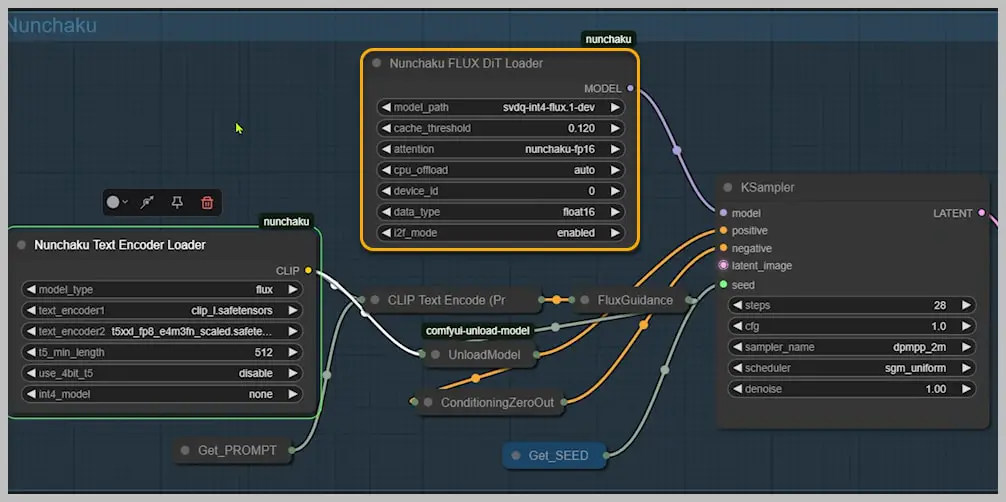
Key Components
- Specialty Models Required:
- Base model (mandatory)
- Optional add-ons:
- Canny for edge control
- Fill for inpainting/outpainting
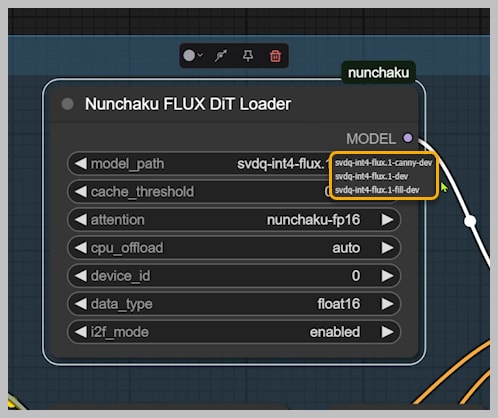
Critical Settings
| Setting | Function | Recommendation |
|---|---|---|
| Cache Threshold (0.12 default) | Speed ↔ Quality trade-off | 0 = max quality; higher = faster but coarser |
| Attention Method | Processing mode | Only “nunchaku-fp16” available currently |
| CPU Offload (Auto) | VRAM saver | <14GB GPUs: Keep auto; manually enable if crashing |
Pro Configuration Tips
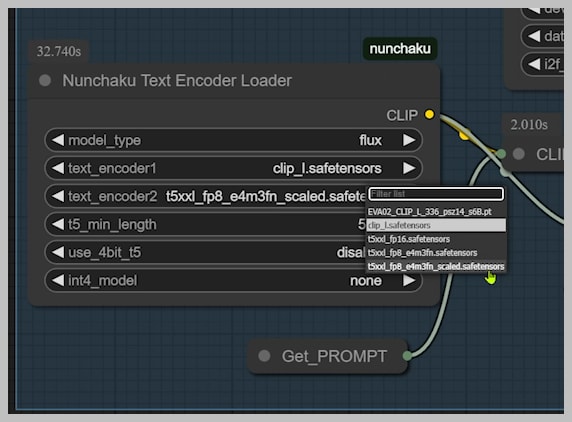
- Text Encoder Options:
- High VRAM (16GB+): Use fp16 T5 encoder
- Low VRAM (8GB): Switch to GGUF T5 version
- Memory Management:
- Attach an “Unload Model” node to automatically clear VRAM after text encoding
“Think of the Unload Model node as your memory janitor—it quietly cleans up behind the scenes so you don’t hit VRAM walls.”
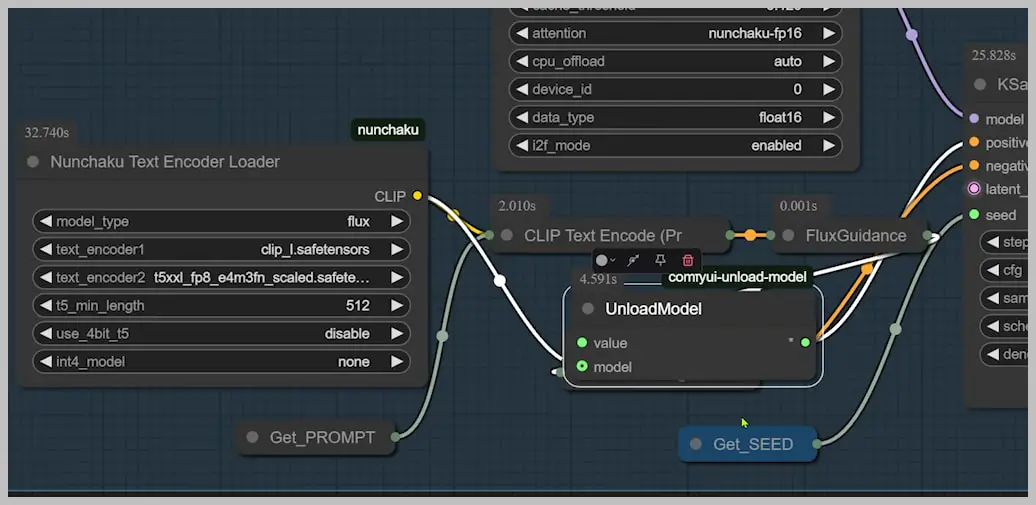
This streamlined architecture explains how Nunchaku achieves its blistering speeds without turning your GPU into a space heater.
Benchmarking Nunchaku: A Comprehensive Performance Analysis
1. Nunchaku vs. PixelWave: The Quality Showdown
Test Methodology:
- Same hardware: Tesla T4 GPU (16GB VRAM)
- Resolution: 1024×1024
- Sampling steps: 28 (both workflows)
Performance Metrics:
| Metric | Nunchaku | PixelWave | Advantage |
|---|---|---|---|
| Render Time | 26 seconds | 112 seconds | 4.3x faster |
Quality Comparison:
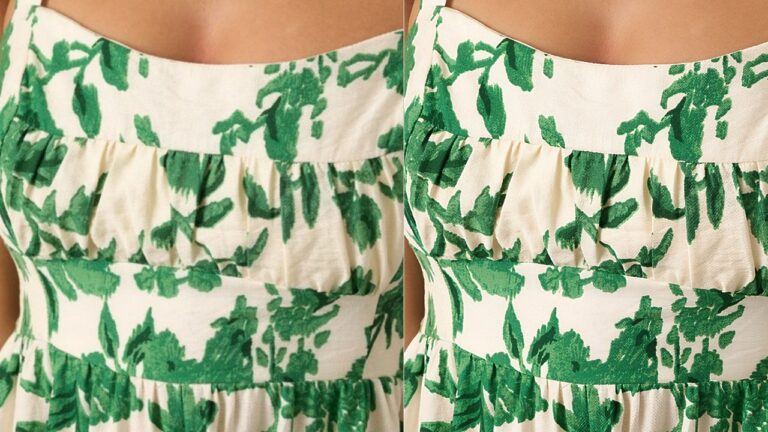
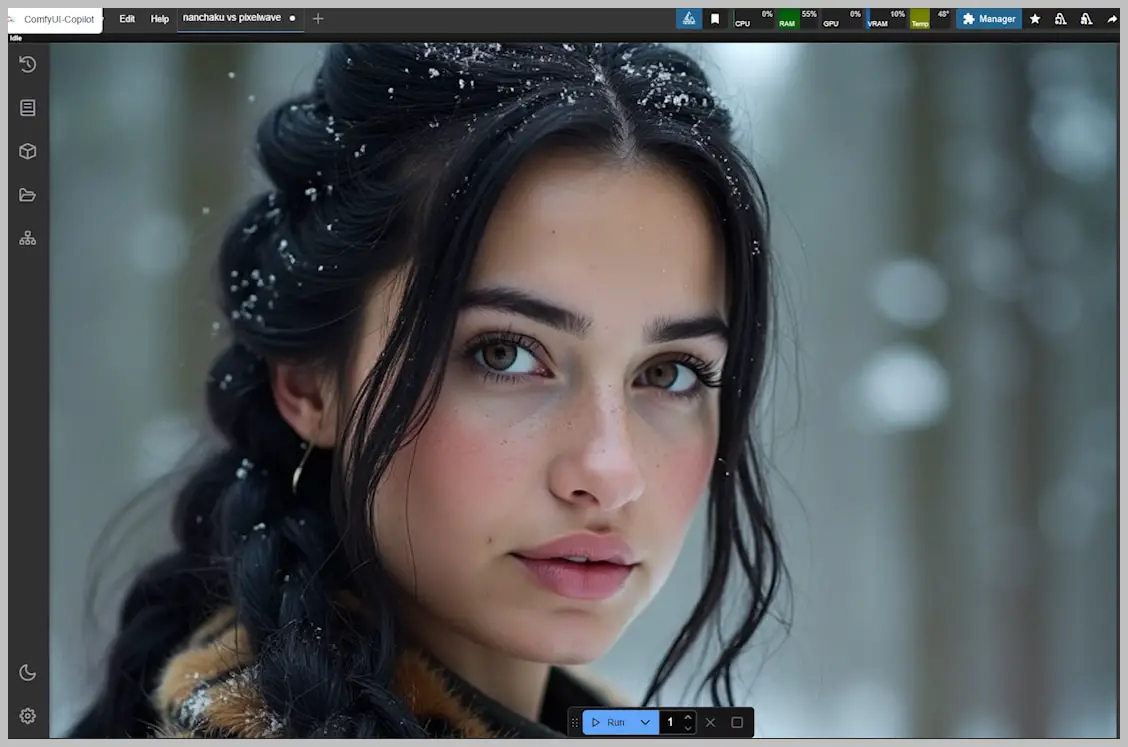
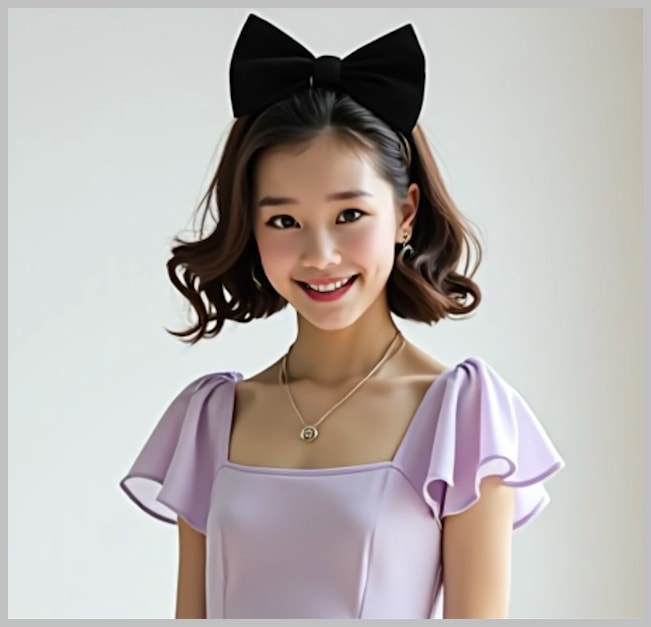
- Facial Features:
- Nunchaku rendered natural-looking freckles with proper distribution
- PixelWave created clustered freckle patterns with uneven density
- Eye Details:
- Nunchaku produced clear iris patterns with depth
- PixelWave showed smudging in the pupil region
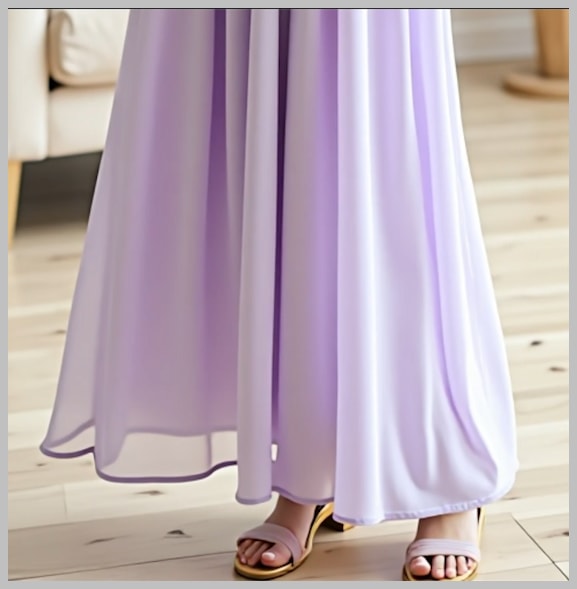
- Clothing Texture:
- Nunchaku’s fur trim showed individual hair strands
- PixelWave’s version appeared more painterly
- Anatomical Accuracy:
- Nunchaku correctly rendered all body parts
- PixelWave failed to generate one foot and distorted toes
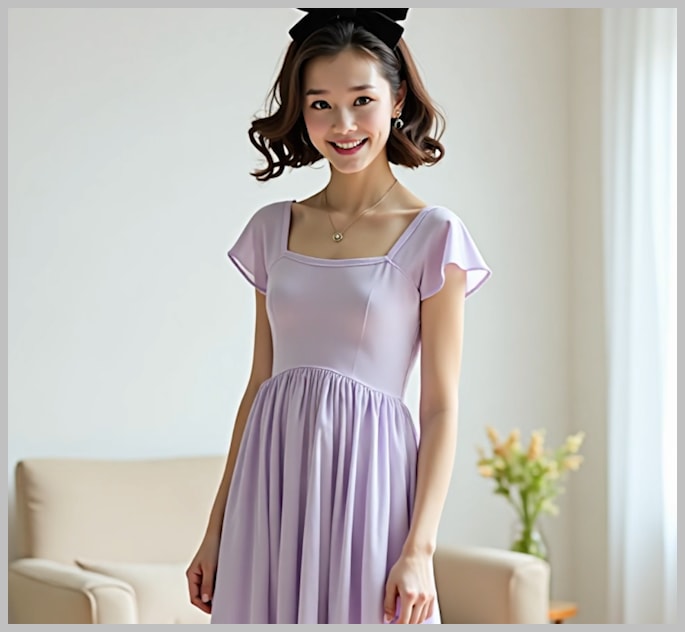
Nunchaku:

PixelWave:
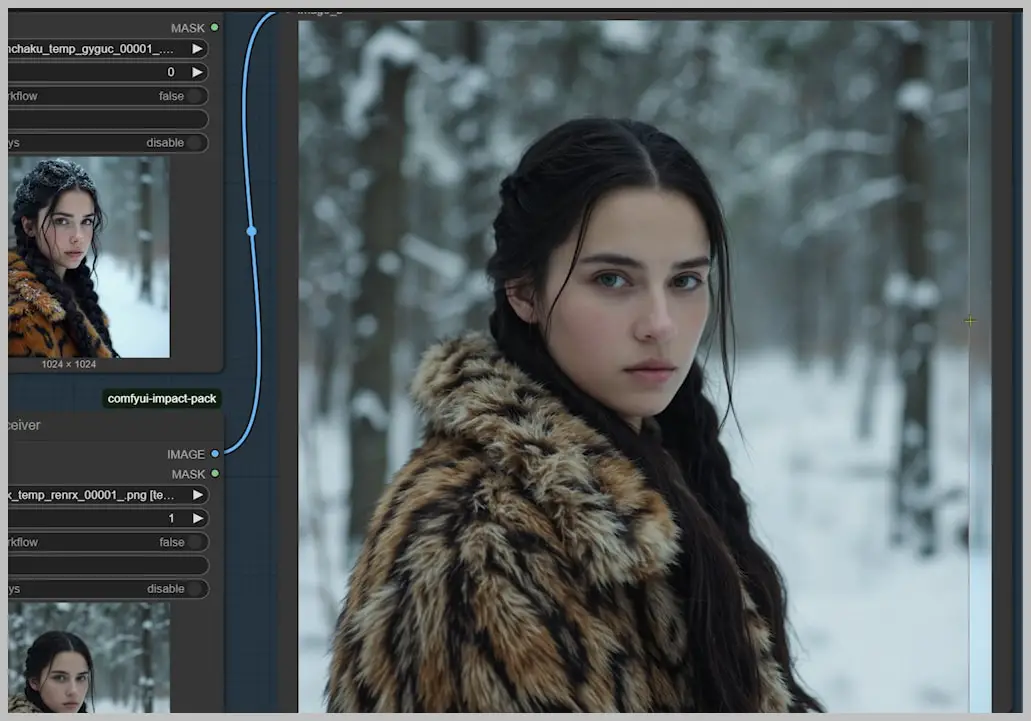
Nunchaku Full Body Image:

PixelWave Full Body Image:

2. LoRA Integration: Turbo vs. Standard
Compared three configurations:
| Configuration | Render Time | Quality Assessment |
|---|---|---|
| Nunchaku (Standard) | 26s | Excellent detail preservation |
| Nunchaku + Turbo LoRA | 17s | Noticeable quality degradation |
| Flux fp8 + Turbo LoRA | 40s | Poor detail, artifacts |
Quality Trade-offs:
- Standard LoRA:
- Maintained all texture details
- Preserved prompt adherence
- Recommended for final outputs
- Turbo LoRA:
- speed boost
- Lost fabric weave patterns
- Simplified facial features
- Only suitable for quick previews
Nunchaku + Turbo LoRA:
Flux fp8 + Turbo LoRA:
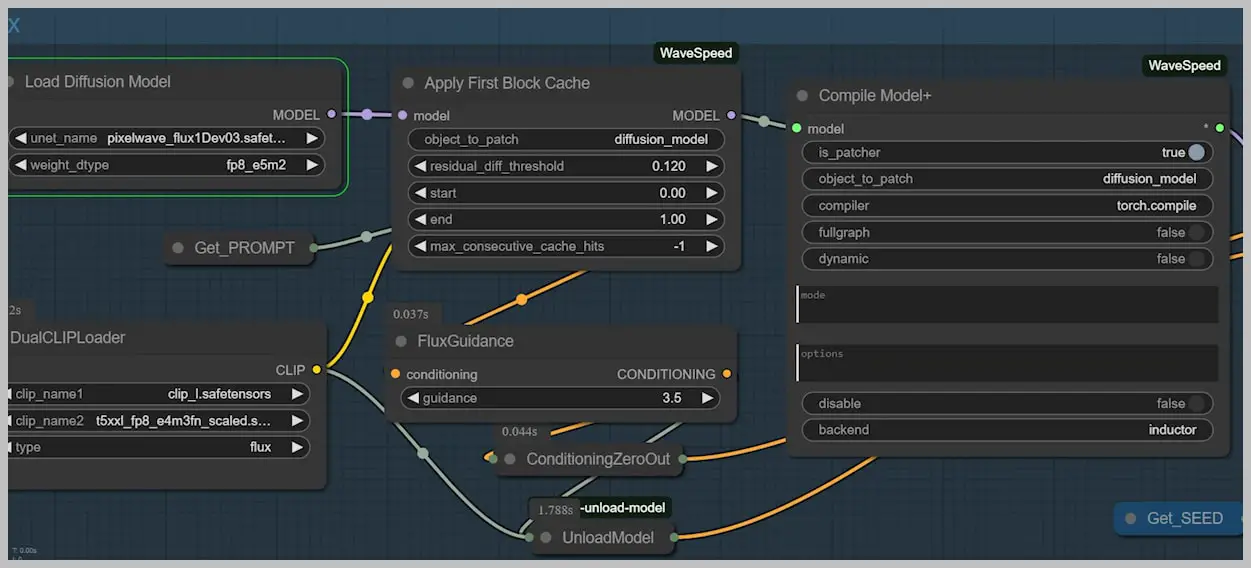
3. Nunchaku vs. WaveSpeed: Architecture Comparison
Workflow Differences:
| Component | Nunchaku | WaveSpeed |
|---|---|---|
| Base Model | Specialized SVD Quant | PixelWave |
| Control Method | Dedicated nodes | Plugin-based |
Performance Testing:
- Both set to equivalent quality settings
Results:
| Metric | Nunchaku | WaveSpeed | Difference |
|---|---|---|---|
| Render Time | 28s | 84s | 3x faster |
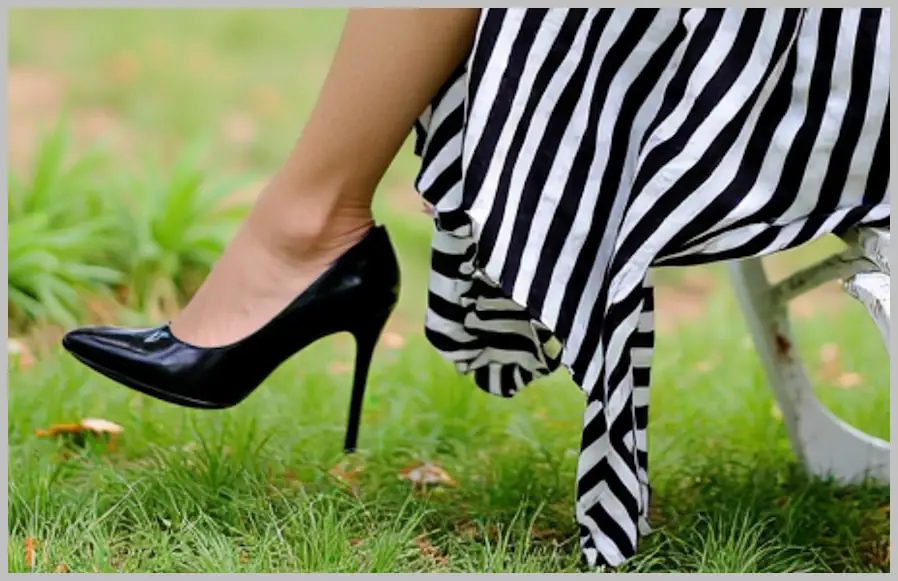
Nunchaku’s ControlNet Mastery: Precision at Speed
1. Canny Edge Implementation: Dedicated vs. Union Workflows
Benchmark Setup
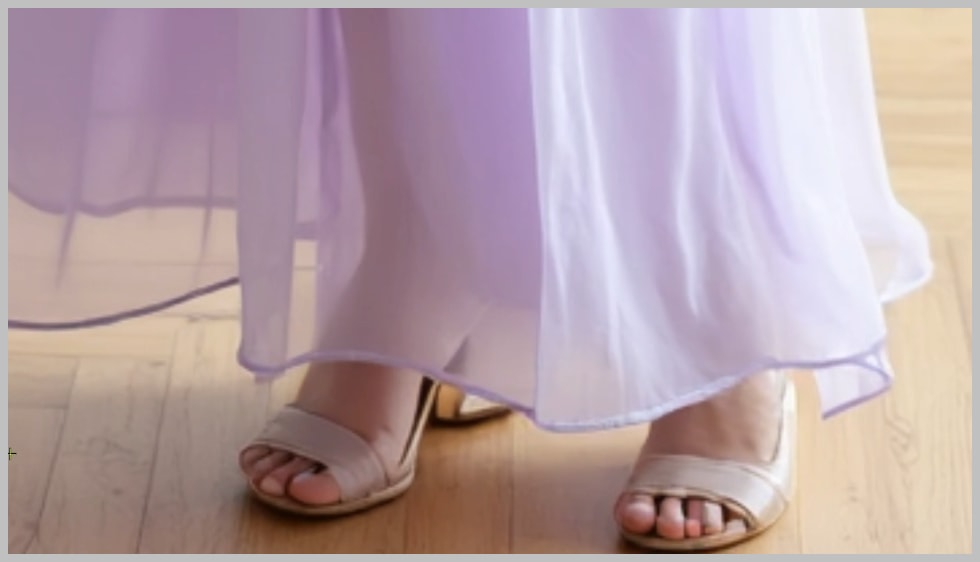
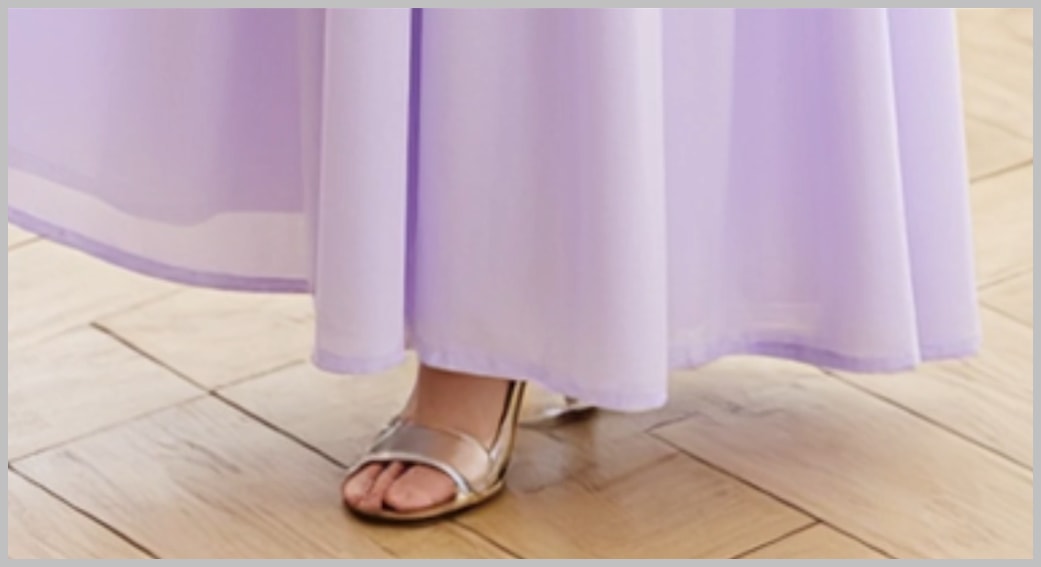
- Test Image: Female figure with complex drapery
- Hardware: Tesla T4 GPU (16GB VRAM)
- Baseline: Traditional Flux Canny (GGUF Q5 model)
Performance Comparison
| Method | Render Time | Fold Detail |
|---|---|---|
| Flux Canny | 196s | Perfect drape continuity |
| Nunchaku Canny (0.12 threshold) | 25s | Minor fold blending |
| Nunchaku Canny (0.3 threshold) | 9s | Lost mid-frequency details |
Nunchaku Canny (0.3 threshold): 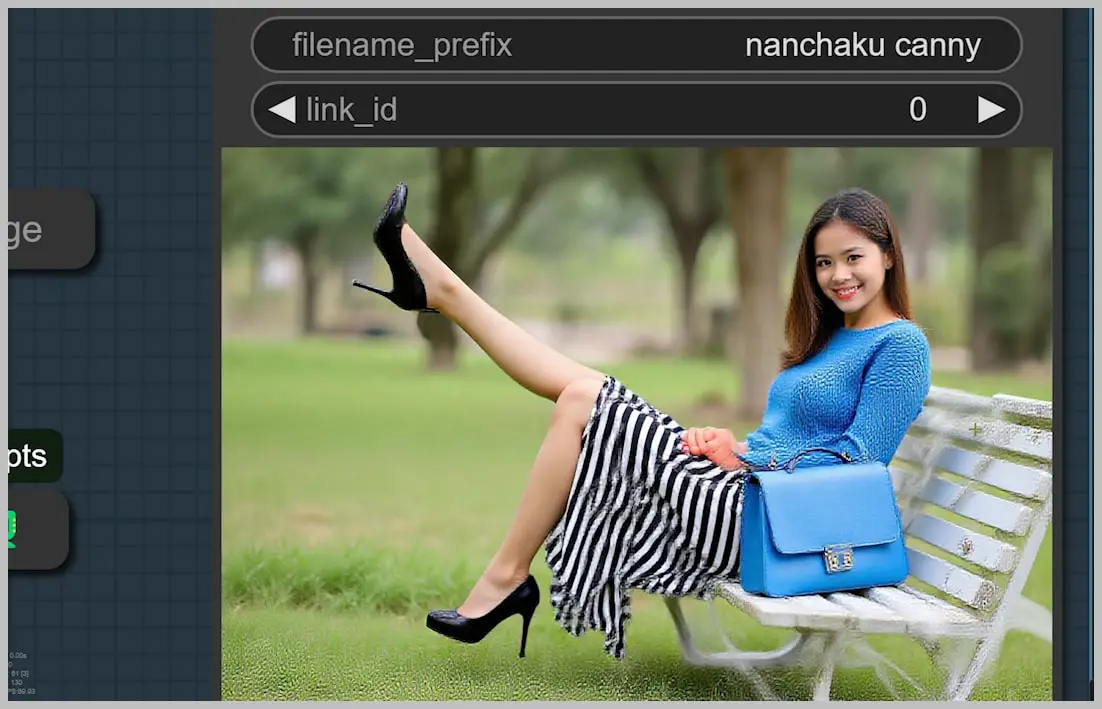
Nunchaku Canny (0.12 threshold):

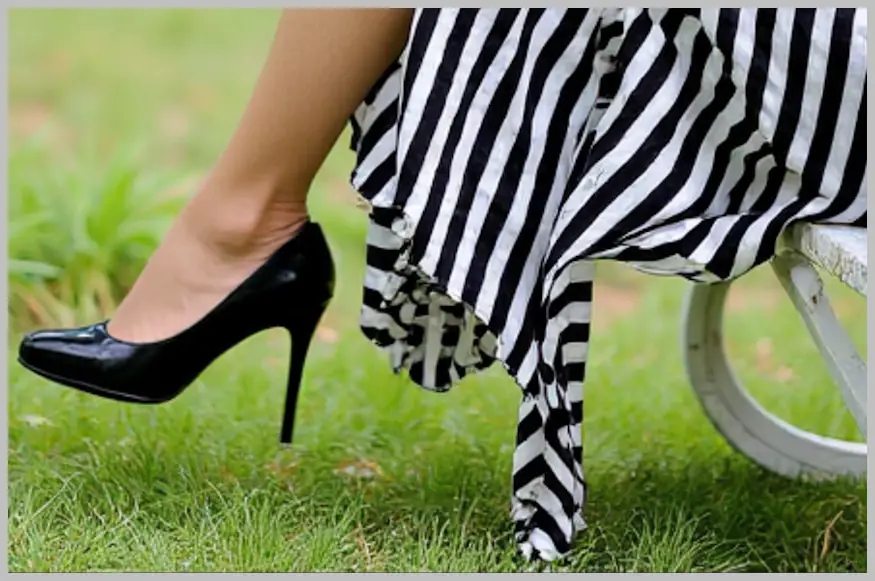
Flux Canny:

2. Union ControlNet: The Flexible Alternative
Architecture Deep Dive
- Single Model handles multiple ControlNet types (Canny/Depth/Normal)
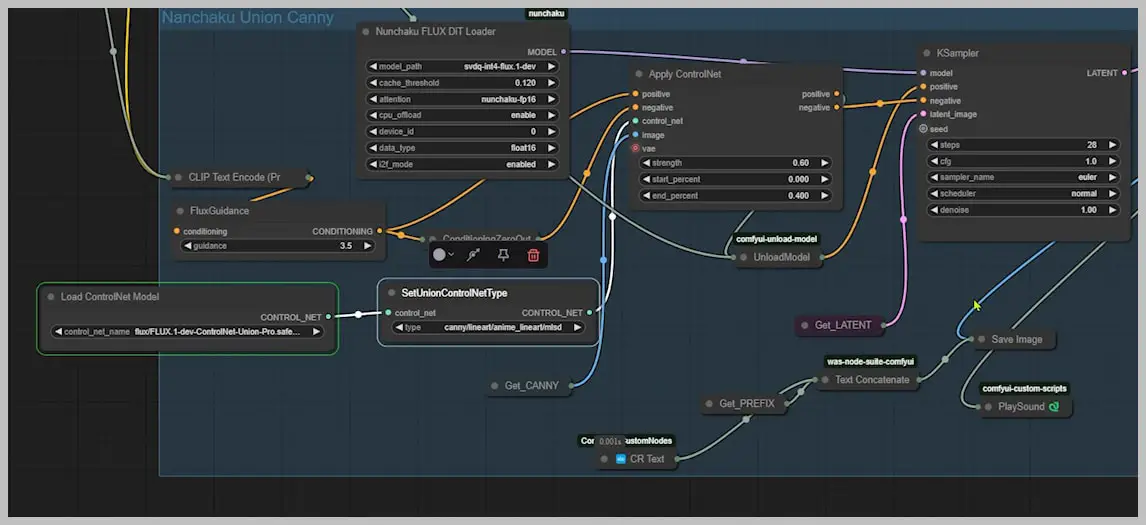

Performance Data
| Task | Dedicated Model | Union ControlNet | Delta |
|---|---|---|---|
| Canny Generation | 25s | 38s | +52% |
| Multi-ControlNet Switching | N/A | Instant | – |
When to Use Union:
- Rapid prototyping with multiple control types
- VRAM-rich environments (≥12GB)
- Non-critical anatomical precision
3. Real-World Workflow Recommendations
For Concept Artists:
- Use Union ControlNet for:
- Rapid layout iterations
- Multi-control experiments
- Switch to dedicated models for:
- Final presentation shots
- Commercial work
Hardware Guidelines:
| GPU Class | Recommended Setup |
|---|---|
| ≤8GB VRAM | Dedicated models + CPU offload |
| >8GB | Union ControlNet |
Conclusion
Nunchaku isn’t just another tool—it’s a quantum leap for ComfyUI workflows. By combining blazing speed (5x faster than alternatives), uncompromising detail, and efficient hardware usage, it redefines what’s possible in AI-assisted content creation.
Join our community and try it free for 7 days to get the workflow: https://myaiforce.com/join