PixelSmile in ComfyUI: Smooth, Controllable Facial Expressions
Have you ever wondered how some portraits achieve incredibly smooth and natural-looking expression changes? In this article, I’ll walk you through a powerful technique using PixelSmile, a technology that makes facial expression editing not only more realistic but also highly controllable.
What makes PixelSmile stand out is its ability to precisely manipulate facial expressions while preserving the original identity and details of the subject. Once I started using it, the difference compared to traditional methods became immediately obvious.
YouTube Tutorial:
Gain exclusive access to advanced ComfyUI workflows and resources by joining our community now!
Key Features of PixelSmile
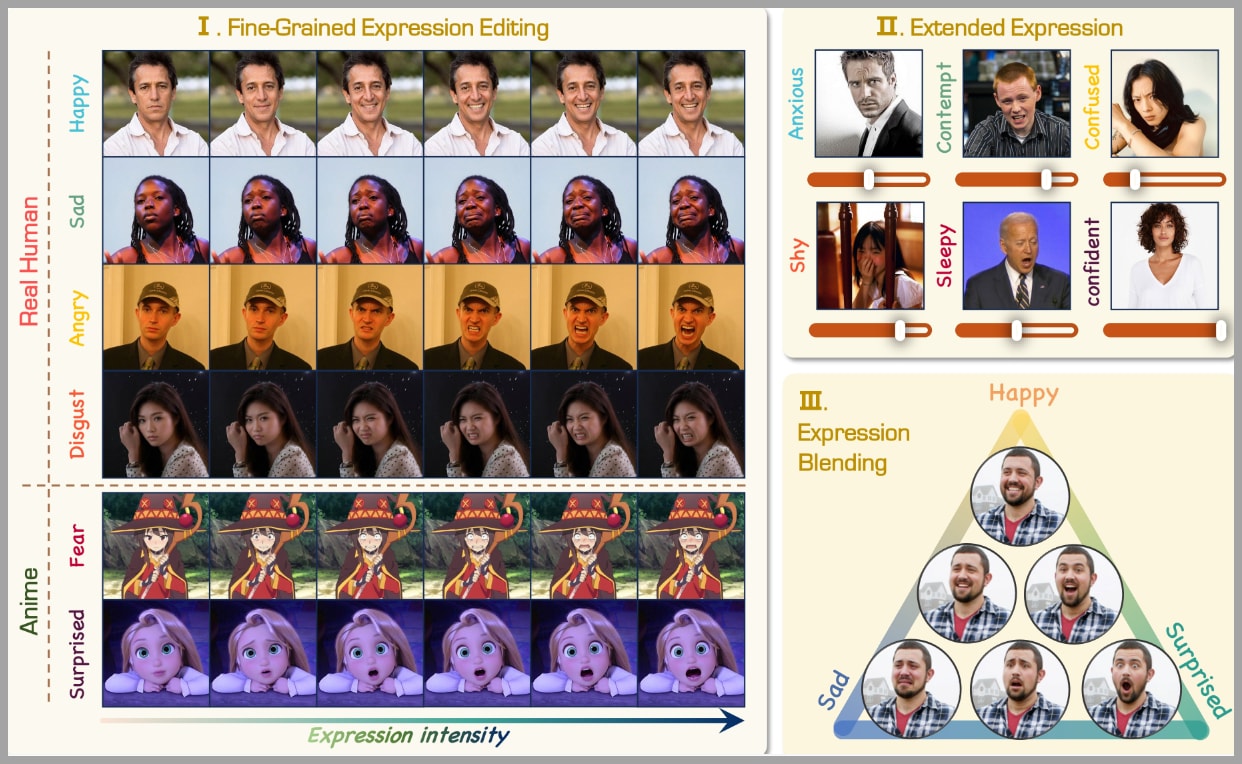
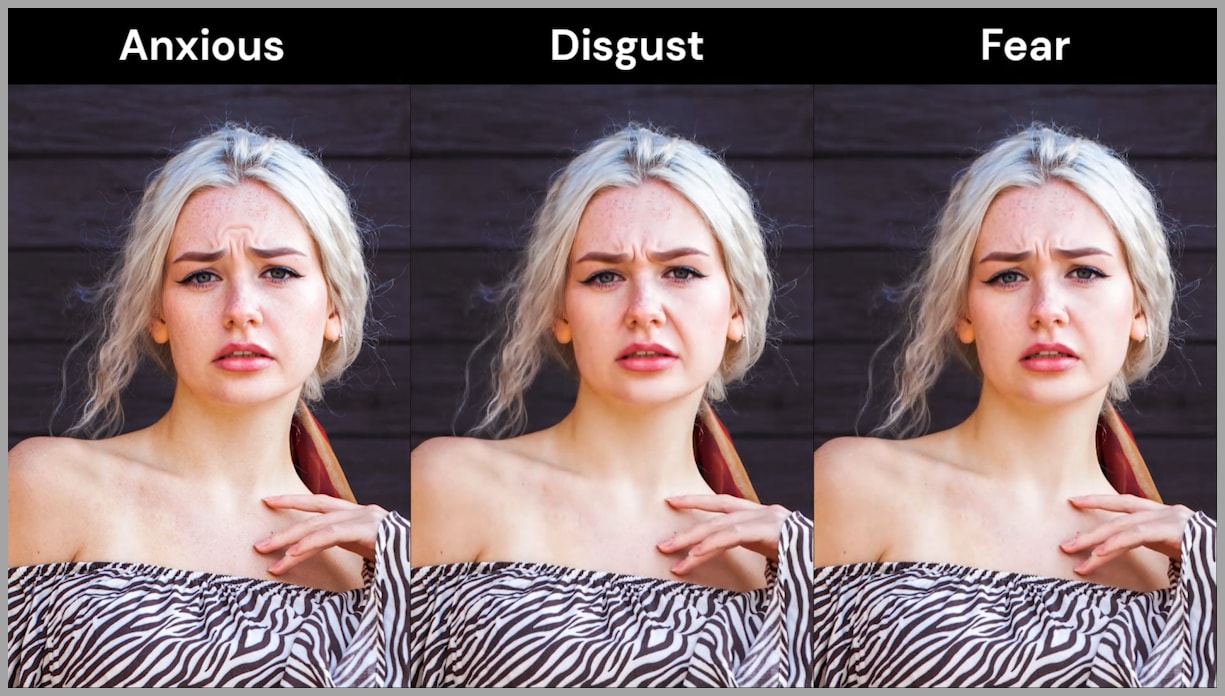
PixelSmile is designed to give you fine-grained control over facial expressions. It supports a wide range of emotions, including:
- Happy
- Sad
- Angry
- Disgust
- Fear
- Surprised
- Anxious
- Contempt
- Confused
- Shy
- Sleepy
- Confident
That’s already impressive—but it doesn’t stop there.
Expression Blending
One of my favorite features is the ability to blend expressions. For example, you can combine:
- Happy + Sad
- Happy + Surprised
- Sad + Surprised
This opens up a whole new level of subtle emotional control that feels much closer to real human expressions.
Adjustable Intensity
PixelSmile works similarly to a Slider LoRA, meaning you can adjust the strength of an expression using a numerical value. This gives you:
- Subtle micro-expressions
- Strong, exaggerated emotions
- Everything in between
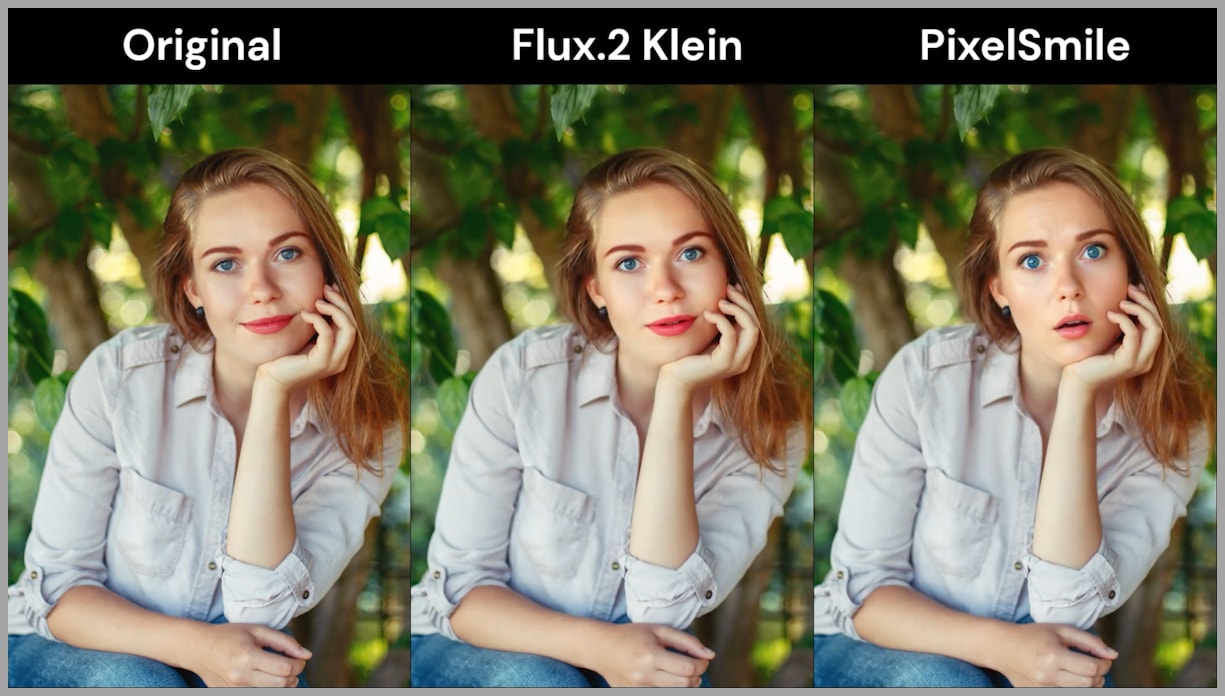
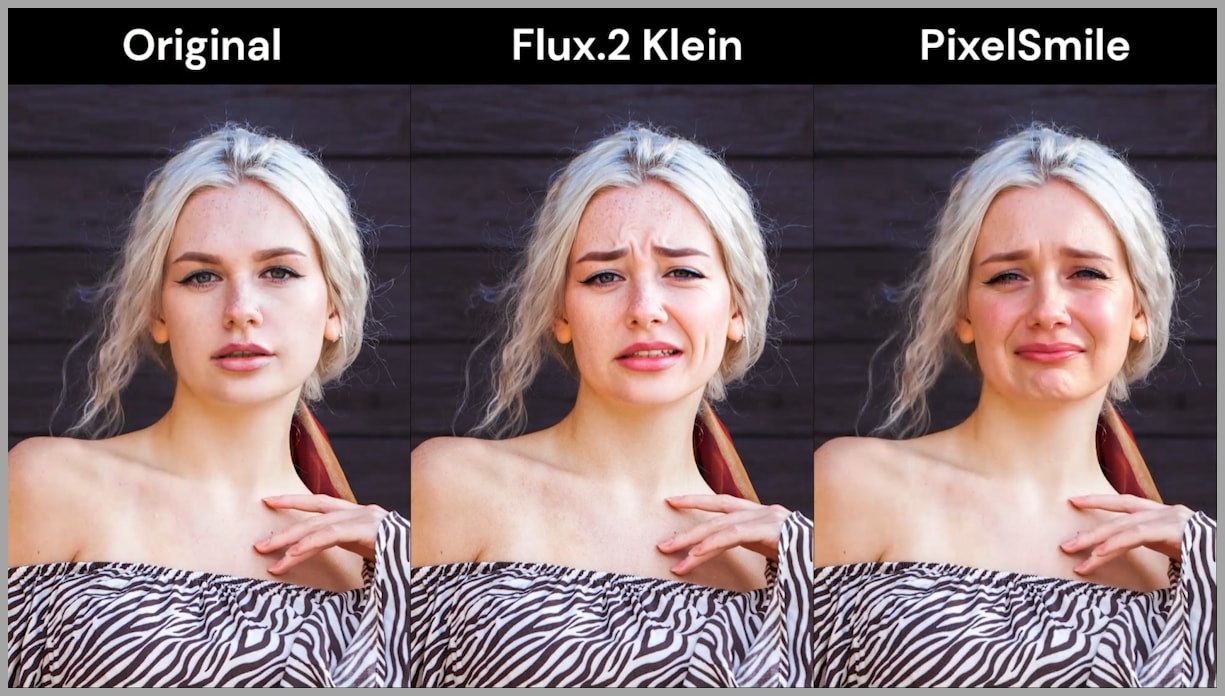
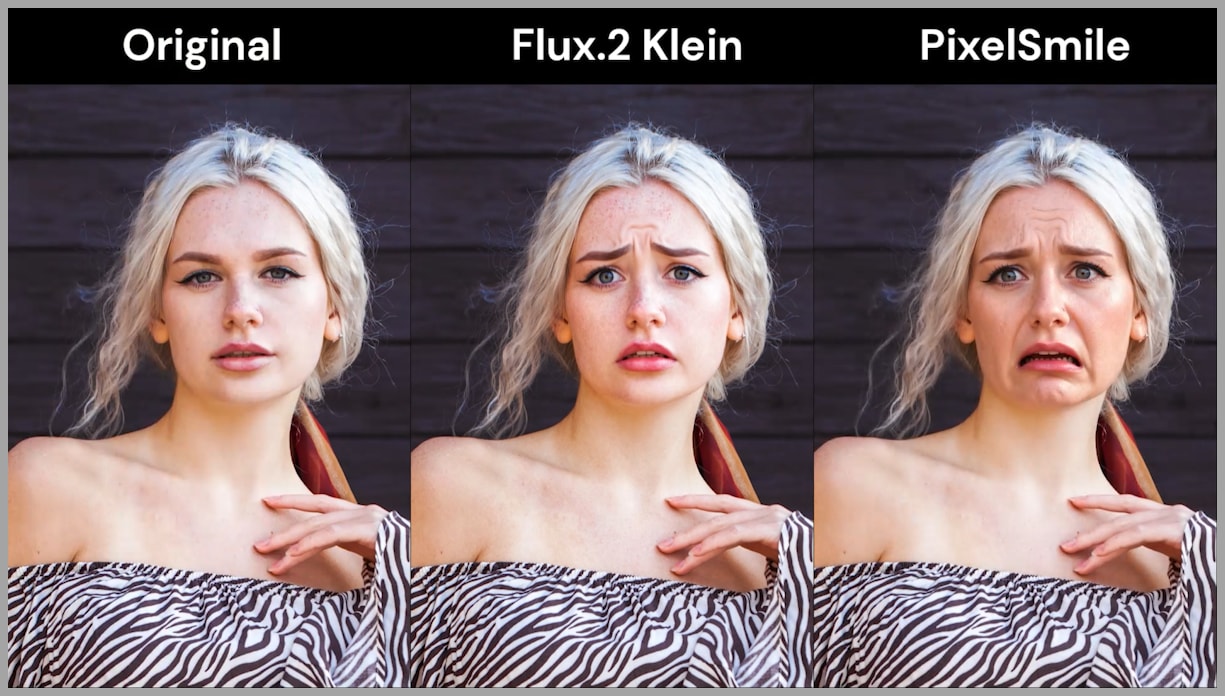
PixelSmile vs. Flux 2 Klein
At first, I wondered: why use PixelSmile when models like Flux 2 Klein can also edit expressions?
So I tested both—and the results were quite revealing.
Realism
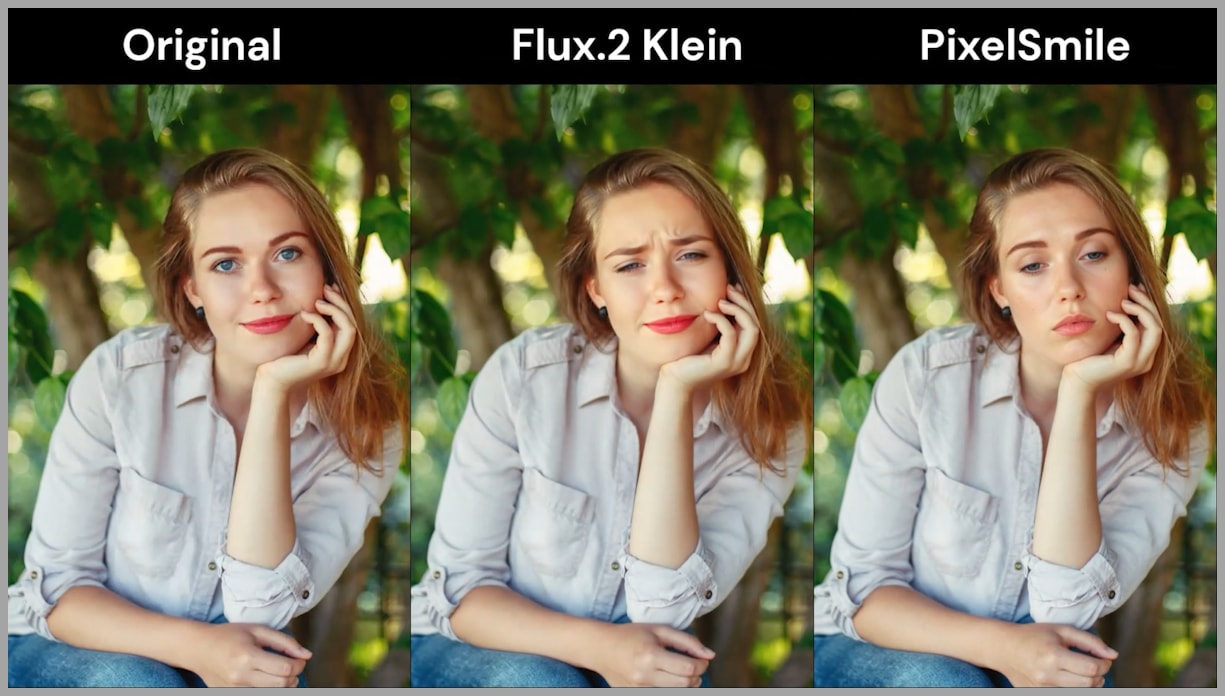
When generating expressions like sleepy or surprised, PixelSmile consistently produced more believable results. Flux 2 Klein often missed the emotional mark—for example:
- A “sleepy” face looked more like a smile
- A “surprised” face lacked intensity
Expression Variety
Flux 2 Klein struggles with unique expressions. Different outputs often look:
- Repetitive
- Too similar to each other
- Less expressive overall
PixelSmile, on the other hand, produces:
- Distinct variations
- More lifelike emotions
- Better emotional clarity
Blending Quality
When blending expressions, the difference becomes even clearer. PixelSmile handles mixed emotions naturally, while Flux results tend to look flat or inconsistent.
Overview of the ComfyUI Workflow
Now let’s talk about how this is implemented in ComfyUI.
The setup is straightforward once you understand the components.
Core Elements
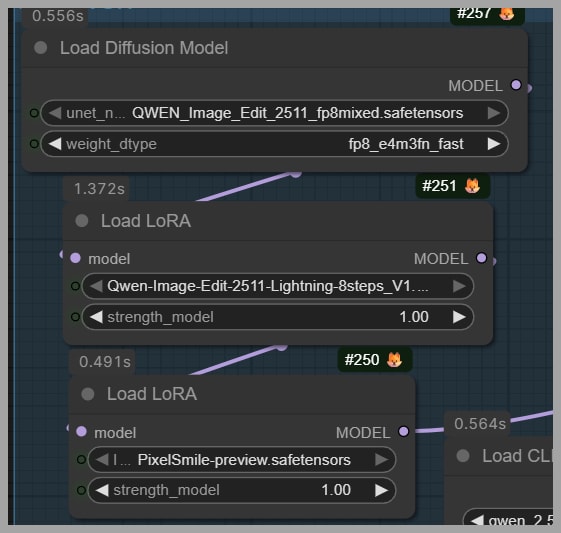
- Base Model: Qwen Image Edit 2511
- LoRAs: PixelSmile-specific LoRA and 8-step lightning LoRA
- Main Task: Edit facial expressions while preserving image quality
The LoRA is specifically trained for PixelSmile, so you can usually set its strength to:
LoRA Strength = 1Simple and effective.
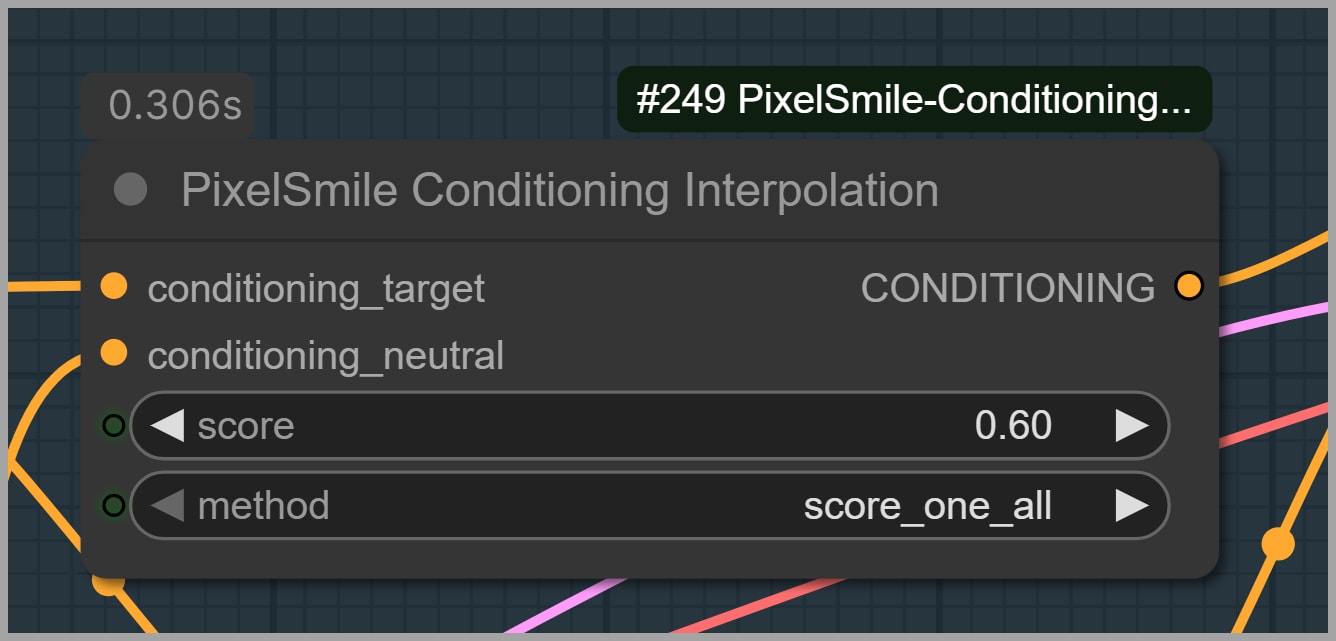
Core Workflow: Expression Editing with PixelSmile
The heart of this workflow lies in a single node:
PixelSmile Conditioning Interpolation
This is where the magic happens.
- It controls expression intensity
- It blends between two conditions
- It uses a score value to determine strength
Prompt Structure
There are two key prompts:
- Primary Expression Prompt
Edit the person to show a surprised expression. - Secondary (Baseline) Prompt
Edit the person to show a neutral expression.
To change the expression, simply replace the keyword:
- “surprised” → “happy”, “sad”, etc.
The second prompt usually stays neutral, unless you want to blend expressions (more on that later).
Face Cropping and Masking Strategy
One of the most important design decisions in this workflow is:
Only editing the face—not the entire image
Why Crop the Face?
If you process the whole portrait:
- You risk losing fine details
- The model may unintentionally alter other parts
Instead, we isolate the face for precise editing.
Step-by-Step Process
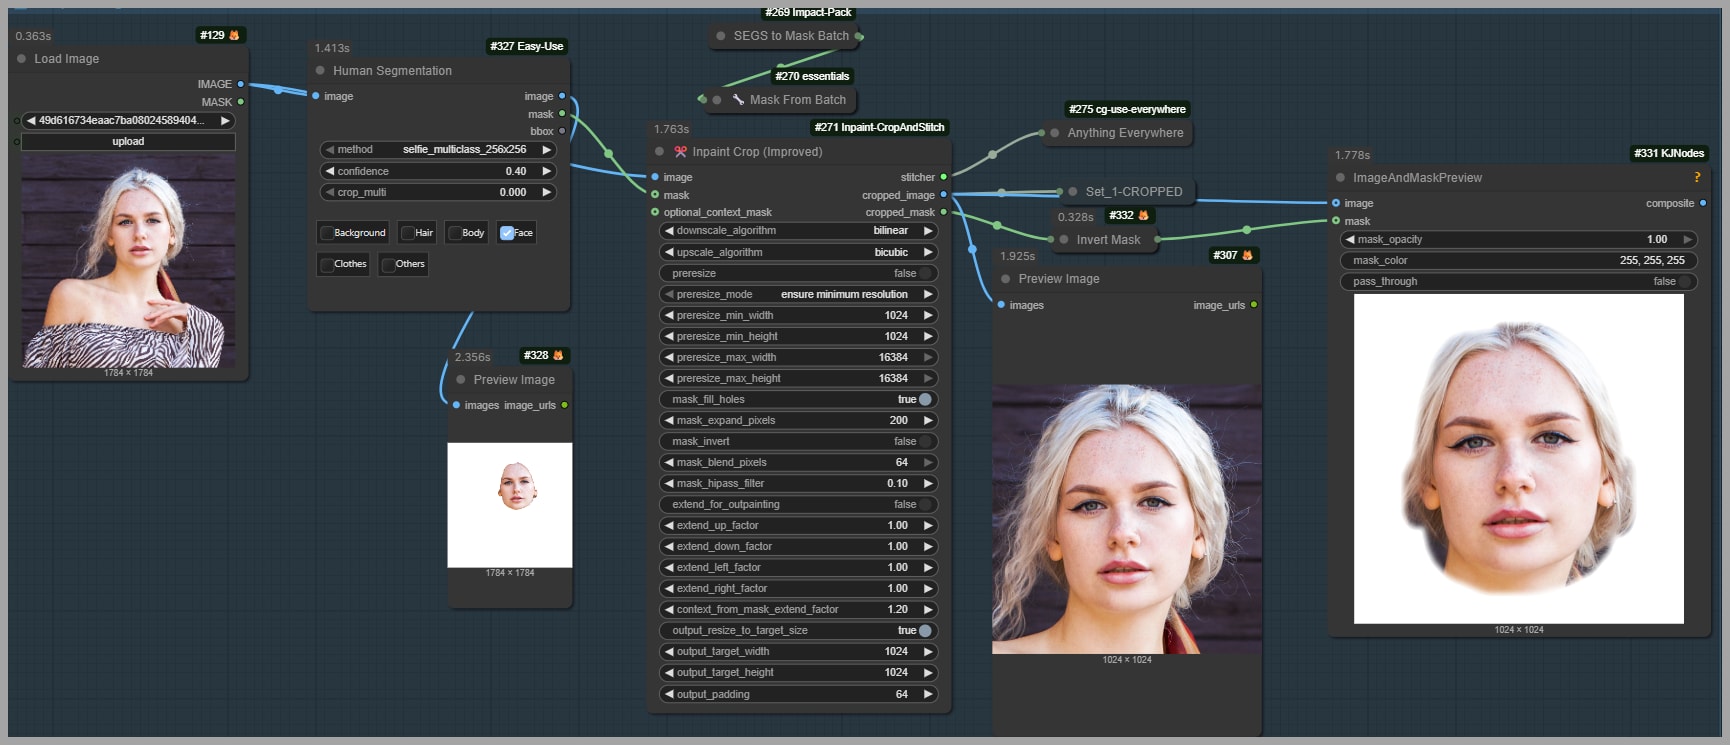
- Human Segmentation Node
- Generates a mask of the face
- Inpaint Crop Node
- Crops the image to a 1024×1024 region
- Centers the face
- Expression Editing
- PixelSmile modifies only this cropped region
Why Mask Expansion Matters
Here’s a crucial detail: the mask is expanded beyond the face.
Why?
Some expressions change the shape of the face:
- “Surprised” → mouth opens
- Face becomes longer
If the mask is too tight:
- Parts of the face (like the chin) may get cut off
Example Fix
- Original setting:
Mask Expand Pixels = 200 - Fix for missing chin:
Mask Expand Pixels = 400
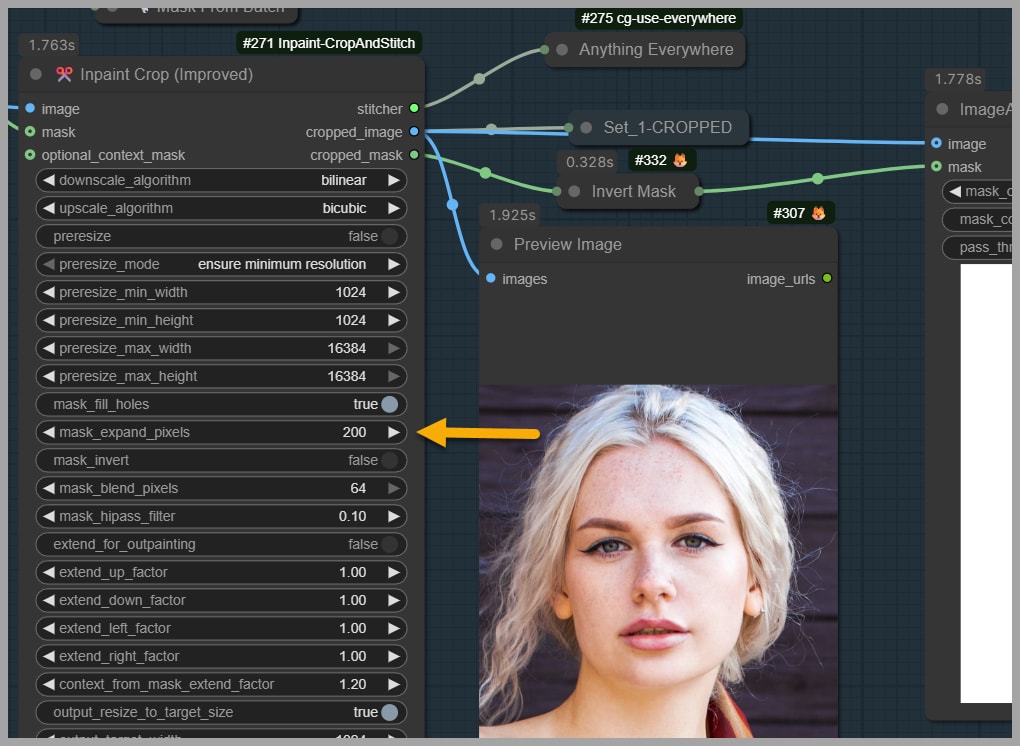
Always give the model enough room to work.
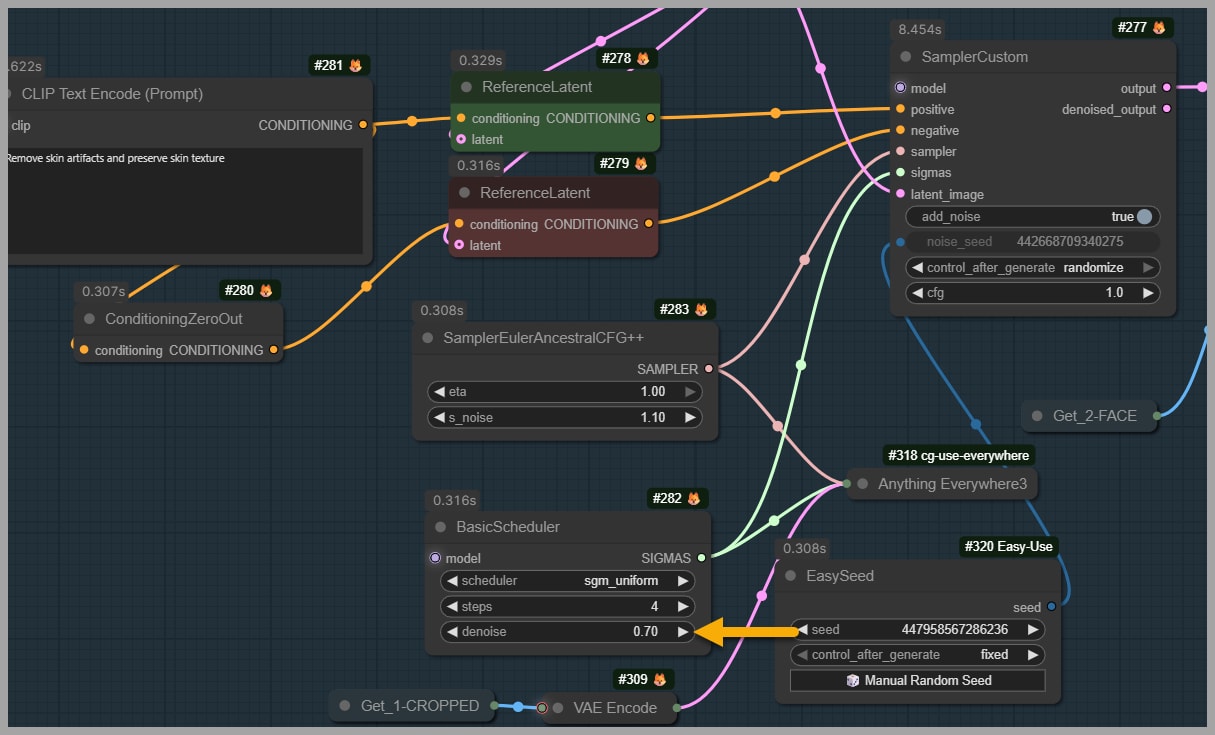
Refinement Pass with Flux 2 Klein
Interestingly, even though Flux 2 Klein isn’t great for expression generation, it still plays an important role.
Why Use It?
PixelSmile can sometimes introduce:
- Skin artifacts
- Texture inconsistencies
So I use Flux 2 Klein as a repair pass.
Prompt Used
Remove skin artifacts and preserve skin texture.
Scheduler Choice
Instead of the default Flux scheduler, I use the Basic Scheduler because:
- It allows control over denoising strength
- This gives better fine-tuning during cleanup
Even if the difference isn’t always dramatic, it often improves overall quality.
Blending Expressions in Practice
Now let’s get to one of the coolest features: expression blending.
How It Works
Originally:
- Prompt 1: “surprised”
- Prompt 2: “neutral”
This effectively blends:
Surprised + Neutral
To Blend Expressions
Simply replace the second prompt:
- Change “neutral” → “happy”
Now you get:
Surprised + Happy
That’s it—no extra nodes required.
Troubleshooting and Optimization Tips
Problem: Missing Facial Parts (e.g., Chin)

Cause: Mask too small
Solution: Increase mask expansion:
Mask Expand Pixels → Increase value

Conclusion
PixelSmile brings a new level of control and realism to facial expression editing in ComfyUI. With features like:
- Precise expression control
- Natural blending of emotions
- Adjustable intensity
- Targeted face editing
…it clearly outperforms traditional approaches for this specific task.
Combined with smart workflow design—like face cropping and optional refinement passes—you can achieve results that are both expressive and high quality.
If you’re serious about character expression editing, this is definitely a workflow worth exploring.
Gain exclusive access to advanced ComfyUI workflows and resources by joining our community now!