Midjourney + ComfyUI = Perfect Product Photography
Midjourney is renowned for producing stunning product photography, but when it comes to generating scene images tailored to your specific products, some additional processing is required.
In this article, I’ll guide you through a workflow I’ve developed using Midjourney and ComfyUI to create product scenes that resonate more closely with your own offerings.
Midjourney and My ComfyUI Workflow
We all appreciate how Midjourney can generate visually captivating product photography. Take this beauty product, for instance—the lighting is exquisite.

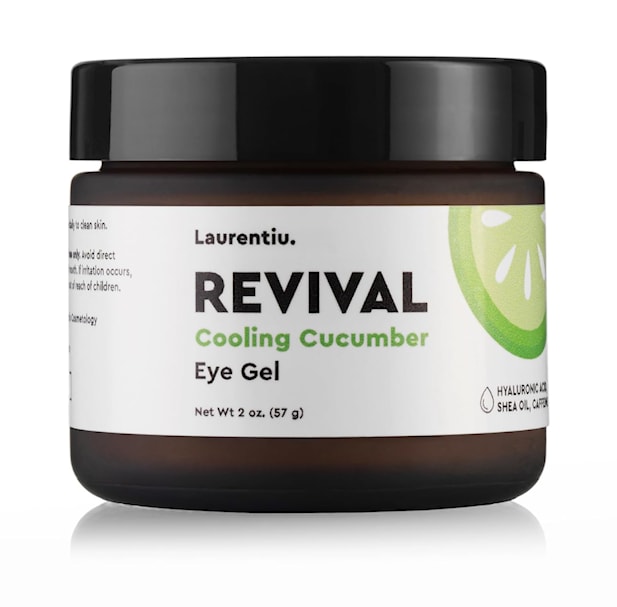
However, what we need is a scene that accurately reflects our own products. Here’s an example using our eye cream.
Midjourney’s image reference feature allows us to approximate the appearance of our product in the generated image.
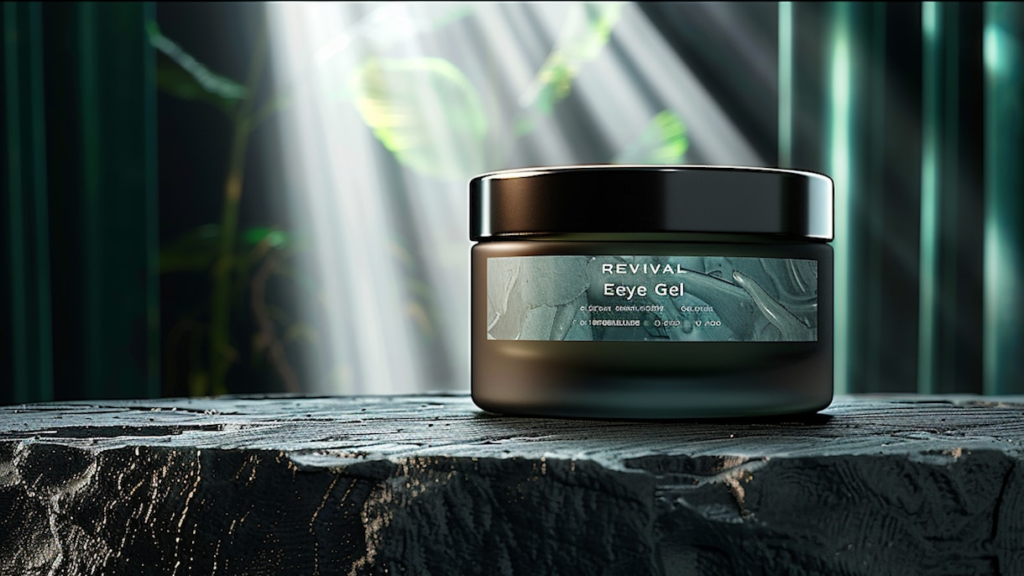
Although replicating every intricate detail isn’t feasible, this image was crafted using Midjourney and further refined with my ComfyUI workflow.
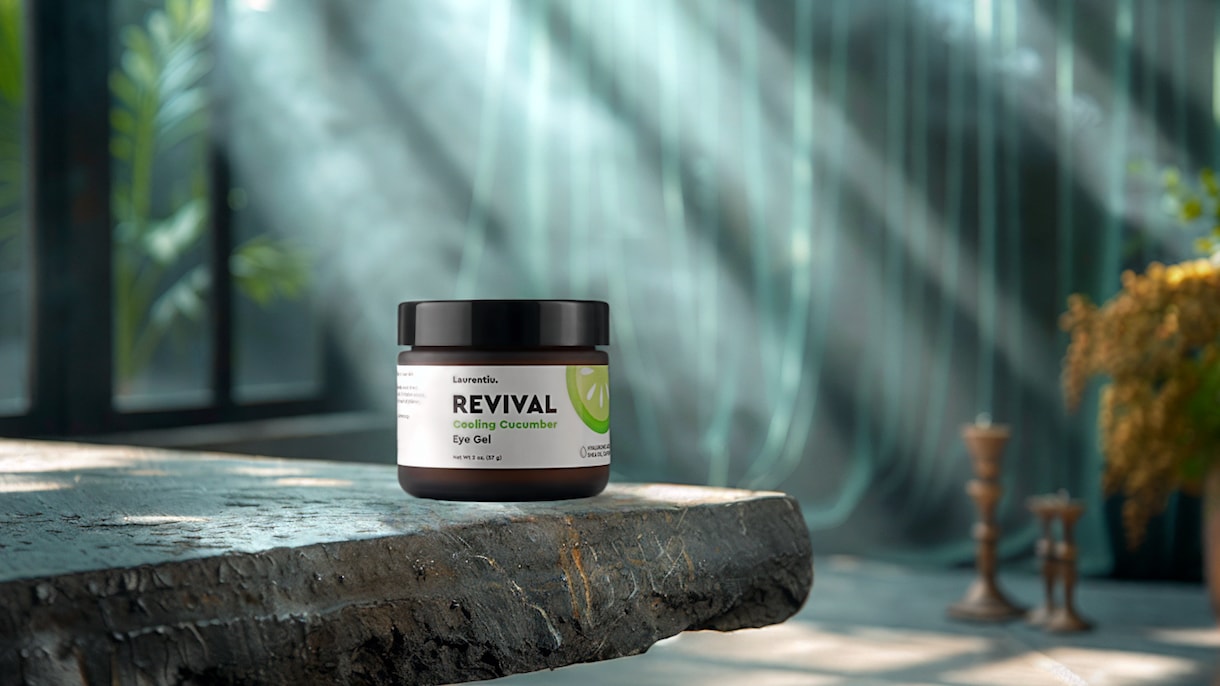
Midjourney set up the scene, and my ComfyUI workflow ensured the product fit seamlessly into it.
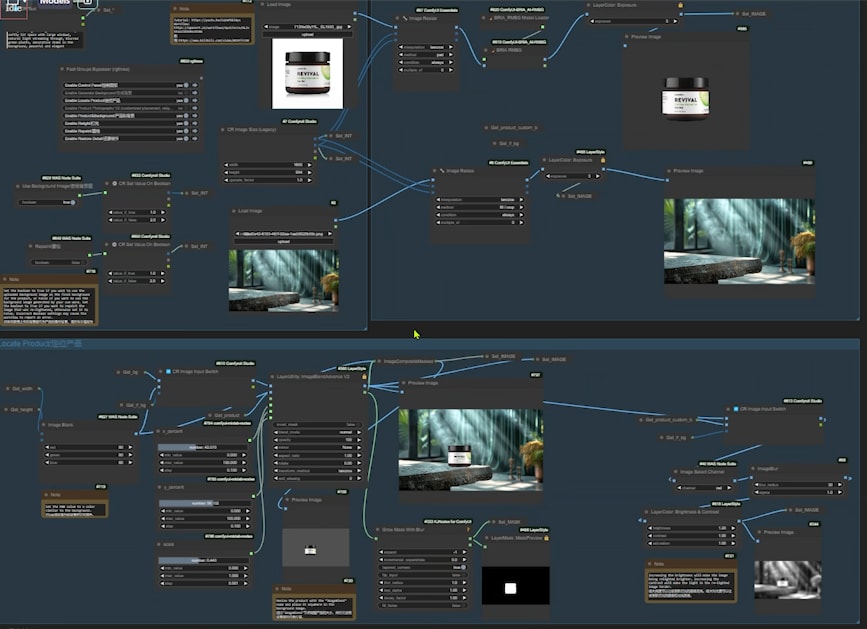
The workflow adjusts lighting and shadows while preserving key details, like the text on the product.
Thanks to feedback from the community, I’ve upgraded this workflow to version 2. If you’re curious about the underlying logic of this workflow, I recommend watching the video presentation of the first version:
In this article, I’ll first show you how to generate relevant product backgrounds with Midjourney, followed by an overview of the updates in the second version of my workflow.
For those who love diving into Stable Diffusion with video content, you’re invited to check out the engaging video tutorial that complements this article:
Download this workflow: https://openart.ai/workflows/myaiforce/GL2vEhda2lKbX0snXCNG
Gain exclusive access to advanced ComfyUI workflows and resources by joining our community now!
Here’s a mind map illustrating all the premium workflows: https://myaiforce.com/mindmap
Run ComfyUI with Pre-Installed Models and Nodes: https://youtu.be/T4tUheyih5Q
How to Generate Product Backgrounds with Midjourney
When it comes to product photography, a well-chosen background can enhance the product’s visual appeal and highlight its texture. Midjourney or Stable Diffusion can be used to create a background that perfectly complements your product. Here’s a step-by-step guide with prompt formulas to get you started.
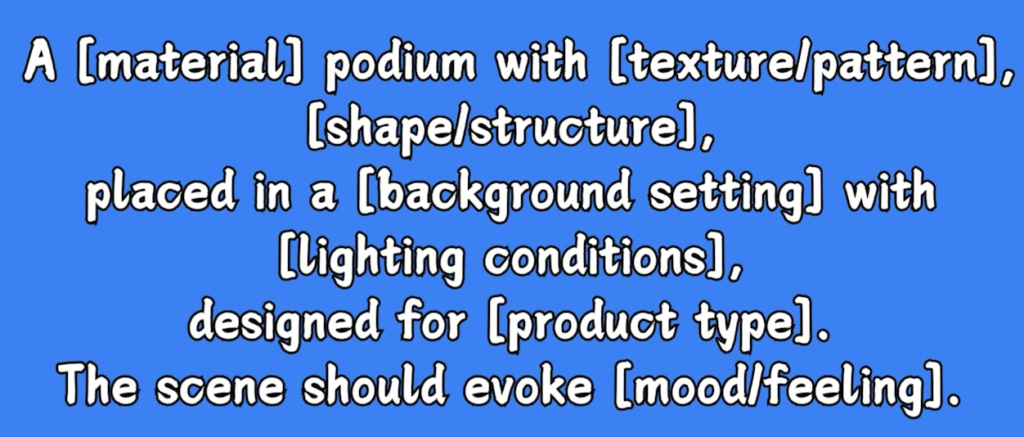
1. Prompt Formula: Creating Diverse Podiums
To generate various podium backgrounds, you can use this customizable prompt formula. Replace the placeholders like “Material”, “Texture/Pattern”, “Shape/Structure”, etc., to tailor the podium to different products.
- Example Formula:
A [material] podium with [texture/pattern], [shape/structure], placed in a [background setting] with [lighting conditions], designed for [product type]. The scene should evoke [mood/feeling].
- The Role of the Podium:
A well-designed podium guides the viewer’s focus to the product while enhancing its perceived value.
2. Example 1: Modern and Minimalist Background for Tech Products
- Background Description:
The podium is made of acrylic, with a smooth texture and a rectangular shape. The background is white, bathed in soft, diffused light, creating a modern and minimalist atmosphere. 
- Effect:
Once this background is generated, the ComfyUI workflow can seamlessly integrate the product, resulting in a high-end, professional image.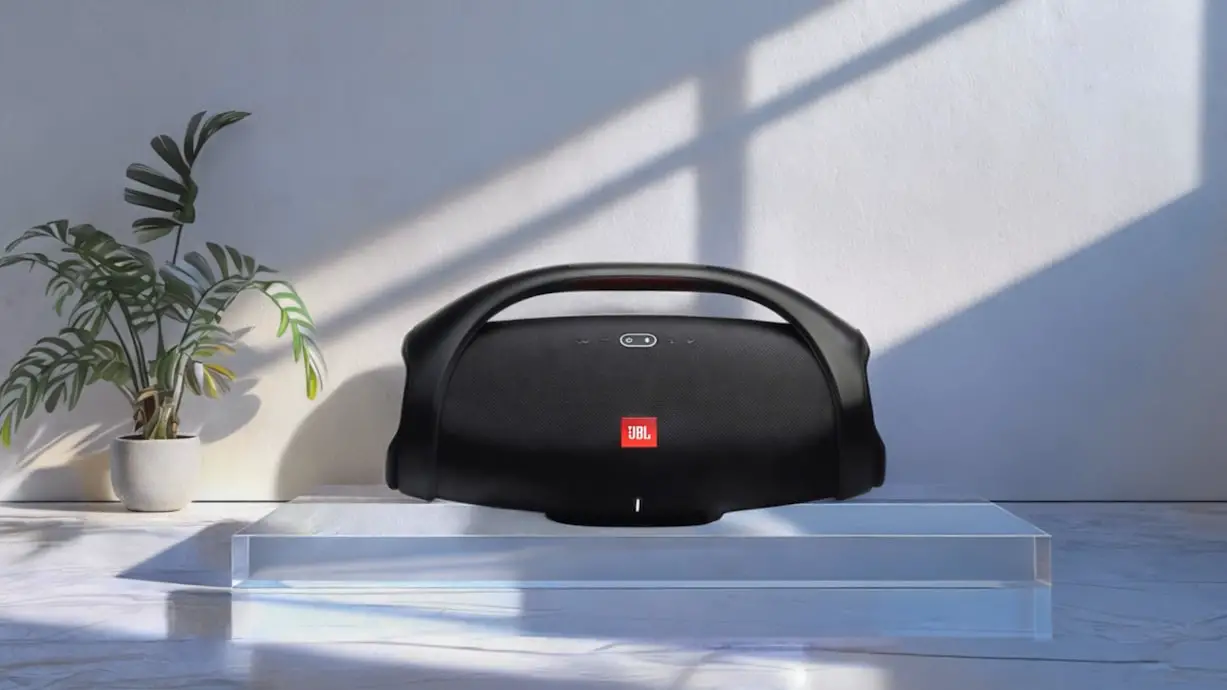
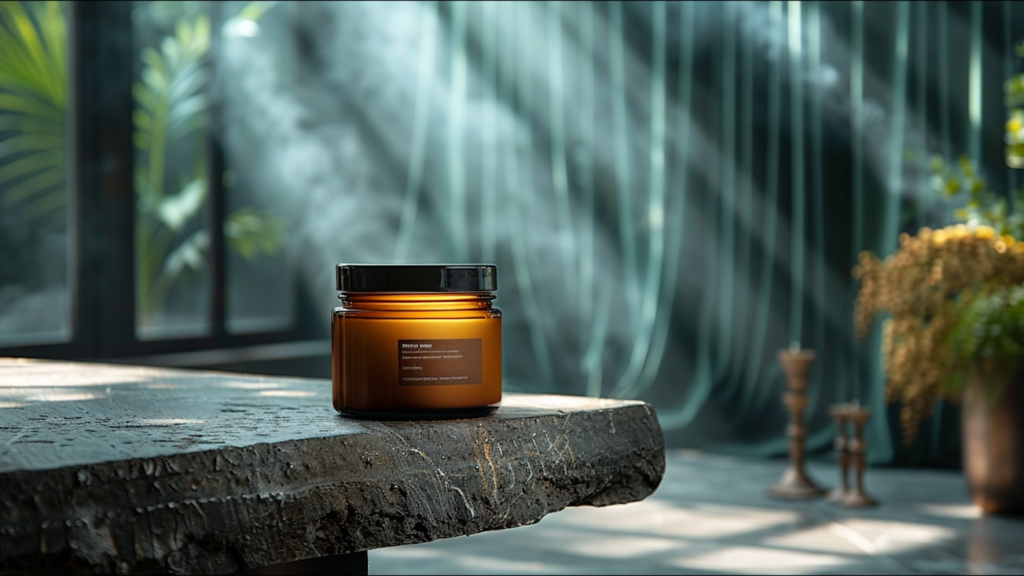
3. Example 2: Rustic Organic Skincare Background
- Background Description:
The podium is crafted from naturally textured, rounded wood, set against a warm, cozy background with natural light, ideal for organic skincare products. The scene evokes a rustic, earthy feel.
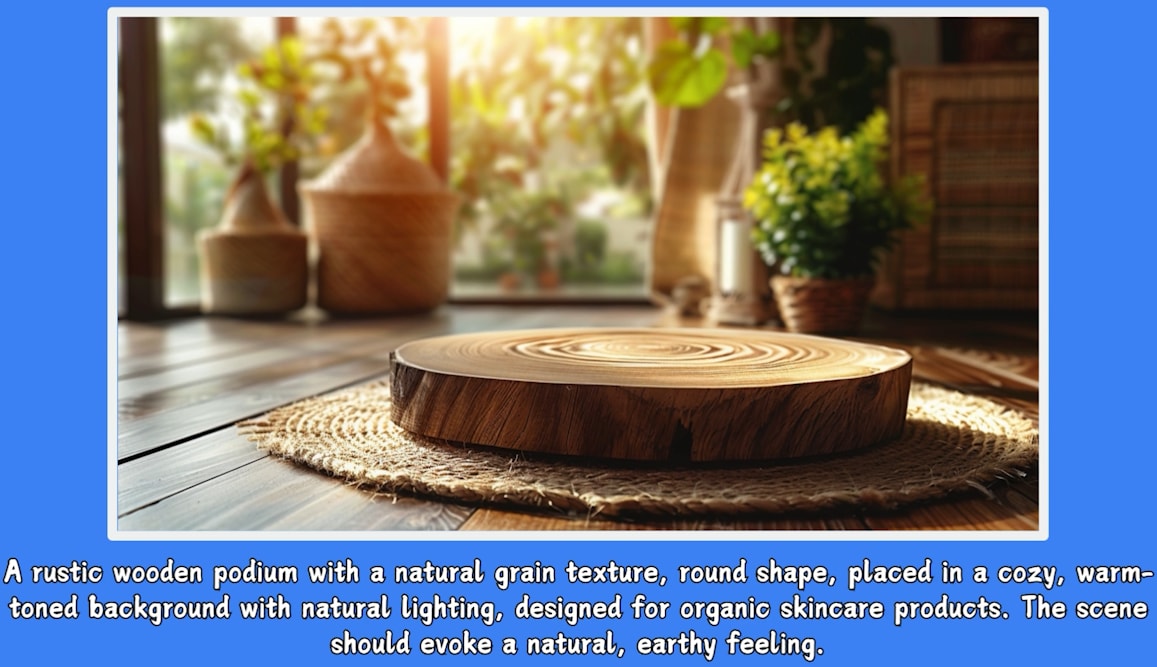
- Effect:
Incorporating your product into this setting via the ComfyUI workflow yields a natural and inviting showcase.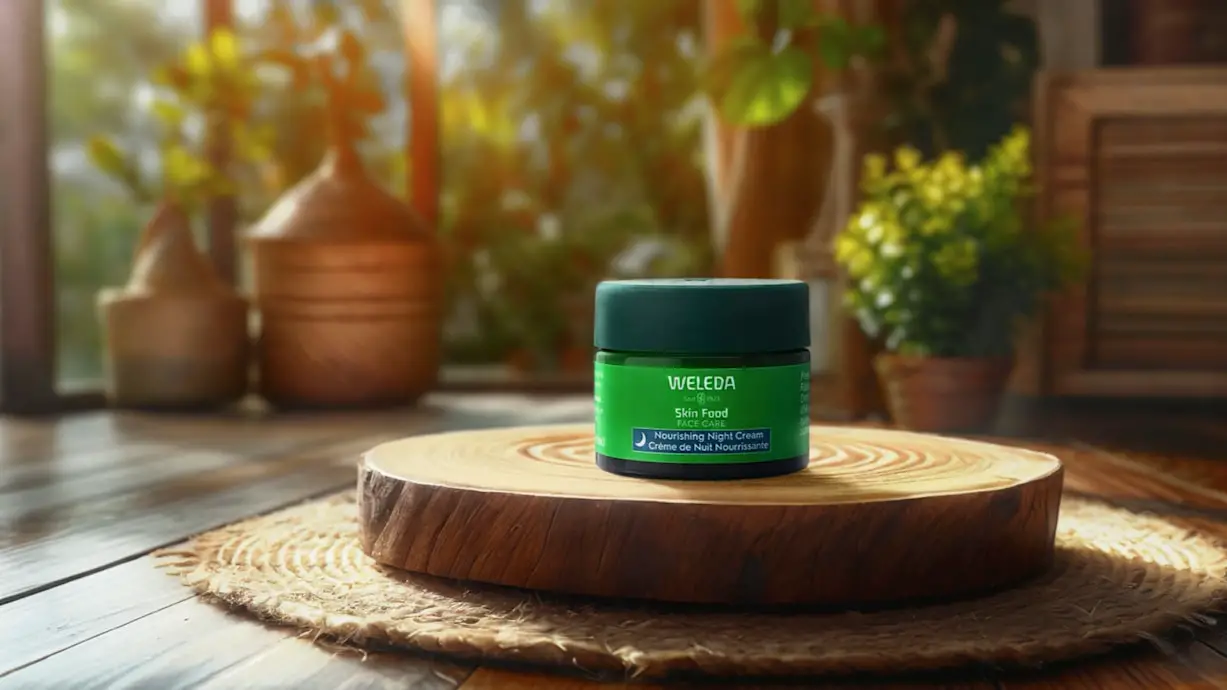
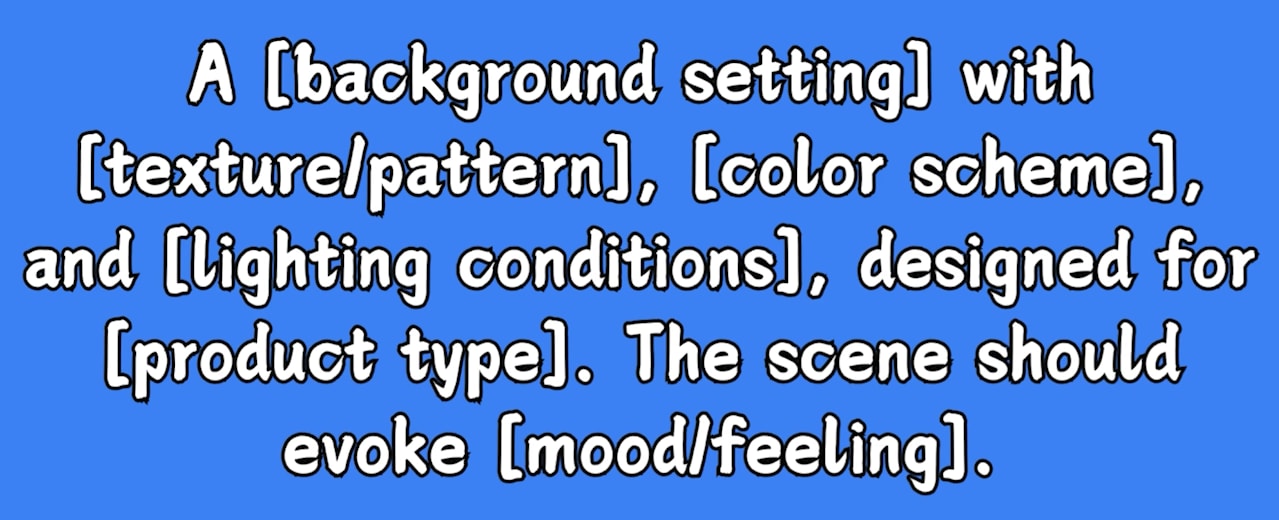
4. Background Generation Without Podiums
If you prefer a background without a podium, use this alternative prompt formula:
- Example Formula:
A [background setting] with [texture/pattern], [color scheme], and [lighting conditions], designed for [product type]. The scene should evoke [mood/feeling].
Alternatively, you can upload your product image to Midjourney as a reference and generate a scene that closely resembles your product. Afterward, you can manually remove the product from the generated image, leaving just the background. This technique can yield an excellent product background.
For instance, in the background image mentioned earlier, the product was initially part of the scene.
However, I manually removed the product, retaining only the background, which turned out to be highly effective.

5. Extended Reading
For more insights on using Midjourney for product photography, check out a detailed article I previously wrote:
ComfyUI Workflow V2 Updates
Version 2 of the ComfyUI Workflow includes several enhancements based on your feedback. Here’s a breakdown of the new features:
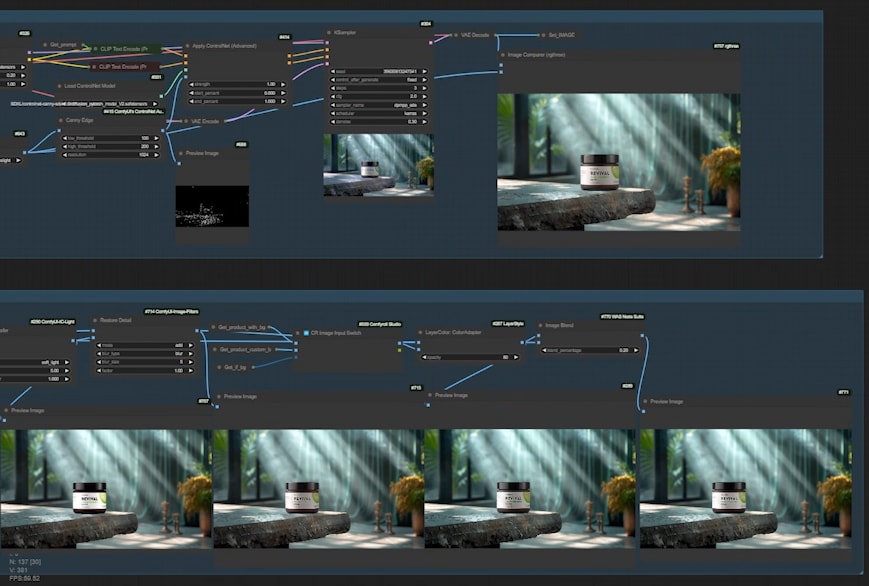
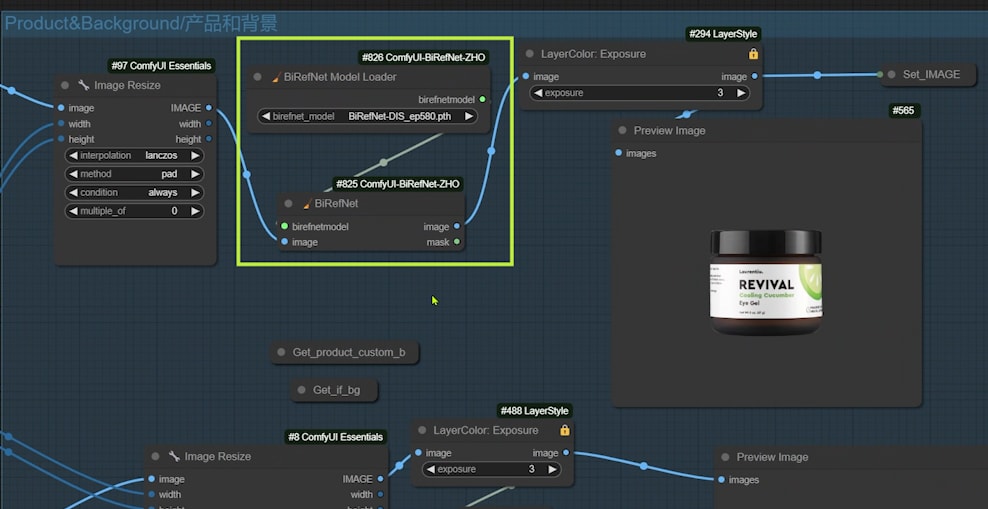
1. Accurate Background Removal: From “Image Remove Bg” to “BiRefNet”
The first major update involves replacing the “Image Remove Bg” node with the more precise “BiRefNet” node. This upgrade significantly improves background removal accuracy, ensuring the product blends more naturally with the background.
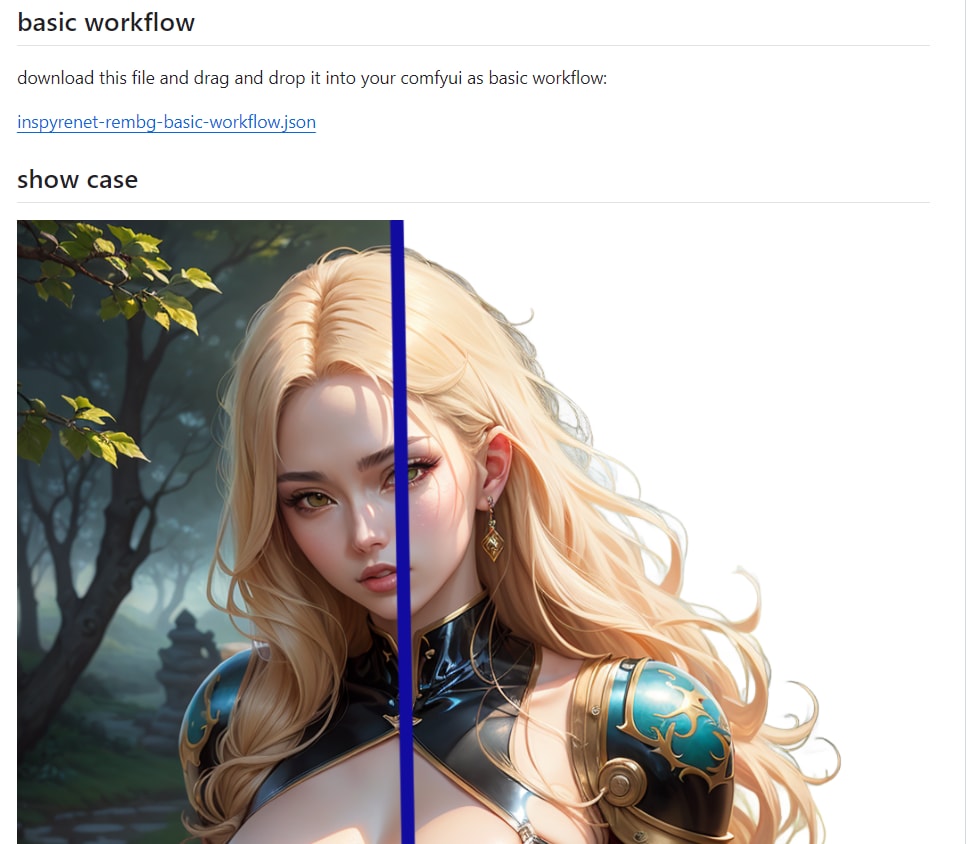
- Alternative: For even greater precision, consider the “Inspyrnet” node. It excels in handling complex backgrounds, like hair.
- Caveat: Inspyrnet’s initial background removal process is slower, which is why I don’t use it by default. However, its accuracy is impressive, and the Github demo offers more details.
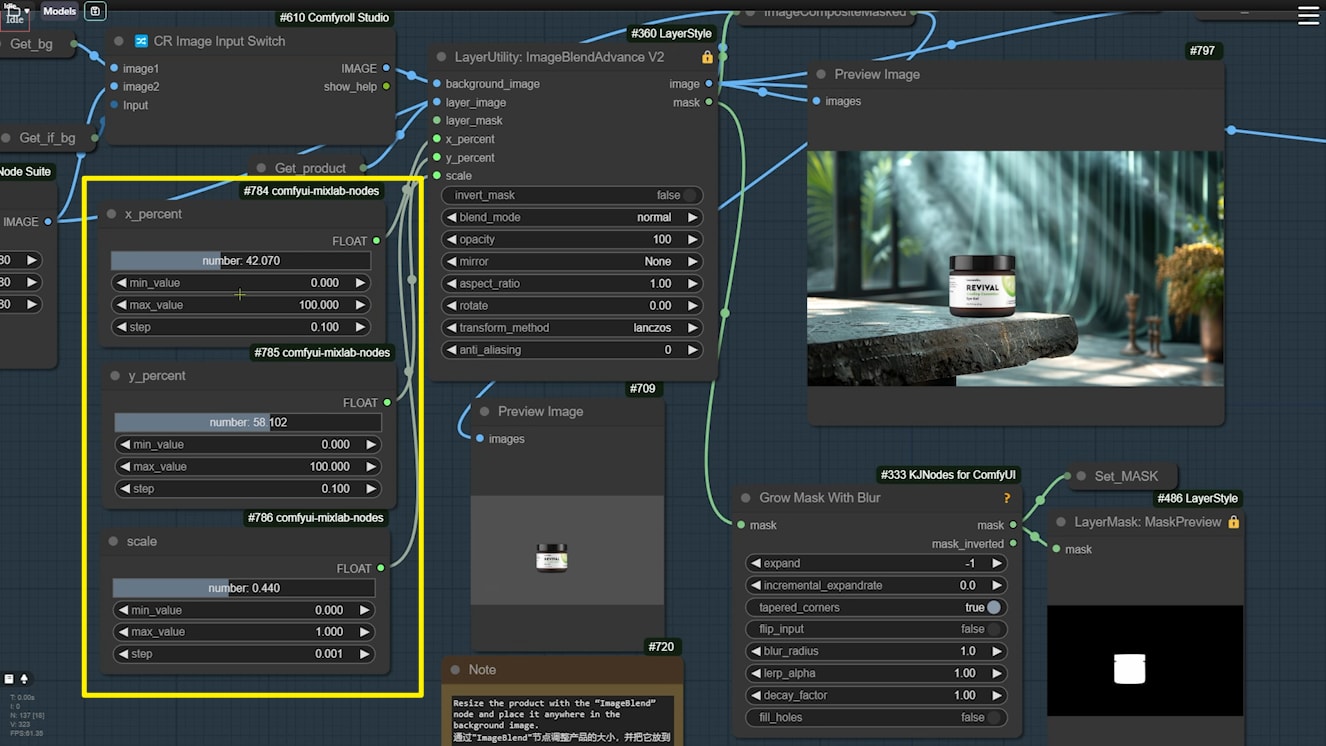
2. Easier Image Adjustments: New Float Sliders
The second update introduces three float sliders to the “ImageBlend” node, simplifying the process of adjusting your product’s position and size. Now, you can easily fine-tune these aspects by dragging the sliders, eliminating the need to manually input values.
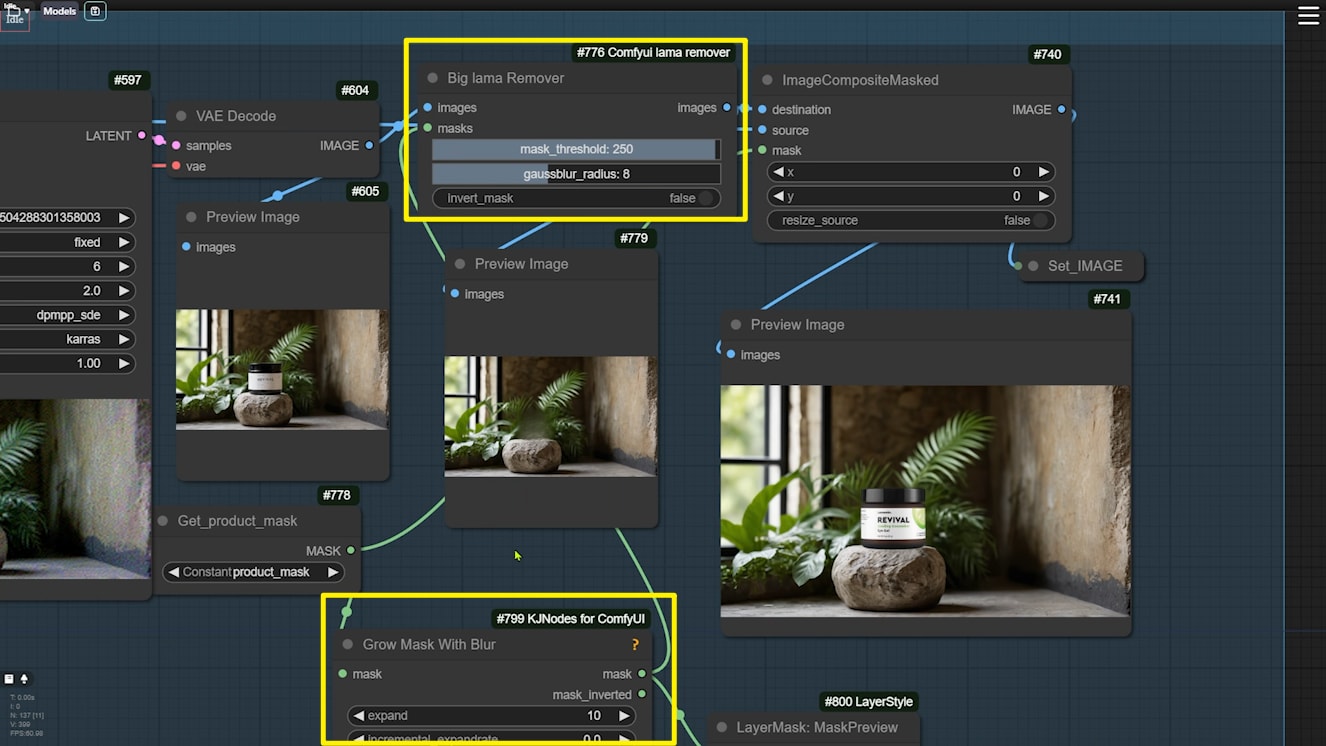
3. Optimized Product Edges: New “Lama Remover” Node
In the “Generate Backgrounds” group, I’ve added the “Lama Remover” node to address extra pixels that might appear around the product’s edges.
- How It Works: Lama Remover cleans up these pixels before pasting the product image onto the background, preventing any unwanted artifacts.
- Additional Actions: If some extra pixels persist, you can expand the mask with the “Grow Mask With Blur” node and run the removal process again.
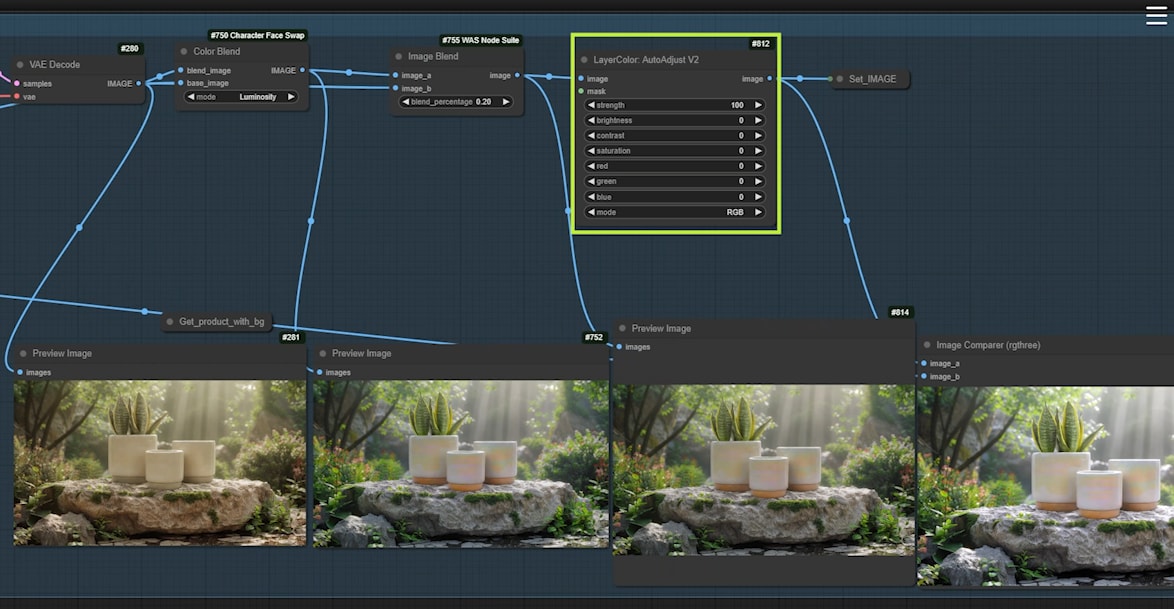
4. Automatic Lighting Adjustments: New “AutoAdjust” Node
The “Lighting” group now features an “AutoAdjust” node, which automatically corrects color and contrast issues, addressing potential color casting during the lighting process.
- Useful Scenarios: If your image suffers from severe color distortion, the “AutoAdjust” node can quickly optimize the colors. Set the intensity to 100 to enhance color contrast, significantly improving the final result.
Summary and Reminders
These updates in Workflow V2 are designed to improve both the accuracy and ease of image processing.
- Upgrade Tip: Before using the latest V2 workflow, ensure that ComfyUI is updated to its latest version, and all necessary nodes are installed for the new features to function correctly.
If you have further suggestions or questions, feel free to engage in the comments section below.