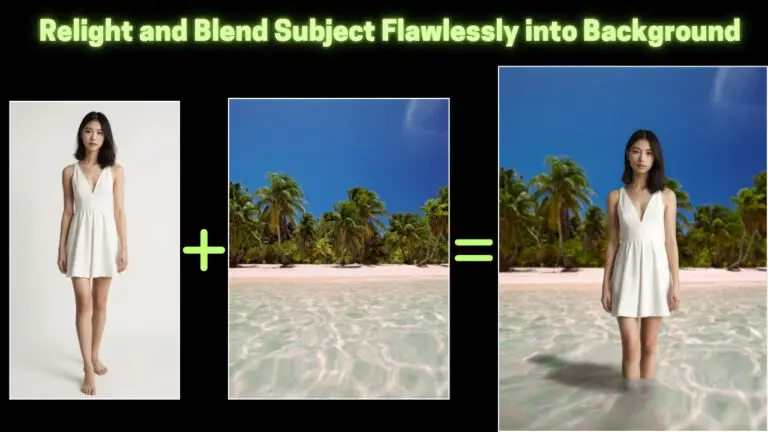
Photorealistic Relighting with Qwen Image Edit in ComfyUI: Realistic Shadows & Details Perserved
This article walks you through a complete, production-ready workflow for relighting images in ComfyUI. You’ll learn how to add realistic shadows and directional light while keeping faces, details, and object positions intact—equally useful for portraits and product shots.
Using LoRA for Realistic Relighting
The “secret sauce” is a dedicated relighting LoRA layered on top of a strong editing backbone. In this setup:
- Qwen Edit (v2509) provides instruction-following edit capability.
- Lightning LoRA (8-steps) helps the model follow concise prompts reliably.
- Relighting LoRA specializes the edit toward believable illumination and shadow behavior.
Together they let you “speak lighting” in your prompts—e.g., “Relight: window light from camera left, long shadow on the floor to camera right.”
Identifying Limitations of the Basic Workflow
The standard “Qwen Edit” relighting approach often causes:
- Text/label drift (e.g., packaging copy subtly changes).
- Subject shifting (elements move in frame).
- Detail loss in fabric, hair, or micro-texture.

To overcome this, you’ll build a custom, five-group workflow that stabilizes composition, confines edits, and restores fine detail at the end.
Workflow at a Glance (Node Groups Map)
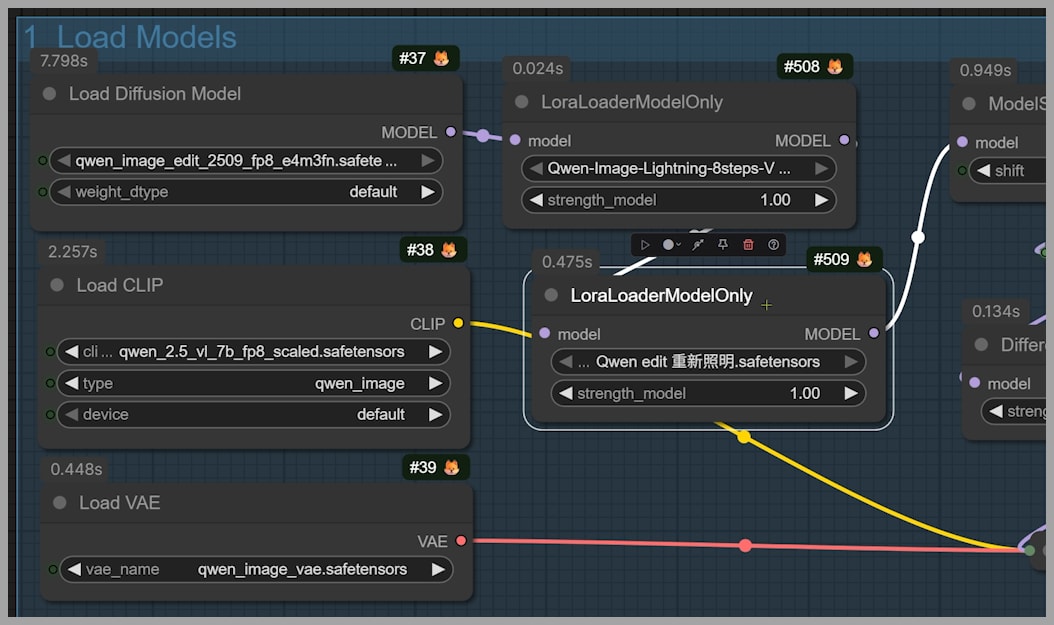
Group 1 — Qwen Edit + Lightning + Relighting LoRA Set up the model stack that understands and applies relighting instructions.
Group 2 — Inpaint Crop to Fix Shifting Crop to a square edit canvas (e.g., 1024×1024) and define a precise mask to anchor composition.
Group 3 — Inpainting + Prompting for Relighting Perform the actual relight with a simple “Relight:” prompt recipe and explore variations via seed.
Group 4 — Refining Image Quality Run a second pass to recover crispness and micro-contrast that can soften during inpainting.
Group 5 — Restore Fine Details & Composite Paste relit pixels back on the original and use Frequency Detail Restore to bring back high-frequency detail (labels, fabrics, skin texture).
YouTube Tutorial
Gain exclusive access to advanced ComfyUI workflows and resources by joining our community now!
Group 1 – Qwen Edit and Lightning LoRA Setup
Purpose Initialize an edit-friendly backbone that will interpret relighting instructions while keeping your changes responsive and controllable.
Steps
- Load Qwen Edit (v2509) as the base editing model.
- Attach Lightning LoRA (8-steps) to improve adherence to concise directives.
- Attach the Relighting LoRA to bias edits specifically toward lighting/shadow changes.
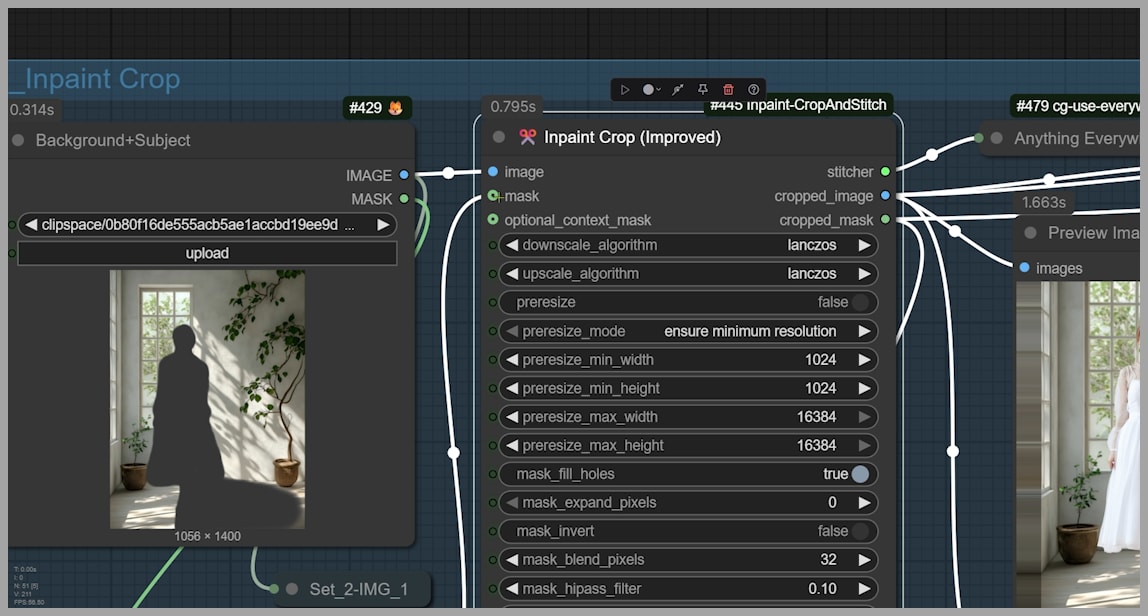
Group 2 – Inpaint Crop Node to Fix Shifting
Qwen Edit can introduce subtle frame drift. Constraining the operation area significantly reduces shift and protects composition.
Key Idea Use Inpaint Crop to square the working area and localize edits to the region that truly needs relighting.
Steps
- Inpaint Crop → Size: set to 1024×1024.
- Mask Editor: paint a mask over the relight zone.
- The node will trim some pixels and pad others to create a square edit canvas while previewing the masked region.
Group 3 – Inpainting and Prompting for Relighting
This is where the relighting happens.
Prompt Recipe
- Always start with:
Relight: - Then specify:
- Light source & direction (e.g., “soft window light from camera-left at 45°”)
- Shadow behavior (e.g., “cast a long, sharp-edged shadow on the floor to camera-right”)
- Mood/intensity if relevant (e.g., “higher contrast, deeper falloff on the dress folds”)
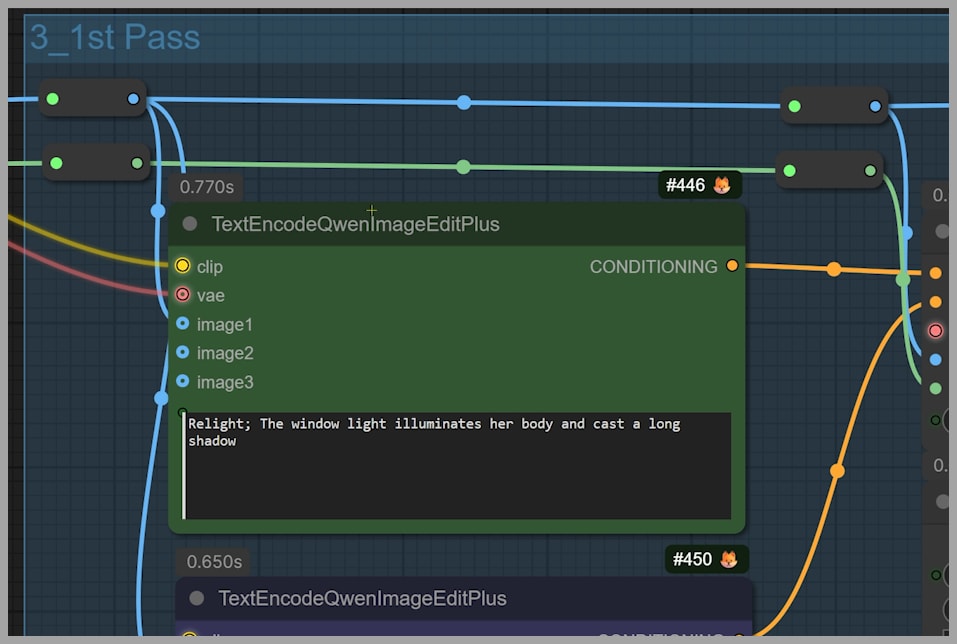
Examples
Relight: soft window light from camera-left, long ground shadow to camera-right, stronger highlights on face and dress, keep composition.Relight: golden hour side light from the right, soft falloff across the torso, floor shadow extends diagonally, preserve original details.
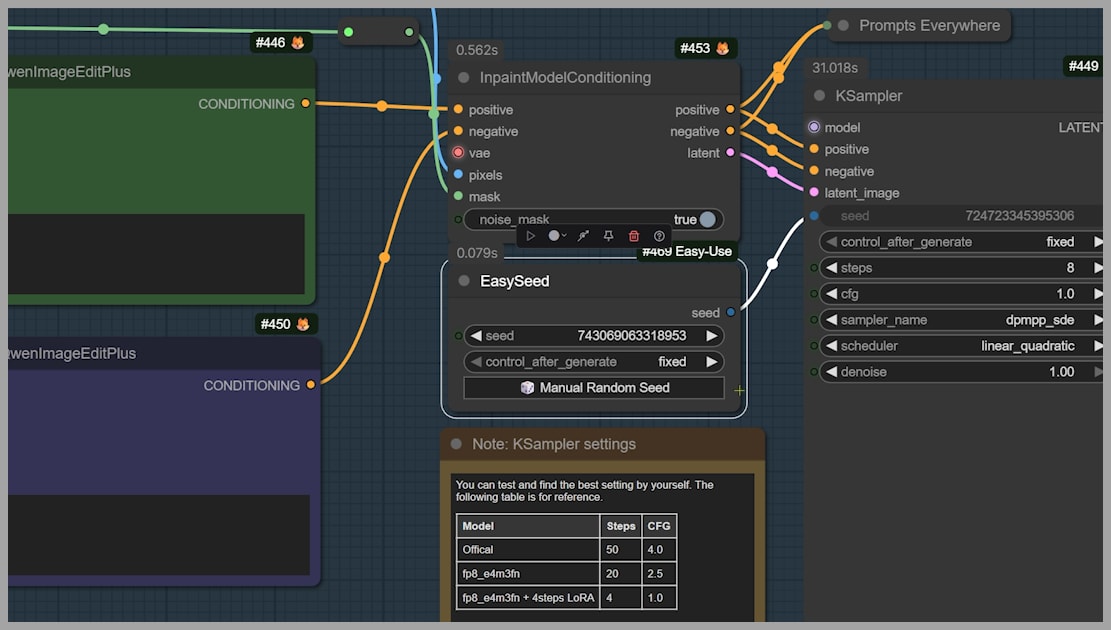
Steps
- Connect the masked 1024×1024 crop to your inpaint node(s) within the Qwen Edit stack.
- Enter your prompt using the recipe above.
- Generate a result.
- If the first try isn’t perfect, toggle “Manual Random Seed” and iterate. Keep your best candidates.
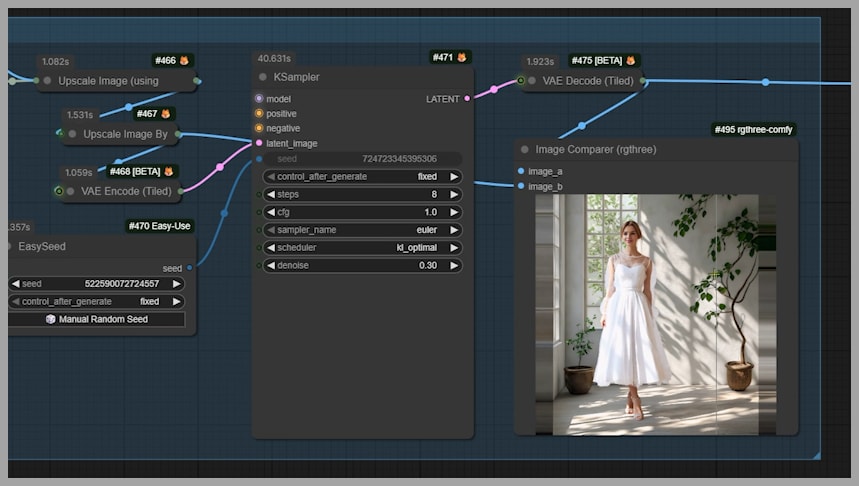
Group 4 – Refining Image Quality
Inpainting can soften micro-detail. This pass restores crispness while respecting the new light/shadow.
Steps
- Send the Group 3 output through your quality/refinement stage (e.g., a gentle repaint or detail-enhancing node path).
- Avoid heavy denoise; aim for edge clarity and texture recovery.
- Compare before/after at 100% zoom to confirm improved fabric weave, hair strands, and small accessories.
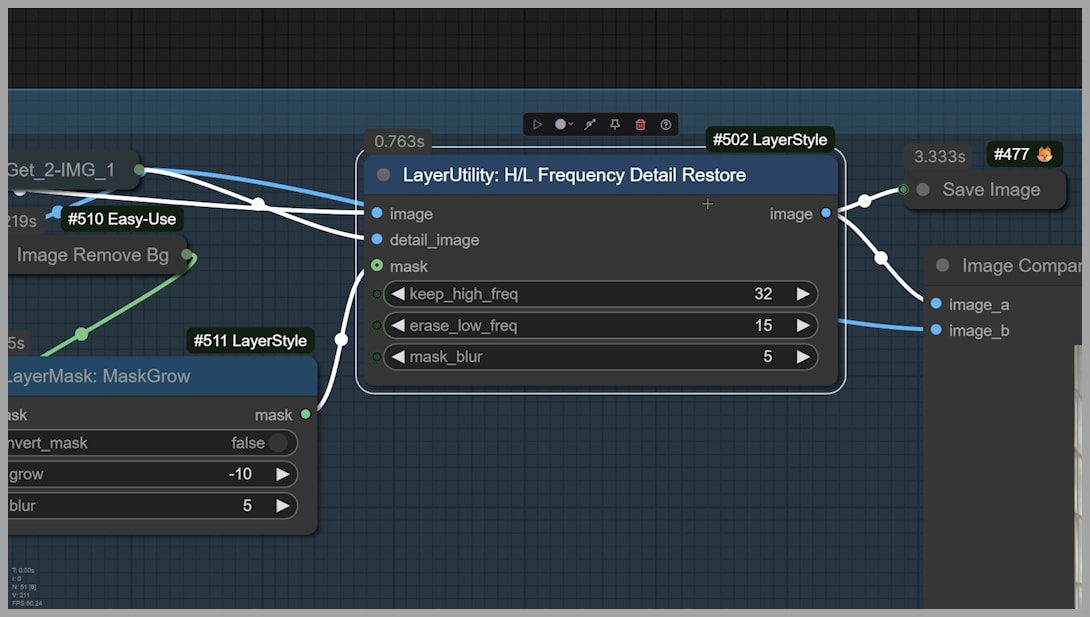
Group 5 – Restoring Fine Details (Composite + Frequency Detail Restore)
Now you’ll paste the relit patch back onto the full-resolution original and restore high-frequency detail so nothing “reads” AI-soft.
Two Key Actions
- Composite
- Place the refined 1024×1024 relit area back into the original 1056×1400 image at the correct position.
- Frequency Detail Restore
- Blend high-frequency detail (skin pores, lace, labels) from the original into the relit composite.
- Think Photoshop frequency separation: control low (tone/lighting) vs high (texture) influence until it looks natural.
Conclusion
Relighting in ComfyUI becomes far more powerful and controllable when you move beyond the basic workflow. By combining Qwen Edit, Lightning LoRA, and a dedicated Relighting LoRA, you can add believable light and shadow without sacrificing the integrity of your original image. The grouped workflow outlined here keeps your edits stable, restores lost texture, and delivers professional-grade results that feel naturally lit.
Experiment with different lighting directions, shadow strengths, and detail restoration levels—the flexibility of ComfyUI means each image can tell a unique visual story under the perfect light.