Say Goodbye to Smooth AI Skin: Realistic Upscaling with SUPIR & SRPO
In the world of AI image generation, achieving realistic skin textures has been one of the most challenging aspects, especially during the upscaling process. Many AI-generated images tend to have overly smooth, plastic-like skin that lacks natural detail.
In this article, we will walk through a proven workflow designed to enhance the texture of skin, making it more realistic and detailed during upscaling.
The Problem: Smooth, Unrealistic Skin in AI Images
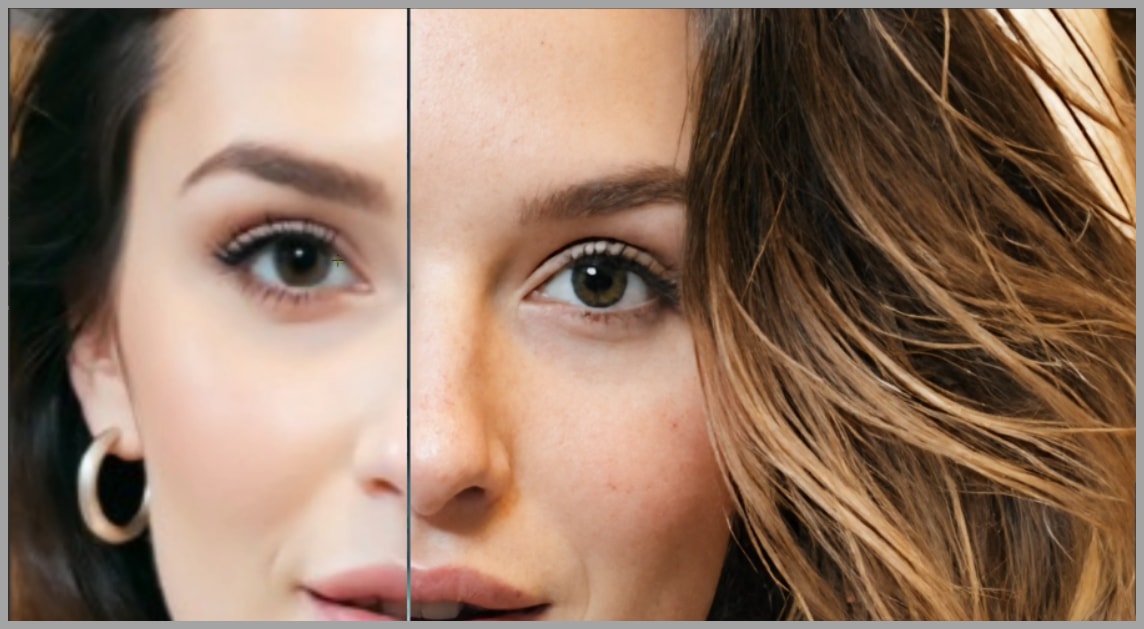
AI-generated images often struggle with creating natural skin textures. A common issue is overly smooth skin, devoid of fine details like pores, wrinkles, and texture that give the skin a lifelike appearance.
For example, in a previous image generated from Wan2.2, the model’s skin appeared unnaturally smooth, even though the sweater and wooden background had realistic textures.
 The lack of skin detail made the image look less realistic, which is where our workflow comes in.
The Workflow Overview
This workflow involves a two-stage upscaling process, which enhances both the resolution and the texture of the skin. The first stage focuses on upscaling the image and adding initial texture, while the second stage further refines the skin detail. Both stages utilize advanced AI models and nodes to handle common issues like smoothness and artifacts.
Video Tutorial:
Gain exclusive access to advanced ComfyUI workflows and resources by joining our community now!
Stage 1: Initial Upscaling and Enhancement with SUPIR
The SUPIR Model
The first stage of the workflow utilizes a model known as SUPIR, which stands for Super-Resolution Image Processing.
SUPIR is an AI-based upscaling technology designed to enhance the resolution of low-quality images while retaining important details.
In previous video, I covered SUPIR in detail, discussing the optimal settings for achieving the best results.
Key Nodes in Stage 1
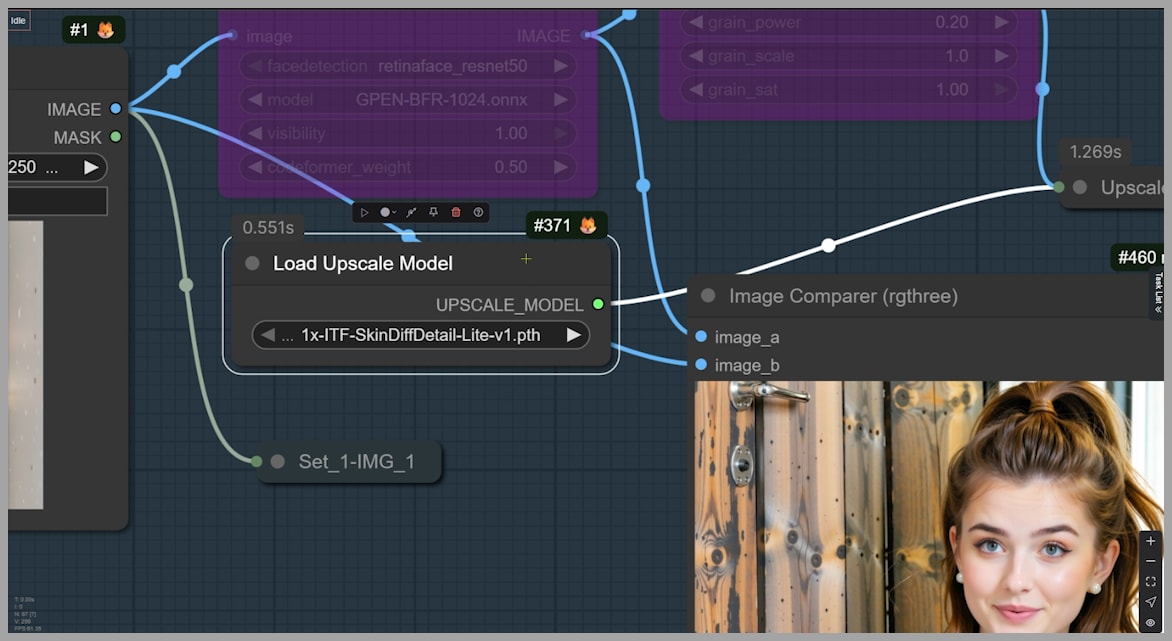
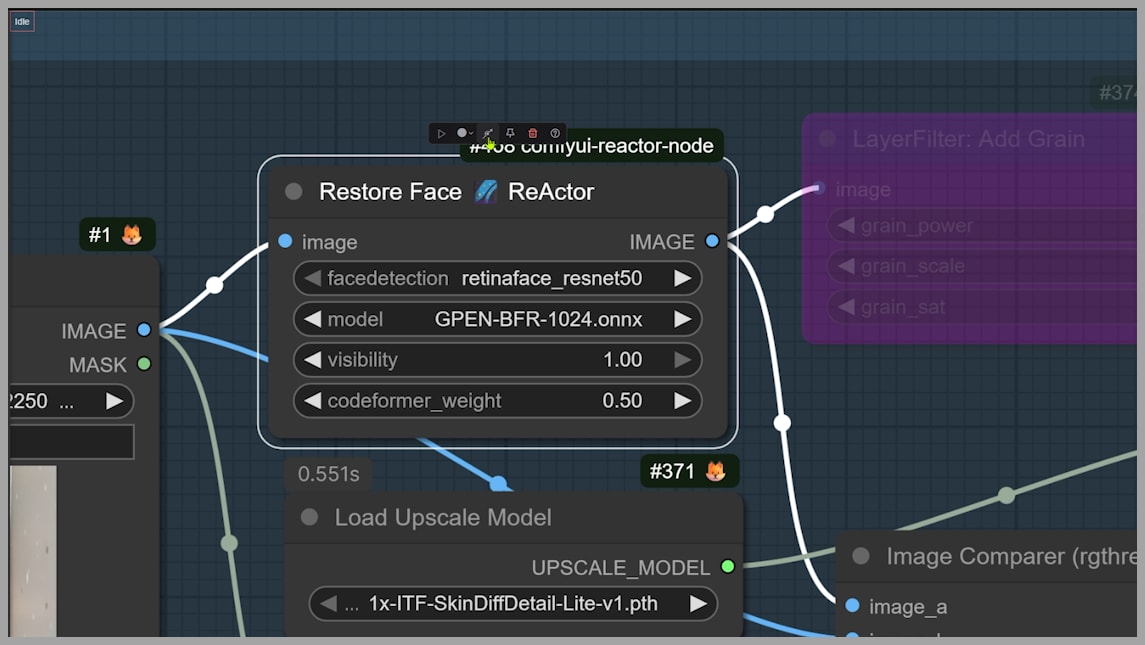
- SkinDiffDetail Node: The key to enhancing skin texture in the first stage is the SkinDiffDetail node. This node adds vital texture to the skin, preventing it from looking too smooth. By introducing slight imperfections and details, the node ensures that the skin looks more natural right from the start.
- Artifact Fixing Node: Some images processed with models like Qwen Edit, Flux Kontext, or Nano Banana might suffer from artifacts that can damage the details or create unnatural patterns. In such cases, you can activate the Restore Face (Reactor) node, which works to clean up these issues and restore the image’s natural look.
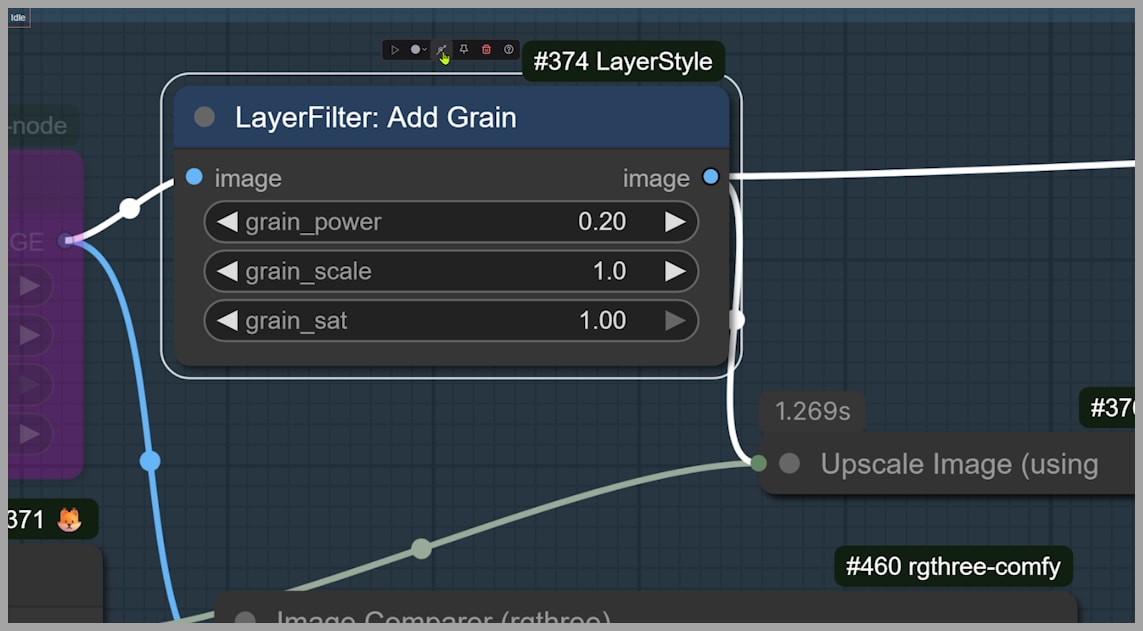
- Add Grain Node: If the SUPIR output lacks skin detail, you can activate the Add Grain node. This subtle film grain effect can add additional texture, especially to smooth areas like the skin.
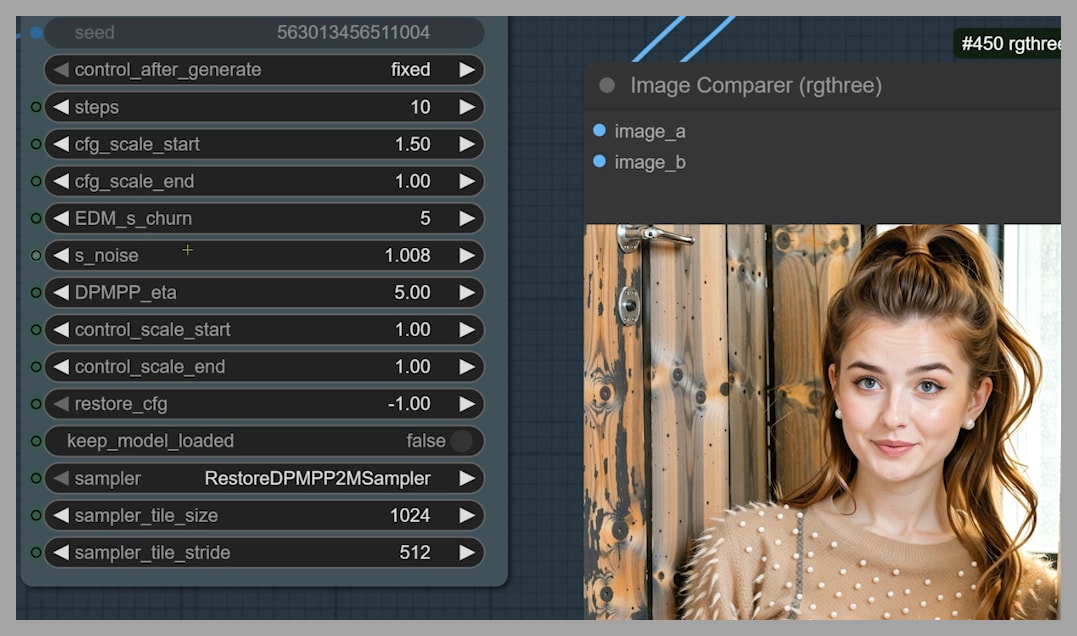
- Detail Adjustments: Fine-tuning settings like DPMPP_eta can significantly improve the image’s sharpness. Additionally, if the output image lacks sufficient skin detail, increasing values like CFG or s_noise could improve the texture. If you encounter artifacts, consider swapping out the DPMPP sampler for the RestoreEDMSampler to fix them.
Stage 2: Advanced Upscaling with Flux SRPO Model
The Role of the SRPO Model in Skin Detail Enhancement
In the second stage, the image undergoes another round of upscaling with the Flux SRPO model. SRPO, which is a fine-tuned model specifically designed for realistic skin textures, excels in enhancing the fine details of the skin that might have been missed in the first stage.
The SRPO model is often compared to Flux Krea, another AI model known for its ability to create photorealistic images.
However, SRPO offers a more focused and effective approach when it comes to skin texture refinement.
Handling Image Size and VRAM with Tiling
To ensure that the image can be upscaled without overwhelming your system’s VRAM, the image is split into smaller tiles before the second stage of upscaling.
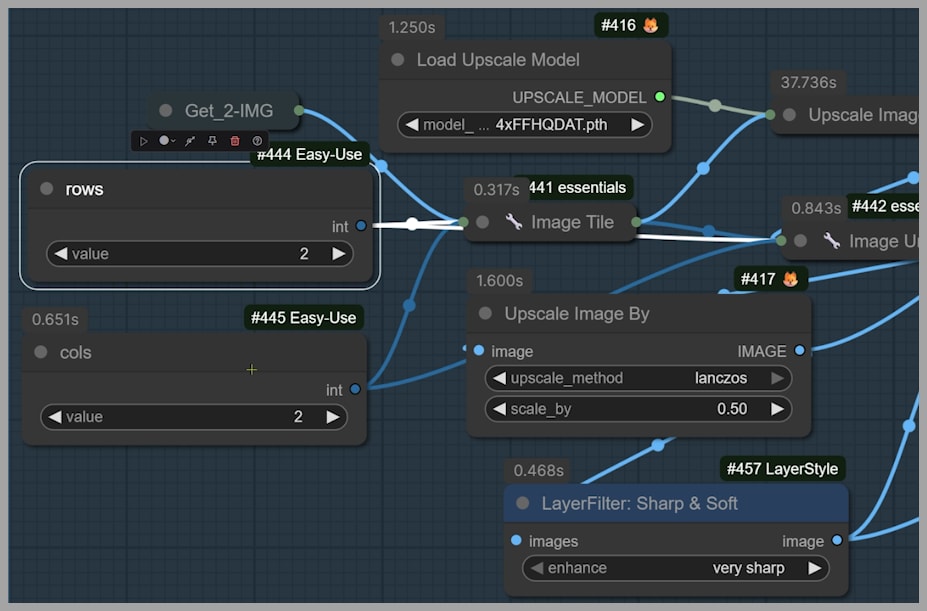
In this demonstration, I divided the image into 4 tiles (2 rows and 2 columns), each with a size of 1024×1024 pixels. Most upscaler models are trained on images of this size, making the tiling technique a useful way to ensure that each section is processed optimally. Adjusting the number of rows and columns ensures that the tiles are close to 1024×1024 pixels, preventing VRAM overload and improving efficiency.
Fine-Tuning the Final Output
The last group of upscaling works to further enhance the image’s details. While the image looks quite good after the second stage, processing it through this final group can significantly improve skin texture. The group also uses tiling to ensure that the image can be processed without overloading system resources.
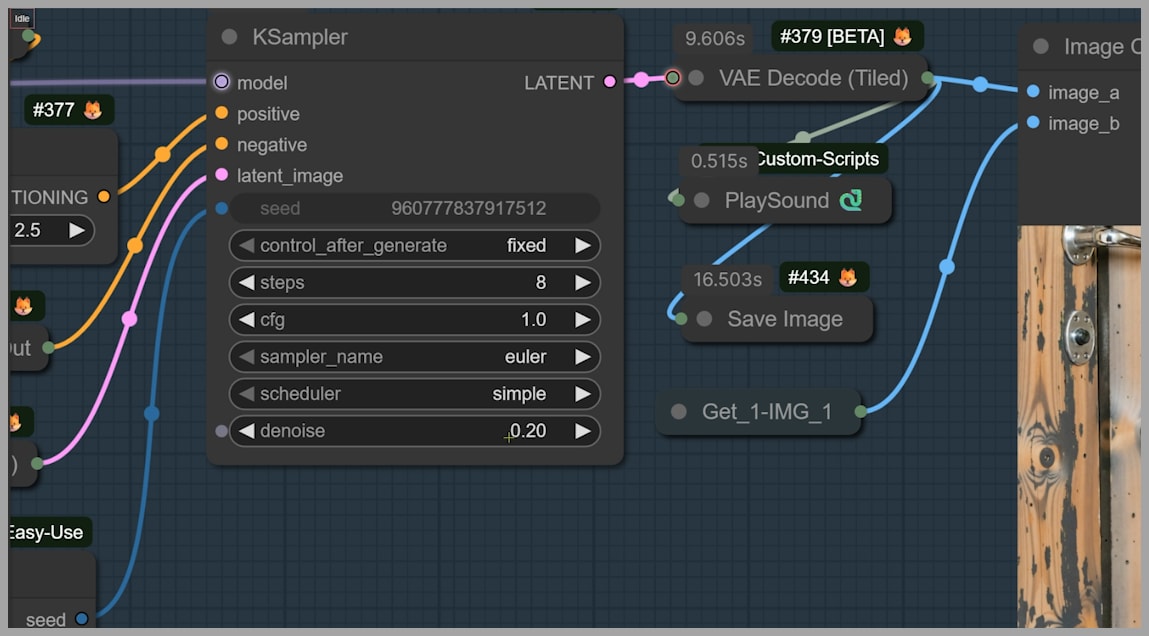
One key adjustment in this final stage is the denoising strength in the KSampler. By increasing the denoising strength, you can emphasize the texture and fine details of the skin, making it appear even more lifelike. For advanced users, experimenting with different samplers and schedulers can also improve skin detail further, allowing you to fine-tune the output to your liking.
Conclusion
This two-stage upscaling workflow provides an effective method for enhancing skin textures in AI-generated images. By combining SUPIR for initial upscaling and Flux SRPO for advanced texture refinement, the workflow addresses common challenges like smooth skin and artifacts.
Whether you’re working with low-resolution images or need more realistic skin textures, this workflow has you covered.