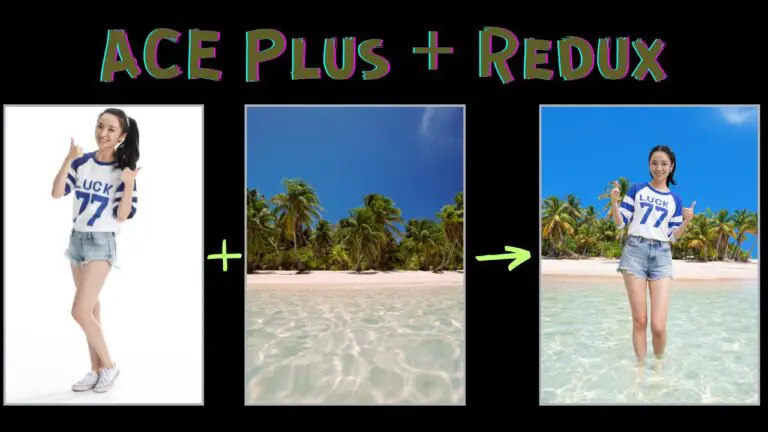
99% Face Consistency in Portrait Background Swaps with ACE Plus + Redux
Last year, I introduced a ComfyUI workflow that revolutionized portrait background replacement, achieving up to 90% facial similarity between the original and generated images.
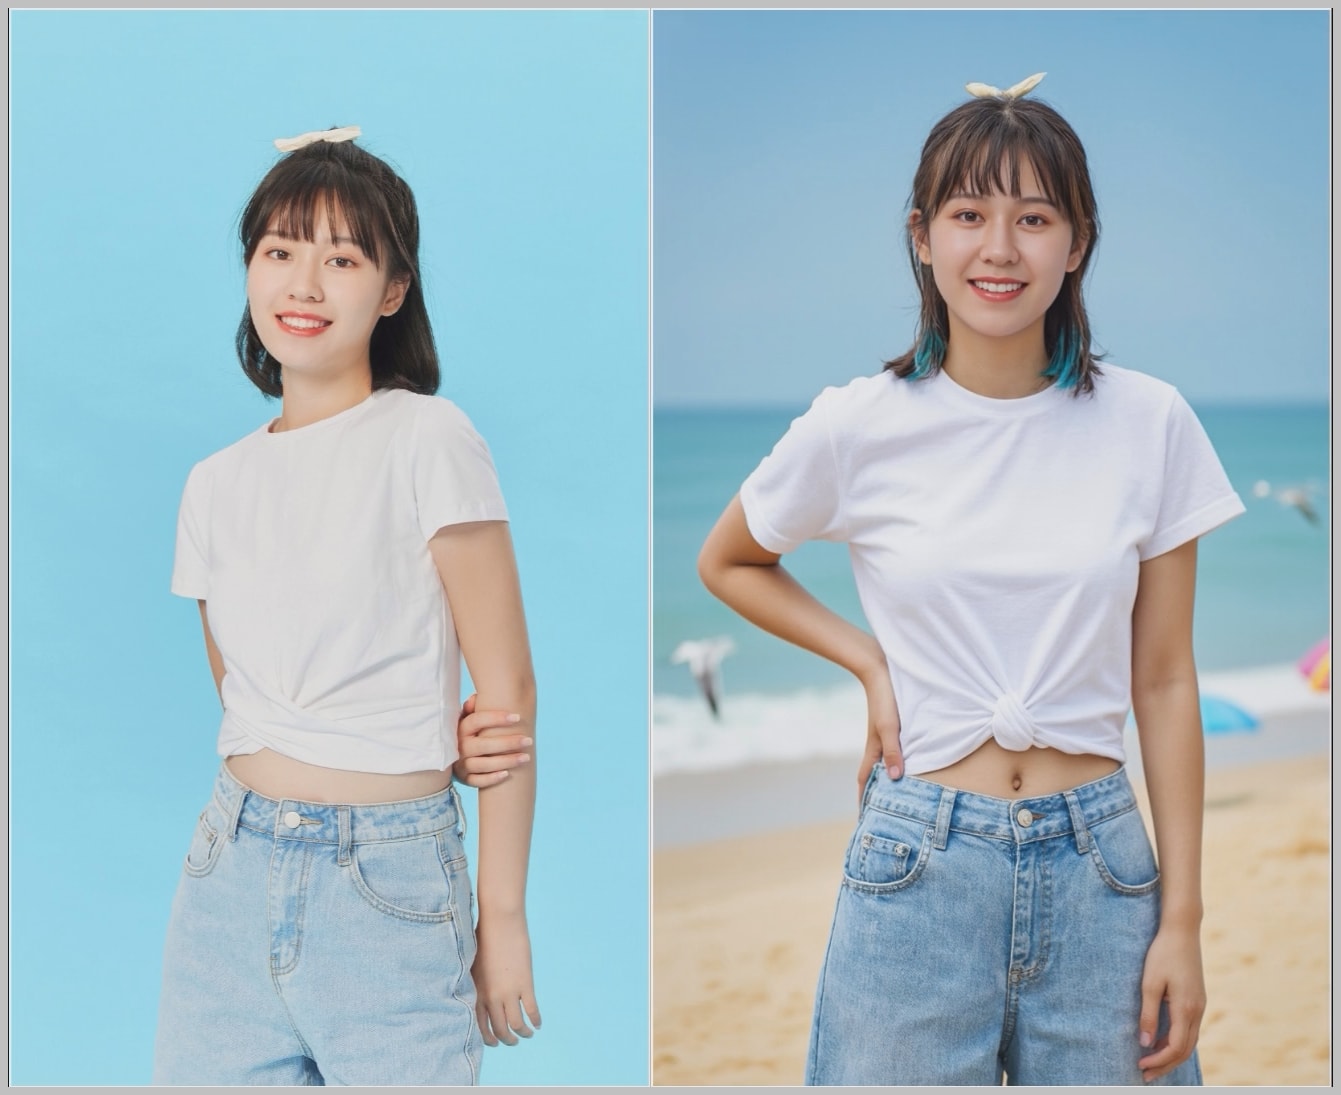
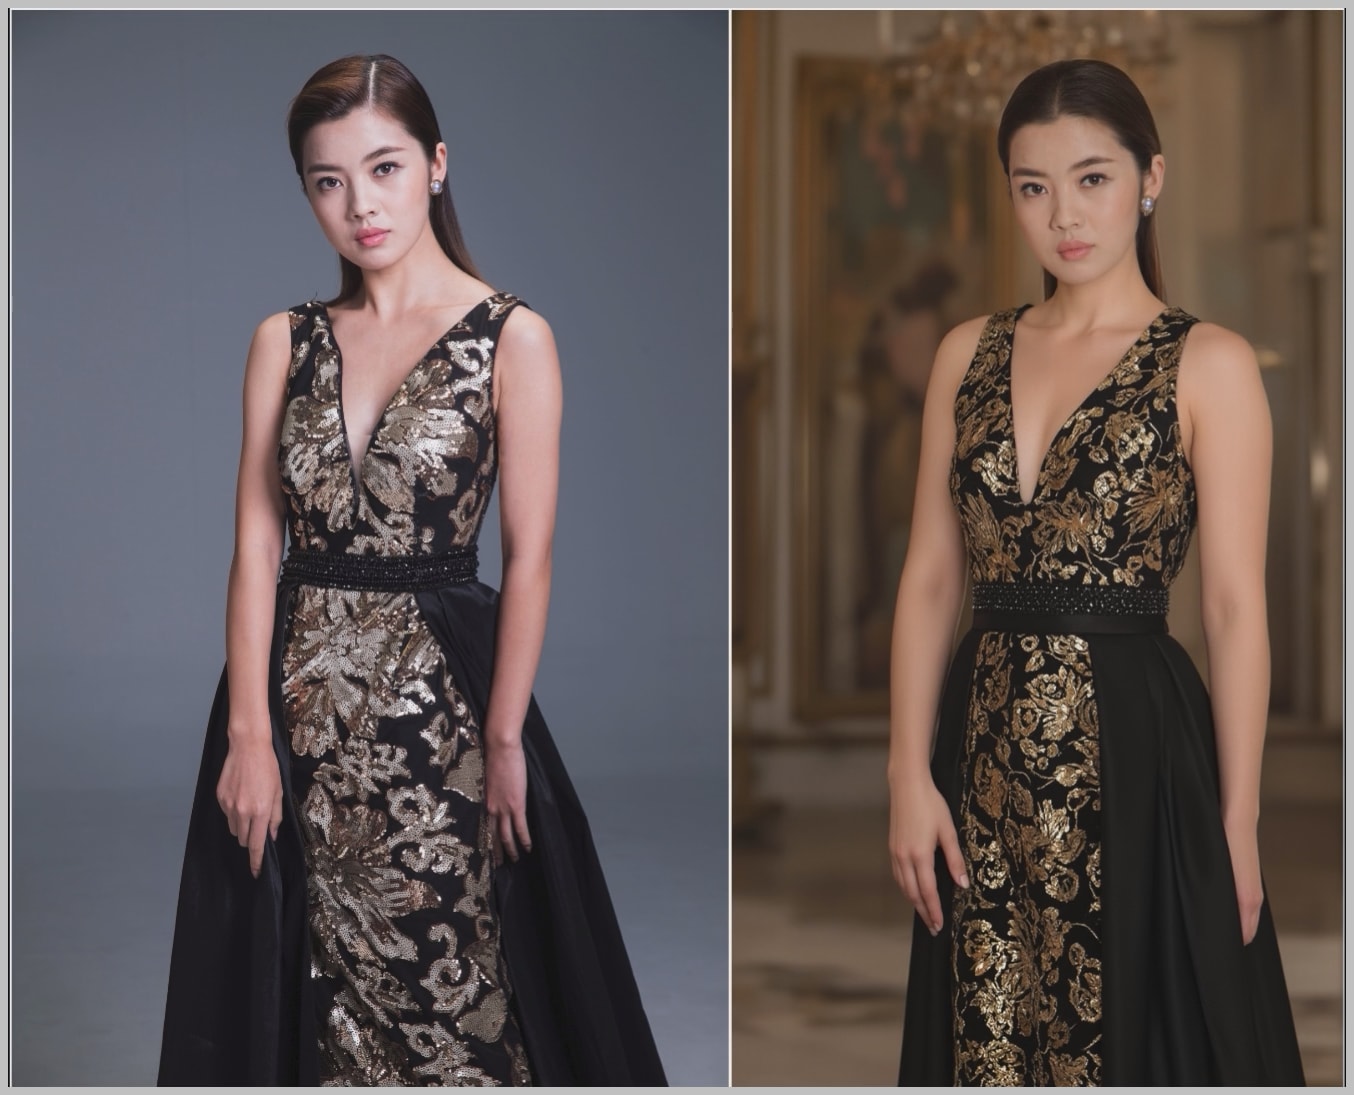
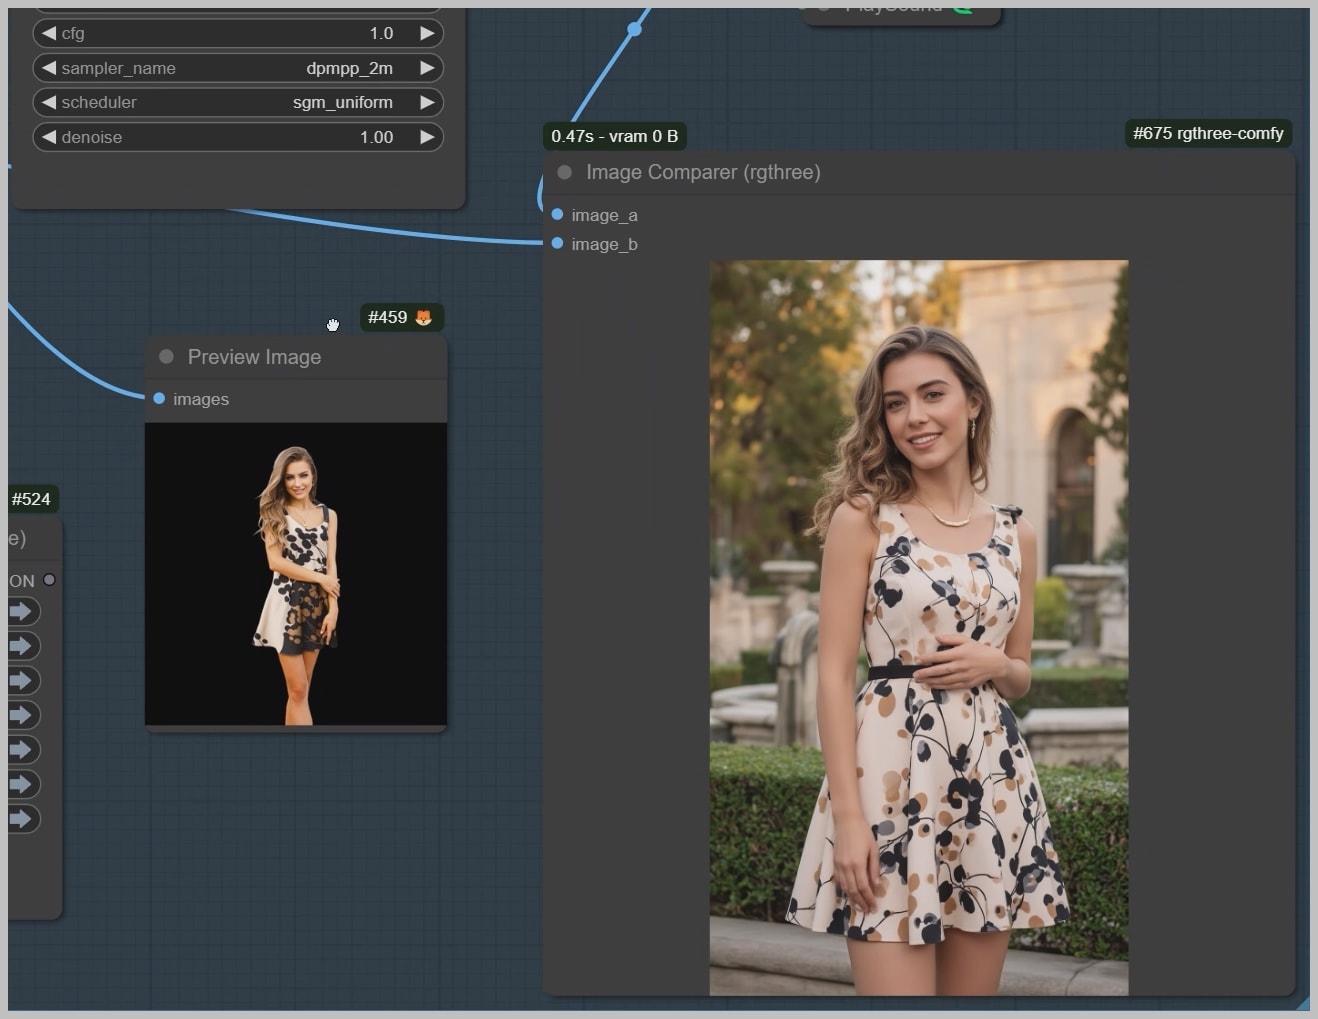
Today, with ACE Plus technology, we’ve pushed that boundary to 99% consistency—a breakthrough that ensures near-perfect facial preservation even in complex edits.

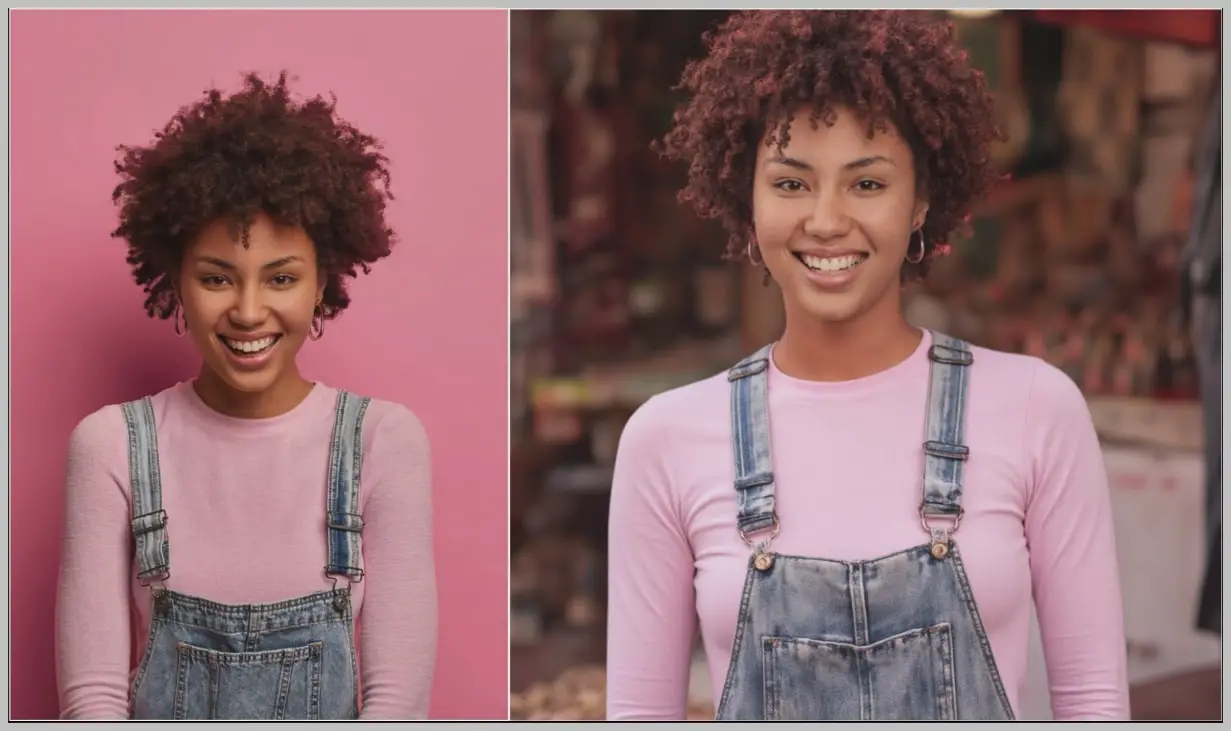
This article will walk you through the upgraded workflow, highlighting how ACE Plus synergizes with Flux Redux models and advanced node configurations to deliver unparalleled results.
Video Tutorial:
Gain exclusive access to advanced ComfyUI workflows and resources by joining our community now!
Here’s a mind map illustrating all the premium workflows: https://myaiforce.com/mindmap
Run ComfyUI with Pre-Installed Models and Nodes: https://youtu.be/T4tUheyih5Q
Model Installation
Downloading Required Models
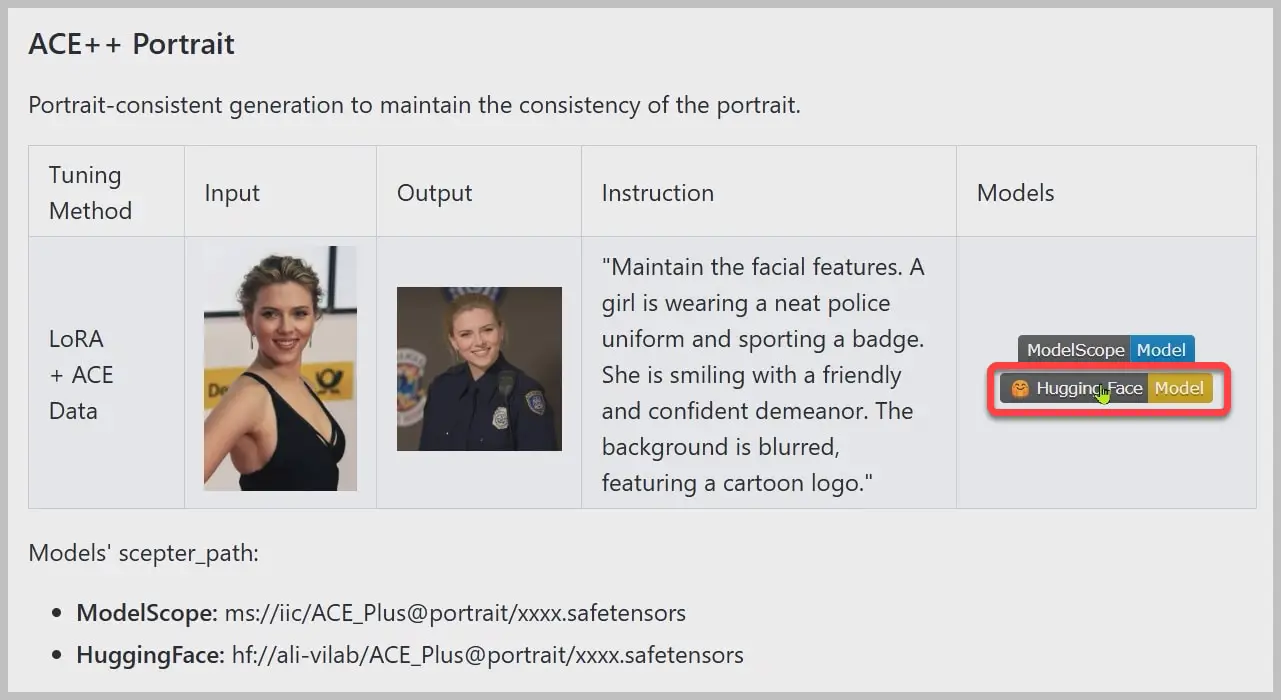
Let’s start by gathering the essential tools for this workflow. Head to the ACE Plus GitHub repository and give the project a star—this small gesture supports the developers and keeps innovation alive!
- Download the ACE Plus LoRA Model:
- Click the “Download” button on the GitHub page, which redirects you to Hugging Face.
- This model isn’t the primary driver of facial consistency, but it supercharges the Flux Redux model when combined. Think of it as a precision-tuning tool for your workflow.
- Synergy with Flux Redux:
- The ACE Plus LoRA works alongside the Flux Redux model to refine facial features and stabilize background transitions.
- Pro Tip: For best results, ensure both models are downloaded and ready before proceeding.
Organizing Model Files
Proper file organization is key to avoiding workflow hiccups. Here’s how to set things up:
- Folder Placement:
- Store the ACE Plus LoRA in the same folder as your standard LoRA models (e.g.,
ComfyUI/models/loras/). - This ensures ComfyUI recognizes the model without additional configuration.
- Store the ACE Plus LoRA in the same folder as your standard LoRA models (e.g.,
- Why This Matters:
- Misplaced models can lead to errors or failed node connections.
- Consistent folder structures save time and streamline troubleshooting.
Node Group 1: Setting Up the Model
Core Models for Background Generation
The first node group is your workflow’s engine room. Here, we load three specialized Flux-based models to handle distinct tasks:
- PixelWave:
- Function: Generates entirely new backgrounds tailored to your portrait.
- Flexibility: While I use PixelWave, you can substitute it with any Flux-based checkpoint.
- Redux:
- Role: Acts as a style reference anchor, ensuring the AI retains the original image’s aesthetic (e.g., lighting, texture, color grading).
- Flux Fill (GGUF Version):
- Specialization: Optimized for inpainting—seamlessly filling gaps when adjusting compositions or expanding space.
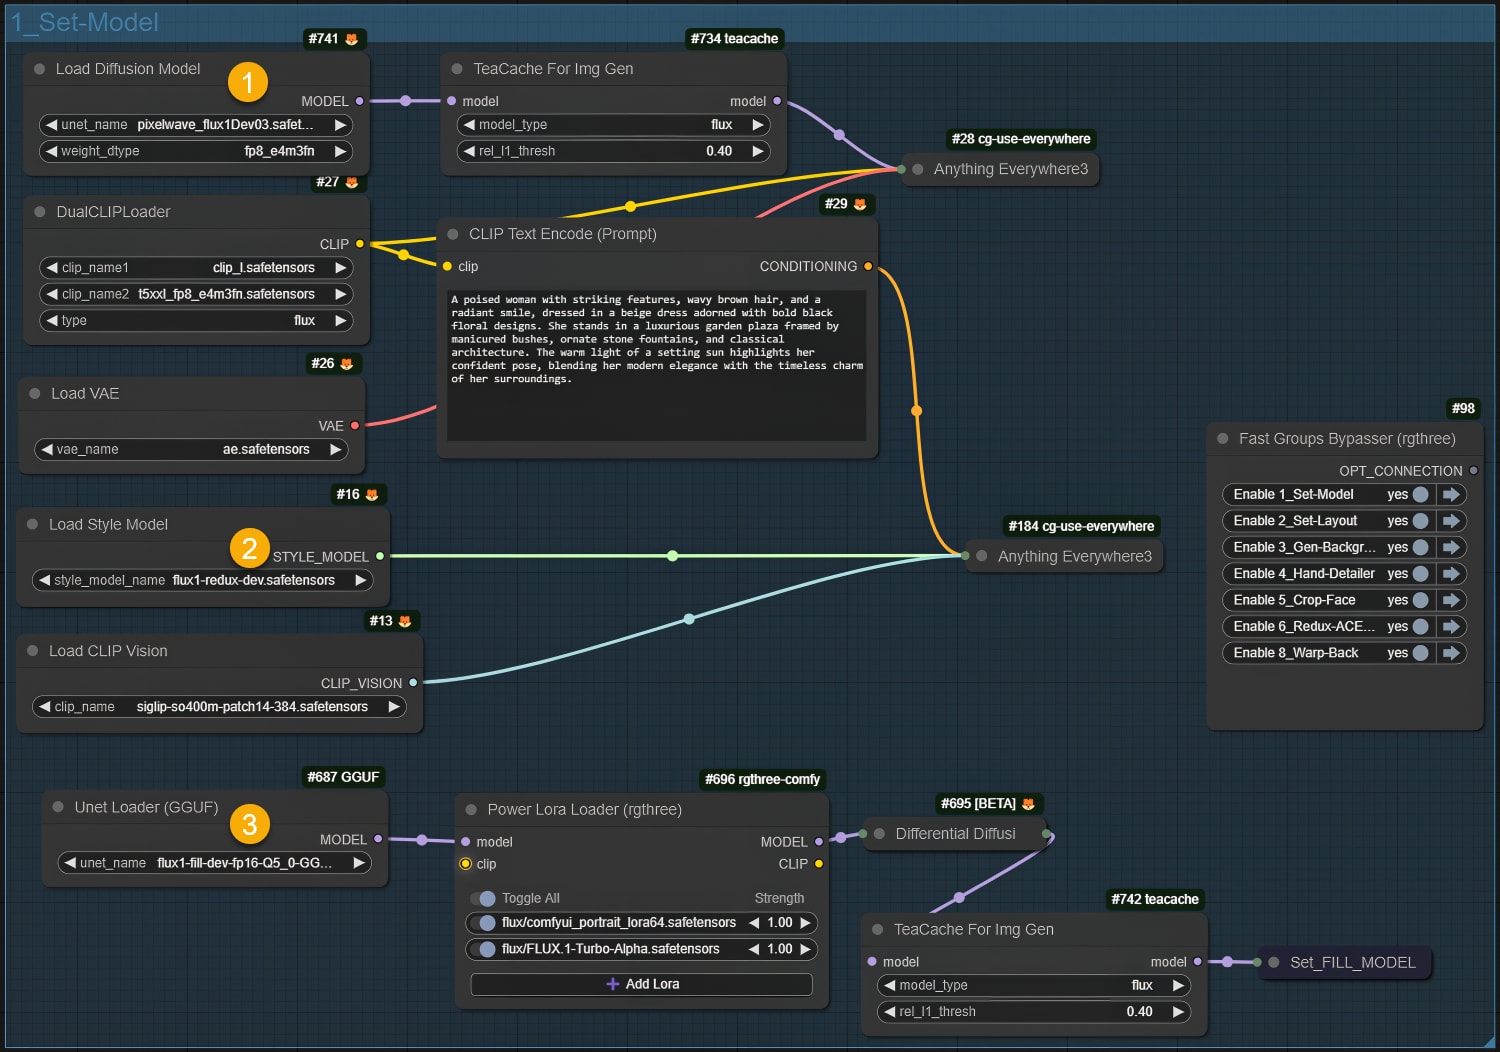
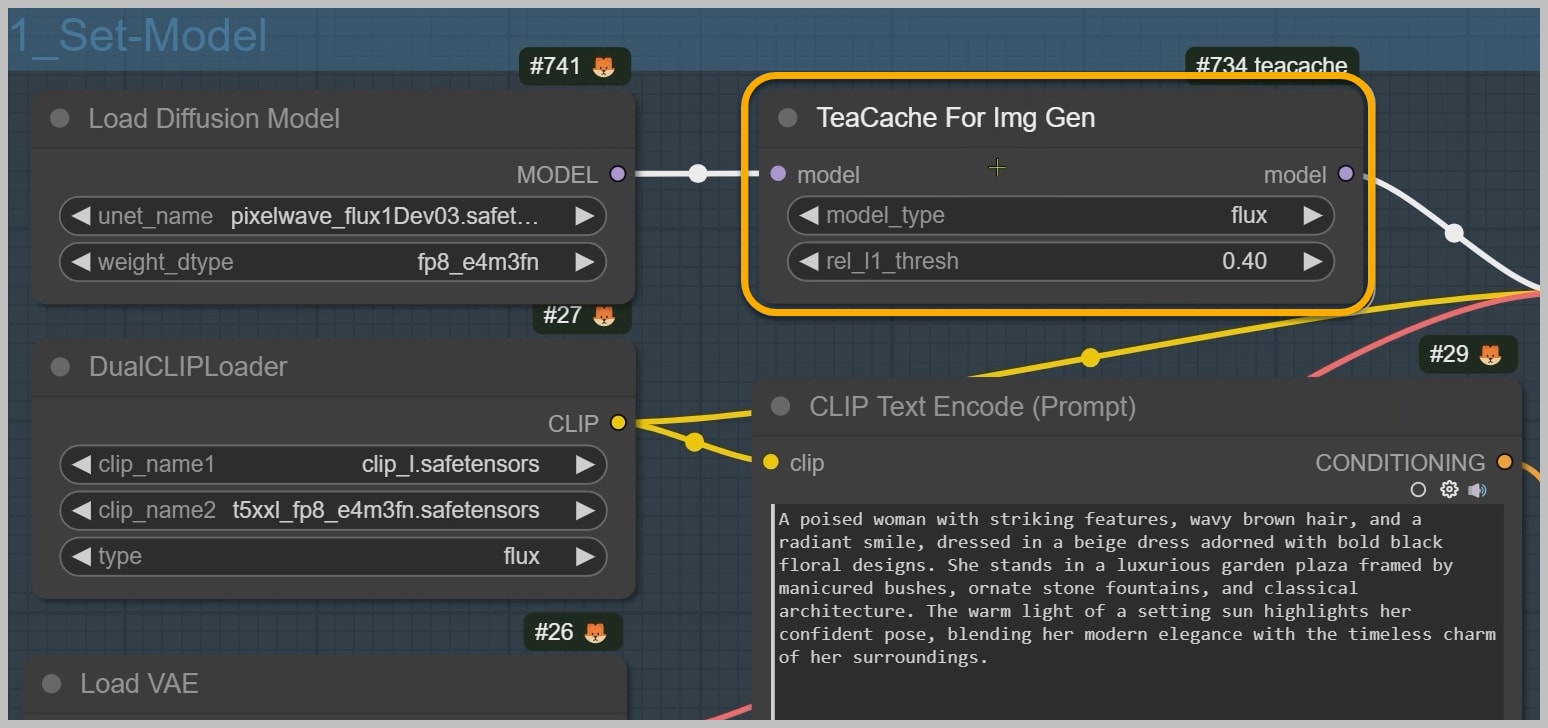
Accelerating Workflow Speed
To prevent long wait times, this group includes performance-boosting tools:
- TeaCache Node:
- What It Does: Dramatically reduces latency by caching intermediate results during generation.
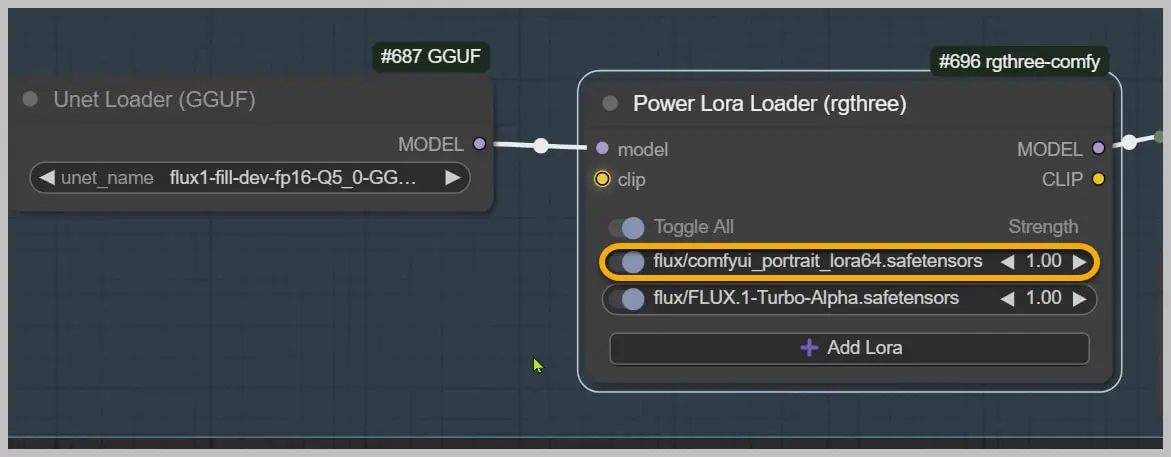
Dual LoRA Power-Ups
On the right side of the node group, two LoRAs work in tandem:
- ACE Plus Portrait LoRA:
- Superpower: Enhances facial consistency by refining subtle details like eye symmetry and jawline definition.
- Pro Tip: Pairing this with Redux’s style guidance is what pushes us from 90% to 99% similarity.
- Turbo LoRA:
- Speed Hack: Slashes sampling steps from 20+ to just 8 steps without sacrificing quality.
- Efficiency Trade-Off: Works best with Flux-based models due to their optimized architecture.

Node Group 2: Image Loading and Preprocessing
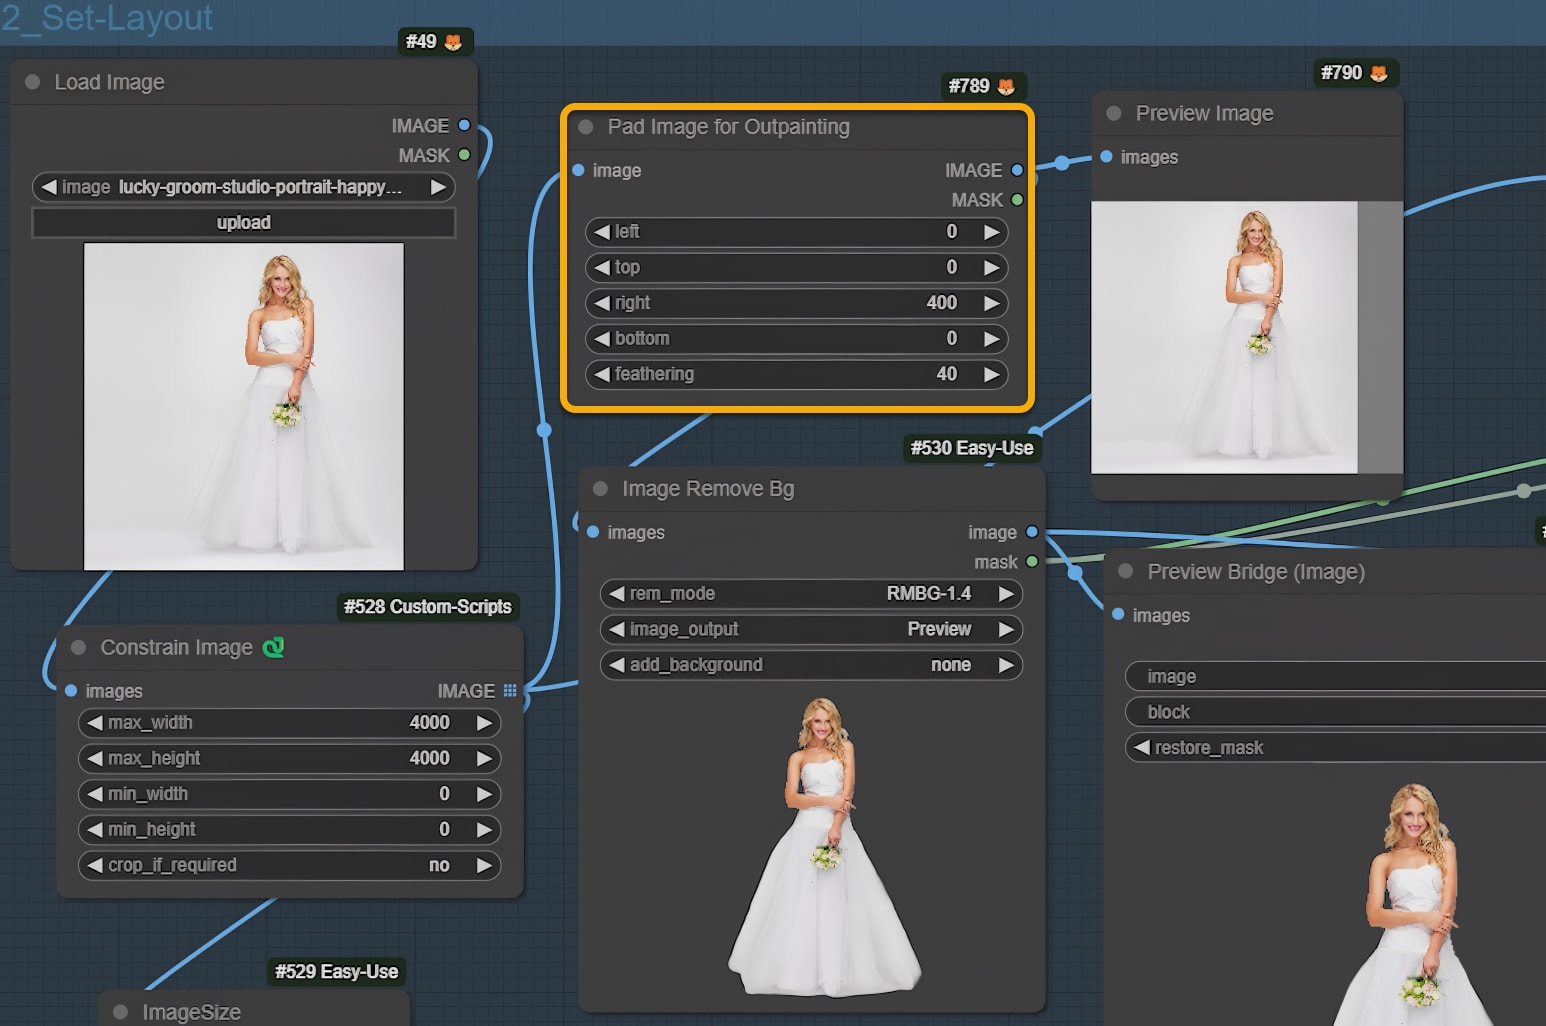
Uploading and Preparing the Source Image
The second node group handles the foundation of your workflow: the input image. Here’s how to optimize it for editing:
- Image Upload:
- Load your portrait into the workflow using the Image Loader node.
- Background Removal:
- Use the “Image Remove Bg” node to isolate the subject from the original background.
- Trimming Unwanted Elements:
- In the “Preview Bridge” node, erase parts you don’t want generated (e.g., feet, shoes) using masking tools.
- Pro Tip: For full-body portraits, skip the this step. For half-body edits, proceed to refine the composition.
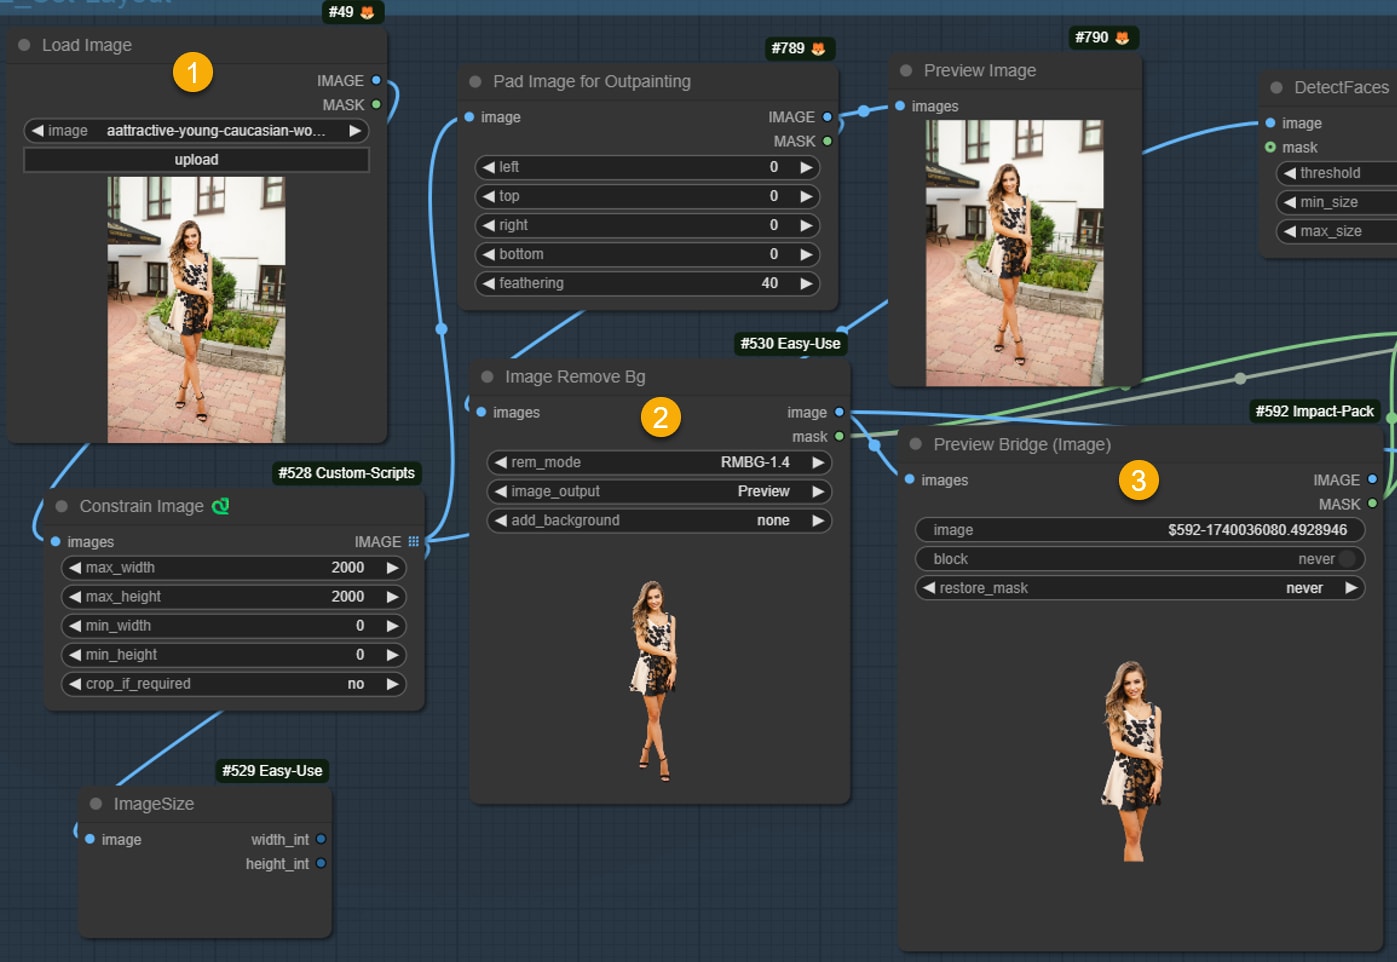
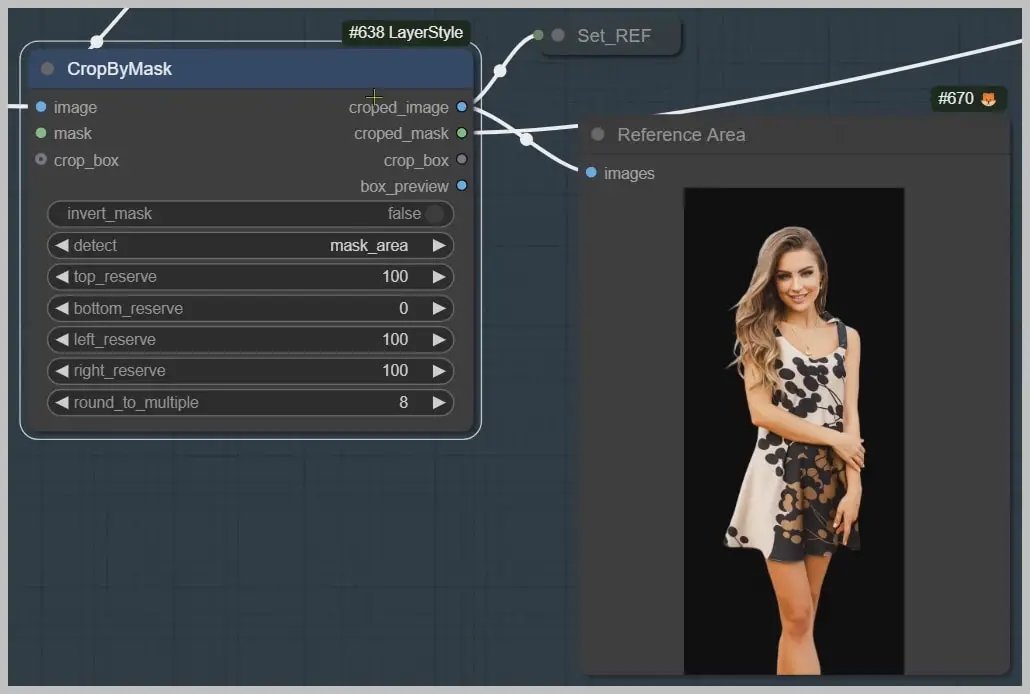
Space Optimization Techniques
Balancing space around your subject is critical for natural-looking results:
- Scenario 1 – Excess Space:
- Use the “CropByMask” node to tightly frame the subject, preventing them from appearing too small in the final output.
- Scenario 2 – Limited Space:
- If the original image lacks room for adjustments (e.g., a tightly cropped subject), activate the “Pad Image for Outpainting” node.
- Example: To center a bride positioned too far right, pad the right side to create symmetry.
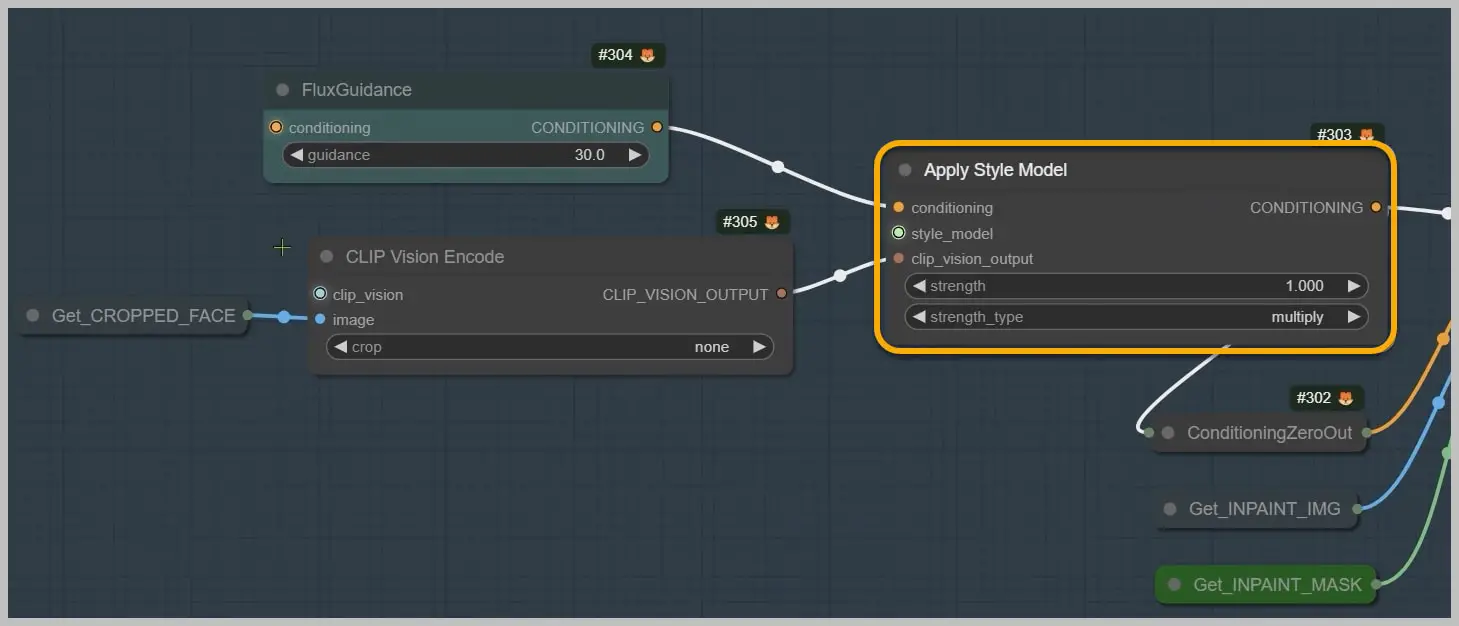
Node Group 3: Background Generation and Style Anchoring
Crafting a New Background with Redux Style Guidance
The third node group generates a fresh background while preserving your subject’s aesthetic:
- Style Reference Workflow:
- The “ReduxAdvanced” node crops your uploaded image into a square, ensuring the subject is centered.
- This square becomes the style reference, guiding the AI to match hairstyles, poses, and lighting between the original and new background.
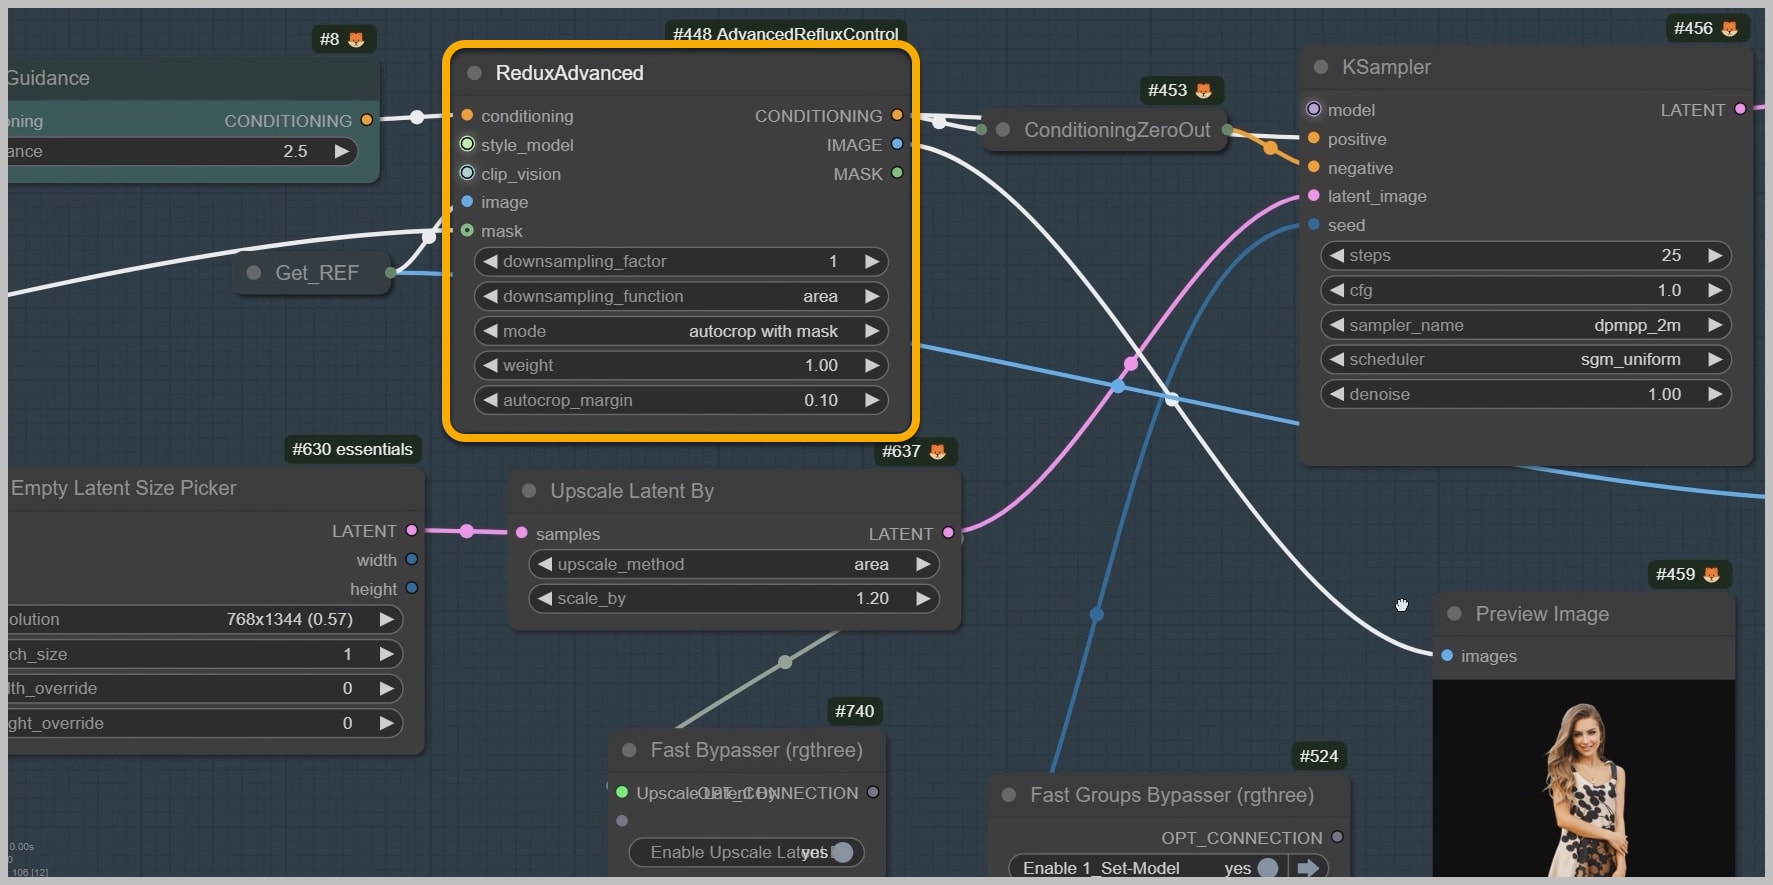
- Why Style Reference Matters:
- By generating the subject and background together, transitions feel seamless (e.g., matching dress textures, ambient shadows).
Composition Tweaks for Professional Results
- Repositioning Subjects:
- Return to the second node group to adjust padding or cropping until the subject is ideally framed.
- Balanced Output:
- The interplay between CropByMask (trimming) and Pad Image (expanding) ensures flexibility in any editing scenario.
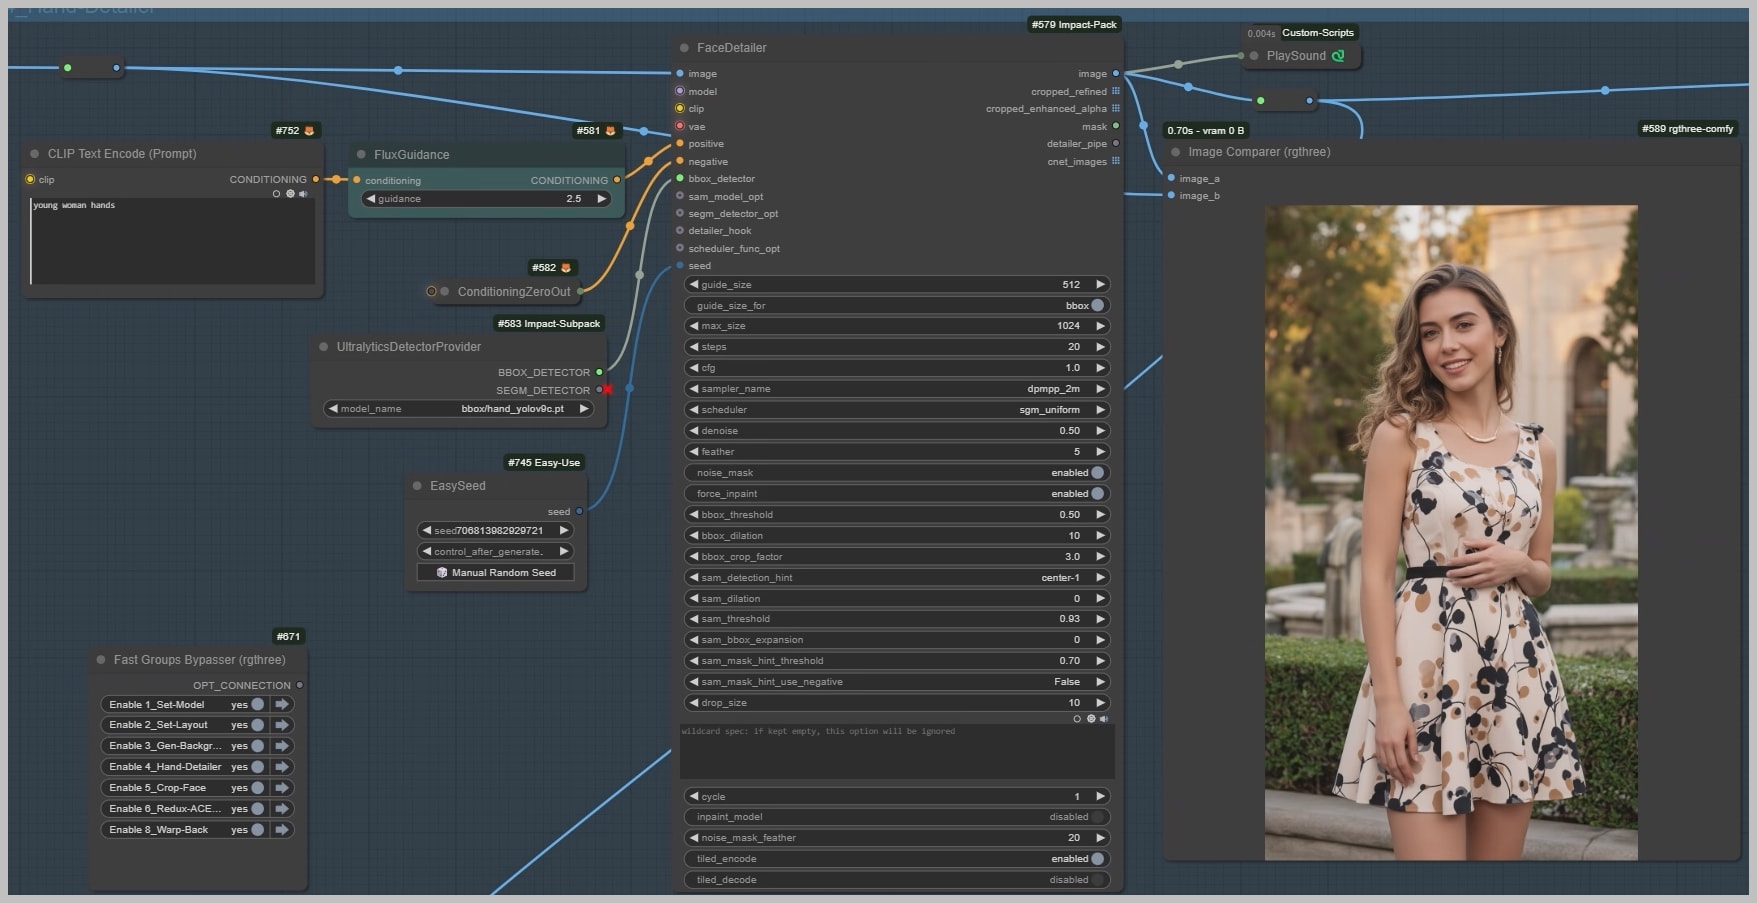
Node Group 4: Fixing Bad Hands
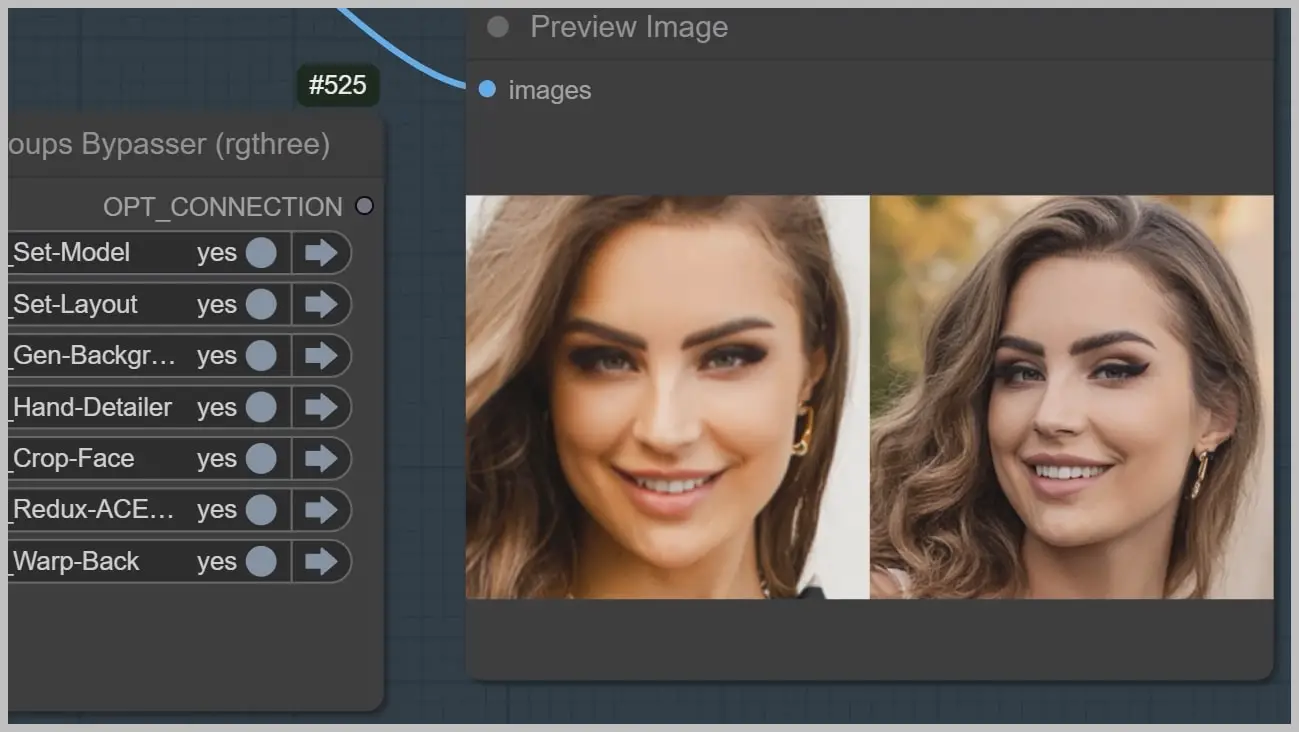
Node Group 5: Cropping and Aligning Faces
The fifth node group is where precision meets consistency. Here’s how to lock in facial details:
- Face Extraction:
- Use the “Crop Face” node to isolate the face from the newly generated background image.
- Place this cropped face side-by-side with the original face in the workspace.
- Reference Setup:
- The original face becomes the primary reference for inpainting in the next node group.
- Why This Matters: This alignment ensures the AI compares features pixel-by-pixel during regeneration.
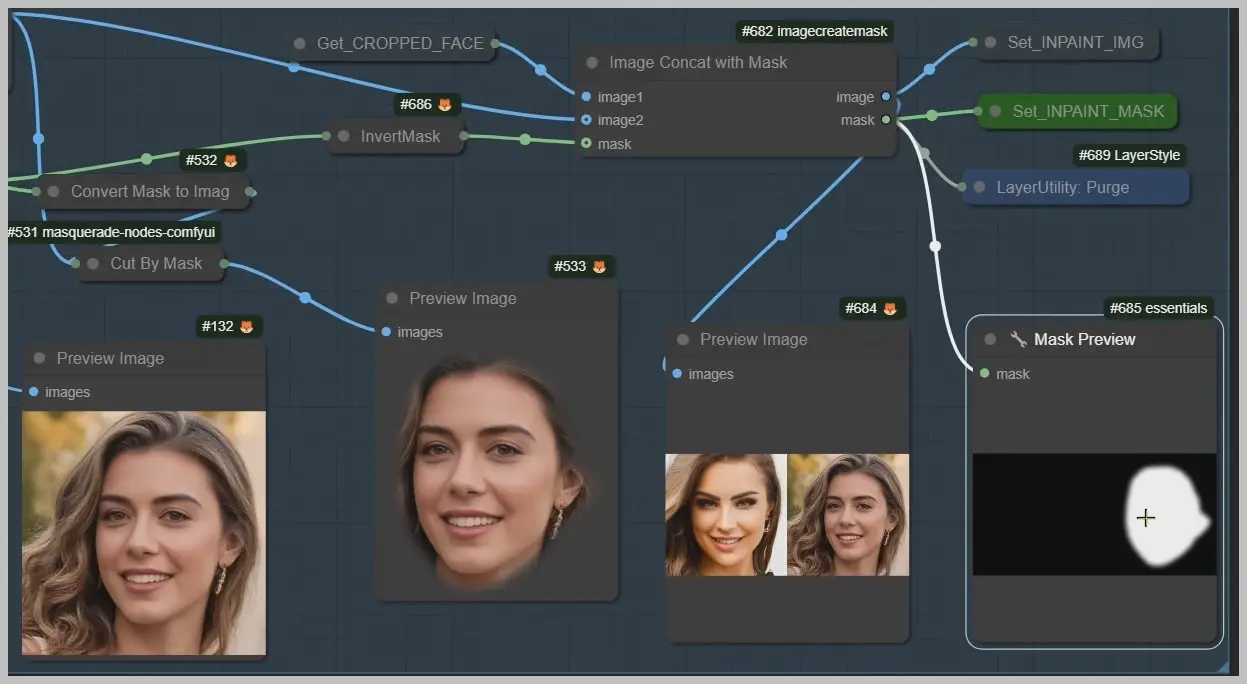
Node Group 6: Mastering Facial Consistency with Triple-Layered Controls
Three mechanisms work in tandem to hit 99% facial similarity:
- Original Face Reference:
- During inpainting, the AI uses the original face as a ground truth to preserve eye shape, lip contours, and skin tone.
- Redux Style Anchoring:
- The “cropped face” node feeds into Redux, which stabilizes the overall style (e.g., lighting, texture) across both images.
- ACE Plus LoRA Optimization:
- The ACE Plus LoRA, loaded earlier, fine-tunes micro-details like eyelashes and pore texture.
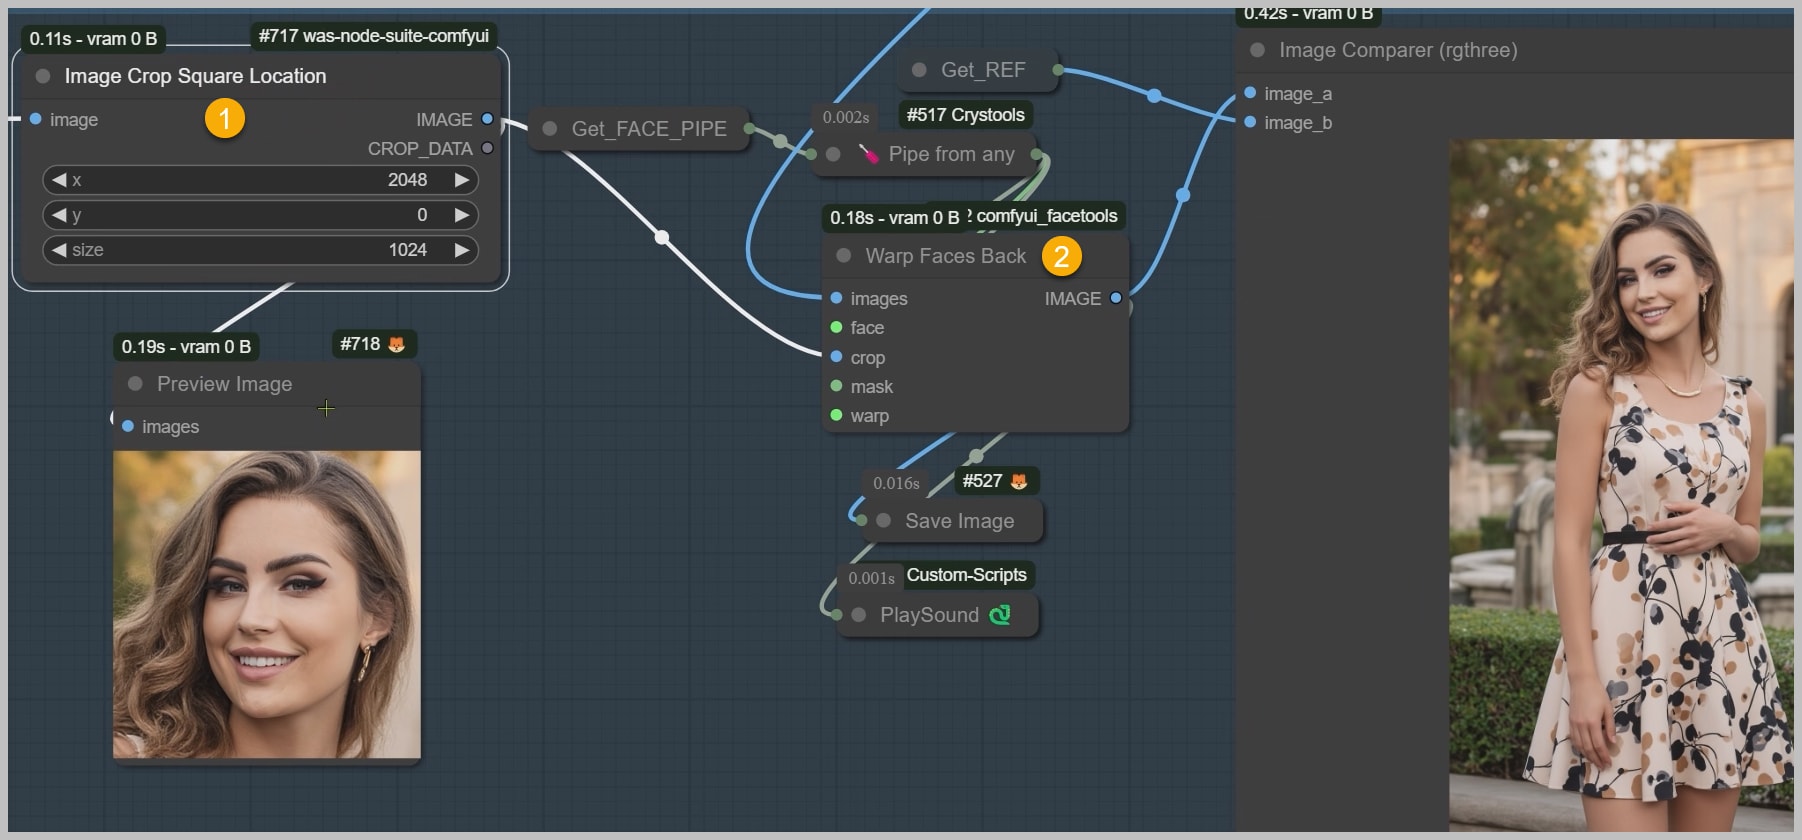
Node Group 7: Final Integration
This node cuts out the newly generated face so we can use it.
Then, we’ll use this node to place the new face back into the image with the new background.
Pro Tip – Reviving Skin Realism
- Skin Enhancement Workflow:
- If skin appears flat or artificial, apply the “Skin Detail Booster” workflow.
- This adds subsurface scattering, wrinkles, and natural blemishes for photorealistic results.
Conclusion
By integrating ACE Plus technology with Redux style anchoring in your ComfyUI workflow, achieving 99% face consistency in portrait background swaps is no longer a distant goal—it’s a repeatable reality. This upgraded process combines precision tools like the ACE Plus LoRA for facial refinement, Turbo acceleration for faster results, and strategic node groups for seamless composition control. Whether you’re refining hairstyles, adjusting poses, or perfecting skin details, this workflow empowers you to deliver professional-grade edits with unmatched accuracy.