ComfyUI Face Retouching Workflow Unveiled: Say Goodbye to Photoshop
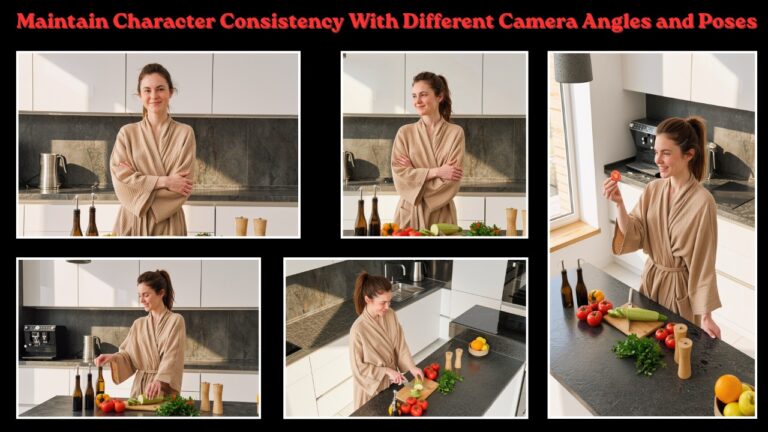
Hello everyone! Today, I’m excited to introduce a newly built workflow designed to retouch faces using ComfyUI.
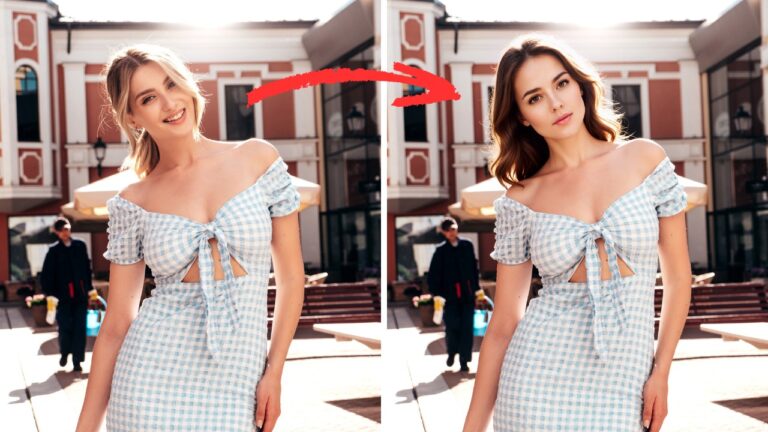
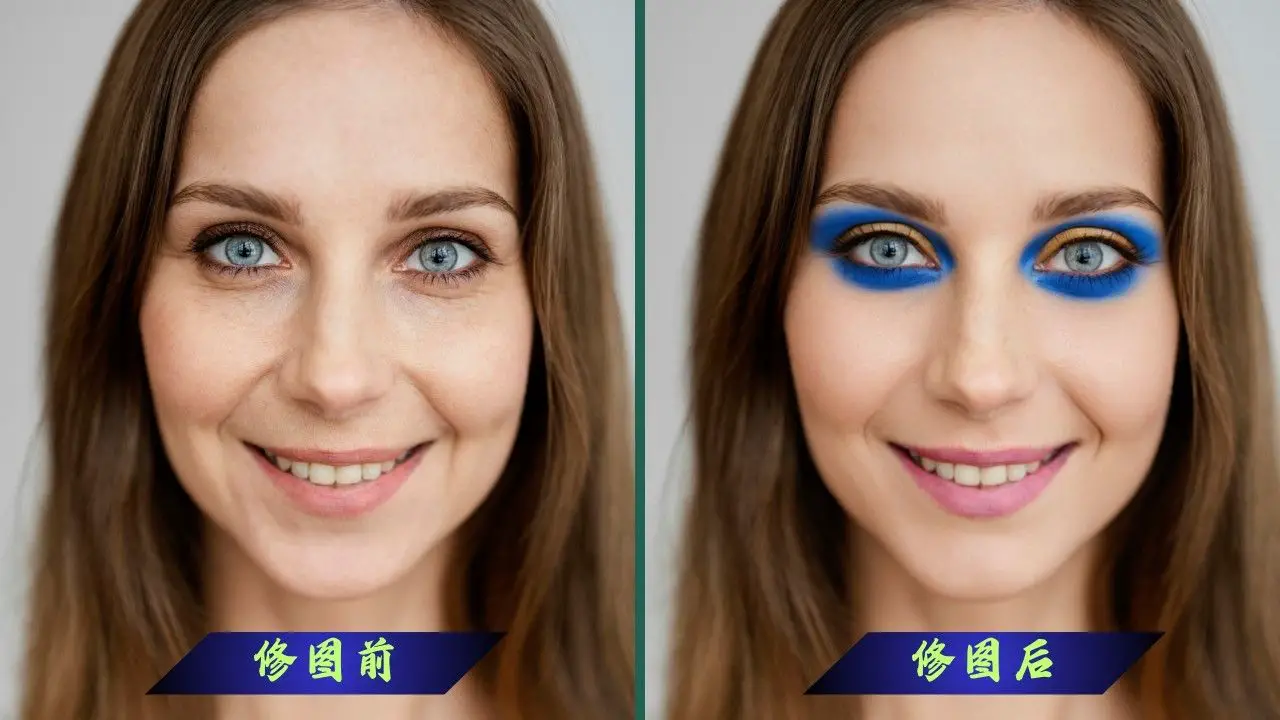
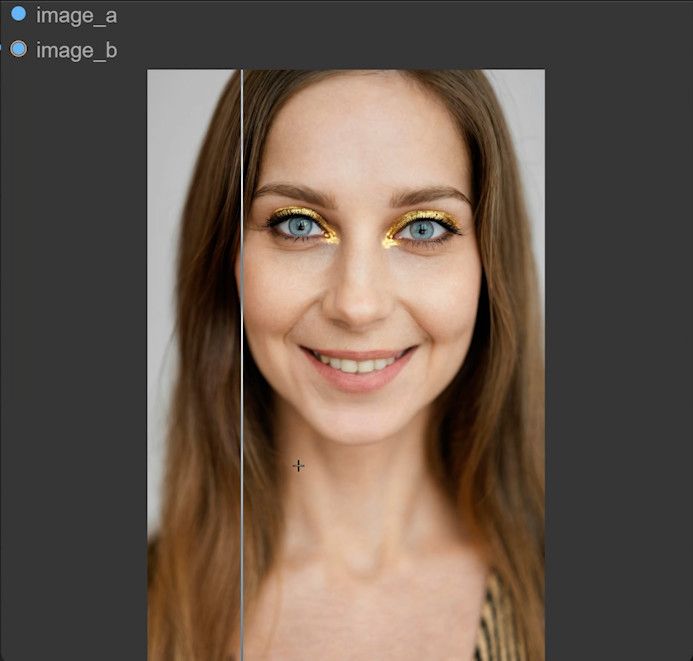
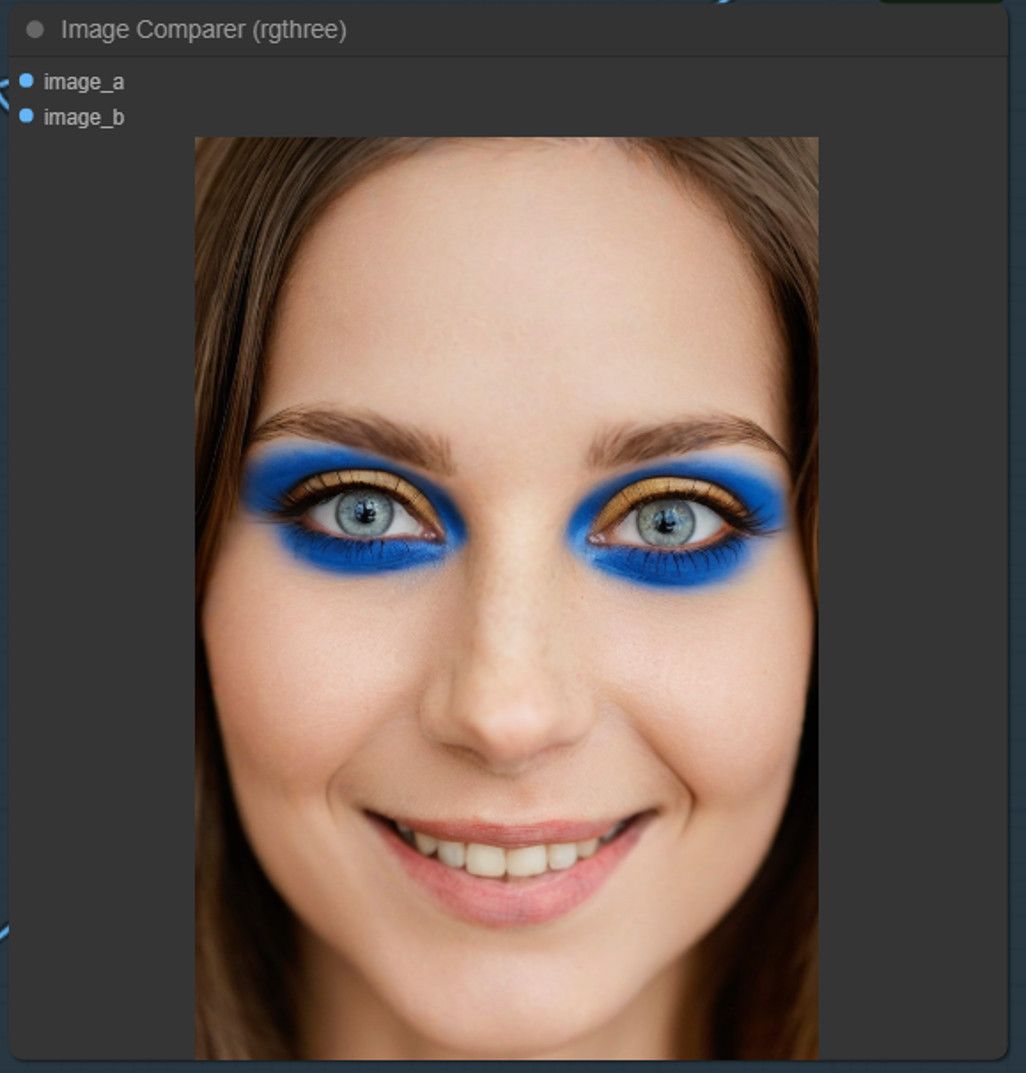
This workflow showcases the remarkable contrast between before and after retouching: not only does it allow you to draw eyeliner and eyeshadow and apply lipstick, but it also smooths the skin while maintaining a realistic texture. Importantly, the facial features remain unaltered, which is the true essence of AI retouching.
For those who love diving into Stable Diffusion with video content, you’re invited to check out the engaging video tutorial that complements this article:
Introduction to Workflow
Before importing the workflow, we need to download a key checkpoint, which is the core of the workflow and helps us to “make up” the woman in AI. While Photoshop can achieve similar effects, obtaining a more realistic texture requires significant skill and time.
Download Checkpoint
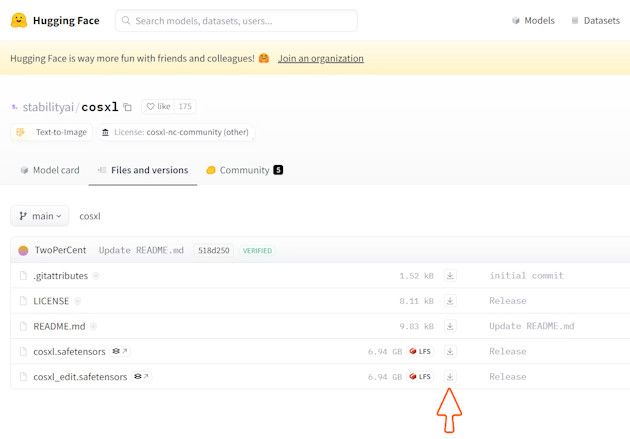
We need to download the Checkpoint at HuggingFace.
1️⃣Register and log in to HuggingFace
Ensure you are registered and logged in on HuggingFace.
2️⃣ Go to the download page
The Checkpoint we are going to download is developed by StabilityAI, the company behind Stable Diffusion. You will need to provide some personal information to access the download page.

3️⃣ Download Checkpoint
On the download page, download the checkpoint below.
Import Workflow
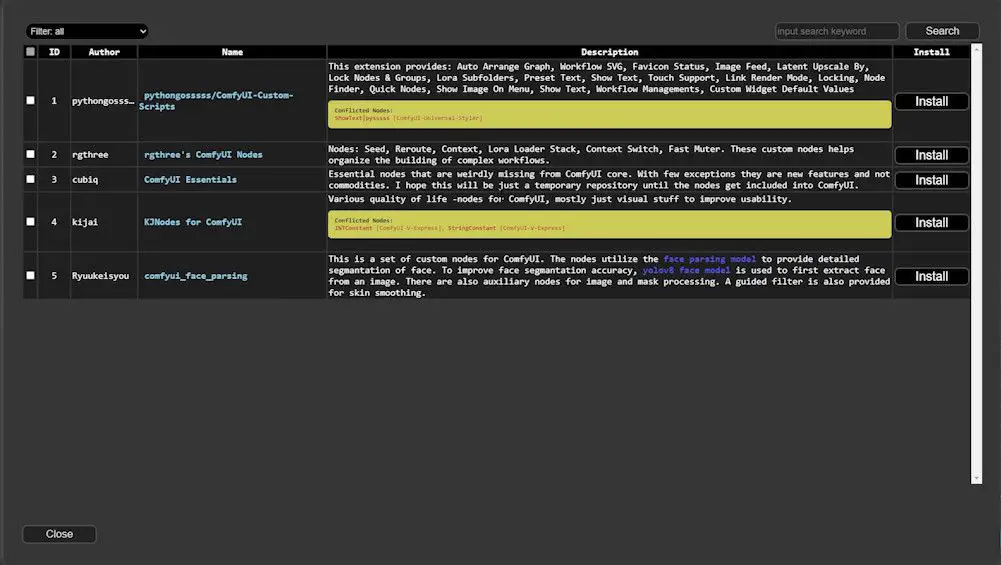
After importing the workflow, you may find some nodes missing. You can install these nodes in ComfyUI Manager or manually:
- ComfyUI-Custom-Scripts
- rgthree’s Comfy Nodes
- ComfyUI Essentials
- KJNodes for ComfyUI
- comfyui_face_parsing
Gain exclusive access to advanced ComfyUI workflows and resources by joining our community now!
Build a Basic Workflow
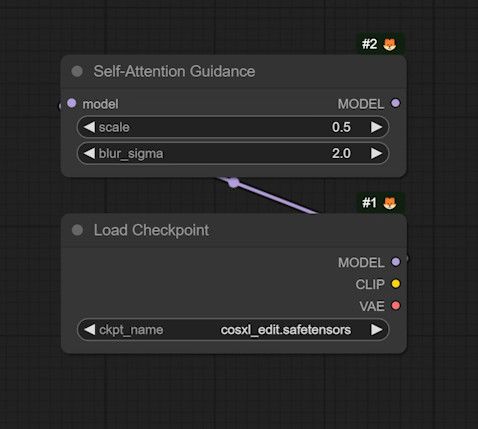
1. Add “Checkpoint Loader”
- Select the checkpoint “cosxl_edit” you just downloaded.
- Add the “Self-Attention Guidance” node, which allows Stable Diffusion to utilize self-attention guidance to improve image quality. Set the Scale to a value below 1 and the blur sigma to a value larger than Scale.
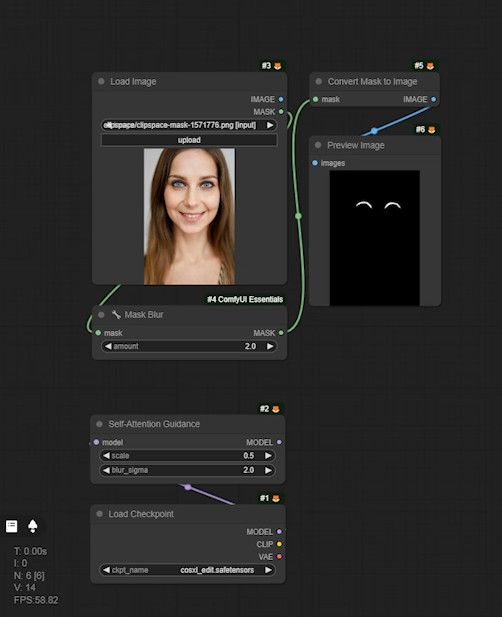
2. Load Image and Make a Mask
- Add the “Load Image” node and upload the image to be modified.
- Paint a mask over the eye line area and add a “Mask Blur” node with a blur level of 2.
- Add the “Convert Mask to Image” node and run ComfyUI to see the resulting mask.
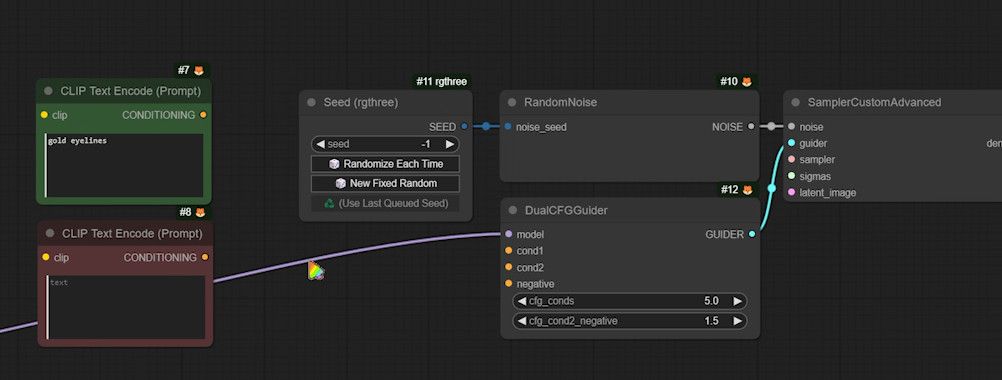
3. Add Prompt and CFG Guider
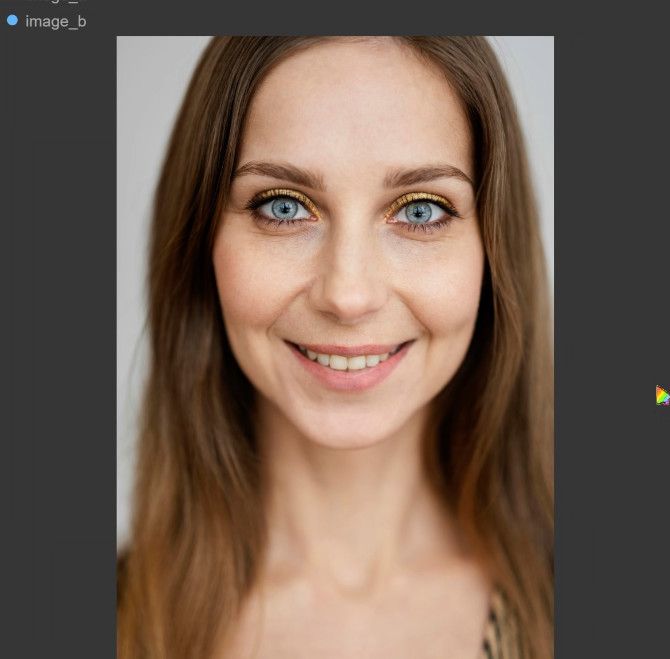
- Add positive and negative prompts, input “Gold Eyeliner” for the positive prompt.
- Add the node “SamplerCustomAdvanced”.
- Add the “RandomNoise” node and convert the noise seed widget to input. Connect it to the “seed” node developed by “rgthree”.
- Add the “DualCFGGuider” node. Configure the Positive CFG and set its value to 5. Configure the negative CFG, with a recommended range of 1.2-1.6. Connect each node input.
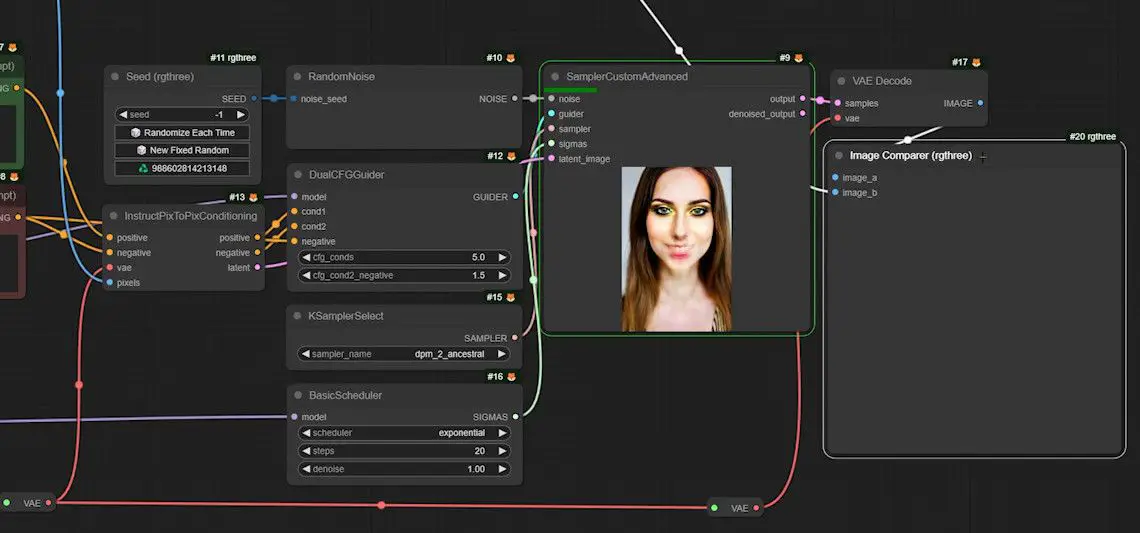
4. InstructPixToPixConditioning
- Add the “InstructPixToPixConditioning” node to prevent the prompt from drastically altering other areas.
- Drag the “KSamplerSelect” node from the “sampler” input of the “SamplerCustomAdvanced” node and select the sampling method with the suffix “ancestral”.
- Drag out the “BasicScheduler” node from the “sigmas” input and choose “exponetial”.
- Add the VAE decoder, and the “Image Comparer” node. Connect the
image_aport to the modified image and theimage_bport to the original image. - Ensure all nodes are connected correctly, especially the CLIP Text Encoders.
- Run the workflow to generate a test image.
5. Add the “ImageCompositeMasked” Node
To further control the modification area and apply eyeshadow in the specified area, add the “ImageCompositeMasked” node.
- What it does: Implements masking operations similar to those in Photoshop.
- Connection:
- Original image (source): Connects to the image just generated.
- Destination: Connects to the first uploaded image.
Then add the Image Comparer node, which is used to compare the image before and after the modification. Connect the image_a port to the modified image. Connect the image_b port to the original image.
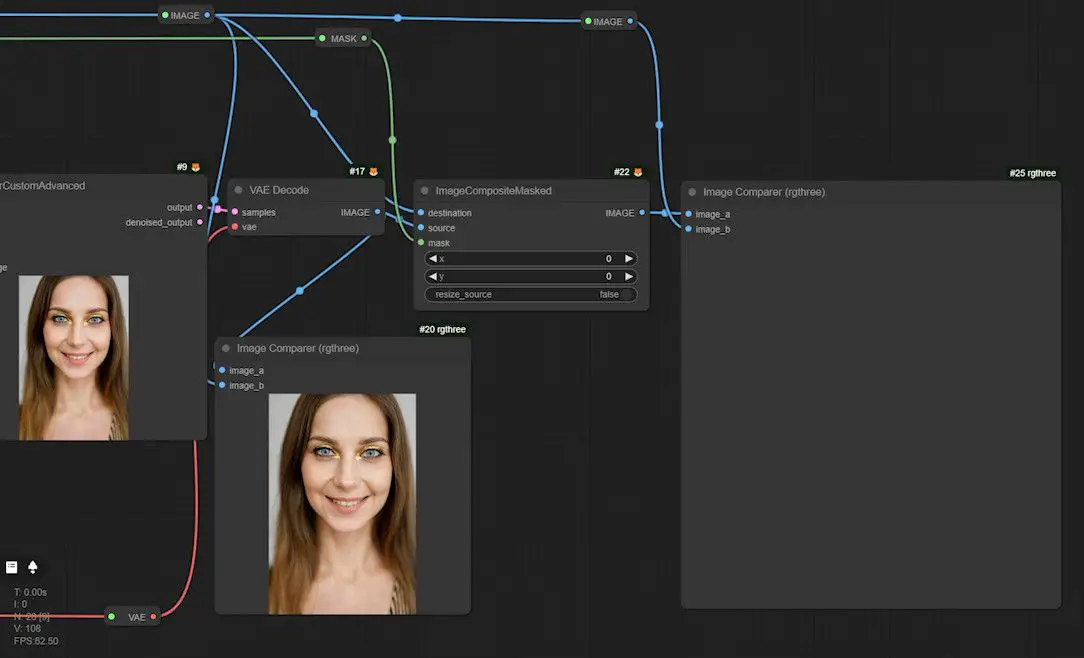
After completing these steps, let’s generate another image to make sure the eyeliner is applied to the specified area.
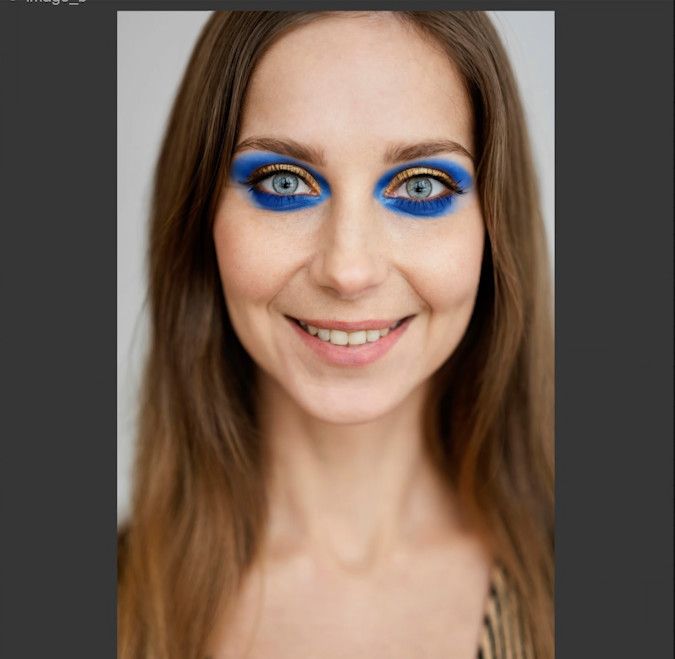
6. Adding Eye Shadow
Next, let’s apply another eye shadow. Copy the image, go back to the “Load Image” node, paste the image, make a mask, set the Mask Blur to a higher level, and change the prompt. Adjust the CFG of “DualCFGGuider” to a smaller size, then generate another image.
Advanced Workflow: Skin Masks
In the previous steps, we’ve added eyeliner and eyeshadow. Now, we’ll smooth the skin while keeping the texture intact. This process involves advanced node configurations to ensure optimal facial skin treatment.
1. The Importance of Smoothing Skin
Smoothing Skin is a key step in portrait retouching. Directly passing a prompt like “Smooth Skin” may lead to undesirable results. Manually masking the skin is time-consuming, so we’ll use FaceParse, a node in ComfyUI that specializes in masking faces.
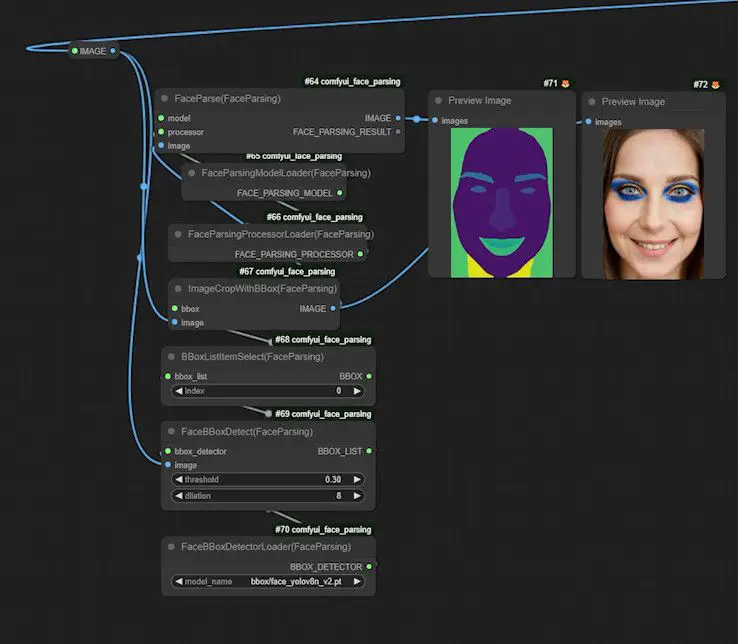
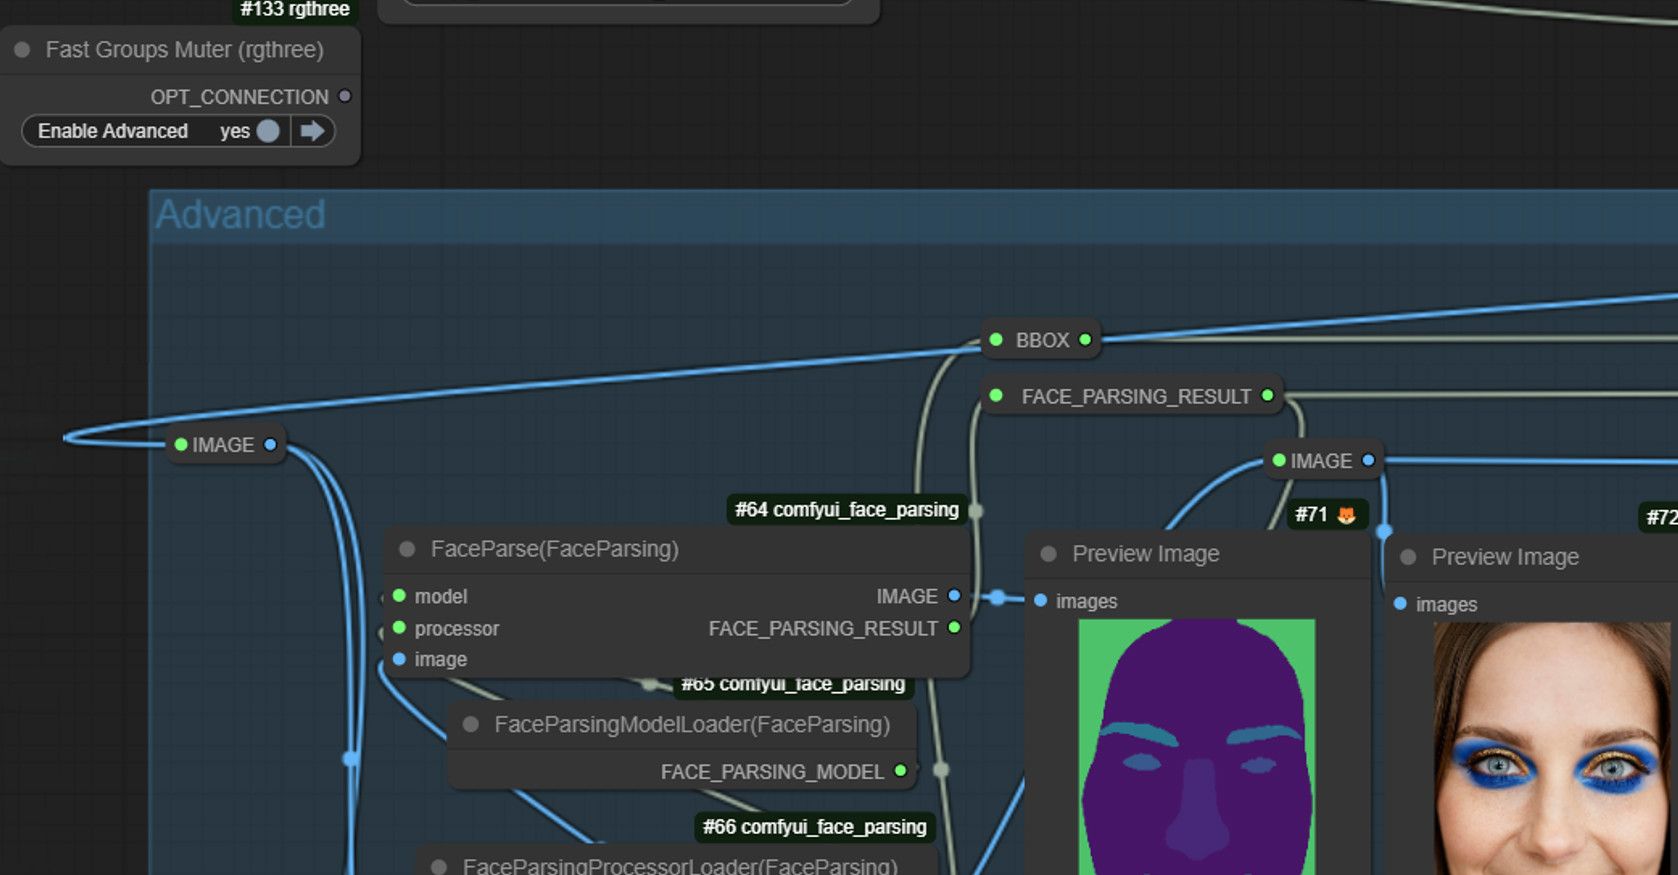
2. Adding the FaceParse Node
- FaceParse: Generates face masks automatically.
- ModelInput: Drag a FaceParse model from the model input.
- Preprocessor: Connect a Preprocessor.
3. Add ImageCropWithBBox Node
- Purpose: Crop the face image.
- BBox: Recognizes facial regions and crops them.
- Connection:
- bbox input: Connects to the
BBoxListItemSelectnode to select the first bounding box (default index value is 0). - bbox_list input: Connects to the
FaceBBoxDetectnode to control the threshold and size of the bounding box. Choose the nano version of the model to minimize resource consumption.
- bbox input: Connects to the
4. Connect to Preview Image Node
- Add Preview Image nodes for
FaceParseandImageCropWithBBoxto ensure correct processing.
5. Run and Check the Result
- Run the workflow and check the results of the face processing.
- Expected results:
FaceParsegenerates a color facial segmentation map andImageCropWithBBoxcrops out the facial image.
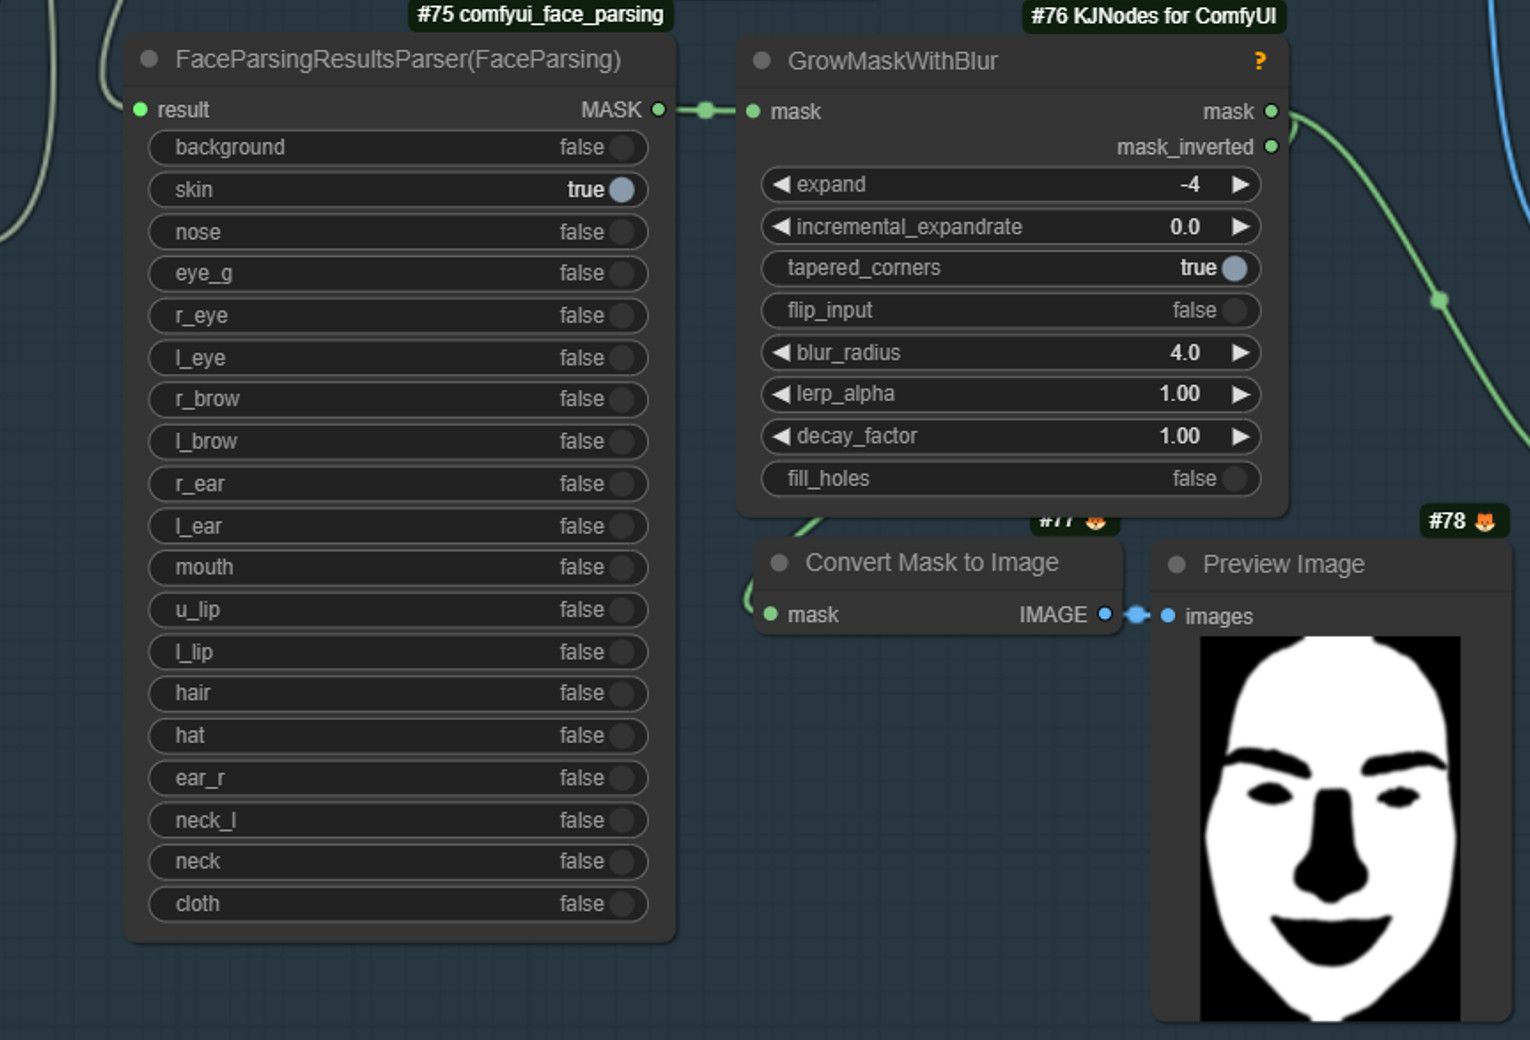
6. Extracting Skin Regions
- FaceParsingResultsParser: Dragged from
FaceParseto extract facial skin regions. - SetParameters: Only turn on the
skinswitch, keeping other parts of the face off.
7. Smoothing Skin Mask Edges
- Add “GrowMaskWithBlur ” Node:
- Set the expansion size and blur radius to smooth the transition of the skin mask edges.
- Preview Mask Effect: Add a preview node to see the effect of the mask.
Advanced Workflow: Inpaint
1. Select Checkpoint
- Select DreamshapeXL’s Lighting Version: This version is faster and has better skin texture.
- Download Link: Dreamshaper XL Lighting
- Another Recommendation: The Lighting version of JuggernautXL is also good, but Dreamshaper is slightly better in skin texture.
2. Add Prompt
- Prompt: Write “smooth skin”.
- KSampler:
- Sampling steps: 3 steps (very fast).
- CFG value: Set to 2.
- Denoising Strength: Set to 0.4.
3. Connecting Nodes
- VAE Encoding: Encode the image to be inpainted with VAE.
- Latent Space Noise Mask: Set and connect.
- Output Image Node: Add two nodes for output image.
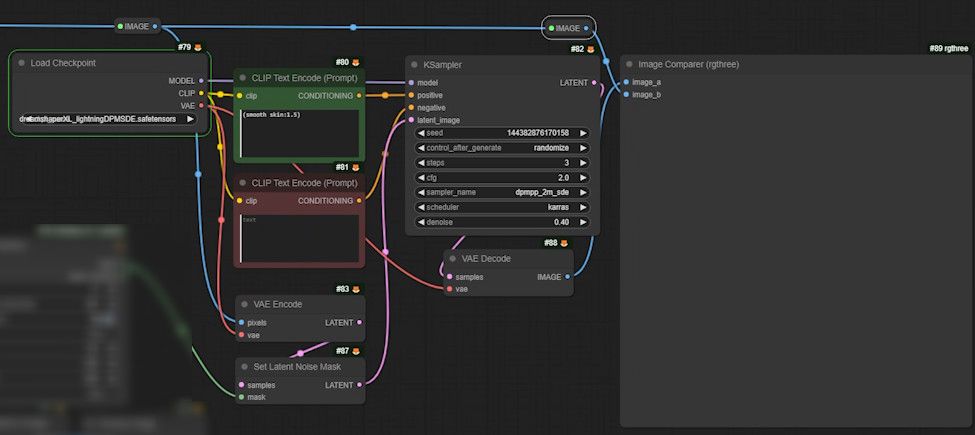
- Run the workflow and check the skin effect. The skin should appear more refined and look 10 years younger.
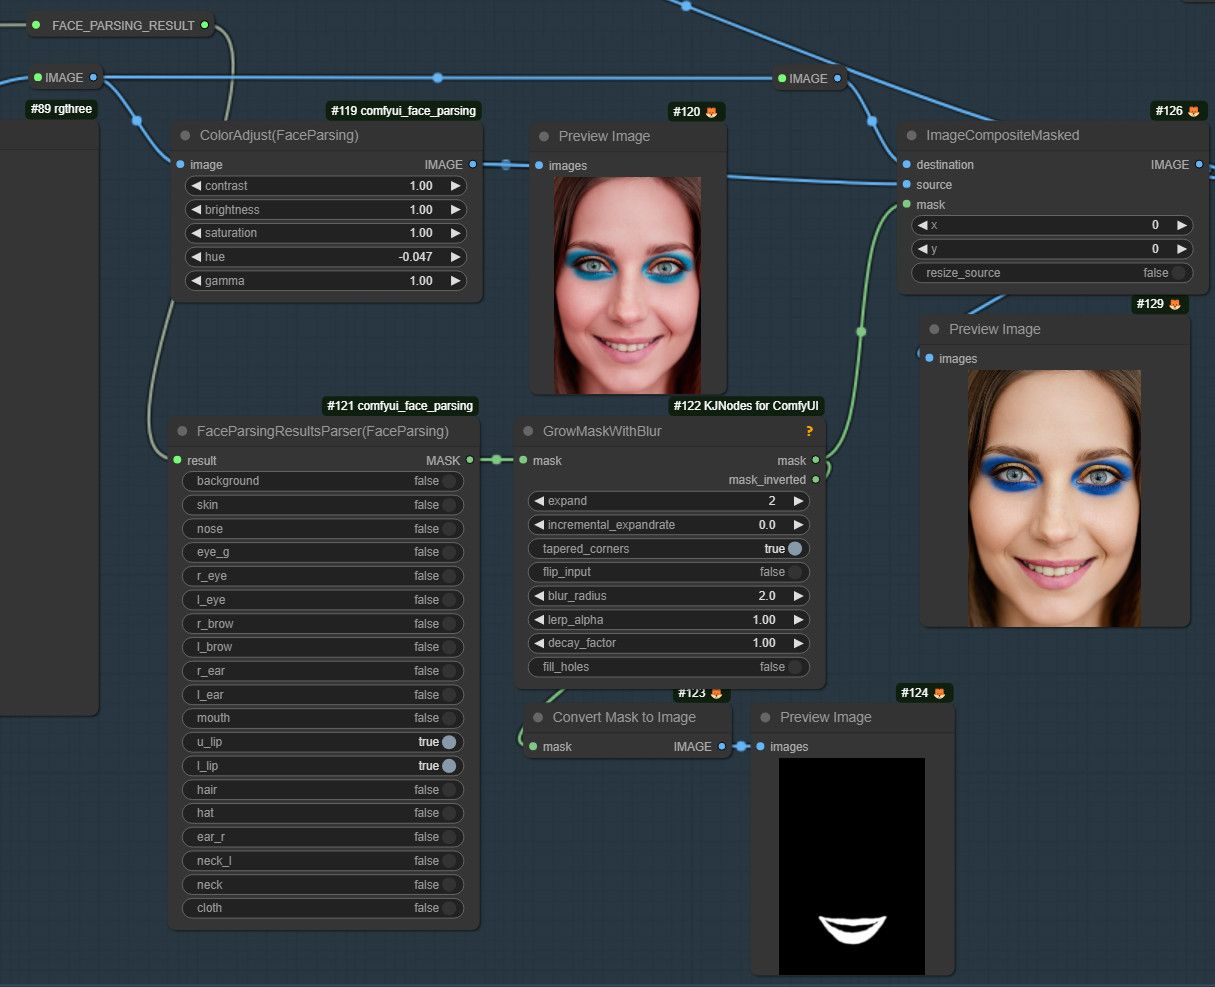
Advanced Workflow: Changing Lip Color
1. Add the ColorAdjust Node
- What it does: Changes the contrast, lightness, saturation, and hue of the image.
- Adjust Hue: Change the lip color.
- Preview Image: Add a preview node to see the effect.
- Problem: The entire face area has changed. The change area needs to be limited.
- Solution: Handle the mask as before.

2. Duplicate the Previous Four Nodes
- Face Mask Area: Select the upper and lower lips.
- Adjust Mask Size and Blur: Precise control is needed due to the small size of the lips.
- Run Workflow: Generate the mask and check the effect.
3. Add the ImageCompositeMasked Node
To limit the change area to just the lips, add the “ImageCompositeMasked” node.
- What it does: Similar to previous workflows, it restricts the modification to a specific area.
- Connection:
- Original image (source): Connects to the processed facial image.
- Destination: Connects to the original image.
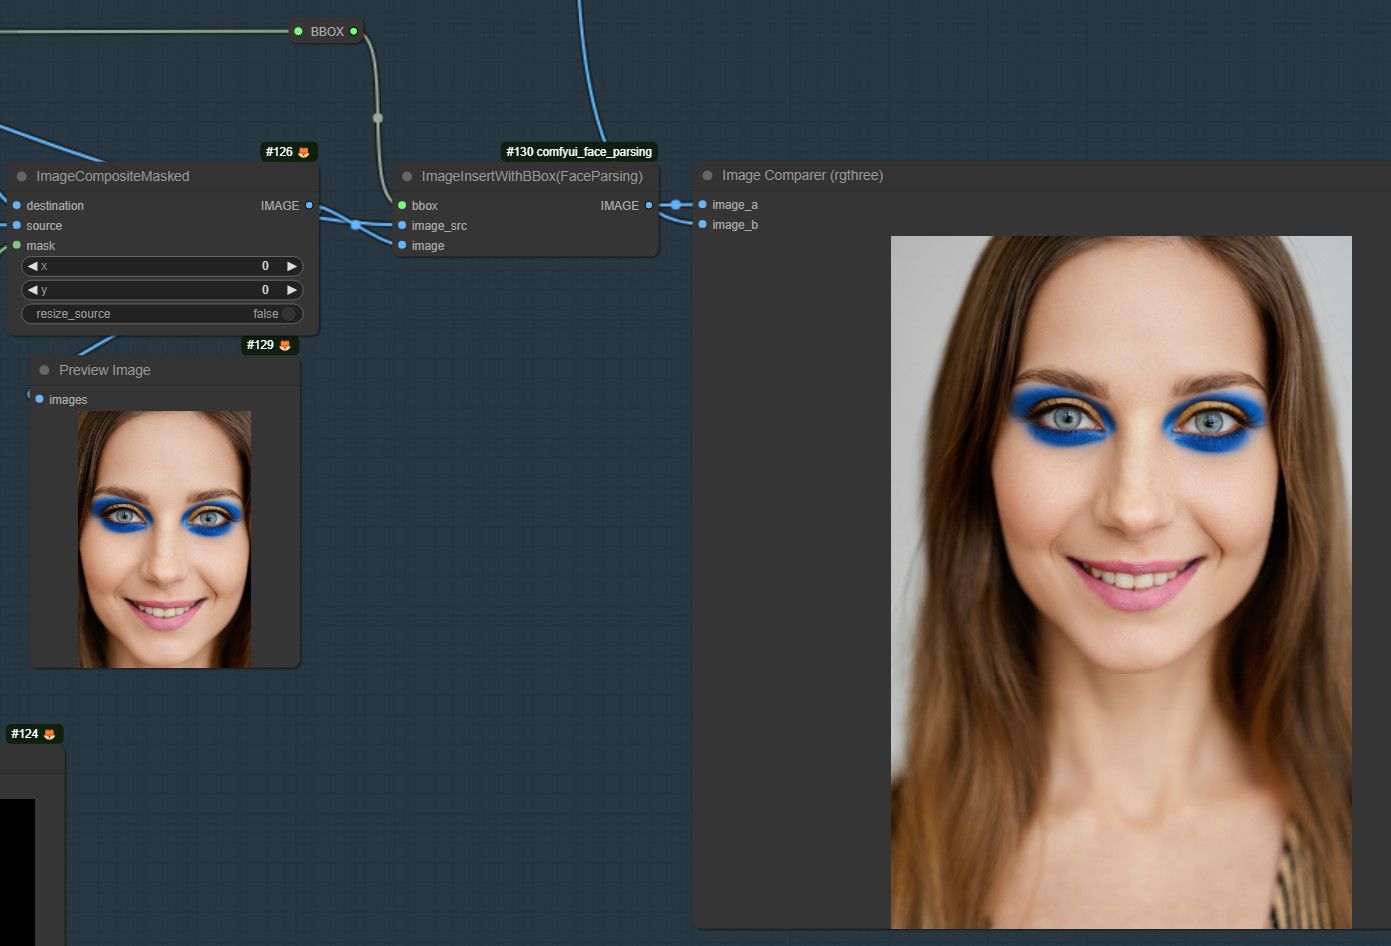
4. Inserting the Retouched Image Back into the Original Image
In the previous steps, we have added inpaint workflow and implemented lip color adjustment. Now, we will insert the processed facial image into the original image by adding a powerful node ImageInsertWithBBox. This step splits the entire workflow into two parts, top and bottom, for more flexibility in making adjustments.
- Add ImageInsertWithBBox Node: For inserting the processed image into the original image.
- bbox input port: Connects to the previous
BBoxListItemSelectnode. - Image Source: Connects to the uncropped original image.
- Image Input: Connects to the processed image.
- bbox input port: Connects to the previous
- Add Image Comparer Node: For viewing the final result.
- image_a port: Connects to the inserted image.
- image_b port: Connects to the original image.
Refining the Workflow
The entire workflow is divided into two parts: top and bottom. The top part uses CosXL to help make up the woman.
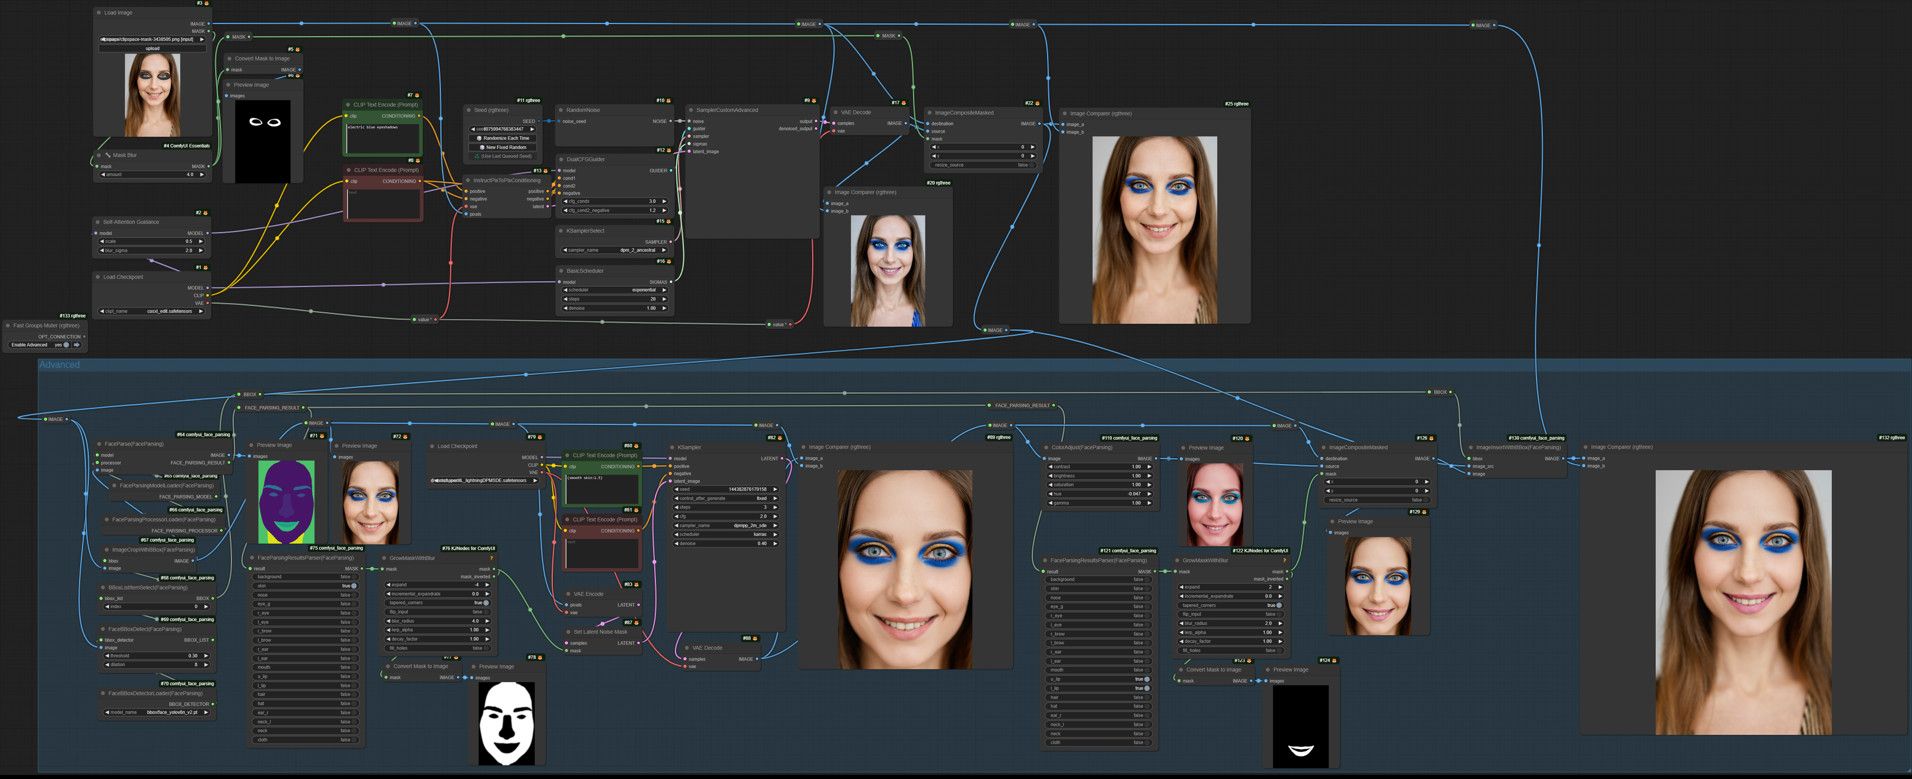
The make-up process may take place multiple times, so it’s best to run the top workflow while temporarily freezing the bottom one. Let’s group the bottom workflow and add a node to toggle this group’s state.
It’s easier to apply makeup to the woman first, and when you’re satisfied with the result, activate the bottom group to handle the facial details.
Conclusion
With this workflow, you can easily achieve high-quality face retouching with flexible local adjustments and details. These steps should help you improve your retouching efficiency and create more stunning works. Thank you for reading, and I look forward to seeing better results in your retouching process!