Transform Faces and Backgrounds Seamlessly Using Flux Redux and PuLID in ComfyUI
If you’ve ever attempted to replace a portrait background, you know the challenge of ensuring the subject matches the lighting and ambiance of the new scene. Enter the Redux model by Black Forest Lab, which excels at maintaining lighting harmony between the subject and the background.
It’s comparable to IP-Adapter in some ways, but with unique capabilities. Let’s explore how to use Redux to create seamless background replacements using two workflows: basic and advanced.
For those who love diving into ComfyUI with video content, you’re invited to check out the engaging video tutorial that complements this article:
Gain exclusive access to advanced ComfyUI workflows and resources by joining our community now!
Here’s a mind map illustrating all the premium workflows: https://myaiforce.com/mindmap
Run ComfyUI with Pre-Installed Models and Nodes: https://youtu.be/T4tUheyih5Q
Basic Workflow vs. Advanced Workflow
The goal of both workflows is to replace the background of an image with one defined through a prompt. While the basic workflow references the entire original image to maintain lighting consistency, the advanced workflow focuses on the subject alone, generating the background independently for more natural results.
1. How They Use References
- Basic Workflow:
- The model uses the entire original image—subject and background—as a reference.
- This approach ensures consistent lighting between the subject and the new background, as the lighting from the original image is carried over.
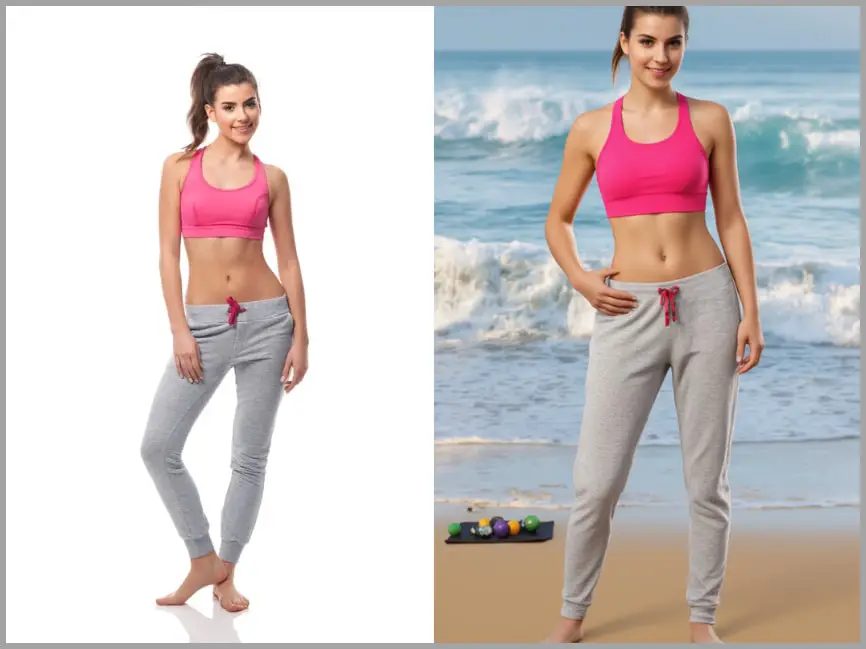
- Advanced Workflow:
- Only the subject is used as a reference, and the background is generated entirely based on the prompt.
- This method achieves better lighting harmony and makes the results feel more natural.
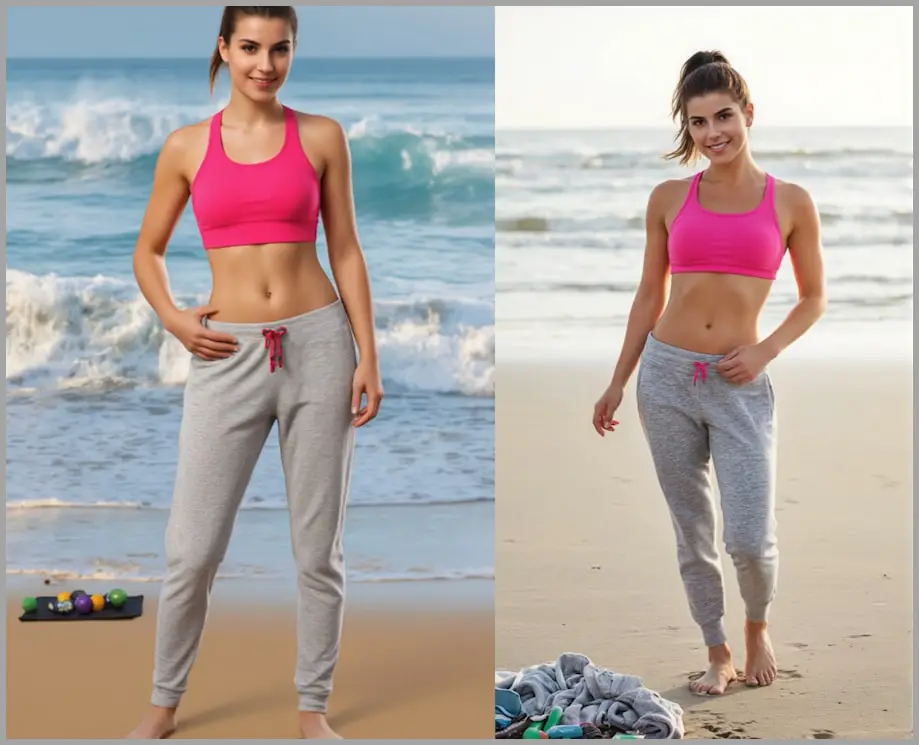
2. Face Consistency and Detail
- Basic Workflow:
- Produces impressive face consistency without requiring tools like PuLID.
- However, when the face occupies a small part of the image, zooming in may reveal a lack of detail—an inherent limitation of text-to-image generation.
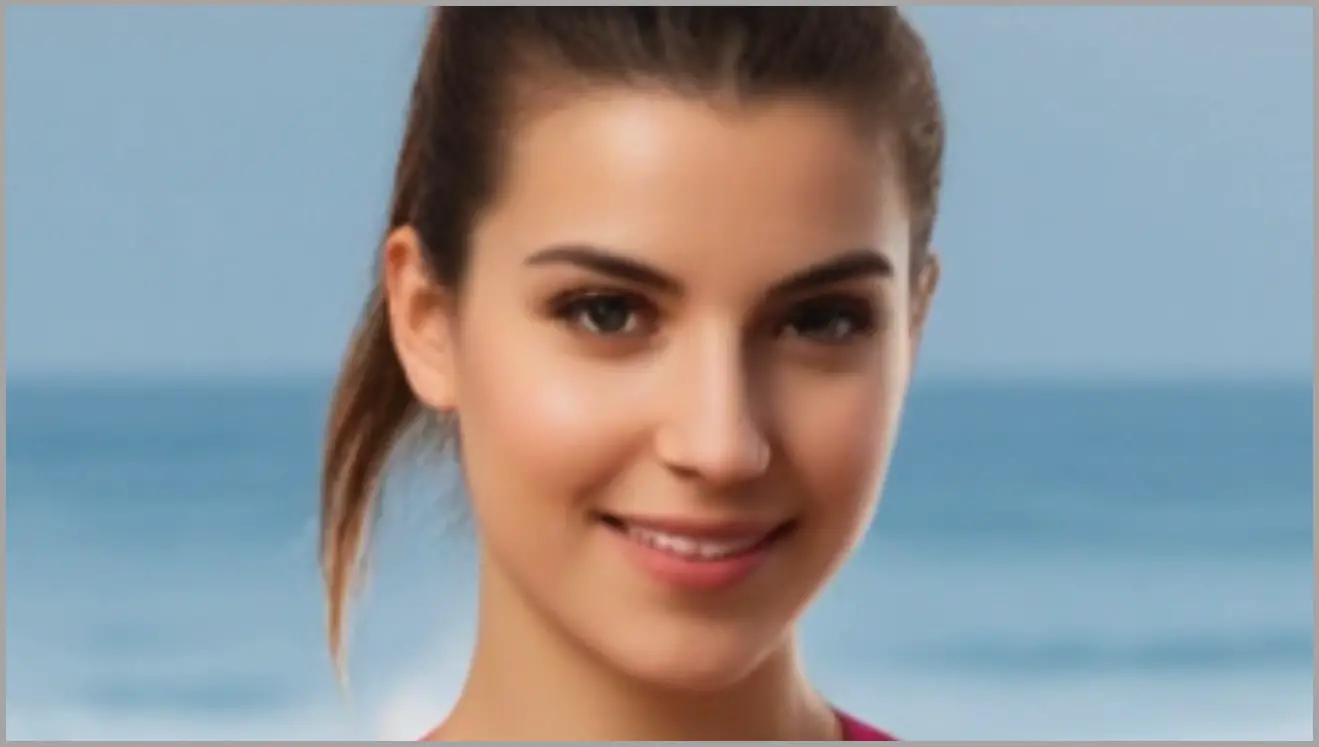
- Advanced Workflow
- Processes the face separately to preserve intricate details.
- This results in a face that looks much closer to the original, even when the face occupies a smaller area in the overall composition.
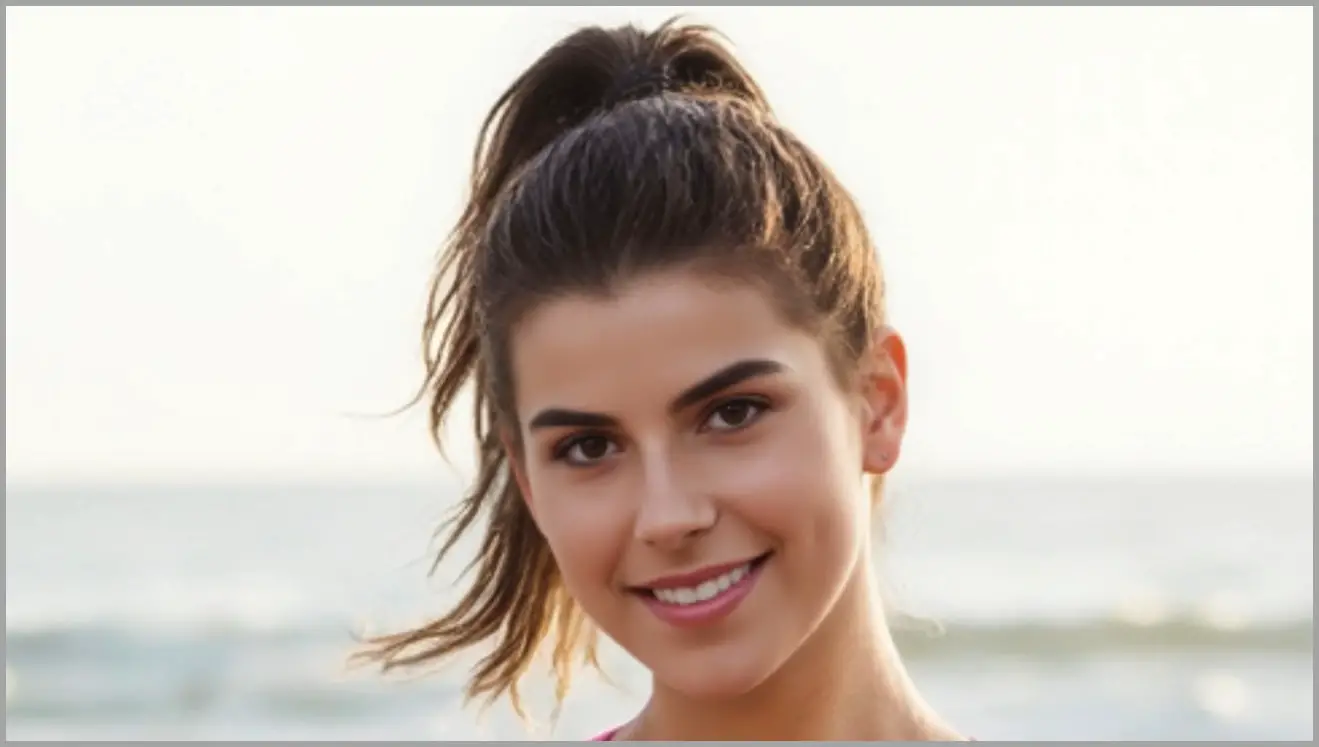
3. Flexibility with Composition
- Basic Workflow:
- Works well for close-up portraits but struggles with larger compositions like full-body shots.
- Often crops out parts of the subject, such as the head or feet, when attempting to generate a full-body image.
- Advanced Workflow:
- Handles various compositions, including full-body, half-body, and close-up portraits.
- Offers greater control over the subject’s placement and the overall framing of the image.
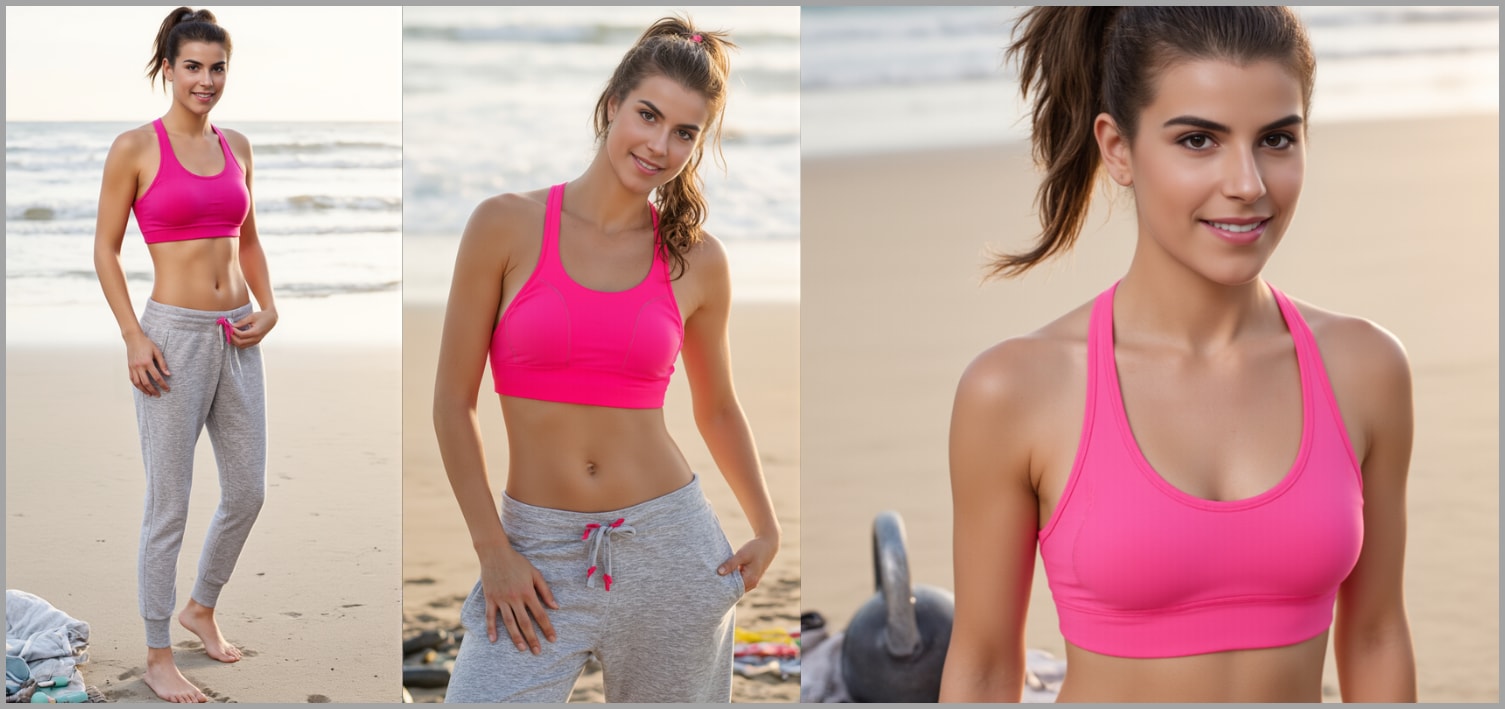
4. Blending natural Results
- Basic Workflow:
- While Redux adjusts the lighting to some extent, the results can sometimes feel unnatural, especially when the new background doesn’t match the original image’s ambiance.
- Redux’s faithfulness to the original image limits its ability to create a seamless blend.
- Advanced Workflow:
- By generating the background independently, this workflow produces results that are more visually harmonious.
- Lighting and ambiance are adjusted to fit the new background more naturally.
5. More Results from the Advanced Workflow
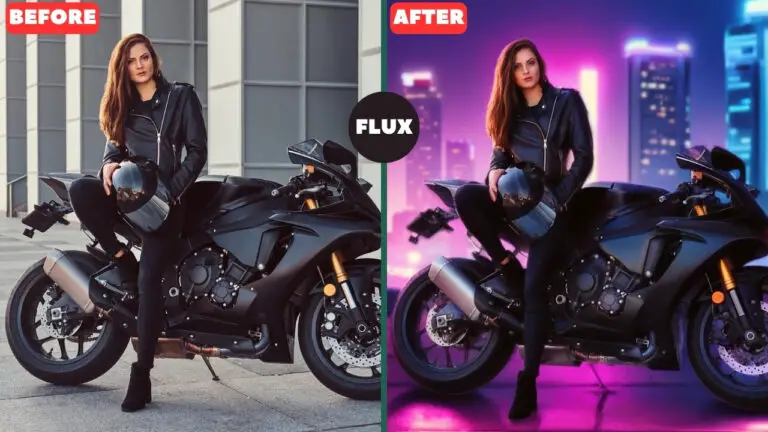
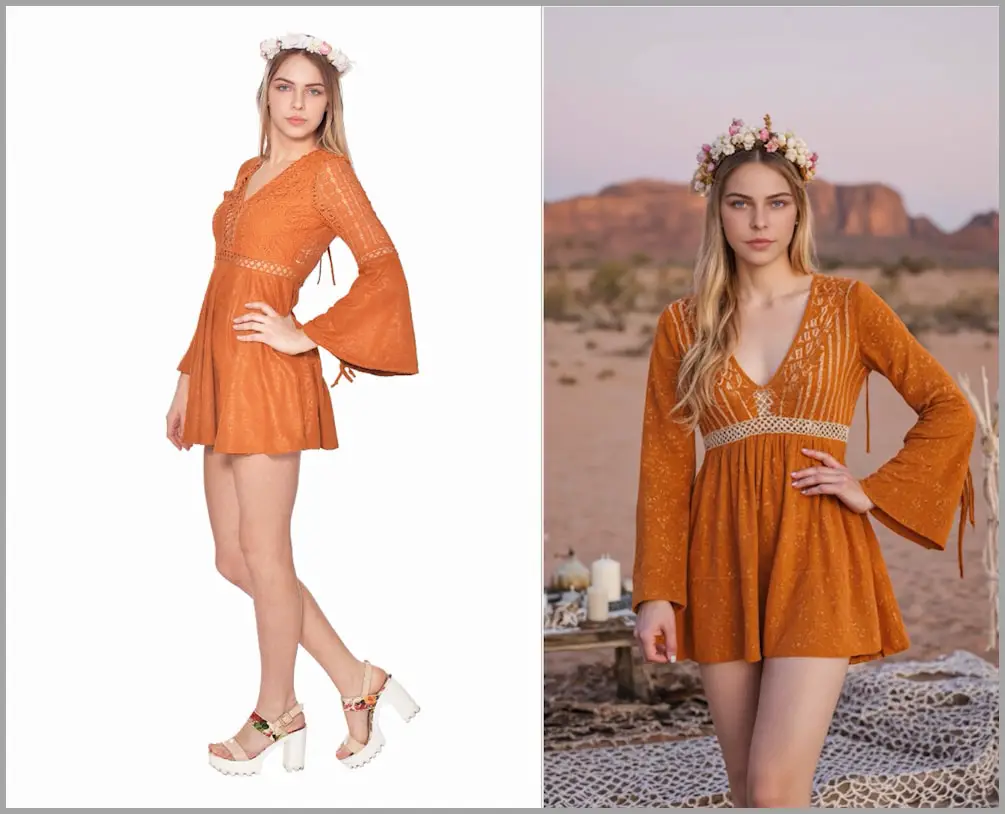
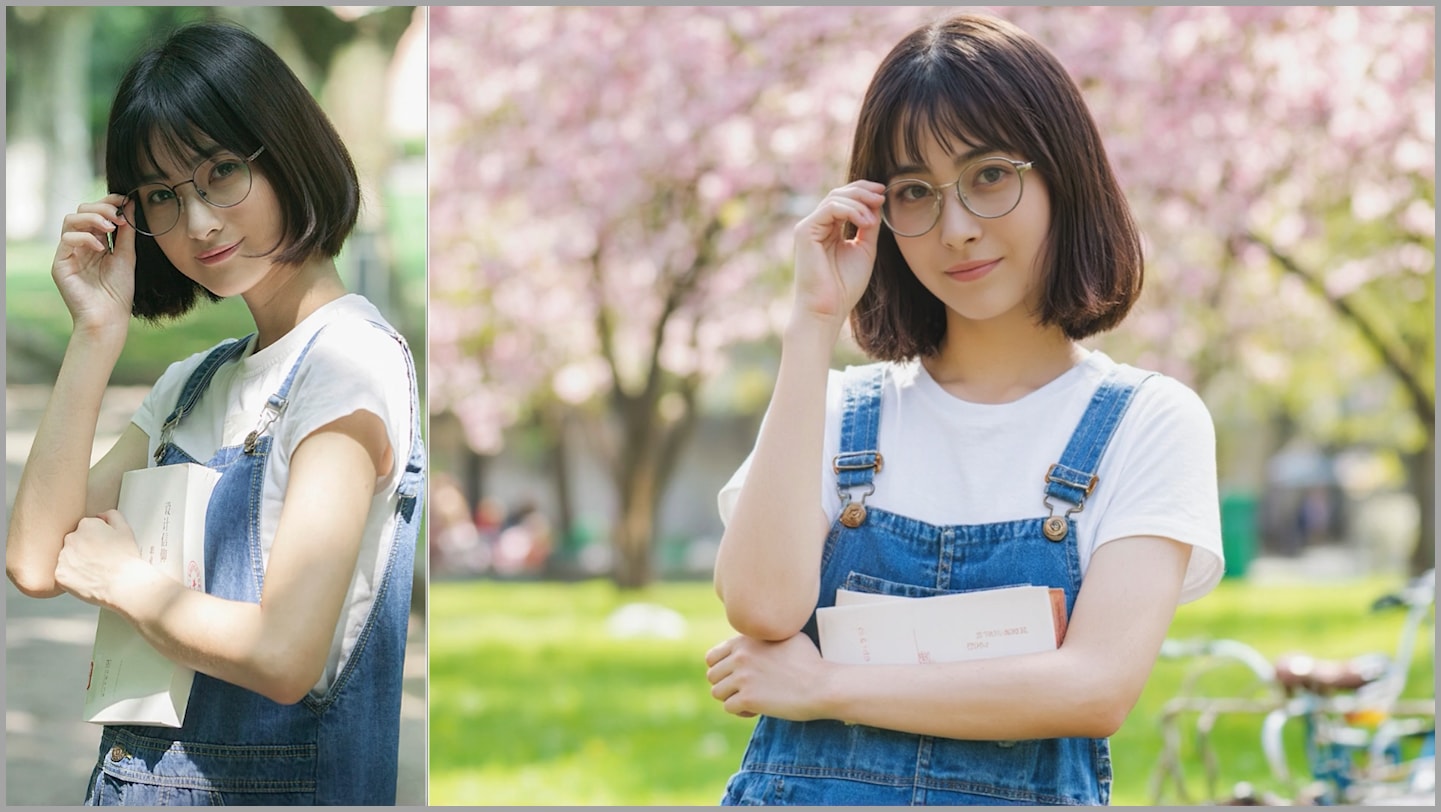
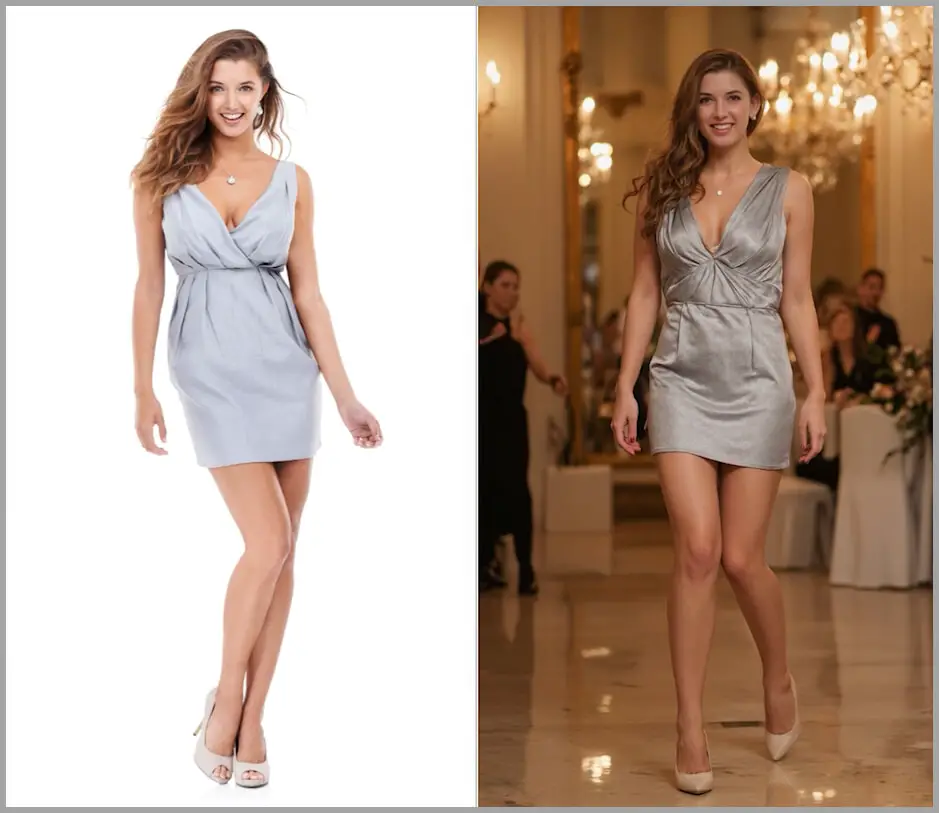
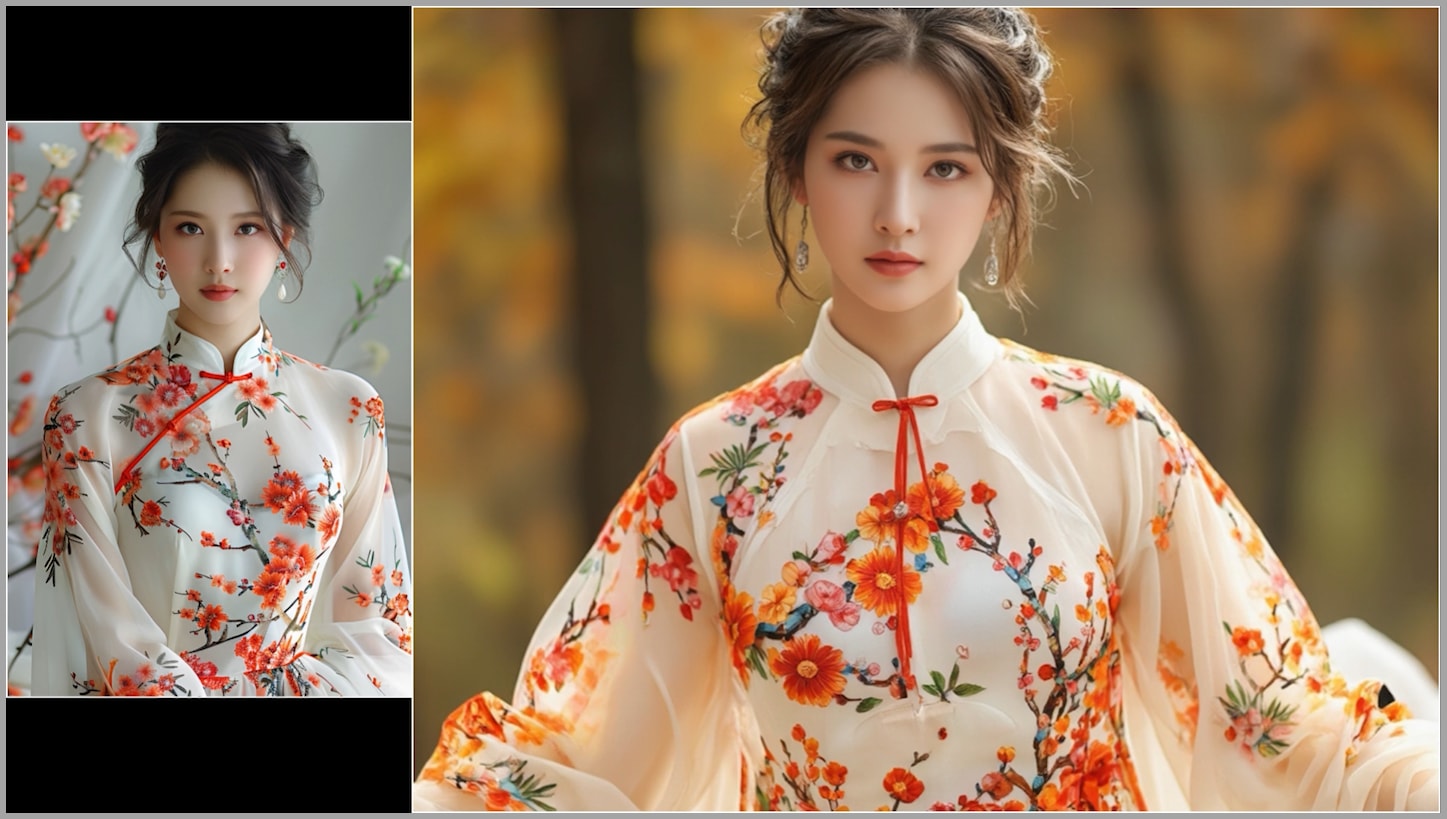
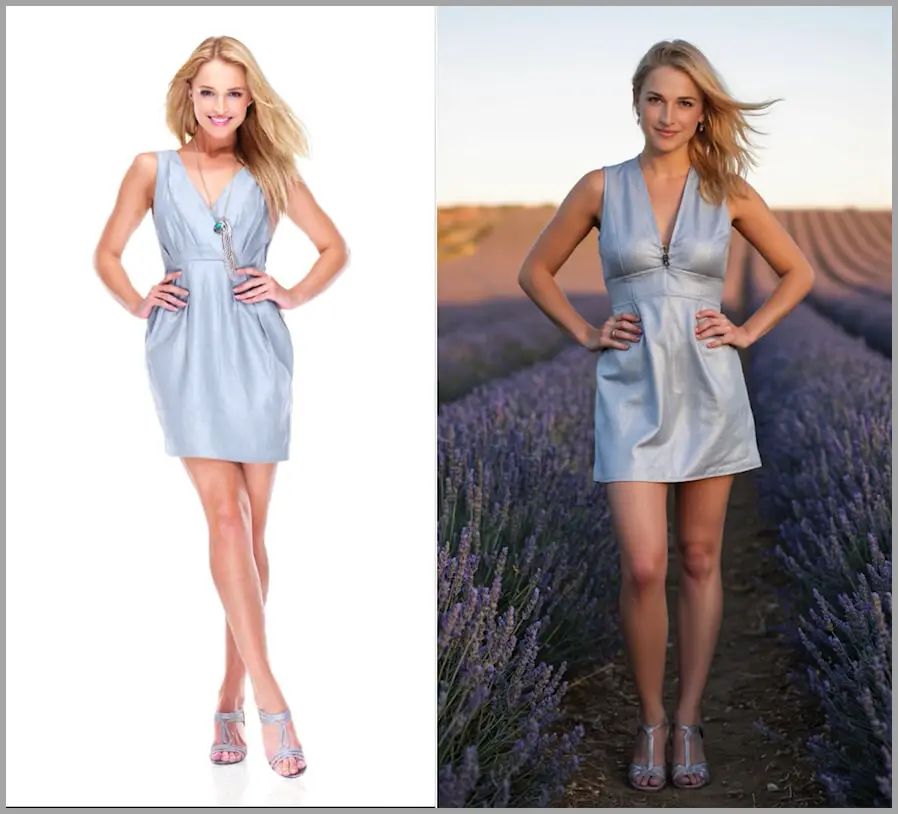
Let me show you some side-by-side comparisons. On the left, you can see the original reference image, and on the right, the result from the advanced workflow. Notice how the face in the advanced version matches the ambient light of the new background much better.
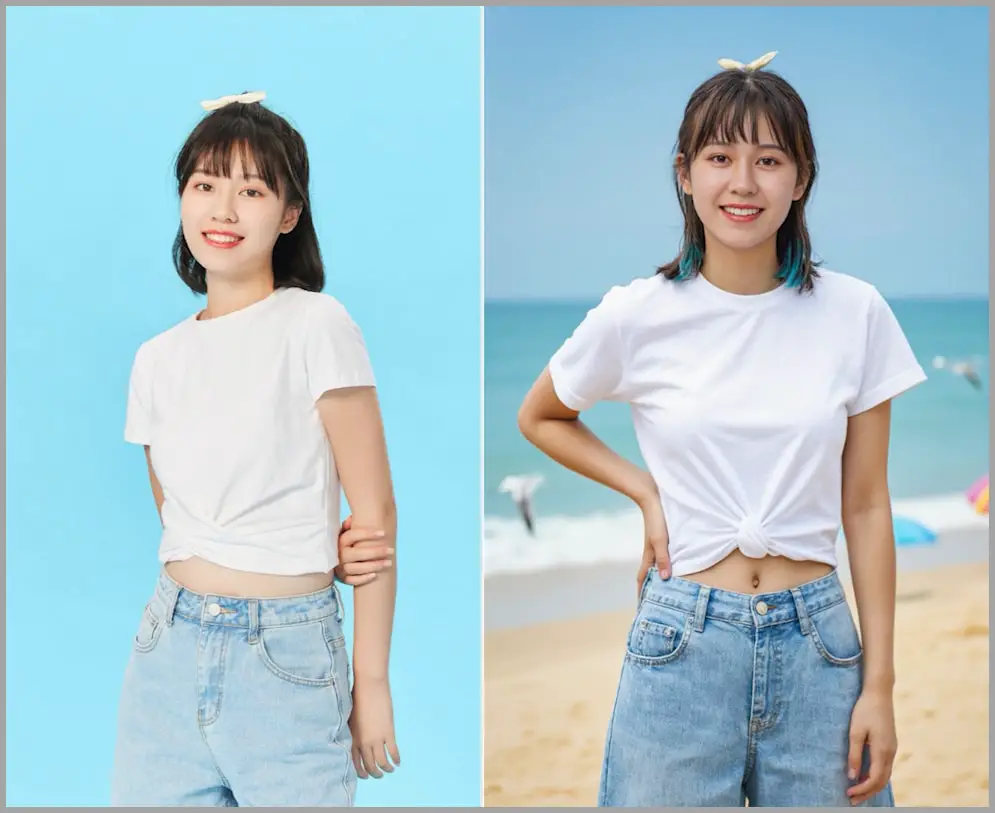
Understanding the Basic Workflow
Alright, now that we’ve compared the results, let’s explore the steps behind these workflows, starting with the basic version. While it has its limitations, the basic workflow is simple and effective, making it a great starting point for background replacement tasks.
Plus, the workflow is free to download, here’s the link: https://openart.ai/workflows/dl6bCcQLKEDoTlC142qW
Models to download:
- pixelwave: https://civitai.com/models/141592/pixelwave
- flux1-redux-dev: https://huggingface.co/black-forest-labs/FLUX.1-Redux-dev/tree/main
- sigclip_vision_patch14_384: https://huggingface.co/Comfy-Org/sigclip_vision_384/tree/main
- FLUX.1-Canny-dev-GGUF: https://huggingface.co/SporkySporkness/FLUX.1-Canny-dev-GGUF/tree/main
- lama remover: https://github.com/Sanster/models/releases/download/add_big_lama/big-lama.pt
You can try it out yourself!
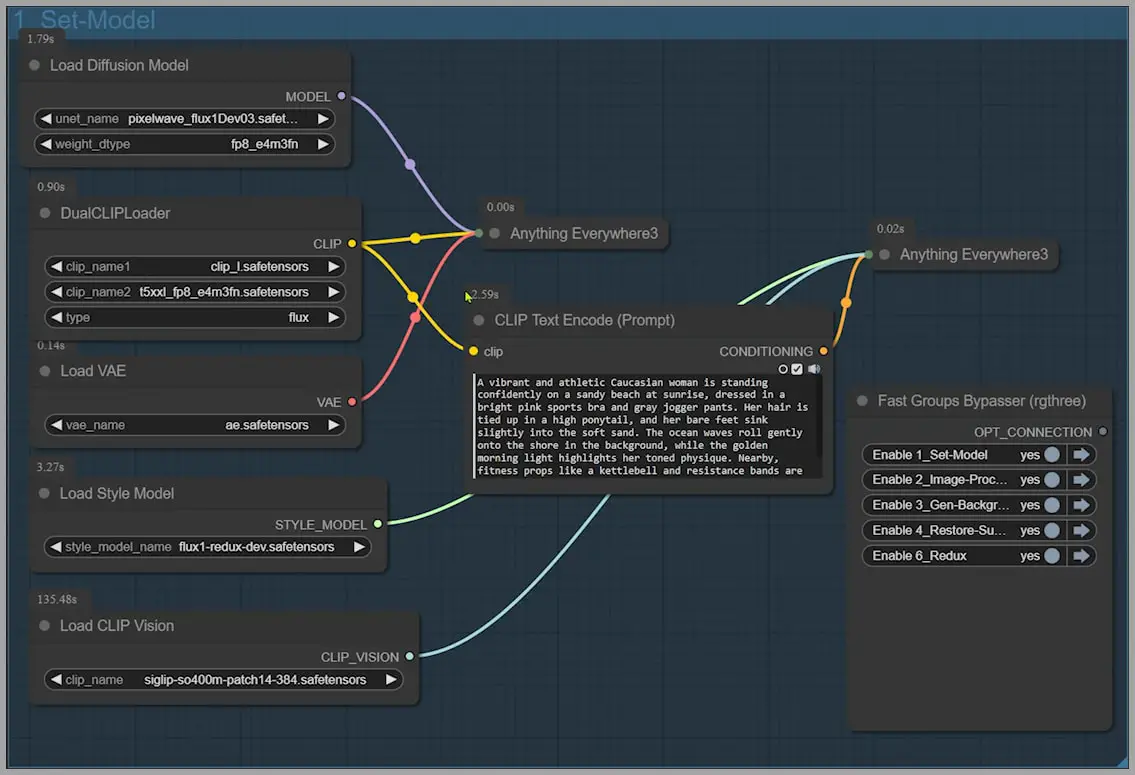
1.Load Models and Set the Prompt
The initial node group sets up the foundation by loading the required models and defining the prompt for the new background.
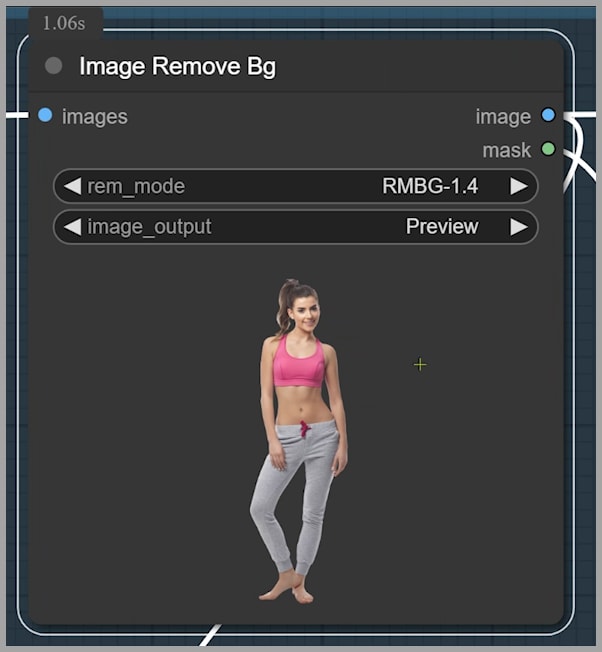
2. Remove the Background
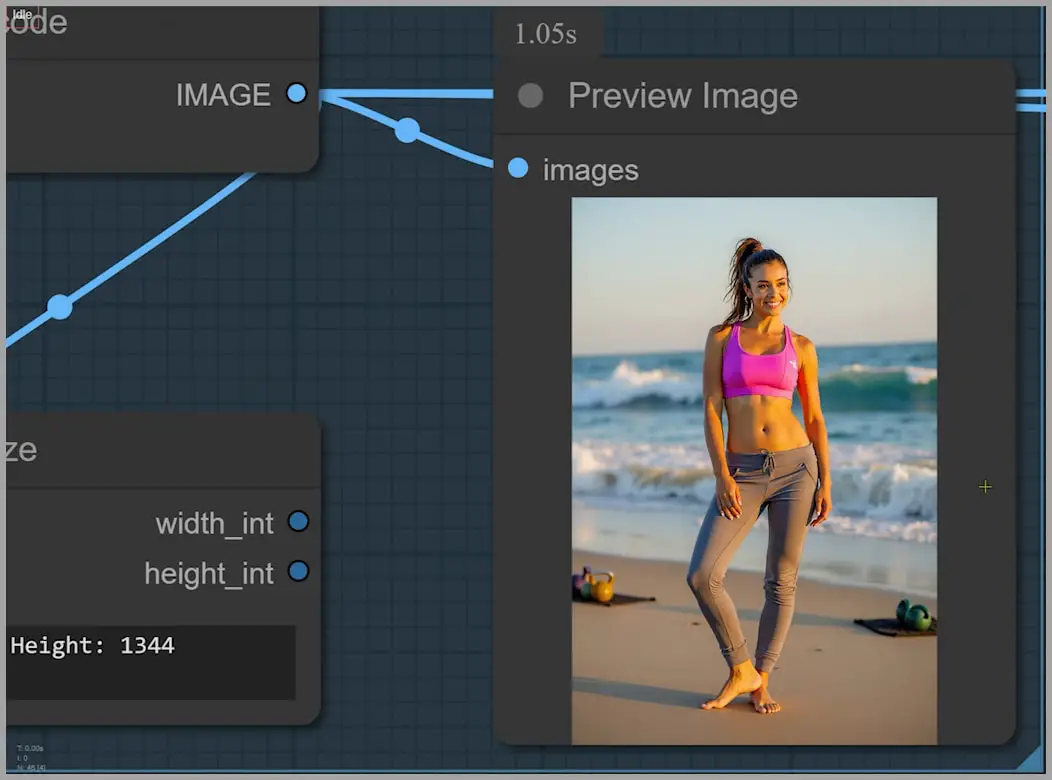
The “Image Remove Bg” node isolates the subject by removing the original background.
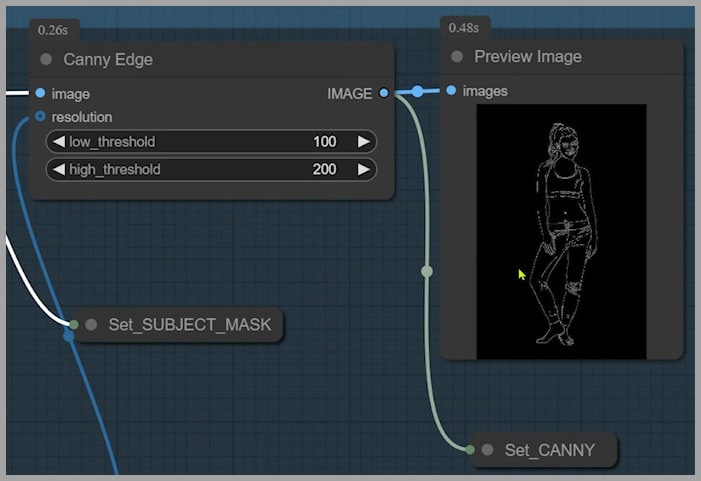
3. Generate a Contour Map
The Canny model (from Black Forest Lab) creates a contour map of the subject.
4. Generate Image with the Contour Map
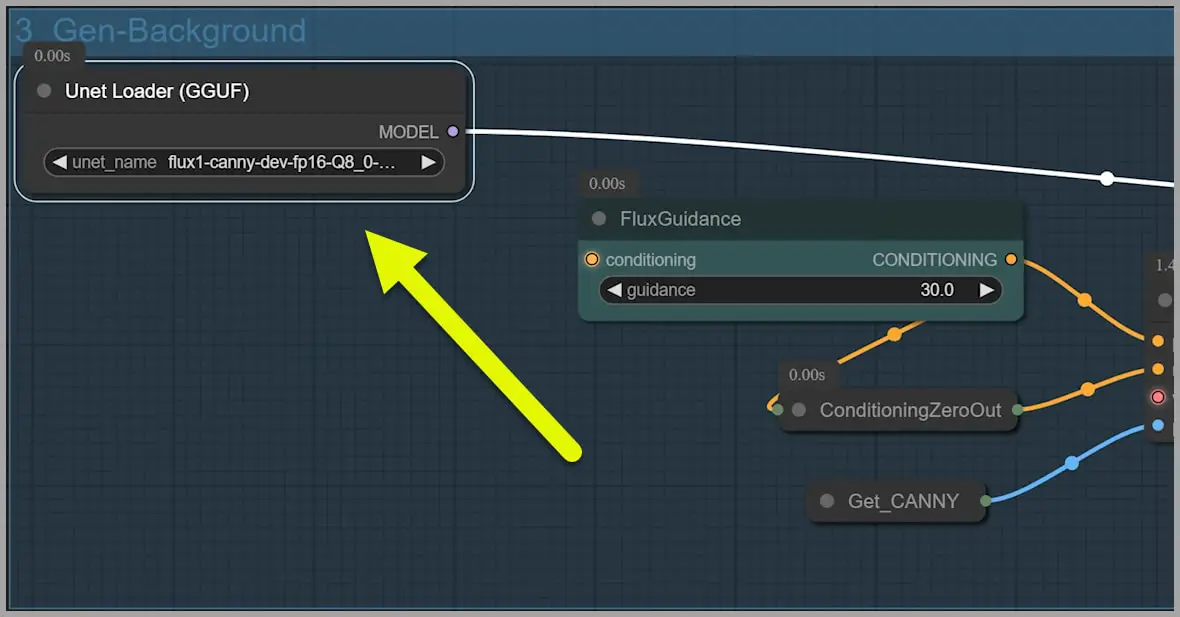
Using this contour map, the Canny model from Black Forest Lab steps in to create a new version of the subject and background based on the outline.
For this task, a quantized version of the model is sufficient. I used the Q8 version, which is lightweight and efficient. If resources are limited, even the Q4 version works fine.
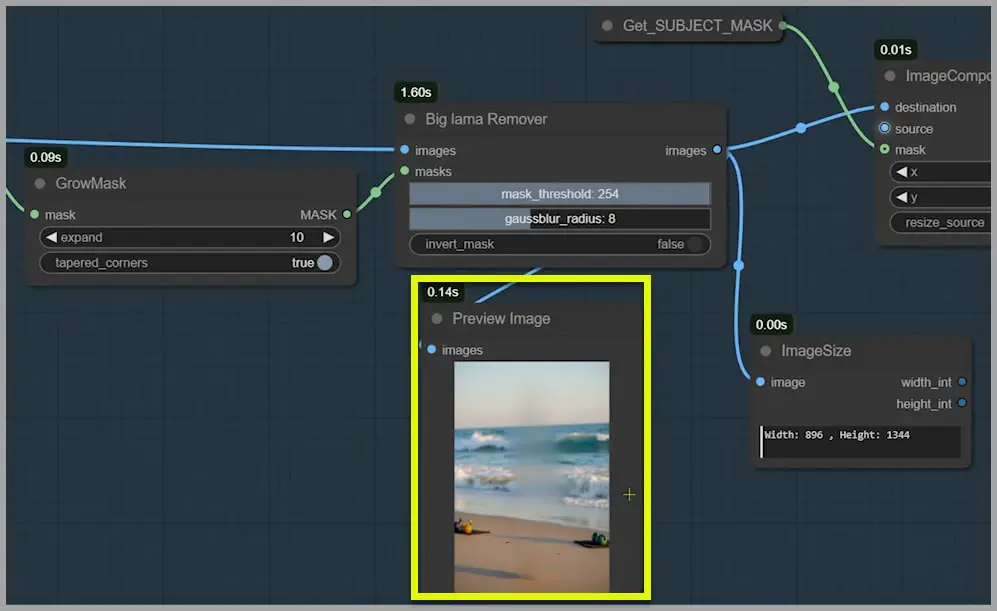
5. Replace the Background
The subject is temporarily removed, leaving only the new background.
Afterward, the original subject is pasted back onto this background, creating an intermediate composite image.
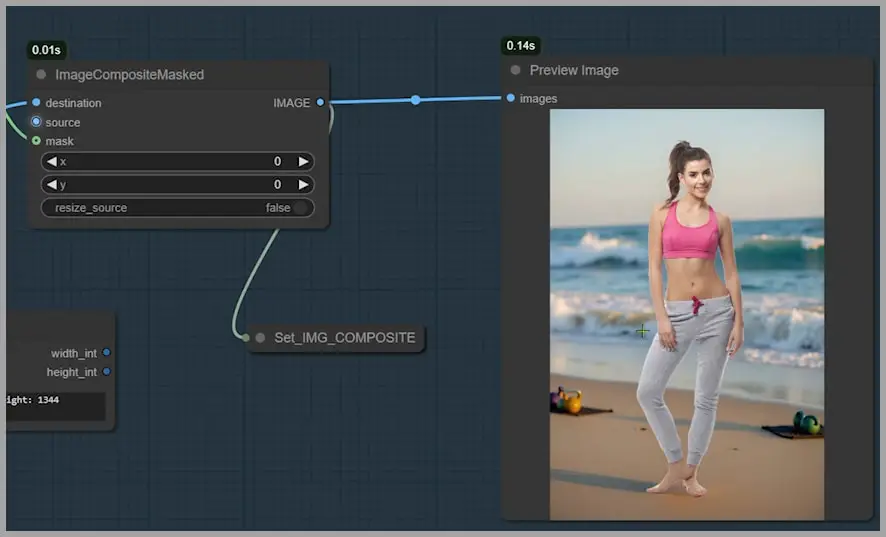
5. Use the Composite as a Reference
The intermediate composite image serves as the reference for the Redux model, which maintains lighting consistency between the subject and the new background.
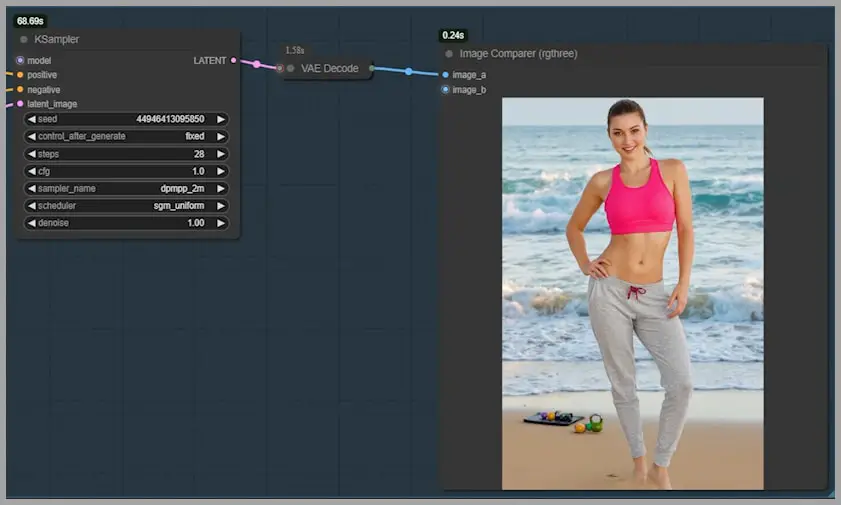
Exploring the Advanced Workflow
The advanced workflow builds on the basic workflow’s foundation while introducing greater flexibility and control. It’s designed for scenarios where natural lighting, realistic integration, and subject detail are critical. Let’s dive into how it works!
Getting Started
- Deactivate Other Node Groups
- Begin by deactivating unnecessary node groups to focus on the advanced setup.
- Initial Steps
- Load the required models, define your prompt, and remove the background. These steps mirror the basic workflow.
Choosing the Right Checkpoint
Selecting an appropriate checkpoint is crucial for achieving the desired result:
- PixelWave: Offers artistic results with realistic skin textures, making it a great choice for natural looks.
- LoRA Compatibility:
- PixelWave isn’t highly compatible with LoRA. If you plan to use LoRA for a specific face, opt for another checkpoint.
- It’s best to introduce LoRA later in the face replacement stage for optimal results.
Pro Tip: The accuracy of face swaps depends on how closely the target face resembles the training dataset. For unique features, consider training a LoRA specific to the subject.
Step-by-Step Process
- Adjust Image Dimensions
- Use the “Constrain Image” node to optimize image dimensions. For example:
- Maximum height: 2000 pixels.
- Width: Automatically adjusts to maintain proportions (e.g., 1333 pixels for a portrait).
- Use the “Constrain Image” node to optimize image dimensions. For example:
- Preview the Isolated Subject
- After removing the background, preview the subject using the “Preview Bridge (Image)” node.
- At this stage, focus on preserving the subject’s body and clothing as faithfully as possible.

- Prepare for Face Replacement
- The nodes to the right of the preview isolate the subject’s face for detailed processing.
- View the cropped face in the preview node, which serves as a reference for subsequent steps.
- Generate the New Background
- The reference portrait with the background removed acts as the baseline for creating a new background.
- This step introduces flexibility by enabling independent background generation, ensuring seamless integration with the subject.
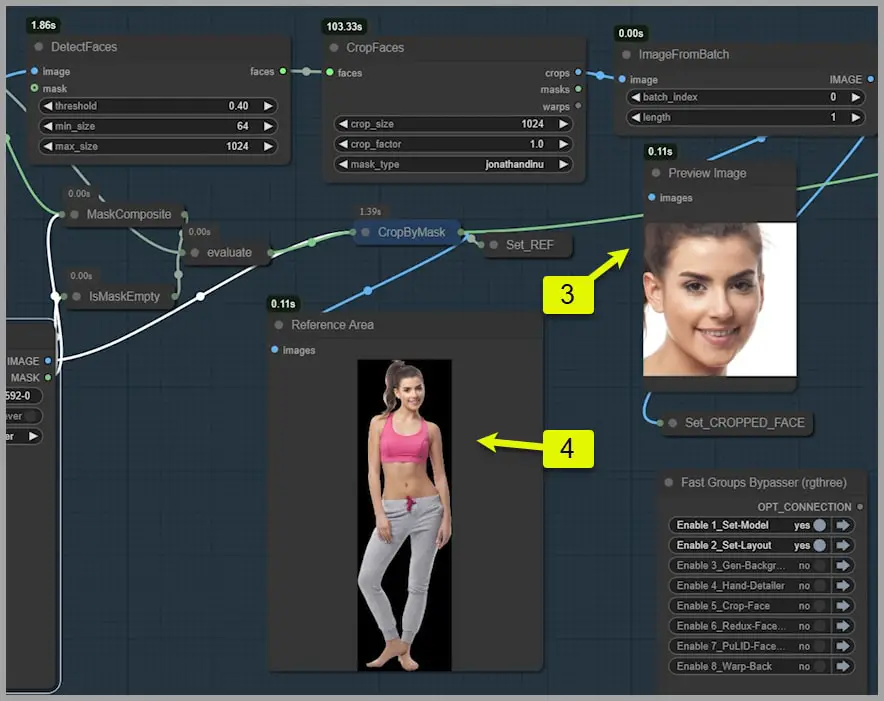
Generating the Background with the Advanced Workflow
The third node group in the advanced workflow focuses on creating a new background. This stage offers significant flexibility and customization compared to the basic workflow, enabling you to tailor the output to fit your vision.
Setting Up the Background
- Define the Background Content
- The background is generated based on the prompt you set earlier in the first node group.
- Control the Image Size
- The “Empty Latent Size Picker” node allows you to choose from a range of preset image sizes.
- For more control, you can switch to a node that lets you manually input specific dimensions for width and height.
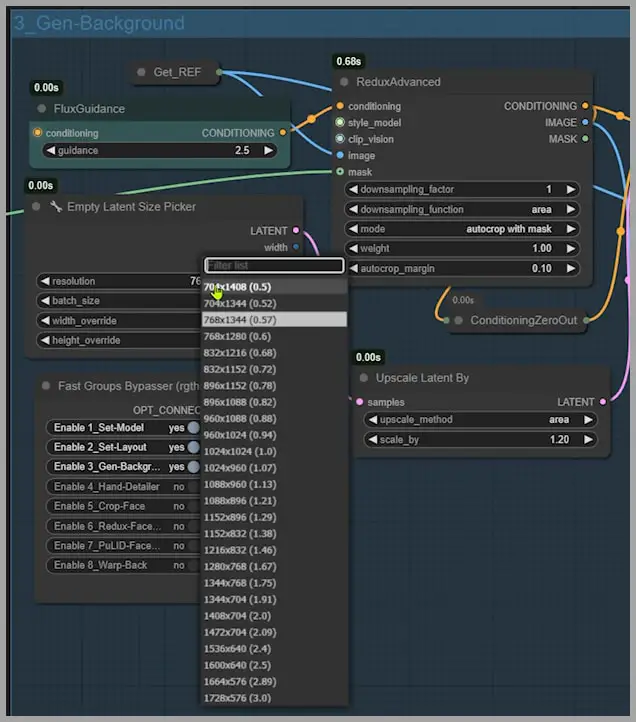
The Power of the ReduxAdvanced Node
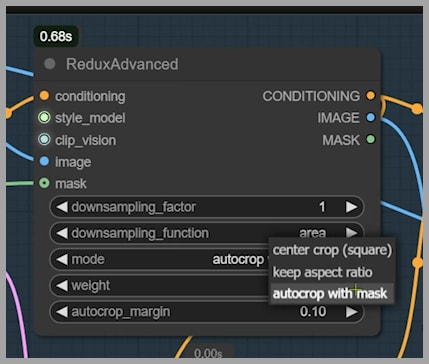
The ReduxAdvanced node is the centerpiece of this workflow, functioning like an advanced version of the IP-Adapter node. This tool offers unparalleled control over the final output, letting you create:
- Full-body photos
- Half-body portraits
- Close-up headshots
Customizing the Reference Area
Here’s how the ReduxAdvanced node works:
- Input an Image and Mask
- The node automatically crops the image based on the mask you provide and uses the cropped section as a reference.
- You can preview this reference in the image preview node to ensure it aligns with the mask.
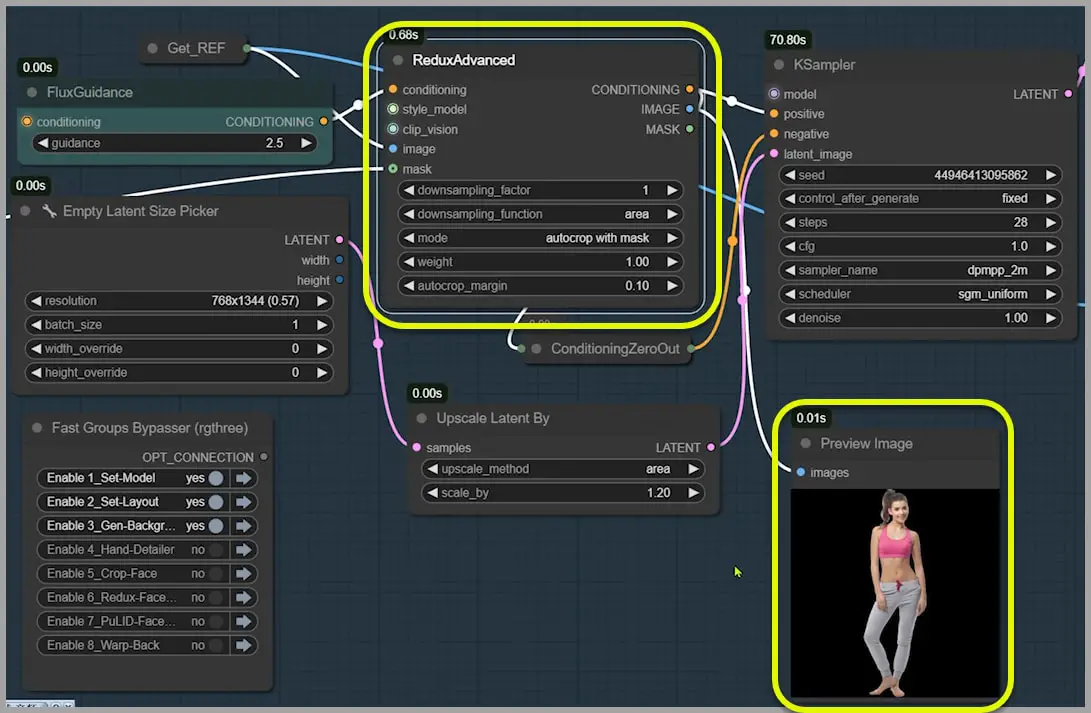
- Enable “Autocrop with Mask”
- Activate this mode to focus the node on the specific area defined by the mask. This feature is especially useful for tailoring outputs to your exact requirements.
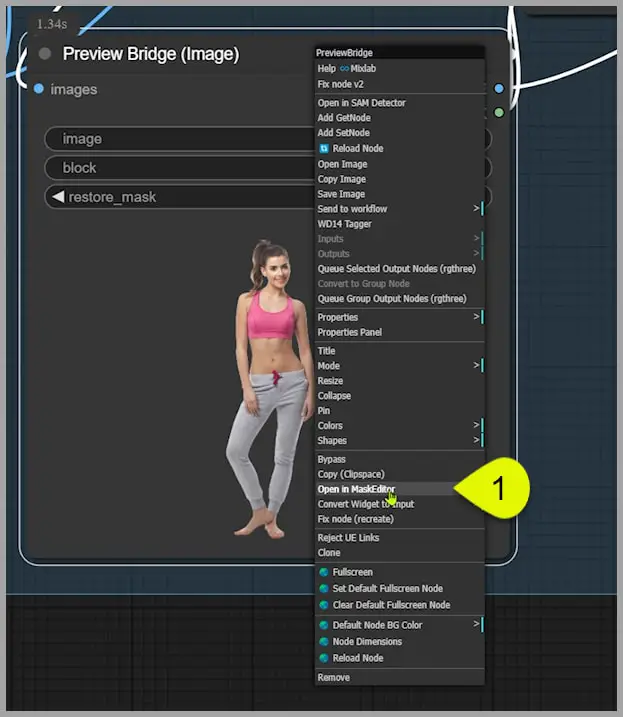
- Edit the Reference Area
- Use the “Preview Bridge (Image)” node to further customize the reference.
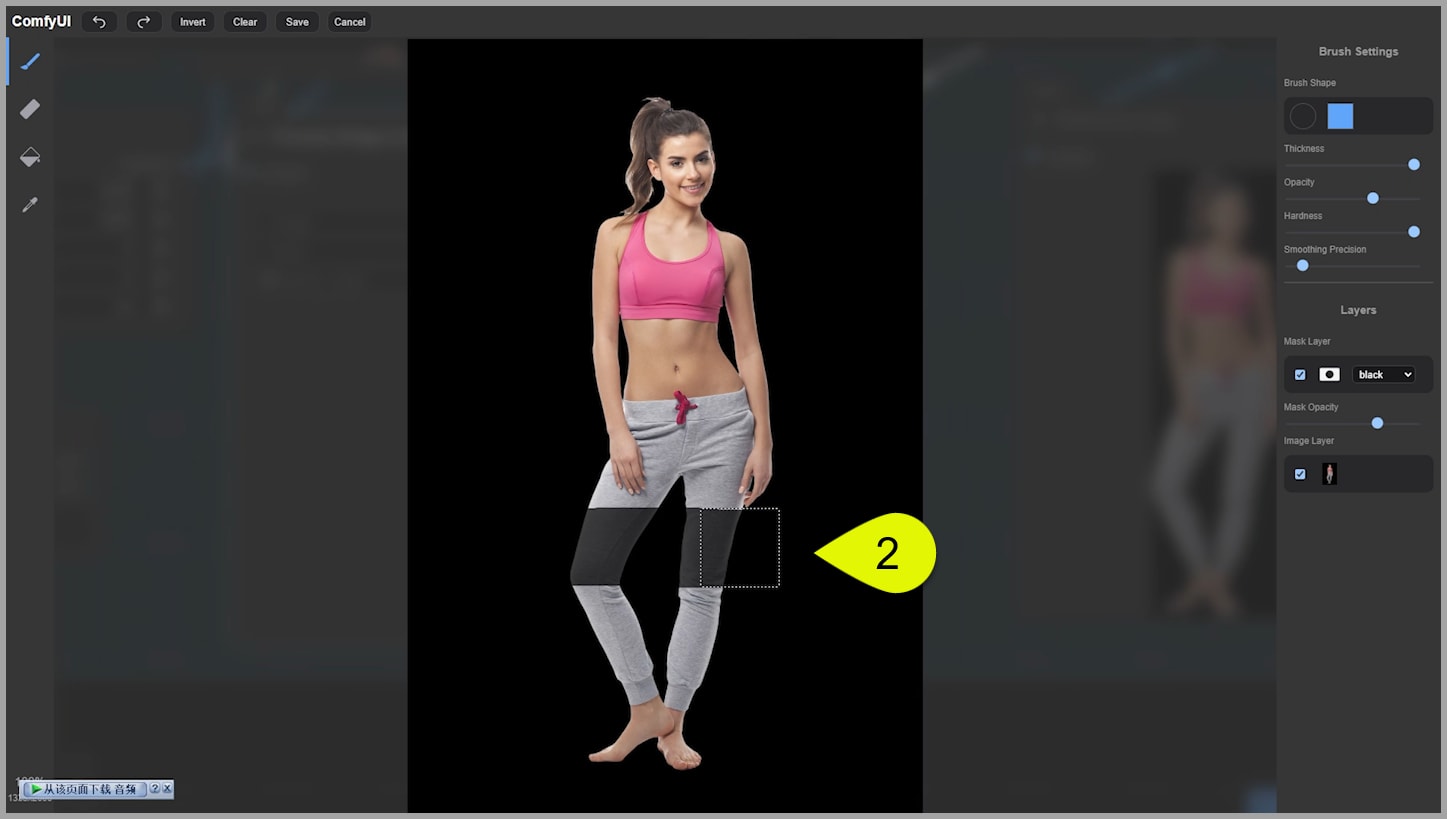
- Right-click to open the mask editor, where you can paint over areas to exclude from the reference. For example:
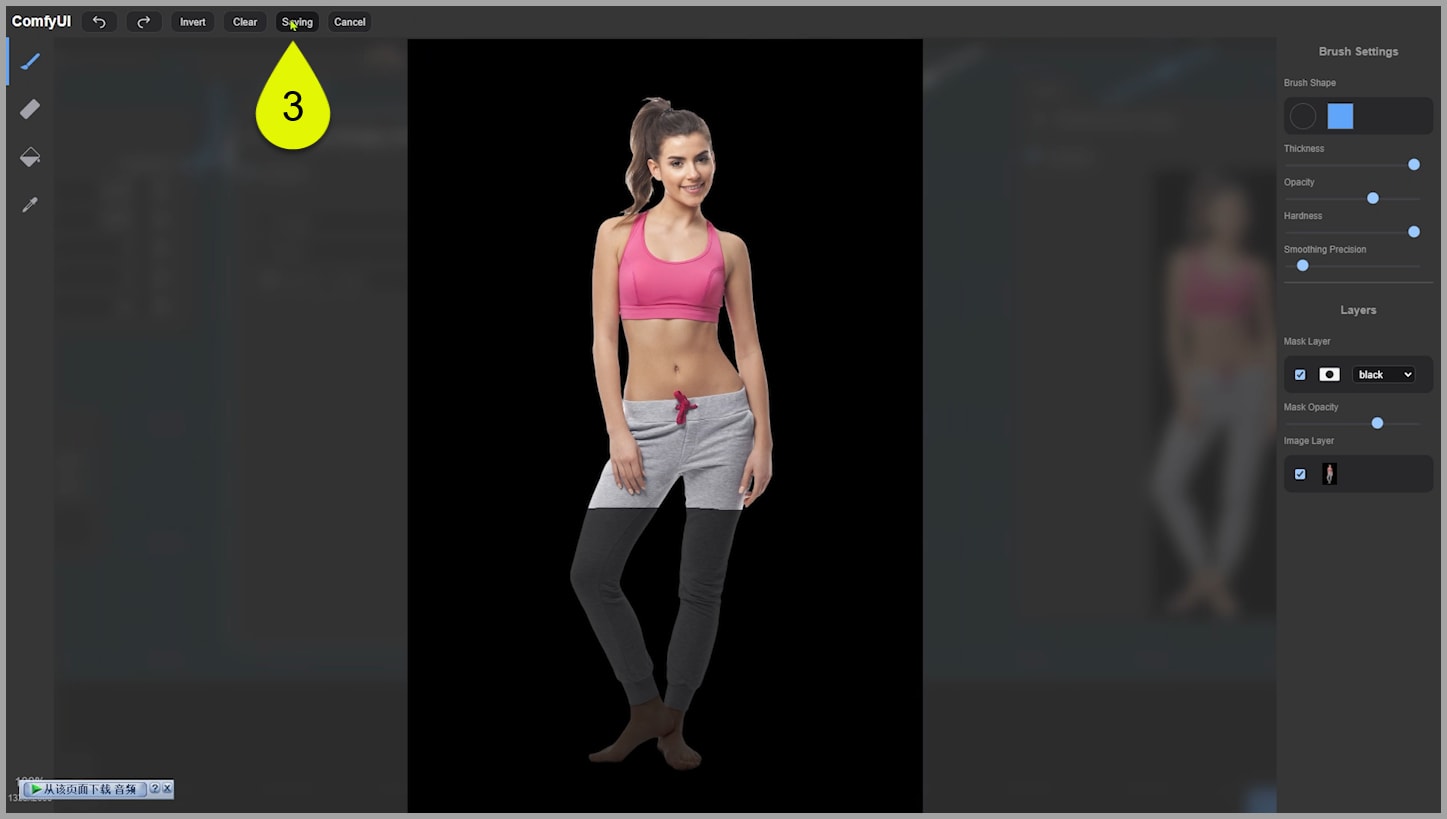
- To create a half-body portrait, mask out the calves and feet of a full-body image.
- Save your changes and rerun the workflow.
Fine-Tuning the Output
Even with precise references, generated outputs may occasionally have small issues (e.g., misaligned hands). Rerun the workflow to address these, or adjust the mask for better results.
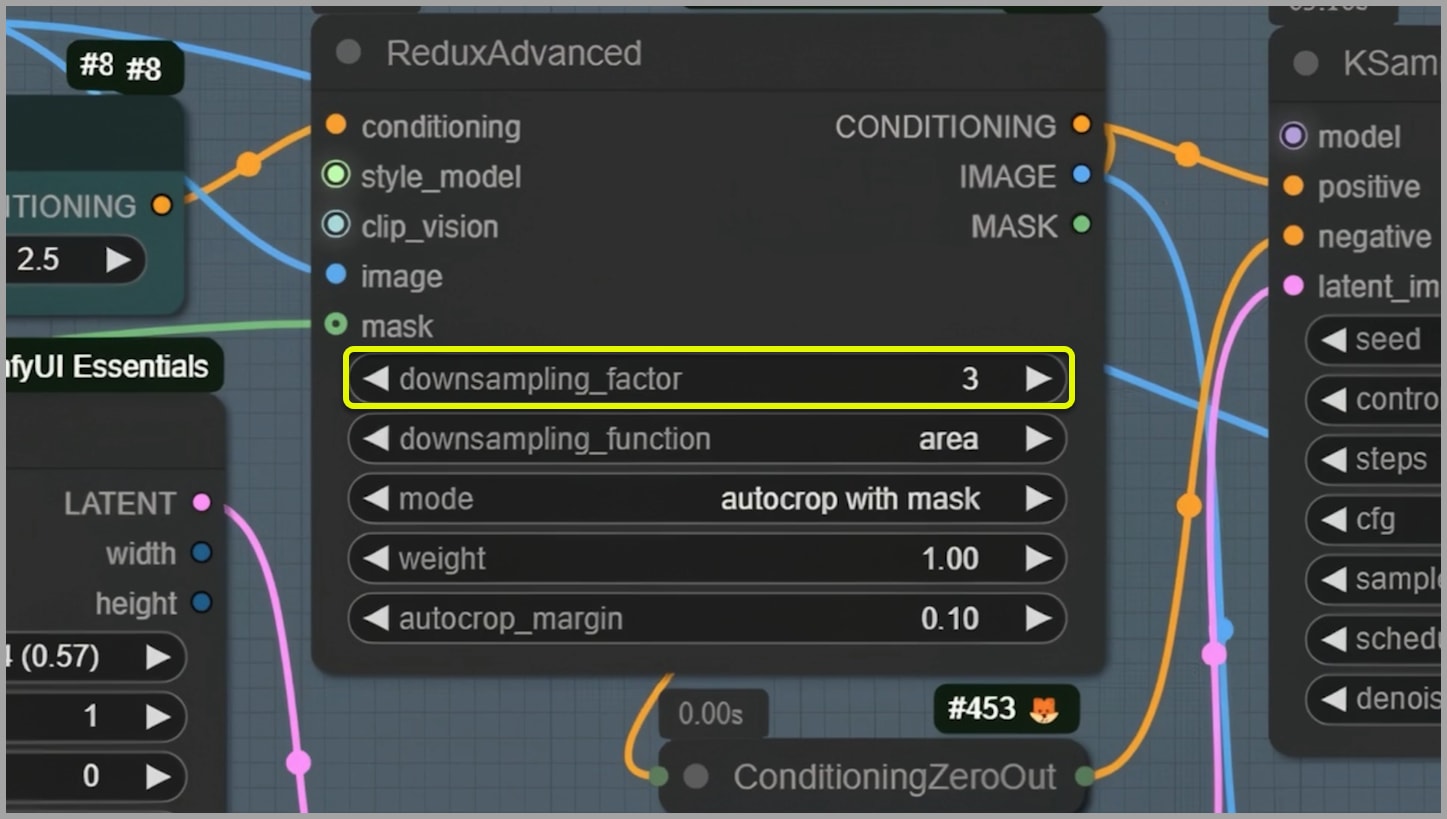
Leveraging the Downsampling Factor
The “downsampling_factor” parameter in the ReduxAdvanced node allows further customization:
- Set to 1: Maintains the strongest reference effect, keeping the output close to the original subject.
- Increase the Value: Introduces flexibility, enabling changes to details like clothing or hairstyles.
Example: I replaced a white T-shirt with a sports bra by increasing the downsampling_factor to 3. While this altered the hairstyle slightly, the trade-off provided the desired outfit change.
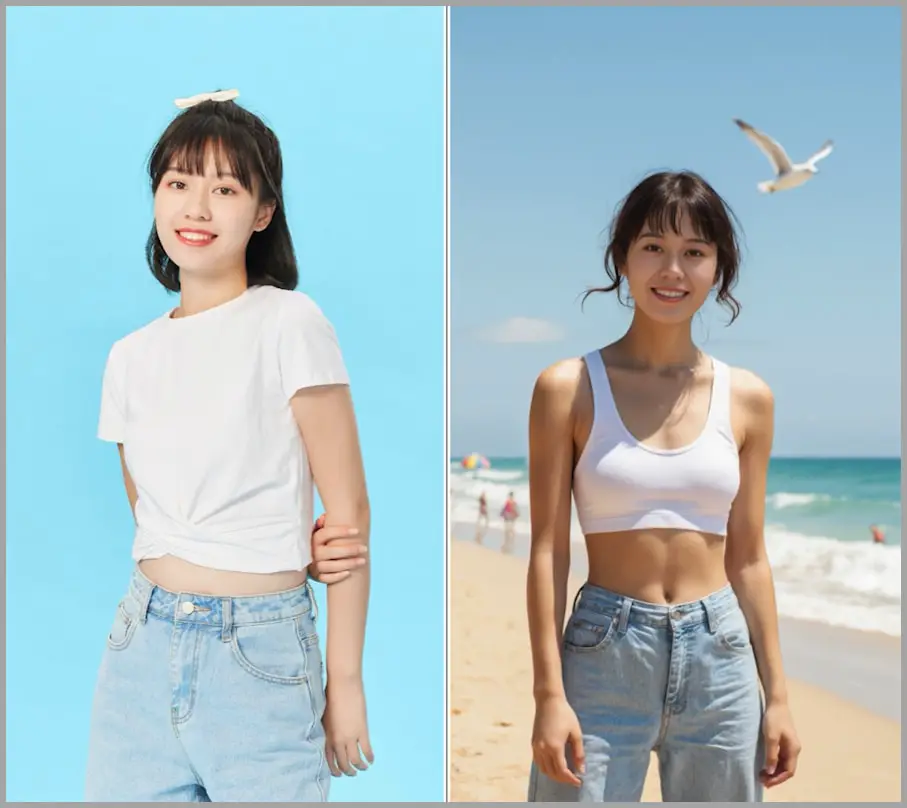
Caution: Higher downsampling values may lead to unexpected changes, so use this parameter judiciously.
Here’s the rewritten section on refining the subject and processing the face:
Refining the Subject and Processing the Face
Once you’re satisfied with the base image, the next step is to address any imperfections in the composition, such as issues with the hands or other minor details. Following this, you’ll refine the face to ensure it aligns seamlessly with the overall image.
Fixing Composition Issues
- Open the Next Node Group
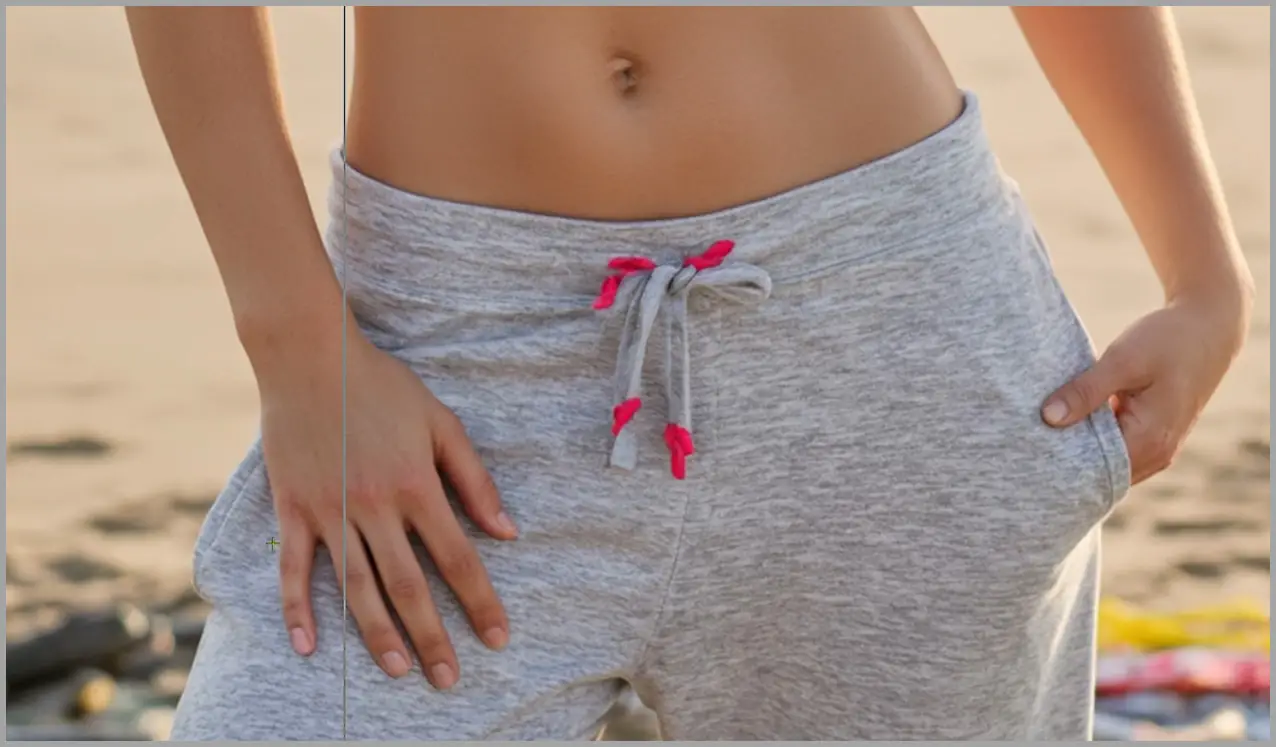
- Use this group to correct small flaws in the composition. For example, hands may appear slightly distorted in the initial output.
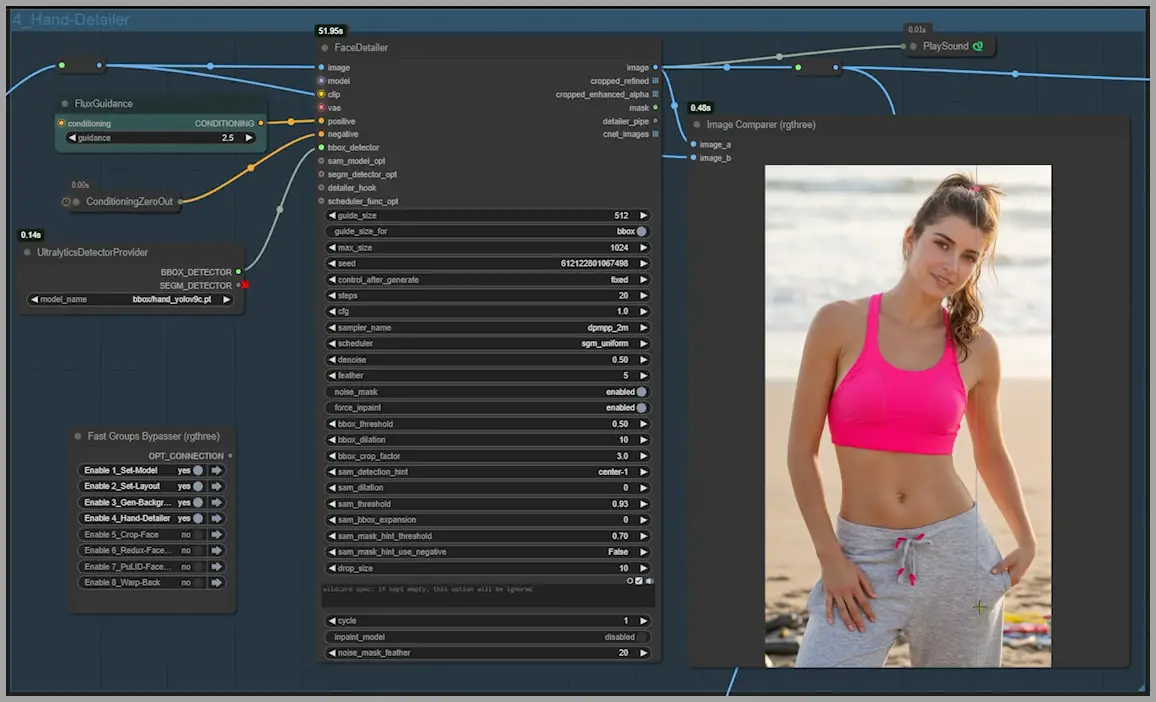
- Refine and Finalize the Main Composition
- After fixing any visible issues, the primary composition—subject and background—is complete. You’re now ready to move on to face processing.
Processing and Replacing the Face
Faces often require additional attention due to their small size in reference images or subtle inaccuracies in generated details. The advanced workflow dedicates a specialized node group for repainting and face replacement.
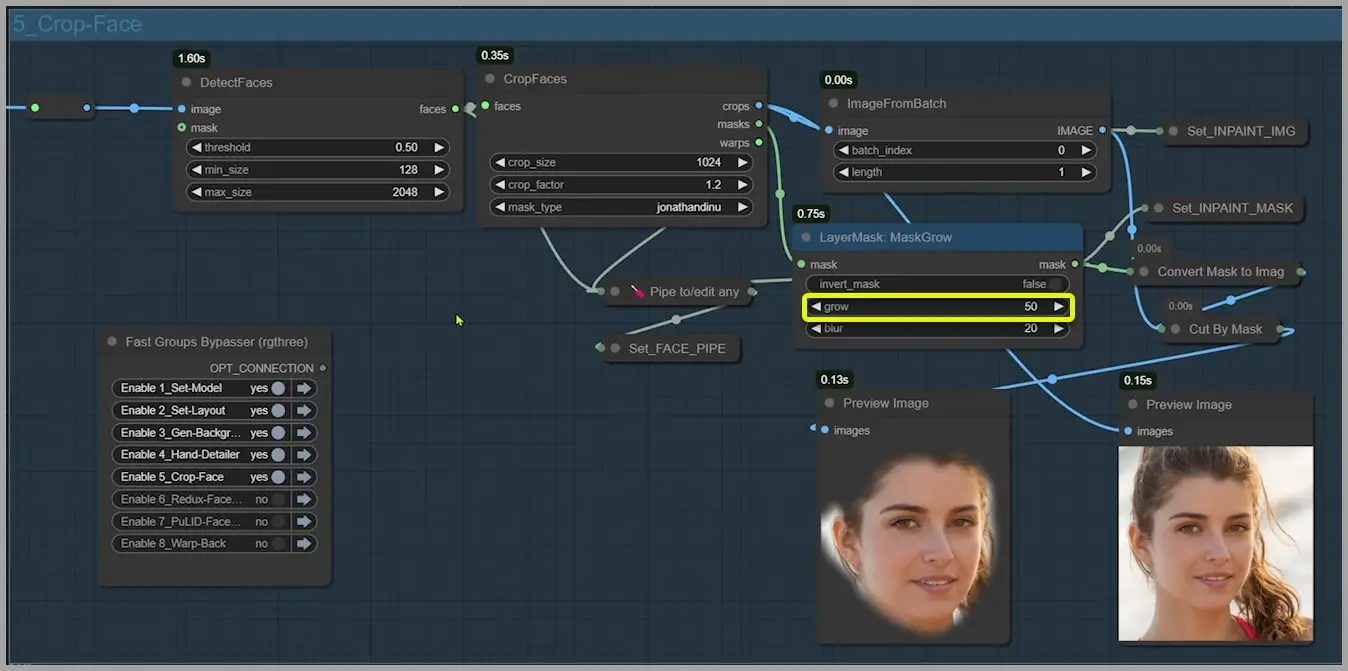
- Crop and Prepare the Face
- The workflow isolates the face by cropping it into a separate image.
- View the cropped face and the repaint area in the preview nodes.
- Adjust the Repaint Area
- Use the “LayerMask: MaskGrow” node to fine-tune the repaint area. The grow parameter lets you control the size of the masked region, ensuring precise adjustments.
- Choose Between Two Face Replacement Methods
- The workflow provides two options for face processing:
- Redux Model: Focuses on consistency and alignment with the main composition.
- PuLID Model: Updated to version v0.9.1, offering a slightly different approach to face refinement.
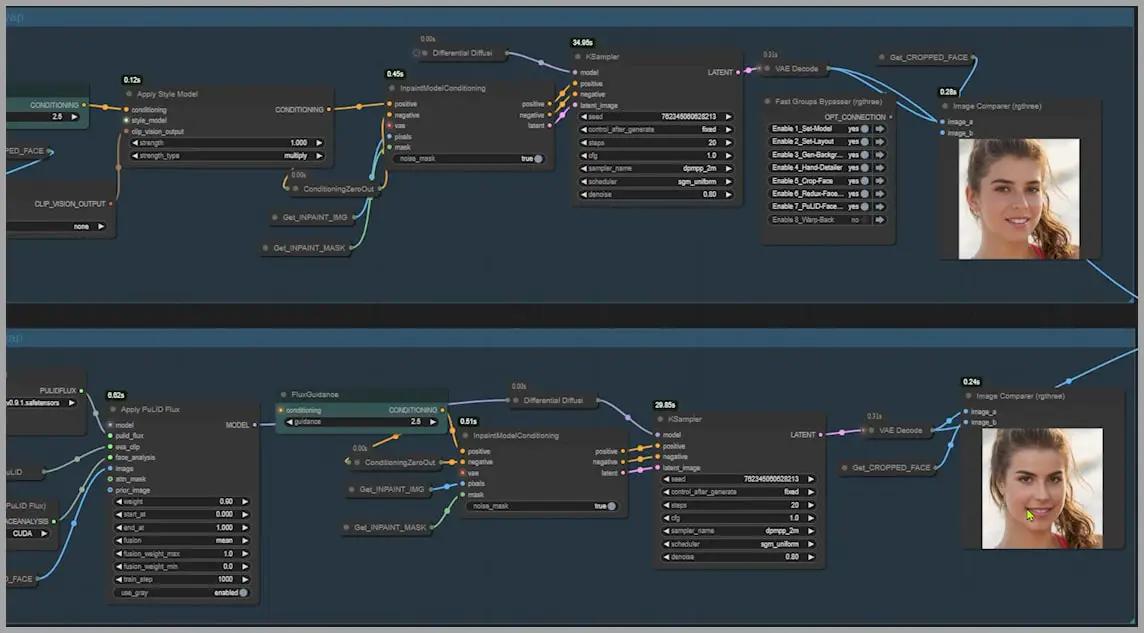
- The workflow provides two options for face processing:
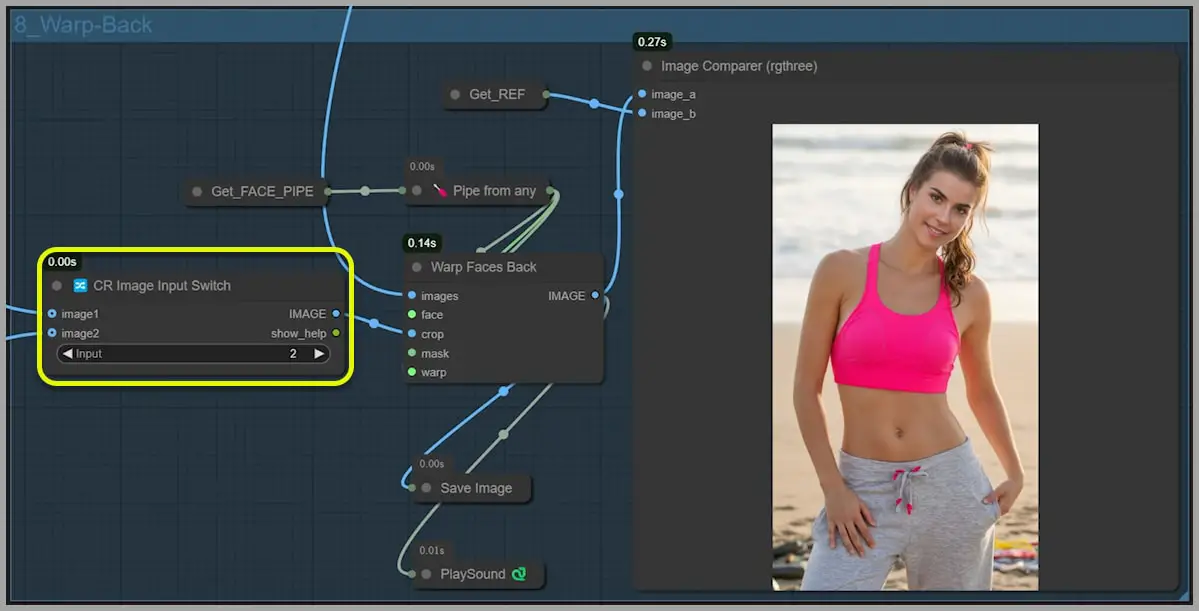
- Integrate the Replaced Face
- Use the final node group to seamlessly blend the replaced face back into the full image.
- The “image switching” node allows you to toggle between the two options:
- Input 1: Face from the Redux model.
- Input 2: Face from the PuLID model.
- After making your selection, rerun the workflow to integrate the chosen face into the final composition.
