Mastering Face Swap in ComfyUI with Flux 2 Klein
Face swapping is one of the most popular and practical tasks in AI image editing.
In this article, I’ll walk you through a complete workflow for performing high-quality face swaps using ComfyUI and the Flux 2 Klein model.
If you’ve previously worked with head swapping, it’s important to know that face swapping is fundamentally different. The two cannot be reliably combined into a single workflow, which is why this dedicated setup is necessary.
By the end of this guide, you’ll understand not just how to do face swapping—but why each step matters, so you can adapt the workflow to your own needs.
YouTube Tutorial:
Previewing Results and Use Cases
Let’s start with what makes this workflow powerful.
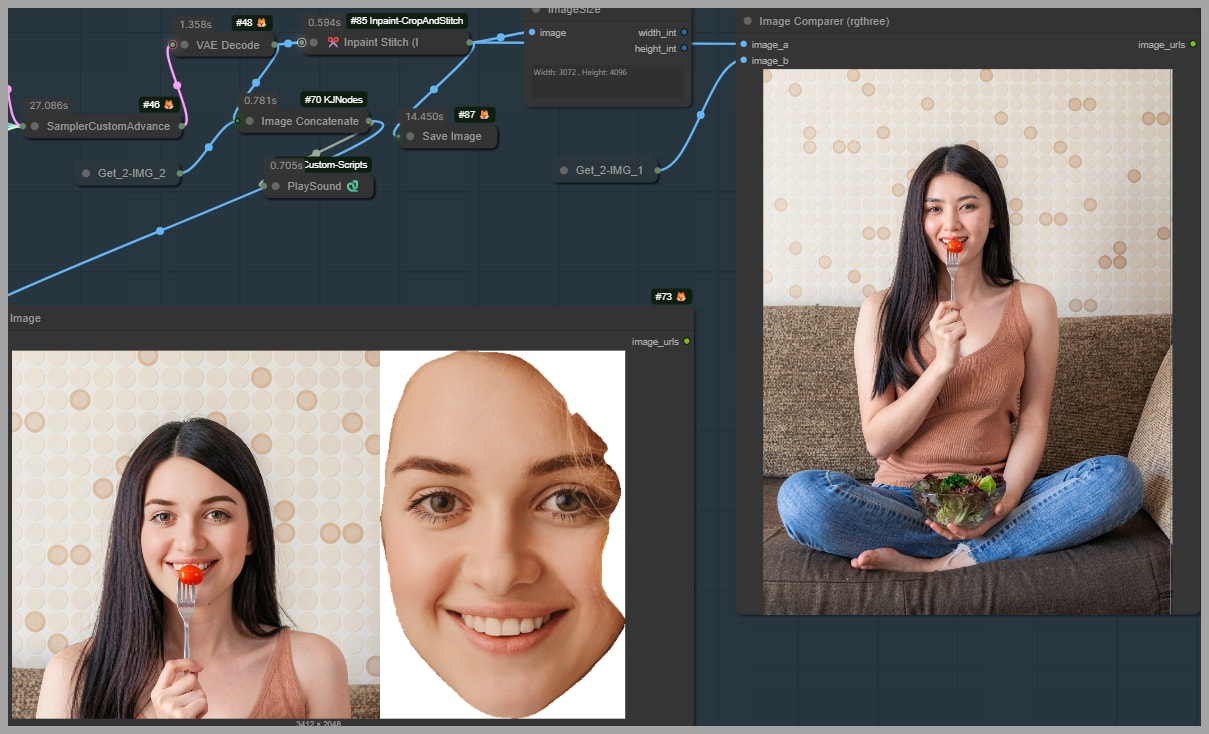
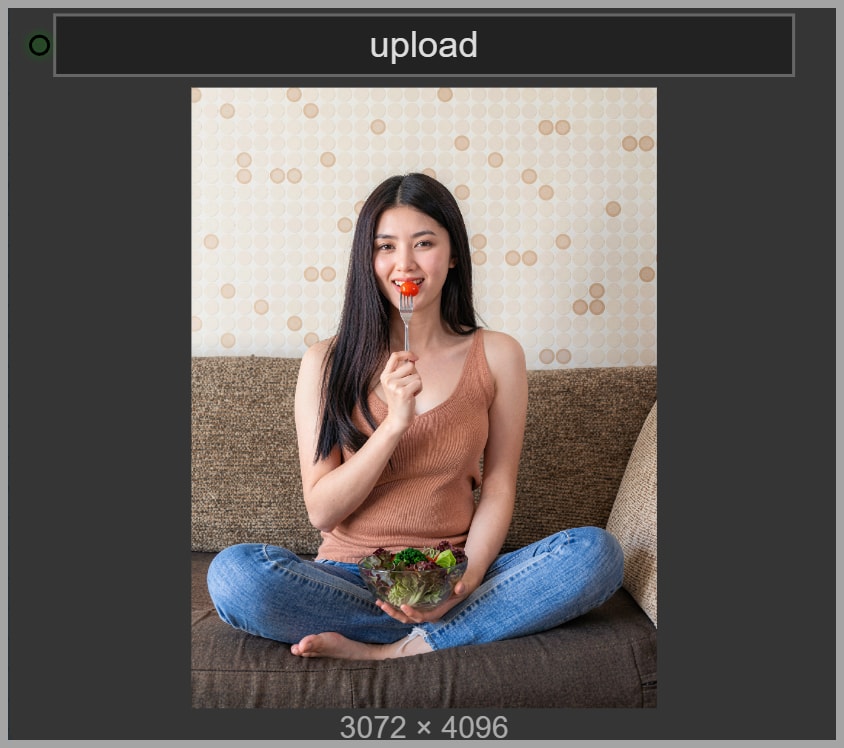
Even in challenging scenarios—like when part of the face is blocked (e.g., by a fork or object)—this method can:
- Preserve the obstruction naturally
- Maintain lighting consistency
- Generate a face that closely matches the reference
This makes it ideal for:
- Portrait editing
- Character replacement
- Creative photography enhancements
Challenges with High-Resolution Images
One major issue with face swapping is image size.
For example:
- Original image: 3072 × 4096 pixels
Processing the entire image:
- Consumes a lot of VRAM
- Slows down generation
- Reduces efficiency
Solution: Work on a Cropped Region
Instead of processing the whole image, we:
- Detect the face
- Crop only the relevant area
- Perform the swap locally
This dramatically improves performance without sacrificing quality.
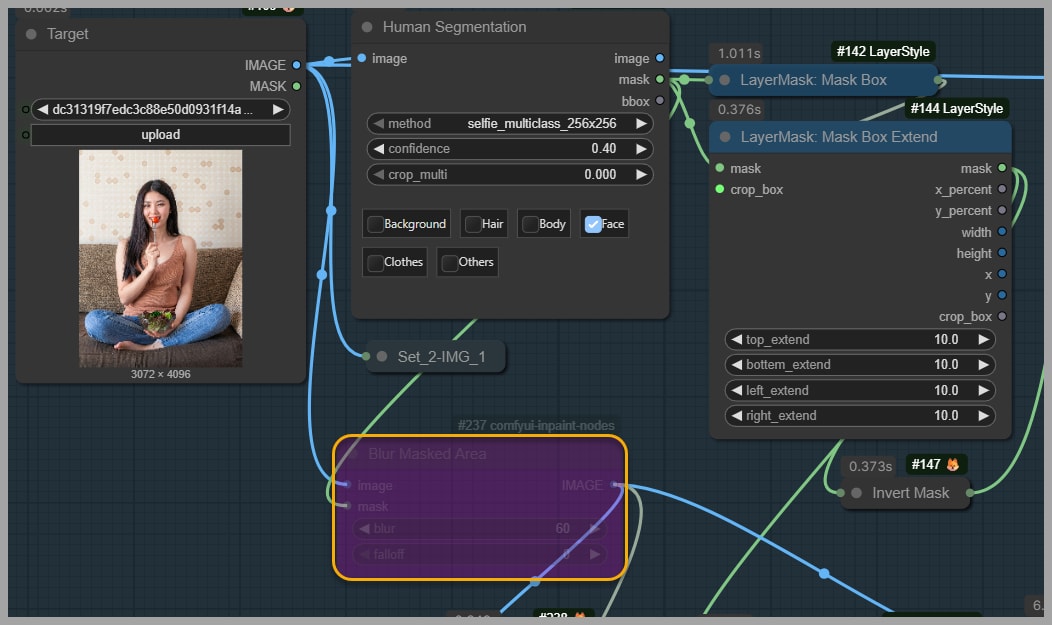
Step 1 – Isolating the Face Using Segmentation
The first step is identifying where the face is.
Node Used: Human Segmentation
- Generates a mask of the human figure
- For this task, we select only the face region
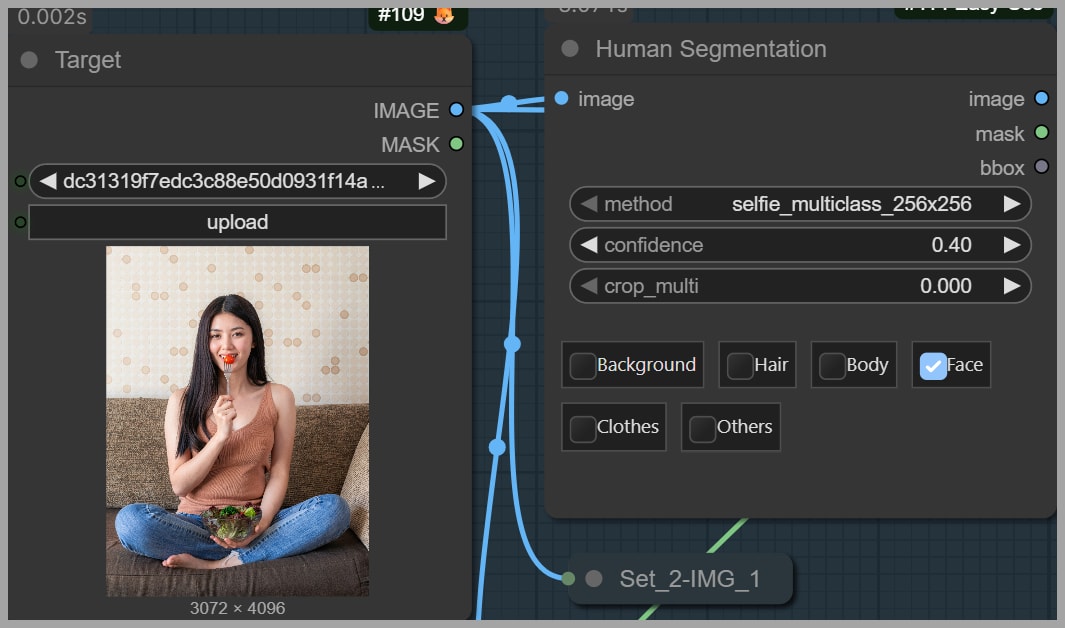
Result:
A clean mask that isolates the face area from the rest of the image.
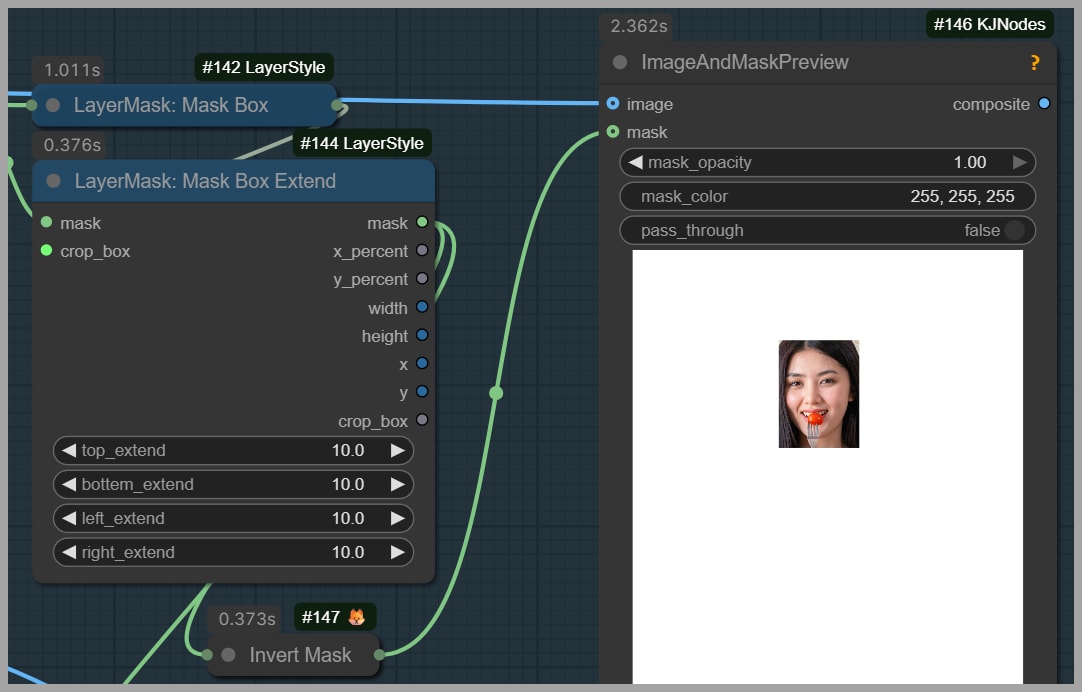
Step 2 – Creating and Expanding the Mask Region
Now that we have a face mask, we convert it into a usable region.
Nodes Used:
- Mask Box → Converts mask into a rectangle
- Mask Box Extend → Expands the area
Why expand?
Because the face alone is not enough. We also want:
- Neck
- Shoulders
- Surrounding context
This helps the model understand:
- Angle
- Perspective
- Lighting consistency
Preview Step:
Use Image and Mask Preview to verify:
- The face is fully included
- The crop isn’t too tight
Step 3 – Preparing the Crop for Inpainting
Now we prepare the image for editing.
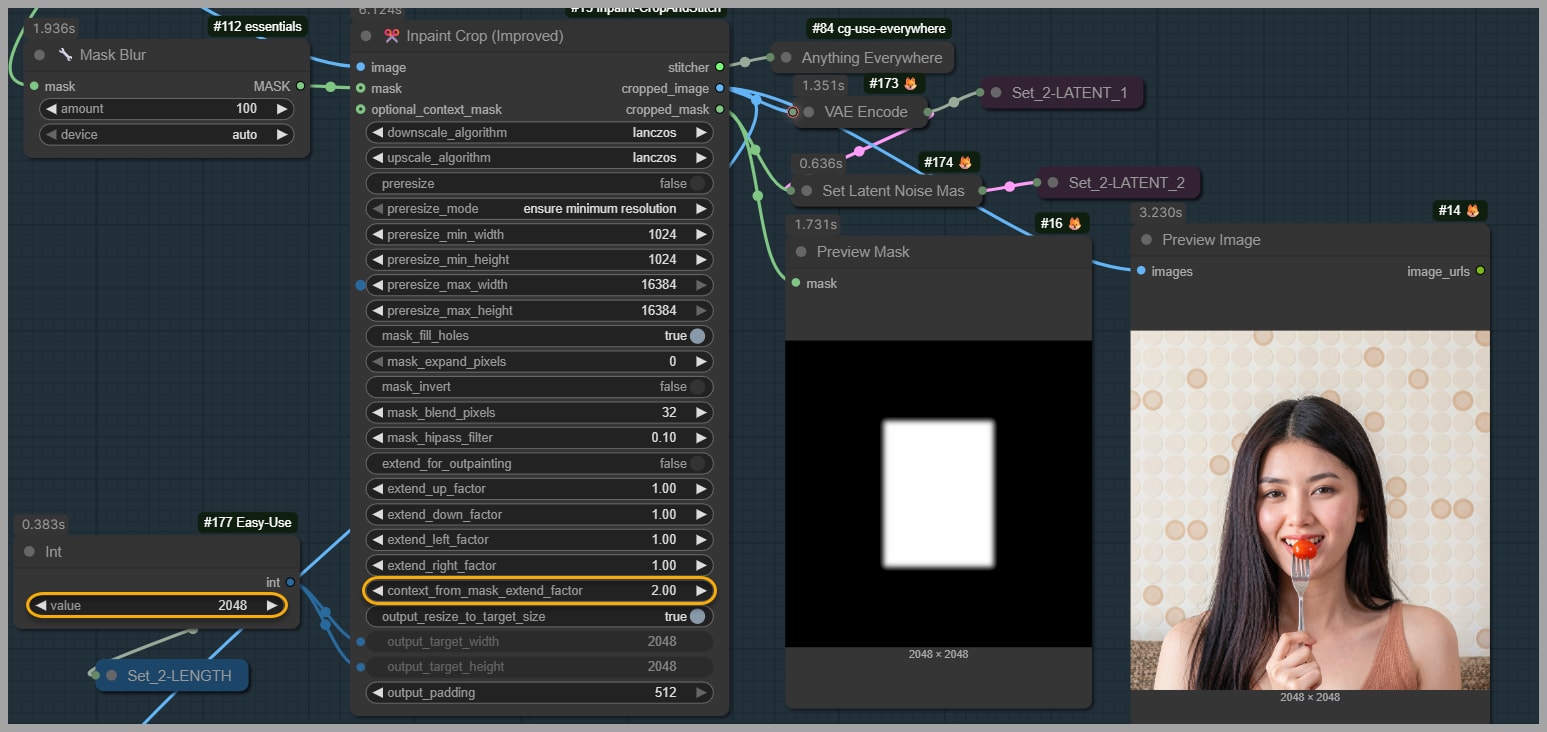
Node Used: Inpaint Crop
This node:
- Creates a square crop (important!)
- Includes both image and mask
- Resizes to a workable resolution (e.g., 2048 × 2048)
Key Setting:
- Context From Mask Extend Factor
This controls how much surrounding area is included.
Why square crops?
They:
- Improve consistency
- Align better with model expectations
- Reduce distortion
Step 4 – Preparing the Reference Face
The reference face determines the final result quality.
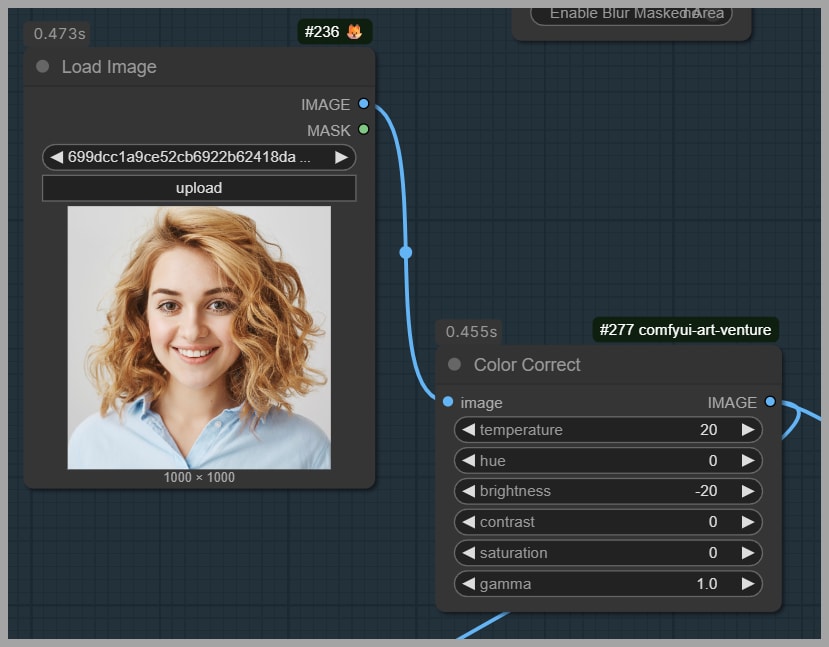
Optional: Color Adjustment
Node: Color Adjust
Sometimes the face doesn’t match the original image due to:
- Lighting differences
- Skin tone mismatch
You can fix this by:
- Increasing temperature → warmer skin
- Lowering brightness → better blending
If unnecessary, you can skip this step.
Isolating the Reference Face
Again, use:
- Human Segmentation
This ensures:
- Only the face is used
- No background interference
Refining the Mask
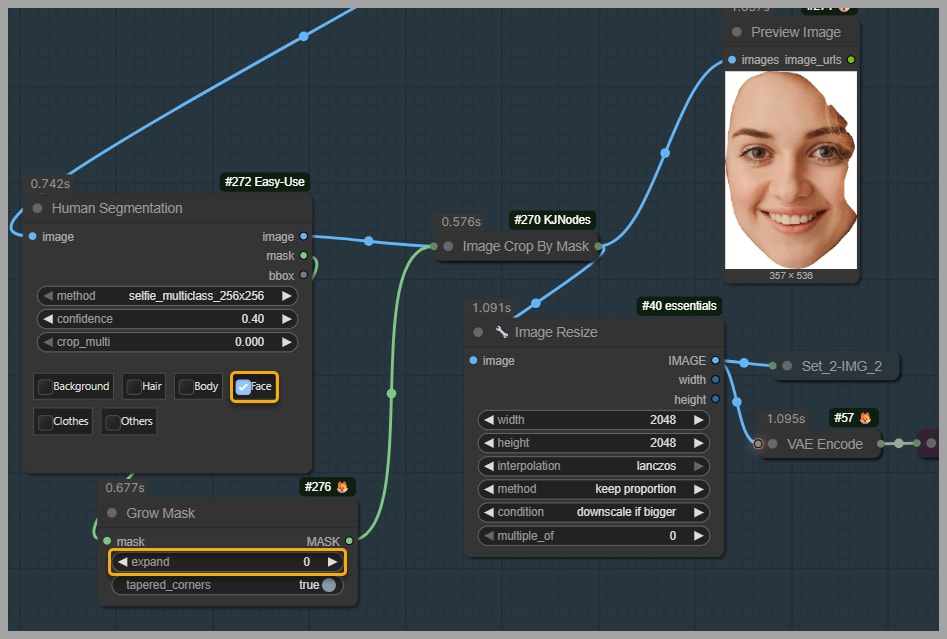
Node: Grow Mask
- Slightly shrinks the mask
- Removes unwanted areas like hair edges
Why?
Hair can:
- Distort color blending
- Reduce face consistency
Step 5 – Writing an Effective Prompt
Prompting is critical for good results.
Example Prompt:
Replace the face in Image 1 with the face from Image 2. Adjust the new face’s lighting, angle, scale, and hairline so it blends naturally with Image 1.
Key Elements:
- Clear instruction (replace face)
- Reference mapping (Image 1 vs Image 2)
- Blending guidance (lighting, angle, scale)
Keep it simple—but precise.
Step 6 – Generating the New Face with Flux 2 Klein
At this stage, all inputs are ready:
- Cropped target image
- Face mask
- Reference face
- Prompt
What happens here?
The model:
- Transfers identity from reference
- Adapts it to the target context
- Maintains realism and alignment
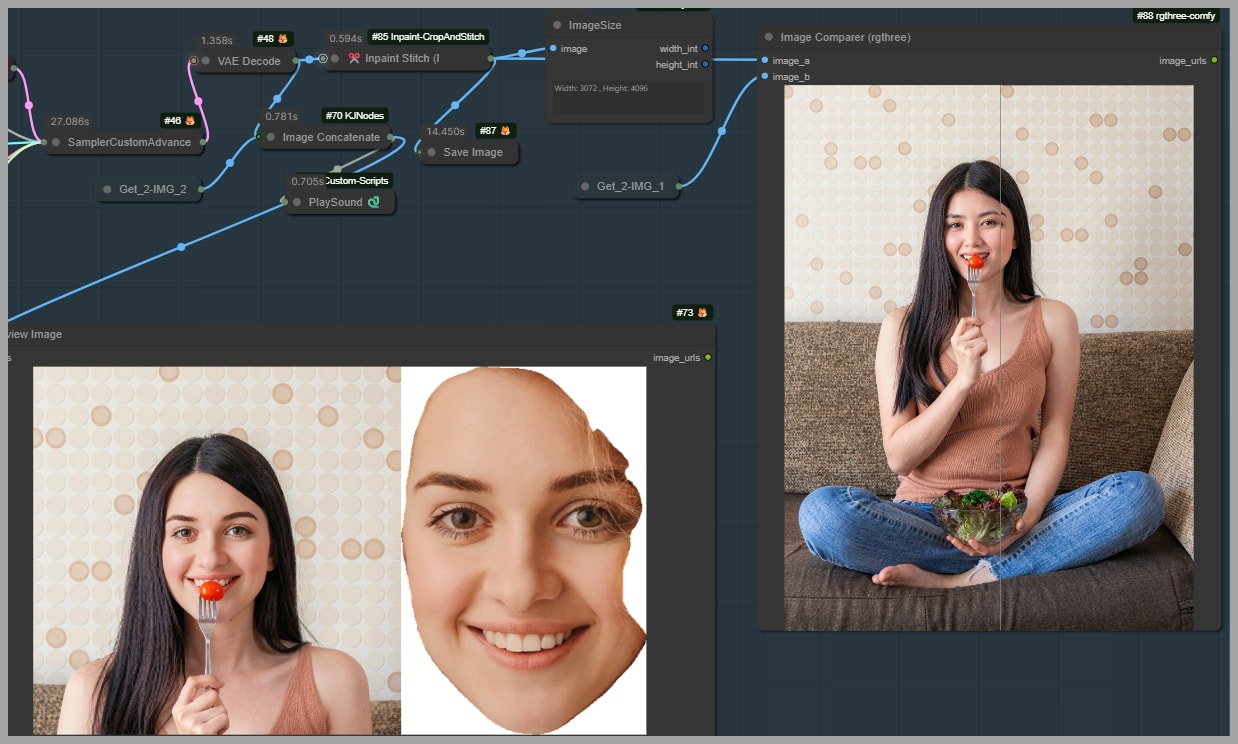
Tip:
Compare:
- Generated face
- Reference face
This helps evaluate:
- Similarity
- Accuracy
Step 7 – Stitching the Face Back into the Original Image
Node Used: Inpaint Stitch
This final step:
- Places the generated face back
- Blends it into the full-resolution image
Result:
A seamless final image where:
- The new face looks natural
- Original elements remain intact
Optional Technique – Improving Face Consistency
Sometimes, the face may not look similar enough to the reference.
Node: Blur Masked Area (Optional)
By default:
- Disabled
What happens when enabled?
- The masked region is blurred before generation
- Removes conflicting visual details
When to Use It
Use this if:
- Face similarity is weak
- Model struggles with identity transfer
Drawbacks
Blurring removes important details.
Example issue:
If an object (like a fork) overlaps the face:
- It may disappear in the final result
Why?
Because the model:
- No longer “sees” that object clearly
- Replaces it during generation
Recommendation
- Keep Blur Masked Area OFF in most cases
- Only enable it when necessary
Conclusion
Face swapping in ComfyUI can seem complex at first, but once you understand the workflow, it becomes a powerful and flexible tool.
By:
- Isolating the right regions
- Preparing clean inputs
- Guiding the model with a clear prompt
You can achieve highly realistic and consistent results, even in challenging scenarios.
Take your time experimenting with:
- Mask sizes
- Context areas
- Prompt variations
That’s where you’ll unlock the full potential of this workflow.