Giant 8K Head Swap with Flux.2 Klein — No Detail Loss
If you have been exploring head swap workflows in ComfyUI, this setup offers a strong alternative to earlier approaches.
In this article, I will walk through a head swap workflow built around the Flux 2 Klein model, explain how it works step by step, and show why the optional head swap LoRA is not always the improvement people expect it to be.
What makes this workflow especially interesting is that it aims to preserve three things at once:
- Natural blending
- Strong image quality
- Pose and composition consistency
Even in difficult cases, such as when part of the face is covered by a hand or an object, the workflow can still produce a believable result.
What This Workflow Is Designed to Do
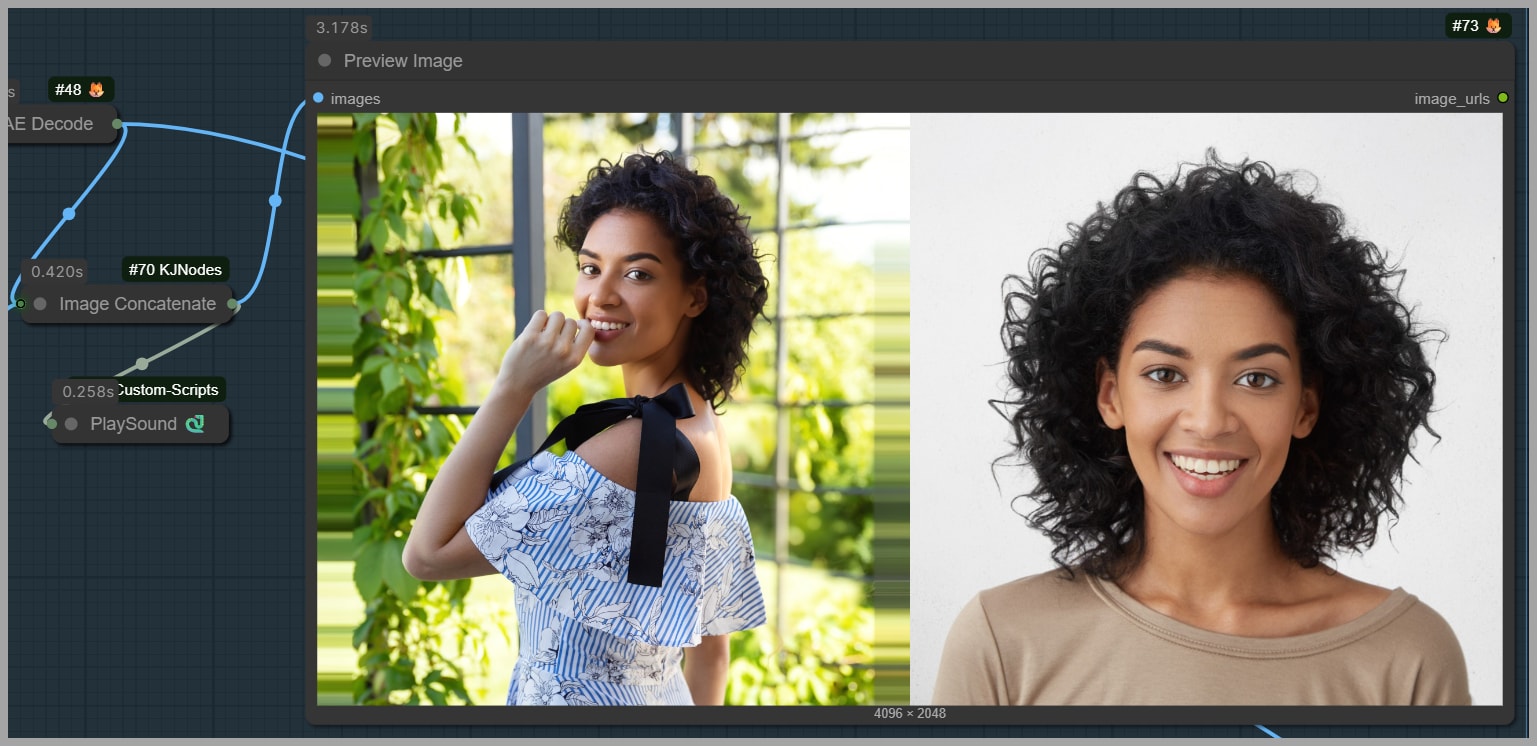
The goal of this workflow is simple: take the head from a reference image and swap it onto a target portrait while keeping the original body, pose, and background intact.
In practice, that means the workflow is not trying to regenerate the entire image. Instead, it focuses only on the region that actually needs editing: the face and hair. That choice is one of the main reasons the final result stays clean and high-quality.
This approach is particularly useful when:
- The original portrait is high resolution
- The subject has a complex pose
- Some of the face is partially hidden
- You want to preserve the original clothing, background, and body position exactly as they are
Why This Method Stands Out
What I find most compelling about this workflow is how well it handles difficult visual situations without degrading the whole image.
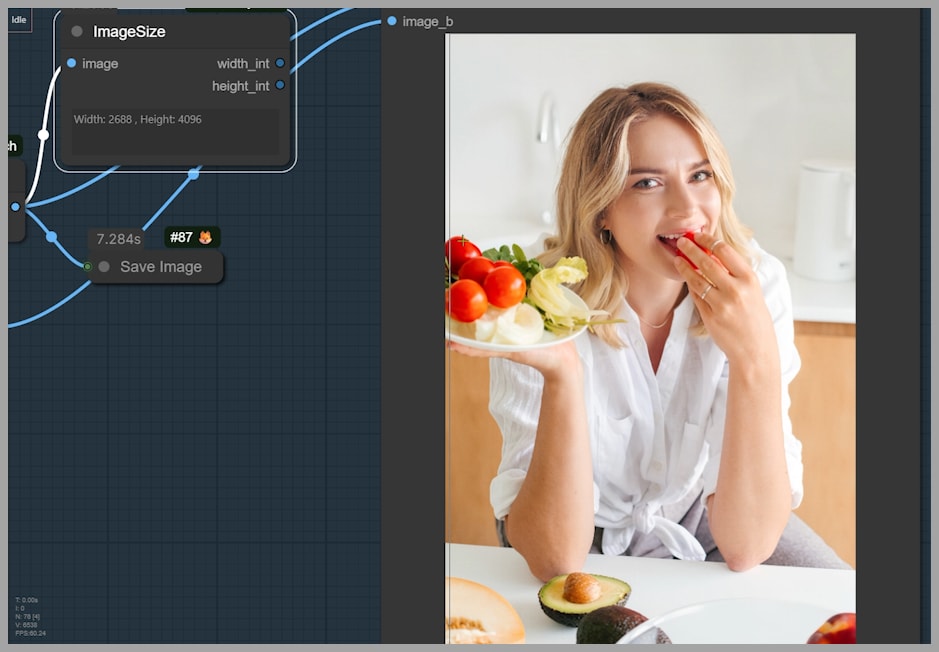
The final output shown in the tutorial is quite large at 2688 × 4096 pixels, which already tells us something important: this is not a tiny experimental render. It is designed to hold up at a high resolution.
Two strengths stand out immediately:
- The swapped face blends naturally into the original portrait
- The overall image quality remains strong during the editing process
That combination is not guaranteed in head swap workflows. Many methods can produce a recognizable face replacement, but the surrounding details often soften, the hairline becomes inconsistent, or the facial integration feels pasted on. Here, the workflow is designed to avoid those problems by using targeted inpainting and careful cropping.
YouTube Tutorial:
Example Results and What They Show
Before getting into the nodes and logic, it helps to understand the kind of results this workflow is aiming for.
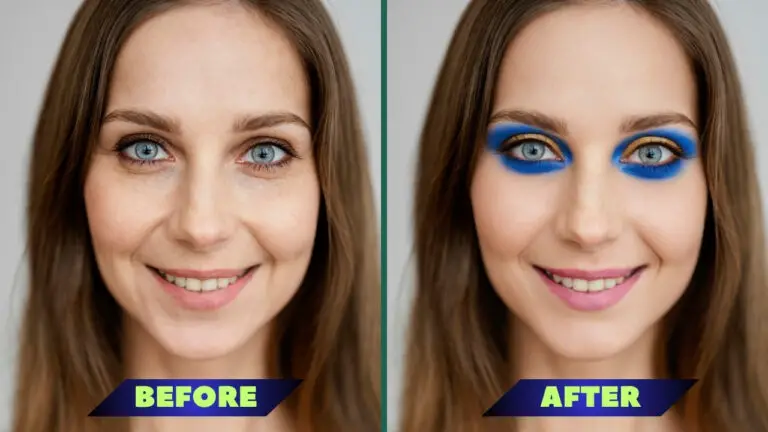
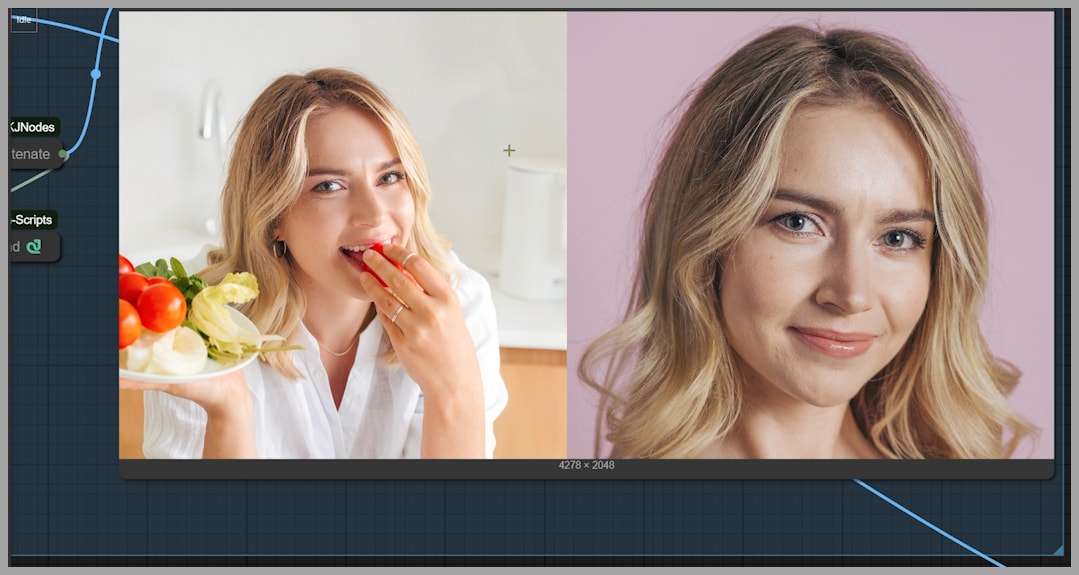
Example 1: Face Partially Covered by a Hand
In the first example, the original portrait includes a hand covering part of the woman’s face. That makes the swap more difficult because the model has to do more than simply replace visible features. It also has to respect the existing occlusion and blend the new face underneath that interruption in a believable way.
The result shows that the new face still integrates naturally into the image. Even though the hand blocks part of the face, the swap does not feel obviously broken or disconnected. Just as importantly, the surrounding image quality remains intact.
The face reference image also looks visually similar to the target structure, which likely helps the model maintain consistency. When the source and reference are already somewhat aligned in proportions and presentation, the workflow has an easier time delivering a convincing result.
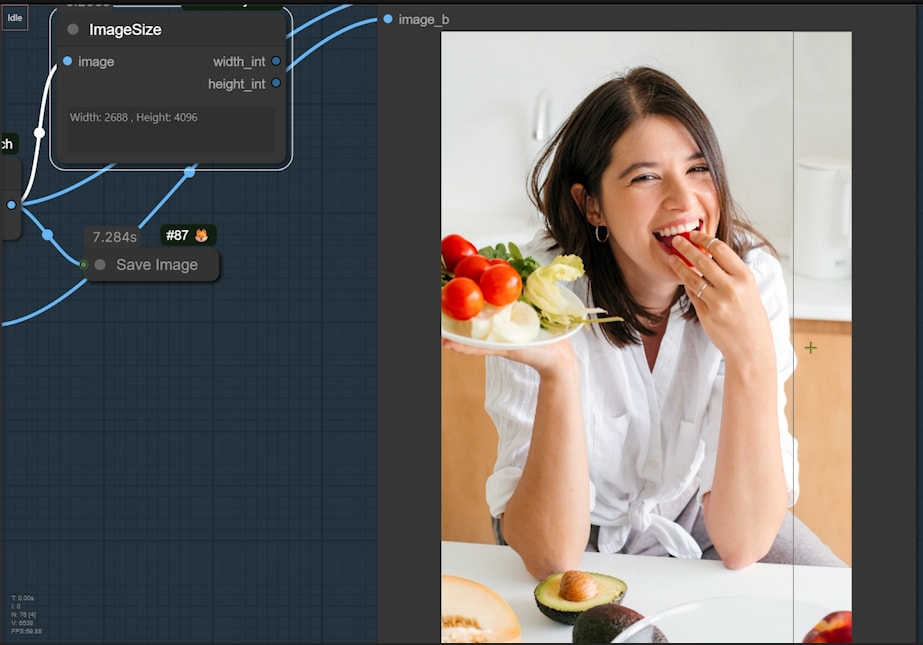
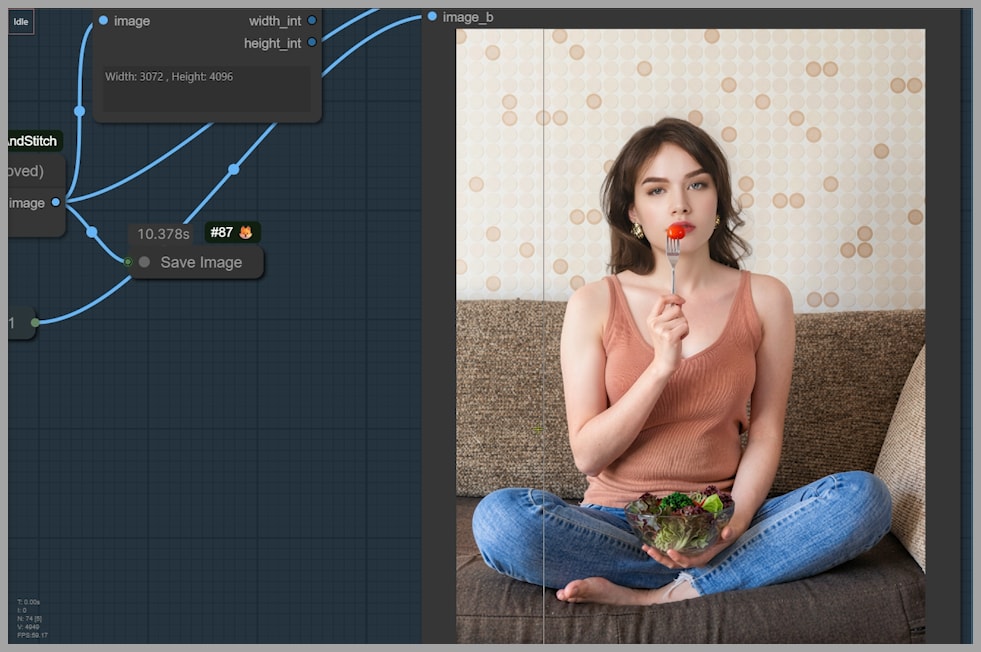
Example 2: Preserving Pose with Foreground Objects
The second example is another strong test. In this case, the subject is holding a fork with a cherry tomato. That means the final image must preserve not just the body pose, but also the interaction between the person and an object in the foreground.
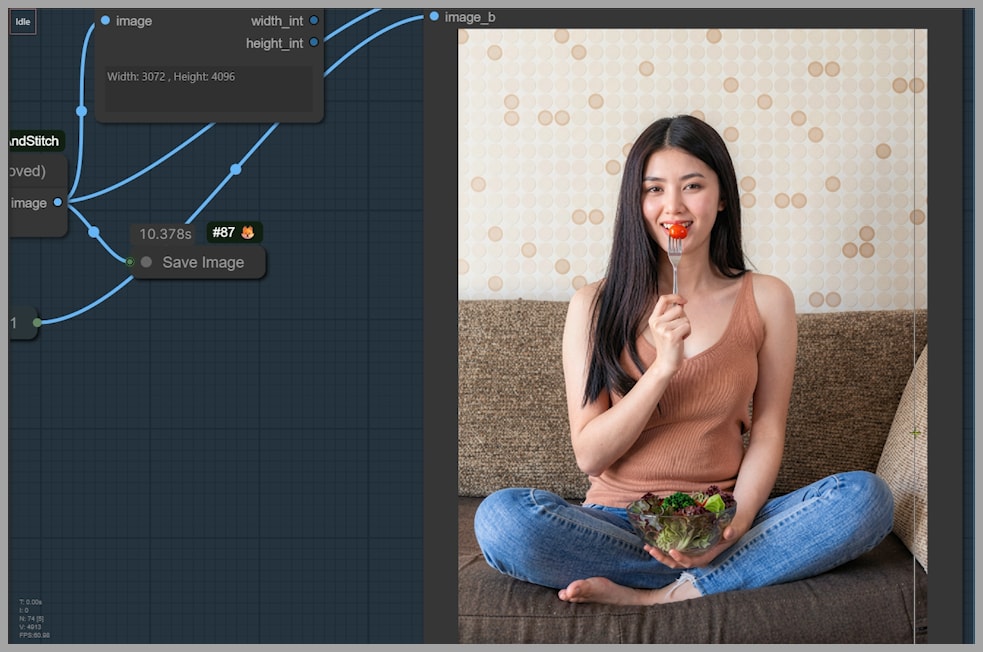
After the swap, the new face still needs to match the original pose. The workflow succeeds by changing only the head-related region while leaving the rest of the image alone. This is a good reminder that in many editing tasks, restraint is more valuable than aggressive regeneration. The less of the image you disturb, the easier it is to preserve realism.
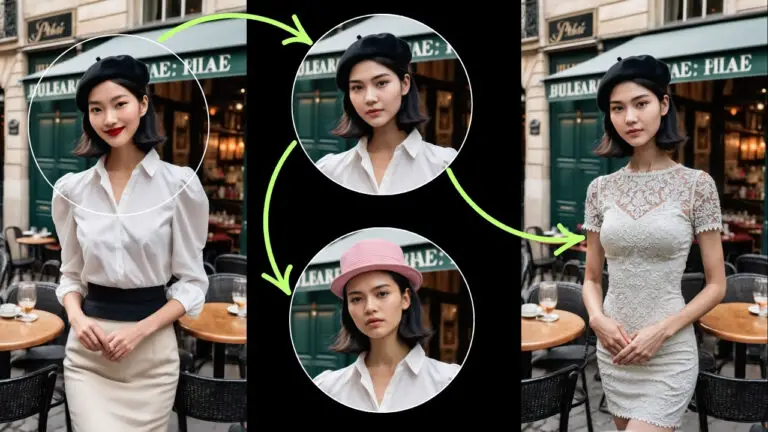
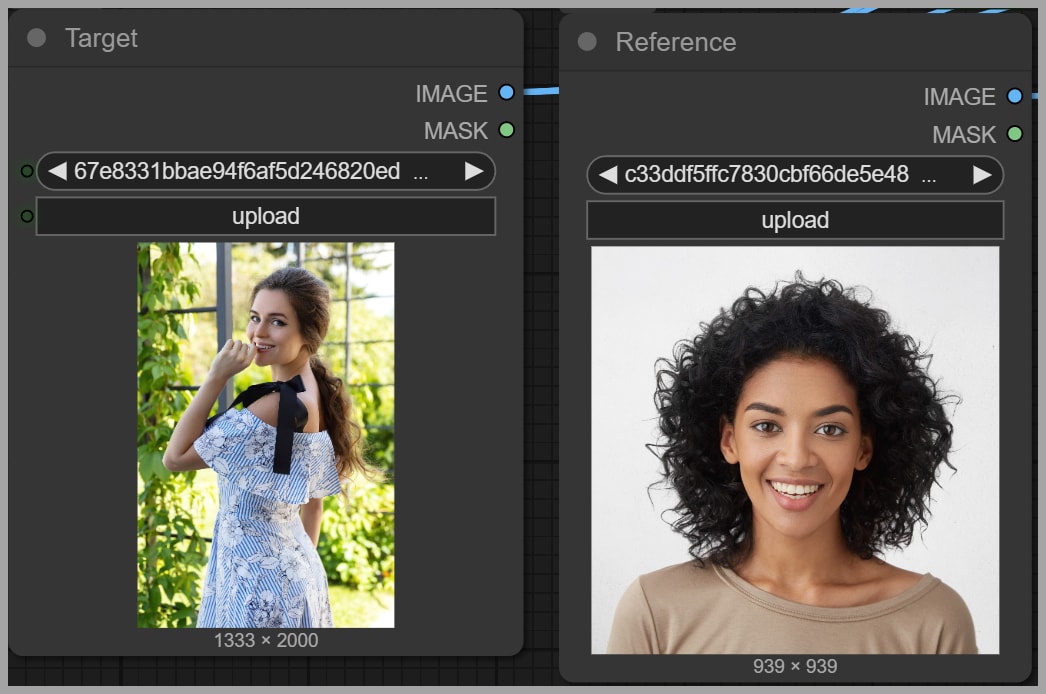
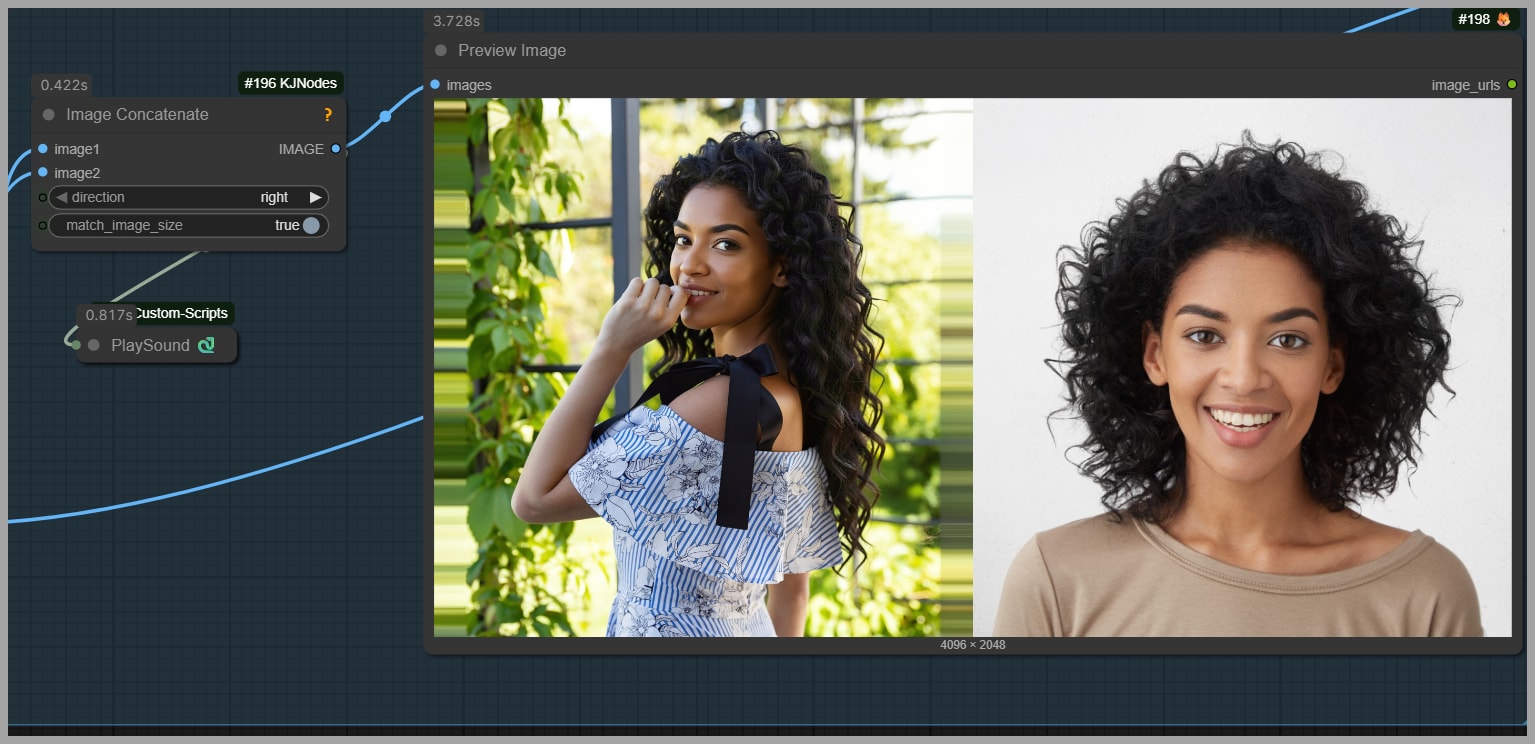
Workflow Goal: Swapping One Woman’s Head onto Another
At the center of the tutorial is a straightforward but visually demanding task: swap the head of one woman onto another woman’s portrait.
This requires two inputs:
- The uploaded portrait, which is the target image to be edited
- The head reference image, which provides the face and hairstyle information for the replacement
The workflow does not treat these two images equally. The portrait is the base image that must remain mostly unchanged. The headshot acts as the identity and appearance reference for the swap.
That distinction is important because it shapes how the workflow allocates its attention. The portrait provides structure, pose, lighting context, and background. The head reference provides facial identity and head-related visual guidance.
Preparing the Portrait for Editing
One of the smartest design choices in this workflow is that it does not send the full uploaded portrait directly into the editing model. Instead, it prepares the portrait so the model only works on the relevant region.
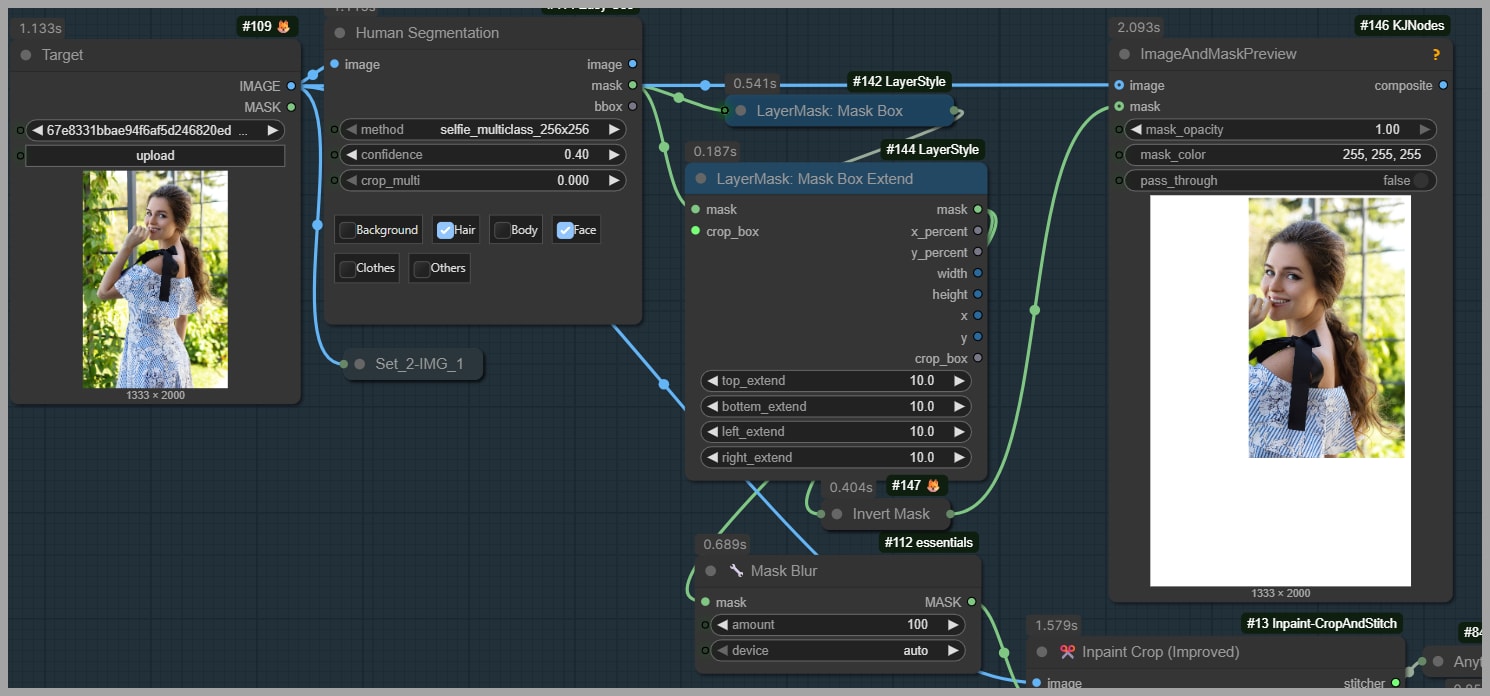
Upload Resolution and Image Size Flexibility
In the example from the tutorial, the uploaded portrait is 1333 × 2000 pixels. However, the workflow is not limited to that size. Larger images can also be uploaded because the image will be cropped before the actual editing happens.
That means the workflow is flexible enough to support higher-resolution inputs without forcing the model to process the entire image at once.
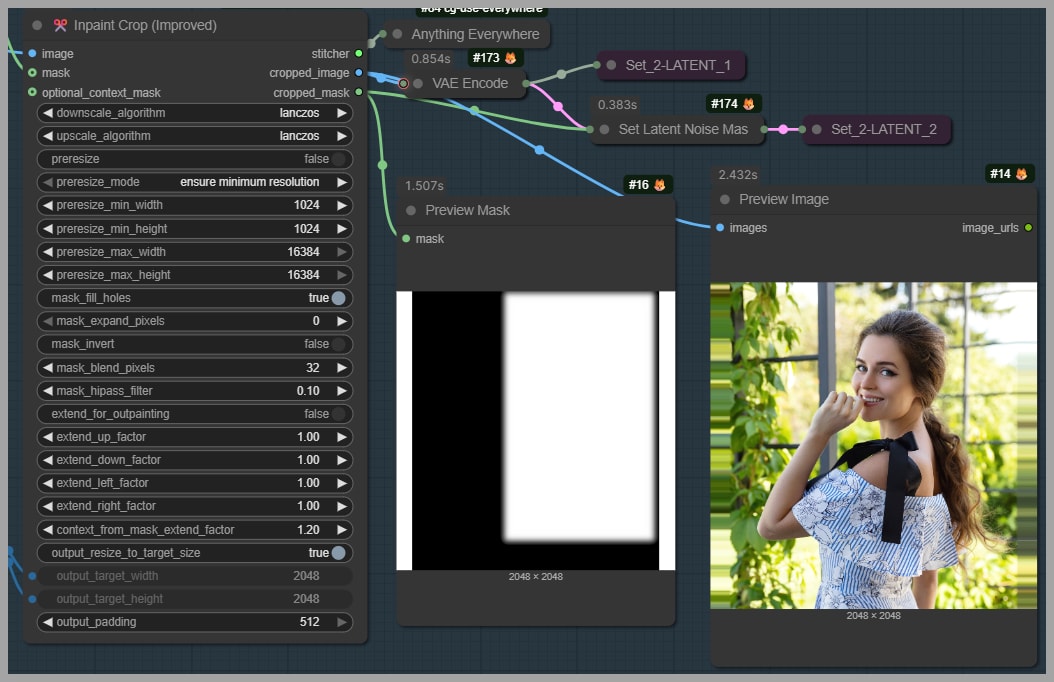
Cropping with the Inpaint Crop Node
The portrait is first processed by an Inpaint Crop node. This node extracts the relevant area so that the Flux 2 Klein model edits only the cropped version rather than the full original portrait.
This is a major efficiency gain. Instead of spending resources on the entire image, the workflow narrows the task down to the part that actually matters.
Why Cropping Helps Save VRAM and Preserve Quality
According to the tutorial, editing the cropped region helps in two ways:
- It saves VRAM
- It helps avoid quality loss
Both benefits are practical and important. Smaller working regions reduce the memory cost of the generation process. At the same time, restricting the edit prevents the model from unnecessarily reinterpreting areas that should remain untouched.
That is often the difference between a polished edit and one that feels overprocessed.
Limiting Edits to the Face and Hair
The workflow is specifically designed to edit only the face and hair. There is no reason to change clothing, pose, hands, background, or body structure if the goal is just a head swap.
By confining the model’s influence to the right area, the workflow preserves the original image where it already works.
Building the Inpainting Mask
The tutorial shows a white region representing the inpainting mask. This mask is created by selecting the hair and face through earlier nodes in the workflow.
The mask tells the model where editing is allowed. This is crucial because the quality of the swap depends heavily on masking precision. If the masked area is too small, leftover features from the original head may remain. If it is too large, the model may alter nearby elements that should stay fixed.
Converting the Masked Area into a Rectangular Region
After the hair and face are selected, two nodes convert the masked area into a rectangle. This rectangular region becomes the model’s actual editing target.
That step is useful because many inpainting pipelines work more cleanly and predictably when the editable region is normalized into a structured area rather than kept as an irregular freeform mask alone.
So before the Flux 2 Klein model even starts generating, the portrait has already been carefully prepared:
- Upload the portrait
- Identify the face and hair region
- Create an inpainting mask
- Convert the selected region into a rectangular crop
- Send only that crop to the editing model
That preparation is a big part of why the results remain stable.
Preparing the Head Reference Image
The second major input is the head reference image.
This image does not have to be cut out perfectly, nor does it need a special background. The tutorial explicitly notes that you can upload a headshot with any background. That makes the workflow much more convenient in practice.
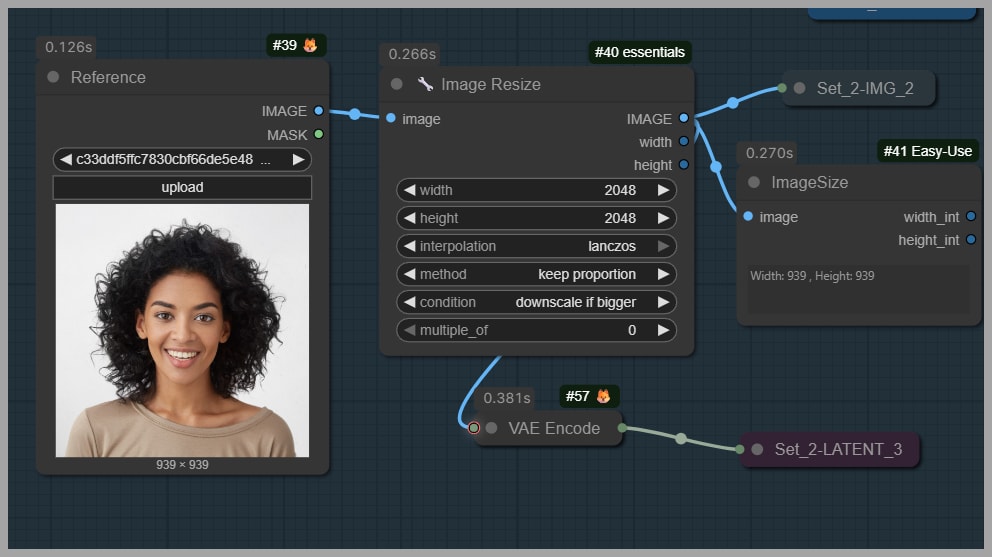
Background Flexibility in the Reference Image
You do not need to isolate the face against a transparent or studio-style background. The workflow can still use a headshot even when the background is ordinary or cluttered.
That said, flexibility is not the same as ideal input quality. The better the reference communicates head scale and facial appearance, the easier the model’s task becomes.
Why Showing the Shoulders Improves Results
The tutorial recommends using a headshot that also shows the shoulders. This is a small but useful tip. Including the shoulders helps the model understand the proper scale of the head in relation to the body.
Without that context, the model may still work, but it has less structural information to infer how the replacement should fit into the target portrait.
So while any background is acceptable, a well-framed reference image with visible shoulders is likely to improve reliability.
How the Head Swap Is Generated
Once the portrait crop and head reference image are ready, the workflow passes them into the Flux 2 Klein model for generation.
On the right side of the workflow, there are two output groups, and each one produces a different version of the swap.
This design is extremely useful because it lets you compare two strategies side by side rather than assuming one setup is automatically better.
Output Group 1: Flux 2 Klein Without LoRA
The first output path uses the Flux 2 Klein model without any LoRA.
This is presented as the simpler path, and based on the tutorial’s results, it is often the stronger one. It relies on the base model and the prompt alone to perform the head replacement.
In the examples shown, this version tends to preserve:
- Hair consistency better
- Facial detail more clearly
- Overall realism more reliably
Output Group 2: Flux 2 Klein With a Head Swap LoRA
The second output path adds a LoRA trained specifically for head swapping.
At first glance, that sounds like it should improve performance. After all, a specialized LoRA is supposed to inject extra task-specific knowledge into the generation process.
However, the tutorial takes a more skeptical view. Although many creators recommend this LoRA, the actual results shown here suggest that it is not always necessary, and in some cases, it can make the output worse.
That is one of the most valuable lessons in the entire workflow: a specialized add-on is not automatically an upgrade.
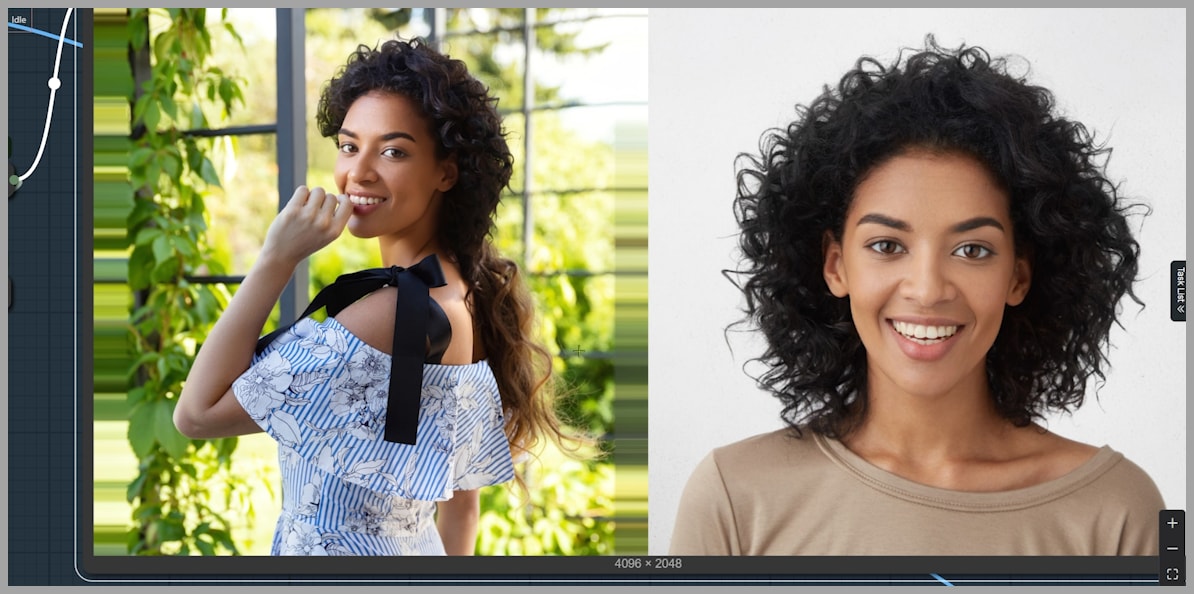
Comparing Results With and Without the Head Swap LoRA
The article’s most practical insight comes from the direct comparison between the two output groups.
Hair Consistency Problems Introduced by the LoRA
In one example, the LoRA version fails to keep the short hair consistent. Instead of cleanly preserving the intended hairstyle, it drifts away from the expected structure.

This is especially important in head swapping because hair is not just a secondary detail. Hairline, length, shape, and silhouette all strongly affect whether the swap feels believable.
If the model gets the face mostly right but the hair wrong, the final result still feels off.
Additional Test Cases and Repeated Patterns
The tutorial shows several more tests, and the pattern repeats:
- The version without the LoRA tends to maintain better consistency
- The version with the LoRA tends to introduce issues in hairstyle or facial direction
- In at least one case, the LoRA also produces a strange eye direction
The repeated nature of these tests makes the conclusion more convincing. This is not just one unlucky example. The workflow author is clearly showing a broader pattern.
When the LoRA May Be Unnecessary
The practical takeaway is simple: treat the head swap LoRA as optional, not essential.
You should not assume that adding it will automatically improve the result. In fact, based on the examples shown, it often makes sense to start with the base workflow without the LoRA and only test the LoRA version if you have a specific reason to do so.
That is a more disciplined and results-driven way to work.
Prompt Design: Why Simpler Can Work Better
Another excellent lesson from this workflow is that prompt quality is not just about length. A longer prompt can sound more detailed and authoritative, but that does not mean it will perform better.
Problems with the Original LoRA Author Prompt
The tutorial mentions that the prompt bundled with the LoRA is very long and was designed by the LoRA’s author. However, parts of it do not translate well into actual results.
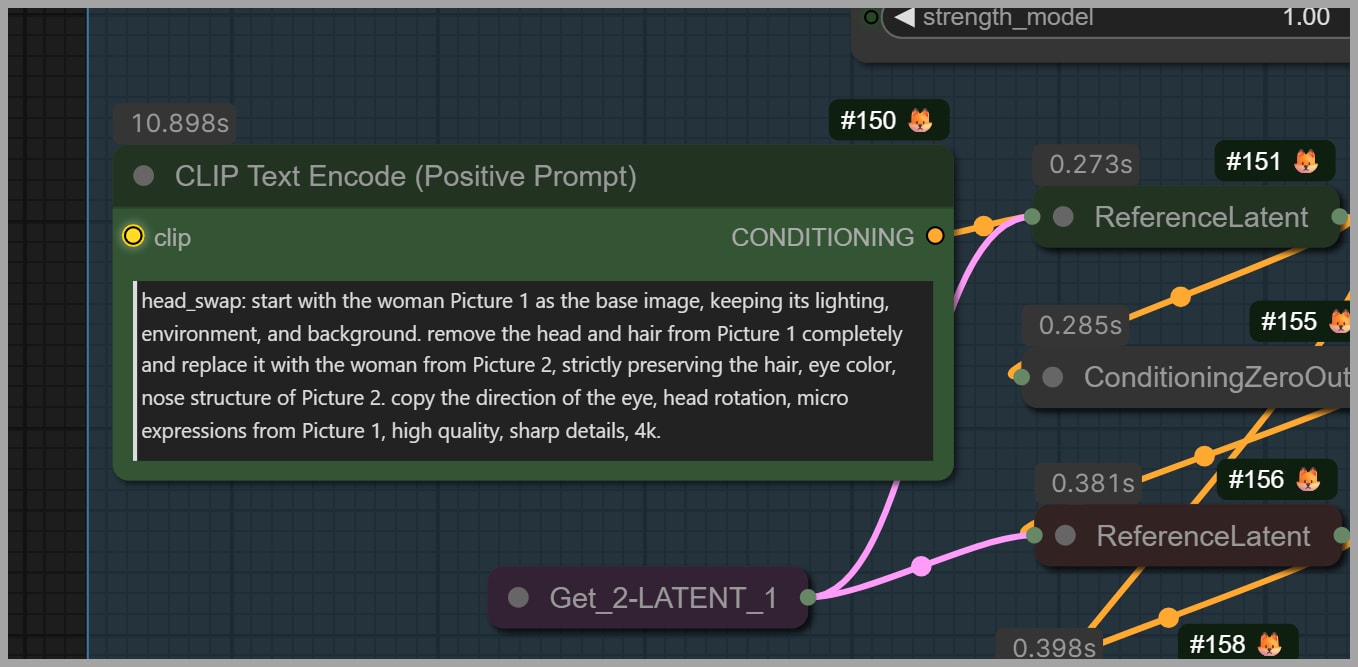
For example, the prompt says:
- Remove the head from Picture 1 completely
- Sharp details, 4K
But in practice:
- The hair is not fully removed
- Some facial and texture detail is still lost
This shows a classic prompting problem: descriptive ambition is not the same as operational effectiveness. A prompt can make bold claims without actually steering the model in the intended direction.
A Simpler Prompt for Head Swapping
Without the LoRA, the workflow can use a much simpler prompt:
Remove the head (face and long hair) from image 1 and replace it with the head (face and hair) from image 2. Relight the face.
This prompt works because it is direct. It tells the model:
- What to remove
- What to replace it with
- What additional adjustment to make
That clarity is often more useful than stylistic excess.
Why the Word “Long” Matters
One of the most interesting findings in the tutorial is the importance of a single word: long.
The uploaded portrait contains a woman with long hair, while the uploaded headshot contains a woman with short hair. If the prompt simply says “remove the hair,” the model may not fully remove the original long hair. Some of it can remain in the image.
By changing the prompt to specify long hair, the workflow gives the model a more precise instruction, which leads to a better cleanup of the original hairstyle.
This is a perfect example of how prompt wording should reflect the actual visual mismatch between the two images.
Testing the Prompt Without “Long”
The tutorial demonstrates this directly by removing the word “long” and running the workflow again.
The result shows that part of the original long hair remains. This makes the swap less consistent and proves that the extra specificity was not decorative; it was necessary.
When a Simpler Prompt Is Enough
The tutorial also points out that if both women have the same hair length—for example, both have long hair or both have short hair—then the simpler prompt should usually be sufficient.
In other words, prompt complexity should be proportional to the problem. You only need extra specificity when the model needs help resolving a visible mismatch.
Fine-Tuning Prompt Wording for Better Consistency
If consistency issues appear, the next step is not necessarily to add more random detail. Instead, adjust the wording with purpose.
The tutorial suggests describing elements such as:
- Hairstyle
- Hair length
- Facial expression
That kind of targeted prompt refinement is more effective than stuffing the prompt with generic quality phrases.
Stitching the Edited Region Back into the Full Portrait
After the model generates the edited head and hair, the workflow still has one important job left: merge that edited region back into the original high-resolution image.
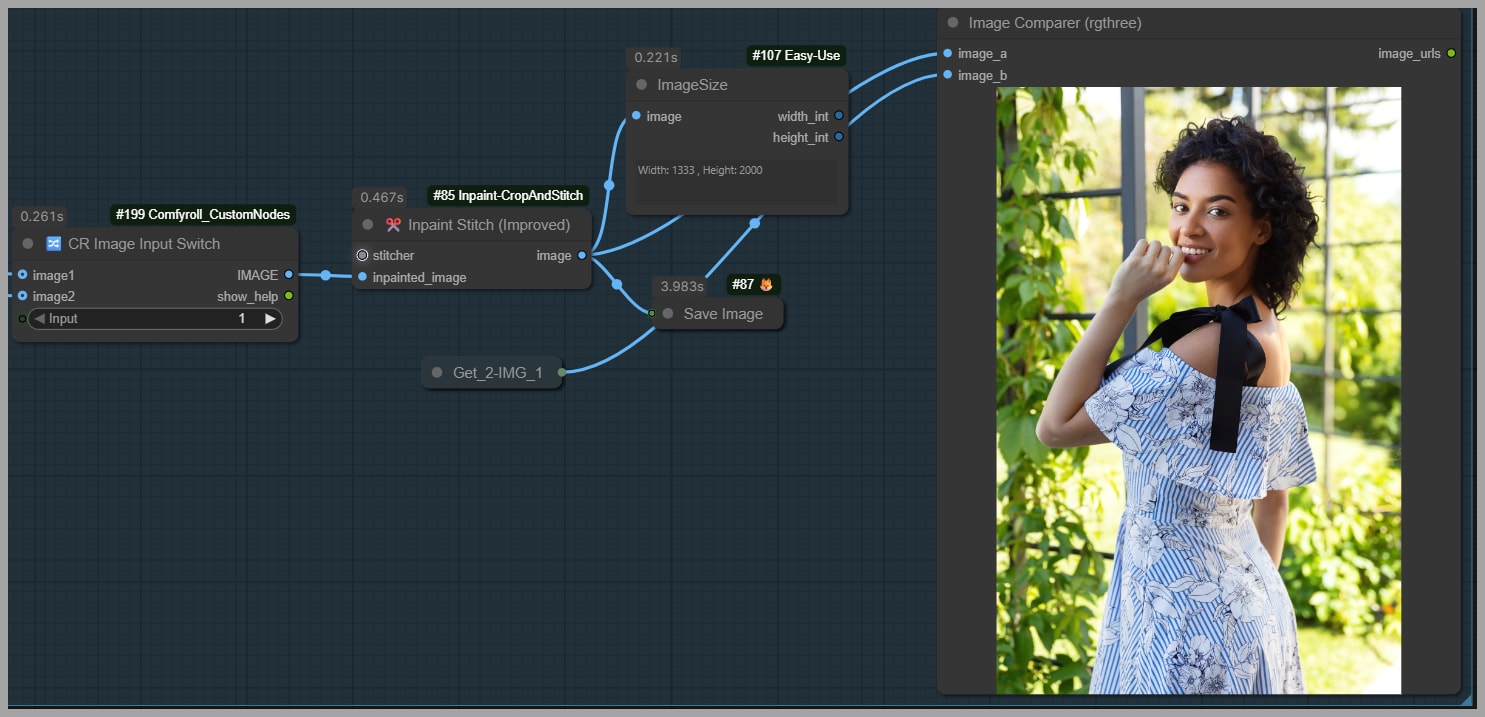
The Role of the Inpaint Stitch Node
This is where the Inpaint Stitch node becomes essential.
Its job is to take the edited crop and place it back onto the original full-sized portrait. This allows the workflow to benefit from focused editing without sacrificing the integrity of the original composition.
It is a very elegant solution:
- Edit only the necessary crop
- Keep the original full-size portrait untouched elsewhere
- Reinsert the edited region into the full image
Choosing Which Output to Use
Because the workflow produces multiple candidate outputs, the final group lets you choose which generated result should be used in the stitched image.
This is a practical design choice. It means you can compare the non-LoRA and LoRA outputs and then decide which one deserves to become the final composite.
Preserving the Original Body and Background
Once the edited crop is stitched back in, only the head and hair have changed. The body and background remain exactly as they were.
That is one of the strongest aspects of this workflow. It avoids the all-too-common problem of generating a face swap that accidentally alters unrelated parts of the image.
Instead of rebuilding the scene, it performs a targeted correction inside the original scene.
Closing Notes
That covers the full workflow.
More importantly, the workflow is worth studying because it demonstrates a smart editing philosophy: preserve what already works, and change only what truly needs to change.