Flux Kontext Clothes Swaps Are UNPREDICTABLE? ACE Plus Fixes It (SEE THE RESULTS!)
Hey everyone! If you’ve tried my previous Flux Kontext workflow for clothes swapping, you know it’s flexible—but that flexibility comes with a catch: unpredictable results. You might spend ages tweaking prompts to get the dress, t-shirt, or pants just right, and even then, it never feels perfect. Sound familiar?
Let me jog your memory: a few months ago, I showed you the ACE Plus technique to swap a dress between two women—and honestly? It outperformed Flux Kontext by a mile. The problem? That old ACE Plus workflow wasn’t built for clothes swapping.
Today? I’m fixing that. I’ve created a tailored ACE Plus workflow designed specifically for seamless, reliable clothes swapping.
By the end of this article, you’ll know exactly how to swap outfits between people (even with totally different poses!) and why ACE Plus is the better tool for the job. Let’s dive in!
Before we jump into the steps, let’s get you set up. This workflow is 100% free for our community—all you need to do is grab it from the link below.
Gain exclusive access to advanced ComfyUI workflows and resources by joining our community now!
Here’s a mind map illustrating all the premium workflows: https://myaiforce.com/mindmap
Run ComfyUI with Pre-Installed Models and Nodes: https://youtu.be/T4tUheyih5Q
Key Models in ACE Plus
Let’s talk about the engines powering this workflow—because understanding the models will make your swaps way more consistent.
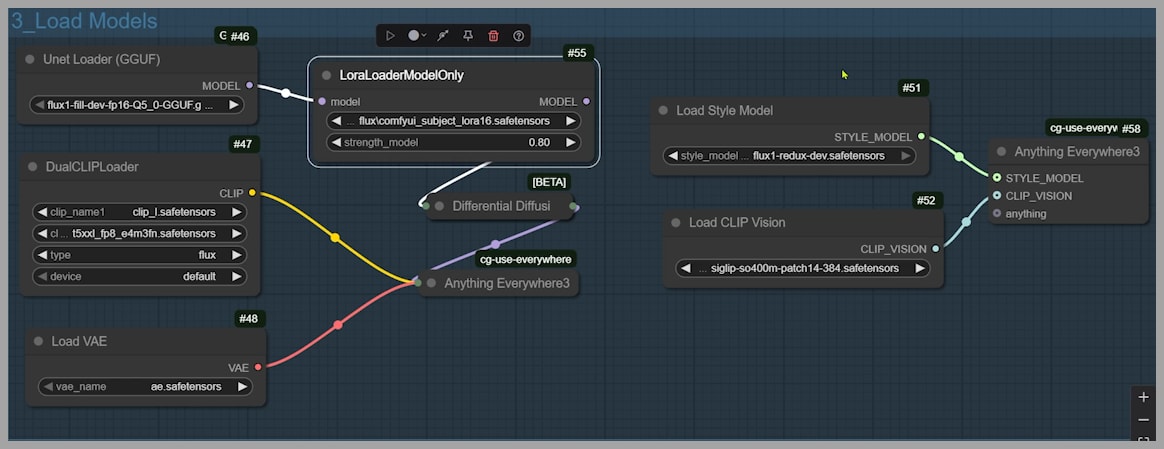
The two stars here are:
- Subject LoRA: You can find this on the ACE Plus GitHub page, and its job is simple: keep your items (say, a dress or a logo) consistent across different scenes. No more wonky proportions or distorted features!
- Black Forest Lab Redux Model: This is the secret sauce for capturing clothing style without copying the original pose or composition. Unlike Flex Redux (a model I’ve mentioned before), which references both style and composition, the Black Forest Lab version lets you focus solely on the outfit—perfect for swapping!
Why does this matter? If you’re swapping a dress from a sitting person to a standing one, you don’t want the new pose to mimic the original. The Redux model keeps things flexible, while Subject LoRA ensures your subject stays recognizable. Win-win!
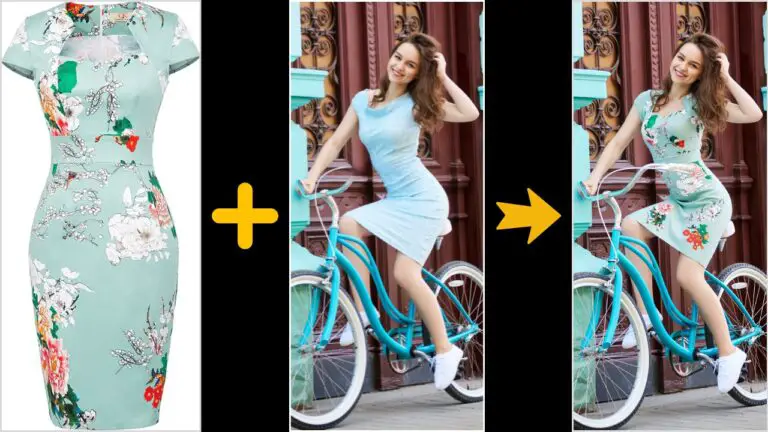
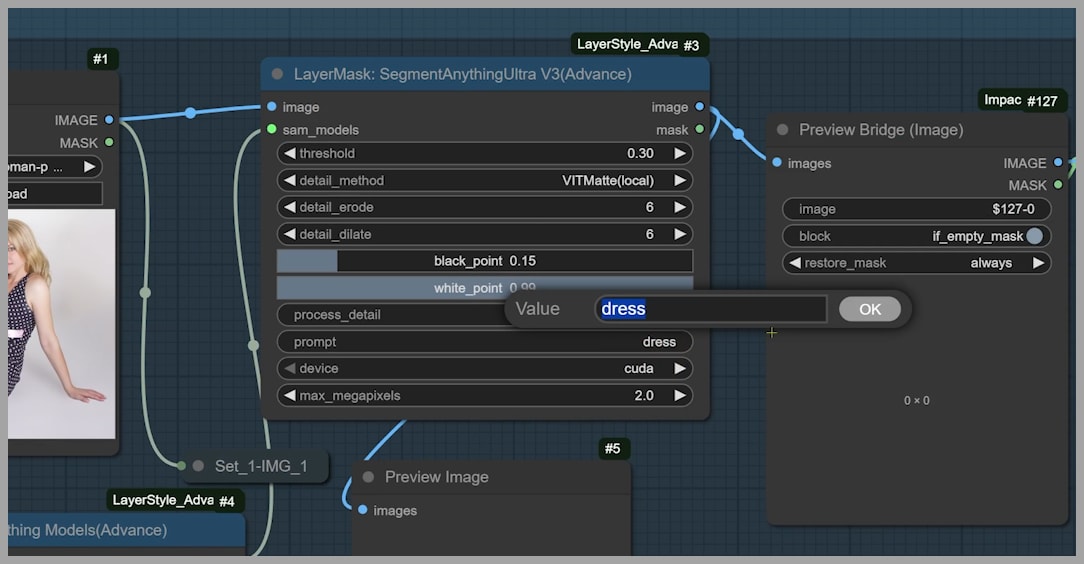
Step 1: Isolating the Target Dress
Let’s start with the fun part: picking the outfit you want to swap. For this example, I’m using a reference image of a woman sitting on the ground in a flowy dress. My goal? Put that dress on a standing woman with a totally different pose.

First, I need to isolate the dress. In the prompt field of the reference node, I typed “dress”—simple, right? If you’re swapping a t-shirt, pants, or even shoes, just replace “dress” with your item.
Step 2: Handling the Target Image
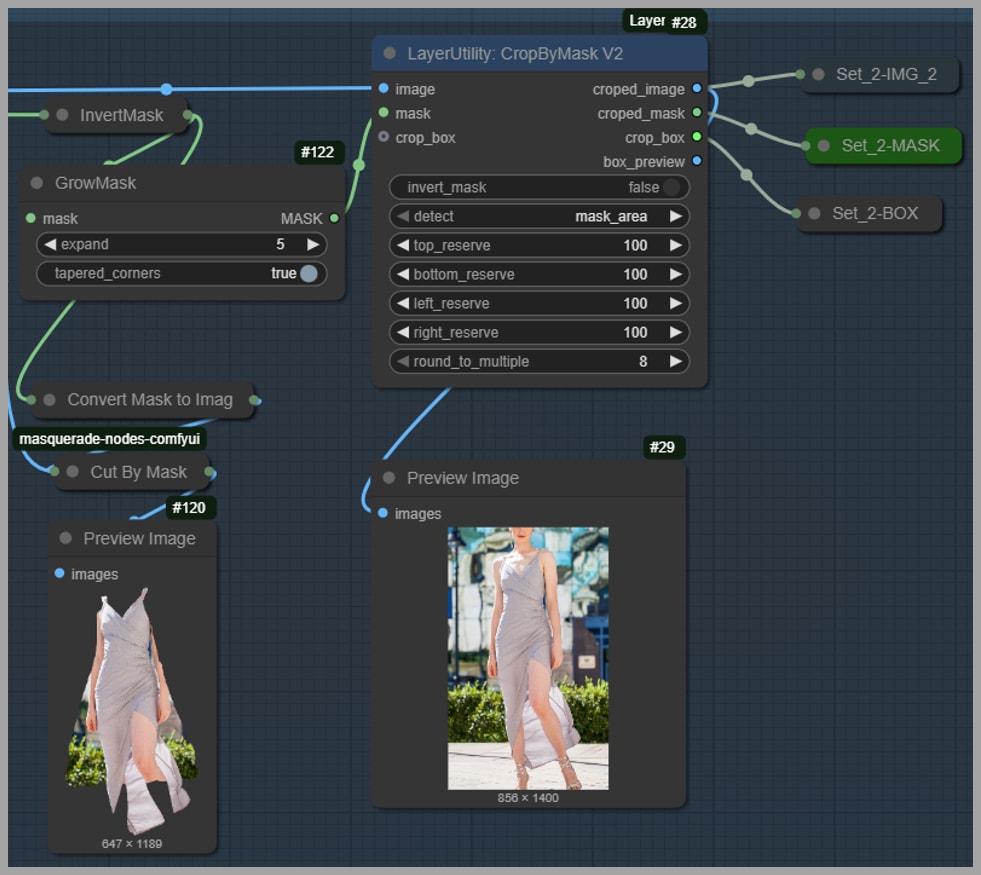
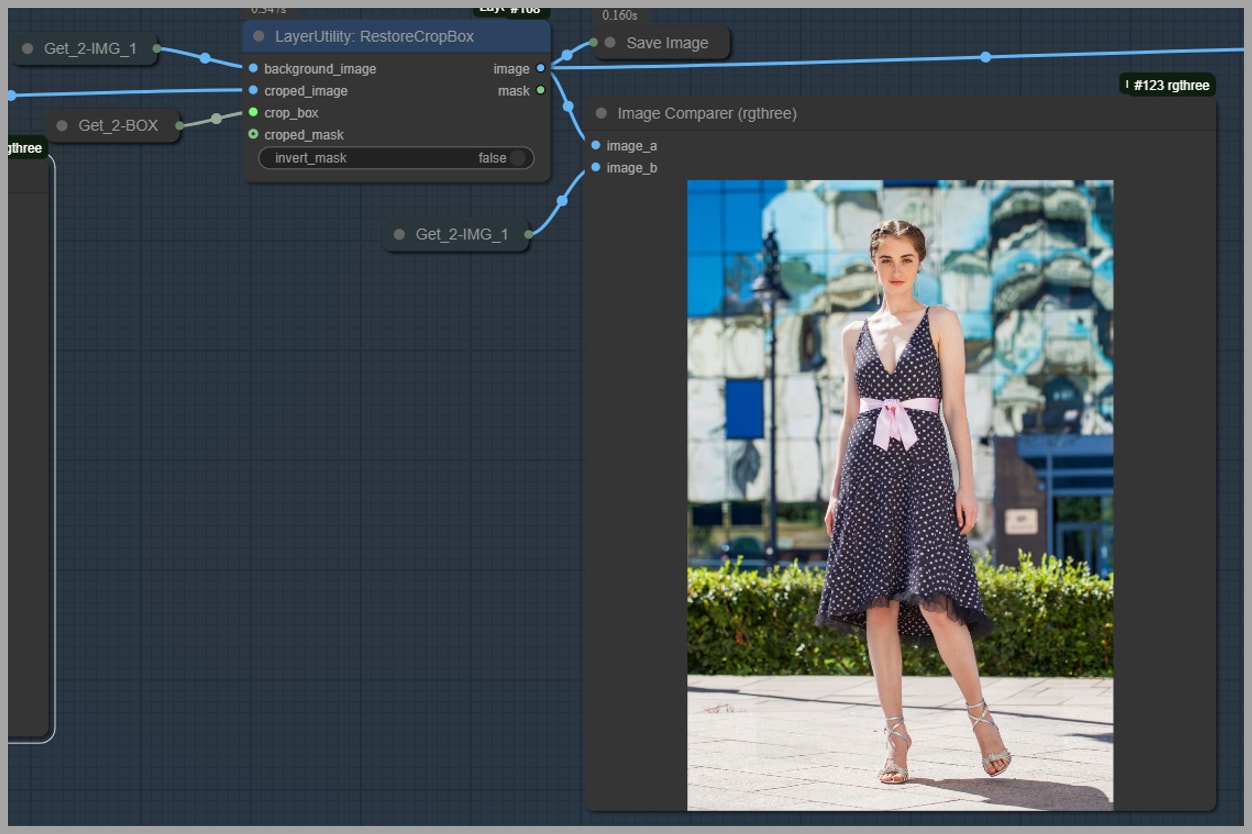
Now let’s turn to the person getting the new dress. We need to find their current outfit to replace it—and the Segment Anything node is your best friend here. It auto-masks the dress in seconds, which saves way more time than manual masking.
But wait—what if the mask is too small? In my case, the target’s current dress was form-fitting, but the new dress is loose. I expanded the mask to cover the skirt area.
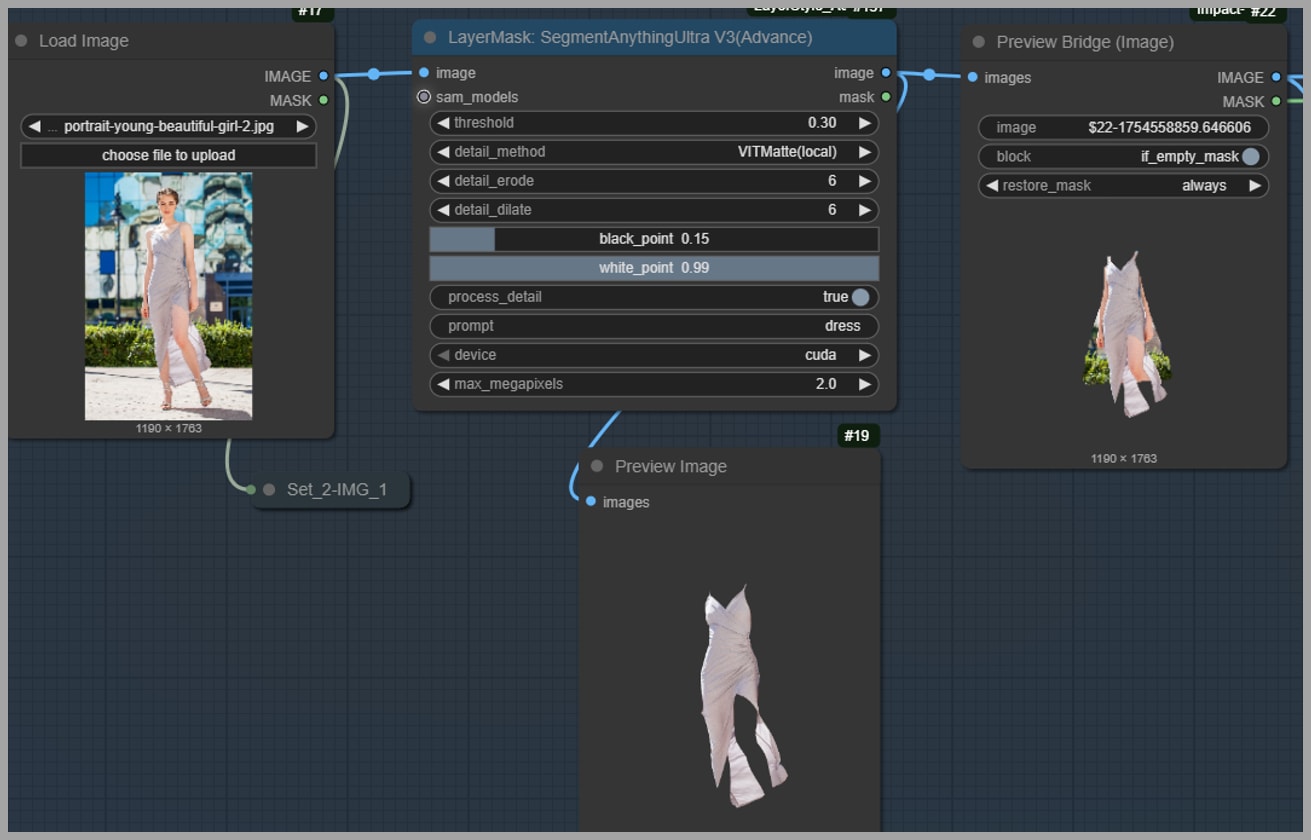
One more thing: I cropped the image to cut out pixels outside the dress area. Why? It saves VRAM, which is a lifesaver for longer workflows. Don’t worry—we’ll put those cropped pixels back later!
Running the Swap
Alright—time to hit the gas! Activate Group 4 (the heart of the swap process) and watch the magic happen.
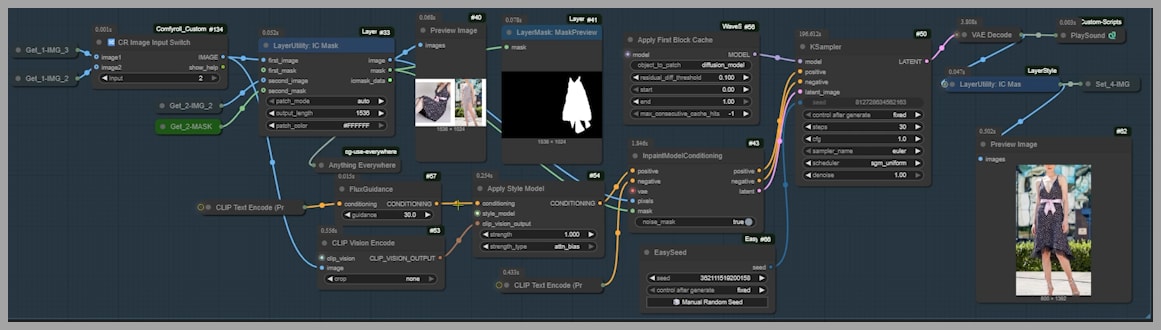
Here’s a key node to remember: the Image Switch. It lets you choose between two reference versions:
- The dress on the original person (great for keeping the outfit’s fit consistent)
- The dress alone (better for simple styles)

For my swap, I went with the first option—and it worked perfectly! The Image Switch gives you flexibility, so don’t be afraid to experiment.
Wait, did you notice the preview of the original dress and target portrait stitched together? That’s a standard ACE Plus trick to keep the outfit looking natural. Trust me—this little detail makes a big difference in the final result!
Cleaning Up: Fixing Rough Edges with Inpainting
No workflow is perfect on the first try—and that’s okay! My initial swap had rough edges around the dress (thanks to the mask I painted earlier). Here’s how I fixed it:
- Mute the KSampler: This pauses the generation so you can focus on inpainting.
- Create a Mask: Use the inpainting node to draw a white line around the messy edges.
- Manual Adjustments: I noticed a weird calf distortion, so I added that area to the mask using the Preview Bridge node.
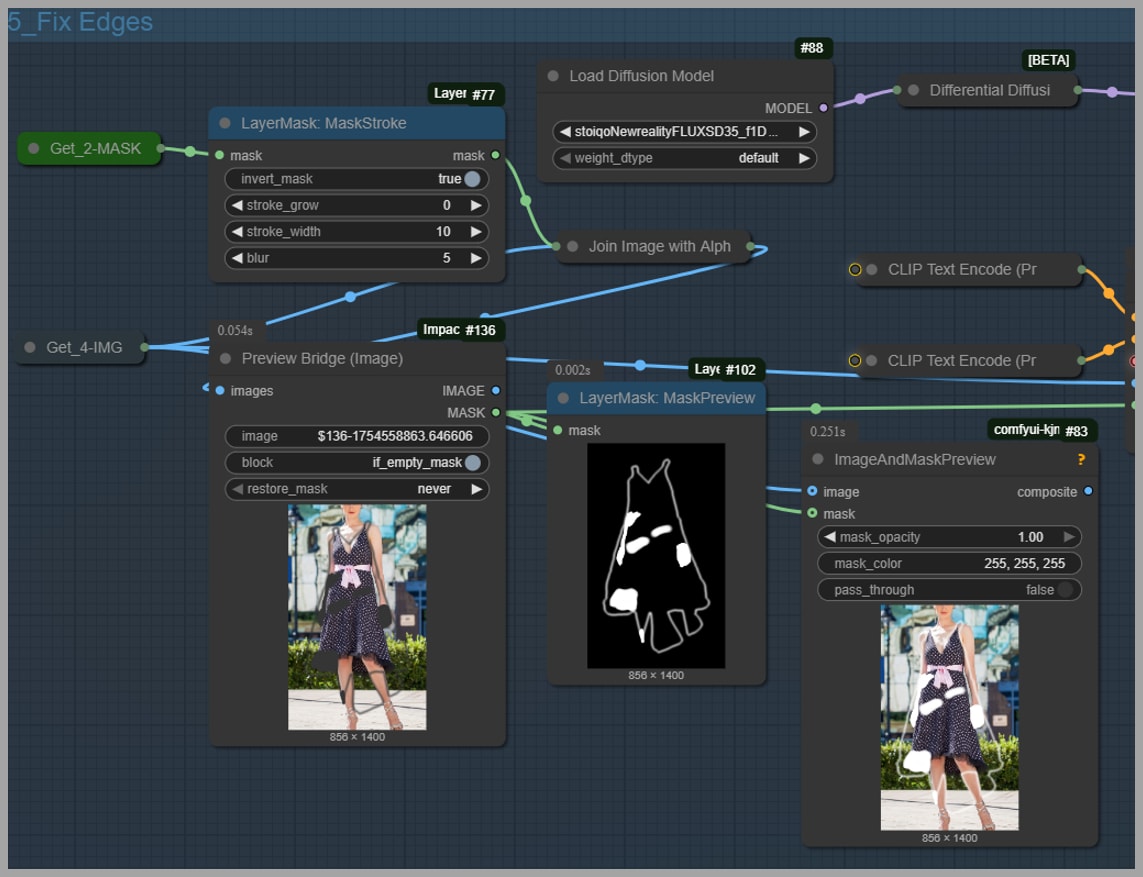
Run the KSampler again—and boom! The edges are smooth, and the calf looks normal.

Now, remember that cropped image? This is where you restore it. A simple node will seamlessly put those cropped pixels back, so your final image has the full background and limbs—no missing pieces!
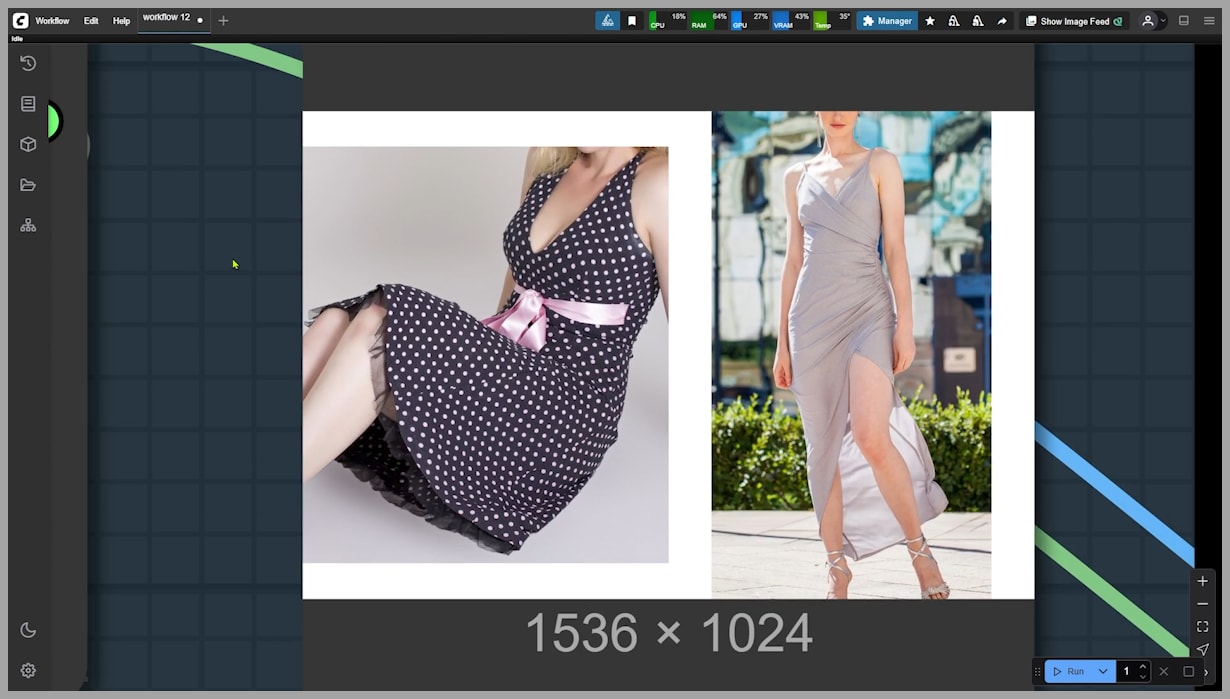
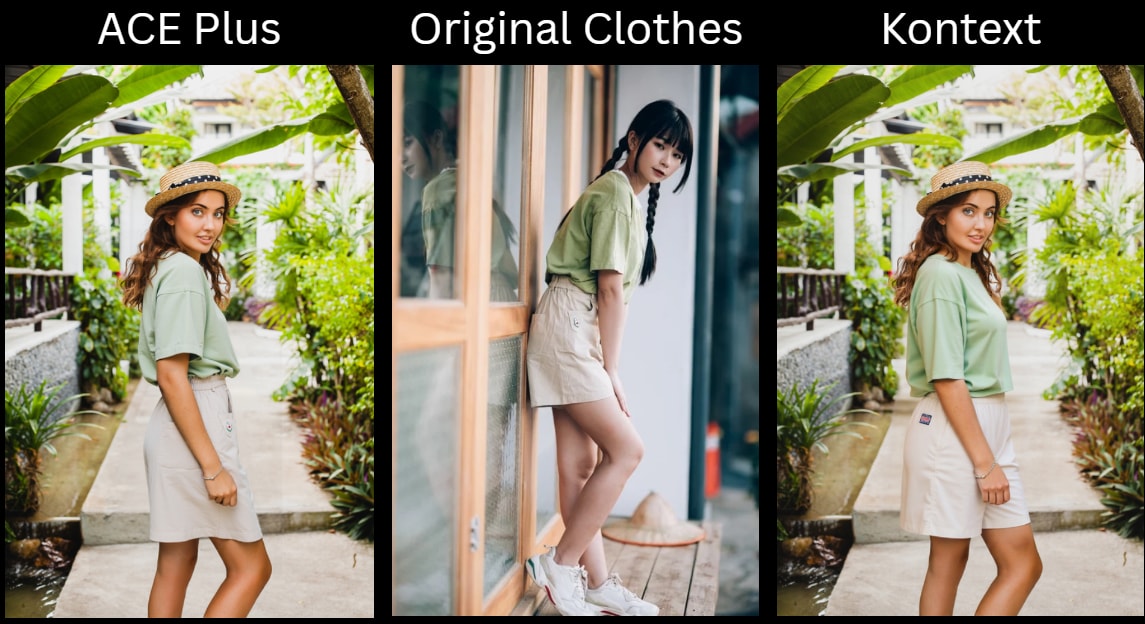
8. ACE Plus vs. Flux Kontext: Side-by-Side Results Comparison
Let’s be real—you want to know if this workflow is actually better than Flux Kontext. Let’s look at some examples:
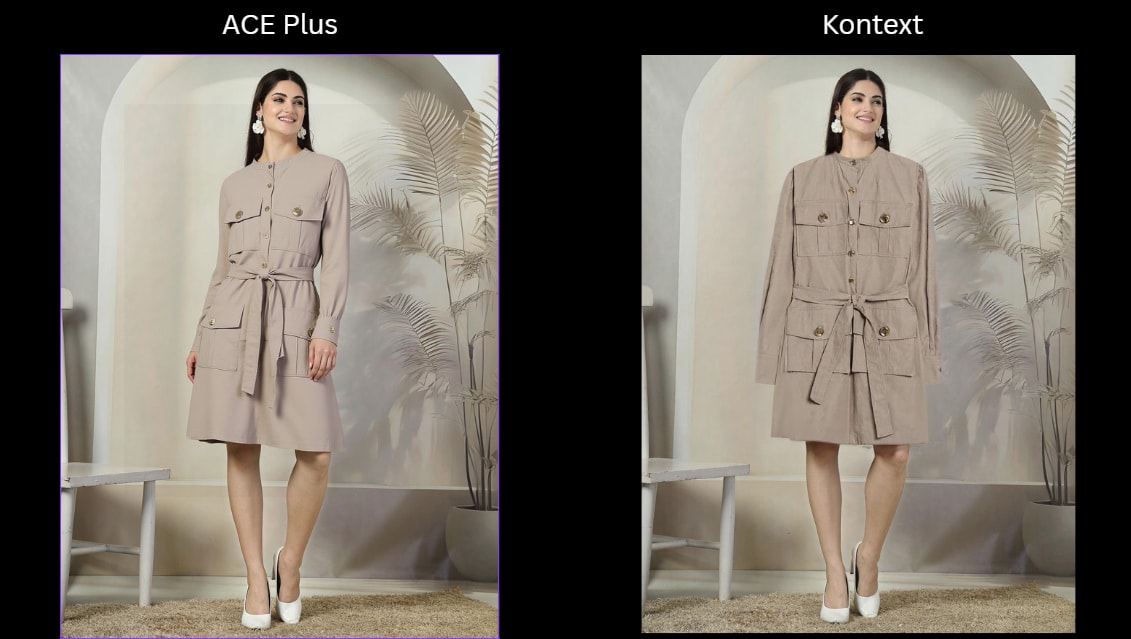
Example 1: Flat Reference Image
If you use a flat, 2D reference (like a dress lying on a table), Flux Kontext struggles to turn it into a 3D outfit on a person. ACE Plus? It nails the volume and fit—every time.
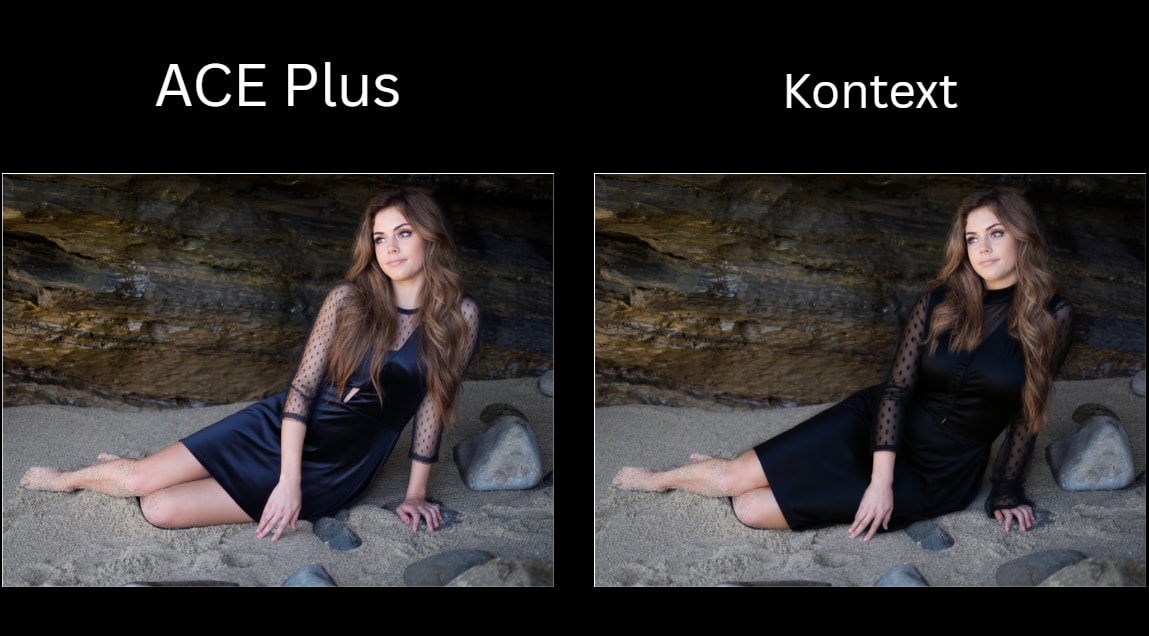
Example 2: Black Lace Dress
I tried swapping a black lace dress with Flux Kontext, and the pattern got totally distorted. ACE Plus? It kept the lace consistent, even on a new body.
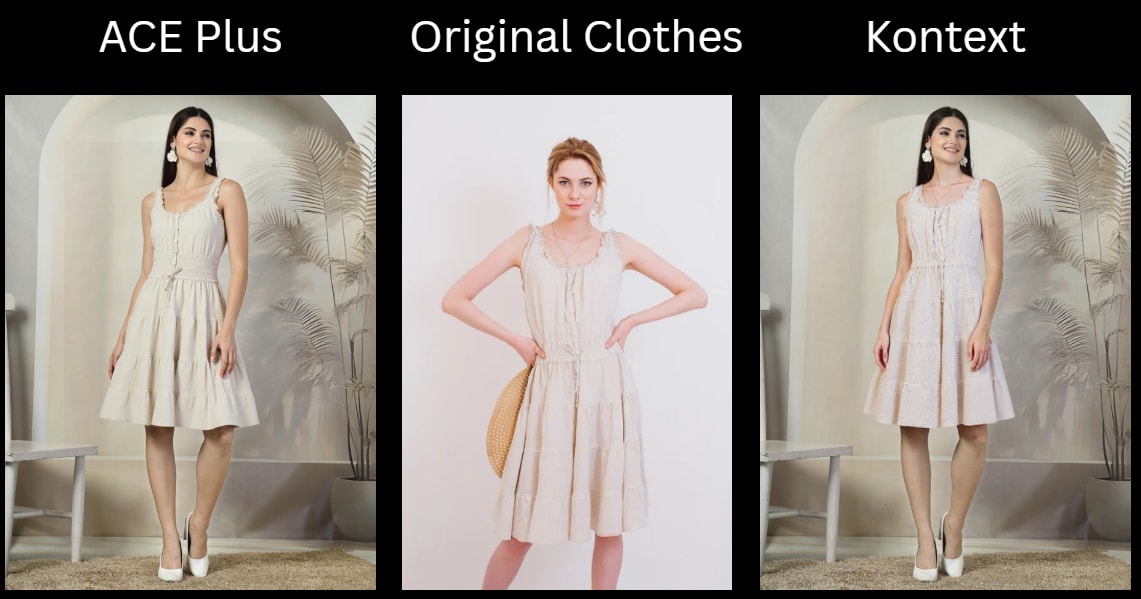
Example 3: Prompt Requirements
Here’s the kicker: Flux Kontext needs prompts (like “dress” or “lace”) to work. ACE Plus? I left the prompt blank—and it still gave me a perfect swap. Less time tweaking, more time creating!
The verdict? ACE Plus is more reliable, easier to use, and gives better results for clothes swapping.

9. Final Thoughts: Next Steps and Joining the Community
That’s it—you’ve just mastered the ACE Plus clothes swapping workflow! Whether you’re swapping dresses, t-shirts, or even jackets, this template will save you hours of frustration.
Remember: You can download the workflow for free from our community through the link below. And if you want to chat with other users, troubleshoot, or share your swaps, come join us! We’re always here to help.
Gain exclusive access to advanced ComfyUI workflows and resources by joining our community now!