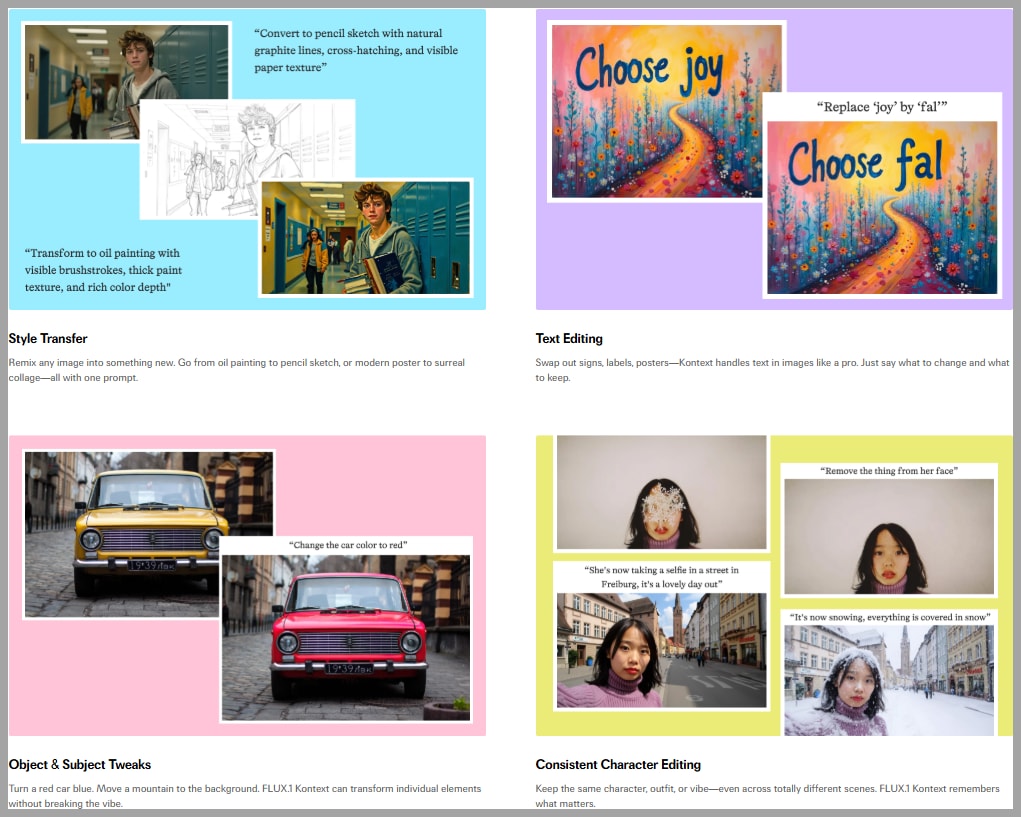
Master FLUX.1 Kontext Dev Model: The Ultimate Custom Workflow for ComfyUI
Hey everyone! A new powerhouse has landed in the world of AI image generation, and it’s poised to change the game. This article will guide you through mastering the incredible new FLUX.1 Kontext Dev model right inside ComfyUI.
We’ll start by exploring the model itself, then dive into the limitations of current standard workflows. But the real magic begins when I unveil a custom-built workflow designed for maximum flexibility and control. Get ready to blend, edit, and create like never before!
Video Tutorial:
Gain exclusive access to advanced ComfyUI workflows and resources by joining our community now!
Here’s a mind map illustrating all the premium workflows: https://myaiforce.com/mindmap
Run ComfyUI with Pre-Installed Models and Nodes: https://youtu.be/T4tUheyih5Q
Technical Nitty-Gritty: VRAM and Model Versions
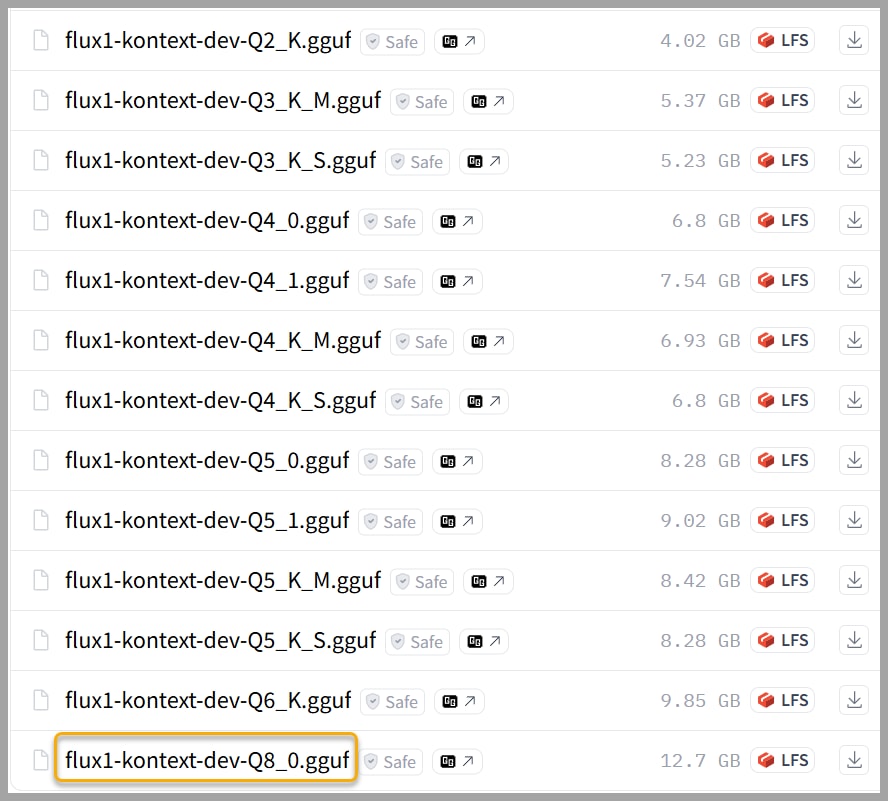
Before we jump in, let’s talk about the technical side of things. The original model from Black Forest Labs is a beast, clocking in at a massive 23.8 GB. To run it smoothly, you’ll need a GPU with about 32 GB of VRAM.
But don’t worry if that sounds out of reach! There’s a more accessible GGUF version available on HuggingFace that’s much more manageable.
- For most setups, I recommend grabbing the Q8 version. It’s a smaller 12.7 GB download and only requires around 20GB of VRAM.
- If your VRAM is still tight, there are even smaller versions you can download to ensure you can get up and running.
The Trouble with Standard Workflows
The ComfyUI team has shared some example workflows on their official website to help users get started with this new model. While they are a good starting point, I have to mention that I ran into a few issues with them.
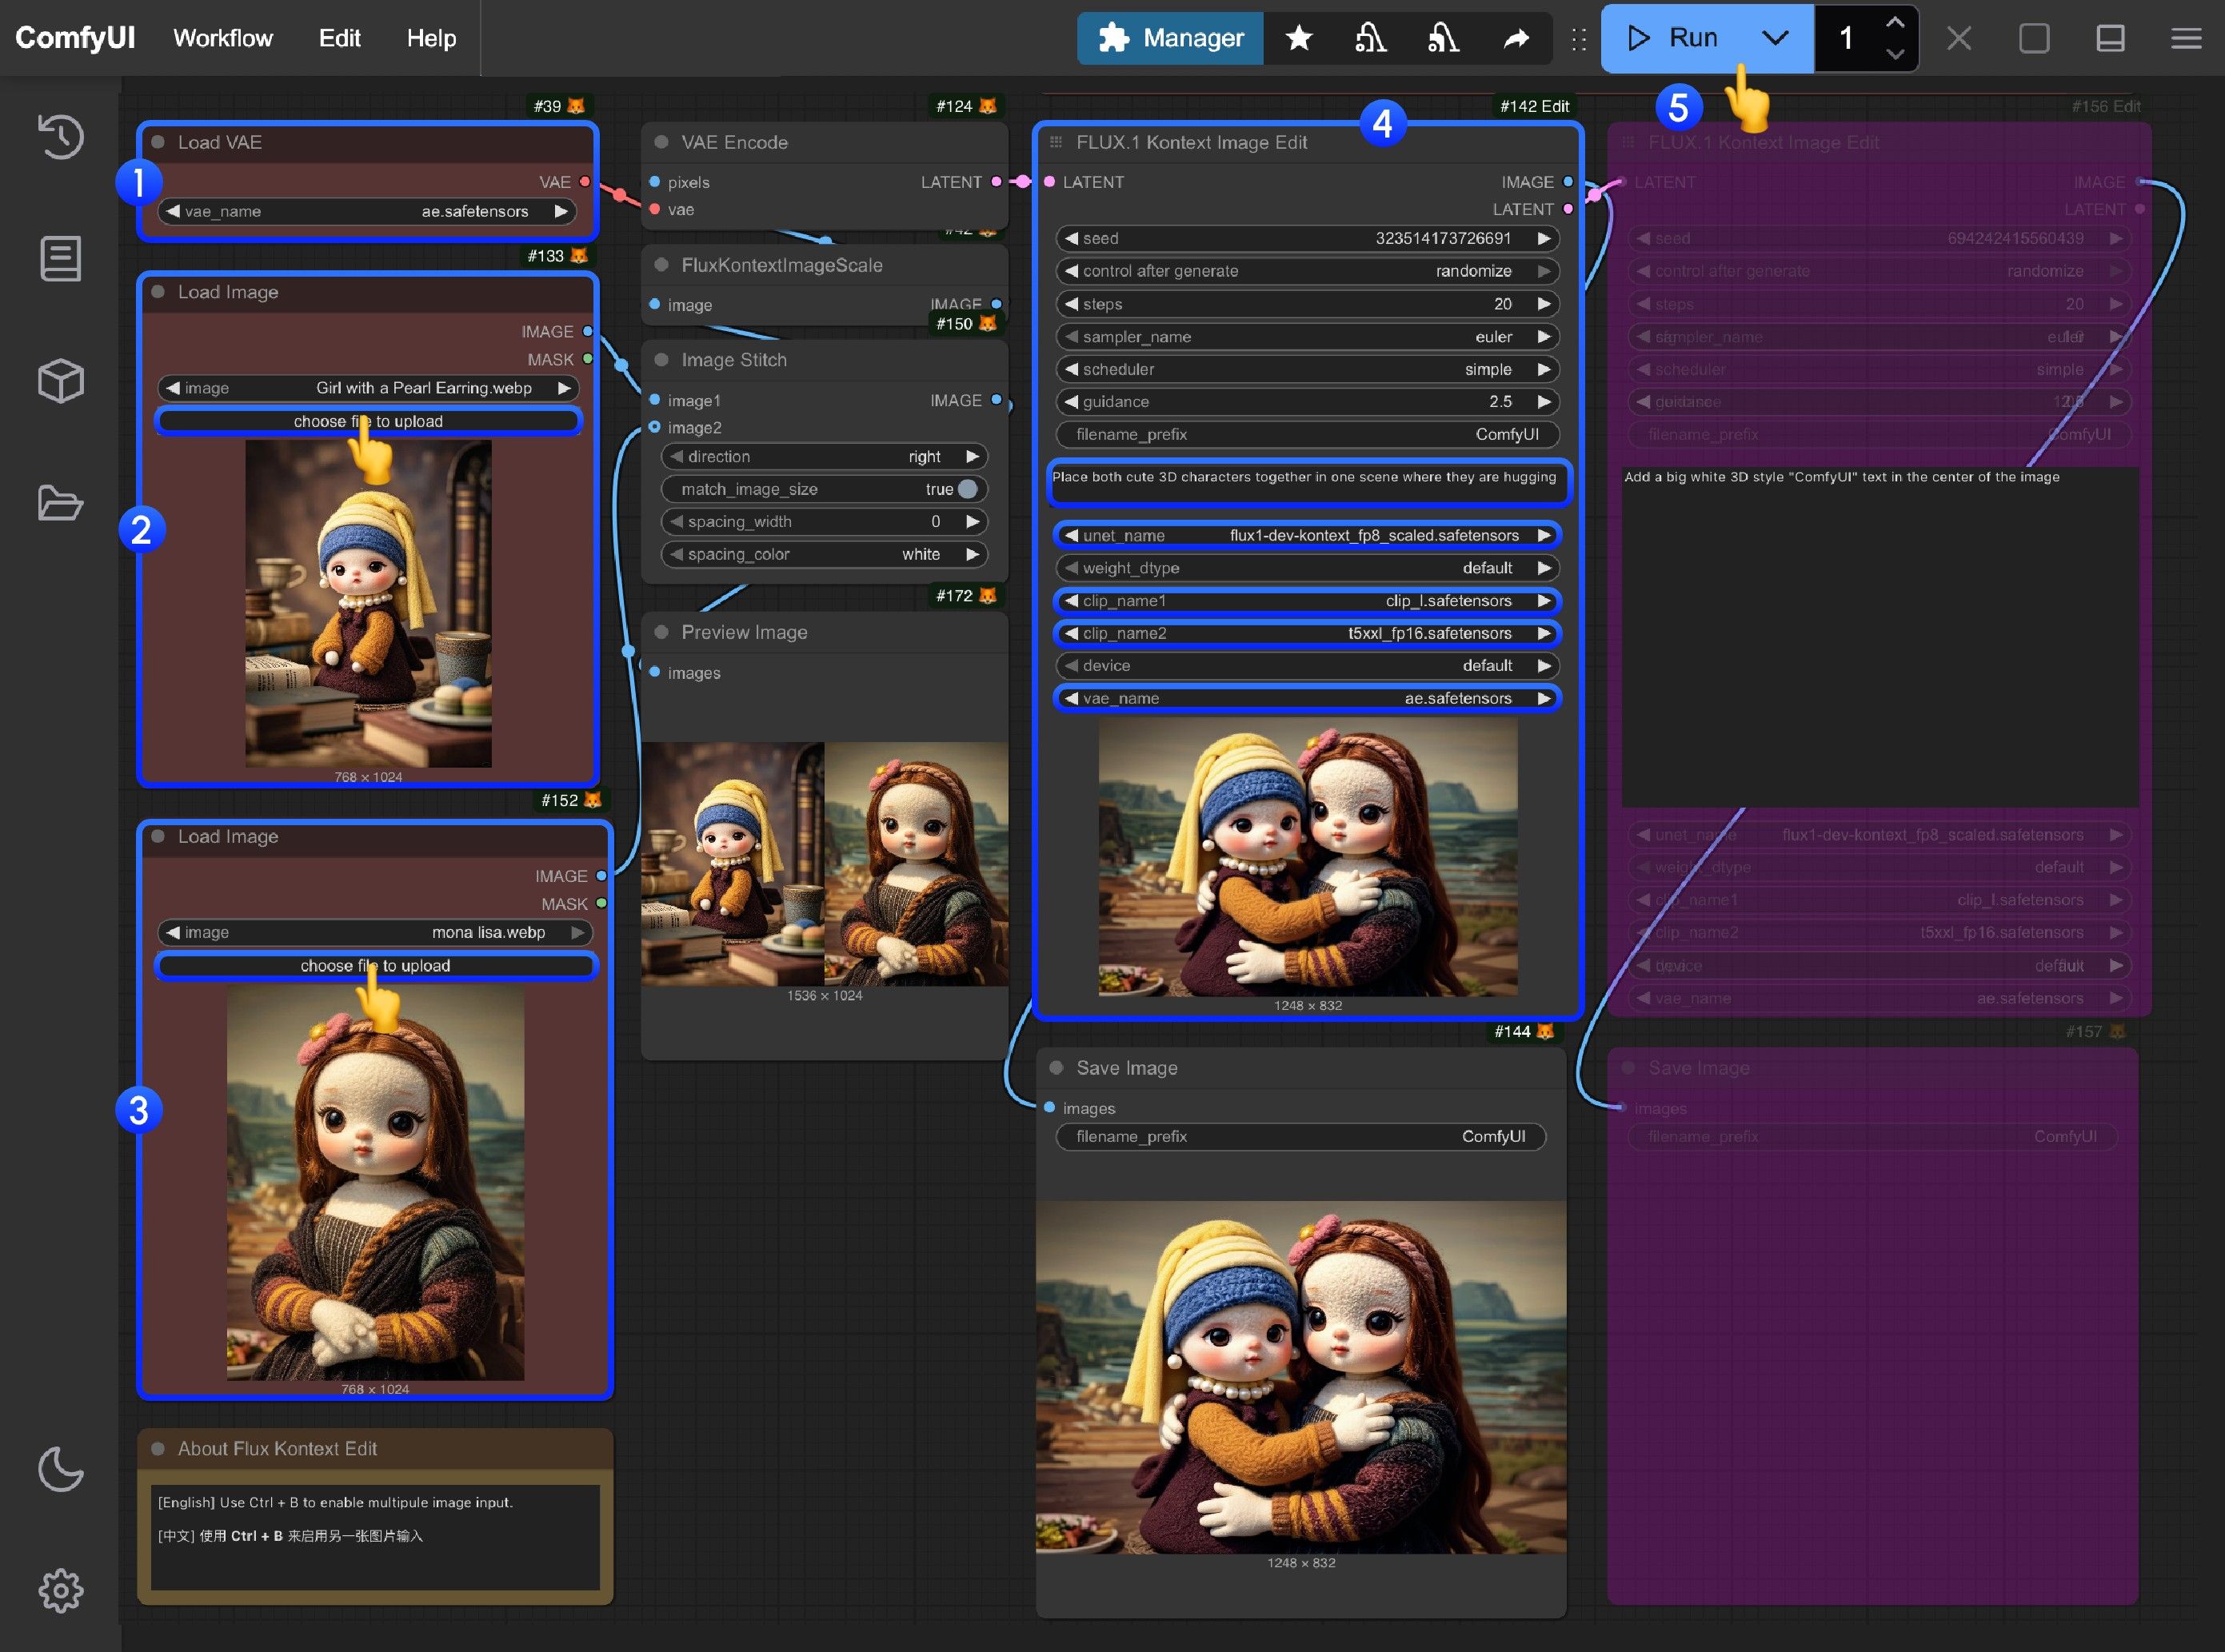
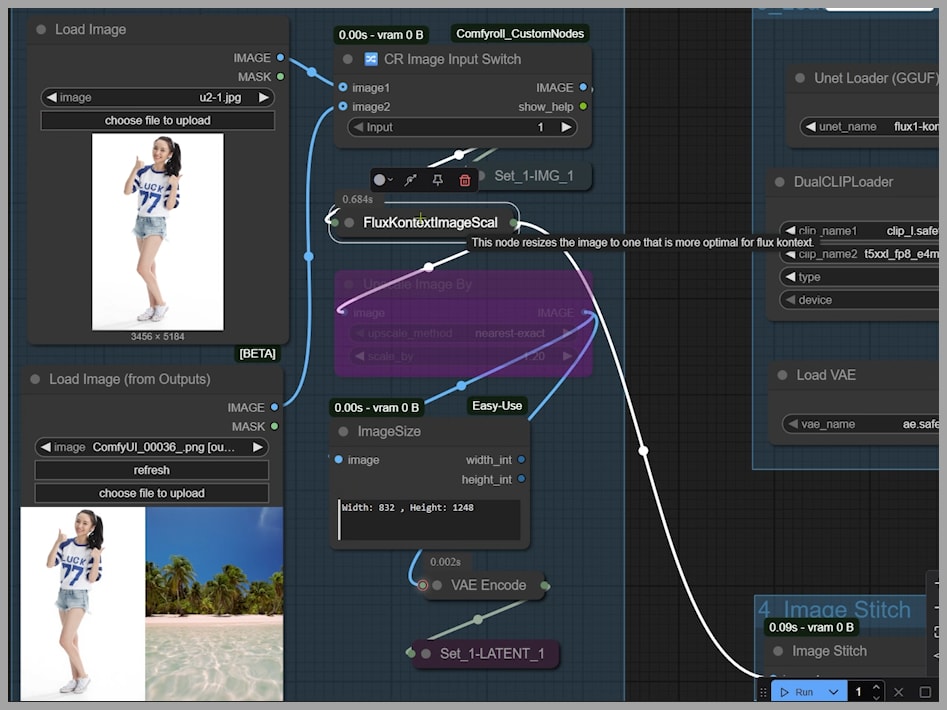
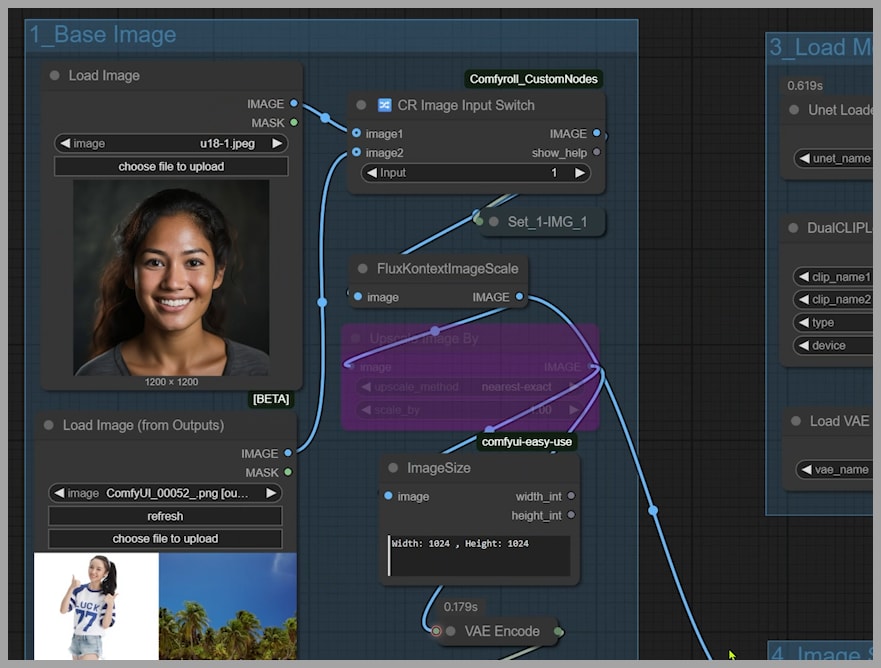
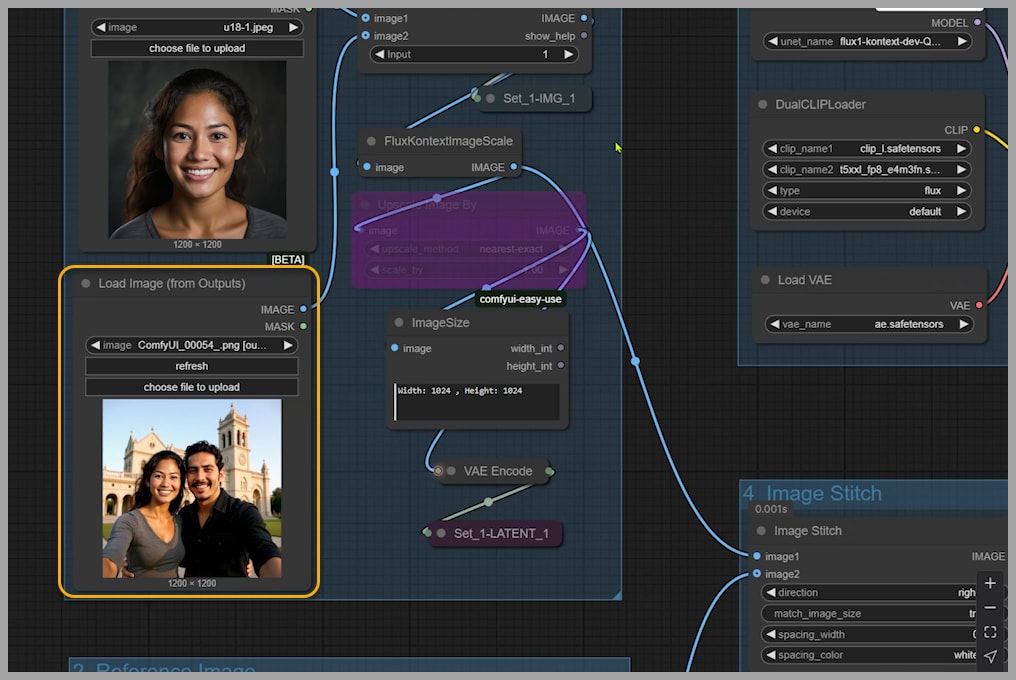
For example, a popular workflow attempts to place two characters into a single scene using an “Image Stitch” node. This node stitches two uploaded pictures together into one combined image. This stitched image is then used for conditioning and is also encoded into the latent space.
I’ve seen many online tutorials copying this exact method. But when I put it to the test myself, it often just doesn’t work as expected. Let me show you what I mean.
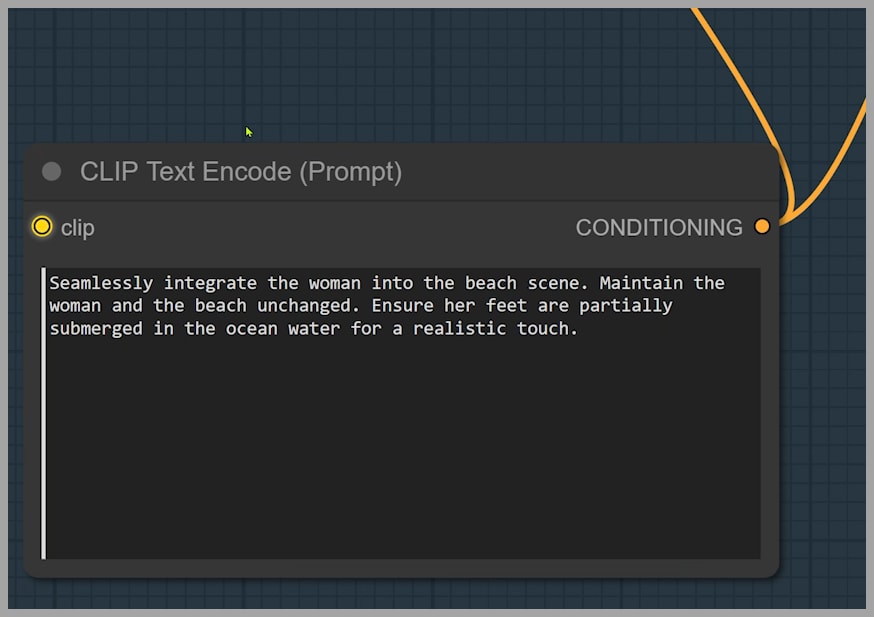
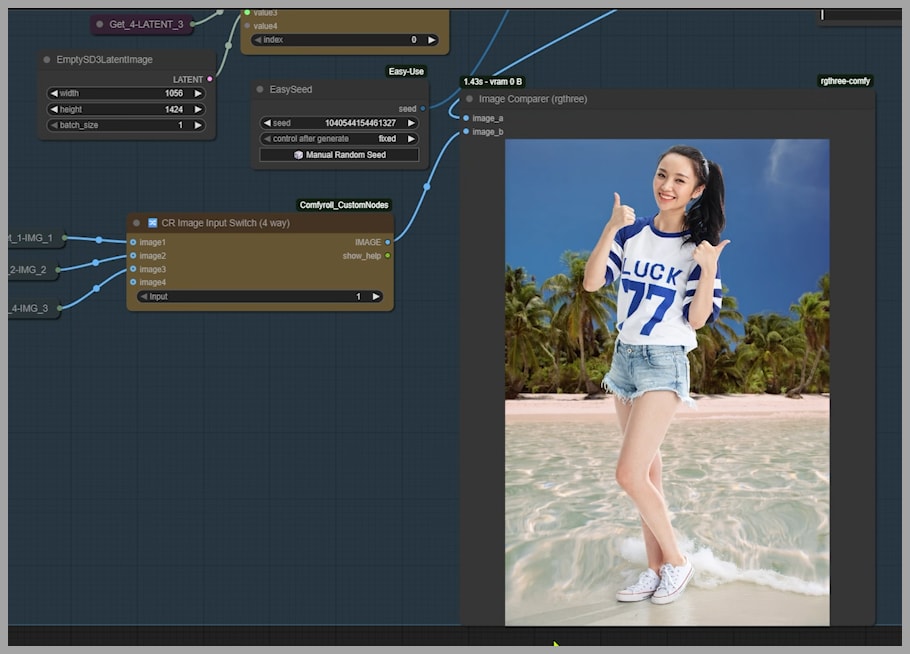
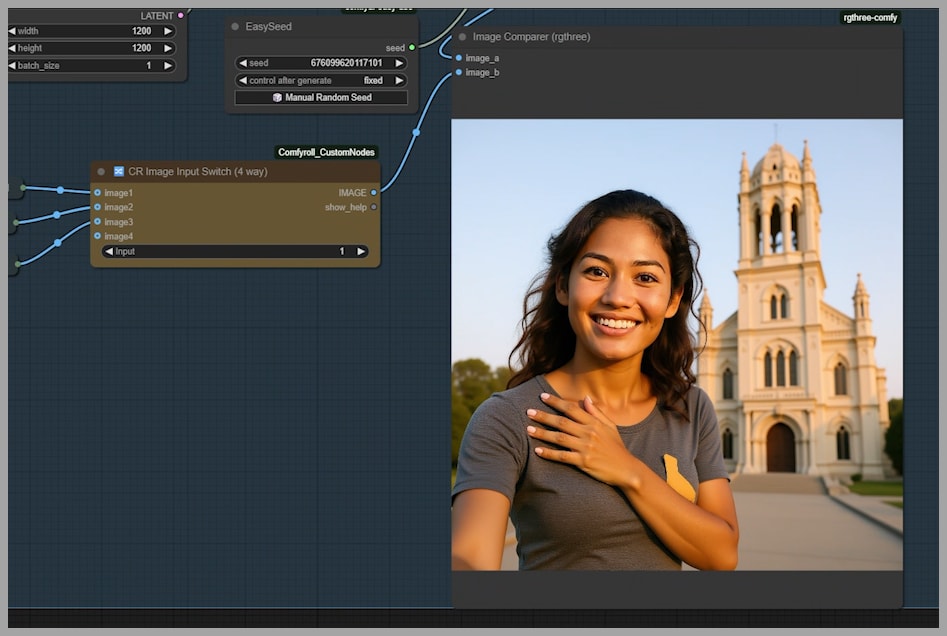
In one test, I tried to blend a woman into a beach scene. The final output, however, was identical to the initial stitched image. My goal was a portrait-style image (taller than wide), but the output was stuck in a landscape format. Critically, there was no way within this standard workflow to set the desired output dimensions. These limitations were a clear sign that a better approach was needed.

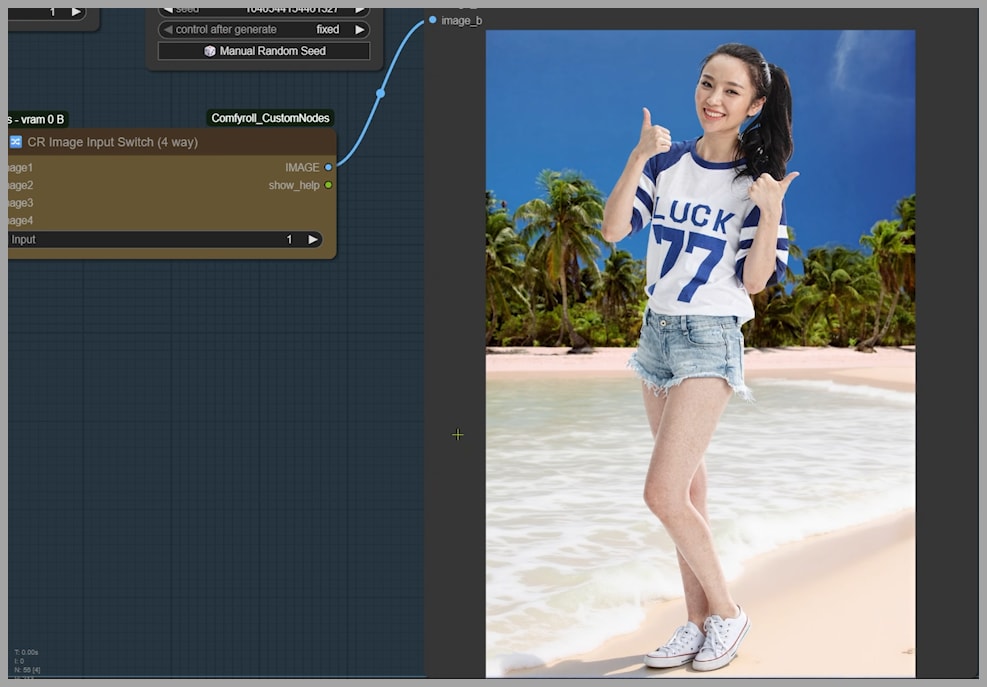
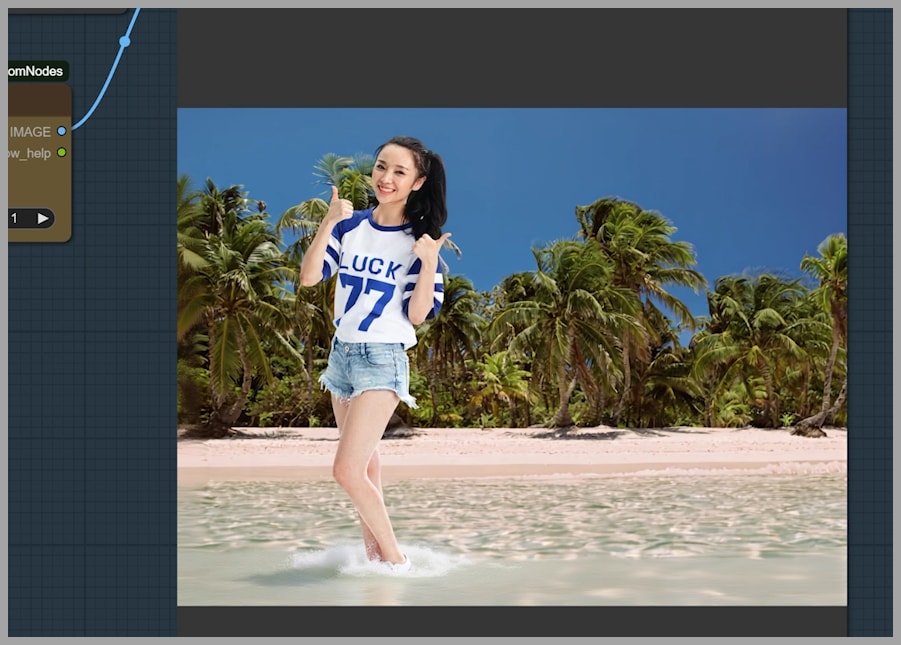
Because of the problems I encountered, I decided to roll up my sleeves and build my own workflow. In my setup, I also begin by stitching the uploaded images together. But just look at this result! I successfully blended the woman into the beach, and you can see how her feet are perfectly submerged in the seawater, exactly as I described in my prompt. This is the level of control we’re aiming for.
Join our community and try it free for 7 days to get the workflow: https://myaiforce.com/join
How It Works: A Deep Dive into the Custom Workflow
The true power of this custom workflow comes from its flexibility. It’s built around two key nodes that give you precise control over the generation process:
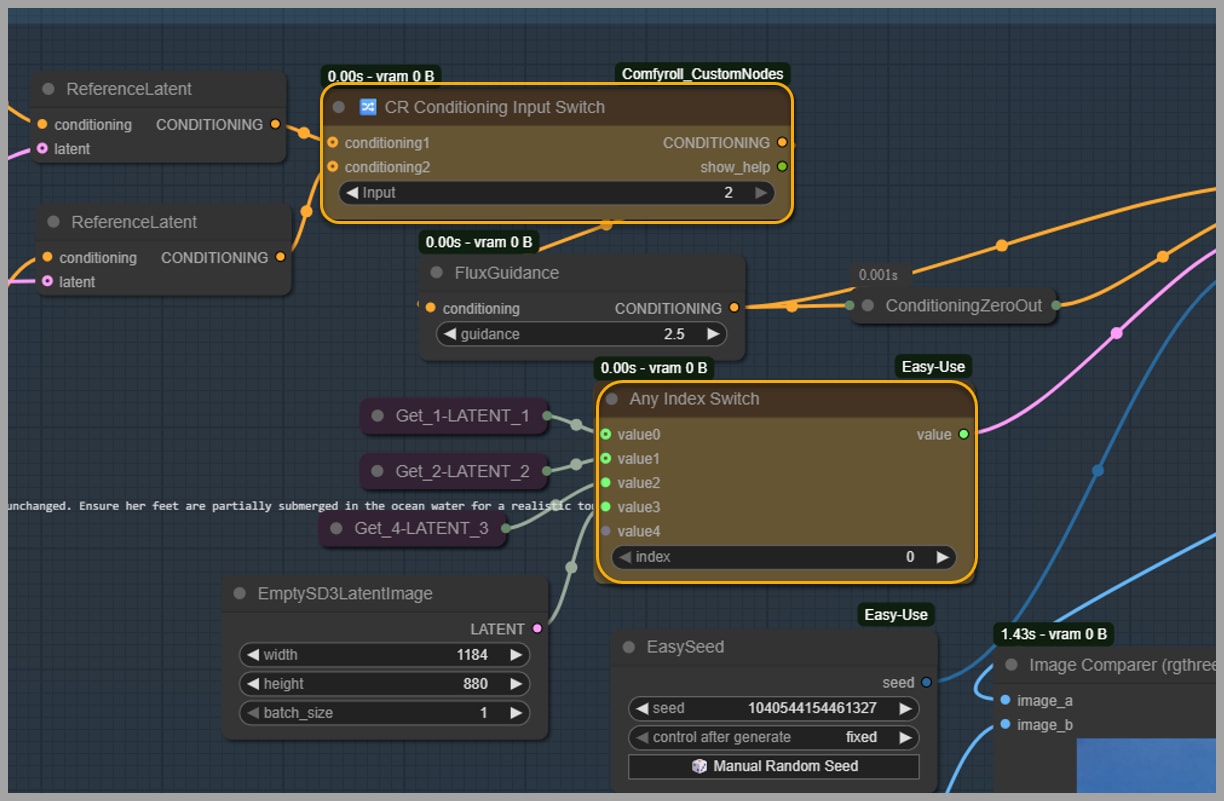
- Conditioning Switch: This node lets you choose between two different conditioning inputs, allowing you to decide which image’s context guides the AI.
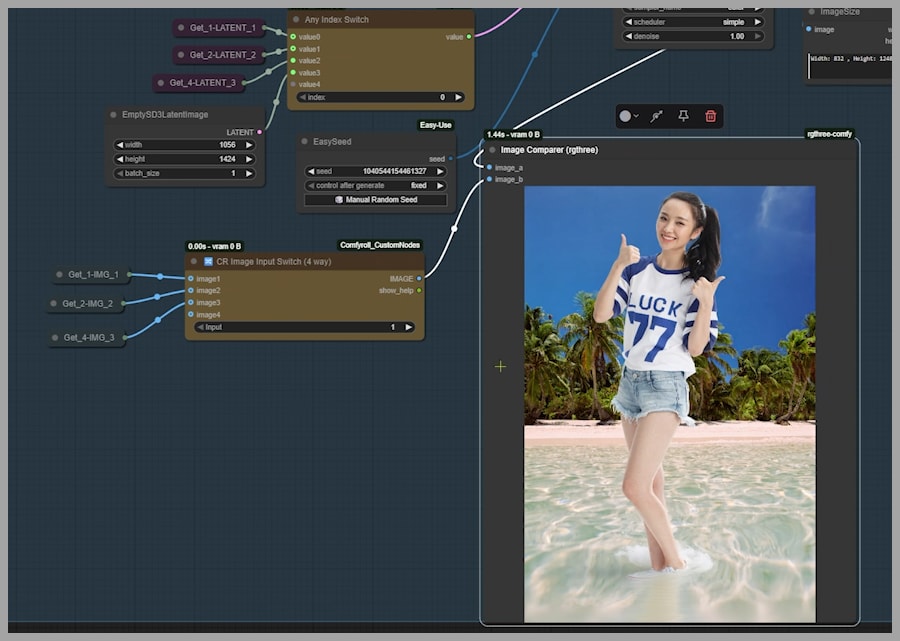
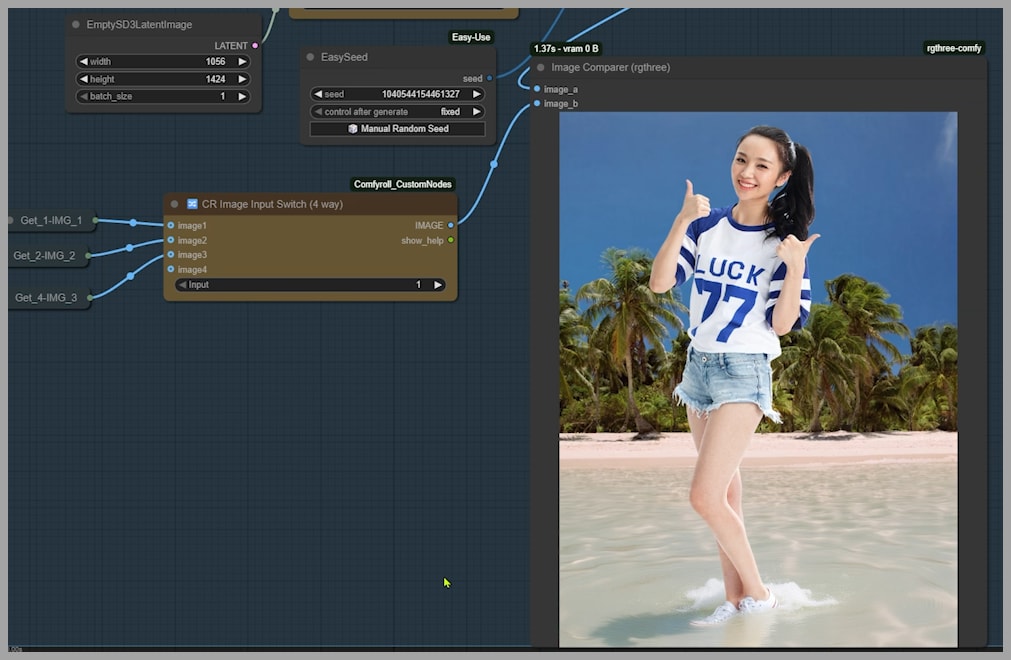
- Index Switch: This node lets you select from four different latent images to feed into the KSampler, giving you ultimate say over the final composition.
Sizing It Right: Controlling Output with Latent Images
The final image size depends entirely on the size of the latent image you choose. You can adjust this easily in the EmptySD3LatentImage node.
- In the current setup, the
Any Index Switchnode is set to0. This means it’s using the latent image from the first node group. - The uploaded image is resized by the
FluxKontextImageScalenode. This smart node resizes your image to be compatible with the Flux Kontext model while preserving the original aspect ratio. Here, it scaled the image to 832×1248. - After being encoded, this becomes the latent image for the KSampler, and this size dictates the final output image size.
To Upscale or Not to Upscale?
What if we want a larger image? Let’s try activating the Upscale Image By node and setting it to enlarge the image by 1.2 times.
After running the workflow, you can see the latent image size is now 998×1498, which means our output will be bigger.

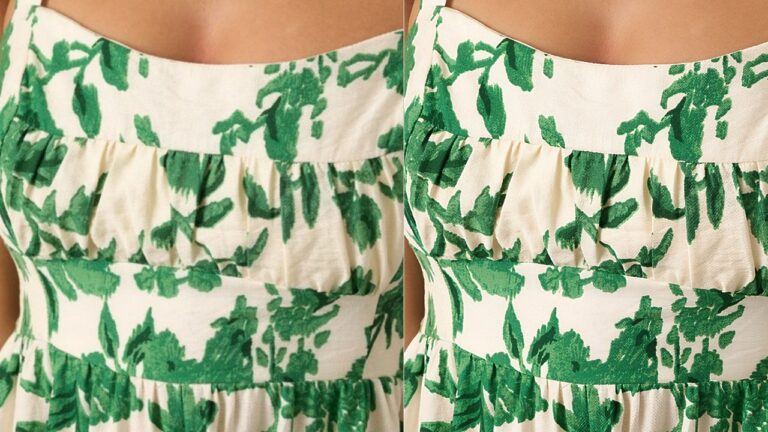
Check out the consistency! The image is larger, but it’s not perfect. Her feet are now dry, not in the water as I requested, and her skin has some noticeable blemishes.
This demonstrates a key lesson: sometimes, bigger isn’t better. The upscaling process can occasionally introduce artifacts or cause the model to lose track of specific details. After deactivating the upscale node and reverting to the initial state, the output once again meets all my requirements: feet in water and clear skin.
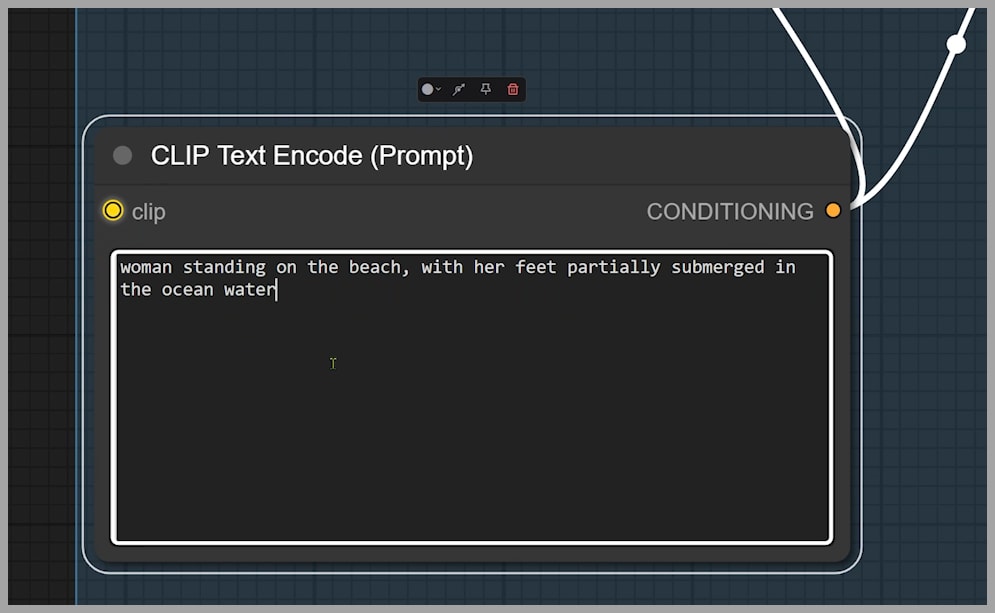
The Craft of Prompting: Why Detail Matters
Through extensive testing, I’ve learned just how crucial prompt phrasing is. For instance, in my successful prompt, I used a detailed, specific request to keep the woman and beach unchanged and to ensure the woman’s feet are submerged in the water.
Now, let’s compare that with a more natural, shorter prompt: the woman's feet are submerged in seawater.
The result? Not ideal. The generated beach doesn’t match my uploaded beach image, and her feet are still dry. This is a powerful reminder that while short prompts can work, for precise control and consistent results, detailed prompts are key.
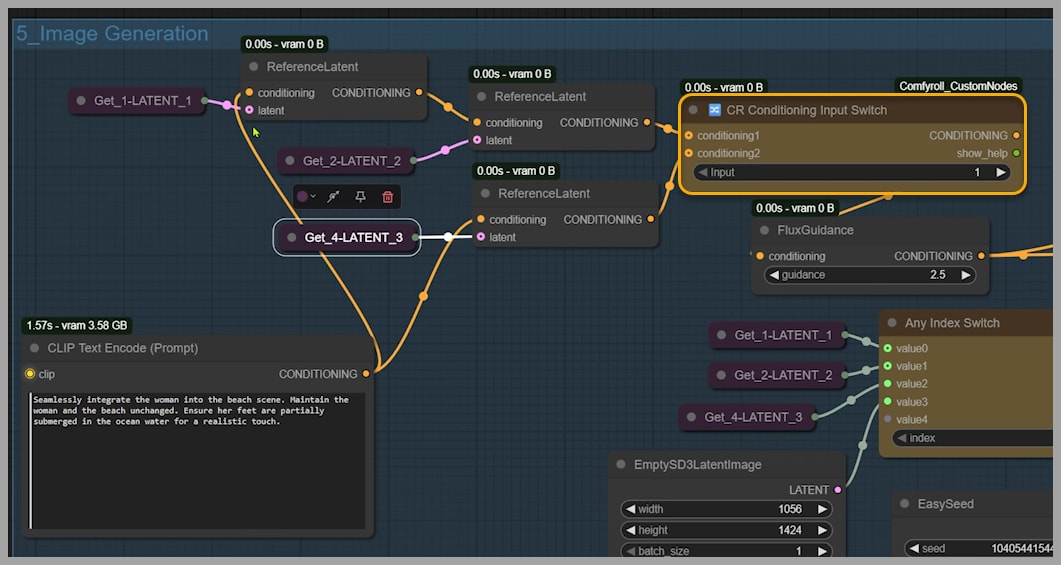
Advanced Control: Mastering Conditioning and Latent Inputs
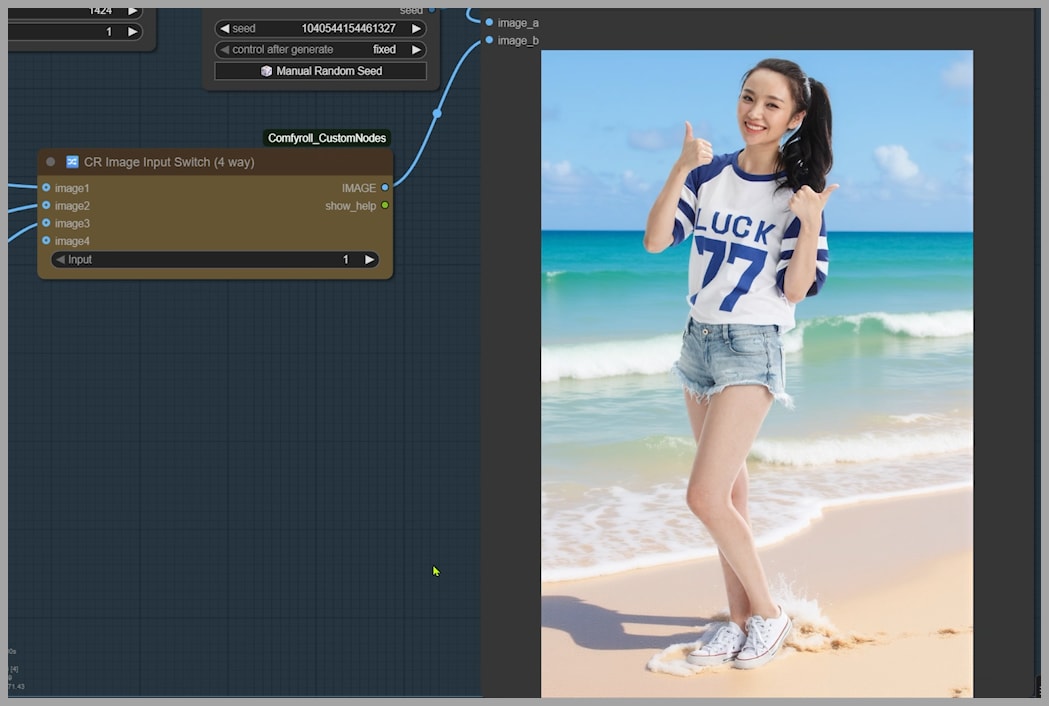
I switched to a more advanced strategy. By setting the Conditioning Switch input to 1, the setup now uses two latents: one from each uploaded image. The ReferenceLatent node transforms them into conditioning and then combines them.
The result is interesting! The woman and the beach look almost identical to the original pictures, which is great for likeness. But her feet? Still not in the water. We’re close, but not quite there yet.
The Switching Game: Finding the Perfect Blend
The KSampler is currently using the latent from the first group (the woman). What happens if we switch it?
- Go to the
Index Switchnode. - Change the index to use the latent from the second group (the beach).
- Run it again.
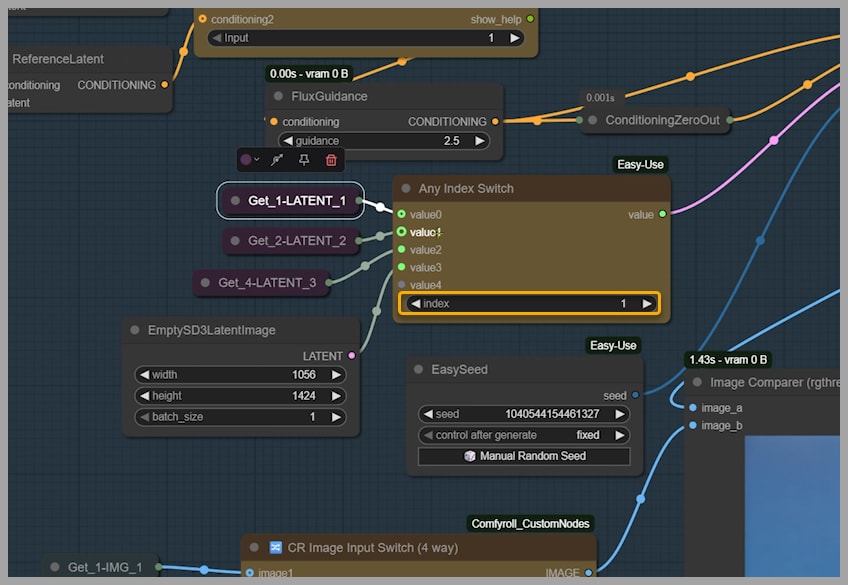
There we go! The output is now exactly what we wanted.
This proves that different combinations of conditioning and latent inputs can achieve similarly excellent results. If your first try isn’t perfect, don’t be afraid to play with these switches!
Pro Tips and Tricks for Flawless Edits
Master Your Aspect Ratio
Remember how the original workflow was stuck in one orientation? Here, you can easily change the output aspect ratio. Let’s set the EmptySD3LatentImage size to 1184×880 for a landscape image.

And just like that, we get a beautiful wide shot!
Bonus Tip: Improve Likeness with the Image Swap
Here’s a fantastic bonus tip for generating images with multiple people. In this example, I’m generating a couple’s selfie. Notice how the man in the output looks pretty close to his original photo, but the woman’s resemblance isn’t as strong.

Instead of just tweaking nodes, we can try a simple trick: flip the uploaded images.
- Originally, the man was in group 1 and the woman in group 2.
- Let’s swap them: woman in group 1, man in group 2.
- Run it again.
The result is much better! The woman is now on the left, and she looks significantly more like her original photo. If you’re struggling with character likeness, definitely try swapping the input images.
From Duos to Solos: Adapting for Single Images
So far, we’ve focused on using two input images. But what if you only want to use one? This workflow handles single images beautifully!
- Simply deactivate the second node group.
- Adjust the prompt to describe only the single subject (e.g., just the woman).
- Run it.
Perfect! We get a fantastic solo selfie of the woman, proving the workflow’s versatility.
The Grand e: Iterative, Conversational Editing
This brings us to the workflow’s most powerful feature: iterative editing.
- Hit the refresh button on the input node. It now shows our latest output, ready to be used as the starting point for a new generation. We can even load previous outputs. Let’s choose the couple selfie we made earlier.
- Crucially, remember to set the conditioning input back to
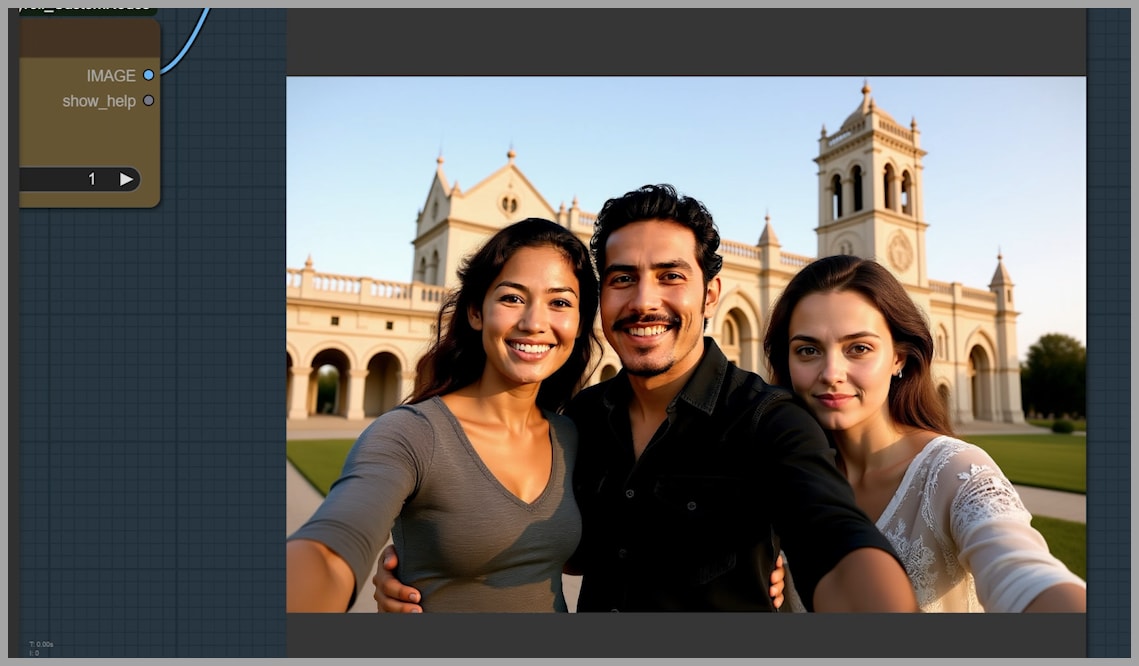
2so it correctly uses the couple image as its source. - Now, let’s add another woman to the shot. Update the prompt to say “a man with two women.”
- Since we need a wider shot for three people, change the
EmptySD3LatentImagesize to a landscape format. - Generate!
Whoops, our first attempt gave us four people. Sometimes the AI overshoots. Let’s try generating again… Yes! Three people this time.
Want to edit this new version further? Just load it into the first group as your new input image. This creates a seamless, conversational, step-by-step editing process that feels just like chatting with an AI.
Conclusion: Now It’s Your Turn to Innovate!
I truly hope this custom workflow makes your experience with the FLUX.1 Kontext model smoother, more powerful, and more fun. The possibilities are vast, and the control this setup offers is a significant step up from standard methods. Now it’s your turn to create!