Outpainting Any Image Using Flux Models in ComfyUI
In this article, I’ll guide you through a workflow I recently developed for outpainting using Flux models. It has given me some fantastic results, and I’m excited to share it with you.
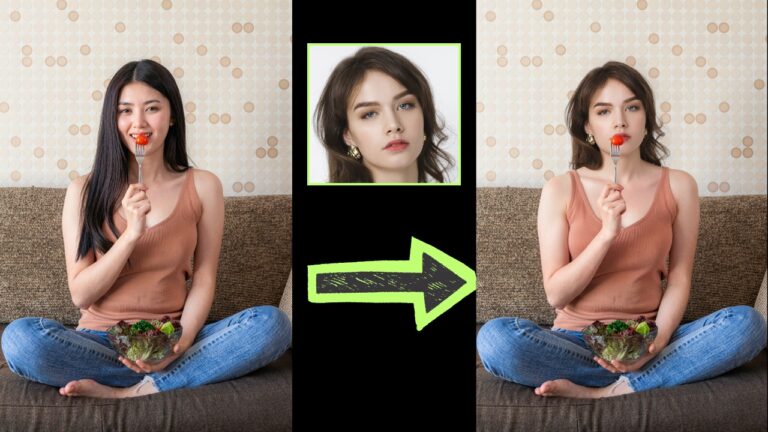
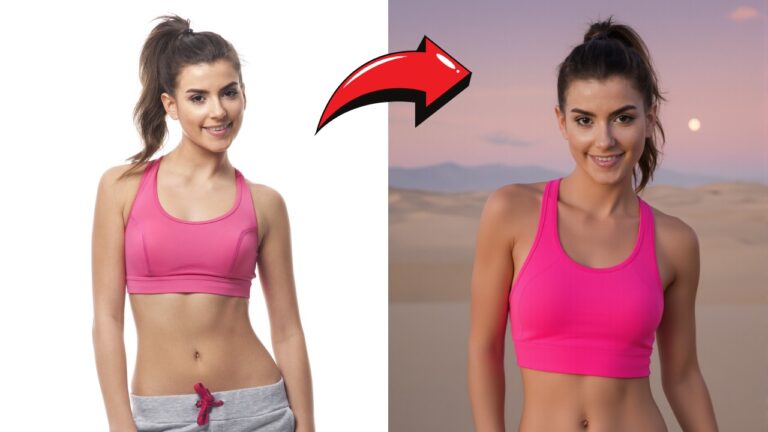
This workflow not only seamlessly expands backgrounds but can also outpaint complex parts of the human body—like hands and feet—with minimal errors.
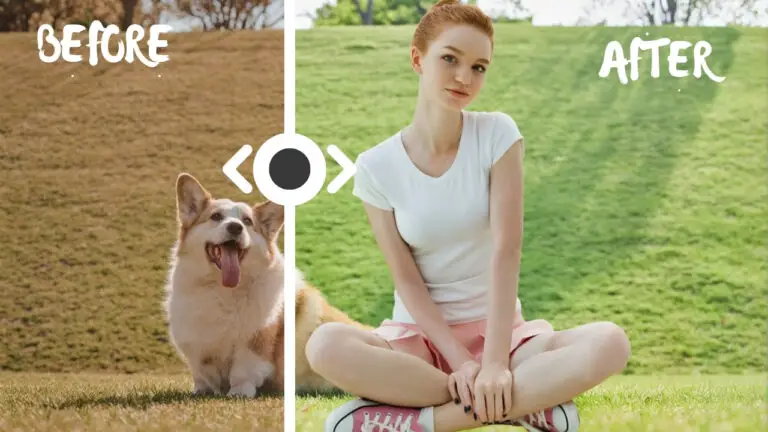
Image Before Outpainting:
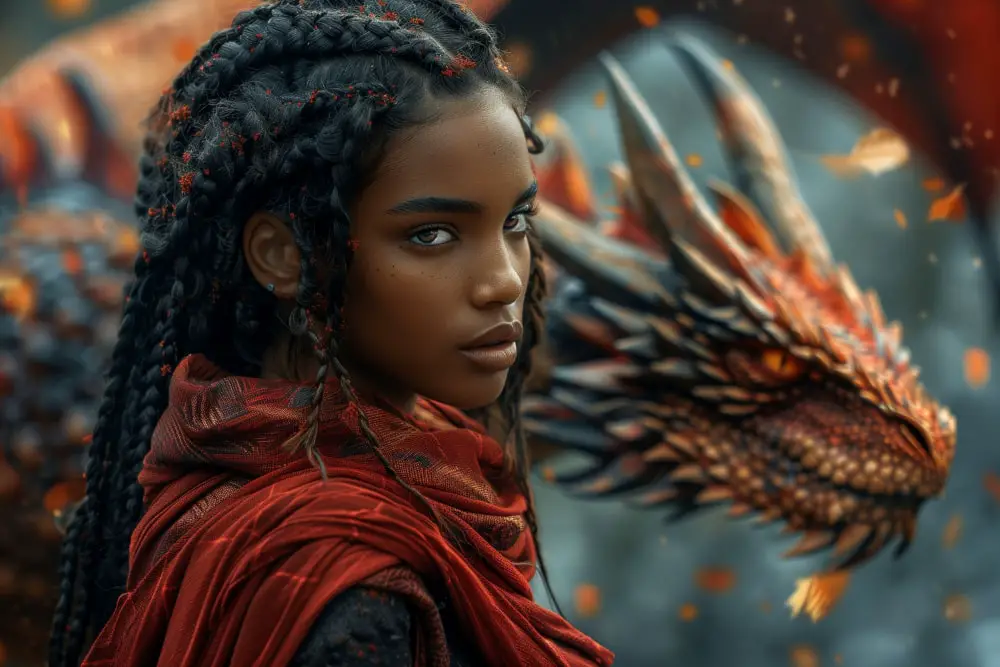
Image After Outpainting:
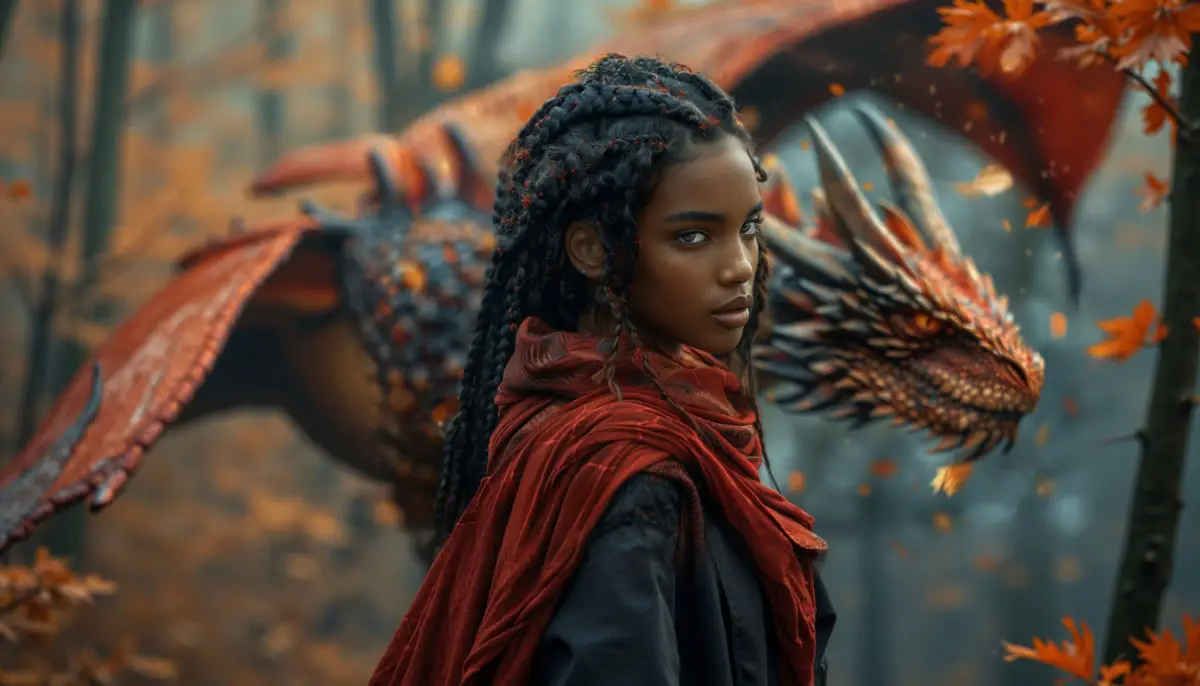
Image Before Outpainting:
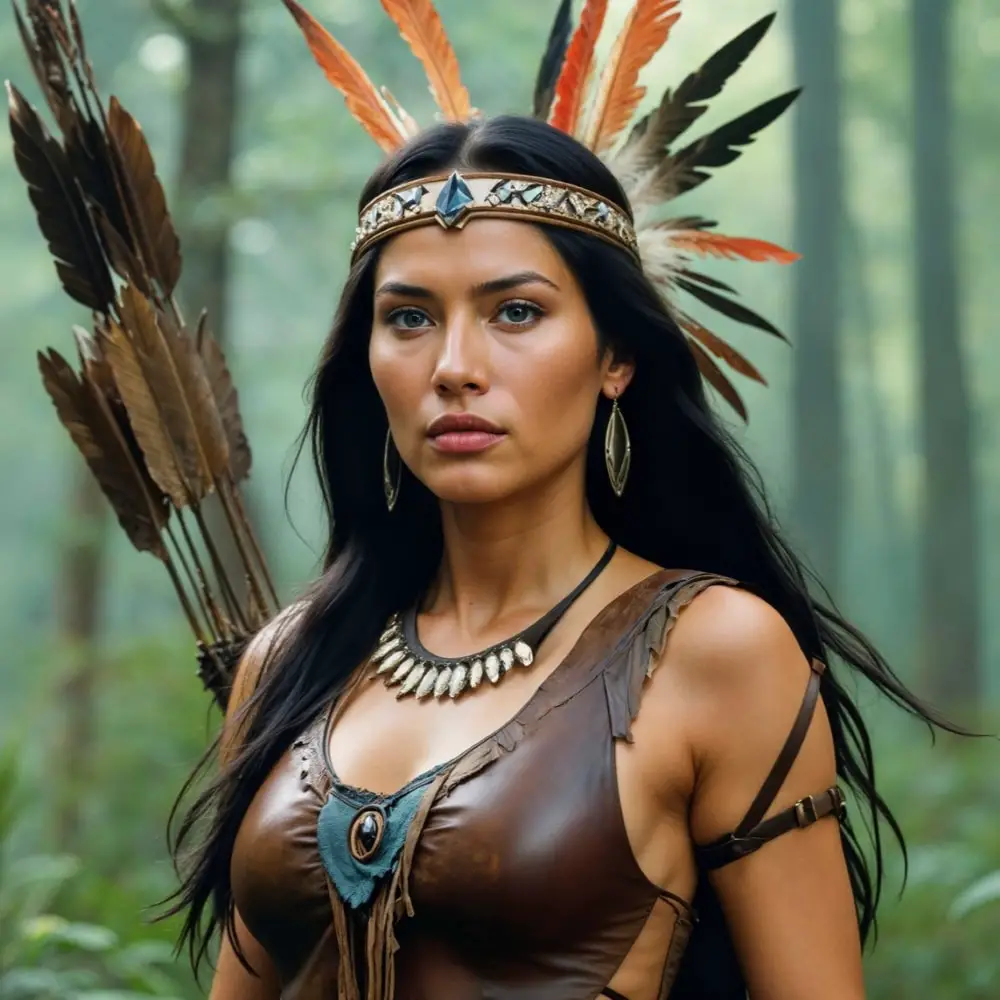
Image After Outpainting:
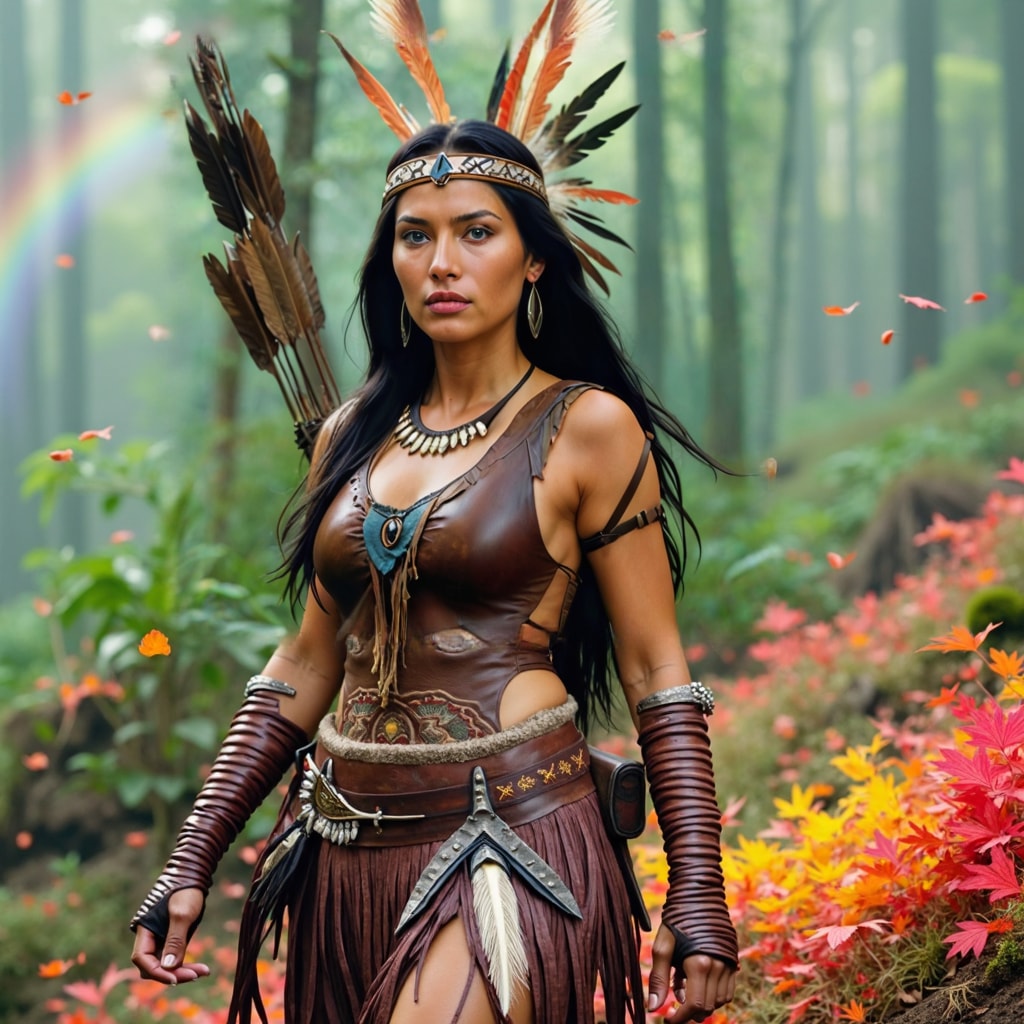
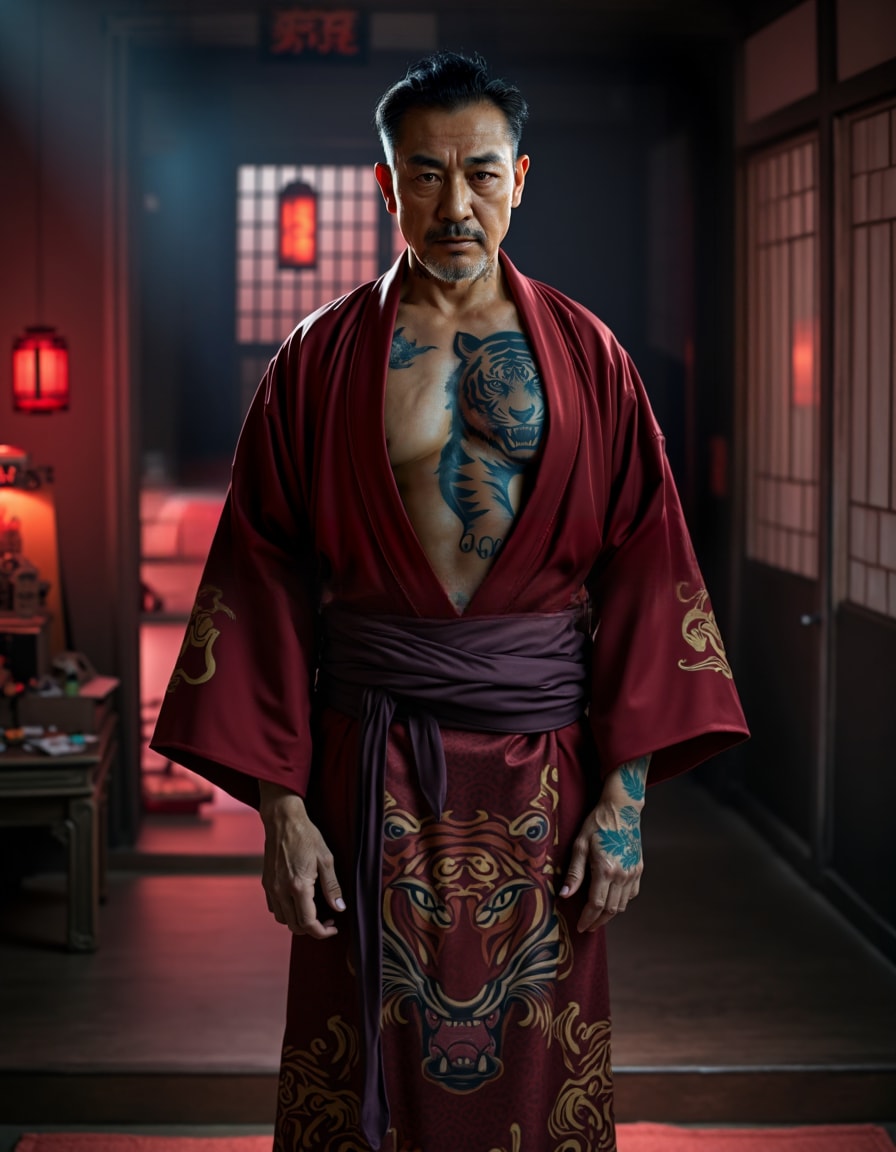
Image Before Outpainting:
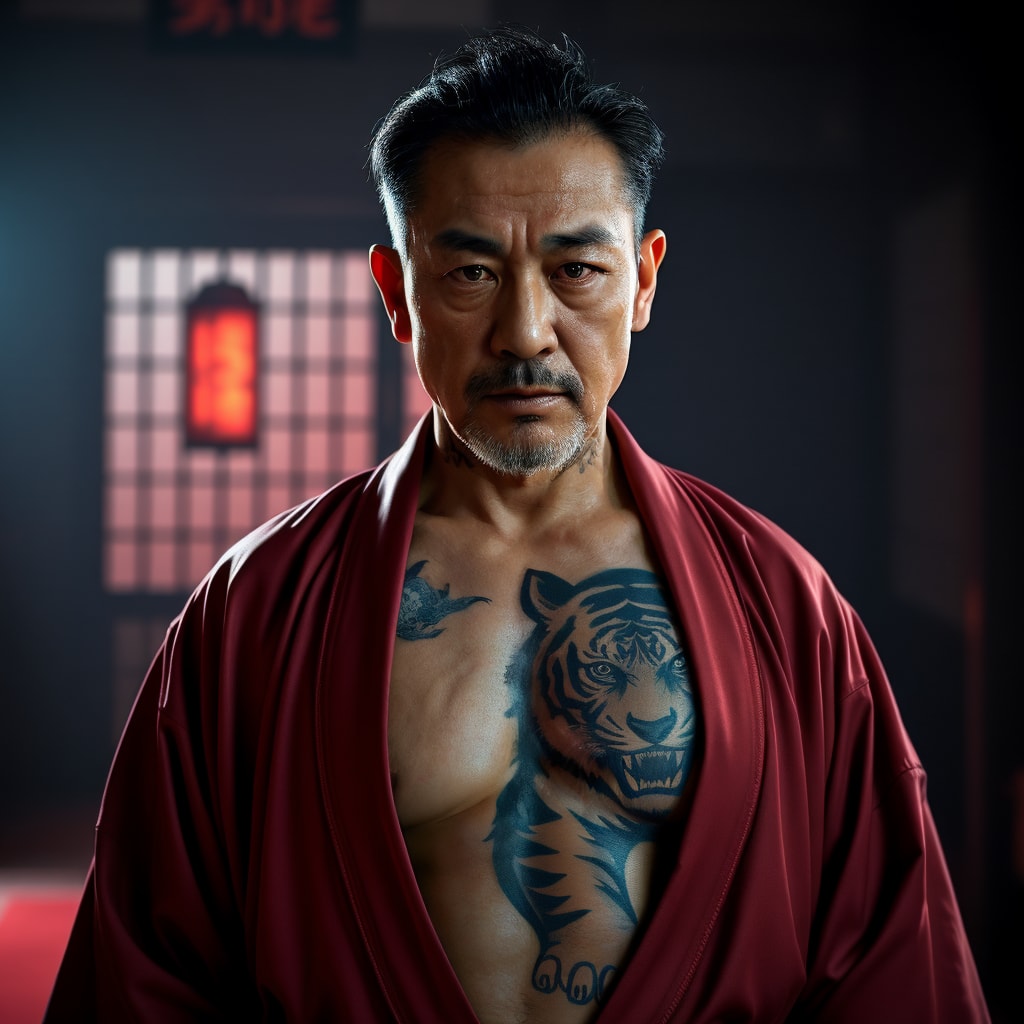
Image After Outpainting:
Pretty cool, right? I’ll include a download link for the workflow so you can try it out yourself.
Download this workflow: https://openart.ai/workflows/myaiforce/M3OEFh46Ojtb6RcdOCsI
Check out the engaging video tutorial that complements this article:
Gain exclusive access to advanced ComfyUI workflows and resources by joining our community now!
Here’s a mind map illustrating all the premium workflows: https://myaiforce.com/mindmap
Run ComfyUI with Pre-Installed Models and Nodes: https://youtu.be/T4tUheyih5Q
Overview of the Workflow
This workflow is structured into 5 main node groups, working from top to bottom:
- Setup Area for Outpainting: This group defines the black section of the image that will be filled in during the outpainting process.
- Initial Outpainting with SDXL: We use an SDXL checkpoint for the first round of outpainting, since direct outpainting with the Flux model is not very effective at this stage.
- Restore Original Details: The third group restores details altered during the SDXL outpainting.
- Repainting with Flux Model: This group uses the Flux model to repaint the SDXL-filled areas and fix any issues, such as weird transitions.
- Upscaling the Final Image: The final group upscales the outpainted image, ensuring it is high-quality and ready for output.
Let’s walk through each group step by step.
1. Setting Up the Area for Outpainting
In the first node group, we upload the image that we want to outpaint and place it on a black background. The black area surrounding the image represents the space that will be outpainted.
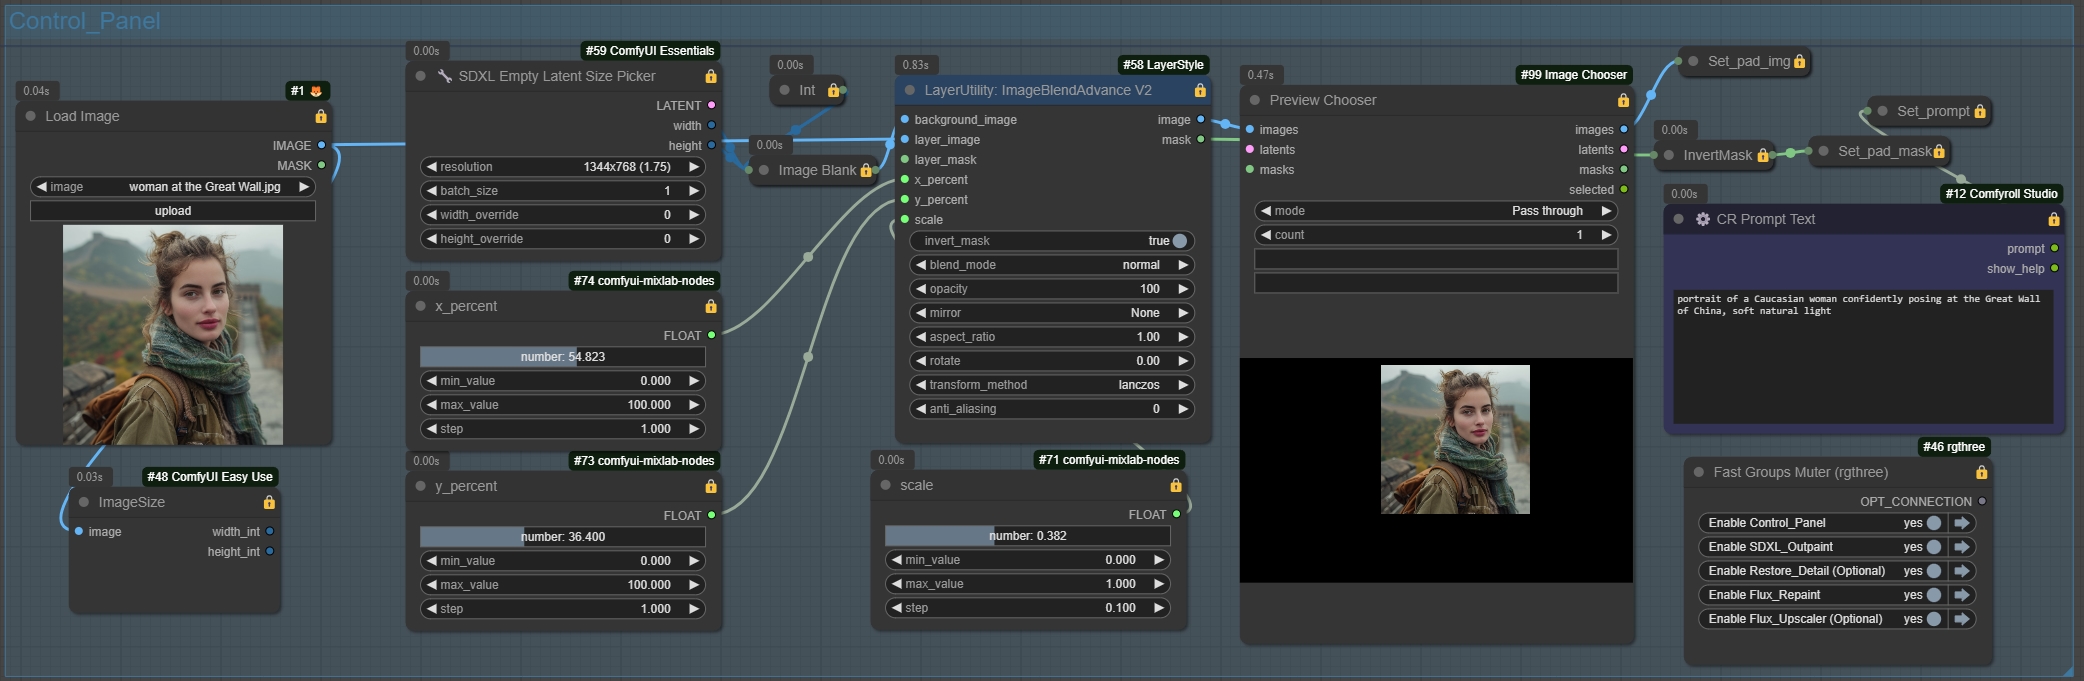
Here’s how to do it:
- Use the “ImageBlend” node to overlay the uploaded image onto the black background. You can adjust the size and position of the image here.
- The “background_image” input is the black image you create, which defines how large the final image will be after outpainting. Use the “SDXL Empty Latent Size Picker” node to set the resolution.
Important: The resolution must match SDXL dimensions to avoid issues like extra hands or feet in the outpainting or unnatural blending.
- Adjust the image layout using the following sliders:
- Scale: Controls the size of the image.
- x_percent and y_percent: Adjust the horizontal and vertical positioning.
- To preview your changes, switch the “mode” parameter in the “Preview Chooser” node to “Always Pause”. This allows you to visualize adjustments before continuing with the workflow.
2. Initial Outpainting with SDXL Model
The second group handles the initial outpainting using the SDXL model. Currently, Flux models don’t perform well for initial outpainting, so we use an SDXL checkpoint here.
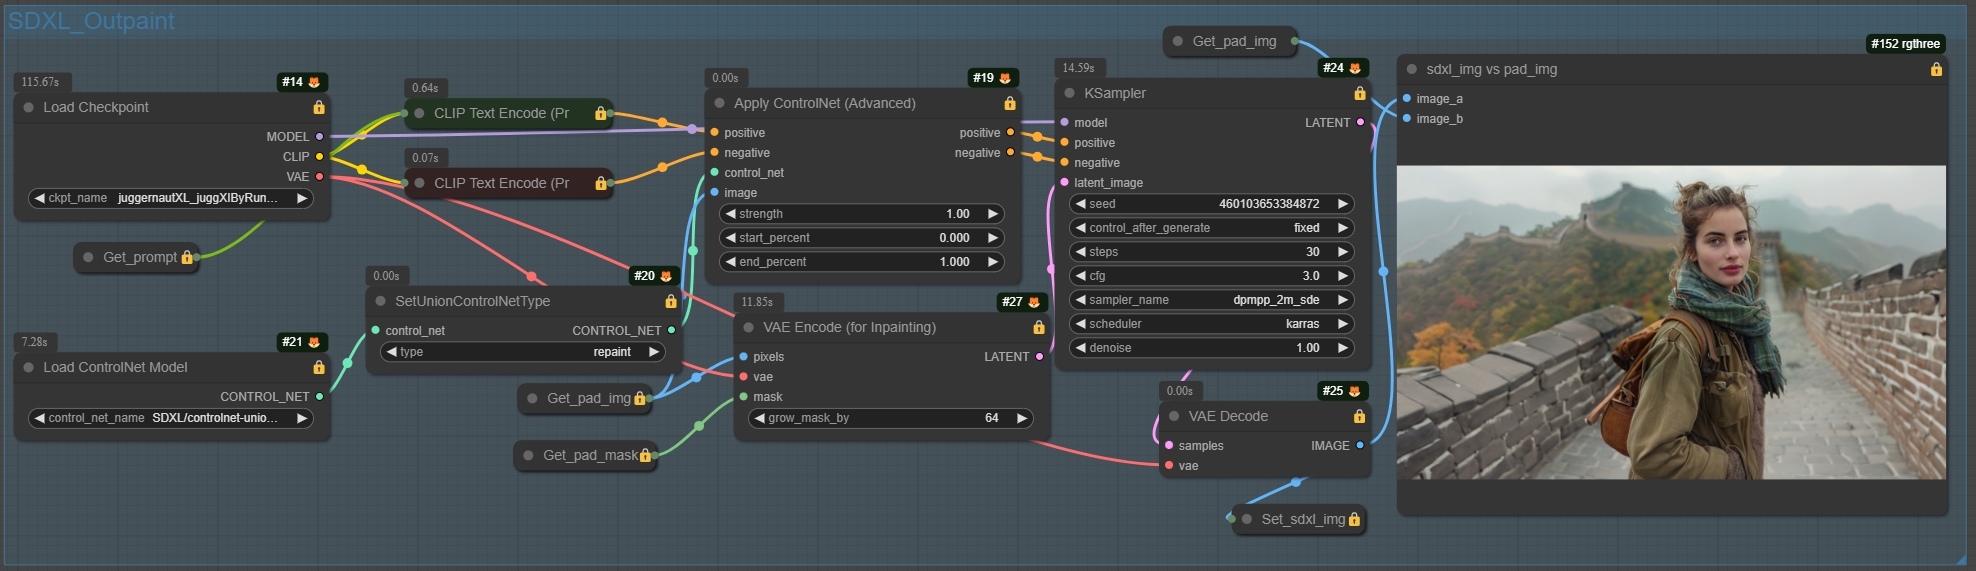
- Download the latest XI version of the SDXL model from Juggernaut.
- We also use the ControlNet model for this step. Download the promax version and place it in your ComfyUI/Models/ControlNet folder.
- Set ControlNet to “repaint” mode and adjust the “grow_mask_by” parameter in the VAE encoder to 64 to prevent visible seams. Lower this value if you still notice issues with seams.
Once this step is done, you might notice slight changes in details like faces or other key features, as well as some color or brightness differences in the outpainted area. If the differences aren’t too noticeable, feel free to skip the next step. Otherwise, proceed to the third group.
3. Restoring the Original Details
In this group, we restore any altered details from the initial outpainting pass.
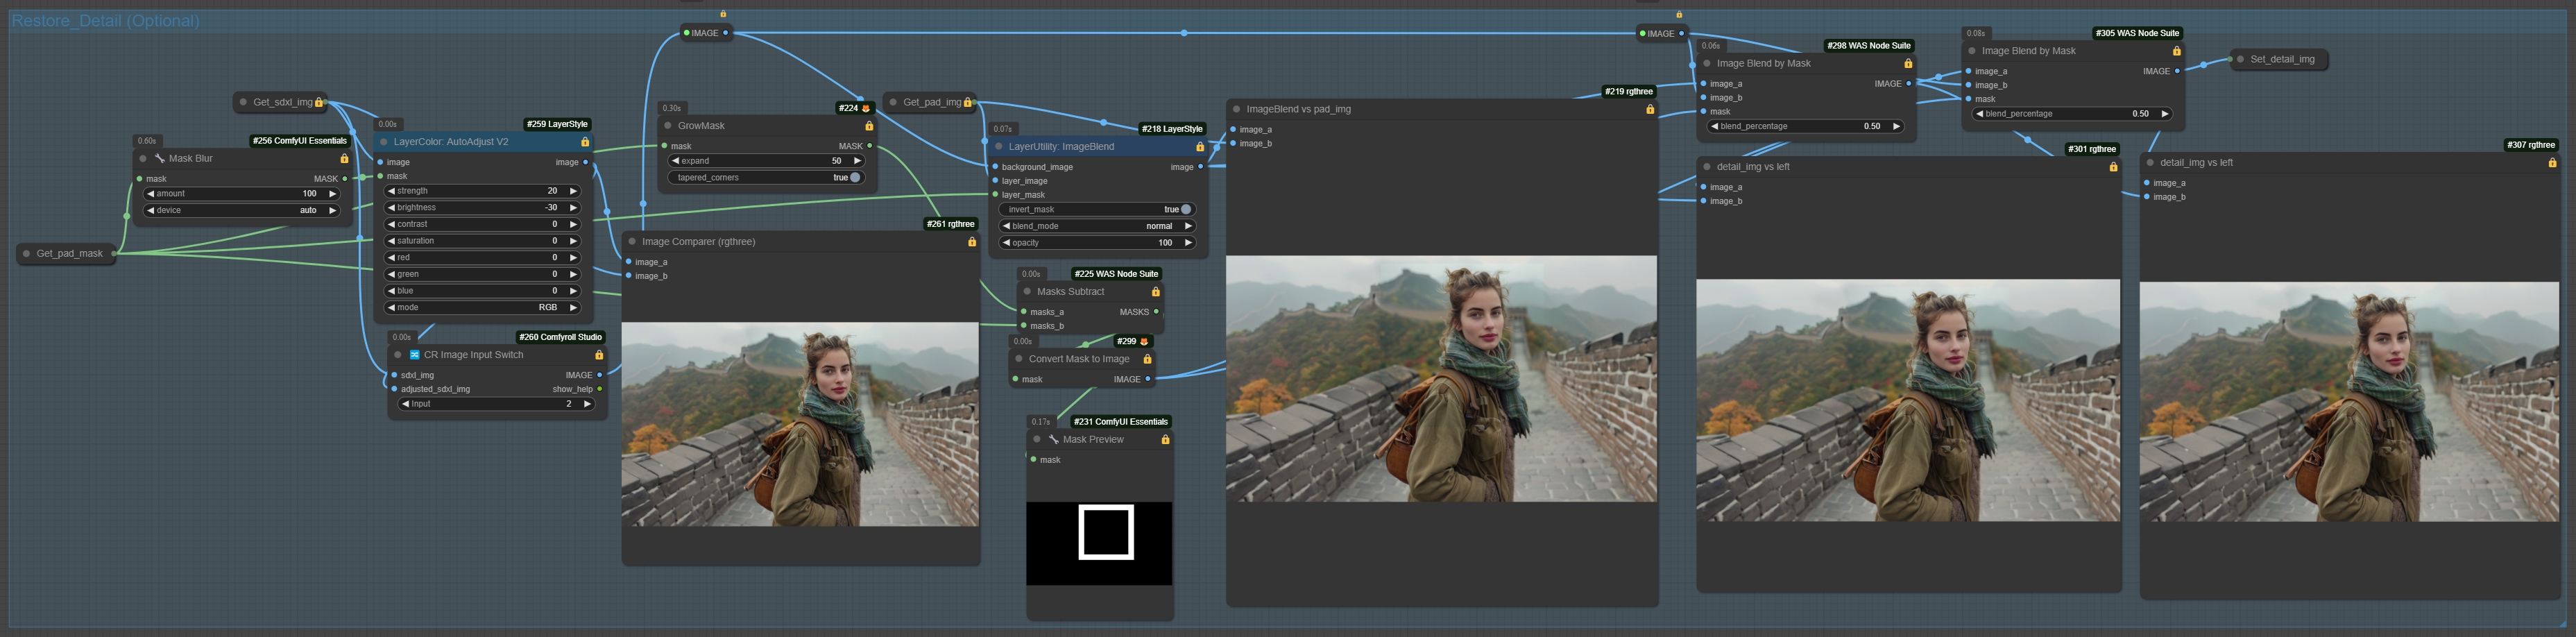
- Use the “ImageBlend” node to overlay the original image onto the outpainted image. This keeps the original details intact but may introduce visible seams around the edges.
- To eliminate these seams, create a mask based on the outline of the original image and use the “Image Blend by Mask” node to blend the two images smoothly.
- Use the Image Comparer node to compare the results and ensure the seams have disappeared.
If seams remain, repeat the blending process or proceed to the next group for further adjustments.
4. Repainting with the Flux Model
Next, we repaint the outpainted area using the Flux model to fix any leftover artifacts or transitions.
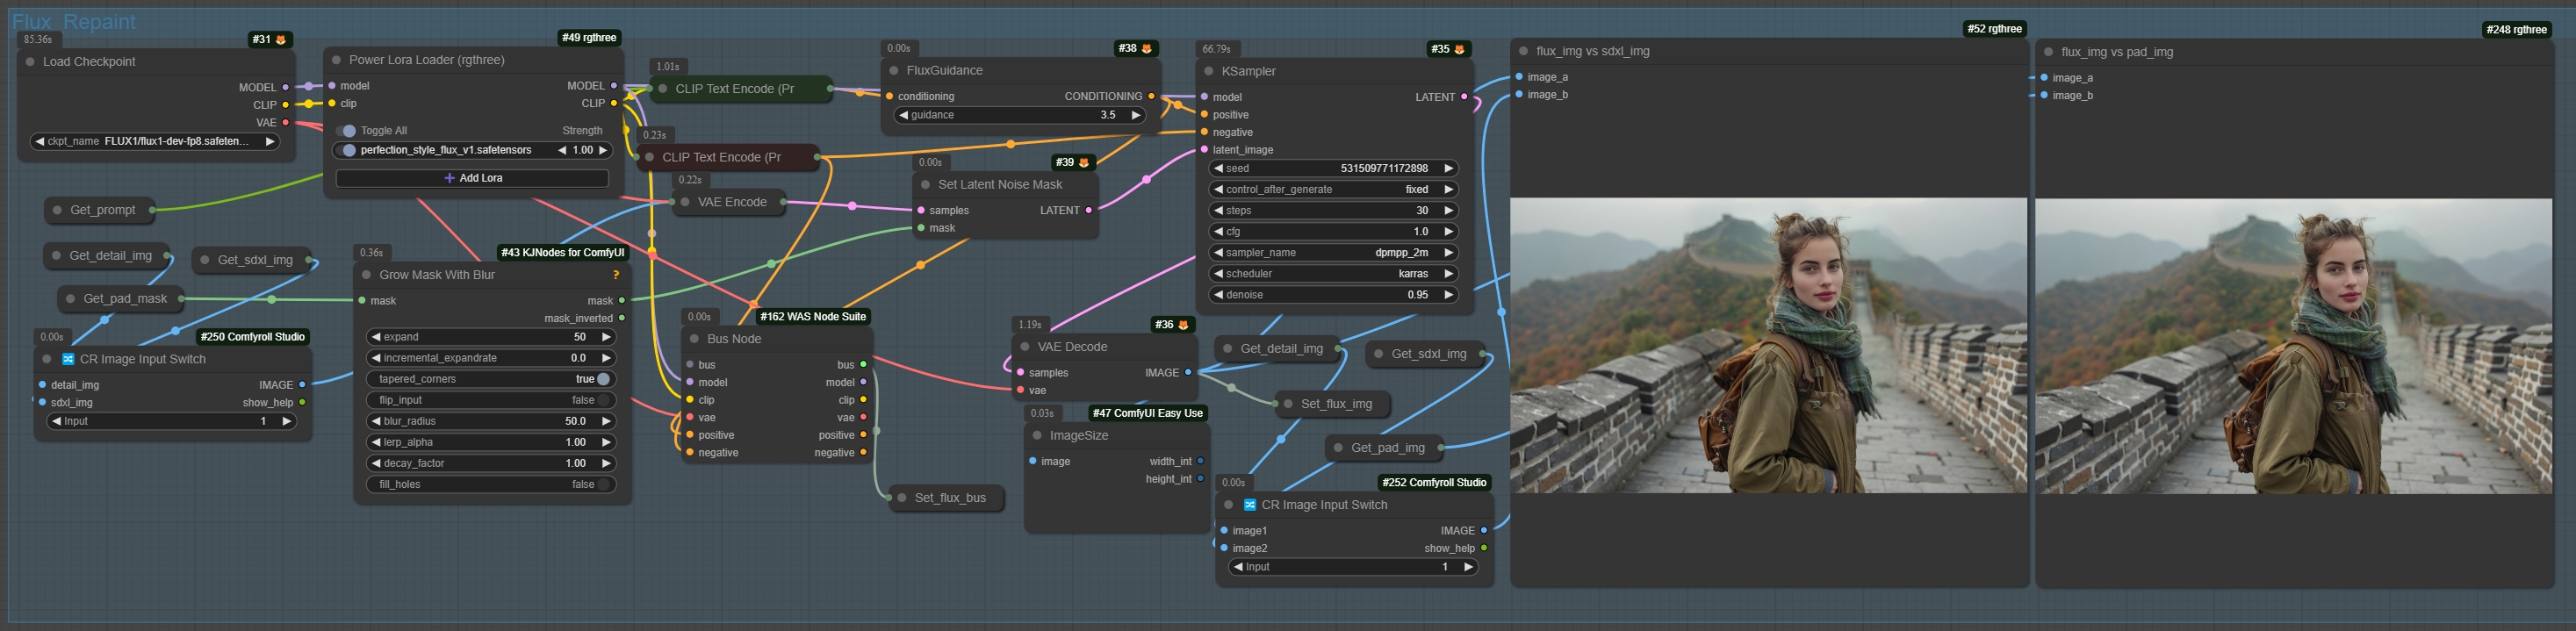
- Choose whether to repaint before or after restoring the original details. I recommend setting the input parameter to 1, meaning we repaint after detail restoration.
- Add a LoRA node if needed to fix specific issues like distorted hands, feet, faces, or bodies. Adjust the Grow Mask With Blur settings to smooth out any remaining seams.
- Set the denoise parameter in the KSampler to 0.95 for best results.
After repainting, compare the before and after images. Depending on the extent of the original distortions, you might not see a significant difference. However, for more complex outpainting (like distorted hands or figures), you’ll notice a substantial improvement after repainting with Flux.
5️⃣ Upscaling the Final Image
Since the image was reduced in size during the first step, we now need to upscale it to ensure the final output is high-quality.
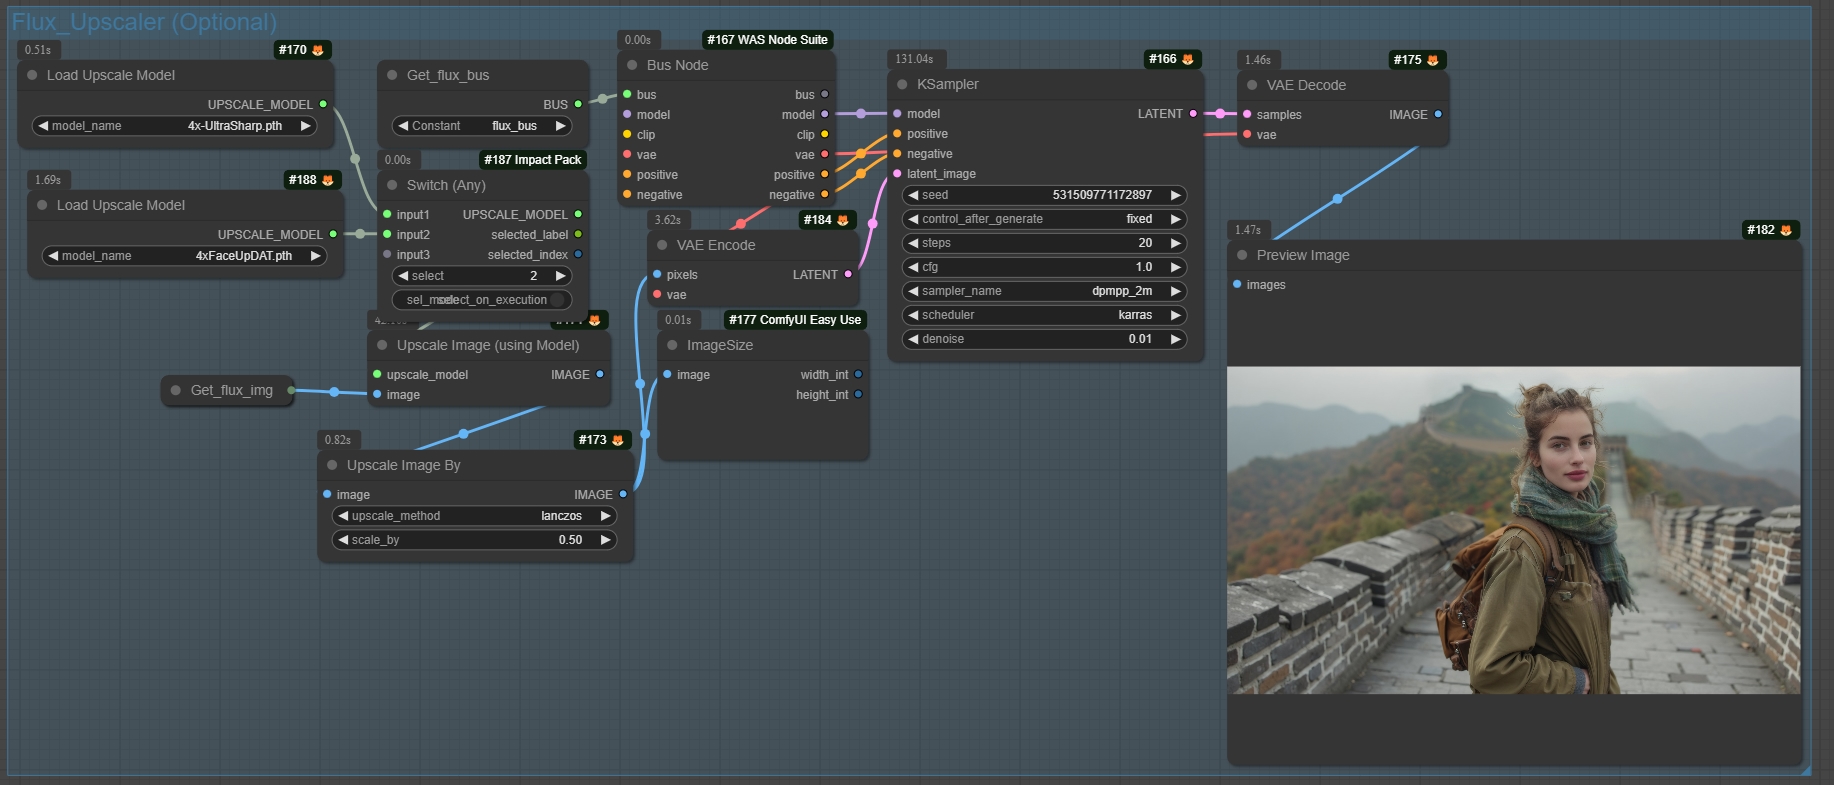
- You can choose between two different models for upscaling. I recommend using the FaceUP model for human faces.
- In the “Upscale Image By” node, set the “scale_by” parameter to 0.5, which will double the image size. Adjust this value based on your GPU’s capacity.
Finally, the upscaled image passes through a Bus Node and is sampled to generate the final output.
Final Thoughts
Feel free to experiment with the various settings to suit your needs. If you have any questions, drop them in the comments section, and I’ll be happy to help.
Thanks for reading, and stay tuned for more articles!