Pose Transfer in ComfyUI with Qwen Edit 2511 (High-Success Workflow)
In this article, I’ll show you how to use the Qwen Edit model in ComfyUI to transfer a pose from a reference image onto a portrait you want to edit. The success rate is surprisingly high—even for poses that are usually tricky to reproduce.
The core idea is simple:
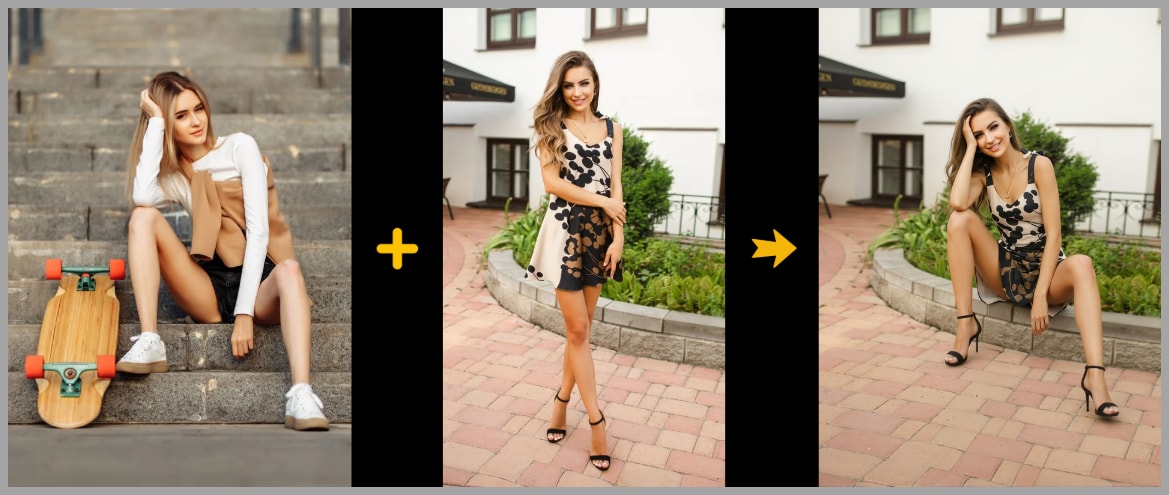
- Image 1: the portrait you want to edit (your “main character”)
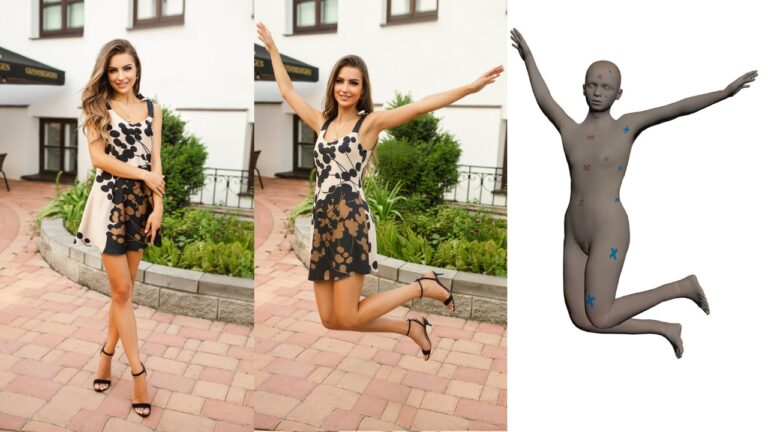
- Image 2: a pose reference (a real image, cleaned up so it doesn’t leak identity details)
- Image 3: a pose skeleton generated from the pose reference using DWPose Estimator
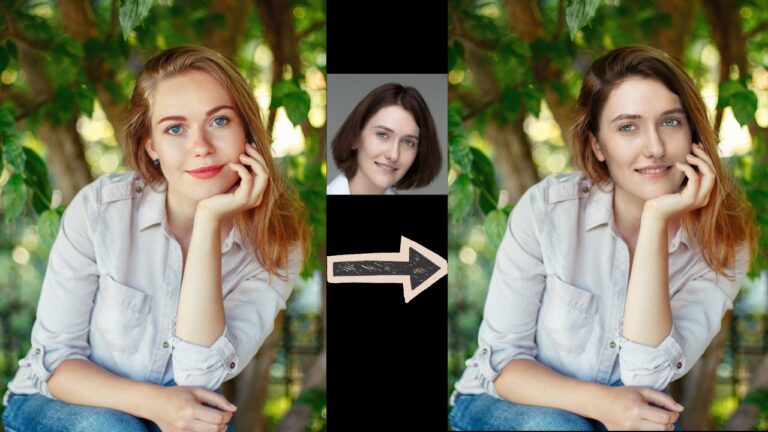
Then we polish the final result using Face Detailer so the gaze and facial consistency match what we want.
YouTube Tutorial:
Gain exclusive access to advanced ComfyUI workflows and resources by joining our community now!
What We’re Building and the Results You Can Expect
The goal is straightforward: make the person in your portrait adopt the exact pose from a reference.
Here’s the typical flow of results this workflow produces:
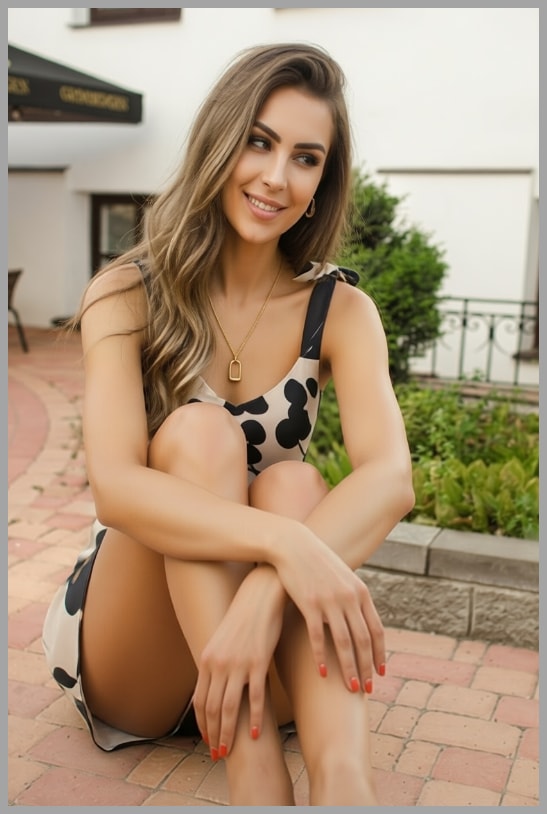
- You pick a pose you want to copy (for example, someone sitting on the ground with arms crossed).
- You pick a portrait you want to edit (the subject whose identity you want to keep).
- The workflow generates a new image where the portrait subject adopts the reference pose.
In the examples from this workflow, even difficult poses (like seated poses with crossed limbs) transfer cleanly—where many “basic” setups tend to fail.
Setup Overview: Key Capability in Qwen Edit
The key capability we’re using (Qwen Edit v2509+)
Starting from Qwen Edit version 2509, we can feed the model a pose skeleton image as a reference for pose transfer.
In practice, that means we can give Qwen Edit a prompt like:
- Make the person in Image 1 copy the exact pose from Image 2.
Where:
- Image 1 is the portrait you want to edit.
- Image 2 is the pose skeleton image.
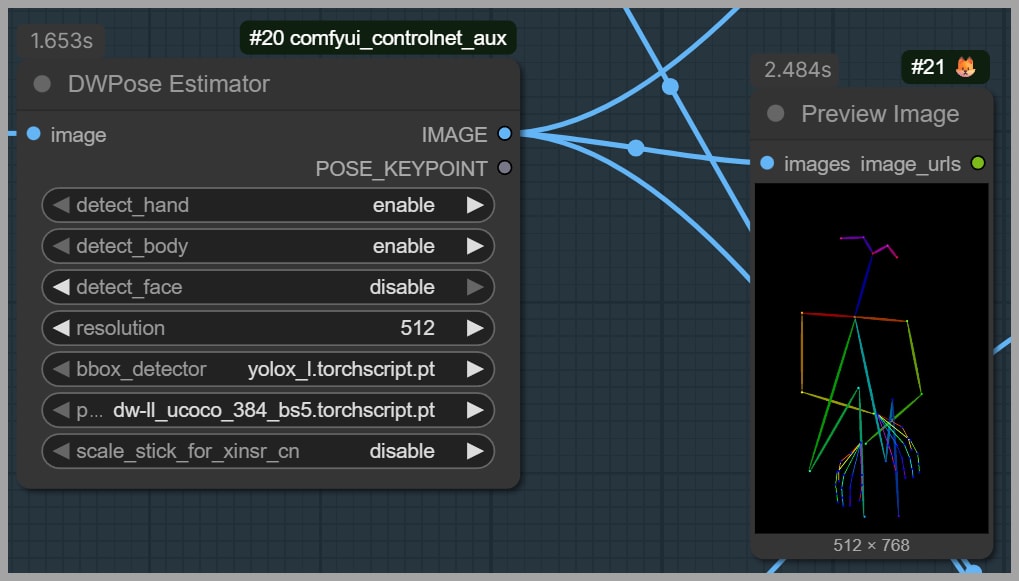
That skeleton is generated using DWPose Estimator. In the example pose described in the transcript, the subject is sitting on the ground with her arms crossed.
This skeleton reference is important because it gives the model a clear structural target instead of relying on “guessing” pose from pixels alone.
Baseline Workflow (Default Qwen Edit) and Why It Breaks on Hard Poses
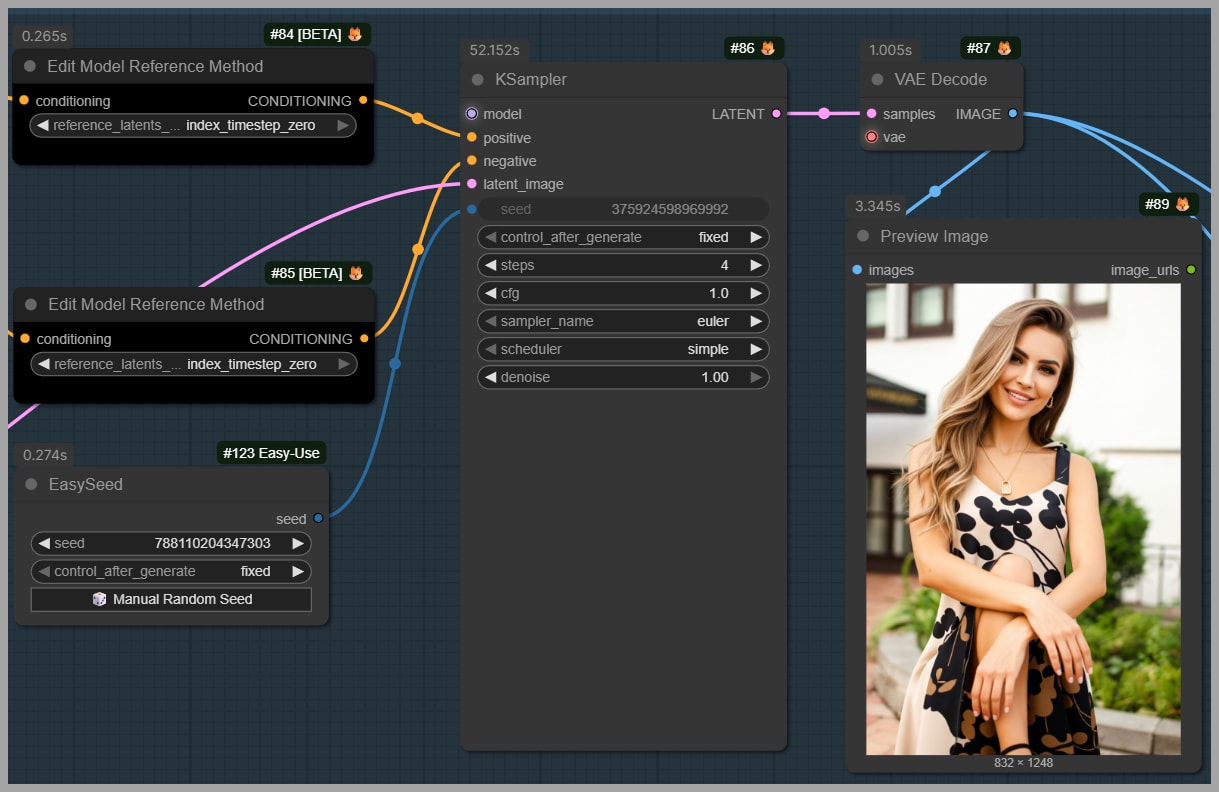
Let’s start with the baseline approach: the workflow is basically the default Qwen Image Edit configuration.
One deliberate choice here matters a lot:
- Detect Face is NOT enabled.
I do this on purpose because I don’t want the face shape from the reference to leak into the final result. The goal is to keep the identity from the portrait (Image 1), not accidentally blend in traits from the reference.
What happens with the basic setup
When we run pose transfer using only the default setup:
- The model partially copies the pose.
- For example: arms crossed might transfer correctly…
- …but the legs and seated posture can fail.
In the transcript example, Qwen Edit gets the arms right, but the subject is not sitting on the ground, meaning the harder part of the pose transfer doesn’t stick.
The takeaway
- Simple pose transfers might work with the baseline workflow.
- Hard poses (seated poses, crossed limbs, complex body angles) often fail.
That’s exactly why we move on to advanced settings.
Advanced Pose Transfer: Two-LoRA Method (Recommended Pairing + Prompting)
In the advanced setup, we add two LoRAs (available on HuggingFace). If you use this approach, it’s worth supporting the author—liking their work or donating via their Ko-fi link if they provide one.
These LoRAs are designed to improve pose transfer reliability, including using a realistic image as a pose reference.
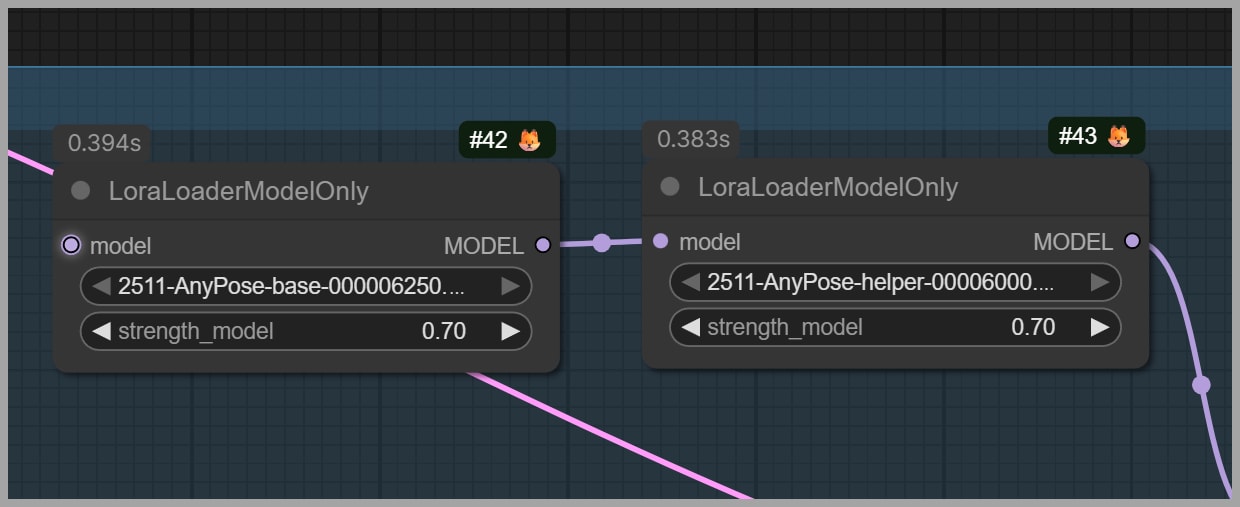
Recommended pairing and strength
The author’s guidelines (as described in the transcript) are:
- Pair Qwen Edit 2511 with the 4-step lightning LoRA.
- Set the LoRA strength to 0.7 for best results.
Inputs and prompt structure
The LoRA workflow is designed around two inputs:
- One image: the main character you want to edit (your portrait)
- One image: the pose you want to copy
The author may provide a prompt template you can reuse. If you want extra details (outfit adjustments, mood, environment), you can append them at the end of the prompt.
Base + helper LoRA: both are required
The author released:
- a base model
- a helper model
You must use them together. In the workflow described, both are loaded at 0.7 strength.
Improving Consistency: 3-Image Input + Cleaning the Pose Reference
This is where the workflow becomes “high success” instead of “sometimes works.”
Even though the author recommends two input images, in this setup I use three.
Why use 3 images?
Because I want the model to have:
- a realistic pose reference (Image 2), and
- a clean structural constraint from the pose skeleton (Image 3)
So the inputs become:
- Image 1: the portrait to edit (identity we keep)
- Image 2: the pose reference photo (cleaned to remove identity/background distractions)
- Image 3: the pose skeleton generated from DWPose Estimator
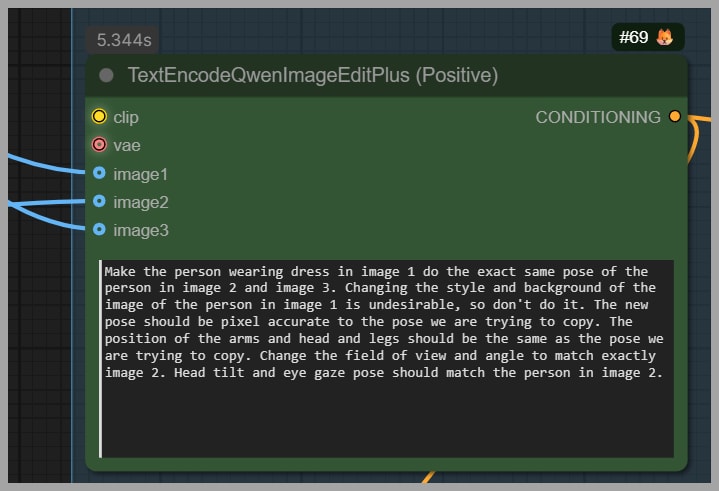
Adjusting the prompt for 3 images
Since the author’s original prompt assumes the pose is in Image 2, I tweak it slightly so the model also uses Image 3.
Instead of only:
- “copy the pose from Image 2”
I guide it toward:
- “copy the pose using Image 2 and Image 3”
That small change matters because the skeleton adds clarity when the pixel-based pose reference is ambiguous.
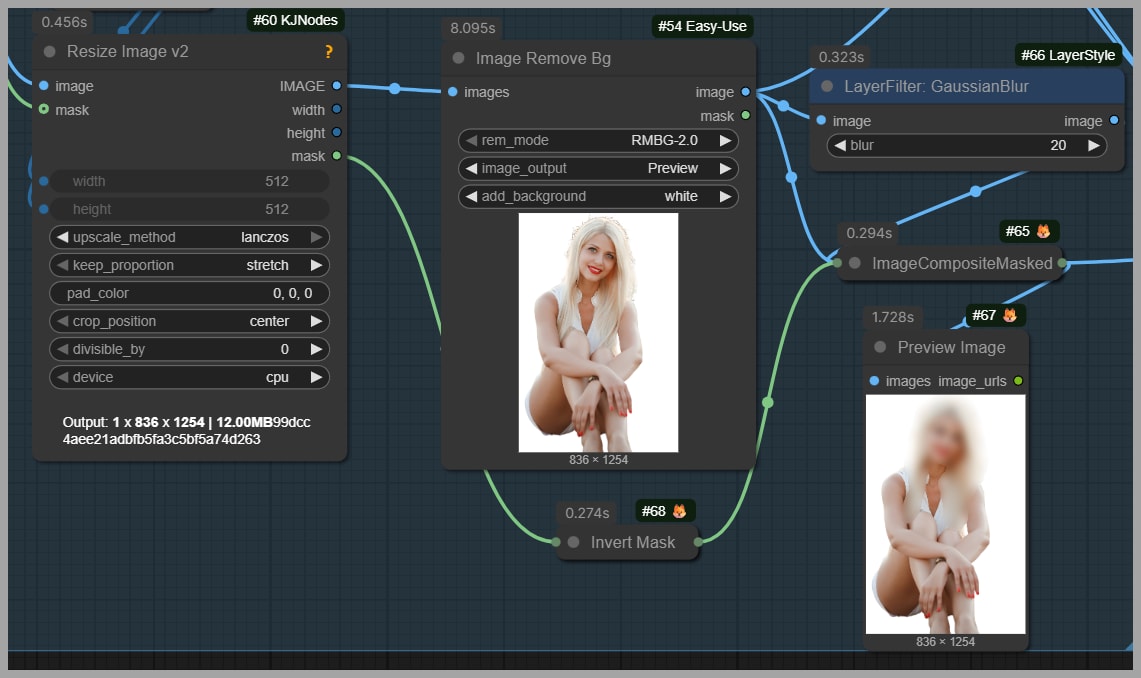
Preparing Image 2: remove anything that might affect consistency
This step is critical. If you feed the model a full pose reference photo, it may unintentionally copy:
- hairstyle,
- face identity,
- background elements,
- or props.
But we want:
- pose from the reference,
- identity from Image 1.
So I modify Image 2 with a few practical edits.
1) Mask the head (preserve face and hair from Image 1)
I paint a mask over the head area because I don’t want:
- the reference hairstyle, or
- the reference face identity
to influence the final output.
This helps the result keep the face and hair consistent with the portrait in Image 1.
2) Remove the background
I remove the background for the same reason: backgrounds tend to leak into the generated image and can change the scene unexpectedly.
A clean pose reference keeps the model focused on body structure, not environment.
3) Mask out extra objects (example: skateboard)
In general, blur or remove anything that shouldn’t appear in your final image.
In the transcript example, the reference included a skateboard. If you don’t mask it out, the model may “helpfully” recreate it—suddenly your final portrait includes a skateboard you never wanted.
A good rule:
- If it’s not essential to the pose, remove it or blur it.
Selecting the Best Output and Fixing the Face with Face Detailer
With the advanced settings, the pose transfer is now much stronger.
Pose accuracy improves—but gaze can be wrong
After applying the LoRAs + cleaned reference + skeleton, the pose finally matches:
- seated posture correct,
- arms crossed correct.
But a new issue appears: the subject may be looking away from the camera.
If you want the subject to look at the viewer, we fix that in the final step.
Choosing which pose-transfer result to finalize
The pose transfer stage produces two result images.
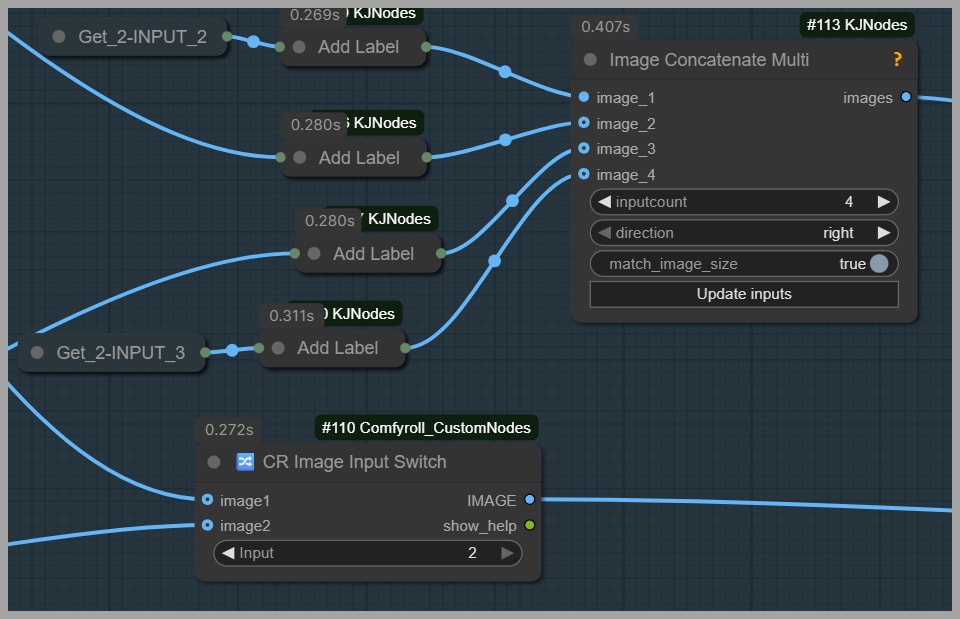
To make the decision easier, the workflow stitches together:
- the two input images, and
- the two generated outputs,
with labels at the top of the preview.
This gives you a quick comparison view.
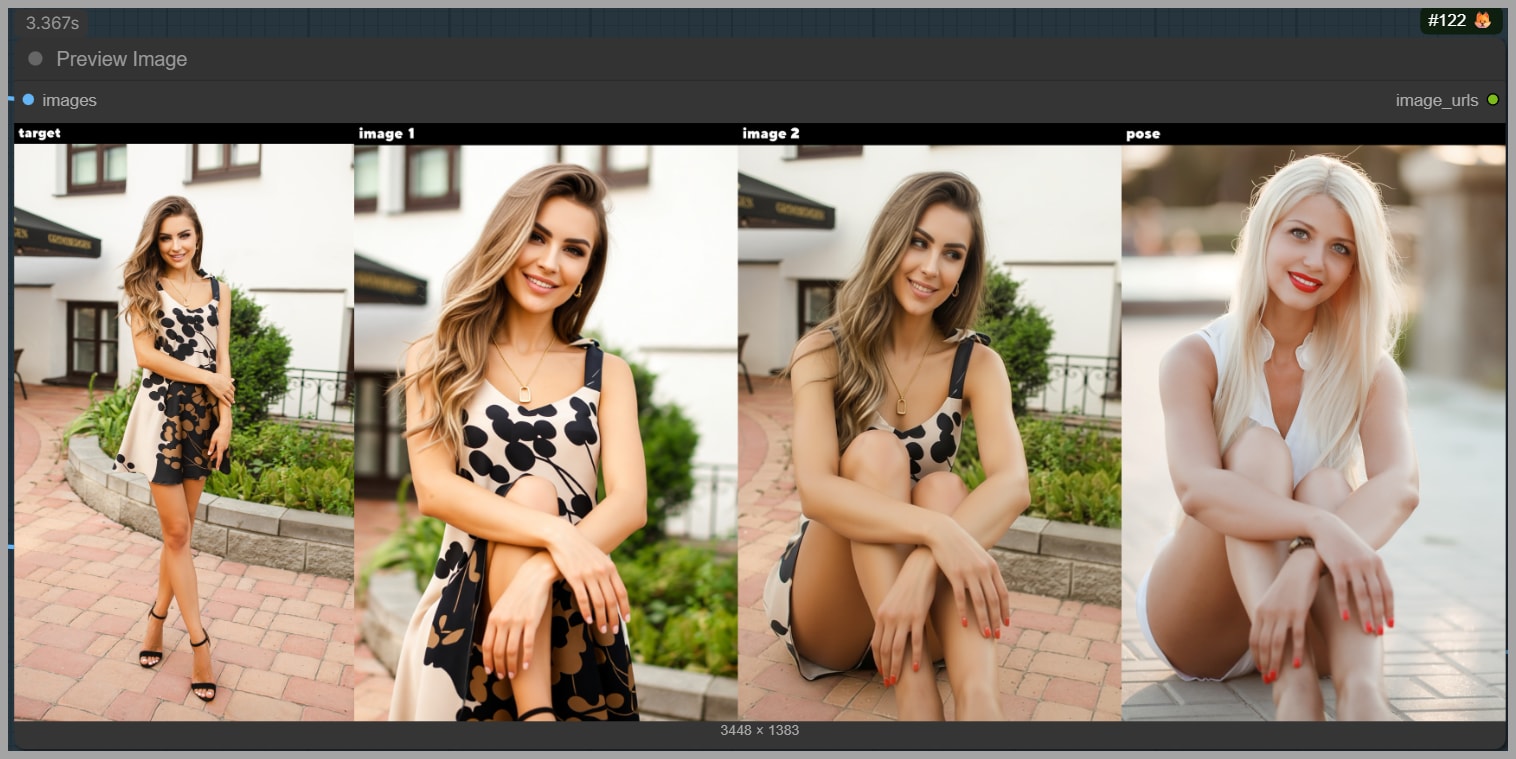
In the transcript example, the best option is:
- Image 2 (the second generated result), because it has the correct pose.
So in the Image Input Switch node:
- Set the input value to 2.
- Send that chosen result to the final polishing group.
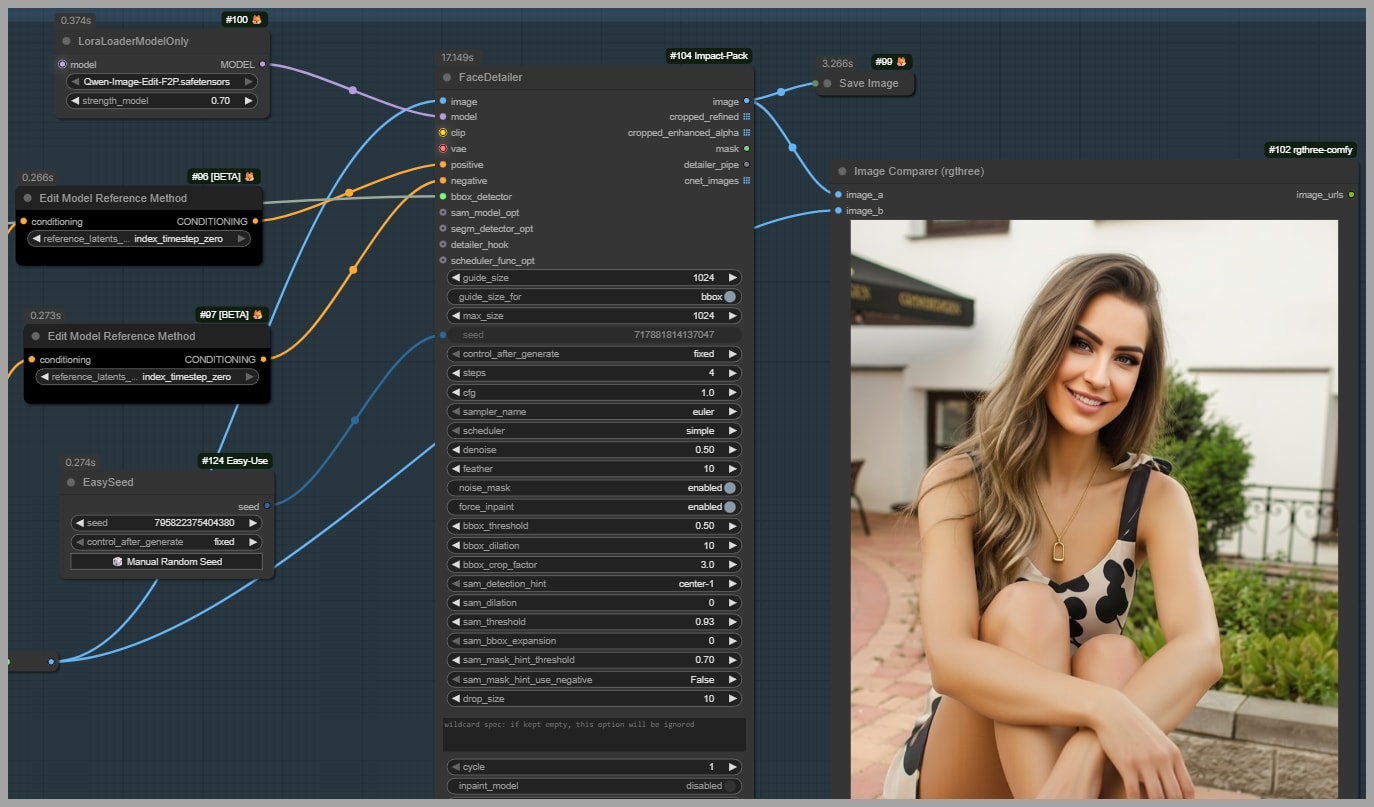
Final polish: Face Detailer (fix gaze + improve identity)
In the final group, I use Face Detailer to repaint the face.
This accomplishes two things:
- The subject now looks at the viewer (correct gaze direction).
- Face consistency improves further, because I also add another LoRA that helps preserve facial identity.
That “extra face LoRA” is the same one I previously explained in my earlier article about a head swap workflow.
Face Detailer denoise: the important rule
For denoising strength in the Face Detailer node:
- Set it to 0.5
- Do not go above 0.5
If you push higher than 0.5, you risk creating a mismatch where:
- the face lighting looks different from the body lighting,
- and the face starts to feel “pasted on” rather than integrated.
0.5 is the safe ceiling described in the workflow.
Wrap-Up
If you want to support the creator/community behind workflows like this, consider joining their community—those contributions are what keep these tools improving.
Gain exclusive access to advanced ComfyUI workflows and resources by joining our community now!