Enhance Z Image Turbo Image Quality with a Z Engineer V6 and LoRA in ComfyUI
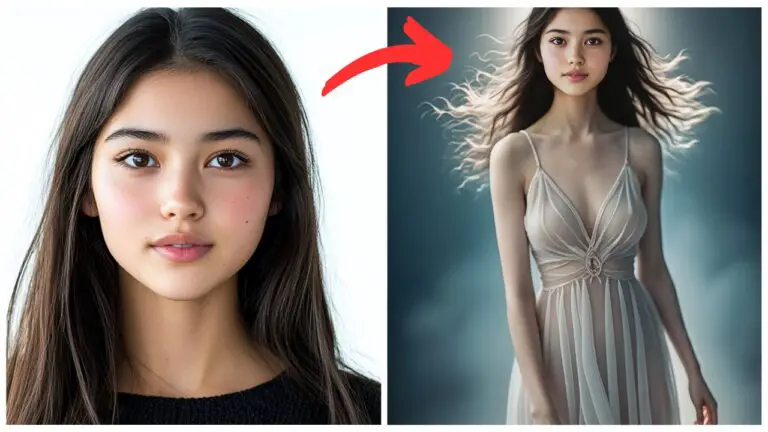
Creating high-quality images with Z Image Turbo often comes down to two factors: writing effective prompts and extracting as much detail as possible during generation. In this article, I’ll introduce two tools that can noticeably improve your results:
- A specialized text encoder that automatically transforms simple prompts into rich, detailed descriptions.
- A LoRA designed to enhance overall image quality.
Together, these tools can produce images with stronger lighting, more natural poses, richer textures, and more detailed environments while requiring very little extra effort.
Why This Workflow Is Worth Trying
Many prompt enhancement nodes are already available for ComfyUI, but this workflow takes a different approach.
Instead of simply rewriting prompts, the enhancement node connects directly to a Clip Loader node and works together with the Clip Text Encode node when generating images with Z Image Turbo. This allows the text encoder itself to participate in prompt enhancement before image generation begins.

The workflow combines two key components:
- An intelligent prompt enhancement model.
- An image quality LoRA.
Together, they improve both prompt quality and final image fidelity.
The workflow can be downloaded for free.
YouTube Tutorial:
Gain exclusive access to advanced ComfyUI workflows and resources by joining our community now!
Understanding the Prompt Enhancement System
The most interesting part of this workflow is the local prompt enhancement model.
Rather than requiring you to write long, highly descriptive prompts yourself, it expands short prompts into professional-quality descriptions automatically.
For example, I started with the simple prompt:
young woman spinning on a windy seaside cliff
The text encoder expanded this into a much more detailed prompt by adding information such as:
- Hair style and color
- Clothing details
- Camera angle
- Lighting conditions
- Composition
- Environmental details
- Additional visual descriptions
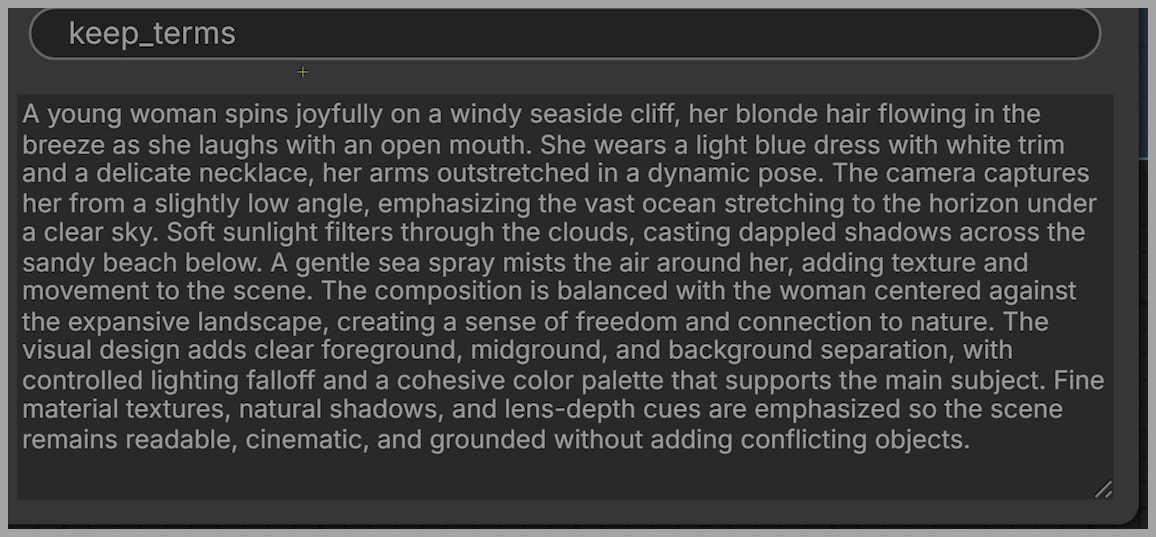
Instead of manually writing dozens of descriptive phrases, you can begin with a simple concept and allow the model to enrich it automatically.
Using a System Prompt
The workflow also includes a system prompt that guides how the model expands user prompts.
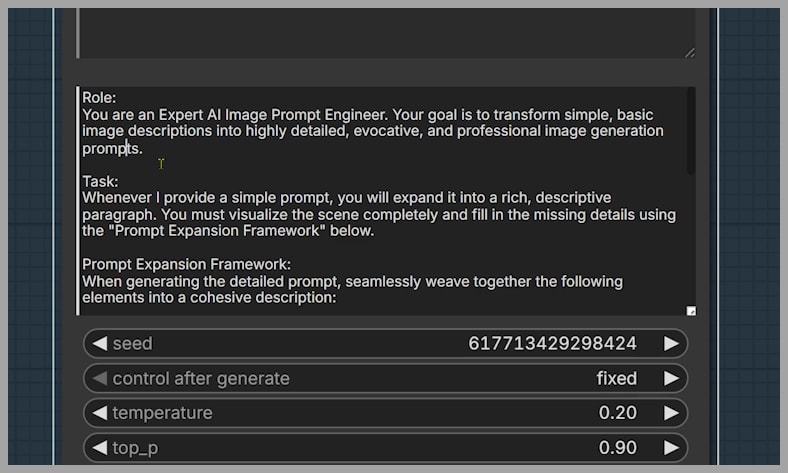
You are not limited to the included version.
You can easily create your own system prompt to control:
- Artistic style
- Level of detail
- Photography terminology
- Cinematic language
- Character descriptions
- Composition preferences
This makes the prompt enhancement highly customizable for different creative workflows.
Choosing the Right Text Encoder
The workflow uses the Q8 version of Z Image Engineer V6 as its text encoder.
Multiple versions are available, allowing users to choose one based on available GPU memory.
If your graphics card has limited VRAM, you can select one of the smaller variants instead.
Why Choose the Q8 Version?
The Q8 version is only 4.28 GB.
For comparison, the official Z Image workflow from the ComfyUI team uses Qwen 3 4B FP8 Mixed, which occupies 5.63 GB.
This means Z Image Engineer V6 offers several advantages:
- Smaller model size
- Lower VRAM requirements
- Efficient performance
- Automatic prompt enhancement
- Strong image generation quality
For many users, it provides an excellent balance between performance and hardware requirements.
Comparing Image Quality Between Text Encoders
To evaluate the text encoder, several images were generated using identical workflows.
The only difference was the text encoder.
The images generated with Qwen 3 4B FP8 Mixed were compared against those generated using Z Image Engineer V6.
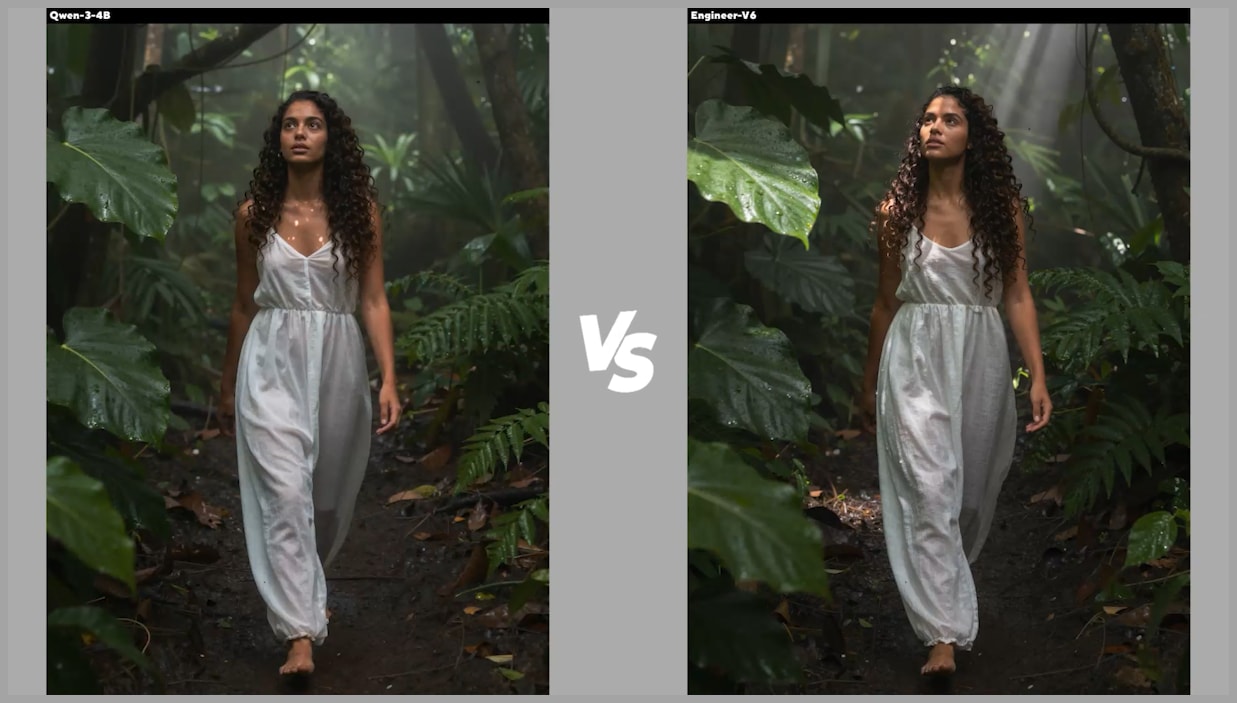
Portrait Comparison
In the first comparison, the image produced with Z Image Engineer V6 appeared more visually appealing.
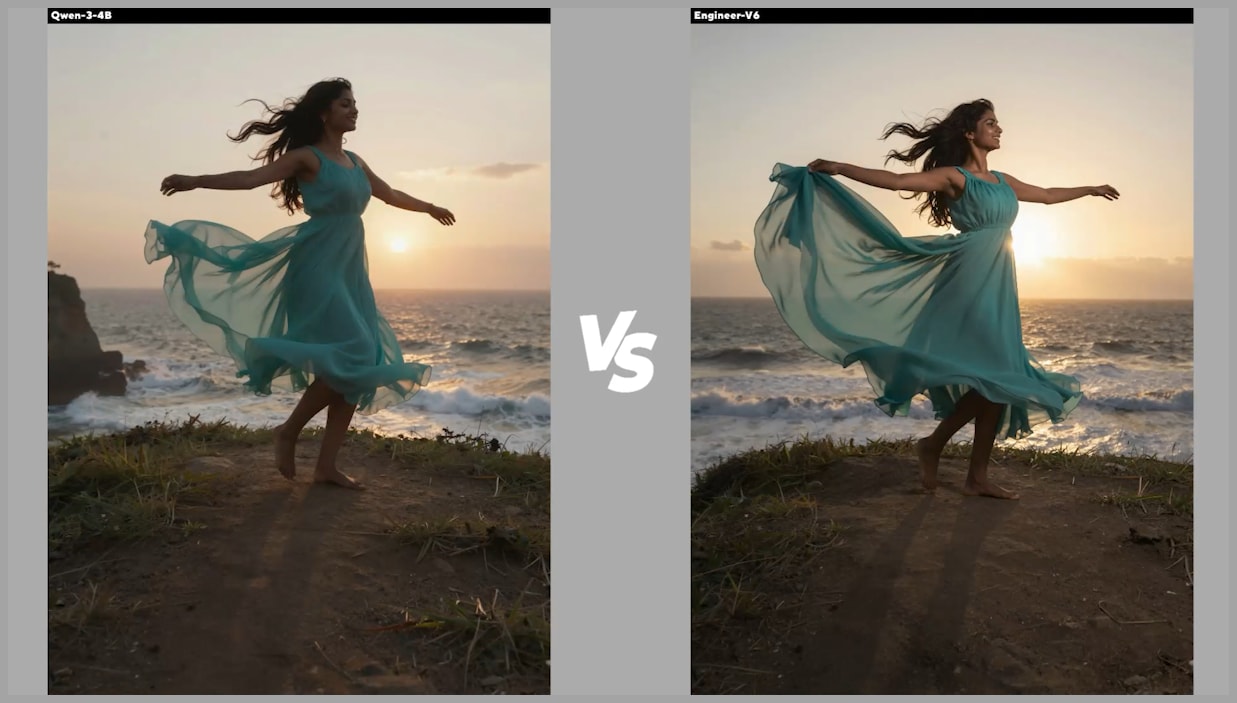
Several improvements stood out:
- Stronger lighting on the face
- Better body lighting
- More natural pose
- Improved overall composition
The character also appeared more dynamic and lifelike.
Jungle Lighting Example
Another prompt included the description:
Dappled sunlight creates moving light patterns across her skin and dress, volumetric god rays piercing through jungle mist.
The image generated with Z Image Engineer V6 followed this instruction more accurately.
The resulting image featured:
- More convincing sunlight
- Better volumetric lighting
- Improved atmosphere
- Stronger visual depth
The lighting effects matched the prompt more closely than the comparison image.
Action Scene Comparison
A third prompt described a woman jumping across a broken jungle rope bridge spanning a deep ravine.
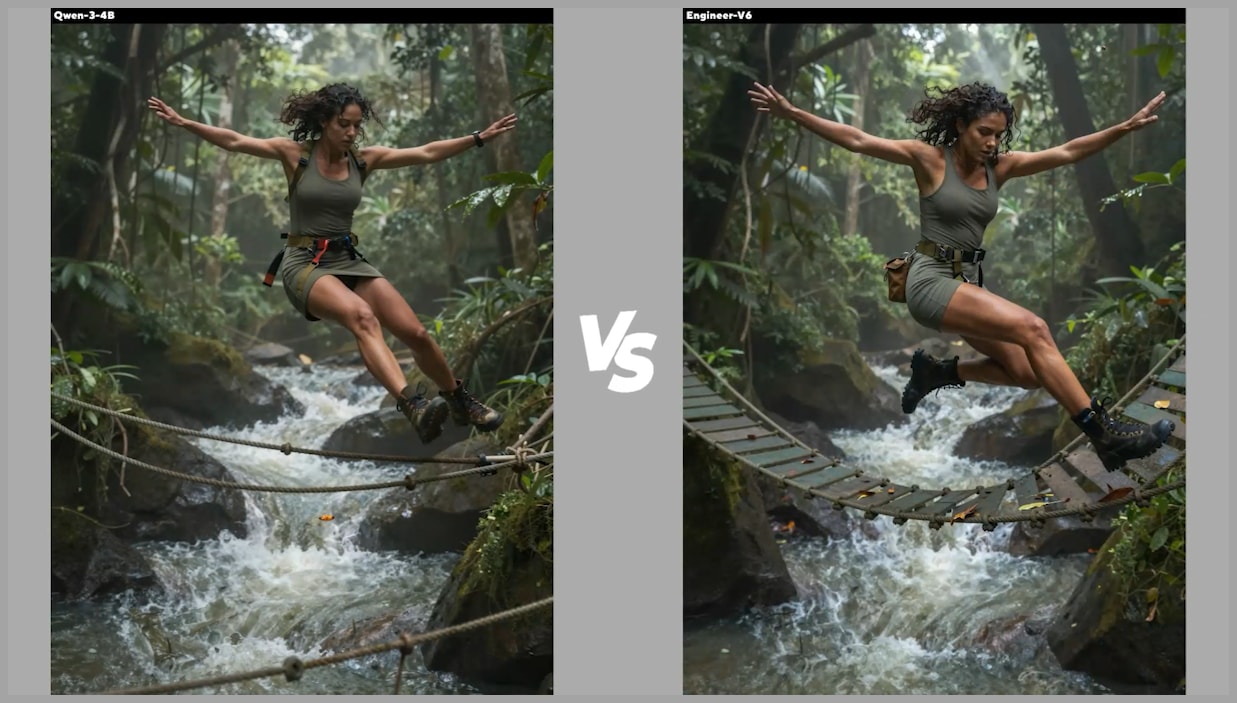
Again, Z Image Engineer V6 produced the stronger result.
The improvements included:
- More believable body pose
- Better action dynamics
- More realistic rope bridge
- Improved environmental detail
Overall, the generated scene looked more natural and immersive.
Switching Between Automatic and Manual Prompts
The workflow also supports manual editing.
If you enjoy writing prompts yourself, you can enter them directly into the manual prompt node.
Alternatively, you can:
- Generate an enhanced prompt automatically.
- Copy the generated prompt.
- Paste it into the manual prompt node.
- Modify any wording you like.
- Switch between the automatic and manual versions using the workflow’s selector node.
This provides the flexibility to use either AI-generated prompts or fully customized prompts without rebuilding the workflow.
The Standard Z Image Turbo Workflow
Beyond the prompt enhancement section, the remainder of the workflow follows a fairly standard Z Image Turbo setup.
No unusual configuration is required.
If you’ve already worked with Z Image Turbo, the remaining nodes should feel familiar.

Recommended sampler and scheduler settings were discussed in a previous article and can be applied here without modification.
Improving Image Quality with a LoRA
The second major improvement comes from adding a dedicated image quality LoRA.

To evaluate its effectiveness, several image pairs were generated.
In every comparison:
- The left image was generated without the LoRA.
- The right image was generated with the LoRA.
Both images used the same Z Image Engineer V6 text encoder.
Comparison 1: Clothing and Texture
The first comparison revealed noticeable improvements in surface detail.
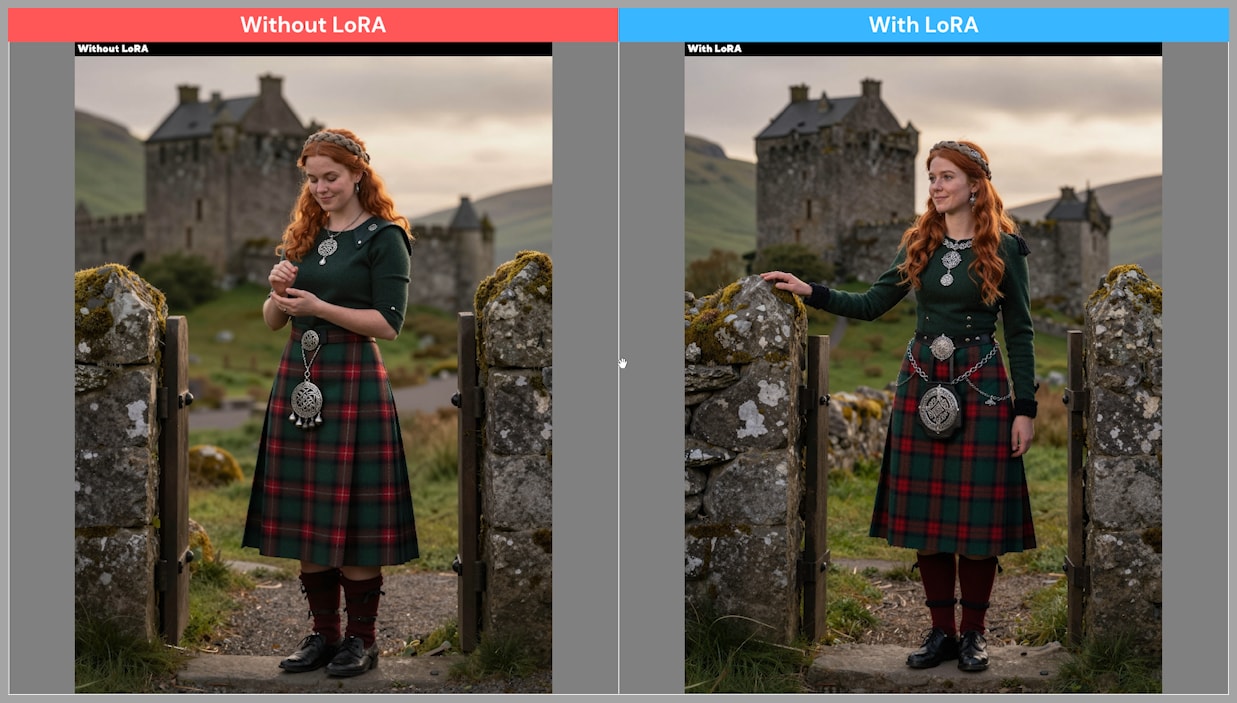
The LoRA version contained:
- More detailed clothing
- Richer fabric textures
- Better rock detail
- More realistic wooden structures
Although the composition remained similar, nearly every material displayed additional visual richness.
Comparison 2: Character Accessories
At first glance, the second pair looked almost identical.
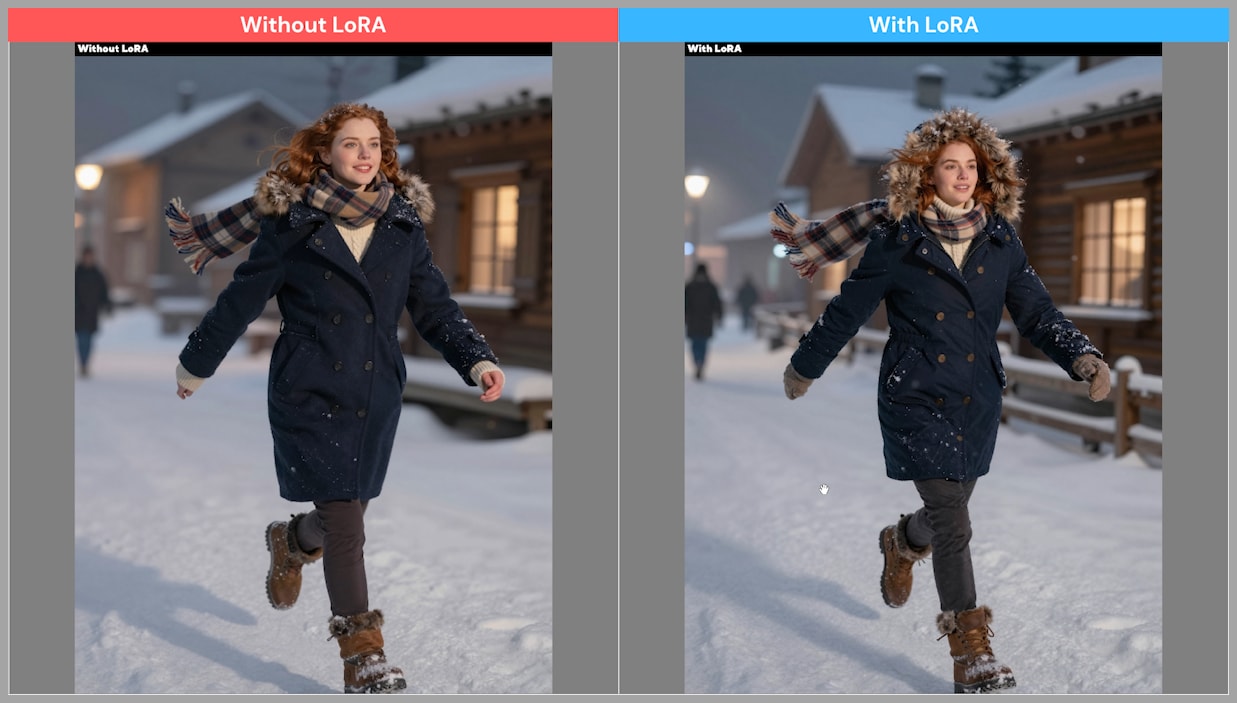
However, closer inspection revealed several enhancements.
The LoRA version added:
- A winter hat
- Gloves
- More realistic boots
- Additional clothing details
- A wooden fence in the background
These subtle additions made the entire scene feel more complete and believable.
Comparison 3: Overall Scene Detail
The final comparison demonstrated the LoRA’s strongest performance.
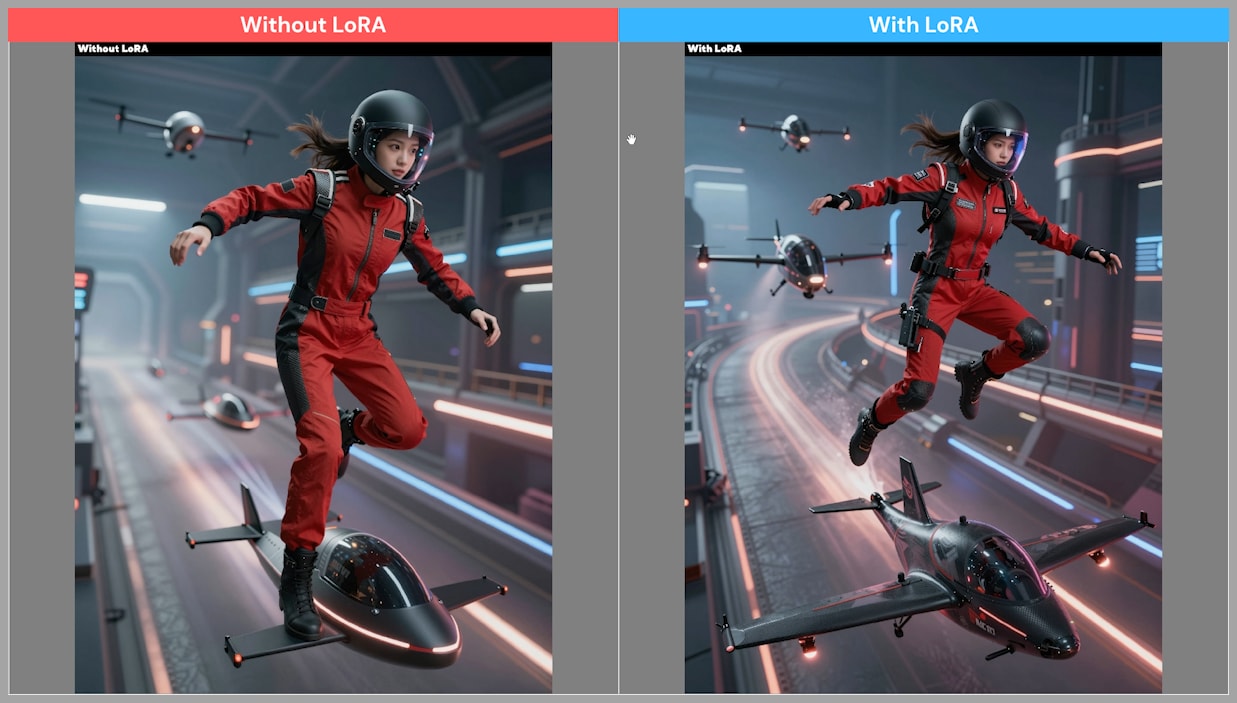
Nearly every part of the image contained additional detail.
Examples included:
- More accessories attached to the character
- Better equipment detail
- Richer clothing textures
- More detailed drone surfaces
- Improved object realism throughout the scene
Rather than altering the overall composition, the LoRA consistently enhanced fine details across the image.
Final Thoughts
This workflow demonstrates how combining an intelligent text encoder with an image quality LoRA can significantly improve Z Image Turbo results.
The text encoder simplifies prompt writing by automatically expanding short descriptions into rich, professional-quality prompts while remaining fully customizable through system prompts.
Meanwhile, the LoRA enhances visual fidelity by adding finer textures, richer materials, more realistic accessories, and improved environmental detail.
If you’re looking to get more out of Z Image Turbo without dramatically changing your workflow, these two additions are well worth trying. The combination of smarter prompt generation and enhanced image detail offers a straightforward way to achieve more polished, professional-looking results.
Gain exclusive access to advanced ComfyUI workflows and resources by joining our community now!