ChatGPT Connects 6000+ Apps, Boosting Efficiency by 100x!
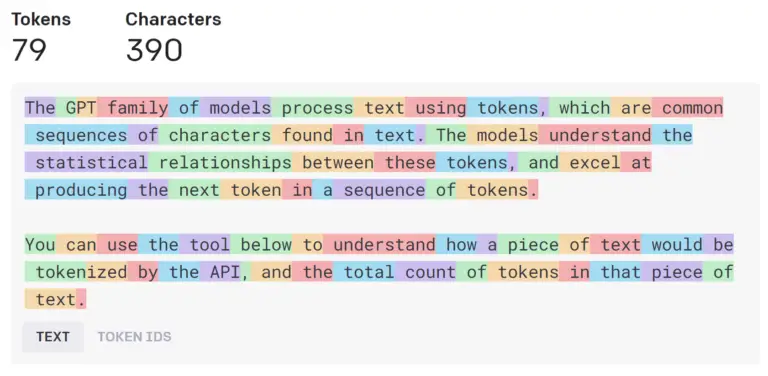
ChatGPT has been a game-changer for our productivity! It’s like having a digital Swiss Army knife, tackling tasks from summarizing articles to drafting emails, and finding creative solutions. But, how do we harness its output effectively? Moving beyond the old copy-paste method, we’ve found a new ally: GPTs.
GPTs aren’t just about running custom workflows; they’re about seamless integration with other apps. Imagine having ChatGPT draft an email and send it straight off without a hitch. Now, that’s smart work!
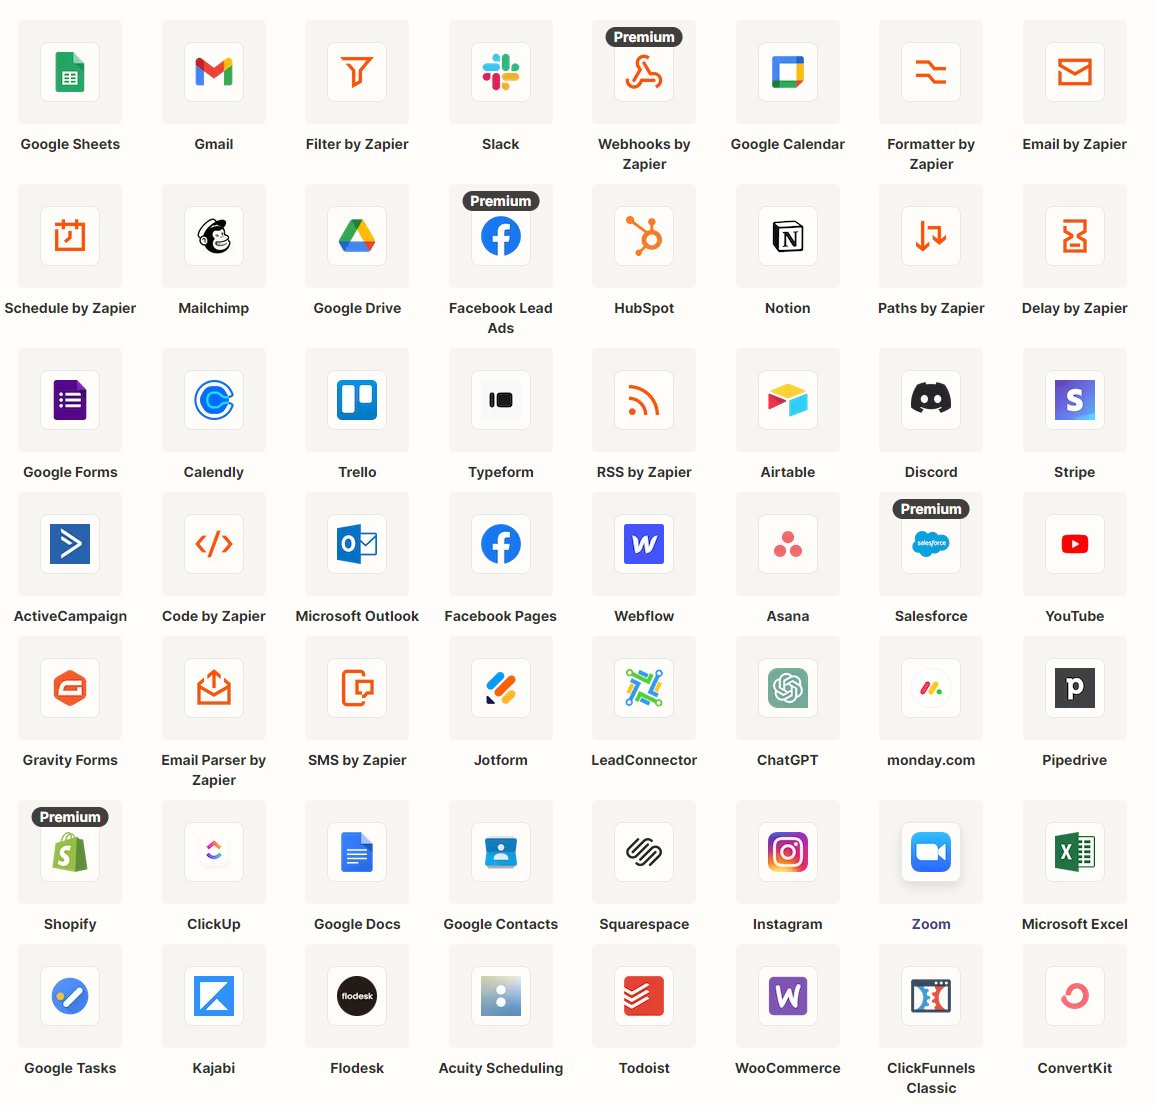
For the coders out there, integrating APIs for automation is a breeze. But for the rest of us? Zapier and Make.com are our go-to. Remember Zapier? It’s that cool platform that lets you mix and match over 6000 apps with a few clicks. Think of it like playing with Lego blocks, but for workflows.
From email services to social media, and office suites to communication tools – Zapier’s got it all.
As a free Zapier user, you can craft up to 5 workflows, each linking two apps, making your life easier without a single line of code!
Now, let’s dive into creating a custom GPT step-by-step. We’ll take a news link, and watch as ChatGPT summarizes and shuttles it right into Notion.
Breaking it down, it goes like this:
- Whip up a Notion database for news summaries, with fields like title, URL, and summary.
- Get the basic GPT setup ready (minus the Add Actions part).
- Import Zapier’s rules and schema.
- Link up OpenAI, Zapier, and Notion, nabbing the necessary action names and IDs.
- Tailor the GPT’s “Instructions” with these new details.
- Give it a test run, and voilà!
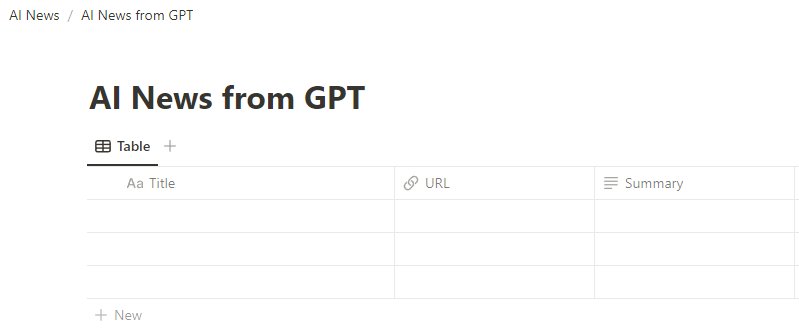
Step 1: Crafting a Notion Database
a. Start by creating a new page, say “AI News”, and pop a database on there.
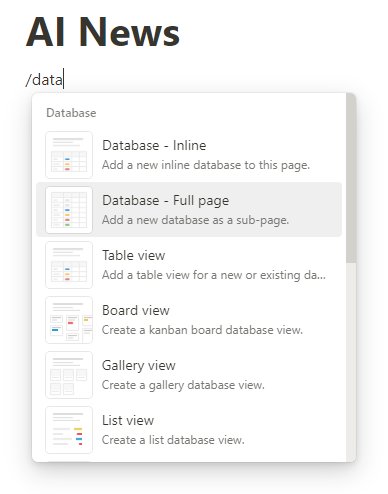
b. I’ve gone ahead and added fields like Title, URL, and Summary for our news summaries.
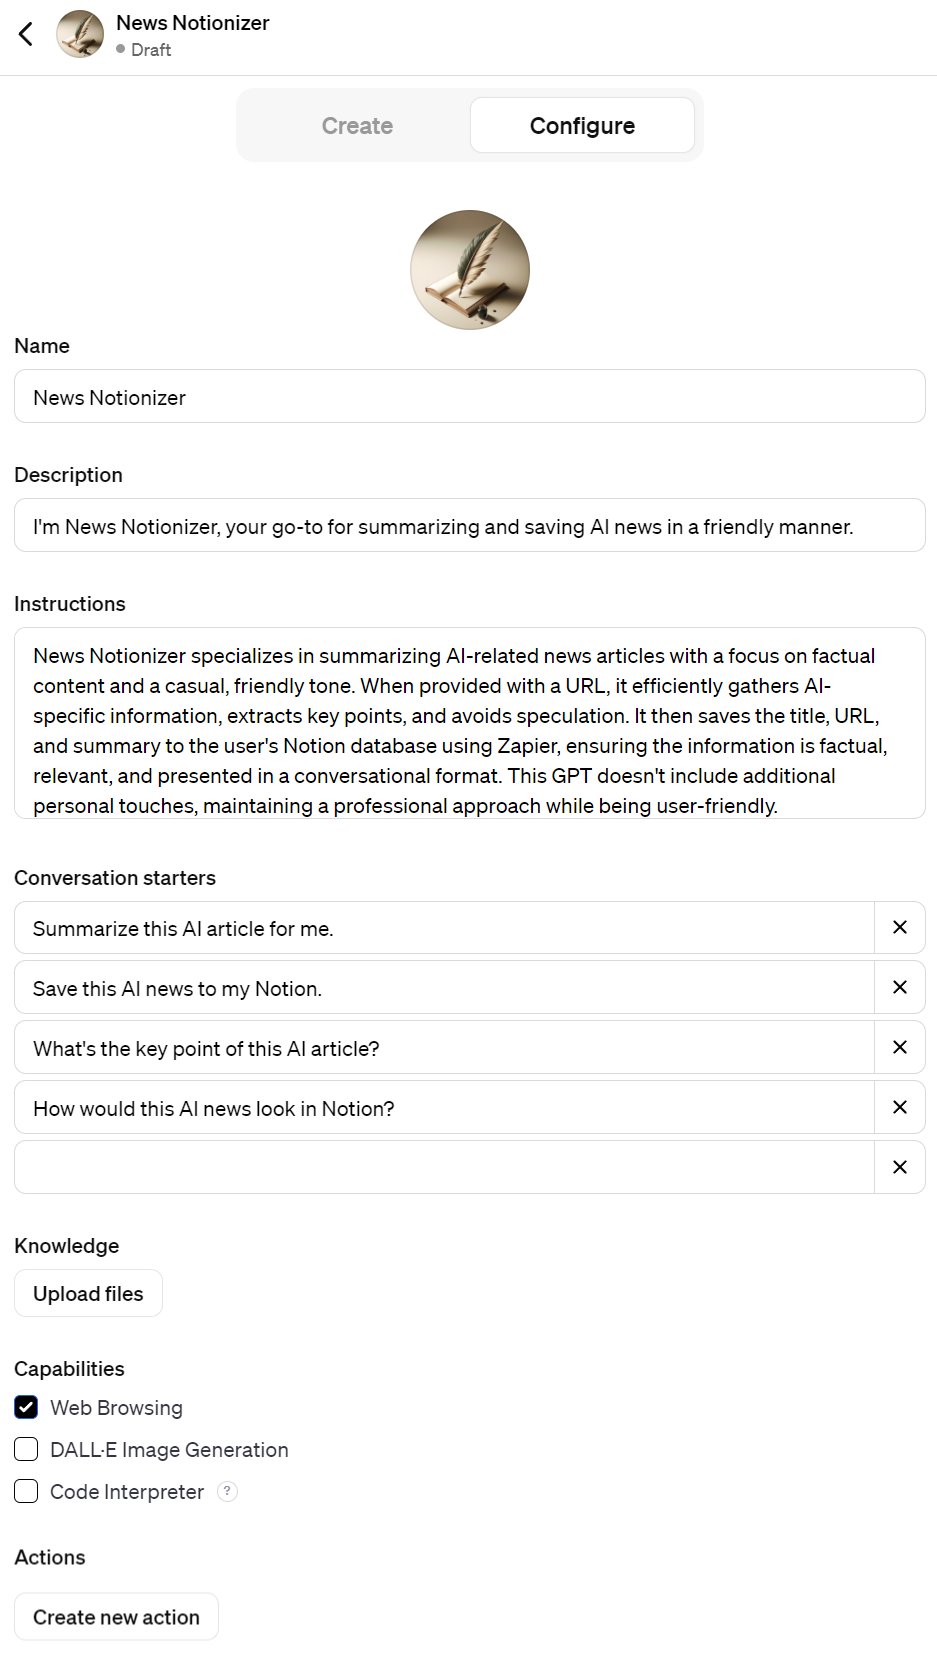
Step 2: The GPT Basics
I’ve covered creating a GPT without API know-how in a previous post.
Here’s a peek at my setup without a Zapier connection, but with web browsing enabled for news-gathering.
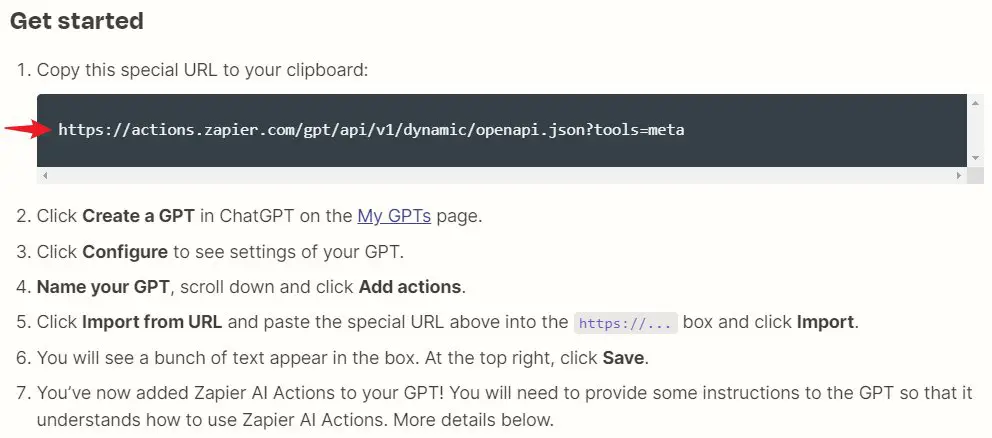
Step 3: Embracing Zapier’s Schema
Zapier has made syncing with GPTs a breeze, laying out the process clearly in their Docs. Just copy the code, and you’re good to go. Here’s a quick guide:
a. Starting Off: Jump over to Zapier’s GPT Docs and grab the essential link.
b. Grab the Schema: Look for the Schema import link on the page and copy it. Easy peasy!
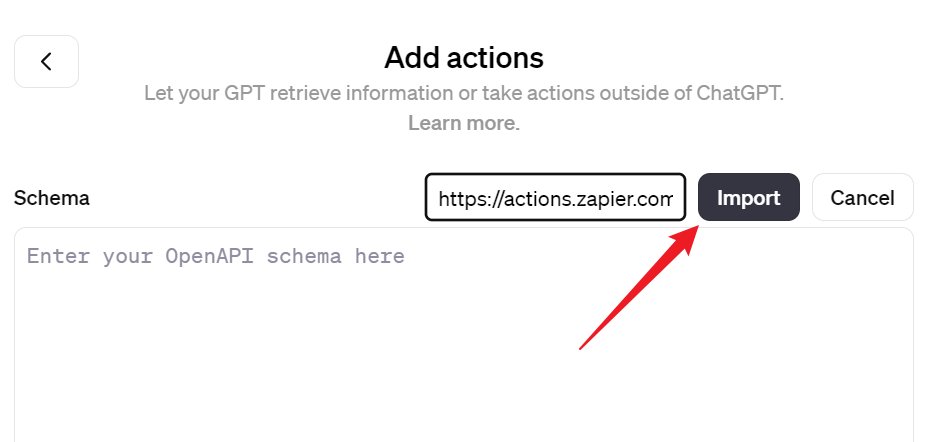
c. Back to GPTs: Head to the GPTs’ Configure page, and hit “Create new action” at the bottom. Next, you’ll find “Import from URL” – click it.
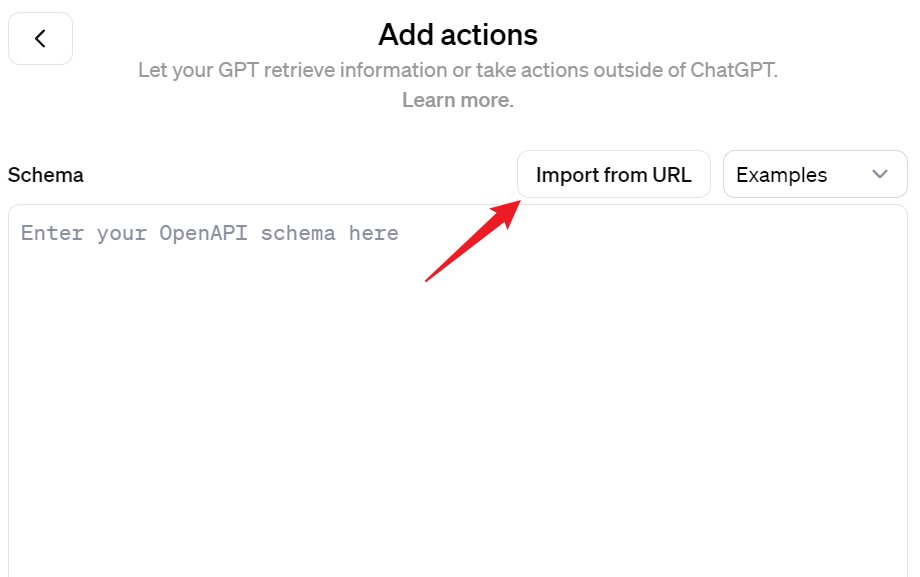
d. Import Time: Now, paste the link you snagged from Zapier’s site and click “Import.”
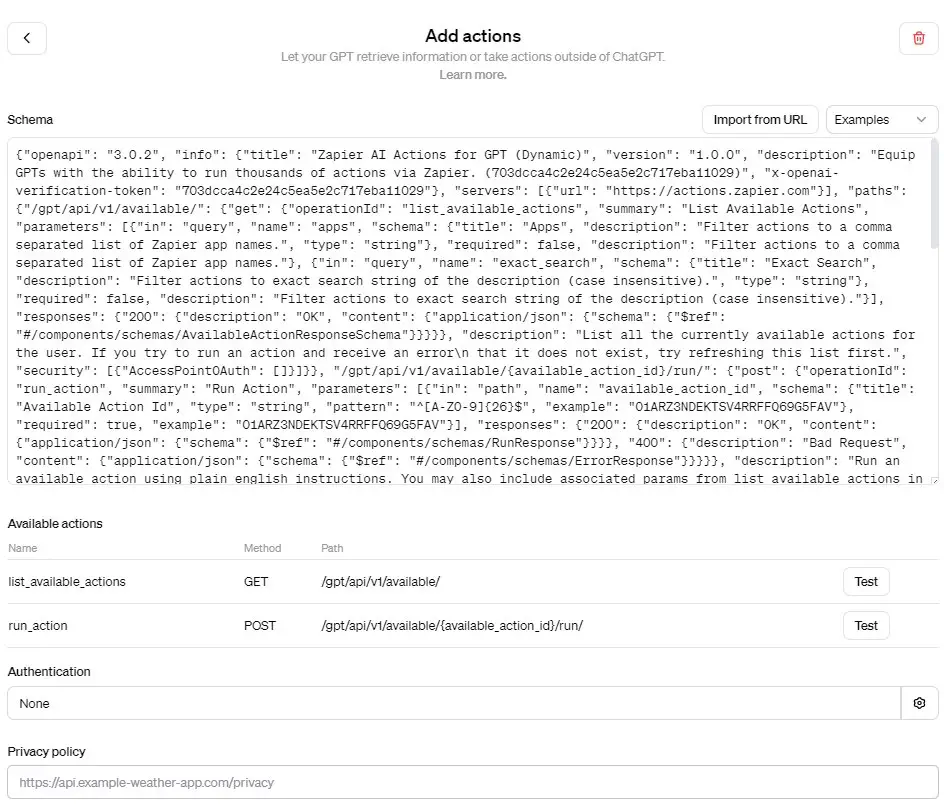
What happens next is pretty cool: the imported Schema pops up, outlining exactly how Zapier will chat with your custom GPT. The best part? The two actions detailed in the Schema are now in your toolkit, under Available actions.
Step 4: Linking OpenAI, Zapier, and Notion
To get our custom GPT and Zapier talking, there’s a bit of digital handshaking needed with OpenAI. Let’s break it down into simple steps:
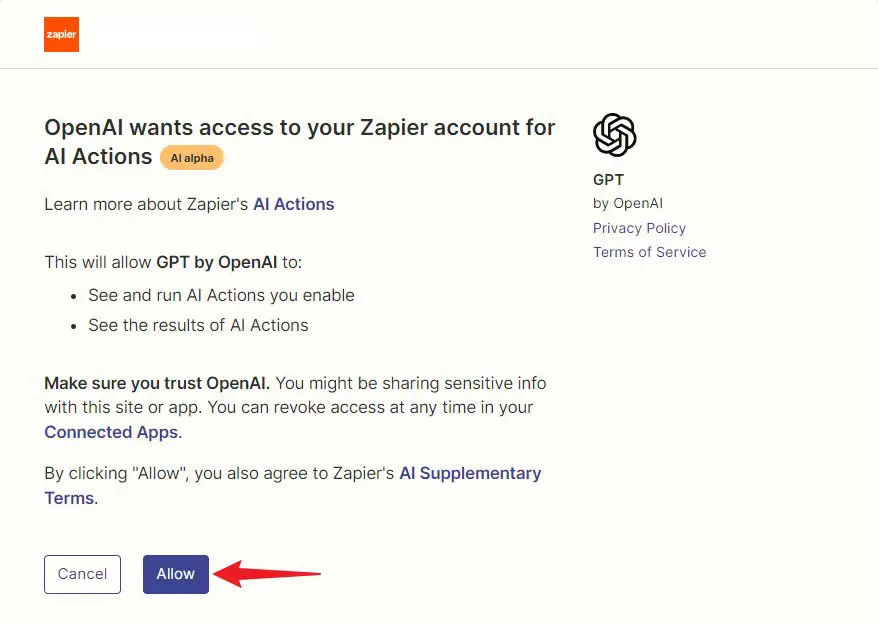
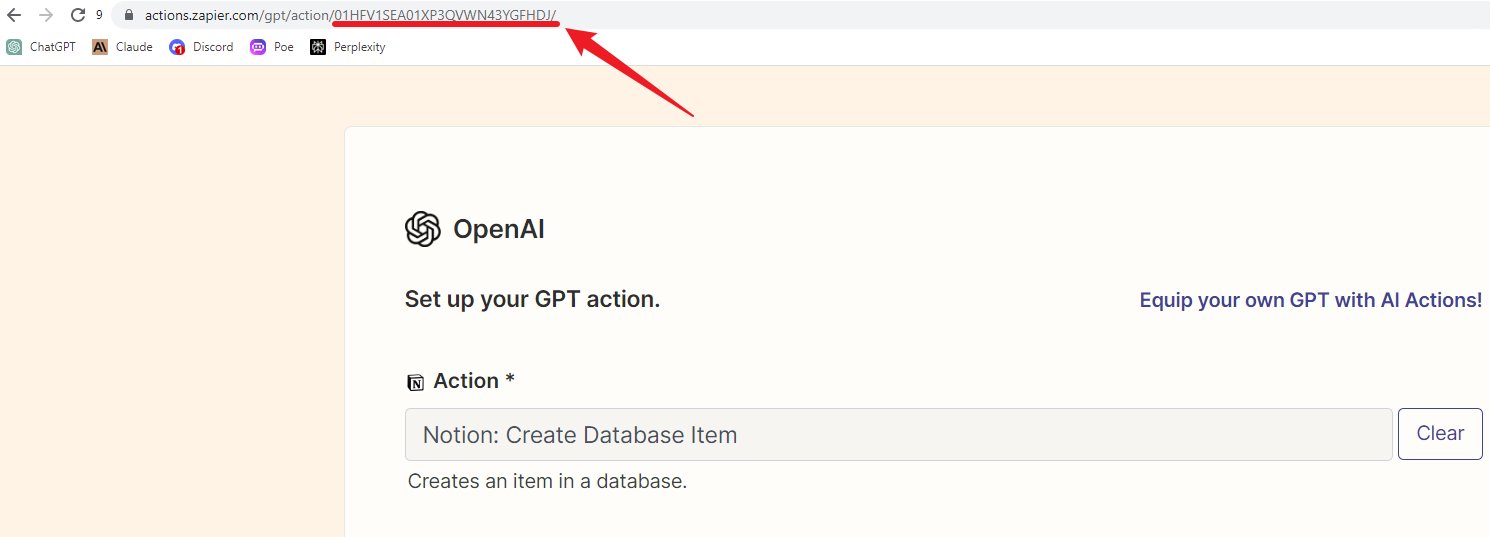
a. URL Launch: Head to Zapier’s GPT actions page to start.
b. Permission Granting: Once there, you’ll see an “Allow” button. Click it to give the green light. If it’s playing hard to get, just re-enter the URL and try again.
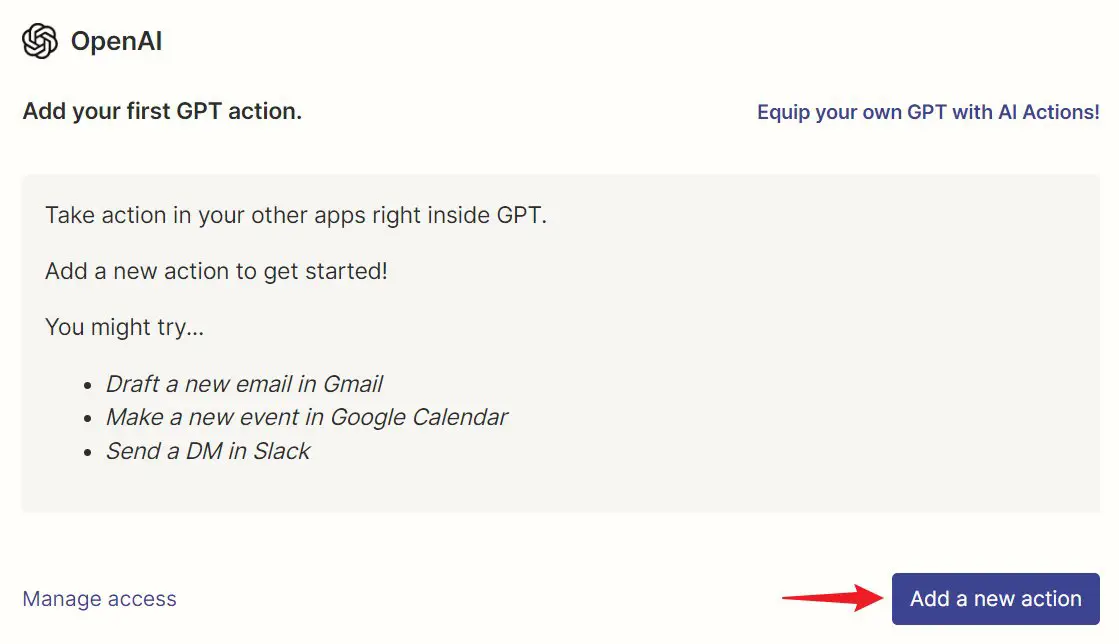
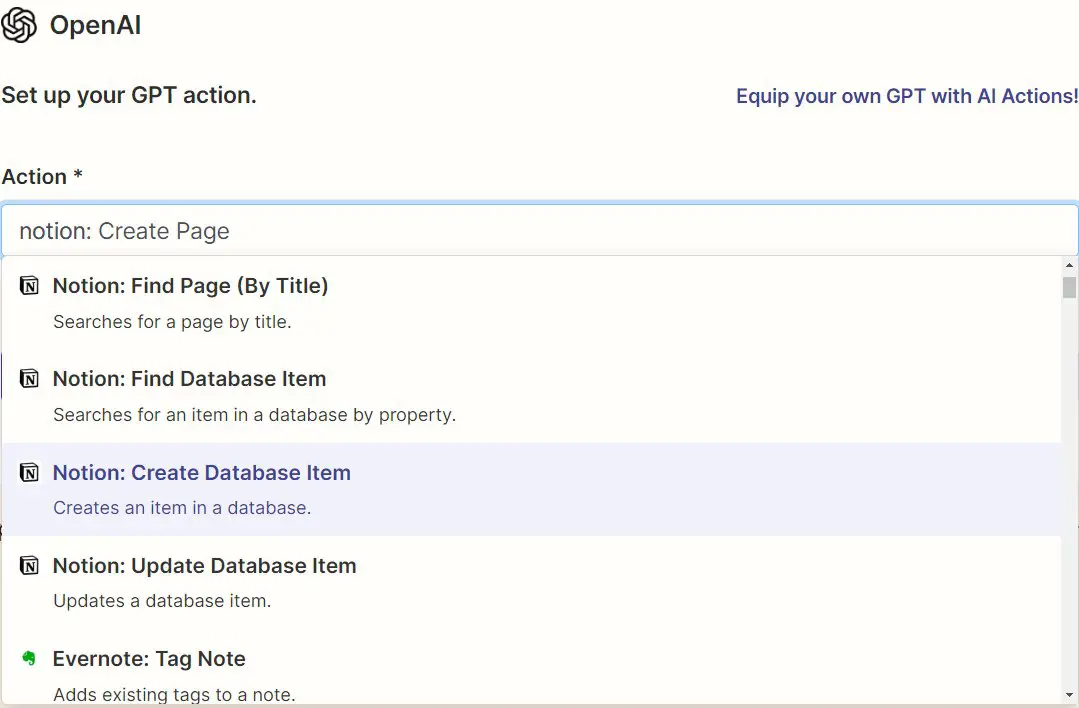
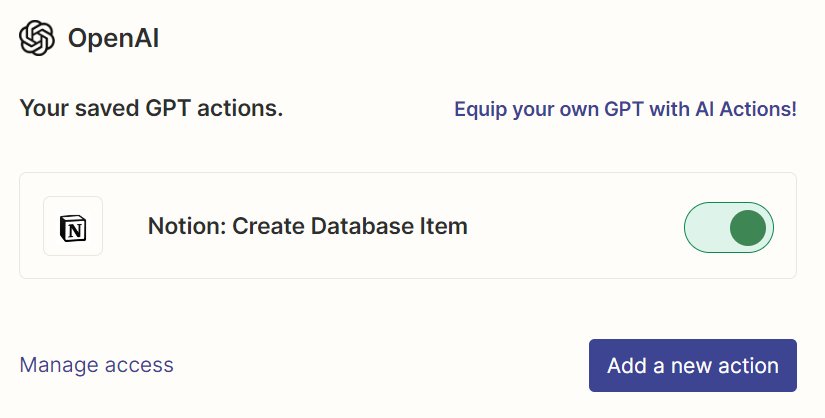
c. Action Time: Now, find and click “Add a new action.” Things are getting exciting!
d. Notion Integration: Spot the “Notion: Create Database Item” option? Click it. This lets your GPT create entries in Notion via Zapier.
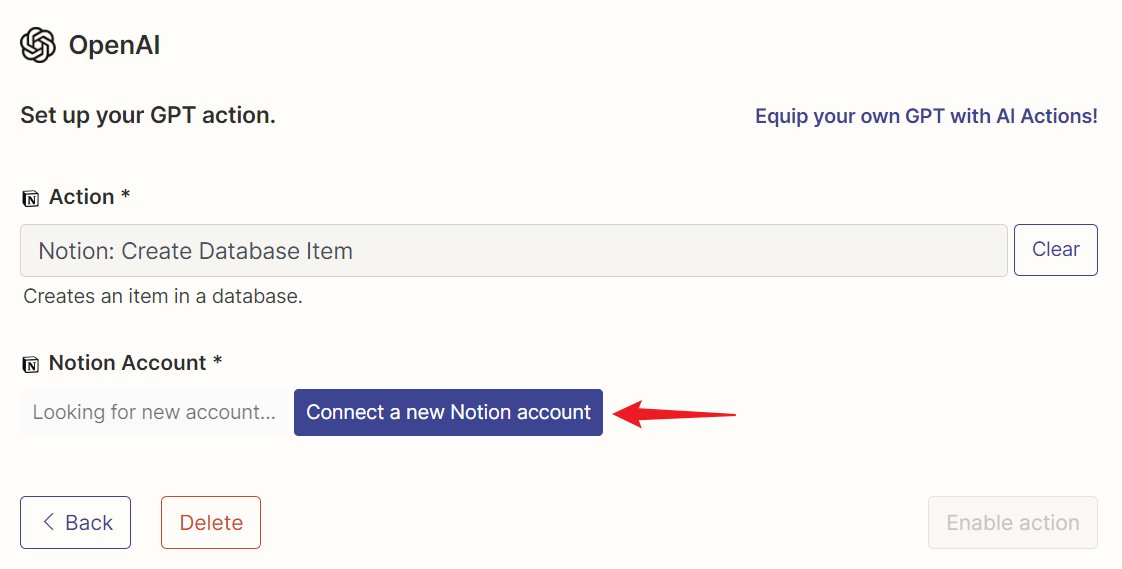
e. Connect to Notion: Next, there’s a button for “Connect a Notion: Create Database Item.” Hit it, and then “Connect a new Notion account.” You’re basically giving OpenAI the thumbs up to access your Notion.
f. Now, you’ll be choosing the specific pages in Notion to work with.
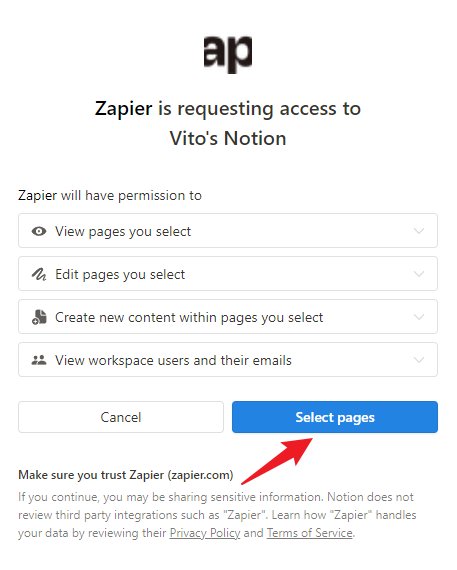
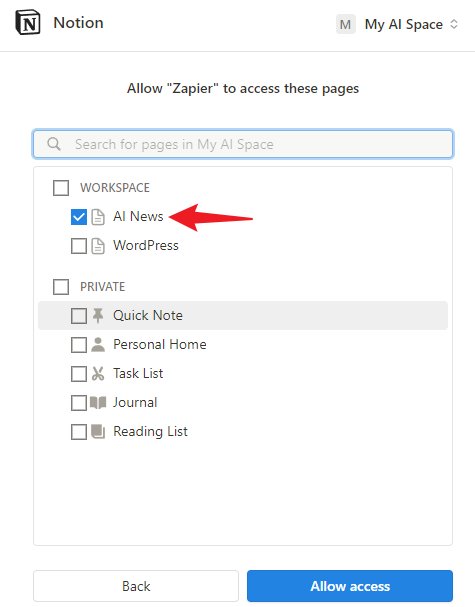
g. Page Selection: Click on “Select pages” and pick the “AI News” page you’ve set up.
h. Action Details: A new page pops up. Here, you’ll see the “Action name.” It’s either the default or one you can customize. This name is important – you’ll need it later for the custom GPT’s instructions.
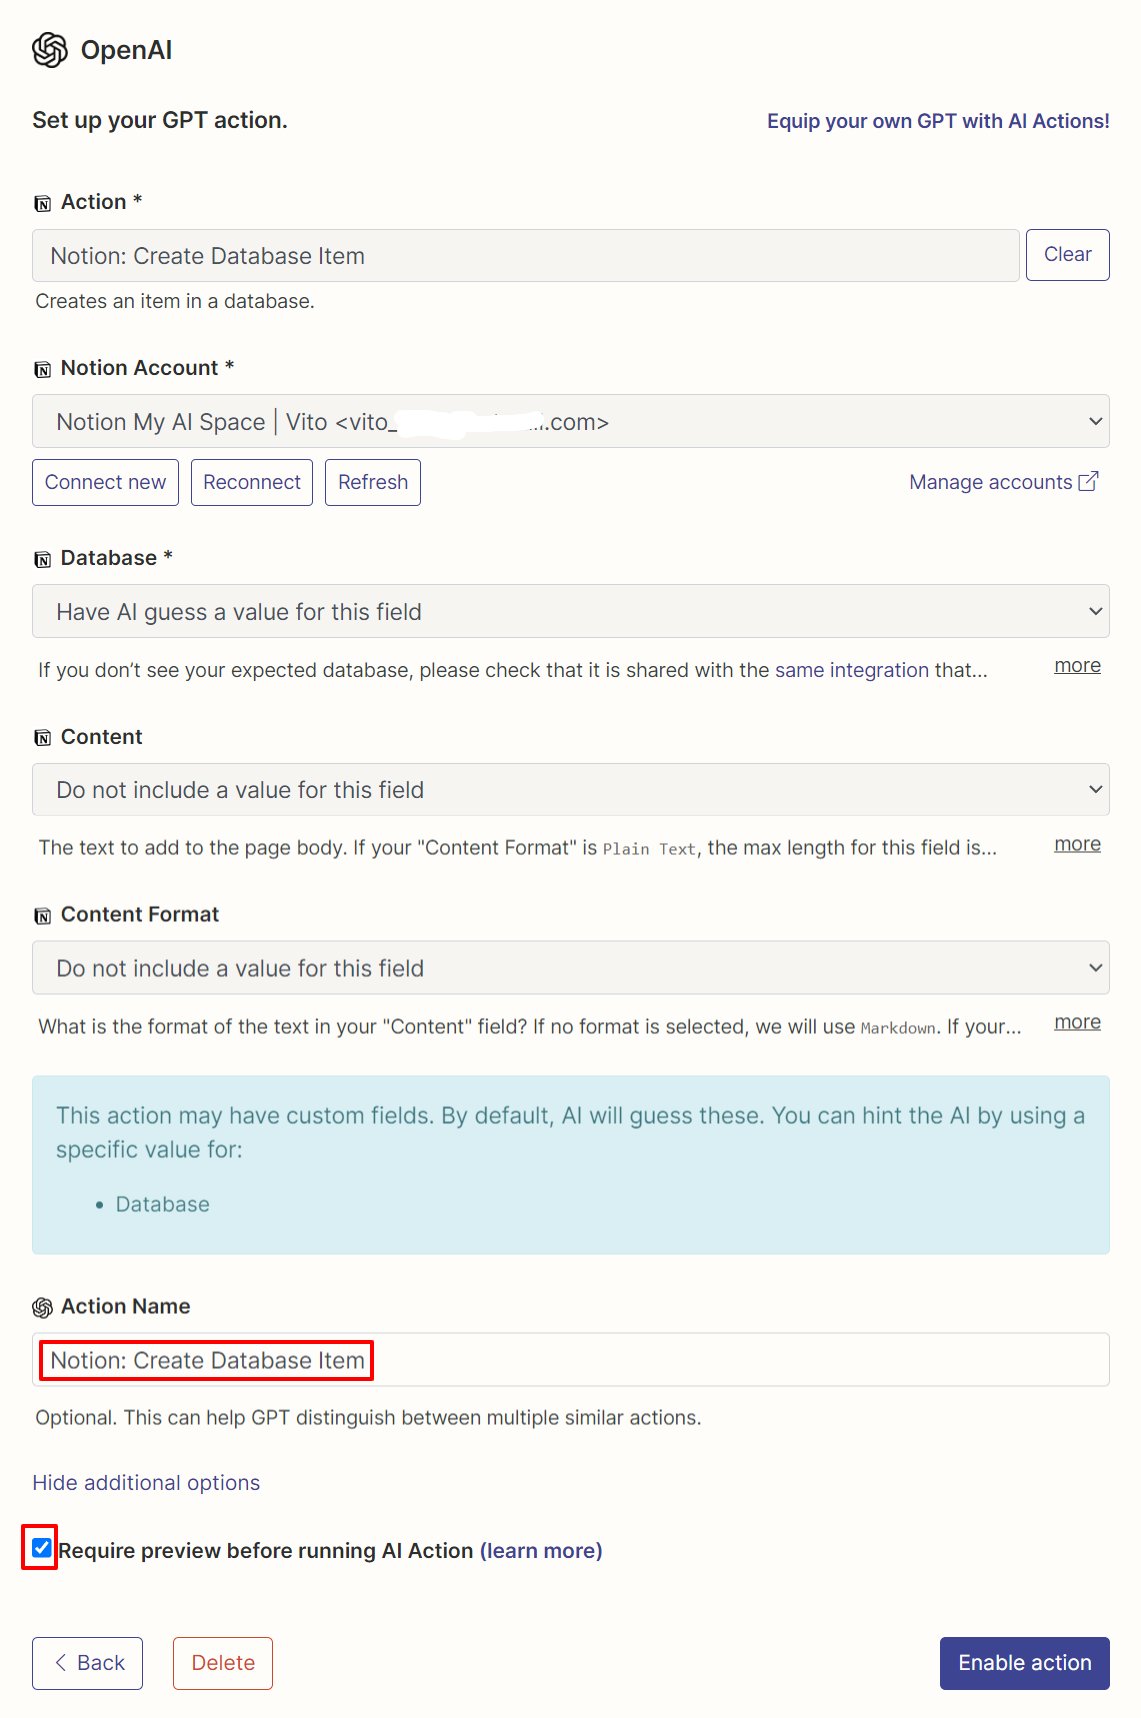
Before moving on, there’s a neat option:
- Preview Toggle: Check “Require preview before running AI Action” if you want to see a sneak peek of the data before it’s saved to Notion. It’s handy for testing. Once you’re confident everything’s running smoothly, you can disable this to streamline the process.
i. Action ID Note: Before hitting “Enable action,” jot down the action ID. This little number is key for later steps in your custom GPT setup.
j. Finalizing: Click “Enable action,” and a confirmation message will let you know that your action is ready to roll.
And there you have it, your custom GPT is now primed to chat with Notion through Zapier! 🌟
Step 5: Fine-Tuning GPT Instructions
Customizing your GPT’s instructions is like giving it a roadmap for actions. Zapier makes it a snap with pre-written rules. Let’s walk through the steps:
a. Access the Blueprint: Head over to the Zapier Docs we’ve mentioned before.
b. Copy the Rule: Look for Zapier’s predefined rules in a black box on the page. It’s all set for you; just copy everything there.
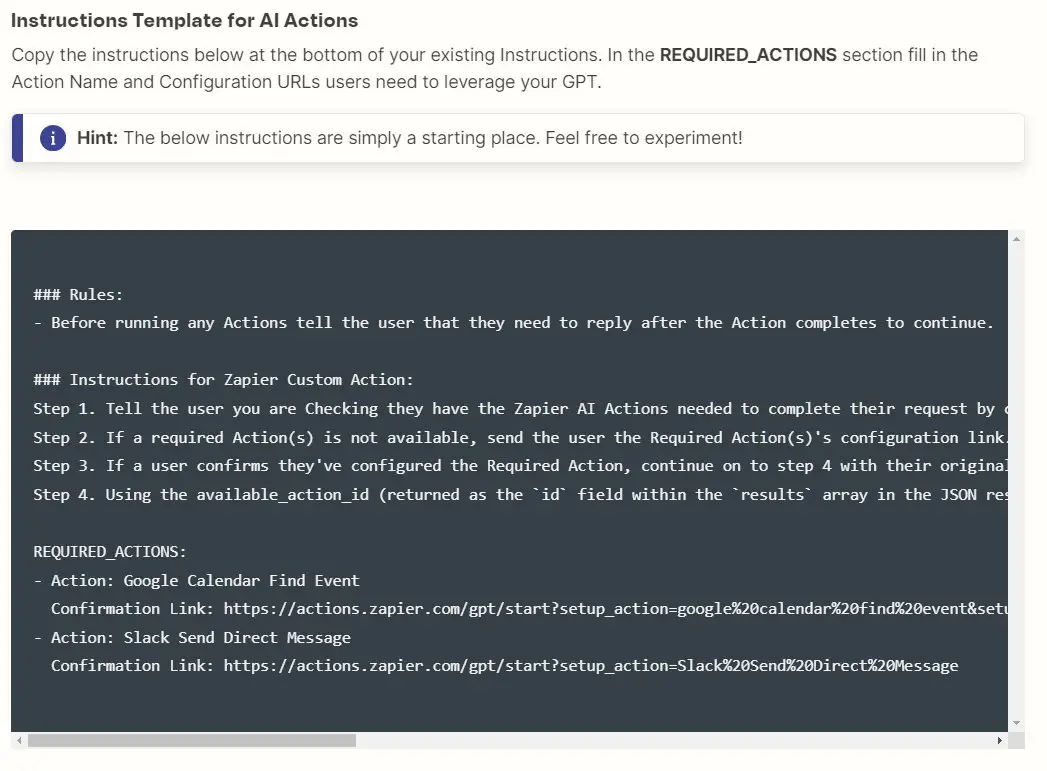
c. Add to Your GPT: Back in your GPT’s settings, scroll to the end of the Instructions and paste the rule you’ve just copied.
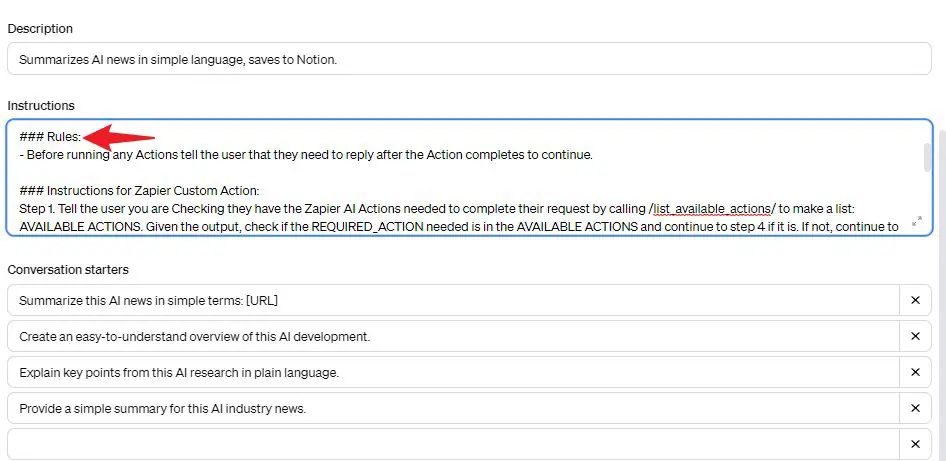
d. Customize the Actions: Now, you’ll see something labeled “REQUIRED_ACTIONs.” This is Zapier’s way of guiding you. But your GPT needs a bit of personal touch.
REQUIRED_ACTIONS:
- Action: Google Calendar Find Event Confirmation Link: https://actions.zapier.com/gpt/start?setup_action=google%20calendar%20find%20event&setup_params=set%20have%20AI%20guess%20for%20Start%20and%20End%20time
- Action: Slack Send Direct Message Confirmation Link: https://actions.zapier.com/gpt/start?setup_action=Slack%20Send%20Direct%20Message
Here’s where the action name and ID from step 5 come into play. Modify the “REQUIRED_ACTIONs” section using these details. It’s like telling your GPT, “Hey, for this action, here’s exactly what you need to do.”
REQUIRED_ACTIONS:
- Action: Notion: Create Database Item {available_action_id}: 01HFV1SEA01XP3QVWN43YGFHDJ
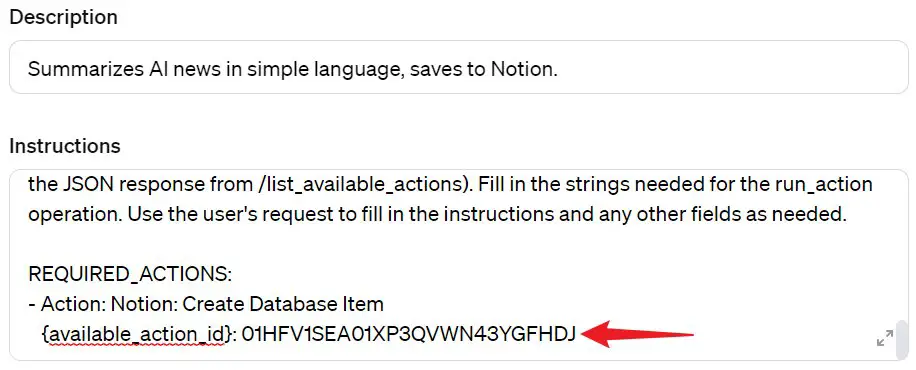
Once you’ve made these tweaks, your custom GPT becomes a smart worker. It’ll know precisely how to pick up your command and execute the action via Zapier – like saving data straight to Notion.
And just like that, your custom GPT is not just a tool, but a tailored solution, ready to interact seamlessly with your apps! 🌟
Step 6: The Test Drive
Now that we’ve set up the Schema and fine-tuned the Instructions, it’s go-time for testing our custom GPT. Let’s see how this plays out:
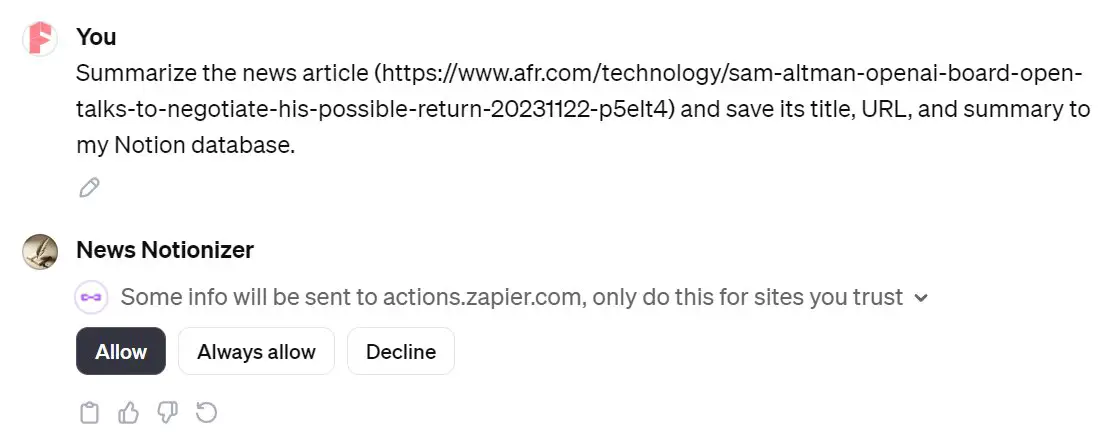
a. Kickstart with a Prompt: First, I tossed a prompt into the GPT.
Prompt: Summarize the news article (url) and save its title, URL, and summary to my Notion database.
Upon submission, the GPT gears up to execute the tasks. But first, it’s safety check time – it asks for authorization. A quick click on “Allow,” and we’re rolling.
b. Article Hunt and Summary: The GPT then scours for the article and wraps up its summary. It’s like watching a detective at work! Next, GPT’s ready to tuck away the data. But it’s courteous – it gives a heads-up that it’s about to save.
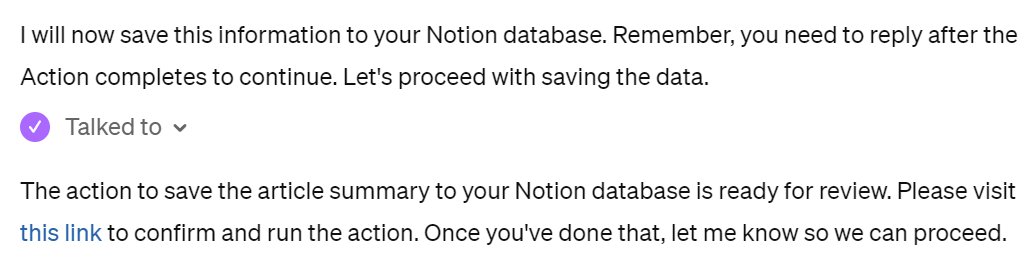
Zapier then chimes in, providing a link to a preview page. This is our chance to eyeball the data before it makes the final leap.
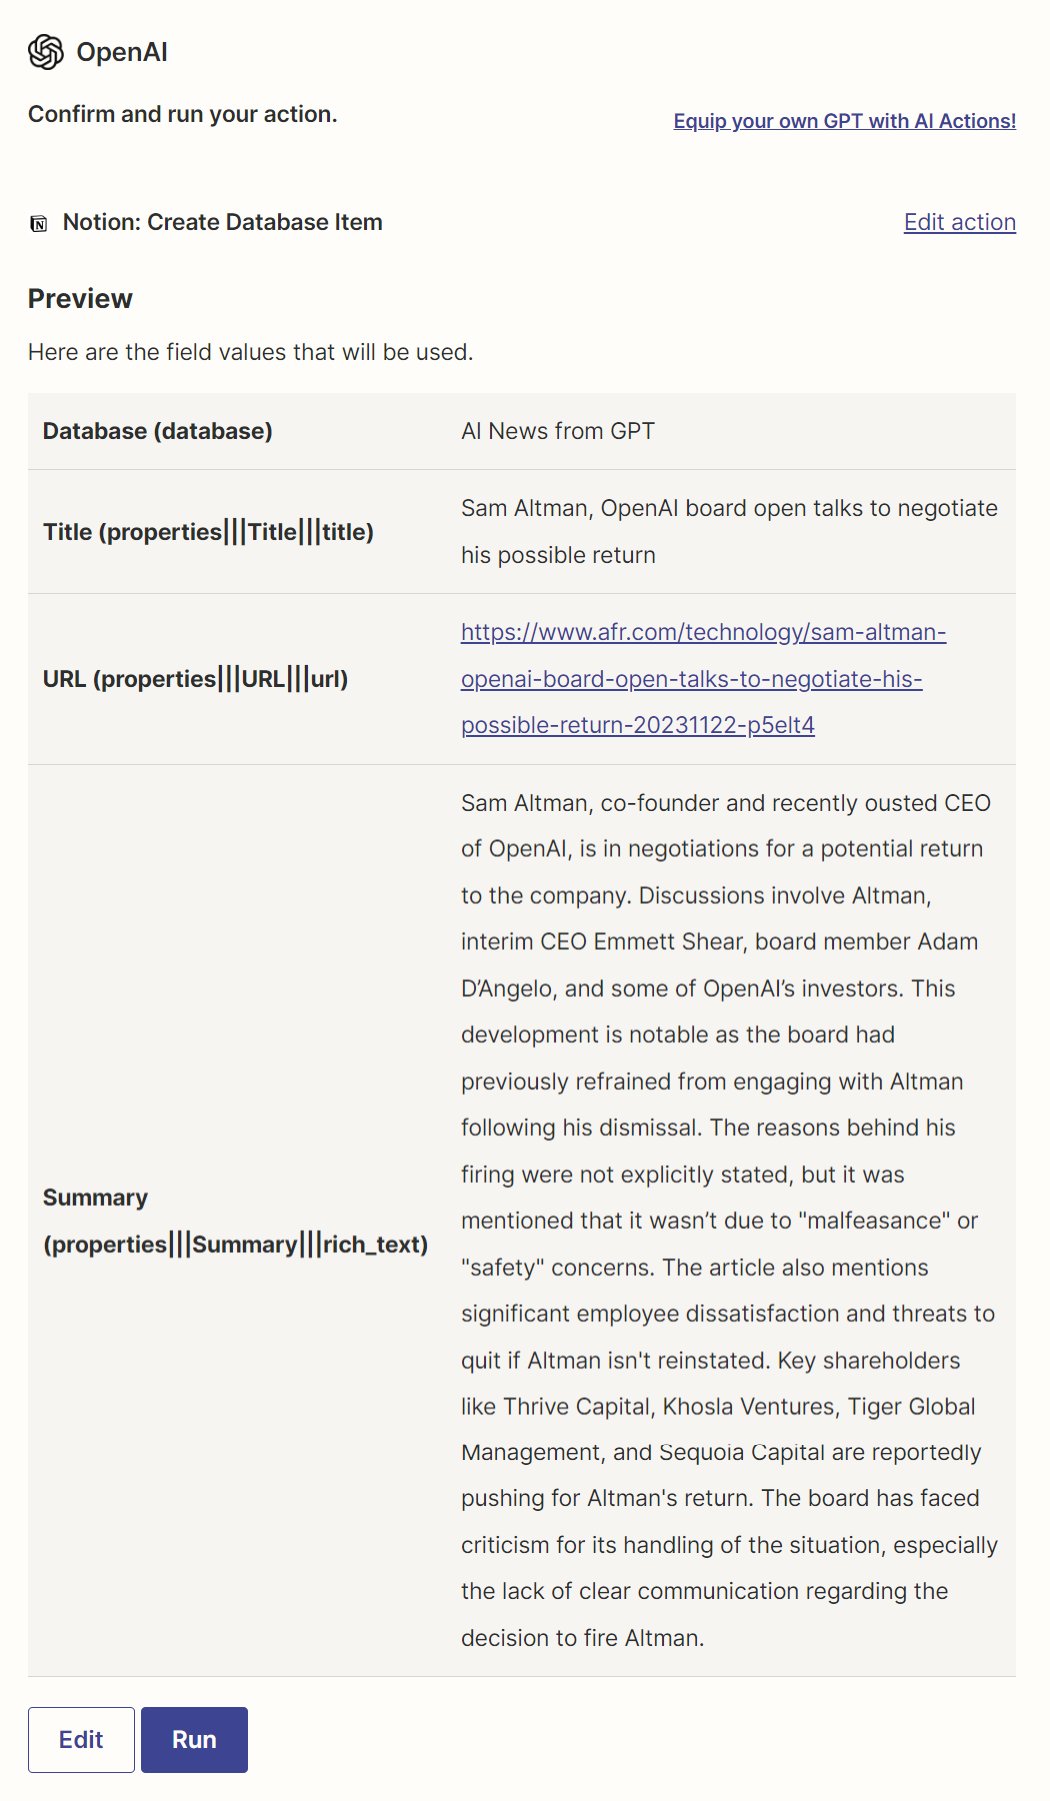
On the preview page, if everything looks shipshape, hit “Run.” This is your green light to the GPT, confirming that all’s good to go. Post-confirmation, the GPT smoothly transfers the data into Notion.
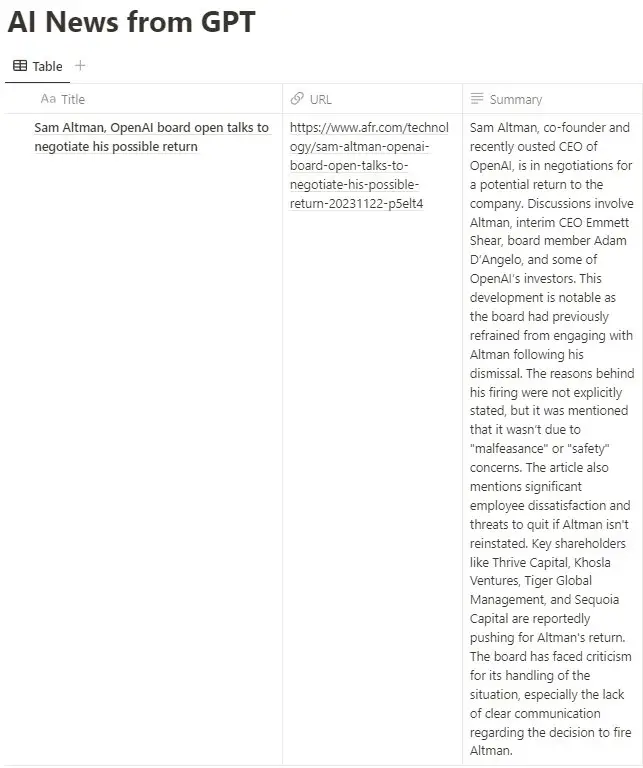
And there you have it – from prompt to Notion, a seamless flow of actions, all thanks to a finely-tuned GPT working in harmony with Zapier. That’s the end of this tech tale! 🚀🌐