Flux 2 Klein Clothes Swap in ComfyUI: A Faster, Higher-Quality Workflow (Compared to Qwen Edit)
A few months ago, I shared a workflow using the Qwen Edit model to swap clothes. In this article, I’m switching to a newer option: Flux 2 Klein. It’s designed for the same kind of job, but in my testing it usually delivers higher-quality results and runs faster too.
Let’s walk through what’s different, how the workflow is structured in ComfyUI, and how to handle common problems like missing garment details, unwanted accessories, and occasional “extra hands.”
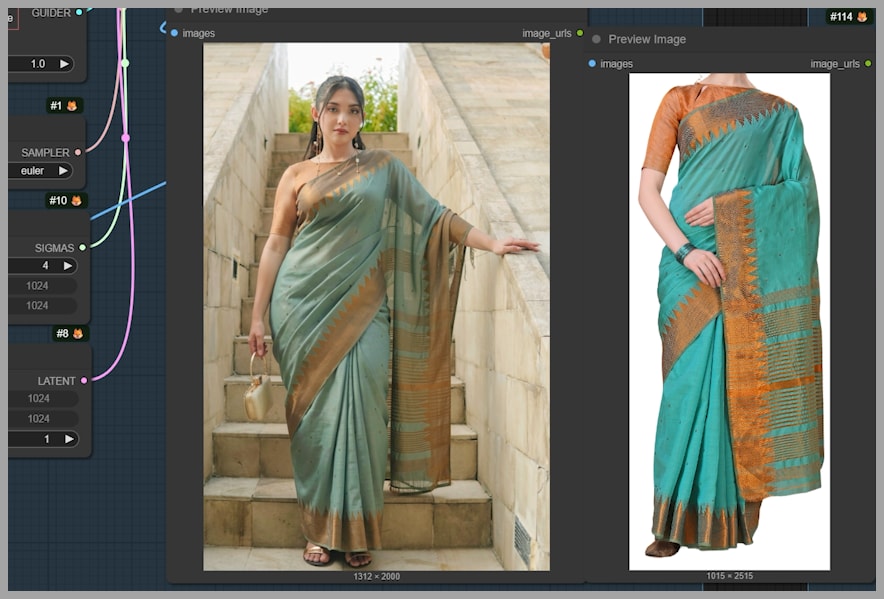
Flux 2 Klein vs Qwen Edit: What Looks Better?
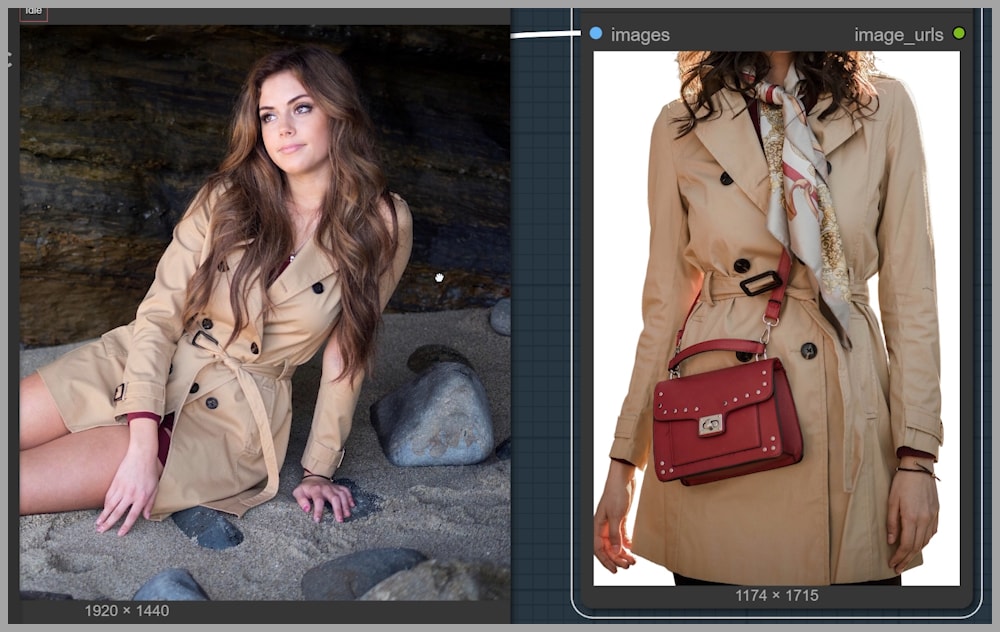
To set expectations, I ran the same kinds of clothing swaps with both models:
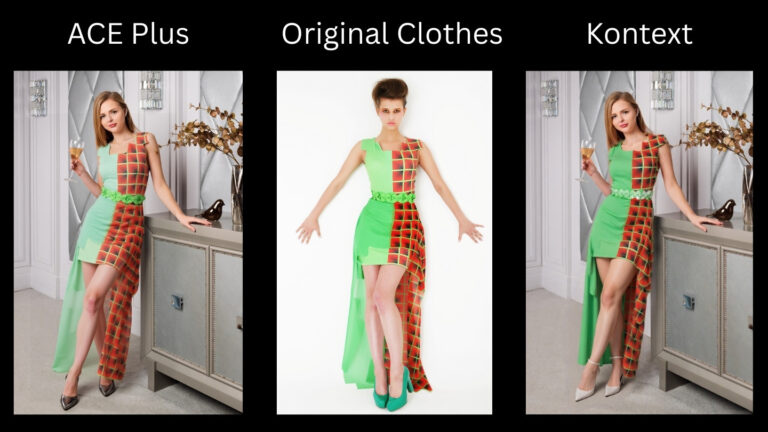
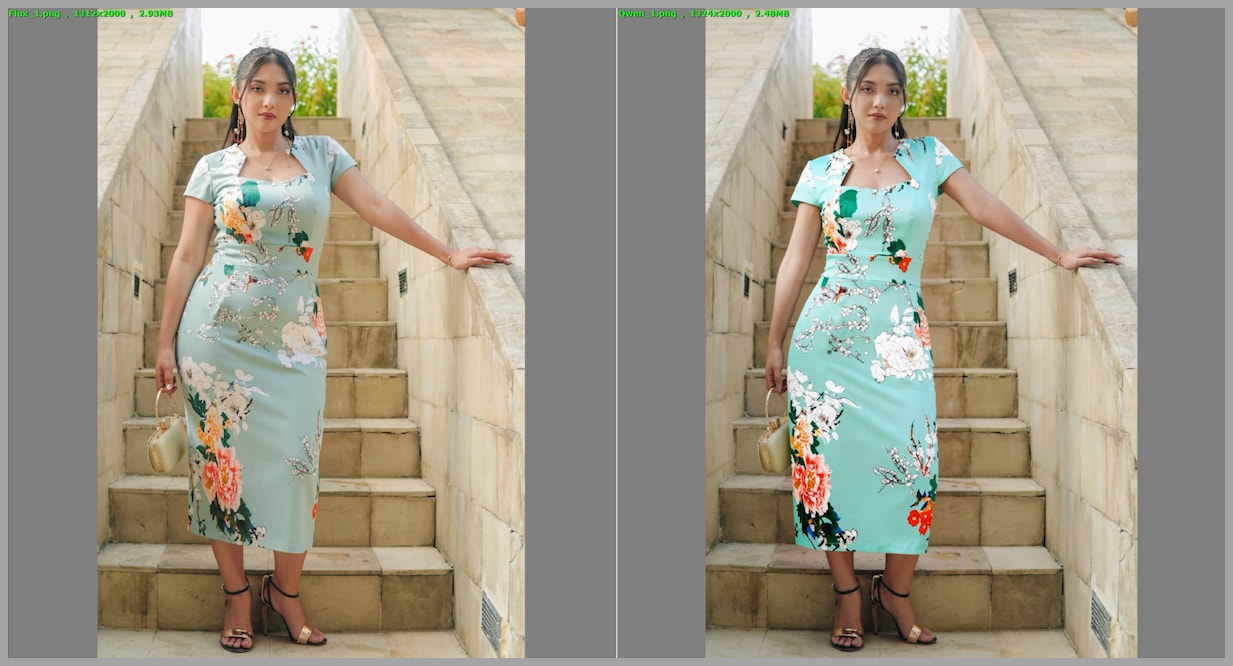
- Left image: Flux 2 Klein
- Right image: Qwen Edit 2511
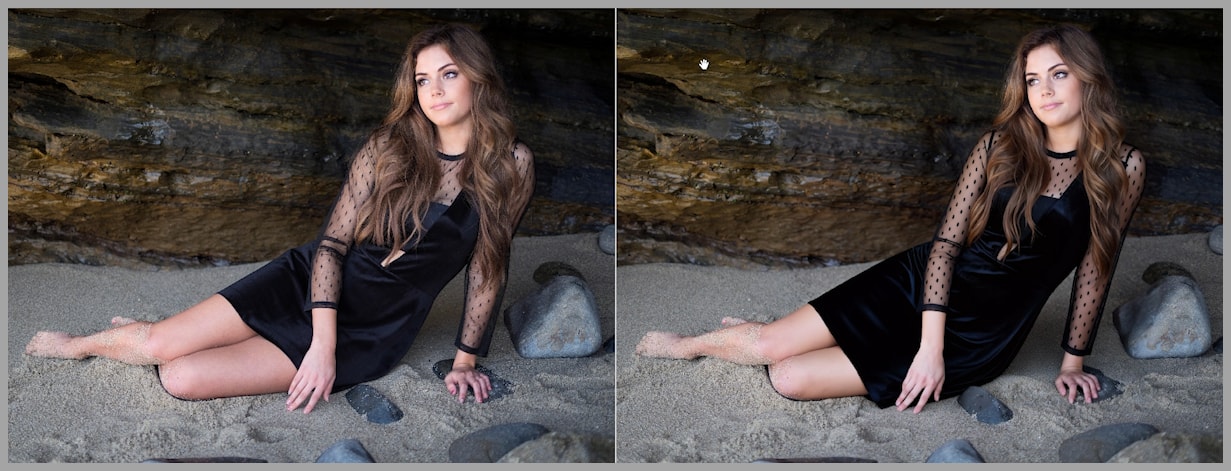
When you zoom in, Flux 2 Klein tends to preserve fine detail better. For example:
- See-through lace texture on an arm remains visible and textured with Klein.
- On the Qwen Edit result, those delicate details can get smoothed away.
- Hair fidelity is another big one—Klein typically holds onto sharper strands and more believable structure.
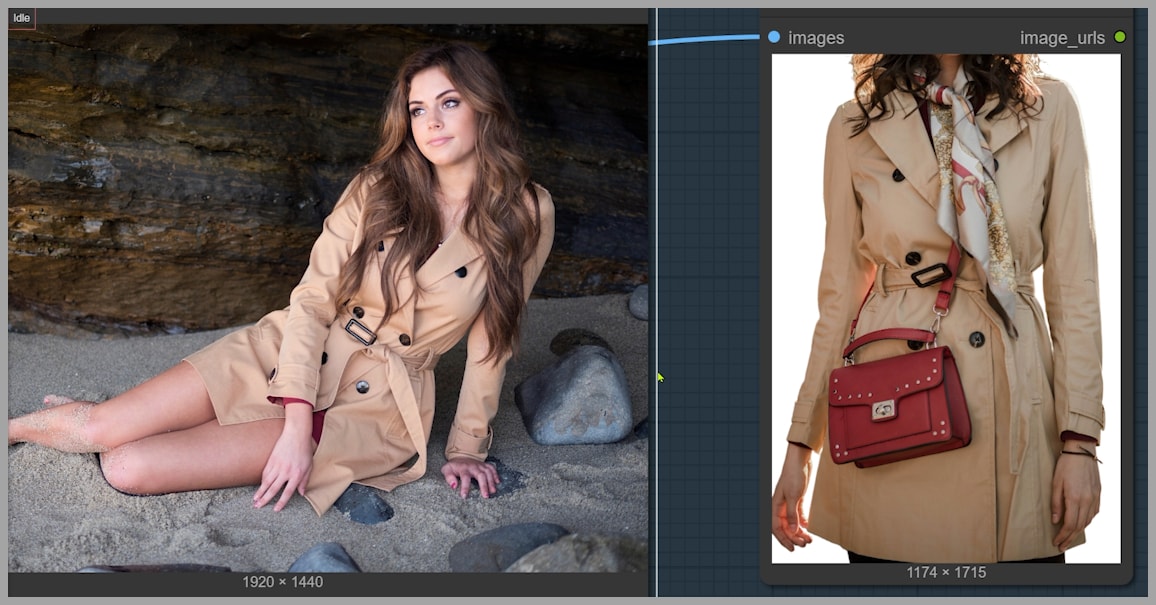
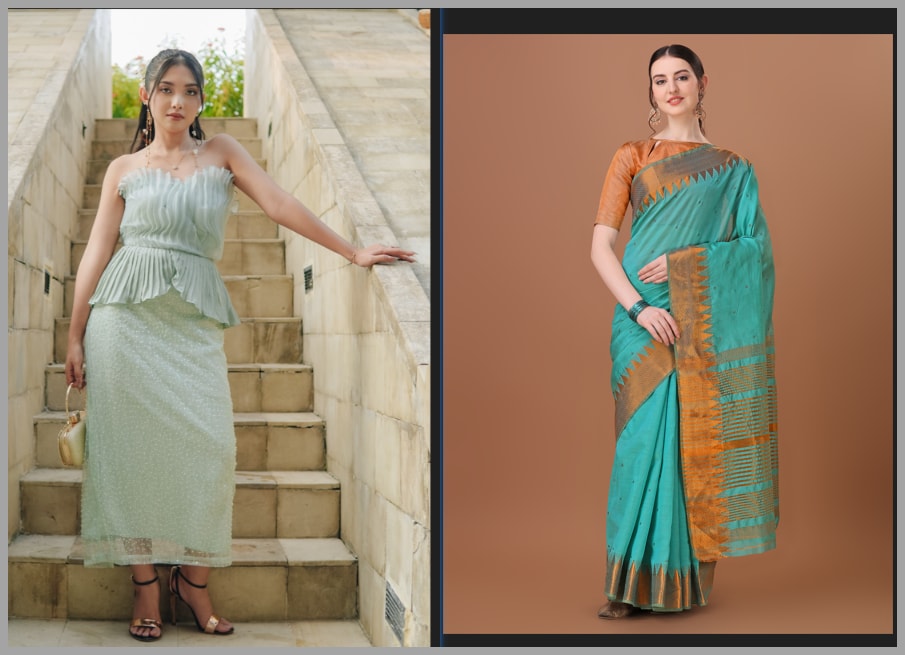
In another example, the difference becomes obvious in the “feel” of the image:
- The dress from Flux 2 Klein looks more dimensional.
- The Qwen Edit version can look a bit flat, and the lighting/shadows may not match the environment as naturally.
That’s the quality reason. The workflow reason comes next.
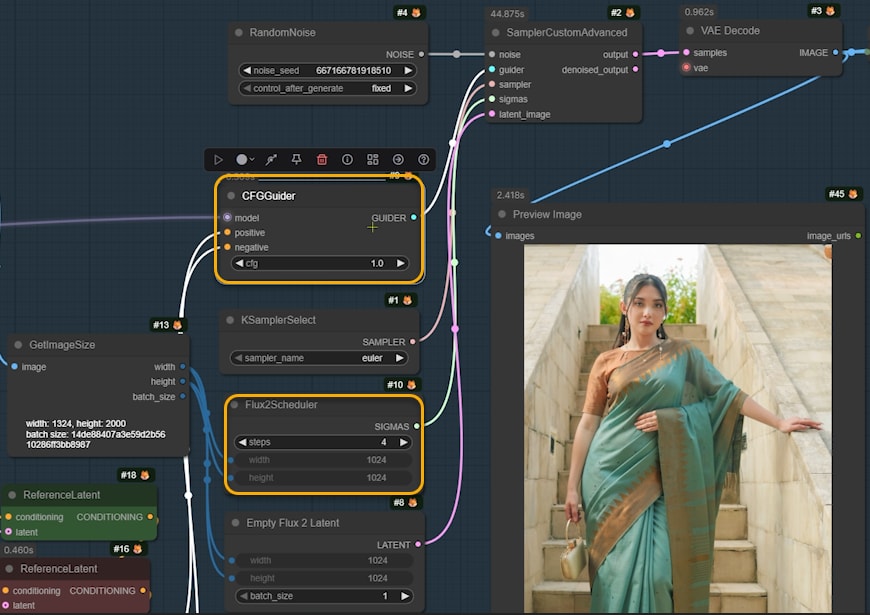
Workflow Overview: 5 Node Groups (But It’s Not Complicated)
This workflow has 5 node groups, but don’t let that scare you—2 of them are optional, and you can deactivate them at first to keep everything simple.
What we’re doing
The main task is straightforward:
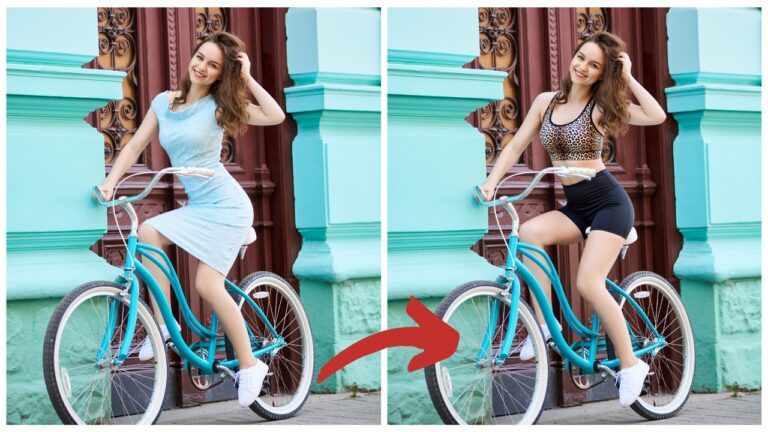
We want the woman in Image 1 to wear the trench coat from Image 2.
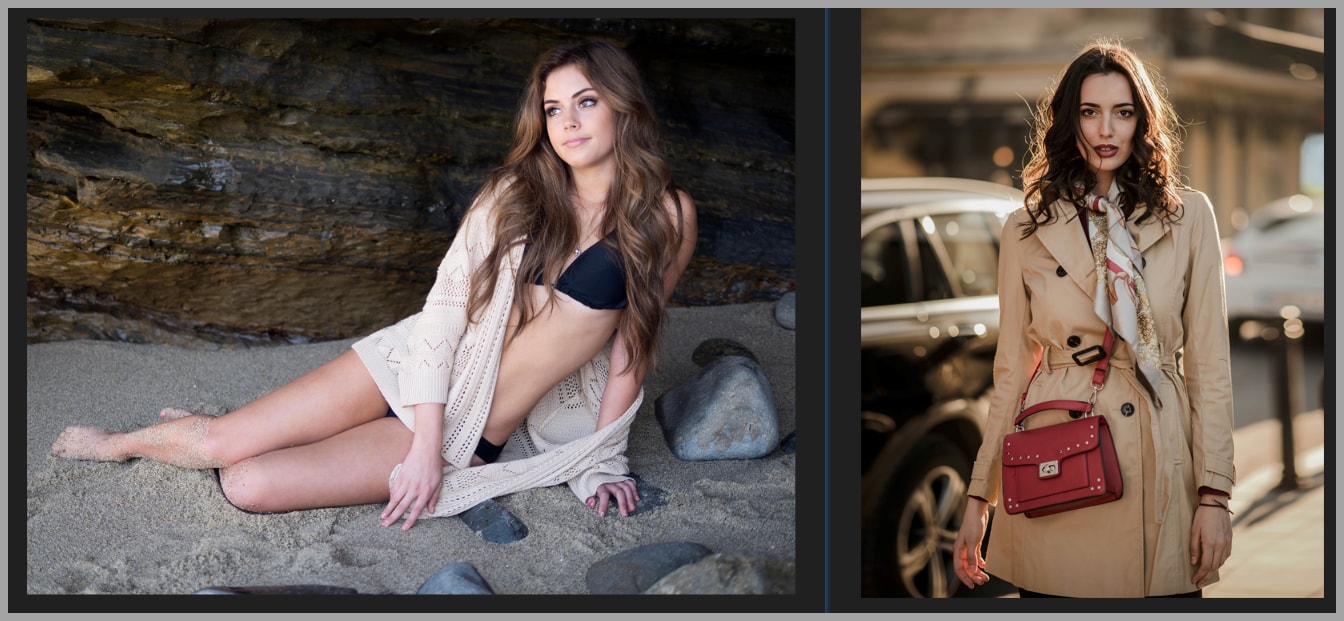
To make that happen cleanly and consistently, the workflow focuses on preparing the reference images in a way that makes Flux 2 Klein’s job as easy as possible.
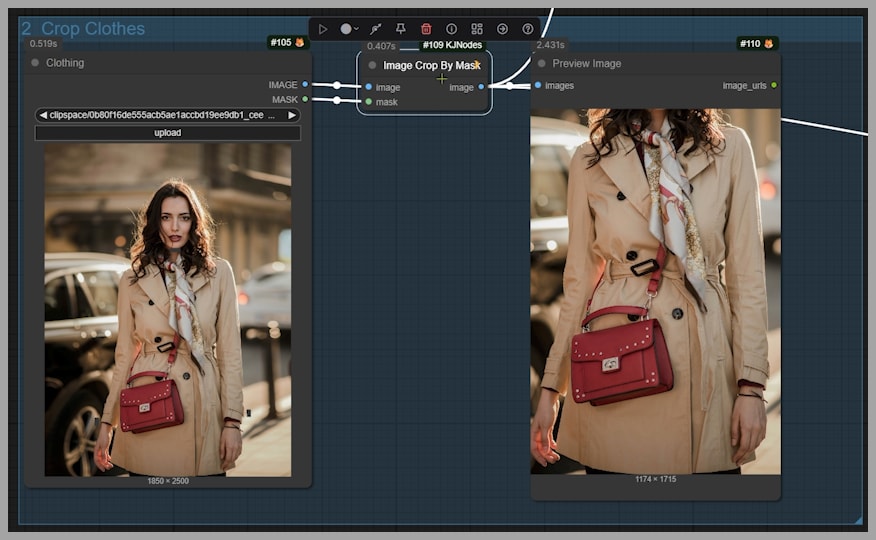
Node Group 1: Crop the Outfit by Mask (Image Crop By Mask)
The first step I take is cropping the clothing reference—here, the trench coat—using an “Image Crop By Mask” node.
Why cropping helps
Cropping is a great practice because it forces Klein to focus on the garment itself instead of wasting attention on background clutter.
How to mask (keep it simple)
You don’t need to carefully paint the entire coat.
- Zoom in on the clothing item.
- Paint four simple marks around the edges:
- One at the top
- One on the left
- One on the right
- One at the bottom
- That’s it.
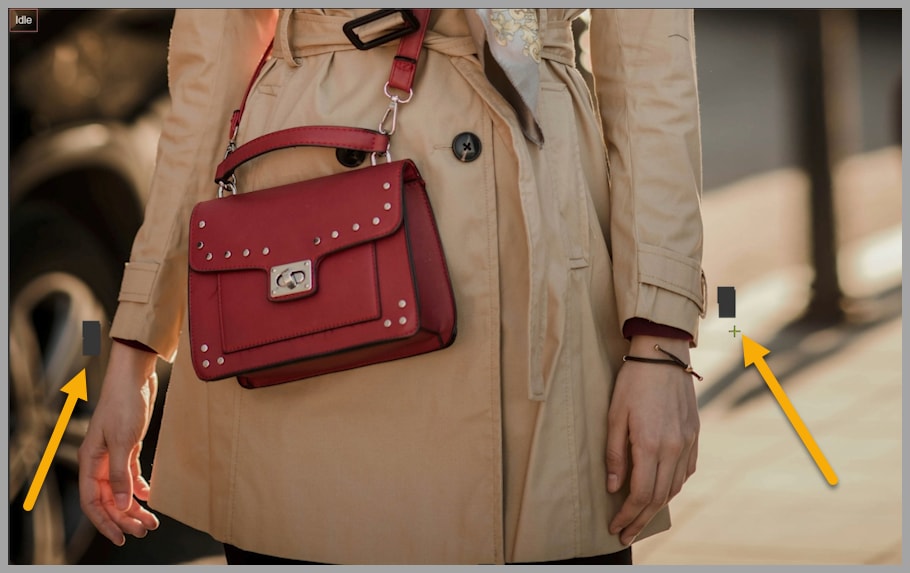
Those minimal edge hints are enough. You’re not “coloring in the coat,” you’re just defining the boundaries.
Dress tip: include knees in the mask area
If you’re working with a dress, it often helps to include the knees inside your mask region. That gives Klein more context about the dress length, so it’s less likely to guess incorrectly.
Node Group 2: Optional Background Removal + Reference Switching
After cropping, I optionally remove the background with “Image Remove Bg.”
Background removal is optional
You can absolutely bypass this step. But when it works well, having a clean garment on a neutral background can make the reference clearer.
After background removal, the coat becomes an image on a white background.
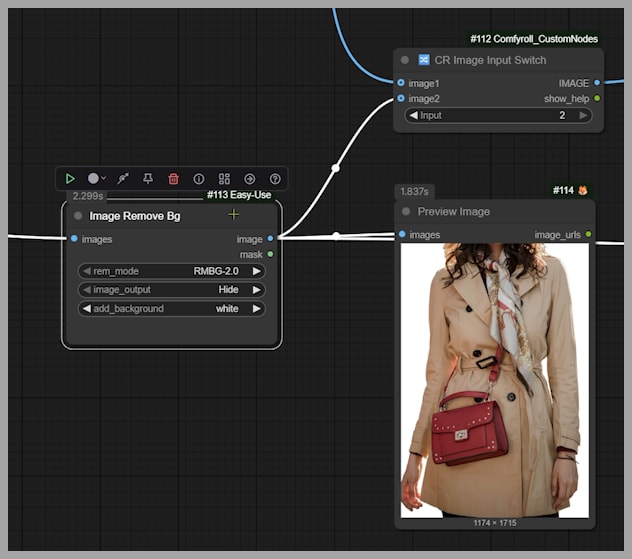
Image Input Switch: choosing the second reference image
The next key node is “Image Input Switch.” This decides what image becomes the second reference image for Flux 2 Klein.
- If the Input value = 2 → the white-background coat image becomes the second reference.
- If the Input value = 1 → the output from Node Group 3 becomes the second reference instead.
This switch matters a lot later, because Node Group 3 is how we “clean up” difficult references and make Klein’s job easier.
Preparing the First Reference Image: Resize for 4K Detail
Now let’s talk about Image 1: the target person (the woman who will wear the coat).
I run it through an “Image Resize” node with a specific rule:
- Condition: “downscale if bigger”
- Limit: 2048
So if either dimension (width or height) exceeds 2048, it scales down to 2048 while preserving the aspect ratio.

Why this matters (and why Flux 2 Klein is great here)
One big advantage Flux 2 Klein has over Qwen Edit models is that it can handle large images with strong detail—like 2048 × 2048—and still behave well.
Qwen Edit models often:
- make more mistakes at 2K resolution, and
- lose quality at that scale.
That’s why in my older Qwen Edit clothes swap workflow, I also had to mask the clothing area on the target person.
With Flux 2 Klein, I can usually use the resized target image directly as the first reference without extra masking.
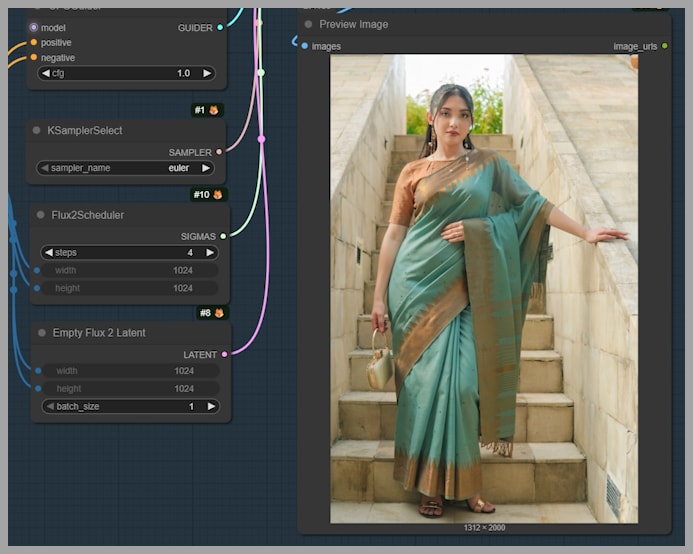
The Base Prompt: Keep It Simple First
The main prompt is intentionally minimal:
Let the woman in image 1 wear the trench coat in image 2.
That’s enough to get a strong baseline result. Run it once like this before adding extra constraints—this helps you understand what Klein does naturally versus what it struggles with.
First result
In my test, the output was already solid:
- the outfit was reproduced successfully,
- the swap looked believable.

But then we hit a common real-world issue…
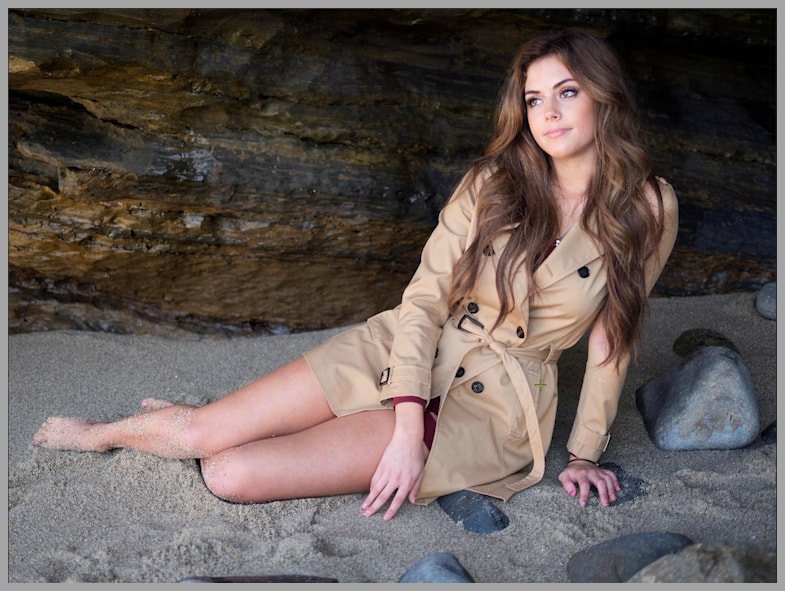
Removing Accessories: Scarf + Bag (And the Button Problem)
In the trench coat example, the output included a scarf and bag, which looked weird—like, wearing a bag while lying on sand and rocks doesn’t really make sense.
So we add a line to the prompt:
remove the scarf and bag
When I reran it:
- scarf and bag disappeared successfully.
But then: garment accuracy dropped
When I compared coat details to the original, I noticed a specific mismatch:
- The original trench coat had 6 buttons.
- The generated coat had 7.
I tried the usual trick:
- changing seeds,
- testing many seeds…
But most of the time, the buttons still weren’t correct. Sometimes:
- the count was wrong,
- or the positions were inconsistent.
The lesson
If you want Flux 2 Klein to be more accurate, you often have to give it a simpler task.
That’s where Node Group 3 comes in.
Node Group 3: Make Klein More Accurate by Splitting the Task
Instead of asking Klein to do everything at once (swap clothes and remove accessories), I separate the accessory removal into its own step.
So I activate Node Group 3.
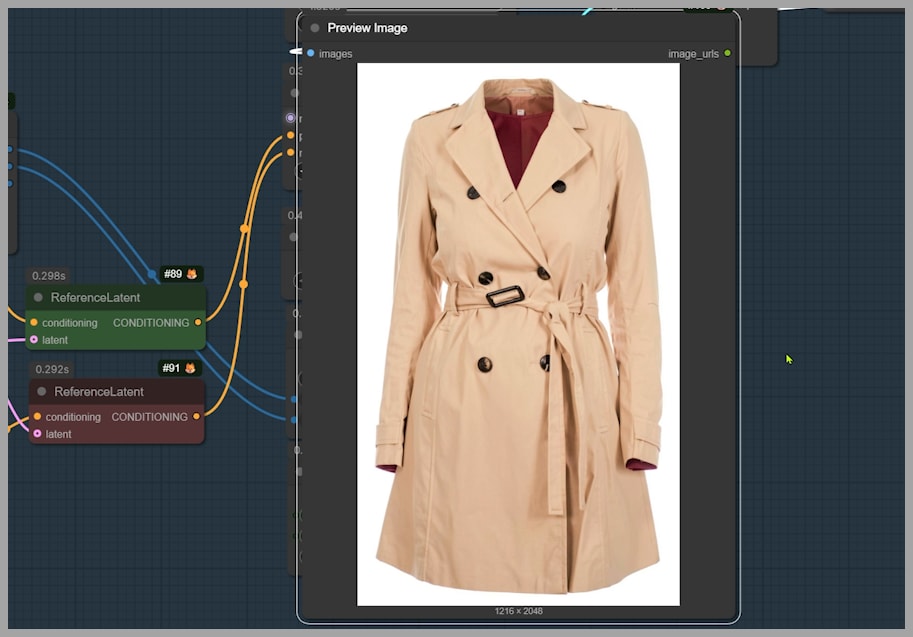
Node Group 3 prompt (example)
For the trench coat case:
extract the dress onto a white background. Remove the scarf and bag.
(Yes, the prompt says “dress” here in the original workflow phrasing—the intent is: extract the garment cleanly and remove unwanted items.)
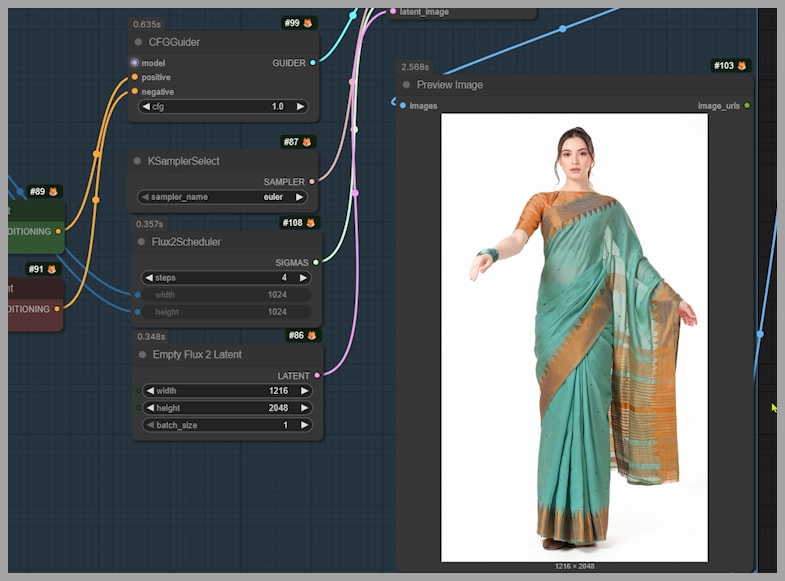
Result
This step produced exactly what I wanted:
- the trench coat isolated on a white background
- scarf and bag removed
The output size here was 1216 × 2048, but you can change the size in the node depending on your needs.
Feeding the cleaned garment back into Klein
Now we use this cleaned output as the reference garment for the final swap:
- Set Image Input Switch → Input = 1 (so the third group output becomes reference image 2)
- Remove “remove the scarf and bag” from the main prompt
- Run the workflow again
This usually improves detail accuracy, because Klein is no longer juggling too many instructions during the swap.
Second Example: Dress Swap + Bracelet Removal (And the “Three Hands” Problem)
Next task:
Let the woman in image 1 wear the dress in image 2. Remove the bracelet.
The output mostly worked—but the woman ended up with three hands.
Why this happens
Sometimes Flux 2 Klein can generate:
- extra limbs,
- extra fingers,
- strange anatomy artifacts.
Common model-side fixes
Besides changing the seed, you can also tweak:
- sampling steps
- CFG value
(I covered that more deeply elsewhere, but the key idea is: those settings influence how strictly the model follows the prompt and how it explores solutions.)
But in this example, pose mismatch was the real culprit
The target woman’s left arm was stretched out, balancing against a wall.
But the woman in the dress reference image wasn’t posing that way.
So Klein had to guess:
- how the dress fabric would drape,
- how the arm should align,
- how the body geometry should reconcile…
…and that’s a recipe for weird anatomy.
Using Node Group 3 for Pose Matching Before the Final Swap
This is where Node Group 3 becomes powerful again—not just for removing accessories, but for making the reference image compatible.
I activate Node Group 3 again, but with a new prompt:
make her stretch her left arm out. Expand and extract the dress onto a white background.
What this does
It creates a version of the dress reference where:
- the pose is closer to the target (left arm stretched out),
- the dress is extracted cleanly on white.
Now we do the same pipeline:
- Set Image Input Switch → Input = 1
- Run the final swap (Node Group 4)
Result
When I compared the final output to the original dress, the consistency was actually quite decent—much better than the first attempt.
Node Group 5: Optional High-Res Fix (Upscale + Detail Pass)
Finally, there’s the last node group: high-res fix.
This step:
- makes the image larger
- can add a bit more detail
You can set:
- the upscale ratio

And the prompt is something like:
add more details, 4k, 8k
What to expect
This won’t magically transform the image, but it can provide a subtle improvement—extra crispness and a little more surface detail.
If you want that final polish, this node group is worth using.
Wrap-Up: The Practical Strategy That Works
Here’s the workflow logic that keeps things reliable:
- Start simple: crop garment → optional background removal → swap with a clean prompt.
- If accuracy slips (buttons/details wrong), split the tasks:
- use Node Group 3 to remove accessories or clean the garment first.
- If anatomy breaks (extra hands/fingers), check for pose mismatch:
- use Node Group 3 to adjust the reference pose before swapping.
- If you want more polish, run the high-res fix at the end.
If you want to download the workflow, consider joining the community and supporting the channel.