IP-Adapter’s New Model Surpasses Roop and Reactor: Mastering Character Consistency
Building on our exploration of IP-Adapter’s groundbreaking Face ID Plus V2 model, this piece ventures further into the realm of creativity.
Today, we aim to uncover the depths of how this formidable instrument empowers us to craft highly personalized character portraits.
With its unique ability to weave together a diverse tapestry of styles while preserving the essence of facial consistency, we’re set to embark on a journey of artistic discovery.
For those who love diving into Stable Diffusion with video content, you’re invited to check out the engaging video tutorial that complements this article:
Gain exclusive access to advanced ComfyUI workflows and resources by joining our community now!
The Prowess of IP-Adapter
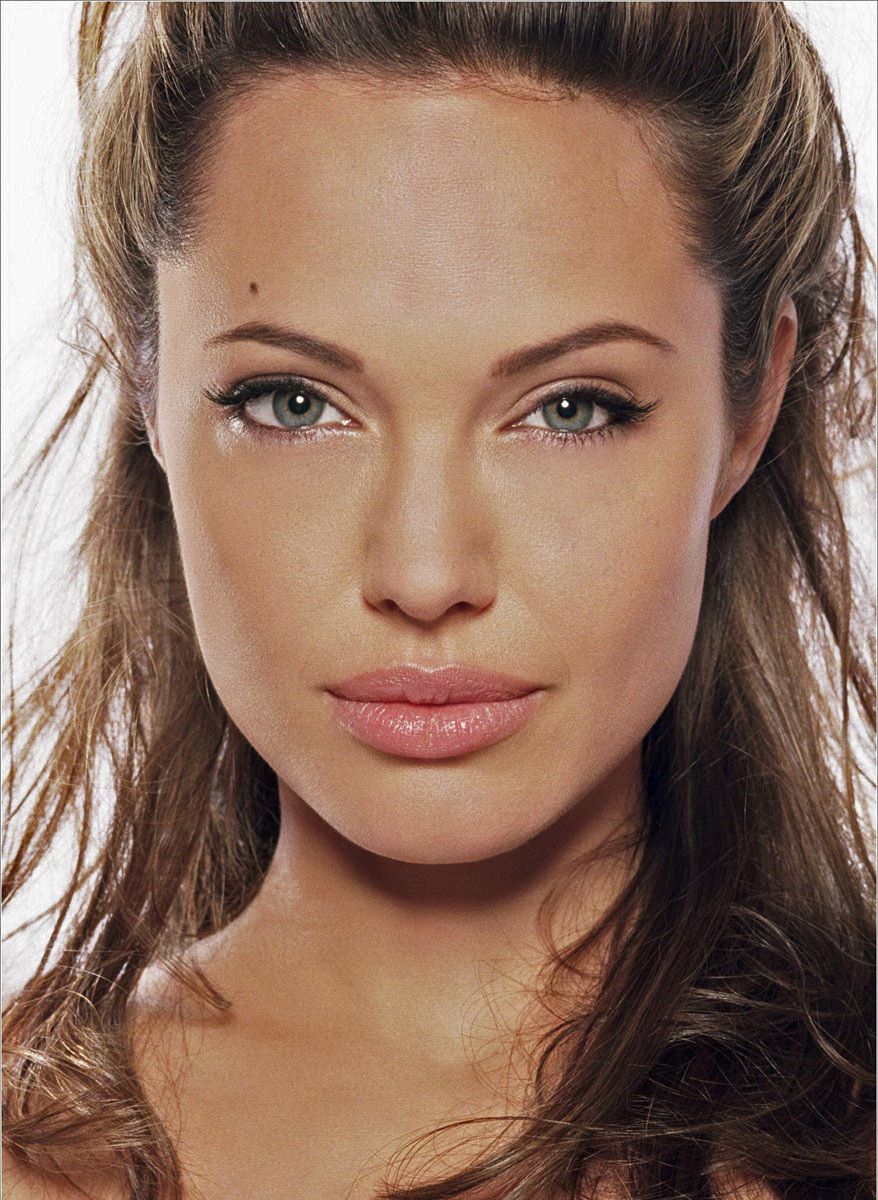
In a preceding discussion, we ventured into the realm of A1111’s img2img using the inpaint feature to seamlessly integrate the visage of the iconic Angelina Jolie into a Midjourney-generated landscape.

Beyond its prowess in image blending, this innovative model shines in A1111’s txt2img functionality.
By employing the same reference image of Angelina, I ventured into creating a tapestry of portraits, each in a unique style yet maintaining an unmistakable consistency in facial features.
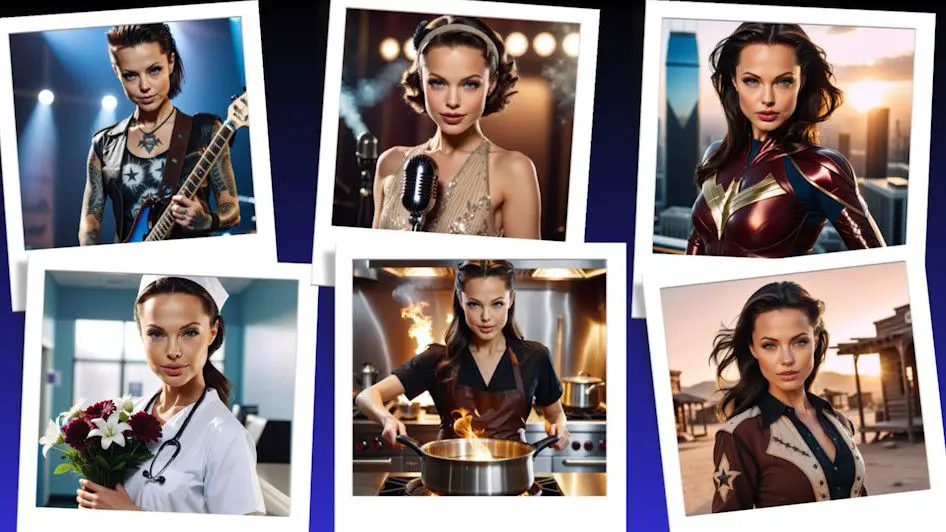
My journey continued with an exploration of other face-swapping tools such as Reactor and Roop.
Despite their similarities, neither matched the finesse of IP Adapter’s model, with Reactor-generated images of Angelina lacking her distinctive essence.
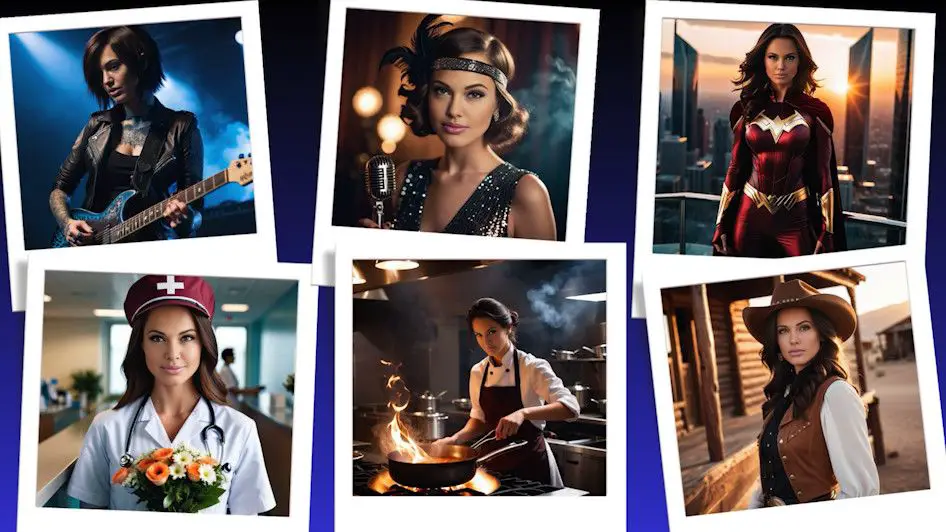
A trial with InstantID revealed a closer resemblance to Angelina, yet it was marred by poor image quality and exaggerated contrasts.
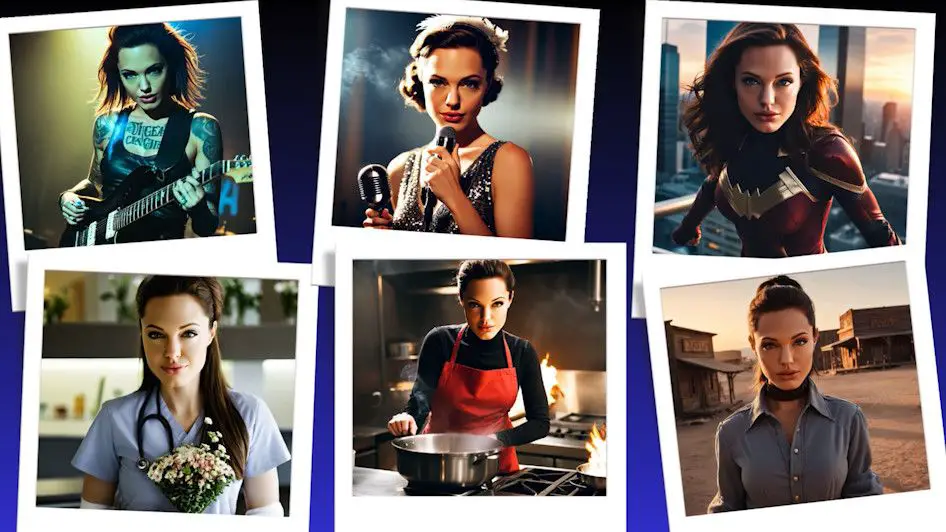
Between these options, IP-Adapter’s model emerged as my preference, combining quality with precision. This guide will navigate its integration with the SDXL model for optimal use.
Installation Guide and Model Preparation
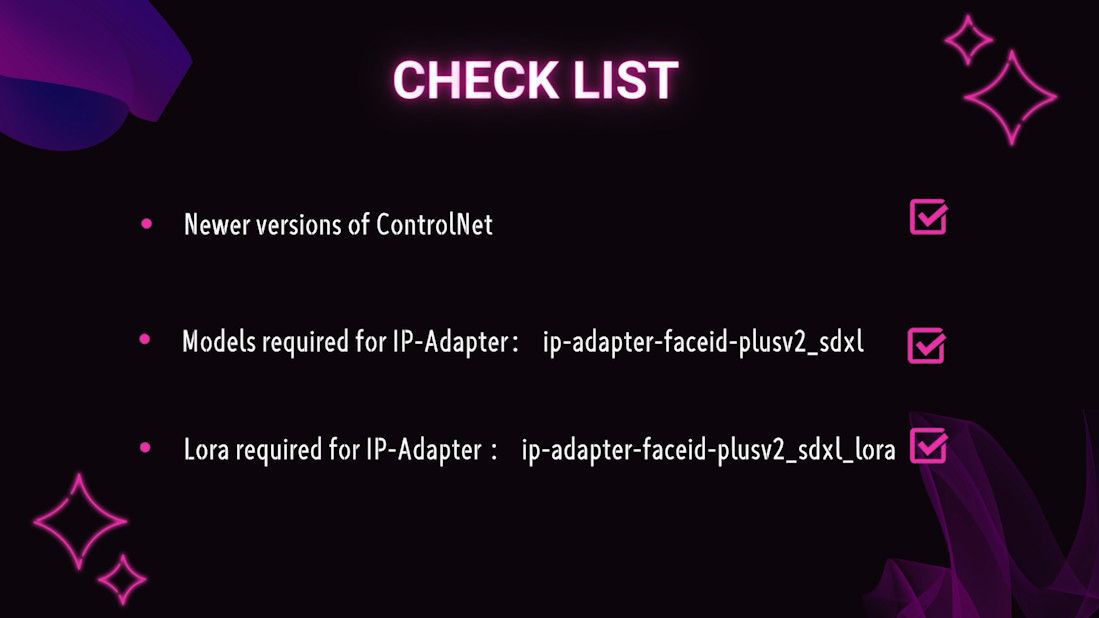
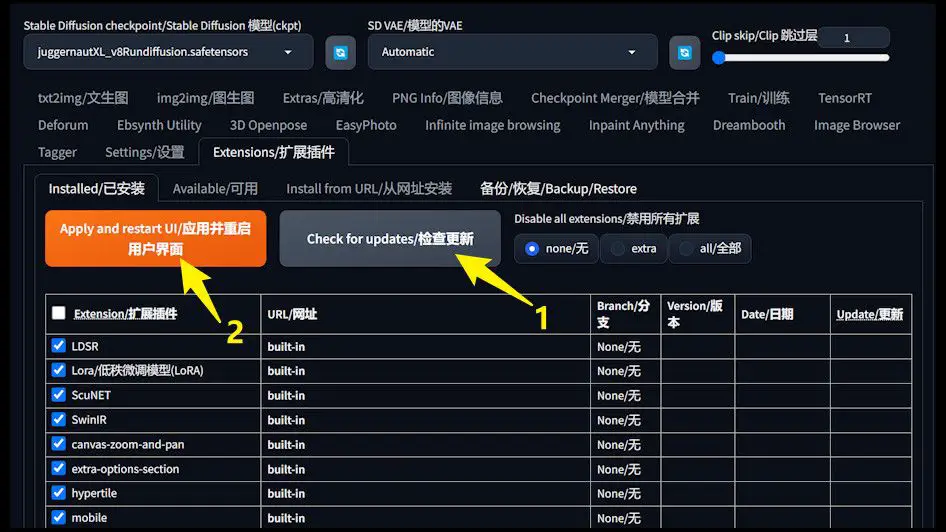
1. ControlNet Update
- Ensuring Currency: The latest ControlNet version is essential for accessing the IP-Adapter feature. Users of legacy versions must initiate an update.
- Update Steps: Navigate to the “Extension extensions” tab within A1111, select “Check for updates”, then “Apply and restart UI”. Post-reboot, ControlNet will be at its newest version.
2. Acquiring IP-Adapter’s Model
- Model Identifier:
ip-adapter-faceid-plusv2_sdxl. Accessible at: https://huggingface.co/h94/IP-Adapter-FaceID/tree/main. - Storage Protocol: Download and place the model files in the
stable-diffusion-webui (A1111 or SD.Next) root folder\extensions\sd-A1111-controlnet\modelsdirectory.
3. Lora Model Setup
- Significance of Lora: This model is crucial for maintaining facial uniformity. Download link remains as provided above.
- Installation Location: Situate the Lora model within the
stable-diffusion-webui (A1111 or SD.Next) root folder\models\Loradirectory.For detailed placement instructions, refer to our prior guide. Face Swapping with Stable Diffusion Latest Model in A1111
Practical Application
Upon completing the setup, IP-Adapter’s integration with the SDXL model is ready for action. Let’s examine the image generation prowess through a practical test.
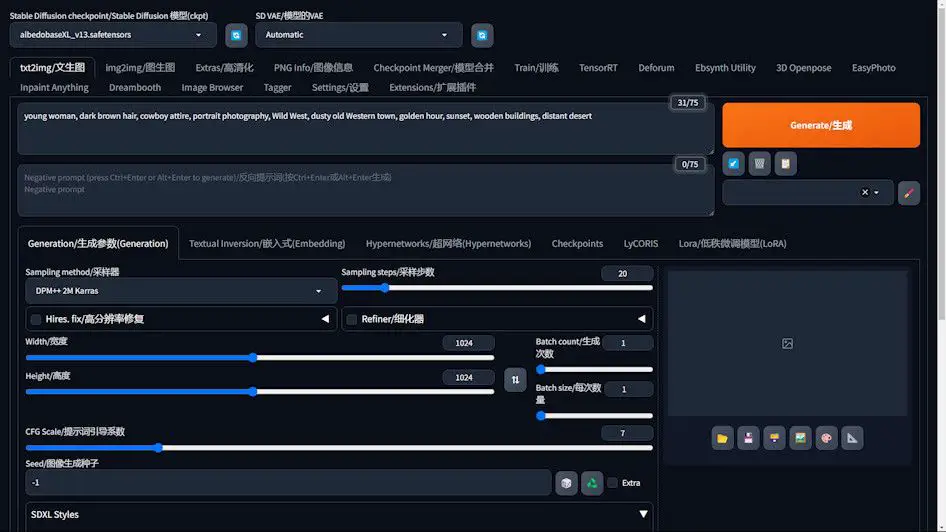
Model Selection and Parameter Configuration
1️⃣ Opting for SDXL Model
- Choice of Model:
AlbedoBasewas selected for its superior image generation capabilities. - VAE Optimization: Setting the VAE to Auto ensures the image quality and detail are automatically enhanced.
2️⃣ Prompt Crafting
- Prompt Precision: Define your vision clearly. For instance, we envisage a young woman donned in cowboy attire, situated in a small western town at dusk.
3️⃣ Sampling Method Selection
- Methodology:
DPM++ SDE Karraswas chosen for its efficiency in boosting image quality.
4️⃣ Image Dimension Setting
- Resolution: Setting both width and height to 1024 pixels guarantees a detailed and high-resolution output.
5️⃣ CFG Scale
- Balanced Guidance: A guidance factor of 7 offers a harmonious balance, guiding the prompt effectively without dominating the natural image generation process.
6️⃣ Style Specification (Optional)
- Utilizing SDXL Styles: The “photographic” style was selected through the SDXL Styles extension to achieve a lifelike photographic effect.
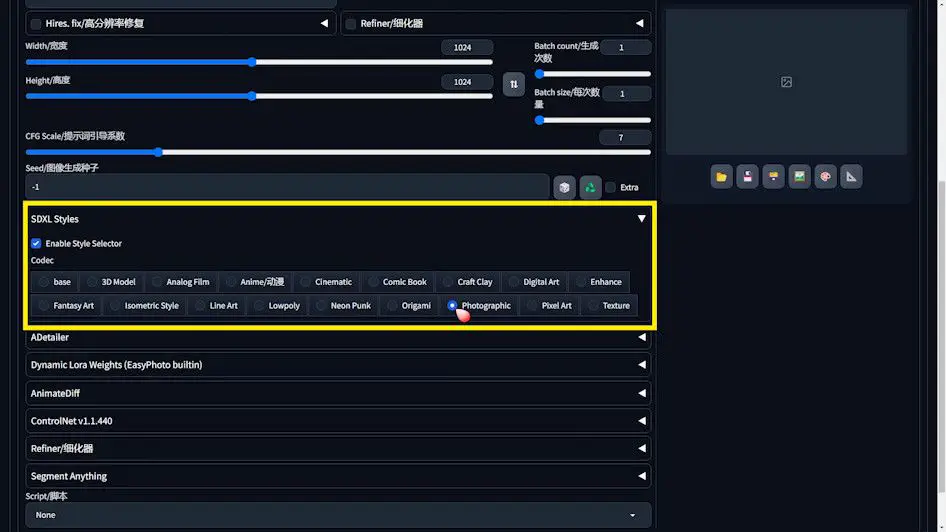
After configuring the settings, hitting the Generate button in A1111 initiates the creation of our envisioned image.

The resultant high-quality image sets the stage for further experimentation with IP-Adapter and the Lora model.
Enhancing Similarity with Lora
Lora emerges as a critical tool in sculpting images that echo the likeness of a specific individual. Follow these steps to leverage Lora for optimizing portrait generation:
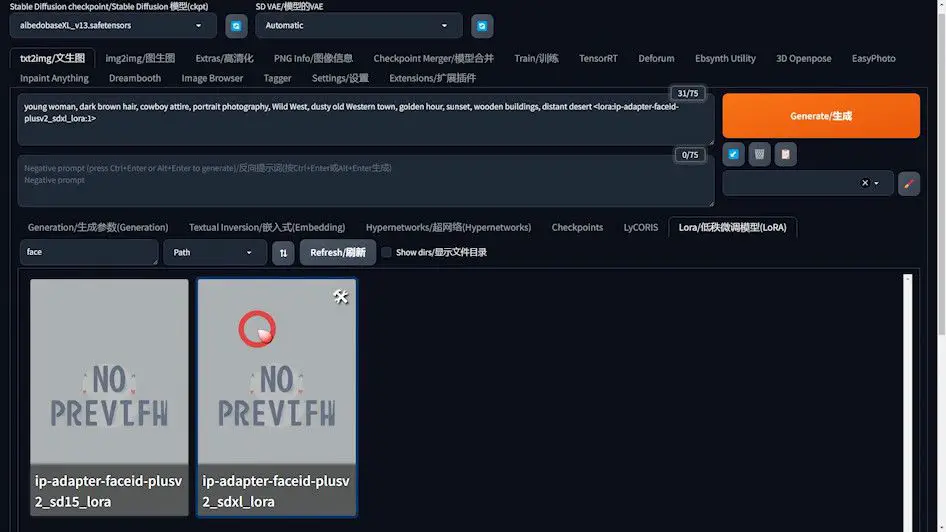
1️⃣ Incorporating Lora into the Prompt
- Procedure: Within A1111’s Lora tab, locate and add our previously downloaded Lora by searching “face”, selecting the relevant option, and adding it to the prompt.
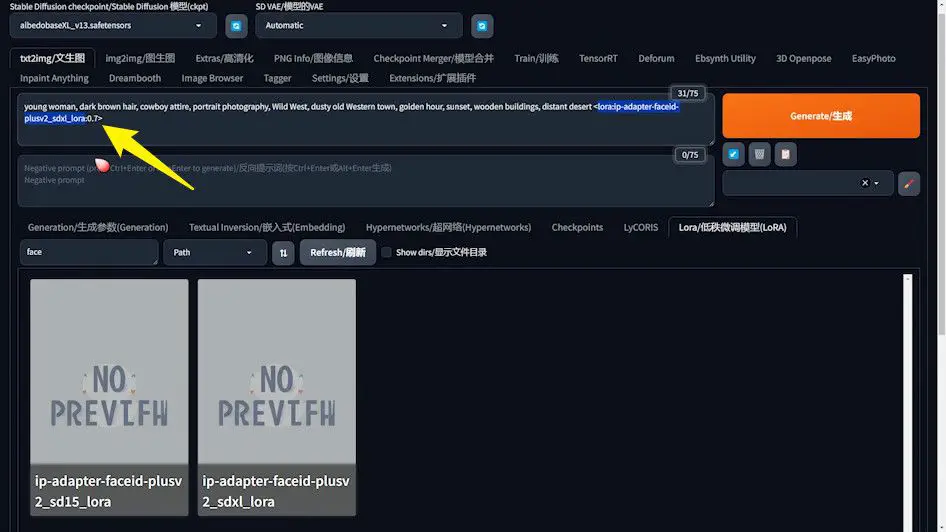
2️⃣ Lora Weight Tuning
- Optimal Weighting: Adjust Lora’s weight between 0.5 and 0.7 by using the Control key alongside the down arrow, ensuring Angelina’s features are preserved without exaggeration.
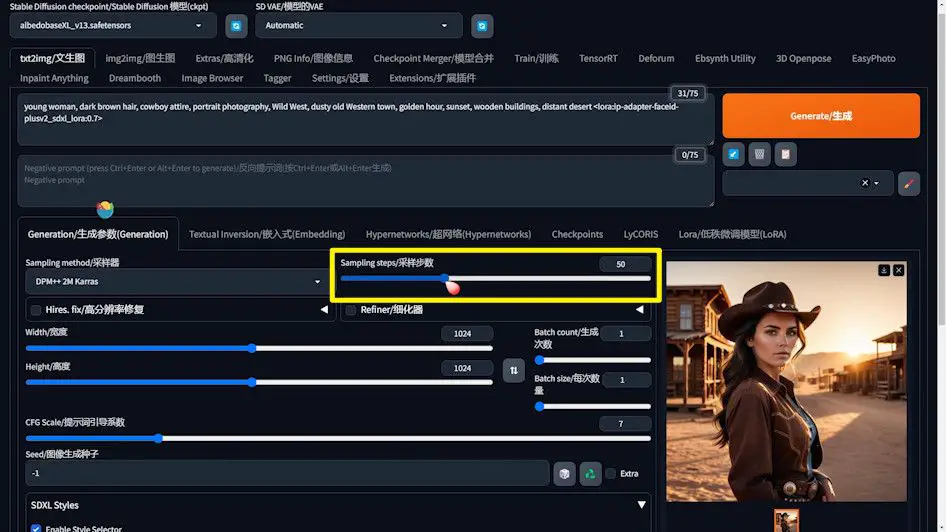
3️⃣ Sampling Step Refinement
- Enhancing Detail: Increase the Sampling steps to 50 within the Generation settings to refine the quality and likeness of the generated image.
These adjustments enable the generation of an image that more accurately reflects the characteristics of the intended person, a boon for portrait creation.
ControlNet Configuration
Properly setting up ControlNet is essential for a seamless face-swap effect. Adhere to the following instructions for optimal configuration:
1️⃣ Photo Selection
- Choosing an Image: Select a suitable headshot of Angelina Jolie for face swapping, prioritizing frontal views and even lighting to enhance the natural effect.
- Upload Angelina’s chosen headshot.
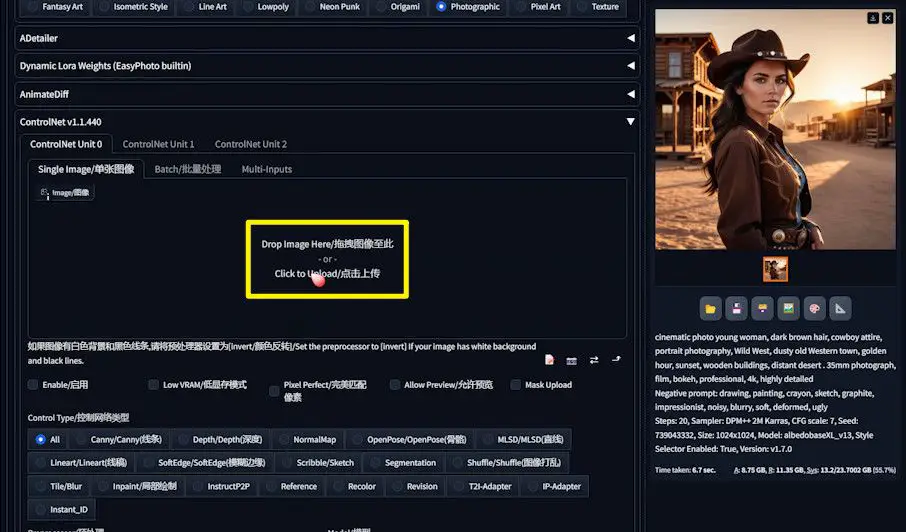
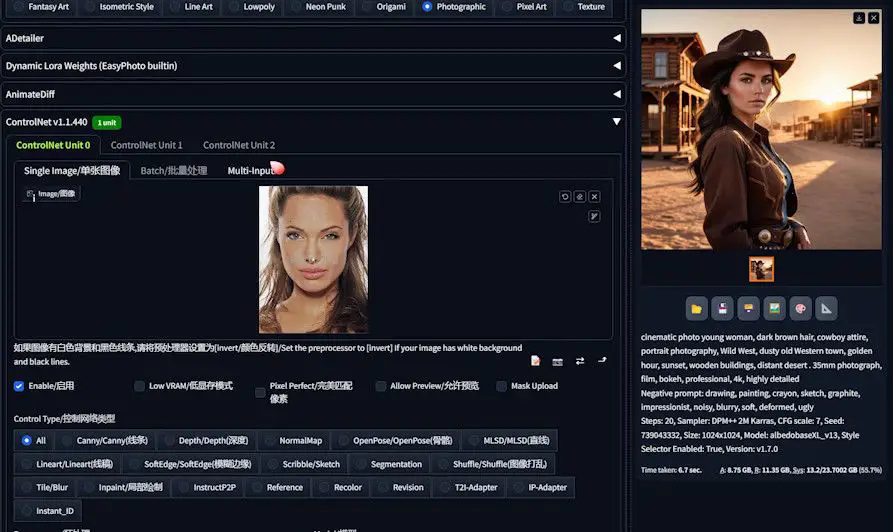
2️⃣ ControlNet Settings
- Pixel Perfect: Activate this feature for flawless pixel-level face swap accuracy.
- Allow Preview: Allow previews to ensure the swap meets expectations before finalizing.
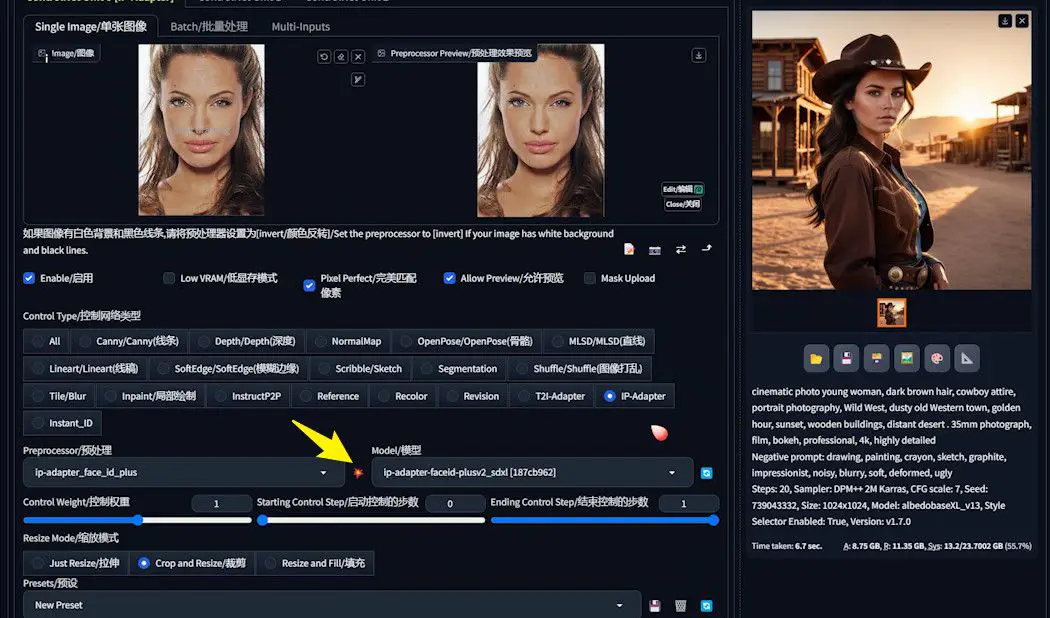
3️⃣ Selecting Control Type and Preprocessor
- Control Type: Choose
IP-Adapteras the control type to leverage its advanced capabilities. - Preprocessor Choice: Opt for the
ip-adapter_face_id_pluspreprocessor. Verify that the preprocessor is correctly installed to match your ControlNet version, ensuring compatibility and avoiding mishaps. Otherwise, you have to update to the newest ControlNet. - Model Selection: Select the
ip-adapter-faceid-plusv2_sdxlmodel, ensuring it matches the preprocessor to prevent any discrepancies.
4️⃣ Previewing the Outcome
- Once all settings are calibrated, click the preview icon to inspect the preliminary effect.
5️⃣Precautions
When delving into the world of face swapping with tools such as Roop, Reactor, and InstantID, it’s crucial to remember that these applications rely on the InsightFace model.
If your projects, especially those with commercial intent, incorporate generated images, securing the appropriate licenses is imperative. This step ensures compliance with copyright laws and respects the intellectual property rights of the technologies and images involved.
During your creative journey with IP-Adapter FaceID, you might encounter a technical snag indicated by a terminal error: No module named 'insightface'.
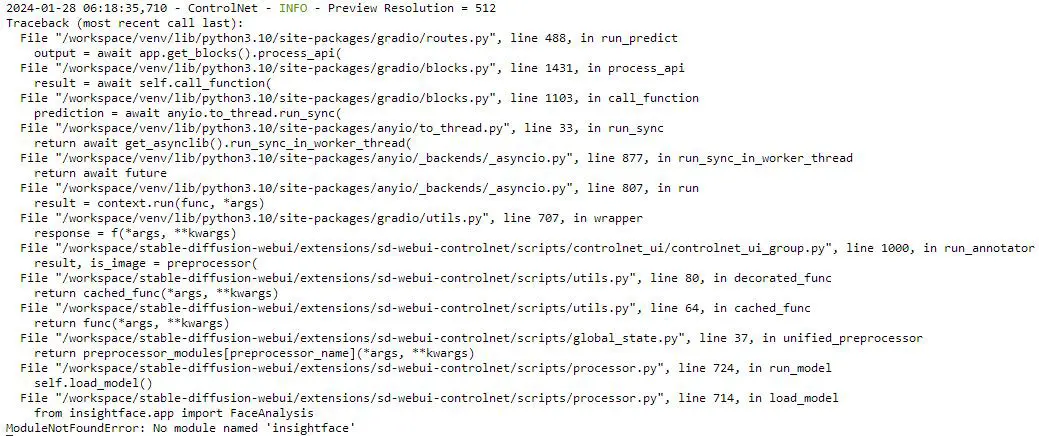
This hiccup requires the installation of InsightFace to proceed smoothly. A dedicated GitHub issue (#162) provides a solution courtesy of user MMoneer, tailored to address this very challenge.
- Acquiring the InsightFace Package: Begin by downloading the precompiled InsightFace package suited to your Python version.
- For Python 3.10, the package is available at: Insightface Package for Python 3.10.
- For Python 3.11, download from: Insightface Package for Python 3.11.
- Installation Preparation: After downloading, place the InsightFace package in the root directory of your stable-diffusion setup, where the “A1111-user.bat” file resides.
- Activating the Virtual Environment: Open your command line interface (CLI) and activate the Stable Diffusion virtual environment with the command
. \venv\scripts\activate. This step primes your system for the installation of new software packages. - Updating Pip: To circumvent any potential compatibility issues, upgrade your pip installation tool using
python -m pip install -U pip. This ensures pip is current and capable of managing the latest software packages. - Installing InsightFace: Finalize your setup by installing the InsightFace package. Select the command matching your Python environment:
- For Python 3.10:
pip install insightface-0.7.3-cp310-cp310-win_amd64.whl - For Python 3.11:
pip install insightface-0.7.3-cp311-cp311-win_amd64.whl
- For Python 3.10:
By following these steps, you can navigate the legal landscape and technical intricacies of face swapping, ensuring your creative endeavors proceed without a hitch.
Refining the IP-Adapter Experience
Mastering the art of customized face-swapping with IP-Adapter entails navigating through certain challenges, such as rectifying exaggerated facial features in generated characters.
The key to achieving a more lifelike and realistic outcome lies in the meticulous fine-tuning of “Ending Control Steps” within ControlNet.
Let’s delve into the process of enhancing the face-swapping effect by adjusting these crucial steps.
1️⃣ Evaluating Initial Results Commence by generating an image to assess its initial effect. Should the character features appear overly exaggerated, it signals a need to modify the operational steps of IP-Adapter to achieve a more balanced portrayal.
2️⃣ Initial Step Adjustment
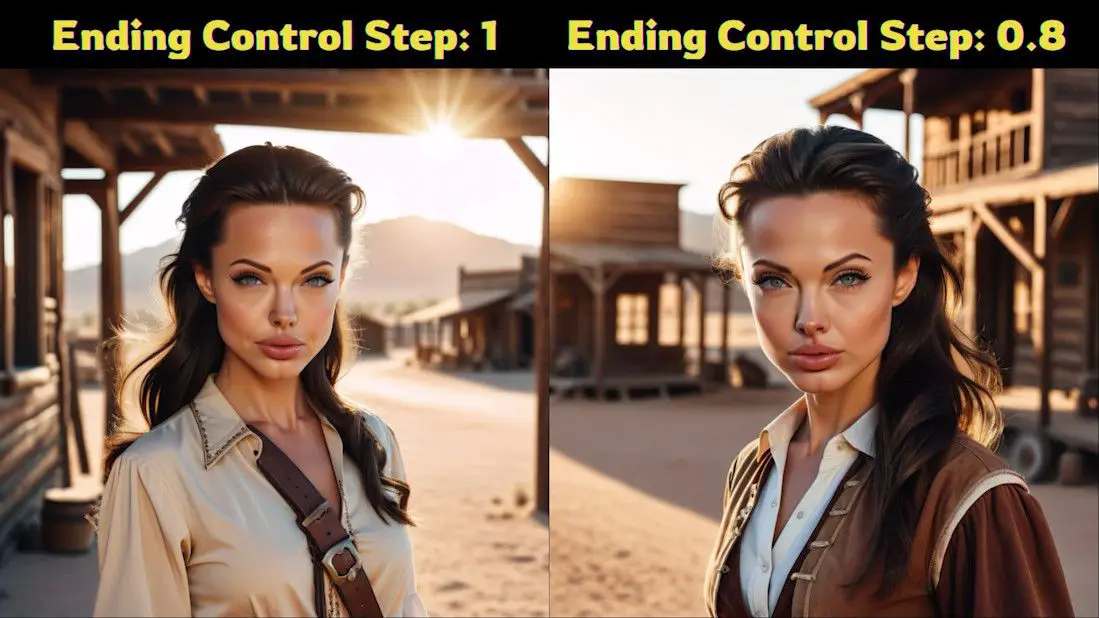
- Modifying to 0.8: Begin with adjusting the “Ending Control Step” down from its default (often set at 1) to 0.8, followed by re-generation of the image. This preliminary adjustment aims to temper the exaggerated features, bringing the image closer to your envisioned outcome.
3️⃣ Advanced Fine-Tuning
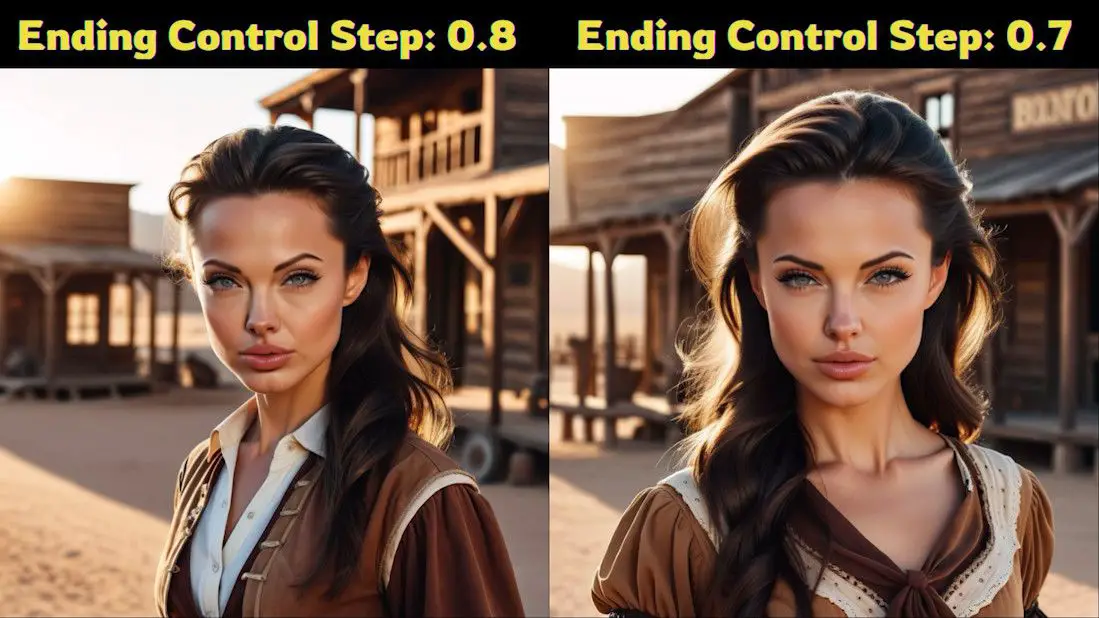
- Further Reduction to 0.7: If the initial adjustment falls short of expectations, proceed to decrement the step further to 0.7. Reassess the generated results to confirm improvements and closer alignment with desired naturalism.
4️⃣ Comparative Analysis of Effects
- From 1 to 0.8: A side-by-side comparison between steps 1 and 0.8 demonstrates that a lower step count can significantly mitigate exaggerated effects, rendering the character features more natural and authentic.
- Between 0.8 and 0.7: Continuing the step reduction enhances the fine-tuning process, facilitating the attainment of an even more refined and desired effect.
5️⃣ Strategic Fine-Tuning Recommendations
Adopting a gradual approach to adjusting steps, coupled with vigilant observation of the ensuing images, paves the way to identifying the optimal step setting.
This ensures the final image not only retains the essence of the target character but does so without veering into over-exaggeration. S
Should the outcomes remain less than satisfactory, persist in the iterative fine-tuning of the “Ending Control Step” until you discover the sweet spot that resonates with your project’s unique requirements.
Wrapping Up
This guide has illuminated the pathway to harnessing the innovative capabilities of the IP-Adapter New Model, synergistically combined with the SDXL model, for crafting portraits teeming with highly personalized features.
Through meticulous calibration of settings and thoughtful adjustments, we’ve unlocked the ability to produce portraits that not only embody facial consistency but also boast a diverse array of styles. This fusion of precision and versatility opens up a vast landscape of creative possibilities.
As you embark on your creative journey, ensure that you have all necessary models and extensions at the ready. By adhering to the outlined steps, you’re well-equipped to forge your own masterpieces, characterized by their unique flair and high fidelity. Dive into the world of customized portrait generation with confidence, and let your creativity flourish!