Krea 2 Clothes Swap: Keep the Face and Pose, Change the Outfit
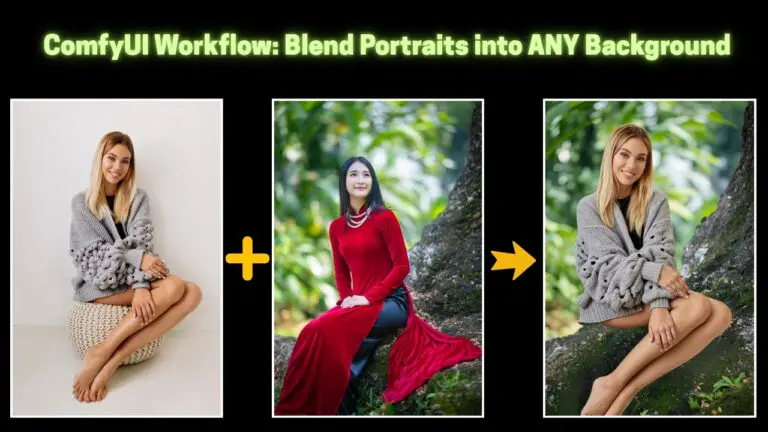
In previous workflows, we explored how AI models can transfer clothing from a reference image onto an AI-generated character. For example, using the Krea 2 model, we could take a dress from a reference image and apply it to a character whose appearance was originally created through a text prompt.
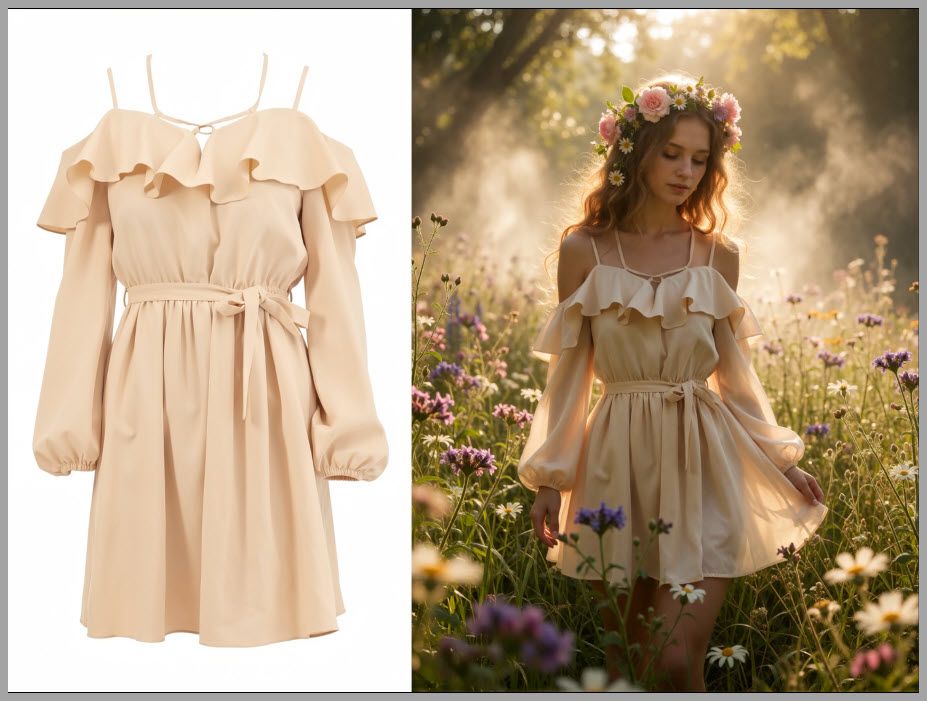
However, that workflow has an important limitation: it works best when the character itself is generated during the process.
But what if you already have an image of your own character?
Maybe you have spent time designing a character’s face, hairstyle, body shape, and overall identity. Now you want to change the outfit while keeping everything else consistent. How can you make the character wear new clothes without changing who the character is?
That is exactly what this ComfyUI workflow solves.
In this article, I will show you how to use Krea 2 Edit in ComfyUI to transfer outfits from reference images onto existing characters while preserving identity, pose, and overall appearance.
YouTube Tutorial:
Understanding the Outfit Transfer Workflow
The basic idea behind this workflow is simple:
- You provide an existing character image.
- You provide a clothing reference image.
- Krea 2 analyzes the clothing and transfers it onto the character.
- The character’s identity remains as consistent as possible.
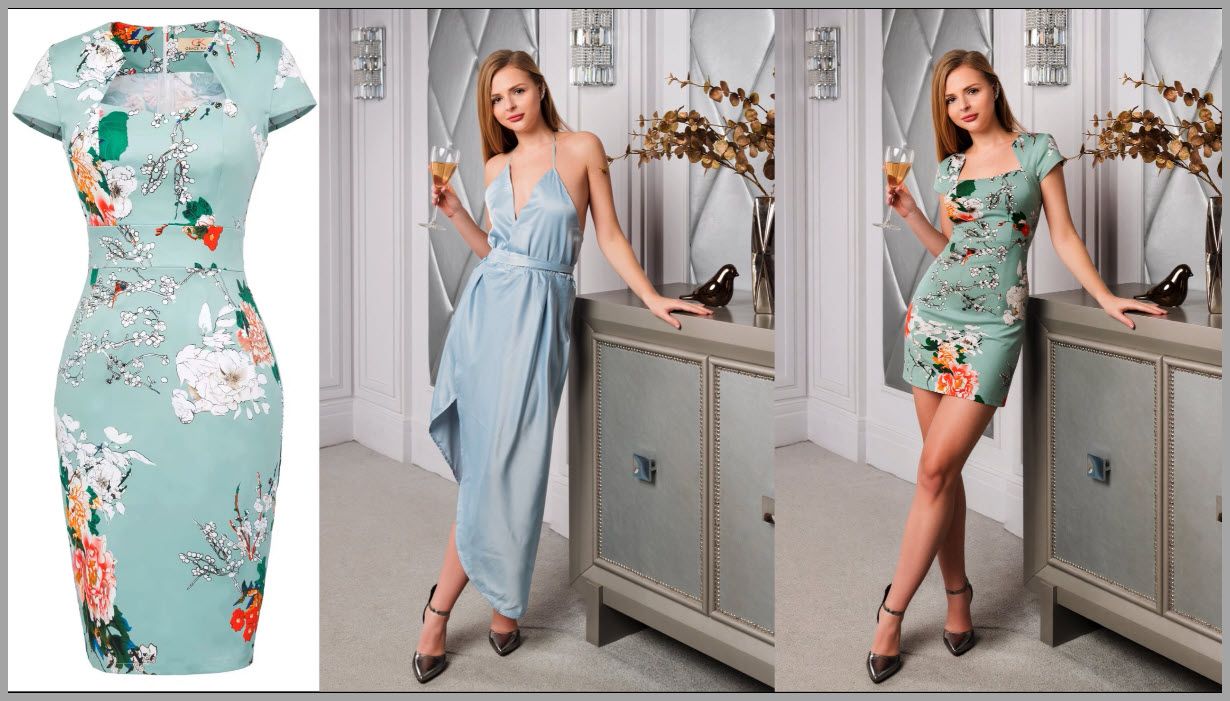
For example:
- The reference image contains a floral dress.
- The character image contains a woman wearing a completely different outfit.
- The workflow replaces the original outfit with the floral dress.
- The character’s face, hairstyle, and general appearance remain unchanged.
The goal is not to create a new character. Instead, the goal is to edit an existing character image.
This makes the workflow especially useful for:
- AI character design
- Virtual fashion modeling
- Character consistency projects
- Creating multiple outfits for the same AI personality
- Building AI fashion catalogs
Krea 2 vs Flux 2 Klein for Clothes Swapping
Before starting, there is one important thing to understand.
Although Krea 2 can perform outfit transfer, it is not always the best option.
Compared with Flux 2 Klein, Krea 2 can sometimes struggle more with maintaining consistency.
In many cases:
- Flux 2 Klein provides stronger character preservation.
- Flux 2 Klein is easier to control.
- Flux 2 Klein often produces more reliable clothing replacement results.
Krea 2 is still very useful, especially when you need its editing capabilities and reference-image understanding.
However, for pure clothes swapping tasks, I recommend testing Flux 2 Klein first whenever possible.
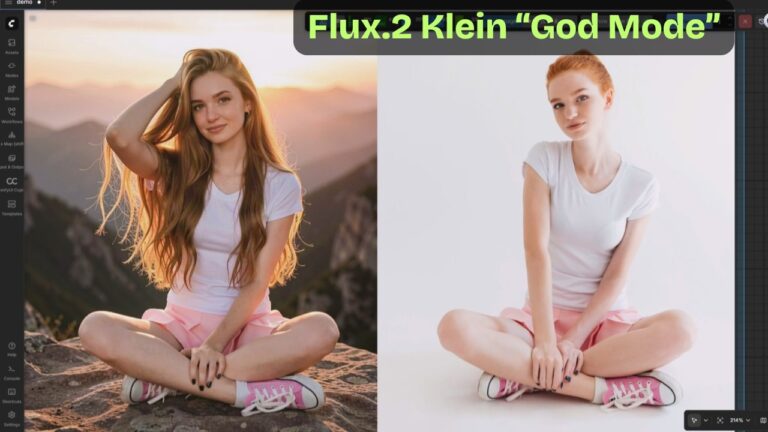
Flux.2 Klein Clothes Swaps:
Preparing the Clothing Reference Image
Before sending the reference image into Krea 2, we need to prepare it properly.
A good reference image helps the model understand:
- Which object should be transferred.
- Which areas should be ignored.
- Which details belong to the clothing itself.
For this example, I selected an outfit reference image containing a dress.
Creating Masks to Remove Unwanted Elements
The first step is creating a mask.
In the reference image, there was a handbag near the dress area.
If we directly send this image to Krea 2, the model may think:
“The handbag is part of the outfit.”
This can cause unwanted results where the handbag appears on the generated character.
To prevent this, I painted a mask over the handbag area.
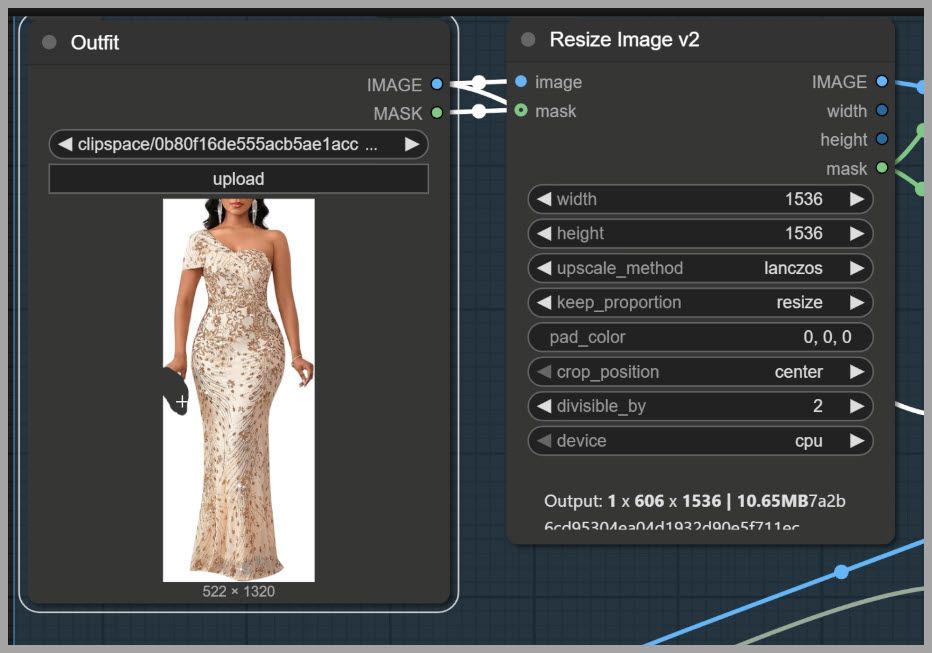
The mask tells the workflow:
- Ignore this area.
- Do not transfer this object.
- Focus only on the clothing.
This small preparation step can significantly improve the final output.
Using the Deep Fashion Model to Crop Clothing Areas
After masking unwanted objects, I use the Deep Fashion model.
The purpose of Deep Fashion is to isolate the clothing region.
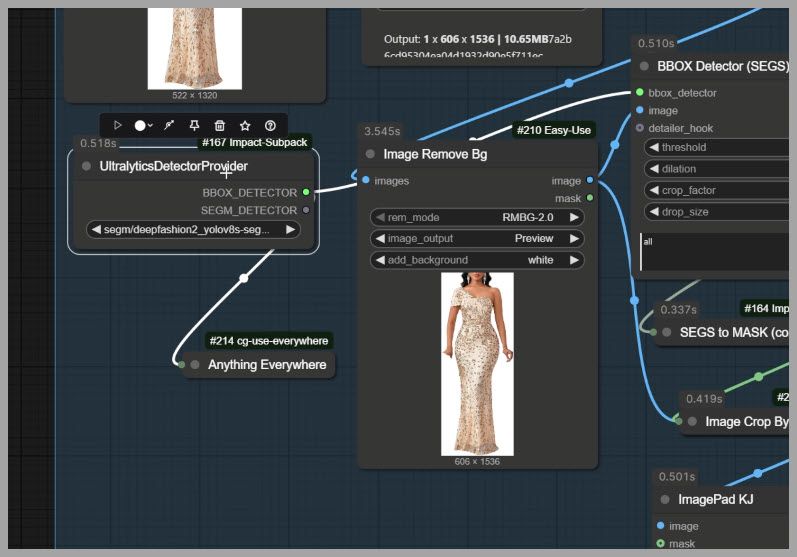
Instead of giving Krea 2 the entire reference image, we provide a cleaner clothing-focused image.
This helps Krea 2 pay more attention to:
- Dress shape
- Fabric structure
- Clothing patterns
- Overall design
The model spends less attention on unrelated details such as:
- Background
- Accessories
- The original person wearing the clothes
Once the reference image is prepared, we can move on to the actual editing process.
Performing Outfit Transfer with Krea 2
After preparing both images, we can run the workflow.
The input consists of:
- The existing character image.
- The prepared outfit reference image.
- The Krea 2 editing workflow.
After generation, the character should appear wearing the new outfit.
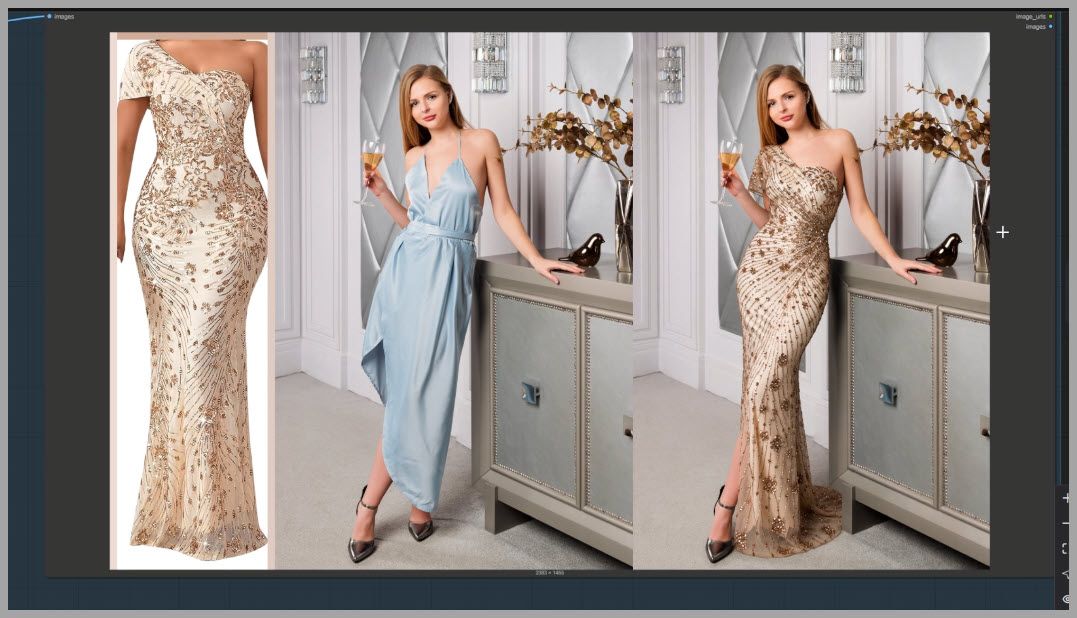
For example:
- The original character wore a long evening dress.
- The reference image contained a short floral dress.
- The final output replaced the original dress with the floral dress.
- The character’s identity remained recognizable.
Writing Effective Prompts for Krea 2 Editing
The prompt used in this workflow is surprisingly simple:
Change her dress; she has white skin; keep her pose consistent.
Although short, each part has a purpose.

“Change her dress”
This tells Krea 2 the main editing objective.
The model understands that the clothing needs to be replaced rather than generating a completely new image.
“She has white skin”
This instruction may seem unnecessary, but it solves a common problem.
Sometimes Krea 2 changes the character’s skin tone during editing.
Adding a skin-tone instruction helps maintain consistency with the original character.
“Keep her pose consistent”
This is another important instruction.
Without this guidance, AI models may:
- Change body position.
- Modify posture.
- Alter the composition.
By explicitly asking Krea 2 to preserve the pose, the original character structure remains more stable.
Understanding the Core Krea 2 Nodes
At first glance, the ComfyUI node group may look complicated.
However, the core functionality depends mainly on two nodes:
- Krea 2 Edit Grounded Encode
- Krea 2 Edit Source Patch
These two nodes activate Krea 2’s editing abilities.

Configuring LoRAs for Better Outfit Transfer
LoRAs also play an important role in improving Krea 2 editing.
In this workflow, I connected two LoRAs:
- Identity Edit LoRA
- Outfit Transfer LoRA
These two LoRAs work together:
- Identity Edit LoRA helps preserve the character.
- Outfit Transfer LoRA improves clothing replacement.
For both LoRAs, I set the strength to:
0.5
In most cases, you can simply keep the default settings.
Adjusting Ref Boost A for Reference Priority
Another important setting is:
Ref Boost A
I set this value to:
10
This controls how strongly Krea 2 follows the reference image.
A higher value helps the model:
- Focus more on the clothing.
- Pay less attention to the original outfit.
- Transfer more accurate details from the reference.
For outfit transfer tasks, increasing reference priority is often helpful.
Improving Results When Krea 2 Misunderstands the Prompt
Sometimes, Krea 2 does not fully understand what you want.
This usually happens when:
- Multiple clothing layers exist.
- The outfit has unusual designs.
- Certain details require precise editing.
Let’s look at a more complicated example.
Making Prompts More Specific
In this example:
- The character wore a wool coat.
- Underneath the coat was a long-sleeve dress.
- The goal was to replace everything with a short floral dress.
The first prompt was too simple:
Replace her outfit with the short floral dress.
The result was incomplete.
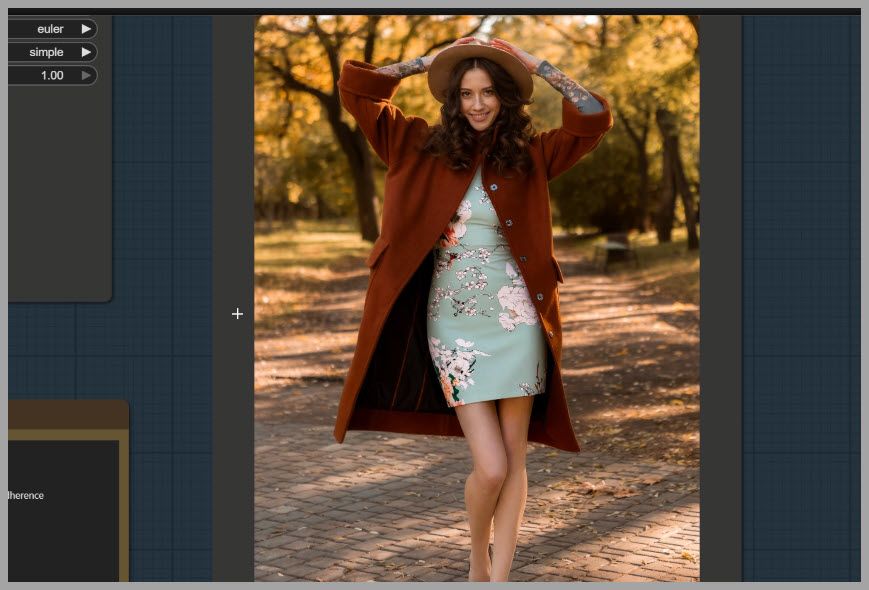
The coat remained because Krea 2 did not clearly understand that the coat also needed to disappear.
So I changed the prompt to:
Replace her coat and long-sleeve dress with the short floral dress.
This additional detail made the instruction much clearer.
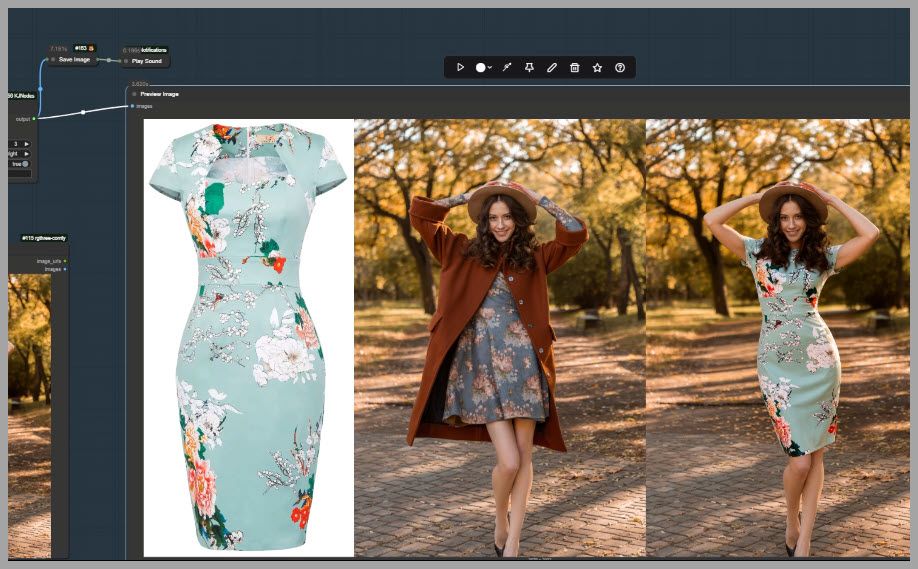
After running the workflow again:
- The coat disappeared.
- The new dress appeared successfully.
Using Masks to Guide Difficult Clothing Changes
Even with a better prompt, some details may still be incorrect.
For example:
The original dress had a cut-out neckline.
The generated result replaced the clothing but incorrectly covered the exposed skin area.
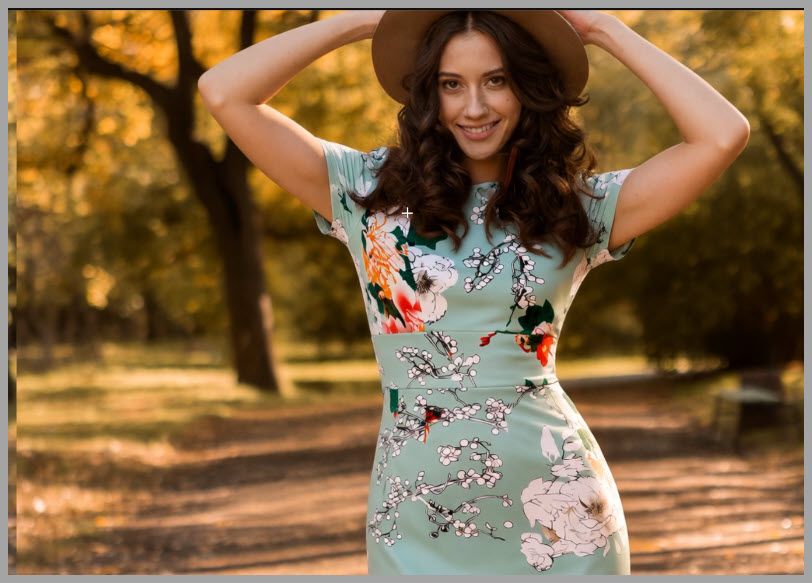
The reason is that Krea 2 did not fully understand the specific design of the neckline.
To solve this, we can manually guide the model.
Creating a Targeted Mask
Go back to the node group and create a mask for the problem area.
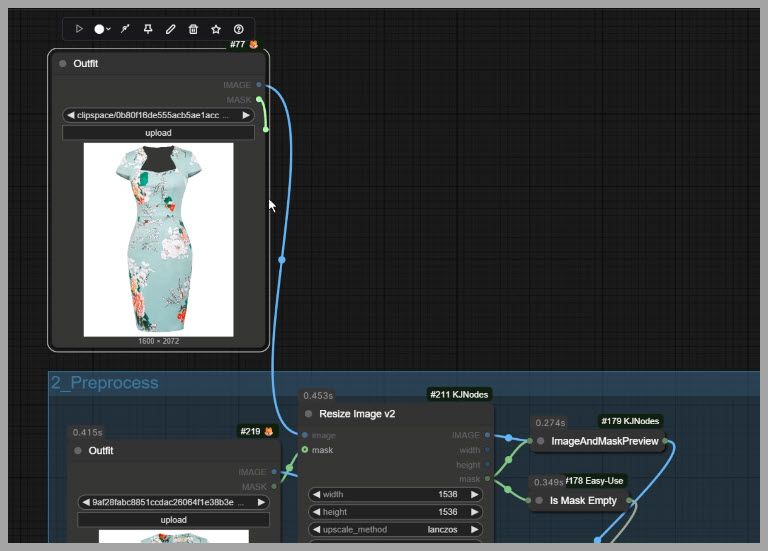
In this example:
- The chest area was selected.
- The mask tells Krea 2 where the edit needs extra attention.
After running the workflow again, the exposed skin area was correctly restored.

Filling Masked Areas with Reference Clothing
Another useful technique is manually covering unwanted clothing areas.
For example:
- Create a mask covering the original coat and dress.
- Convert the masked area into black.
- Tell Krea 2:
Fill the black area with the dress.
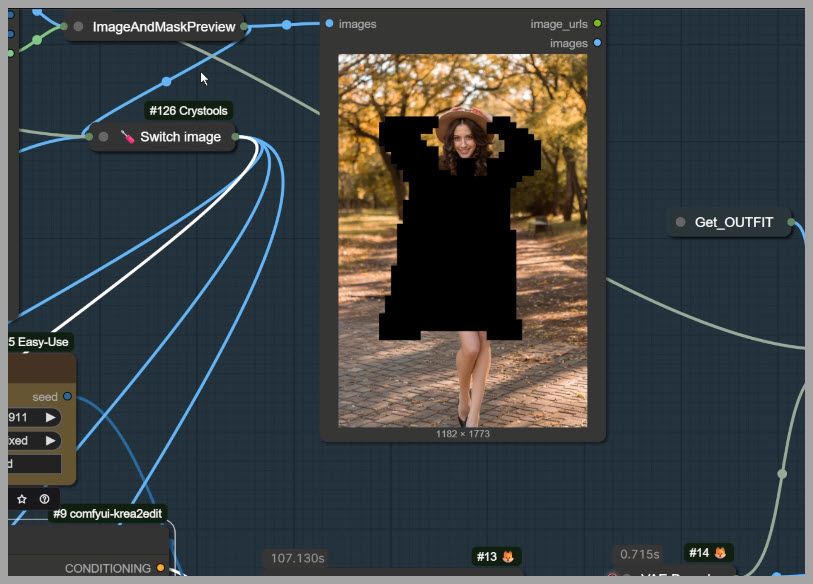
This gives the model a much clearer editing target.
Instead of guessing which clothing should change, Krea 2 receives a direct visual instruction.
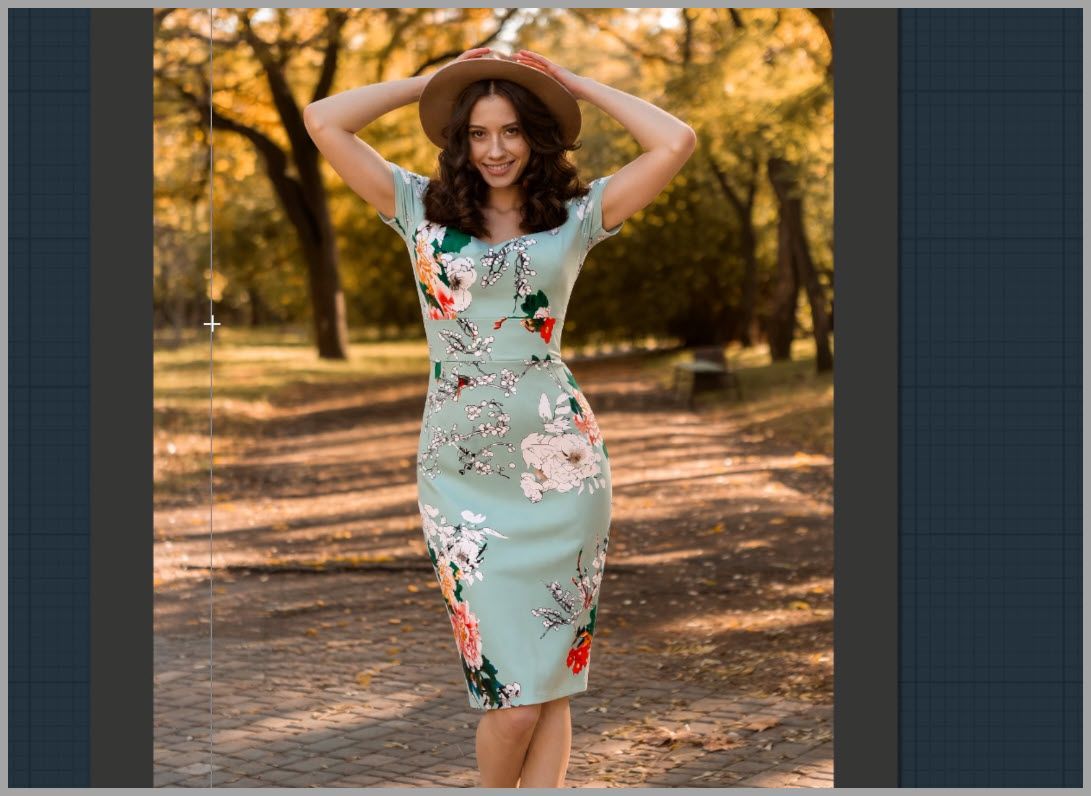
Final Thoughts: Choosing Between Krea 2 and Flux 2 Klein
That covers the complete Krea 2 outfit transfer workflow in ComfyUI.
The main process is:
- Prepare the clothing reference image.
- Remove unwanted objects with masks.
- Use Deep Fashion to focus on clothing.
- Load the character image.
- Use Krea 2 Edit nodes for transformation.
- Adjust LoRAs and reference strength.
- Use prompts and masks to fix difficult areas.
Krea 2 is a powerful editing tool, but it is not always the perfect solution.
For clothes swapping specifically, Flux 2 Klein may provide better consistency in many situations.
However, Krea 2 remains a valuable option when you need flexible image editing and reference-based transformations.
By combining Krea 2, ComfyUI, masks, and careful prompting, you can create a reliable workflow for giving the same AI character countless new outfits while preserving their identity.