Seamless Head Swapping in ComfyUI Using the Krea 2 Model
Hello creators and creative friends, and welcome back! Today, I’m going to show you how to execute flawless head swapping using the Krea 2 model inside ComfyUI.
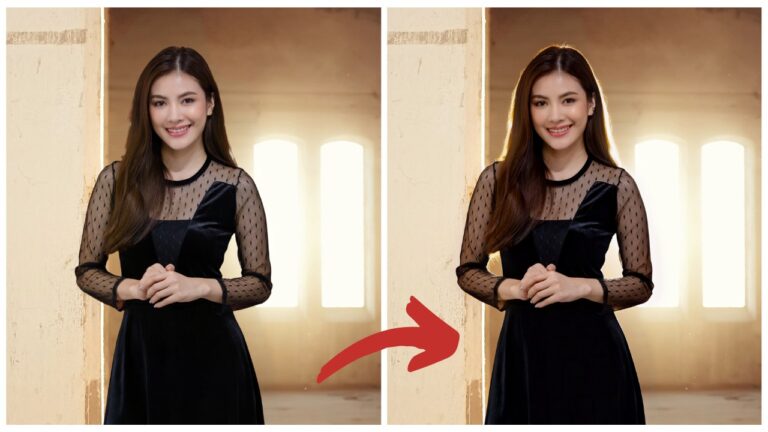
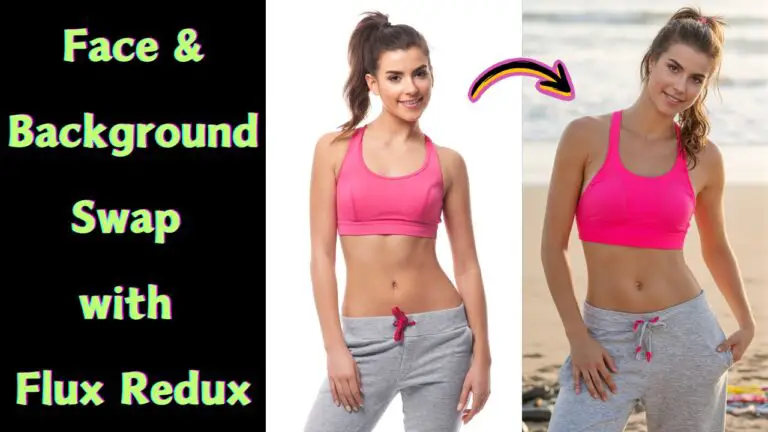
First, let’s take a quick look at the incredible results you can achieve with this workflow. All the tasks I’m going to guide you through today are quite challenging. For example, imagine a headshot where a woman’s hair is pulled back loosely into a low ponytail. Our goal is to swap her head onto a target body of a woman with long, flowing hair.
Here is the catch: if we change that long hair to short hair, the extra area where the long hair used to be needs to be filled in with new background pixels seamlessly. Can this workflow handle such a tricky situation?
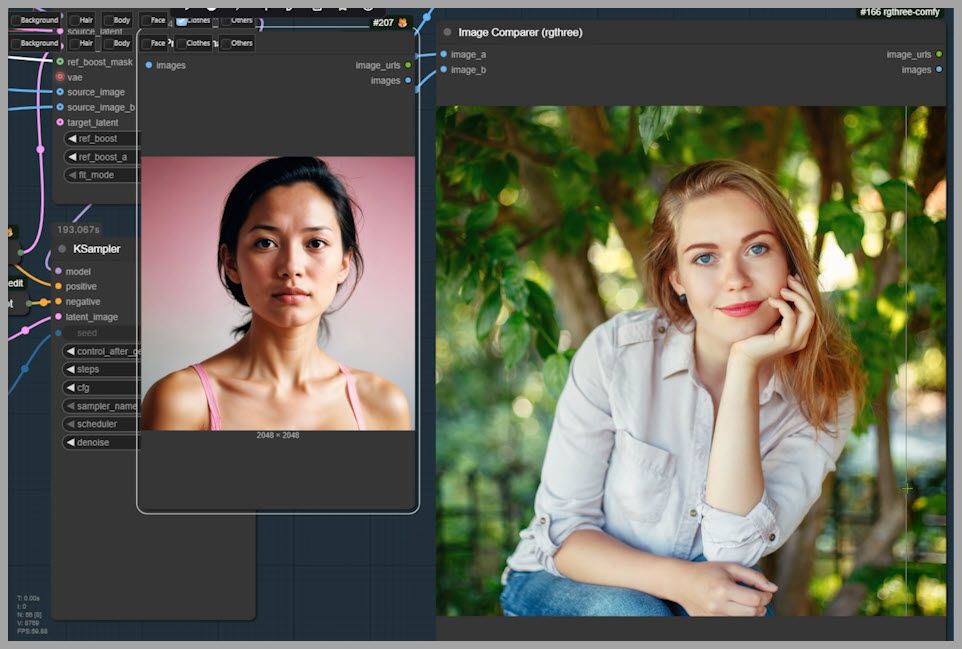
The answer is a resounding yes! The transition is completely seamless.
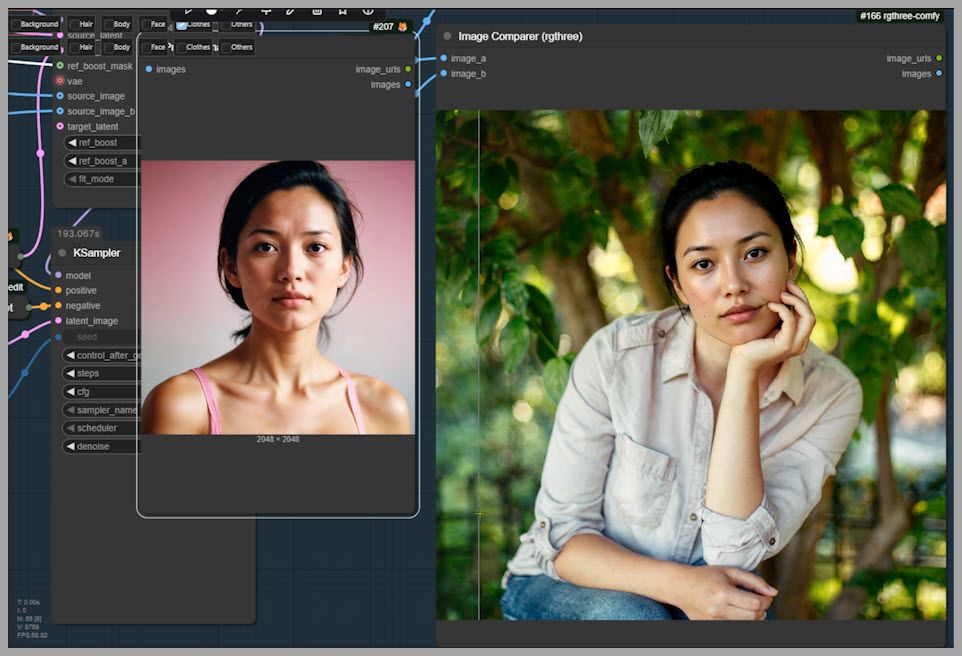
The face matches nicely, the pose stays completely consistent, and intricate details like fingers look totally correct.
In other complex scenarios—like an image where the subject is holding a fork and a cherry tomato—these objects stay exactly where they are supposed to be without any obvious visual artifacts.
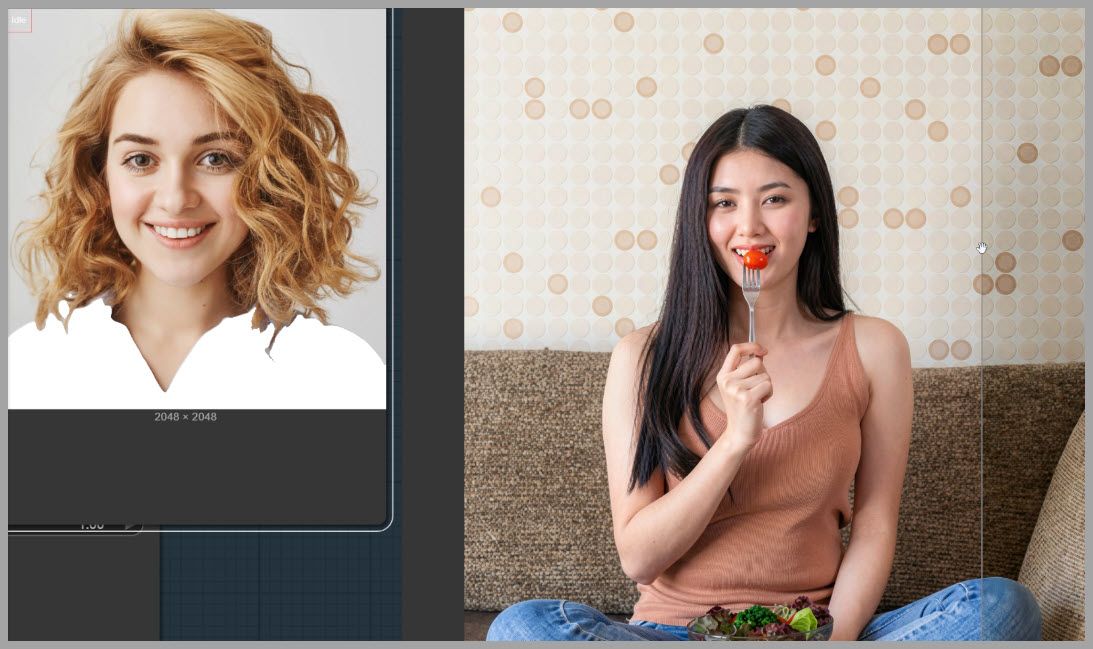
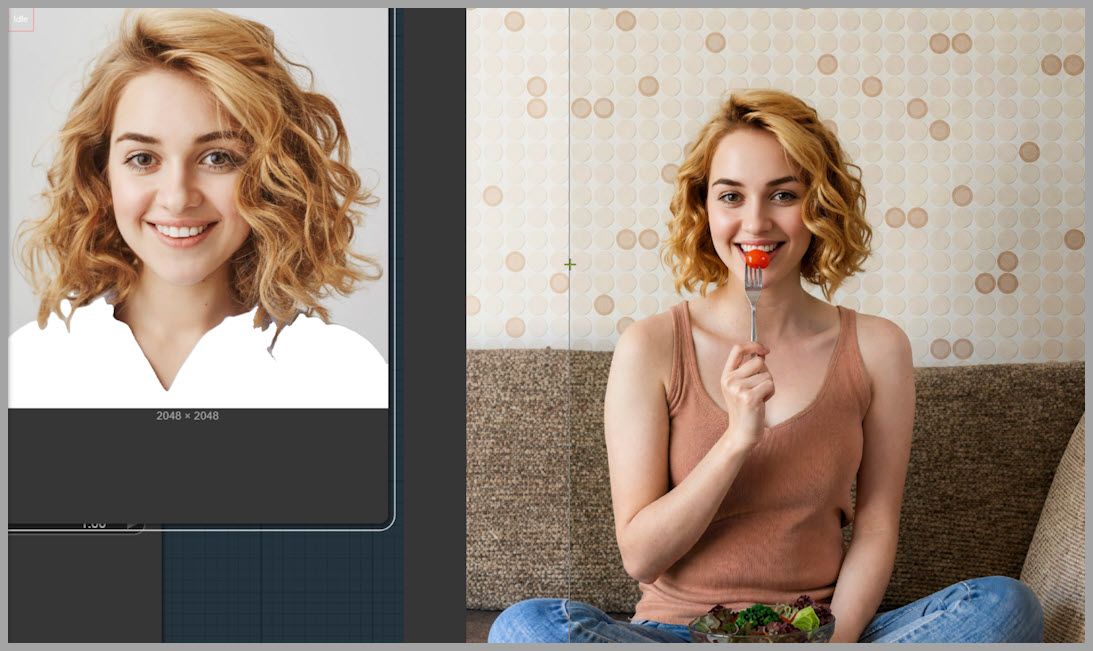
Let’s dive right into how this all works!
YouTube Tutorial:
Gain exclusive access to advanced ComfyUI workflows and resources by joining our community now!
Initial Setup: Inputs and Clothing Masking
Our comprehensive workflow today includes five different node groups. The third group is specifically designed for changing hairstyles. However, it’s not always necessary to use it in every single case, so we will keep it deactivated for now and focus on the primary inputs.
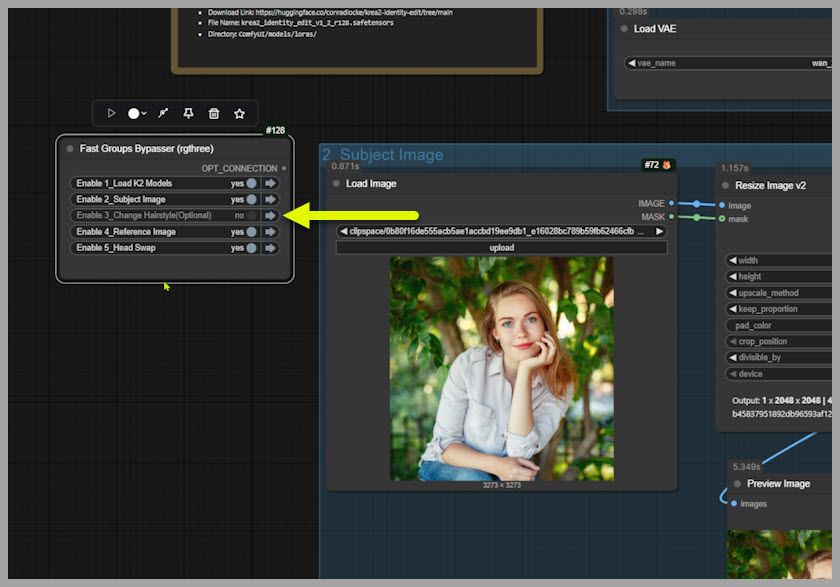
Here are the action steps for your initial setup:
- Upload the Target Image: This is the base image where you want the new head to be placed.
- Upload the Reference Image: This is the headshot that serves as your new head reference.
- Generate a Clothing Mask: Use the Human Segmentation node to generate a mask specifically for the clothes in your reference image.
- Apply a Solid Fill: Pass the result through the Image And Mask Preview node. This step covers the clothes area completely with a solid white color (for example, masking out shoulder straps).
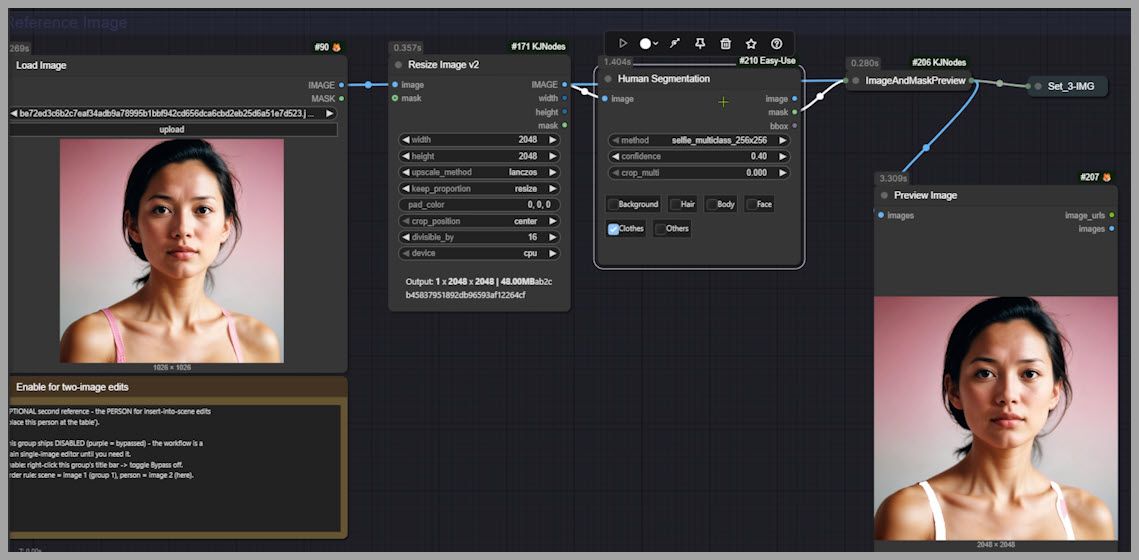
Why do we mask the clothes? The reason is simple: if I didn’t cover up the clothes, some parts of her original outfit might accidentally bleed into the final generated image. We only want to transfer her head, not her wardrobe.
Alternative Tip: You could also just crop the reference image manually before you even upload it. That way, you only keep her head and crop out the clothes entirely from the start.
The Power of LoRAs: Achieving Realistic Results
Once we finish processing the uploaded reference image, it’s time to hand these images over to Krea 2 for the actual editing process. We will jump down to the last node group in the workflow.
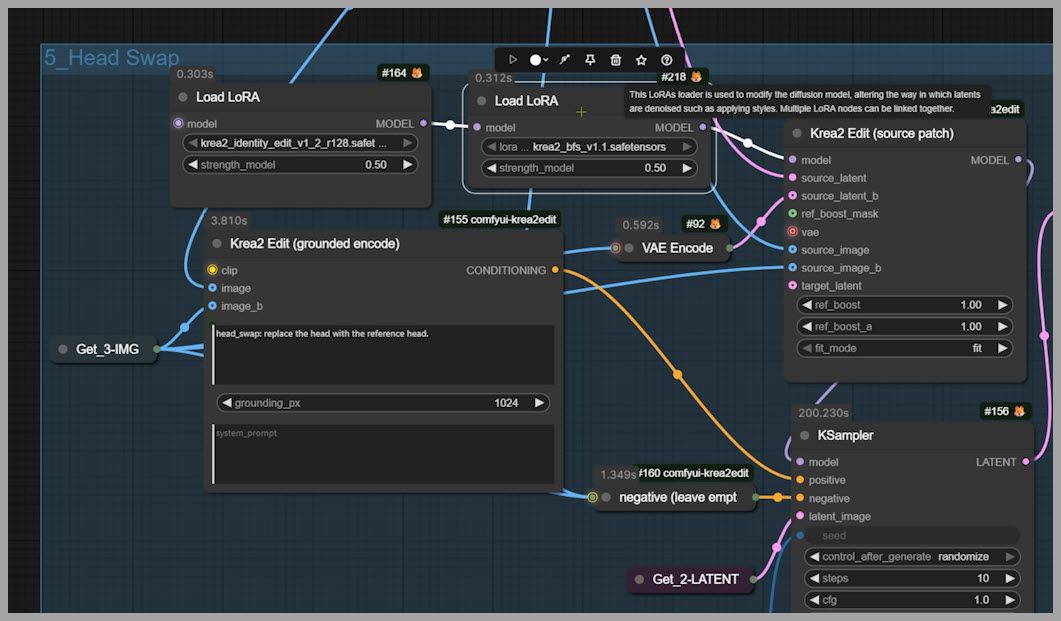
Down here, I’m using two different LoRAs (Low-Rank Adaptations) and chaining them together:
- Identity Edit LoRA: An absolute must-have for any general Krea 2 edit workflow.
- Head Swap LoRA: A highly specialized model trained specifically for head-swapping tasks.
Comparing Workflows
The original author of this Head Swap LoRA published a dedicated workflow on HuggingFace. In his setup, only the Head Swap LoRA is used (with the strength set to 1), completely omitting the general Identity Edit LoRA.
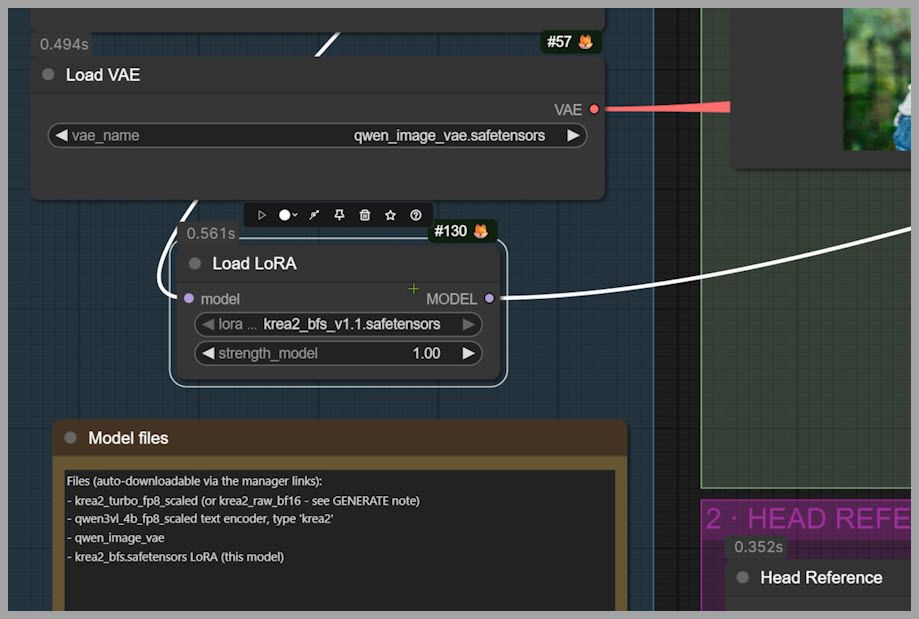
When you run that original setup, the final output has several noticeable issues:
- Low Resolution: The output is restricted to a small 1024×1024 pixel resolution.
- Unnatural Textures: The skin on the face has a very plastic, artificial look.
- Hair Inconsistencies: The new hairstyle doesn’t match the original reference image well.
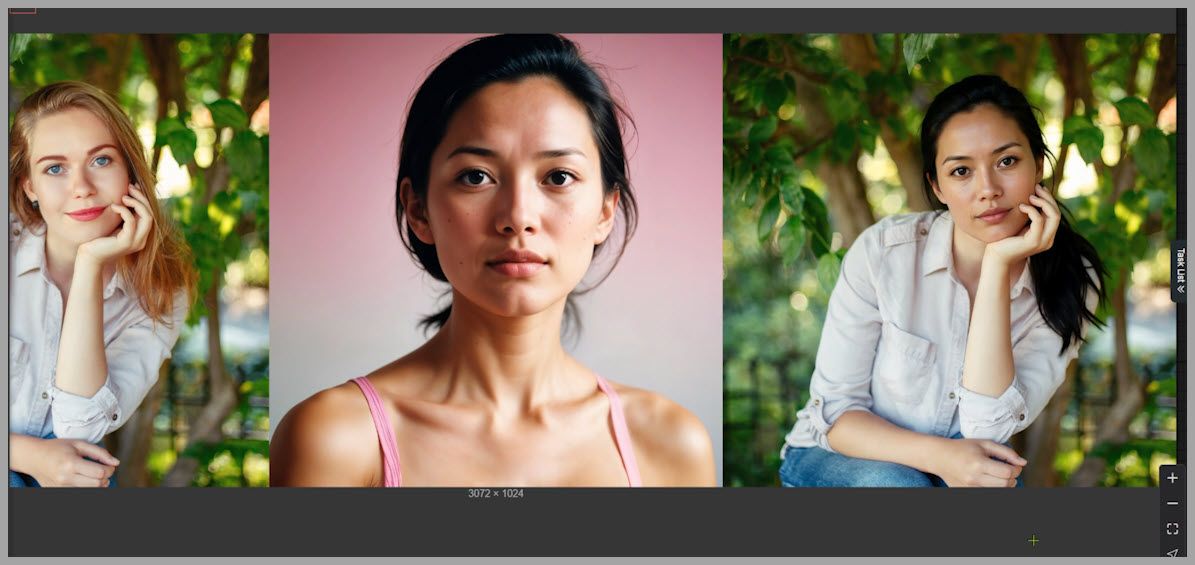
My Optimized Setup
To fix these issues, my setup is slightly different:
- Chain the LoRAs: I include both the dedicated Head Swap LoRA and the general Identity Edit LoRA, chaining them together.
- Adjust Strength Values: I set the strength value to 0.5 for each of them.
After testing many different combinations, I found that balancing these two LoRAs at 0.5 strength yields the absolute best, most photorealistic results.
Tackling Tricky Hair Transitions
Sometimes, the basic workflow handles everything perfectly—even converting long hair to short hair automatically. But what happens when you run into a highly problematic hair transition?
This represents a much more challenging situation where we need to change her long hair to short hair before the head swapping even happens. To help Krea 2 successfully recognize the entire hair area that needs replacing, we have to paint a mask over it.
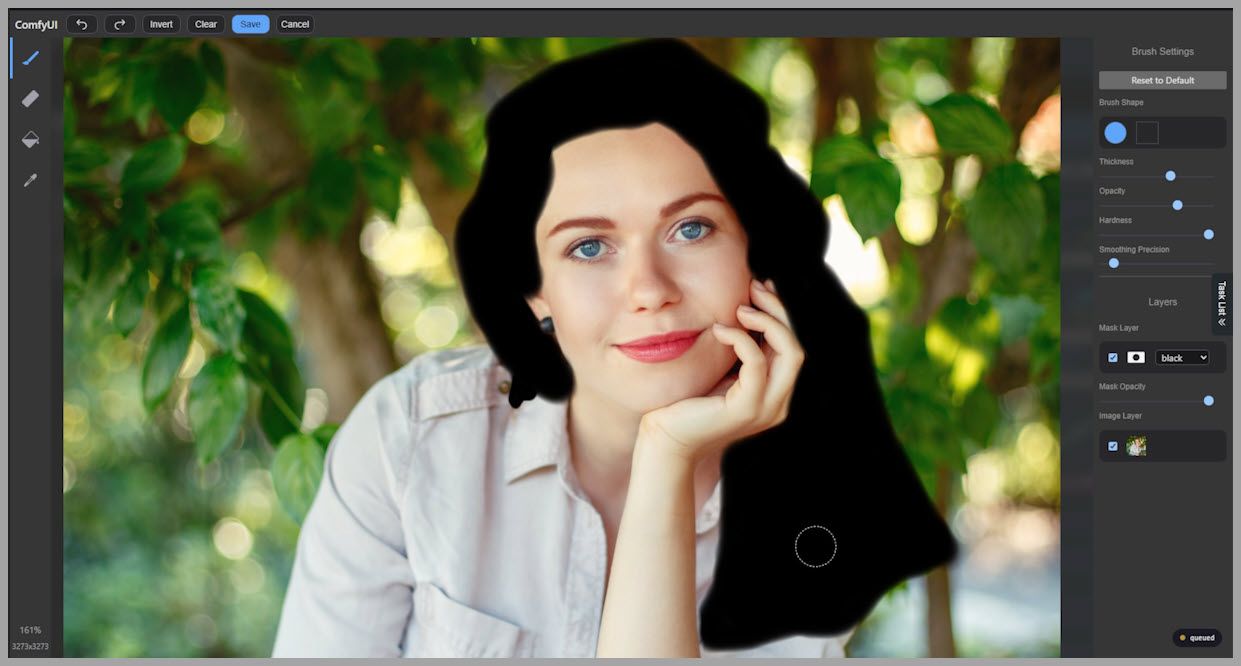
Steps to handle tricky hair:
- Rerun the workflow with a mask added to the target image. Paint a solid mask (typically shown as blue in the editor) completely covering the long hair area you want to remove.
- Activate the third node group (the one we bypassed earlier).
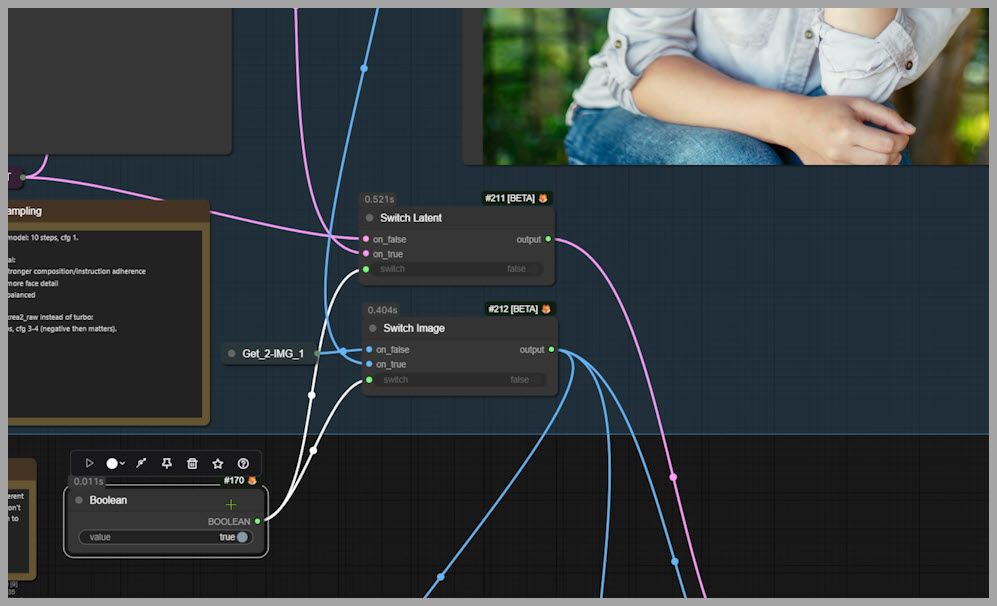
- Switch the boolean toggle node connected to this group from False to True.
- Rerun the workflow.
When you check the output from this intermediate step, you will clearly see her hair changed from long to short.
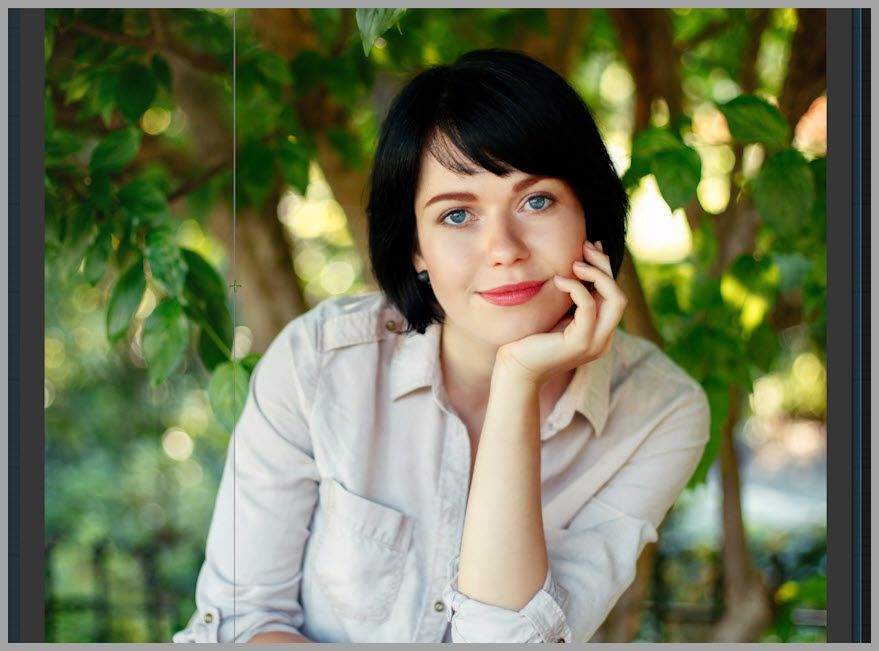
More importantly, the background area where the long hair used to be seamlessly becomes part of her shirt and the surrounding environment!
Fine-Tuning Prompts and Advanced Settings
Let’s look under the hood of that third node group to understand why it works so well for hair preparation.
In this third group, I purposely did not use the Head Swap LoRA at all. Instead, I configured it as follows:
- LoRA Setup: Only the Identity Edit LoRA is connected, and its strength is pushed all the way up to 1.
- Reference Boost Value: I increased the reference boost value in this node to 4 (compared to the last group, where it was left at the default 1). Increasing this value drastically improves the overall consistency of the body reference image.
- Text Prompting: I used a highly specific prompt: “fill the blue area with super short black hair, and keep her pose consistent.”
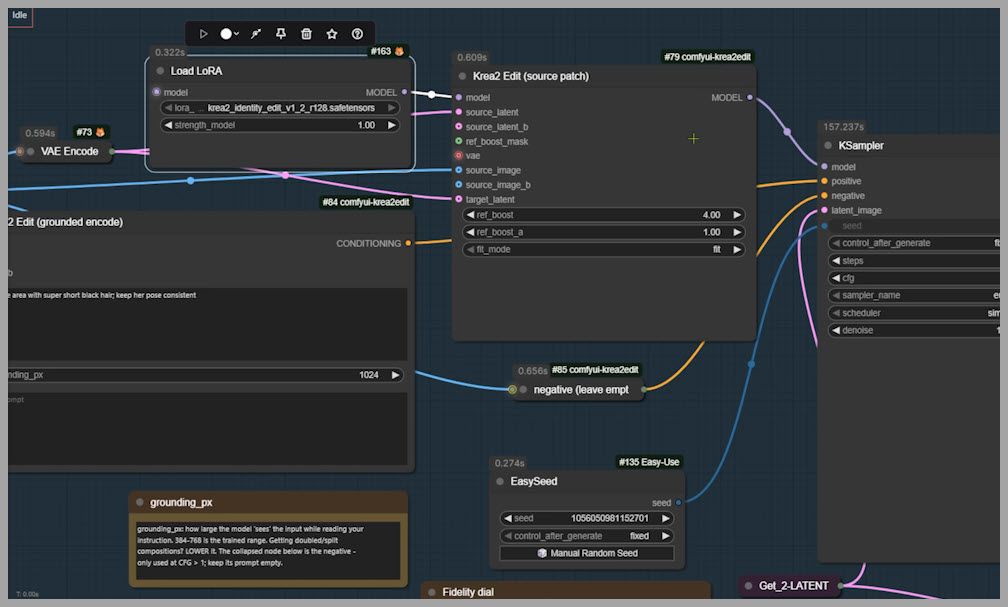
Pro-Tip on Prompting: You can absolutely customize the first half of this prompt based on your specific situation. However, I highly recommend keeping the back part exactly the same: “and keep her pose consistent.” Including that exact phrase ensures her body doesn’t warp or move around during the generation.
The Role of the Switch Nodes: There are two switch nodes placed at the end of this group. Because we set the boolean value to true, this newly generated “short-hair” image is used as the fresh body reference image for the final step. It replaces the original target image we uploaded at the start.
By changing the hairstyle in advance, we remove all conflicting pixels. This preparation makes it incredibly easy for the final node group to perform the head swap flawlessly!
Conclusion and Next Steps
That wraps things up for this article! By combining intelligent masking, balancing specialized LoRAs, and prepping tricky hair areas in advance, you can achieve incredibly seamless head swaps in ComfyUI using Krea 2.
If you want to download this exact workflow that I built, please consider joining our community to support this content. I have also built other head swap workflows based on the Flux 2 Klein and Qwen Image Edit models, which you can find in our community resources.
Gain exclusive access to advanced ComfyUI workflows and resources by joining our community now!
Thank you so much for reading, and I’ll see you in the next article! Happy creating!