How to Transfer Clothing from a Reference Image to a New Character with Krea 2
Transferring an outfit from one image onto a completely new character can be surprisingly useful for fashion visualization, character design, product photography, and AI-generated portraits.
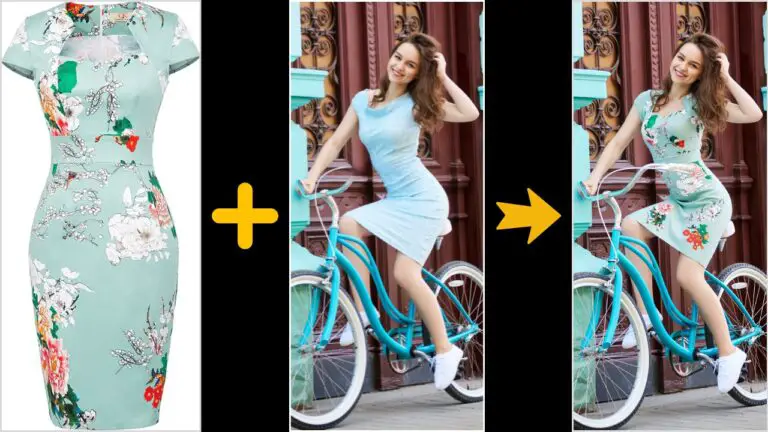
In this article, I’ll walk through a straightforward ComfyUI workflow that takes clothing from a reference image and transfers it onto a newly generated person. The new character’s appearance, pose, and environment can all be controlled with your prompt, while the workflow preserves the visual appearance of the original outfit.
The workflow can handle two especially useful situations:
- A standalone clothing image, such as a dress photographed against a plain background.
- A reference photo where the clothing is already being worn by another person.
It also gives us a simple way to remove unwanted accessories or garment details before generation.
What This Clothing Transfer Workflow Can Do
Let’s begin with the simplest example.
Imagine that your reference image contains a dress against a plain white background. There is no person wearing it—just the garment itself.
Using this workflow, we can take that dress and place it onto a completely new character. The outfit comes from the reference image, while the character’s appearance, pose, and background scene are created according to the text prompt.
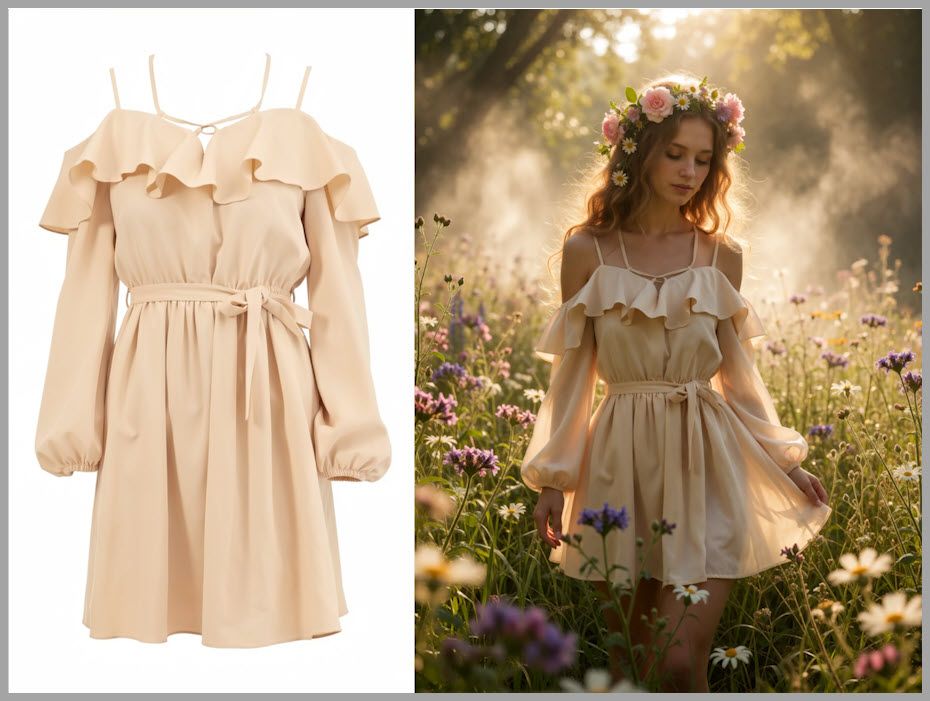
That separation is what makes the workflow useful.
The reference image tells the model:
This is the outfit I want.
Your prompt then tells the model what kind of person and scene should surround that outfit.
Transferring Clothing from an Image with a Model
The reference image does not need to contain an isolated garment.
You can also start with a photograph where another person is already wearing the clothes you want to transfer.
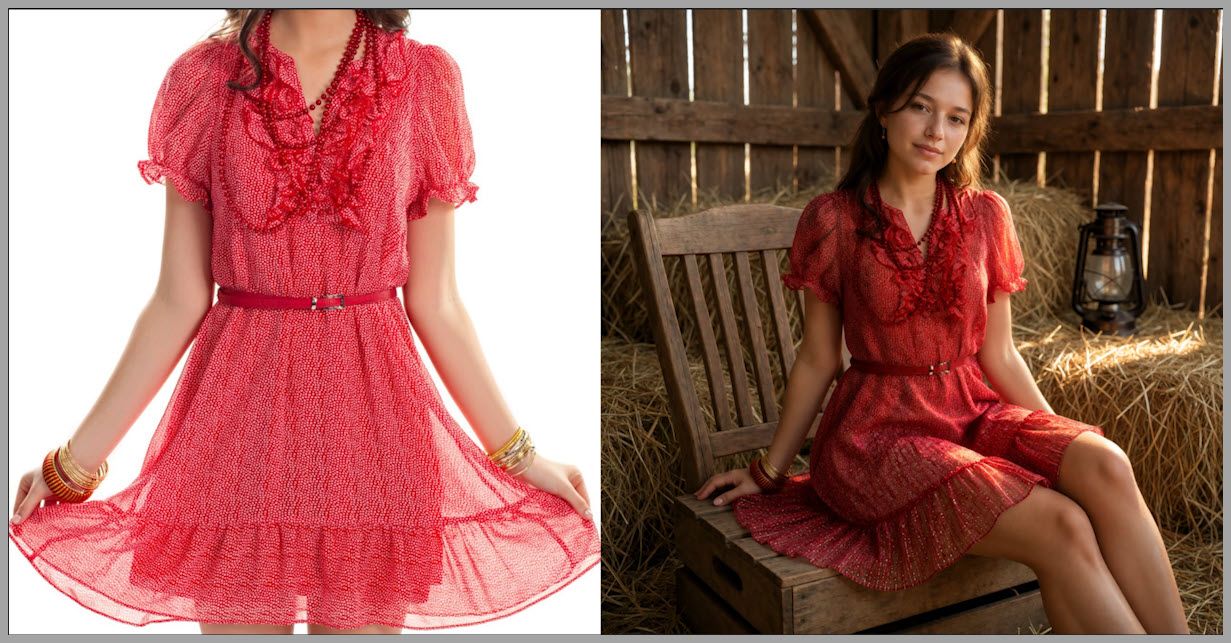
The workflow is designed to identify the clothing region and use it as the visual reference for the new generation.
However, there is one important detail to watch for.
If the original person is wearing accessories close to the clothing, those elements can sometimes be transferred as well. In the example from this workflow, the original model was wearing bracelets, and those bracelets appeared on the newly generated woman too.
Fortunately, fixing that is easy.
Removing Accessories You Don’t Want to Transfer
If an accessory appears in the reference image but you do not want it in the final result, you can simply block it out before generation.
For example, if the original model is wearing bracelets:
- Locate the bracelets in the clothing reference.
- Cover those areas with a solid white color.
- Use the edited image as the reference.
- Run the workflow again.
Once the unwanted regions are covered, they will no longer appear in the generated result.
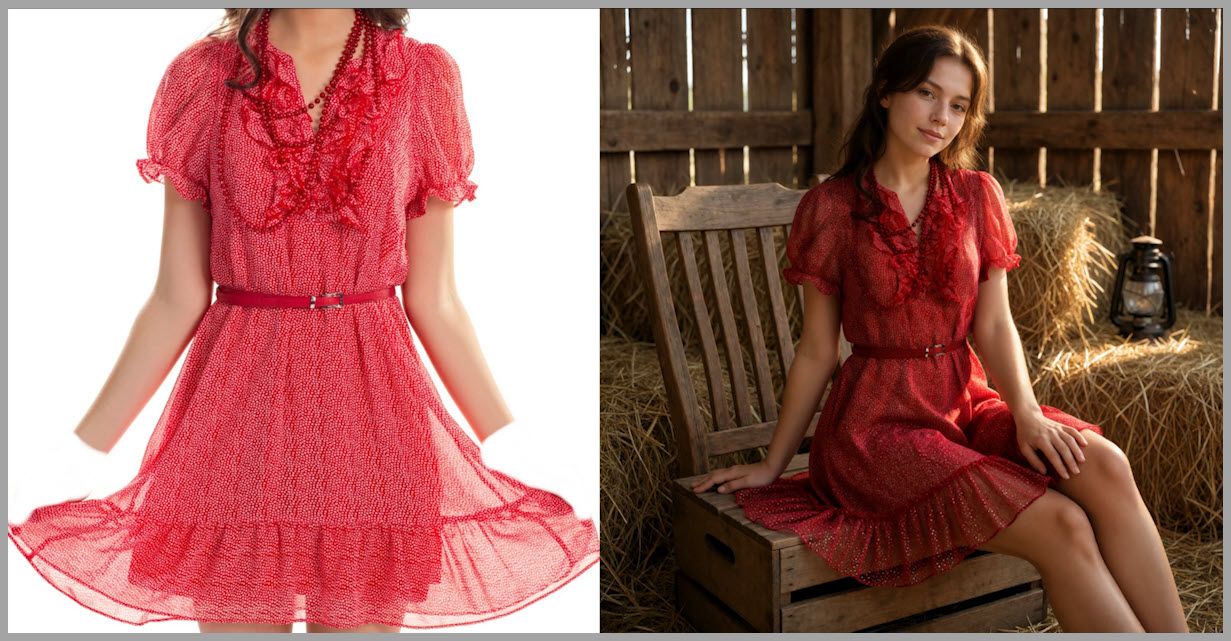
This masking technique becomes especially useful later because it can solve more than accessory problems. We can also use it to remove garment details that should not be visible from a particular viewing angle.
Workflow Overview
The workflow itself is relatively simple.
It consists of only 3 main groups of nodes:
- Core model loading.
- Reference-image preparation.
- Image-conditioned generation.
Understanding those three groups makes the entire workflow much easier to follow.
Download the Workflow for Free:
https://drive.google.com/drive/folders/1KdUnwRfrHipSrFjs4vDh595u9MD_t7_a
YouTube Tutorial:
Gain exclusive access to advanced ComfyUI workflows and resources by joining our community now!
Group 1: Load the Core Models
The first node group is responsible for loading the foundational models required by the workflow.
It contains three main components:
- The main diffusion model
- The CLIP model
- The VAE model
Once these models are loaded, the workflow can move on to processing the clothing reference.
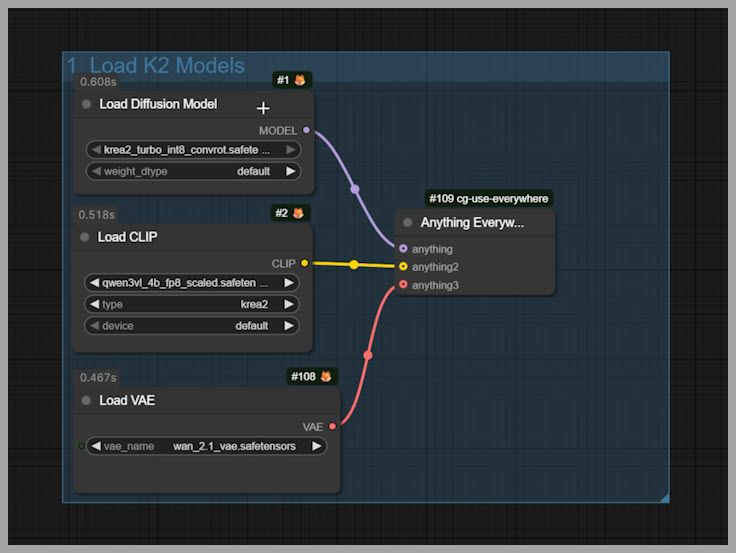
There is not much manual work required in this group. Its job is simply to ensure that the necessary generation components are available for the rest of the pipeline.
Group 2: Prepare the Clothing Reference
The second group is where the reference image is processed.
This part of the workflow has two important goals:
- Isolate the clothing from unnecessary parts of the reference.
- Resize the resulting image to a suitable resolution.
Let’s look at both steps.
Detect the Outfit with Deep Fashion YOLO
The workflow uses the Deep Fashion YOLO model to automatically detect the clothing area in the reference image.
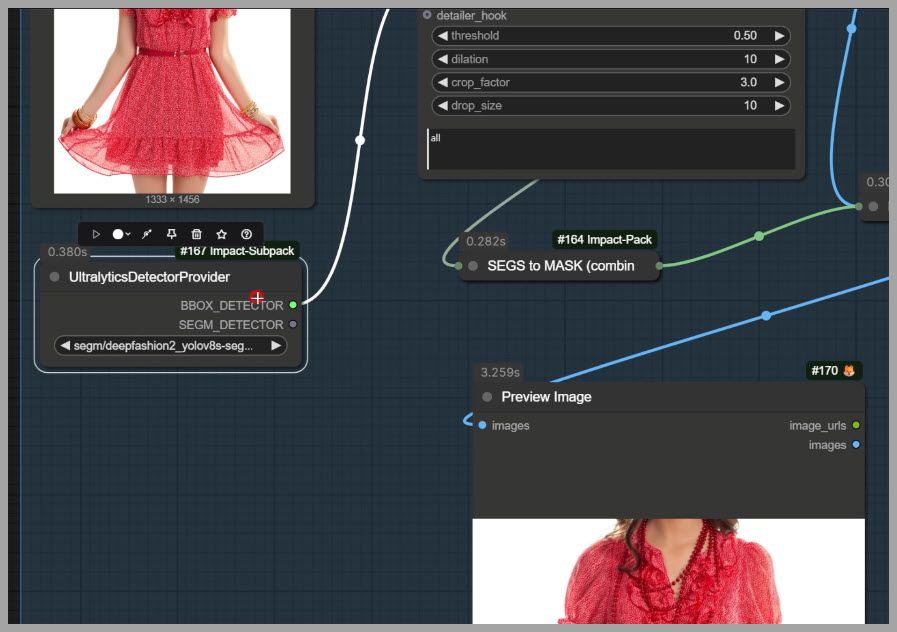
Instead of manually cropping the image around the outfit every time, the model identifies the relevant region and helps remove unrelated portions of the original photo.
For example, if a reference image includes part of the original model’s legs, those unnecessary body regions can be cropped away.
If the person’s head were visible in the image, that could also be removed so the remaining reference stays focused on the clothing.
The result is a cleaner visual reference containing primarily the outfit we want to transfer.
Why Cropping Matters
A clothing-transfer workflow should ideally focus on the garment rather than the identity or body of the person wearing it.
By cropping away irrelevant regions, we reduce the amount of unrelated visual information being sent into the next stage.
That helps establish a clearer relationship:
- The image provides the clothing.
- The prompt provides the new character and environment.
Resize the Reference to One Megapixel
After the clothing area has been cropped, the next node resizes the image to exactly one megapixel.
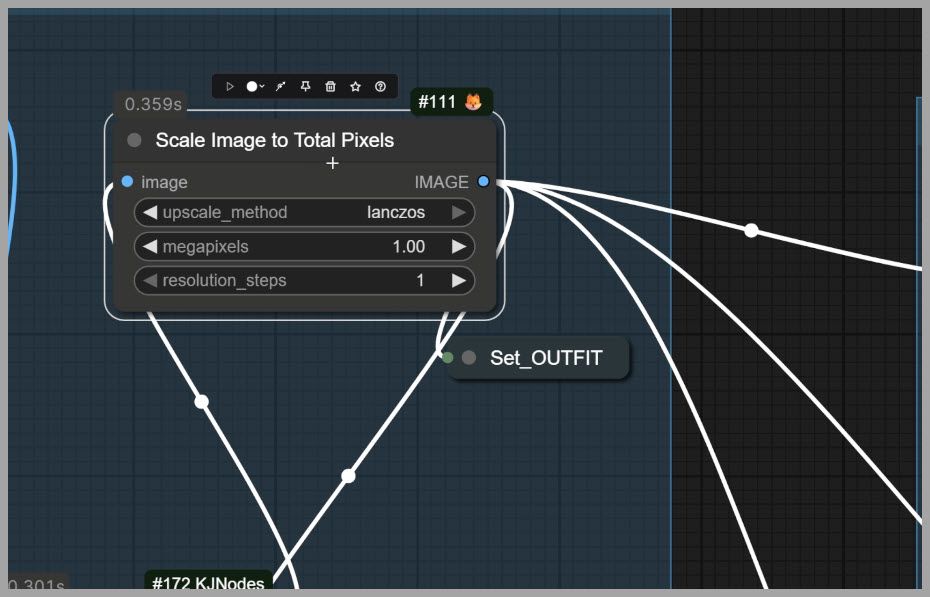
This is an important part of the workflow.
If the reference image is too large, it can cause strange or unexpected issues during generation. Resizing it before sending it into the final generation nodes helps avoid those problems.
So the reference-image preparation stage looks like this:
- Load the original reference image.
- Detect the outfit using Deep Fashion YOLO.
- Crop away irrelevant body regions.
- Mask unwanted accessories or details if necessary.
- Resize the prepared clothing reference to one megapixel.
- Send the resulting image into the final generation group.
Group 3: Feed the Clothing Directly into the Generation Nodes
The third and final group contains two important nodes that can accept images directly as inputs.
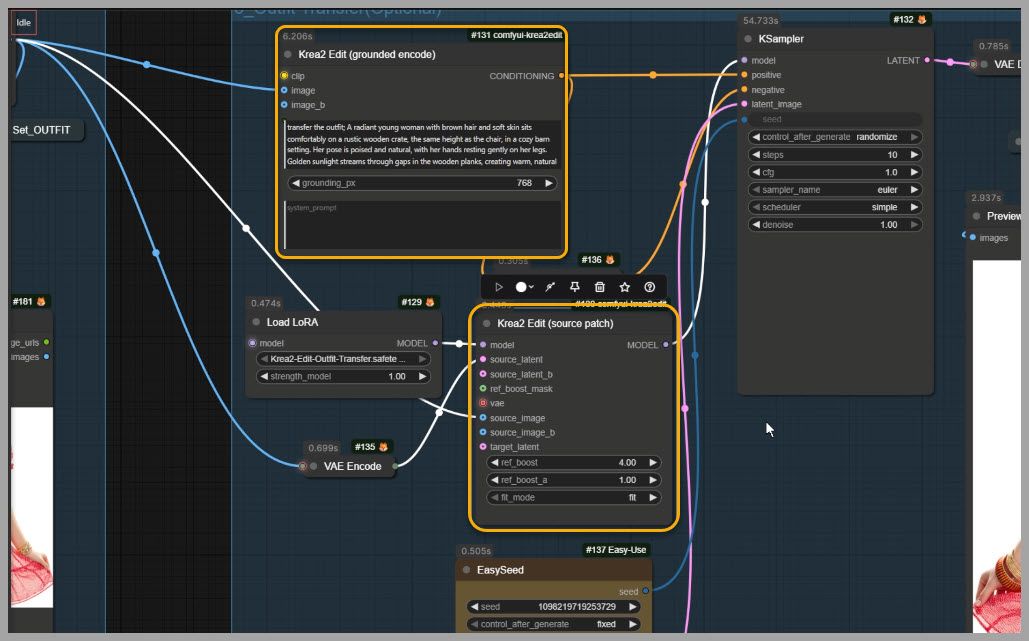
This direct image input is one of the key ideas behind the workflow.
These nodes were also discussed in an earlier article comparing the image-editing capabilities of Krea 2 and Flux.2 Klein.
Why Direct Image Input Matters
Because the nodes receive the clothing reference itself, the encoding process becomes aware of its visual content.
In other words, the system is not relying only on a textual description such as:
red evening dress with short sleeves
Instead, it receives the actual image of the dress.
That allows it to understand what the specific garment is supposed to look like.
This is what allows the workflow to preserve the outfit while still generating a new person and a new environment.
Write the Clothing Transfer Prompt
Once the reference image is prepared and connected to the generation nodes, the next step is writing the prompt.
There is one rule you need to remember:
Always Start with the LoRA Trigger Phrase
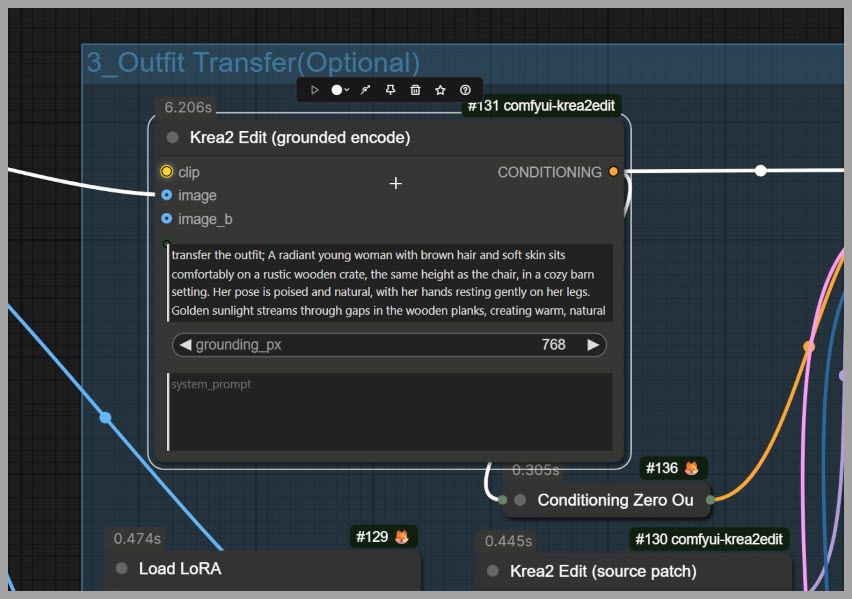
For this particular LoRA, the prompt must begin with:
transfer the outfit
This is the required trigger phrase for the clothing-transfer LoRA.
So instead of immediately writing something like:
a young woman sitting on a wooden crate…
you should begin with the trigger phrase first.
For example:
transfer the outfit, a young woman sitting on a rustic wooden crate…
The exact character and environment description can then continue after the trigger phrase.
What the Clothing Transfer LoRA Does
The LoRA used in this workflow was trained specifically for clothing-transfer tasks.
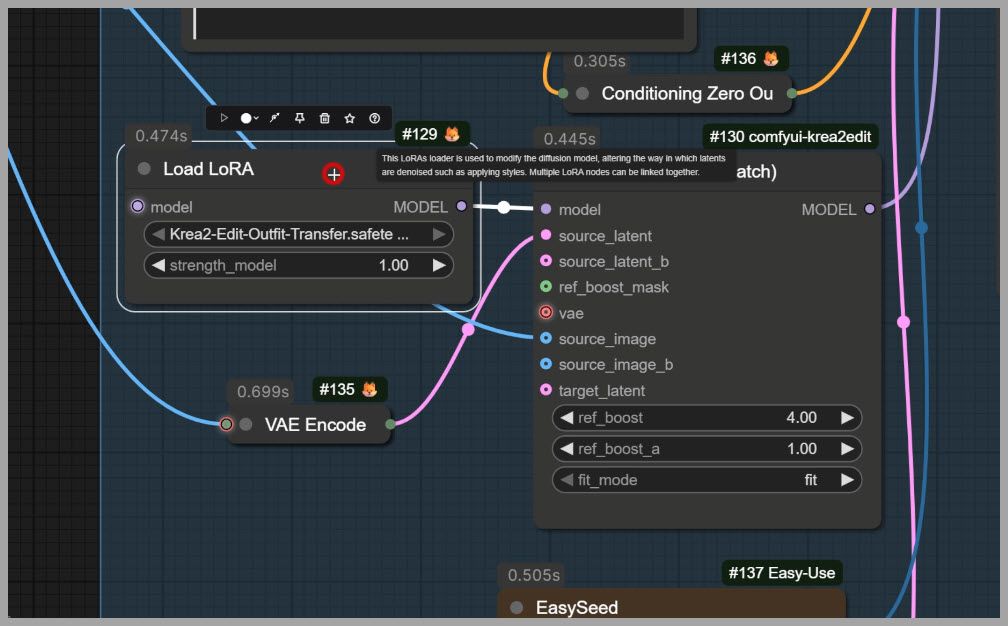
Its job is to help the generation system take the outfit represented by the reference image and reproduce it on the newly generated subject.
According to the source workflow, the LoRA is available for free on HuggingFace.
Describe the New Character
After entering the LoRA trigger phrase, describe the character you want to generate.
You can specify characteristics such as:
- The person’s general appearance
- Pose
- Position in the frame
- How they are interacting with the scene
The outfit itself comes from the reference image, so the rest of the prompt can focus on the new subject and composition.
Describe the Background
You can also describe the environment in the same prompt.
For example, one generated result placed the woman on a rustic wooden crate because that scene had been explicitly described in the prompt.
This demonstrates an important part of the workflow:
The clothing reference and the text prompt serve different purposes.
The reference image controls what the outfit should look like, while the prompt controls the generated scene.
Adjust the Final Resolution
The output resolution can also be changed directly inside the generation node.
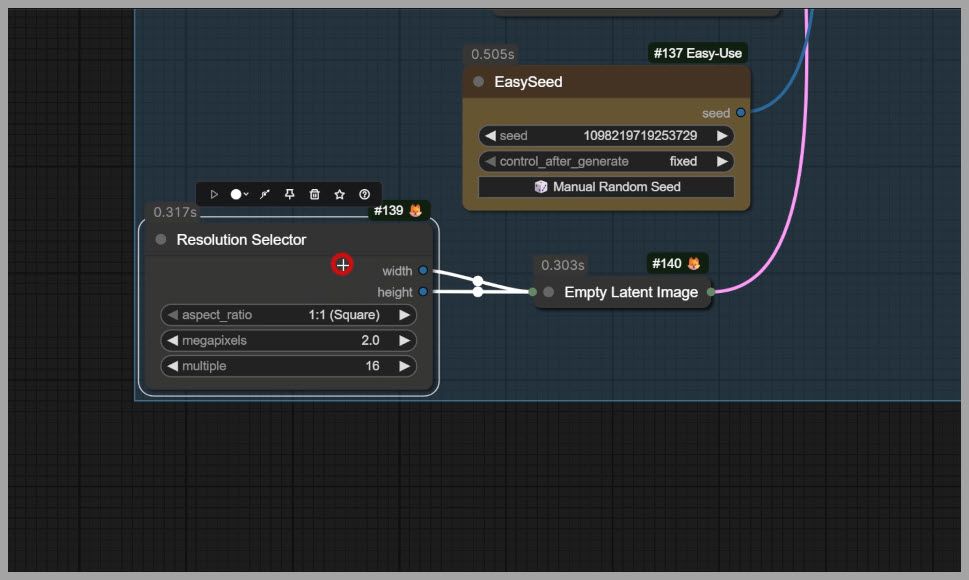
So once the trigger phrase and scene description are ready, you can choose the desired final image dimensions before running the workflow.
Run the Workflow and Inspect the Result
Now we can generate the image.
A useful way to evaluate the result is to compare the reference image and the generated image side by side.
Look at two things separately.
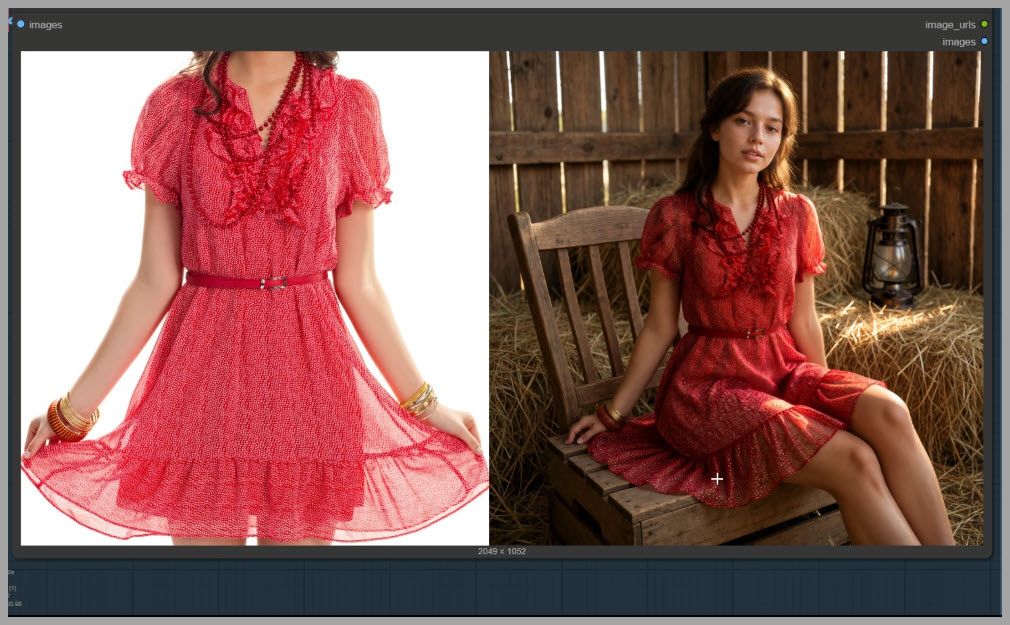
Clothing Fidelity
First, check whether the important visual characteristics of the reference outfit have been preserved.
Pay attention to the overall dress structure and recognizable garment details.
Prompt Fidelity
Next, inspect whether the generated character and scene match the prompt.
For example, if the prompt asked for a woman sitting on a rustic wooden crate, verify that the generated composition actually reflects that description.
If both elements are working correctly, you should have:
- Clothing that comes from the reference image.
- A new character and scene controlled by your prompt.
Fixing Unwanted Bracelets with a Mask
Let’s return to the earlier example where the reference model was wearing bracelets.
The dress itself transferred successfully, but the bracelets were also reproduced on the new character.
If that happens, we don’t need to rebuild the workflow.
Instead, go back to the second node group where the reference image is being prepared.
Step 1: Identify the unwanted region
Locate the bracelets or accessories that should not appear in the final image.
Step 2: Paint over them
Create a mask by covering the accessories so they are hidden from the image information passed to the AI.
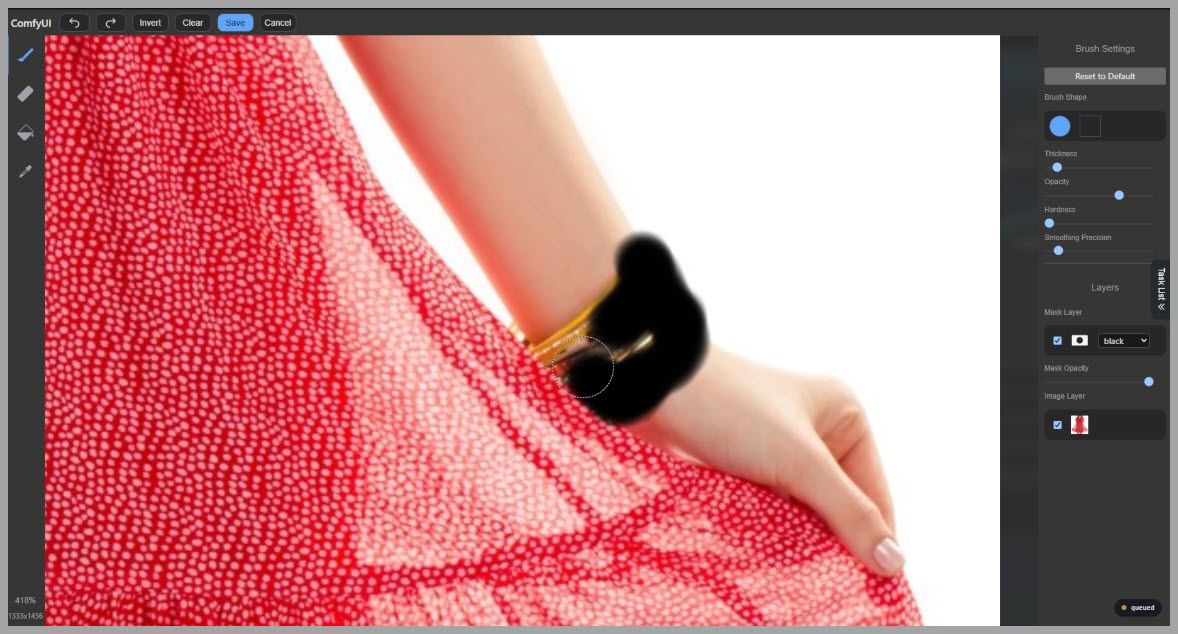
Step 3: Run the workflow again
Regenerate the image with the cleaned reference.
In the demonstrated example, once the bracelets were masked, the next generation no longer contained them.
This makes masking one of the most practical tools in the workflow.
Fixing Problems with Standalone Clothing Images
Accessories are not the only thing masking can fix.
Sometimes a standalone garment reference contains visual information that is technically part of the clothing but should not appear from the angle of the generated person.
The standalone dress example revealed exactly this problem.
The Back Neckline Problem
After transferring the standalone dress onto the generated woman, the back neckline of the dress appeared near the top of the portrait.
That detail should not have been visible from the generated viewpoint.
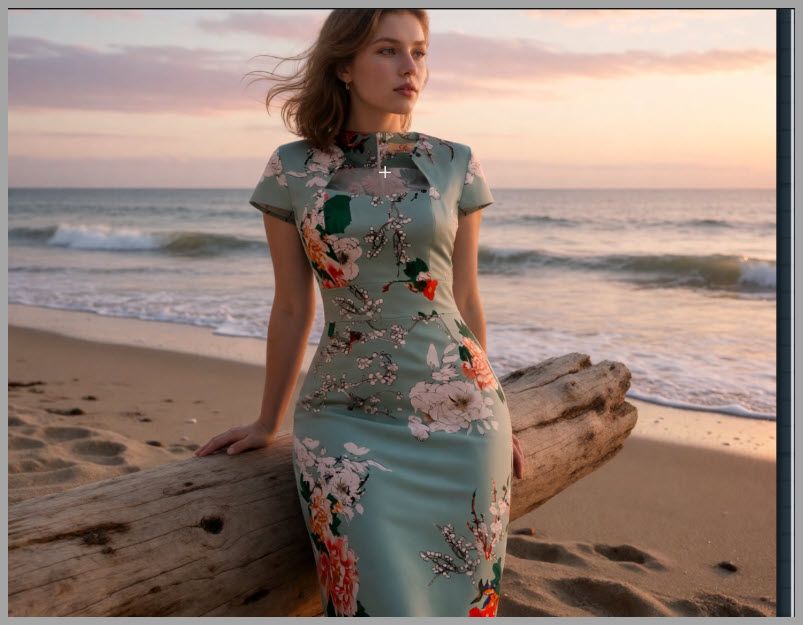
The Cap-Sleeve Lining Problem
The inner lining of the cap sleeve was also visible.
Again, this was information contained in the clothing reference, but it did not belong in the final appearance of the garment.
The solution is the same masking technique we used for the bracelets.
Step 1: Return to the reference image
Open the prepared garment reference in the second node group.
Step 2: Locate the unwanted garment details
In this example, that means identifying:
- The visible back neckline
- The exposed inner sleeve lining
Step 3: Mask those areas
Cover the unwanted regions so they are no longer included as useful visual information for the generation.
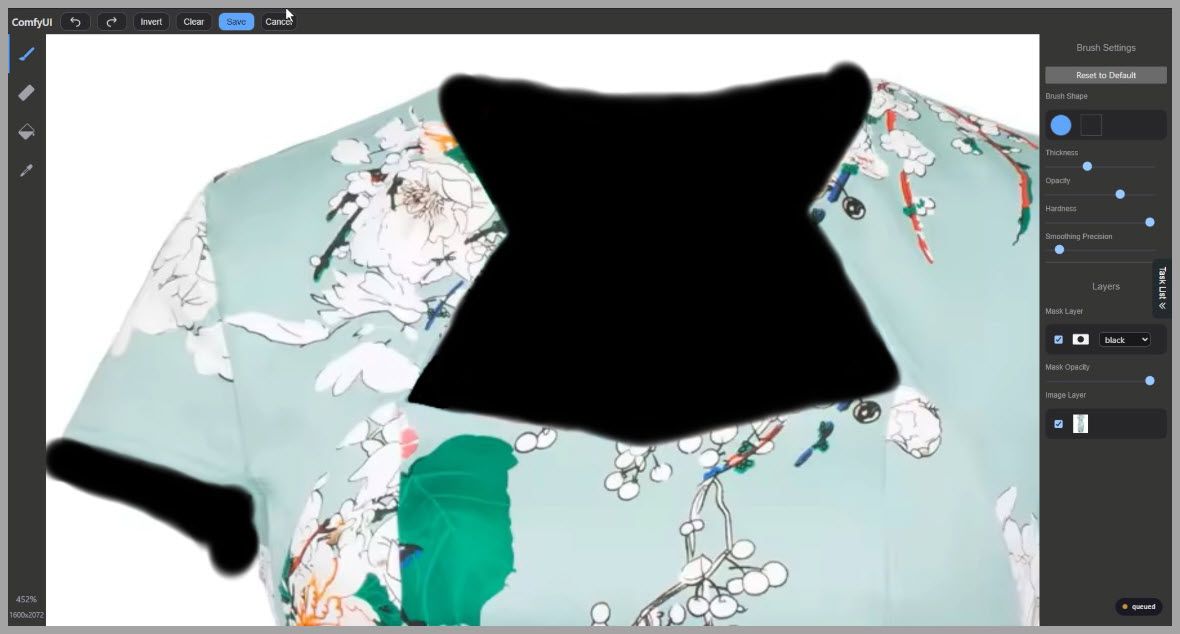
Step 4: Regenerate the image
Run the workflow again.
After those areas were masked and the image was regenerated, the unwanted details disappeared and the final clothing transfer was significantly cleaner.
Conclusion
This clothing-transfer workflow shows how powerful image-conditioned generation can be when combined with good reference-image preparation.
The overall process is surprisingly compact:
- Load the required models.
- Detect and crop the clothing.
- Mask unwanted visual details.
- Resize the reference to one megapixel.
- Feed it directly into the image-aware generation nodes.
- Start the prompt with
transfer the outfit. - Describe the new character and environment.
- Generate, inspect, mask, and refine as needed.
The most useful part is that the workflow works with both isolated clothing images and photographs of people already wearing the outfit.
And when the system transfers something you don’t want—such as bracelets, a back neckline, or visible inner sleeve material—you don’t need to redesign the entire setup. A simple mask can remove those elements and give you a much cleaner final generation.
With those techniques in place, you have a practical way to take an existing outfit, preserve its visual appearance, and place it onto a completely new AI-generated character and scene.
Gain exclusive access to advanced ComfyUI workflows and resources by joining our community now!