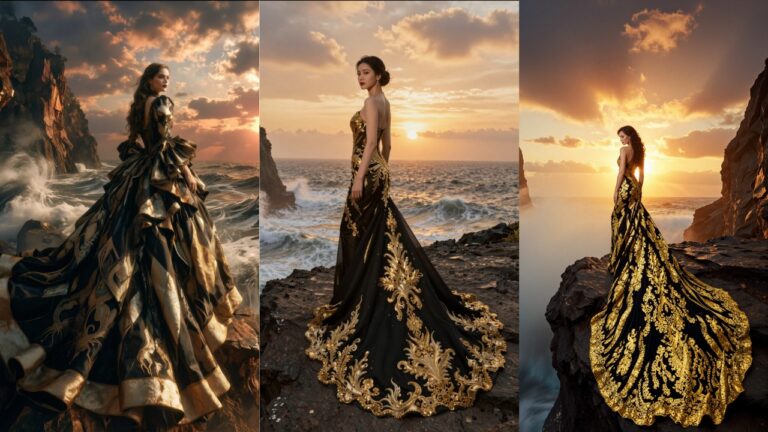
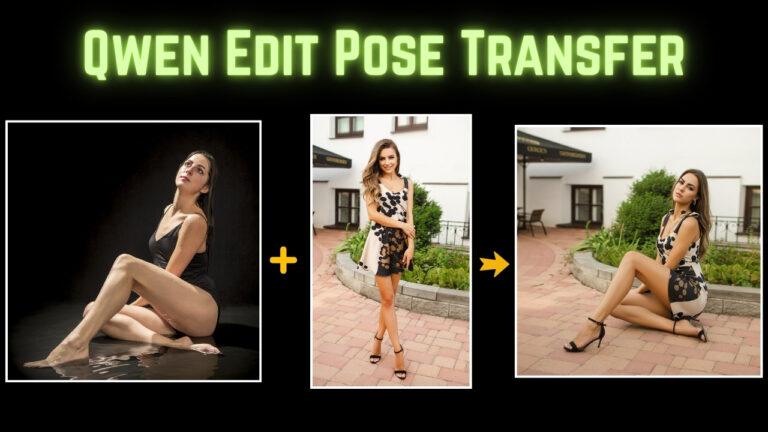
Any-Pose Portrait Editing in ComfyUI: Use a 3D Character to Drive Perfect Pose Transfer
A while back, I shared a workflow using the Qwen Edit model to transfer a pose from a real reference photo onto a portrait. The success rate is surprisingly high—even with tricky, unconventional poses.
But there’s one limitation: you need a pose reference.
So what if you don’t have one?
That’s where this workflow shines. Instead of hunting for the perfect pose photo, we’ll use a poseable 3D character inside ComfyUI.
You can imagine any pose you want, pose the character to match it, and then use that 3D render as the pose reference for Qwen Edit.
The result is a pipeline where:
- You create the pose from scratch in 3D
- Qwen Edit transfers that pose onto your portrait
- You fix identity drift by repainting/swapping the face
- You finish with a clean ~4K upscale using Flux 2 Klein
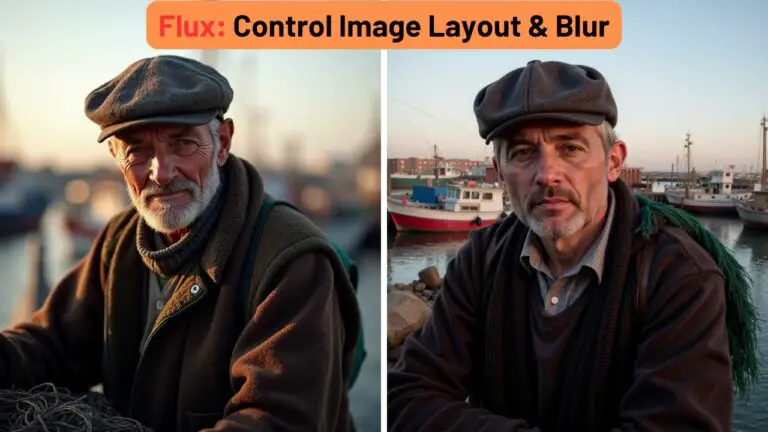
What You’ll Achieve
Here’s the typical “before/after” structure this workflow produces:
- Original portrait (your source image)
- 3D character render (your pose reference, created in ComfyUI)
- Final edited image (your portrait now performing the new pose)
And the big win is that the pose match is very accurate, even when the pose is difficult—because the reference is extremely clear and consistent.
YouTube Tutorial:
Gain exclusive access to advanced ComfyUI workflows and resources by joining our community now!
The Workflow in 4 Steps
This entire process breaks down cleanly into 4 stages:
- Pose Studio: Manipulate a 3D character into the exact pose you want
- Qwen Edit: Copy that pose from the 3D reference onto your portrait
- Face consistency pass: Fix identity drift so the face matches the original subject
- Flux 2 Klein upscale: Increase resolution and sharpness to around 4K
If you’re brand new to pose transfer, I still recommend trying the earlier “photo reference pose transfer” workflow first (Qwen Edit using a real photo). This 3D version builds on the same logic—just with a more powerful way to generate pose references.
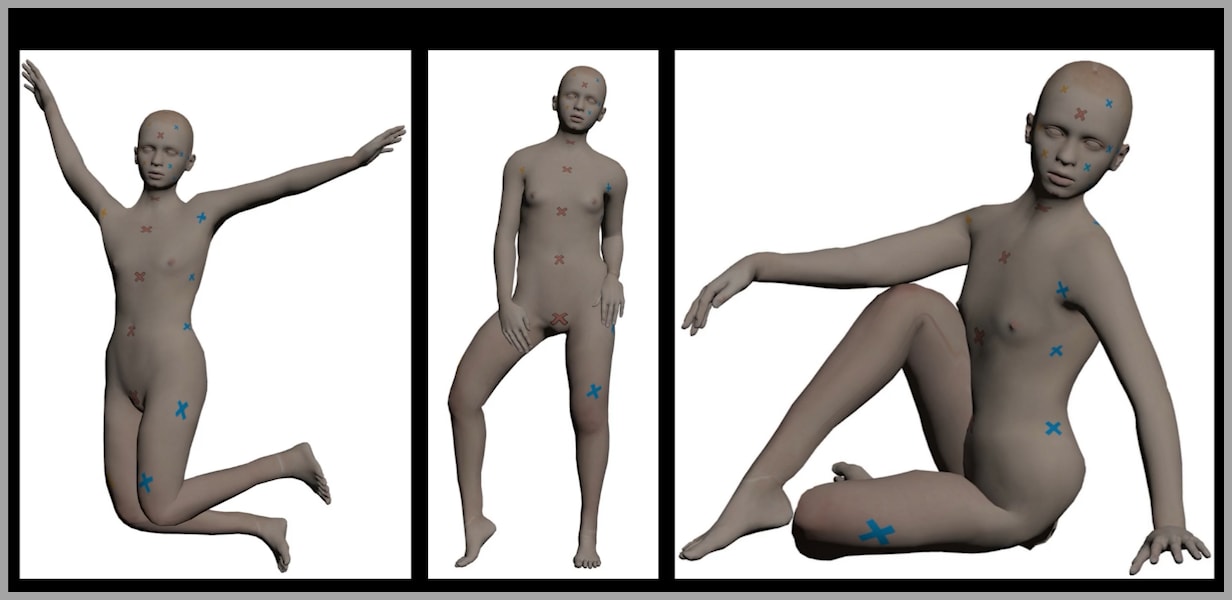
Step 1 — Pose a 3D Character in Pose Studio (Install + Pose Controls)
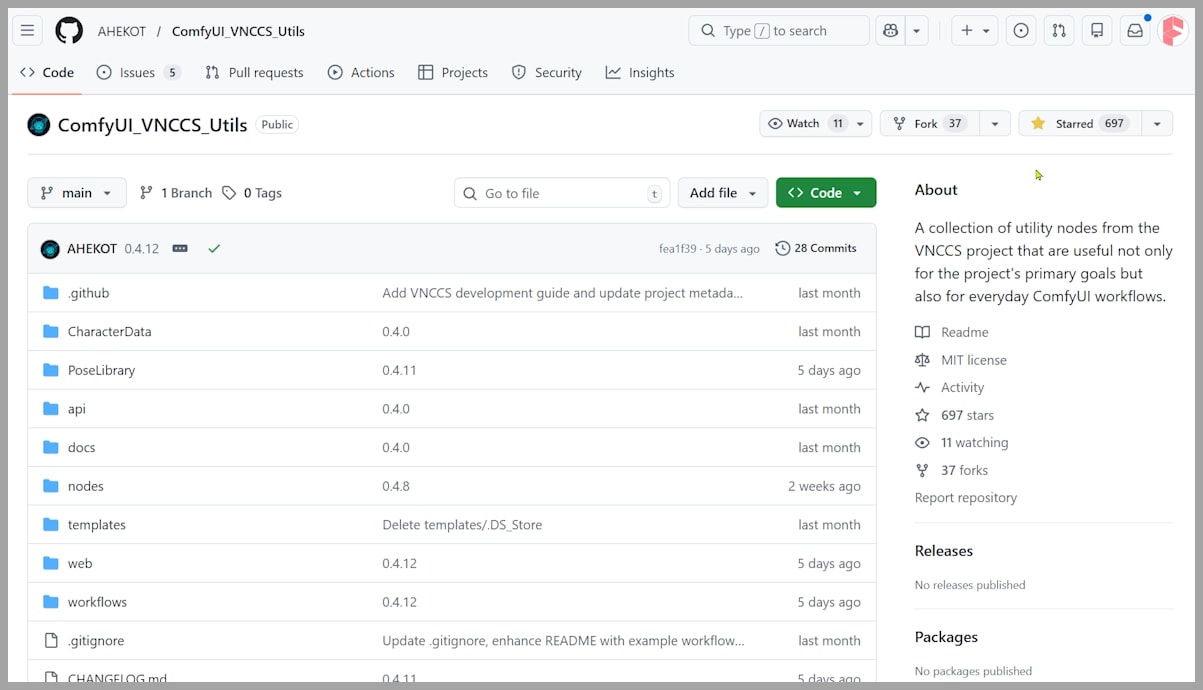
1) Install Pose Studio (VNCCS Utils)
The Pose Studio node comes from a custom node pack called VNCCS Utils, hosted on GitHub.
To install it, you have two common options:
- Copy the node pack into your ComfyUI
custom_nodesdirectory, or - Git clone the repo directly into
custom_nodes
Once installed, restart ComfyUI so the node appears.
Tip: If you find the tool helpful, consider leaving a star on GitHub to support the creator.
2) Reset to the Default Pose
Getting the character into the right pose can take a lot of small adjustments. A great way to understand what changed is to start by hitting:
- Reset
This shows the character’s default “starting pose,” which makes it easier to reason about the adjustments you’re about to make.
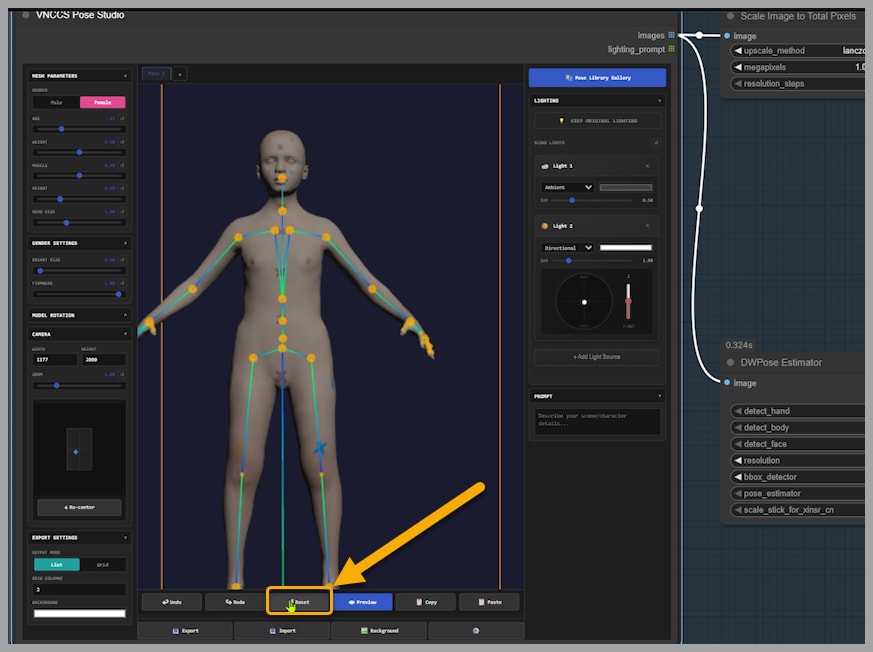
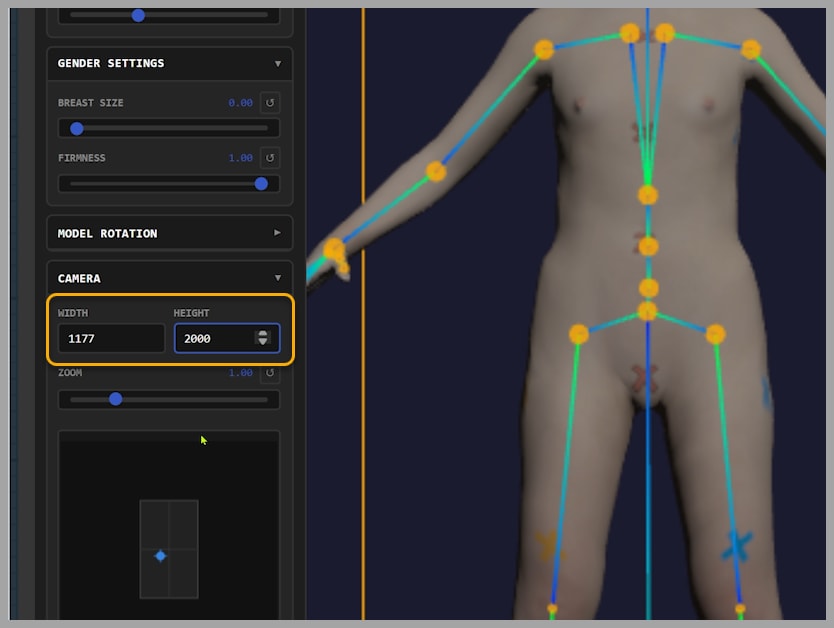
3) Set Canvas Size (Aspect Ratio First, Not Final Resolution)
Early on, set the canvas size by entering:
- Width
- Height
This does not determine the final output resolution, but it does set the aspect ratio, which should match your intended output.
You have two good approaches:
- If you want the final image to match your portrait’s shape, set width/height to match your portrait’s aspect ratio.
- If you intentionally want a different framing (wider, taller, etc.), choose a new aspect ratio here.
4) Position, Center, Scale, and Rotate the Character
Now get the character placed nicely on the canvas:
- Move/position: click and drag the blue dot
- Center automatically: click Re-center
- Resize on canvas: use Zoom
- Turn the model around: rotate the character if it’s facing the wrong direction
At this stage, you’re basically doing composition and framing—making sure the pose will fit well once transferred onto the portrait.
5) Change the Viewing Angle to Access Joints
One of the most useful tricks is adjusting your camera view so joints are easier to manipulate.
To do this:
- Click and hold your left mouse button on the canvas
- Drag your mouse to rotate your view
This helps you see the skeleton and joints from angles that make rotations easier and more accurate.
6) Rotate Joints with the 3D Gizmo (Axis Arcs)
To change the pose, you’ll rotate joints directly.
For example, to lift a leg:
- Click the hip joint
- A 3D gizmo appears
- Each arc on the gizmo represents a different axis (a different 3D dimension)
Then:
- Hover over an arc until it highlights
- Click, hold, and drag to rotate along that axis
In my example:
- Dragging the red arc lifts the leg upward
- Dragging the blue arc rotates the leg outward
And that’s the core principle: you repeat this across the body.
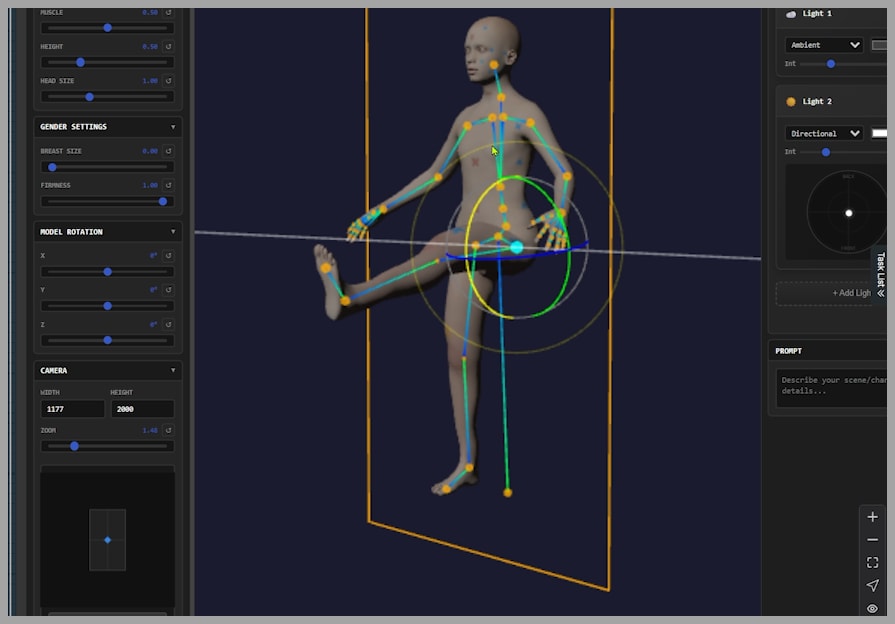
This character has joints all over—arms, legs, torso—so you can create virtually any pose you can imagine.
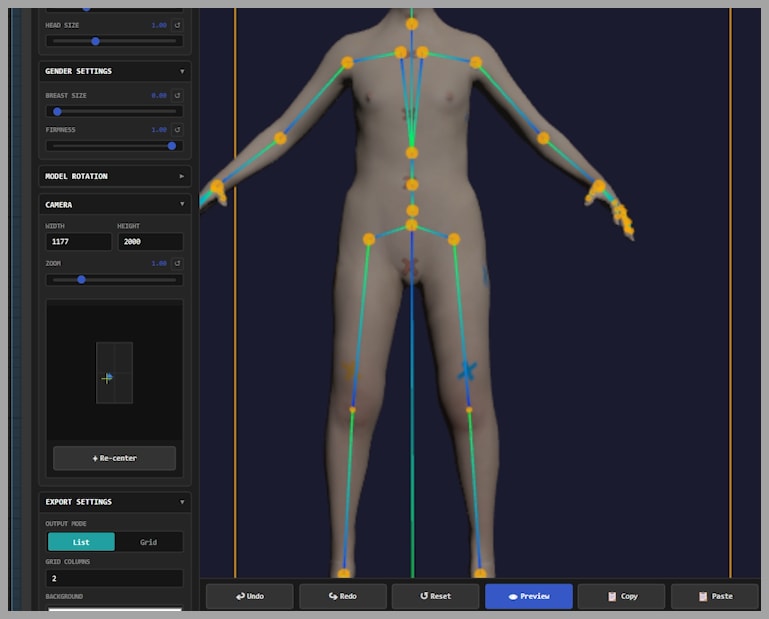
7) Adjust Body Shape (Because It Can Affect the Final Output)
Pose is the main goal here, but body proportions matter too.
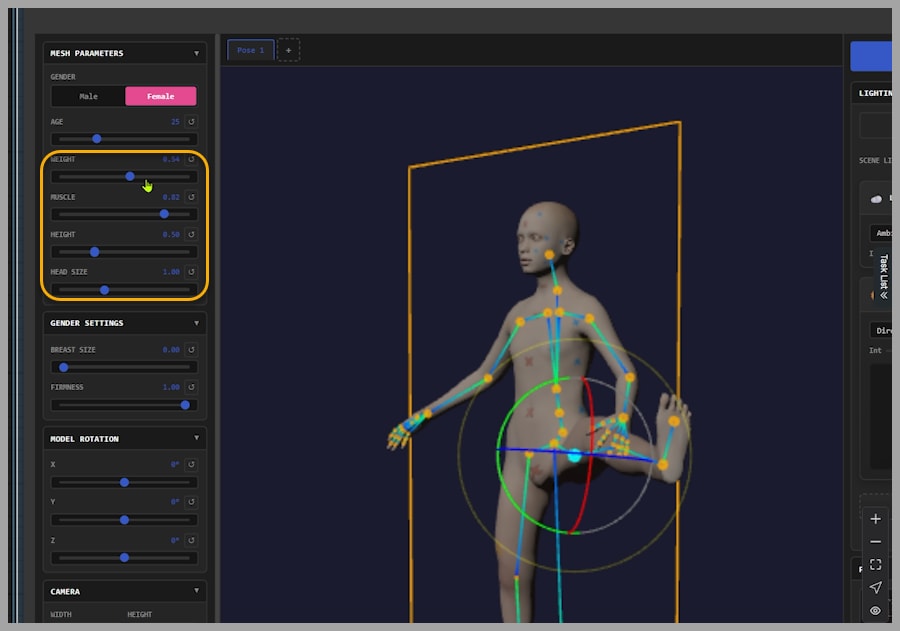
The character includes sliders for things like:
- height
- body shape
These can subtly change how the final portrait render looks after pose transfer—especially if the proportions differ a lot from your portrait subject.
If your results look “off” even when the pose is correct, body shape is one of the first areas I’d tweak.
8) Other Settings (Not Covered Here)
Pose Studio includes additional options that I’m not going into here. If you want to explore deeper controls, check the creator’s GitHub guide for full documentation.
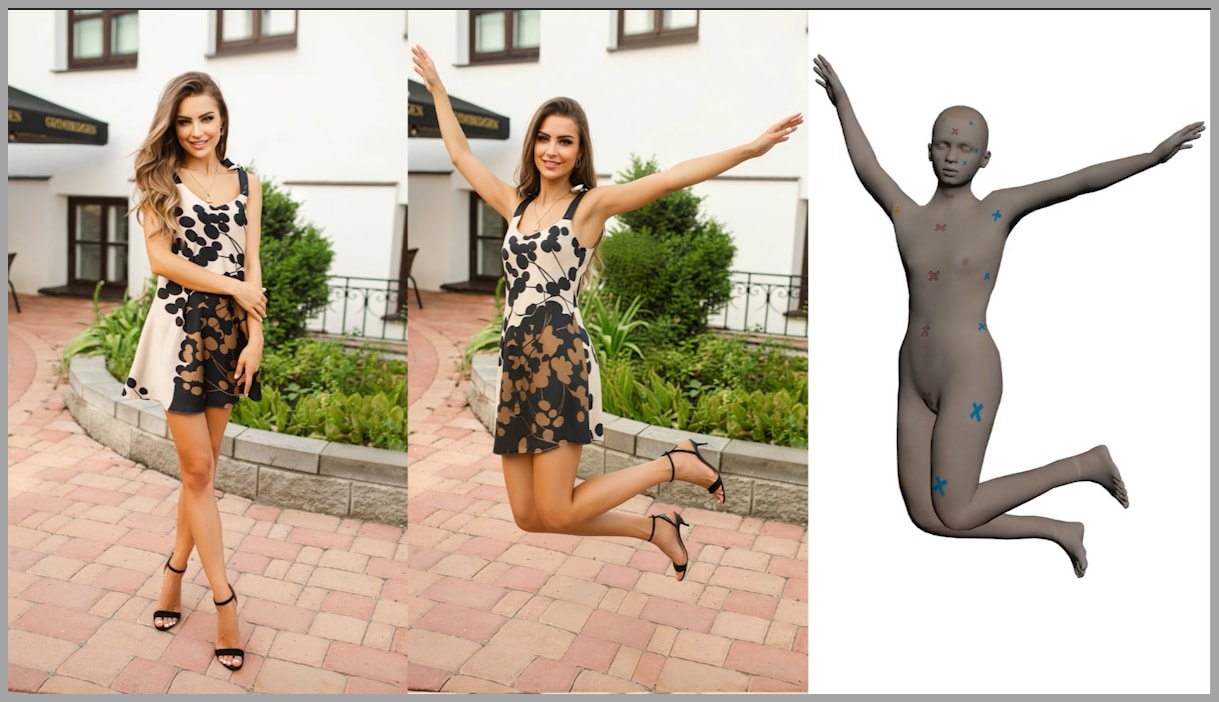
Step 2 — Transfer the Pose with Qwen Edit (Inputs + LoRAs + Prompting)
Once your 3D character is posed, the workflow usually produces three key images:
- The uploaded portrait (your original subject)
- The 3D character render (your pose reference)
- The pose skeleton image (a structural guide for pose transfer)
These three images are fed into the Qwen Edit stage to copy the pose onto your portrait.
Two Key LoRAs (From the Previous Pose Transfer Workflow)
This method relies on two LoRAs that play a major role in stabilizing and improving pose transfer. I covered them in detail in the earlier pose-transfer workflow, so I won’t re-explain them here—but if you’re getting weak pose fidelity, those LoRAs are often the missing piece.
Prompt Strategy: Keep It Mostly As-Is
The prompt used here is long, and that’s intentional.
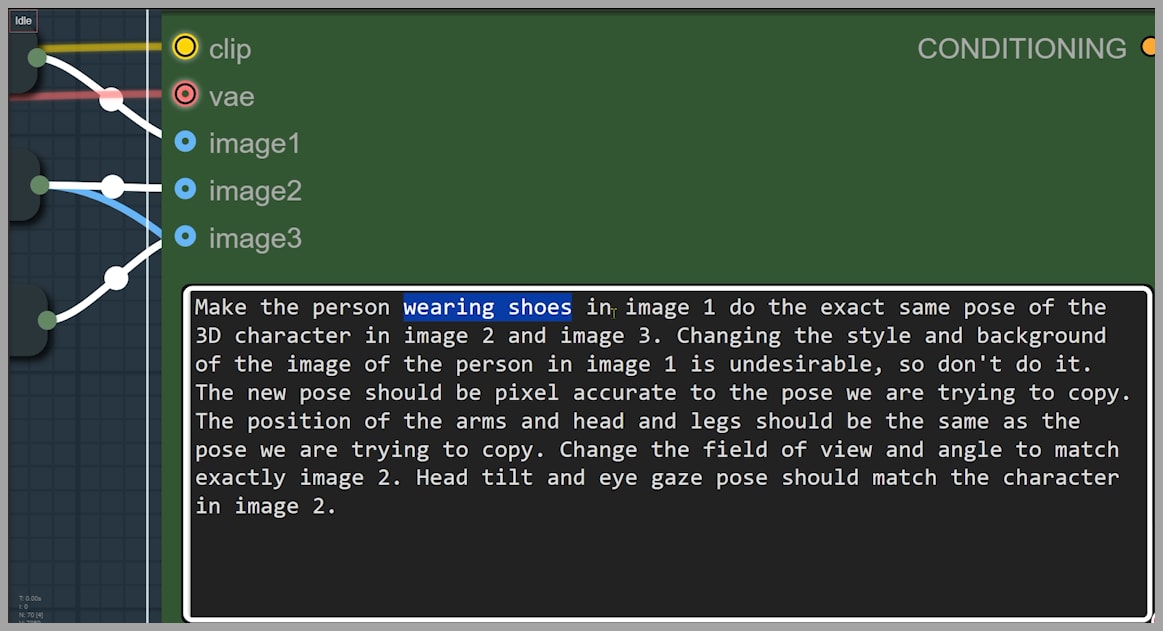
Most of the wording comes recommended by the LoRA creator, and you generally shouldn’t change much of it. Think of it as a “known-good” structure that keeps Qwen Edit behaving predictably.
Where you should edit is in small corrective details that prevent mismatches.
Example Fix: “wearing shoes”
Here’s a real issue that comes up immediately:
- The 3D character is barefoot
- The portrait subject is wearing shoes
If you don’t address that, the output woman often becomes barefoot too—because the model is strongly influenced by the 3D reference.
So I add:
- “wearing shoes”
If your portrait subject is barefoot, you can skip this phrase.
This is the mindset to keep: fix mismatches between the portrait and the 3D reference using small prompt nudges.
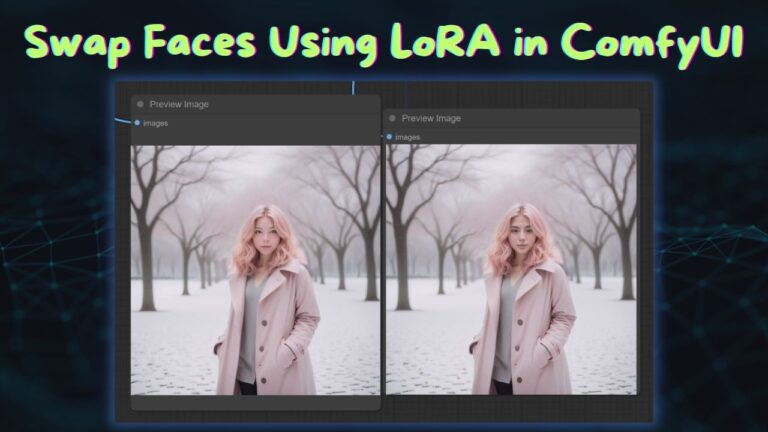
Step 3 — Face Consistency Pass (Face Swap/Repaint + Rerolls)
After Step 2, the pose is usually excellent—but identity can drift.
In other words:
- body pose
- composition
- but the face looks like a “different person”
That’s why Step 3 exists.
This step uses a face repaint / face swap node group (the same one from the previous workflow) to make the final image’s face more consistent with the original portrait.
When the Face Isn’t Quite Right: Manual Random Seed
Sometimes the swapped/repainted face is close—but not perfect.
When that happens, don’t overthink it. Just reroll it:
- Enable Manual Random Seed
- Try another seed
- Repeat until you get a better match
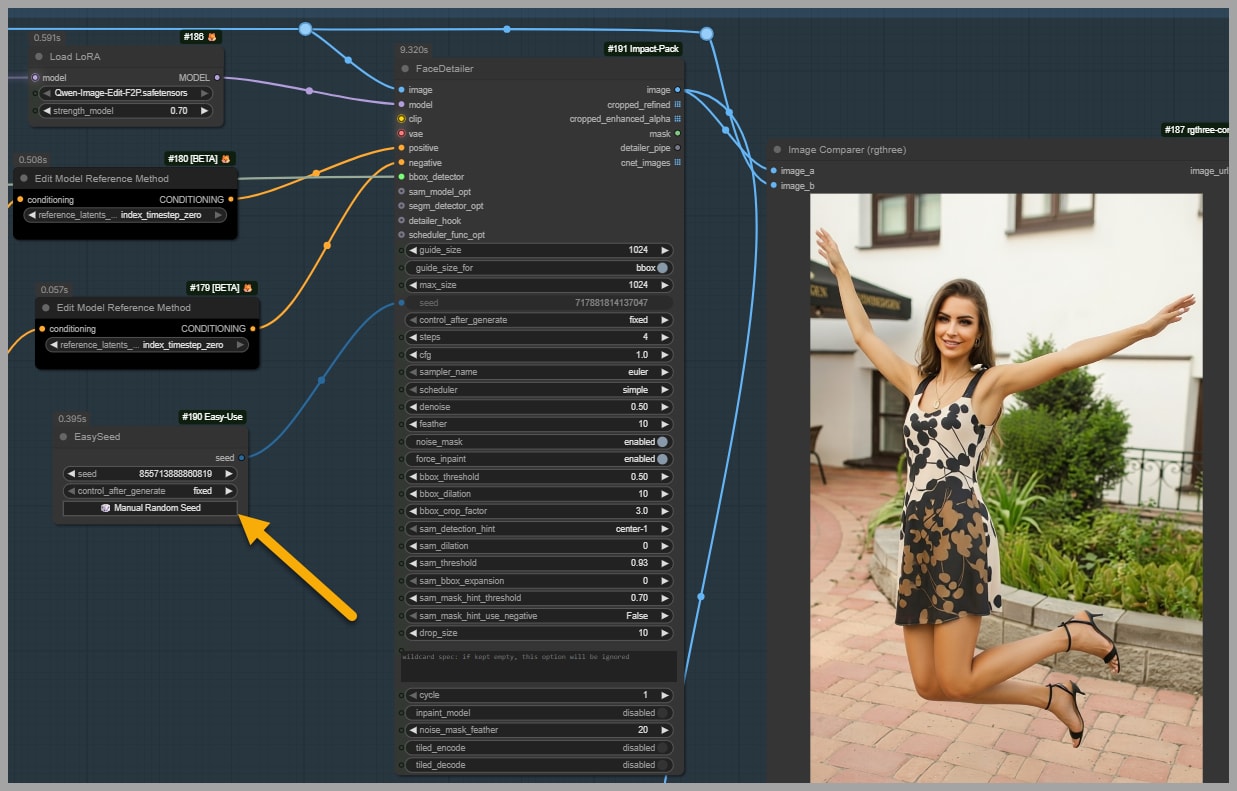
This is one of those practical quality-control steps that saves time compared to endlessly micro-adjusting settings.
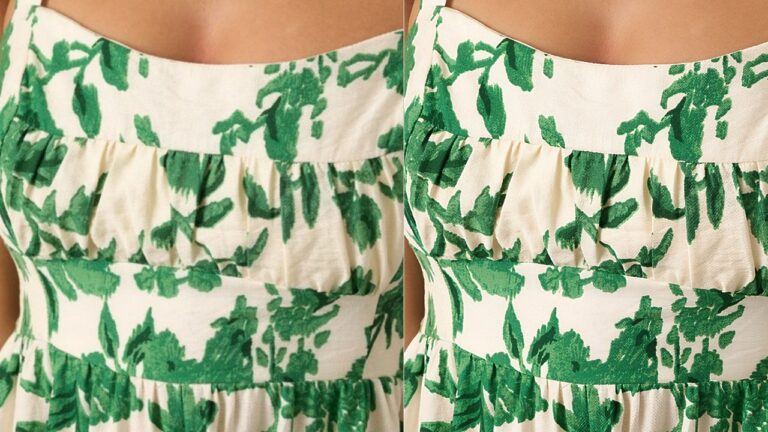
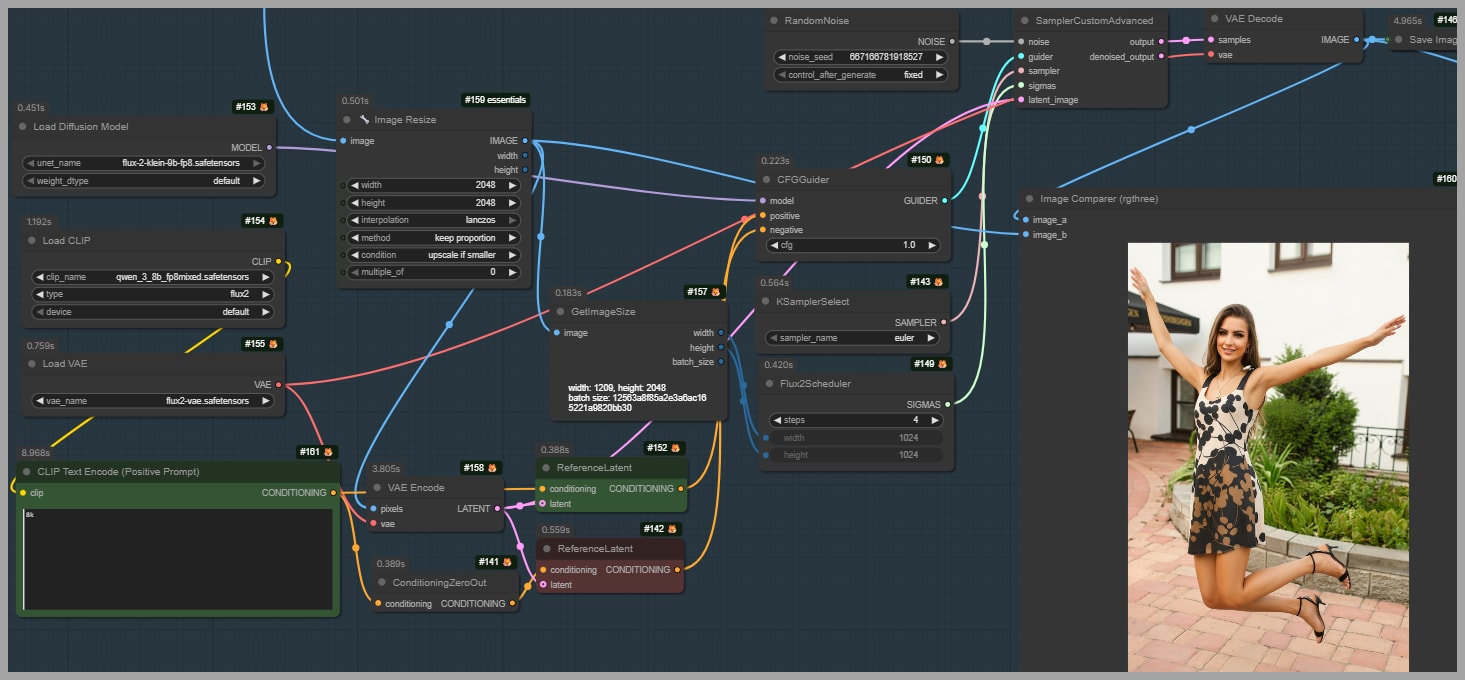
Step 4 — Upscale and Sharpen with Flux 2 Klein (~4K Output)
The Qwen Edit model isn’t great at producing crisp high-resolution images on its own. You can get excellent pose transfer—but the output often lacks sharpness and fine detail.
So we finish with Flux 2 Klein.
This final node group:
- increases resolution
- improves clarity and sharpness
- outputs around 4K resolution
If you want to go beyond that (or extract even more micro-detail), you can use an even more “detail-focused” Flux 2 Klein upscaling workflow—some setups push higher than 4K depending on VRAM and pipeline design.
Wrap-Up
That’s the complete workflow:
- Pose anything you can imagine using a 3D character
- Transfer that pose onto a portrait with Qwen Edit
- Fix the face so identity matches the original subject
- Upscale to sharp, clean ~4K results with Flux 2 Klein
If you want to support the work and grab the workflow, you can usually find it through the community links associated with the tutorial series. And if you’re continuing down this path, the next skill to master is refining prompts and consistency passes so your outputs look less generated and more like authentic edits.
Gain exclusive access to advanced ComfyUI workflows and resources by joining our community now!