Advanced Qwen Image Edit Clothes Swap ComfyUI Workflow: 2K High-Quality Results!
In this article, we’ll dive into an advanced image editing workflow using ComfyUI to swap clothes seamlessly while maintaining high detail and image quality. Many image editing models often struggle with maintaining the integrity of the original image, leading to issues like blurry faces or shifted positions. This workflow ensures a smooth process, giving you great results with minimal adjustments.
Challenges with Traditional Image Editing Models
Traditional image editing models, such as the Qwen Image Edit model, are widely used for tasks like swapping clothes in images. However, they often present two main issues:
- Positional Shifts: After applying changes, the subject in the image (such as a person) might slightly shift position, which affects the final result. For example, in the case of clothing swaps, the person’s position may not align perfectly with the original background, making the final image appear unnatural.
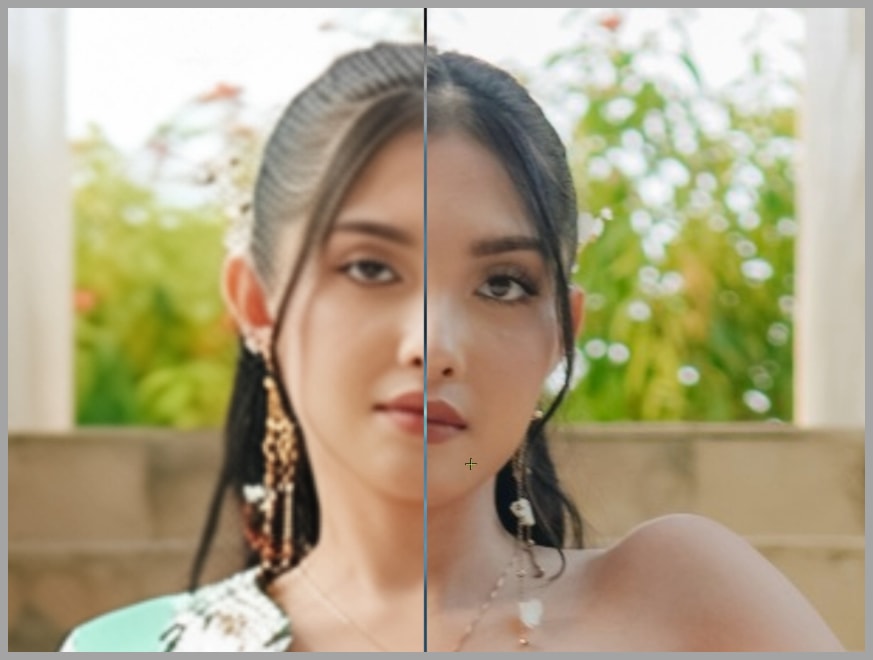
- Loss of Image Quality: Another common problem is image degradation, particularly in finer details like facial features. The Qwen model, while effective, can cause the subject’s face to appear blurry or lose clarity when edited.
In this article, we’ll show you how to address these issues using a customized workflow that ensures the subject remains in the same position and that image quality is preserved.
Youtube Tutorial:
Gain exclusive access to advanced ComfyUI workflows and resources by joining our community now!
The Special Workflow Solution
To solve these problems, we employ a specialized workflow that ensures:
- The subject’s position stays perfectly consistent after editing.
- The fine details, especially the face, remain sharp and clear.
- The final result looks natural, with no visible shifts or blurring.
In the following steps, we’ll break down exactly how this workflow works and how it uses ComfyUI for seamless and high-quality image manipulation.
Step 1: Preparing Input Images
The workflow we’re using is built on ComfyUI, a flexible user interface for creating and managing image processing workflows.
Now, let’s break down the workflow step by step.
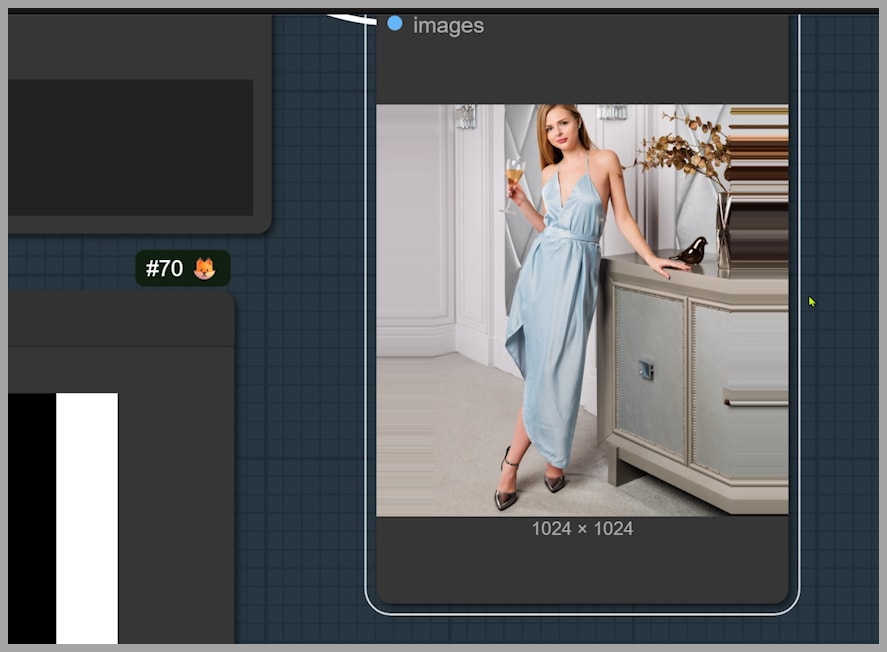
The first step in the process is to prepare your input images. In this case, we have two key images:
- The dress that you want to swap in.
- The woman who will wear the dress.
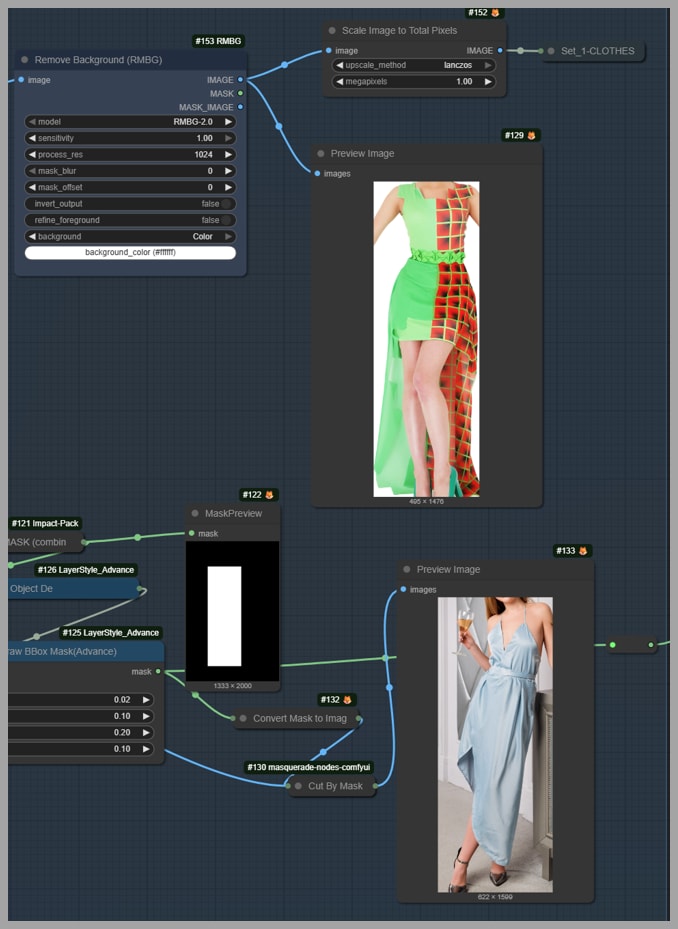
We use a model called DeepFashion to automatically detect clothing areas in both images. This model is lightweight (only 24MB) yet highly effective at detecting the key clothing parts.
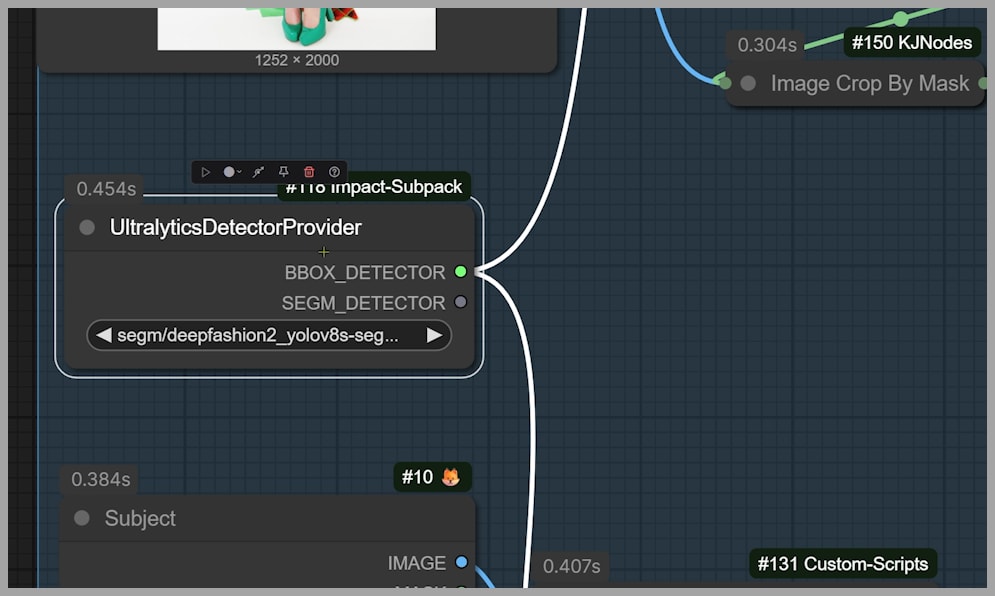
Once detected, the areas are shown in the ComfyUI interface so you can confirm that the correct areas of clothing are identified.
Step 2: Removing Backgrounds and Defining Mask Areas
To avoid confusion and prevent unwanted elements (like the woman’s face or background) from interfering with the editing process, we need to remove the background. The DeepFashion model not only detects clothing areas but also removes backgrounds, focusing solely on the key subject—the dress.
This ensures that the model won’t confuse the background or the face with the clothing, resulting in a cleaner, more accurate swap.
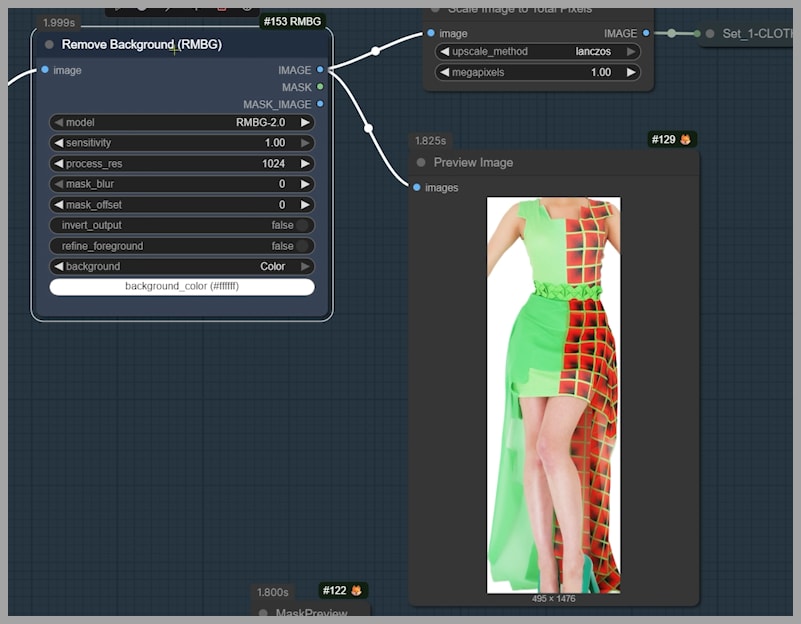
Step 3: Fine-Tuning the Mask with ‘Draw Bbox Mask’ Node
Sometimes, the automatically detected clothing area may not be perfect. For instance, the detected area for the dress might miss details like the feet or might not fully align with the dress edges.
To address this, we use the ‘Draw Bbox Mask’ node. This node allows us to fine-tune the detected area by adjusting the mask.
For example, if the detected dress area doesn’t fully cover the feet, we can modify the mask to add extra space below the dress edge. By adjusting the ‘grow_bottom’ parameter to 0.1, we add a little more space to ensure the feet are included in the mask, allowing for a more accurate and complete edit.
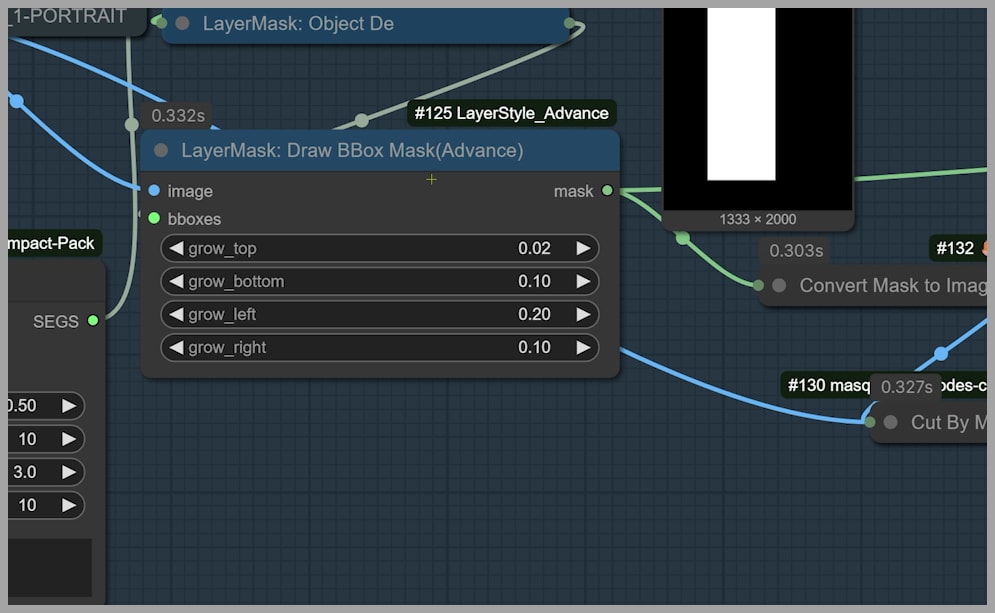
Step 4: Inpainting Process
Now that we have a perfectly adjusted mask, we proceed with inpainting. This technique allows us to replace only specific areas of the image, ensuring that areas outside the mask, like the face or background, remain unchanged.
The inpainting process ensures that the face remains clear and undisturbed, and only the area inside the mask (where the dress will be placed) is altered. This step is crucial for maintaining the integrity of the original image.
Step 5: Cropping and Preparing the Image for Resampling
Once the inpainting is applied, we crop the image down to a 1024×1024 resolution. This ensures that we are only working on the area where changes will occur, while the rest of the image remains untouched.
In this step, there might still be some extra space on the sides of the image. Don’t worry—this will be cropped out later, and it won’t affect the final result.
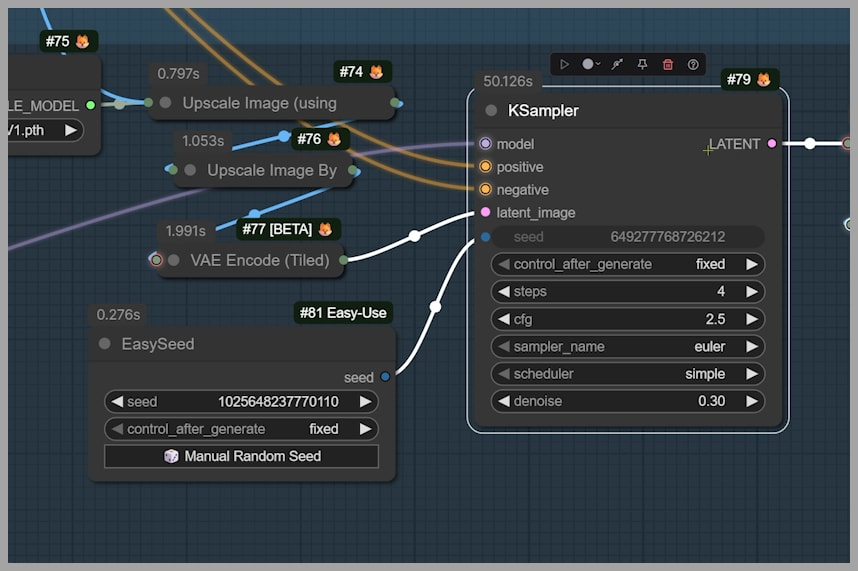
Step 6: Upscaling and Enhancing Image Resolution
At this stage, the details on the dress might not be perfect yet. This is due to the resolution limit of the Qwen Edit model, which typically works at a lower resolution (around 1 megapixel).
To enhance the quality, we upscale the 1024×1024 image to improve the resolution. We then use a KSampler to resample the image, effectively sharpening the details and ensuring the new dress looks crisp and clear.
Step 7: Finalizing the Image with ‘Inpaint Stitch’
The final step is to place the newly enhanced image back into the original, full-sized image. This is done using the ‘Inpaint Stitch’ node. This node ensures that the high-detail section of the image is seamlessly stitched into the rest of the image, leaving you with a clean and cohesive result.
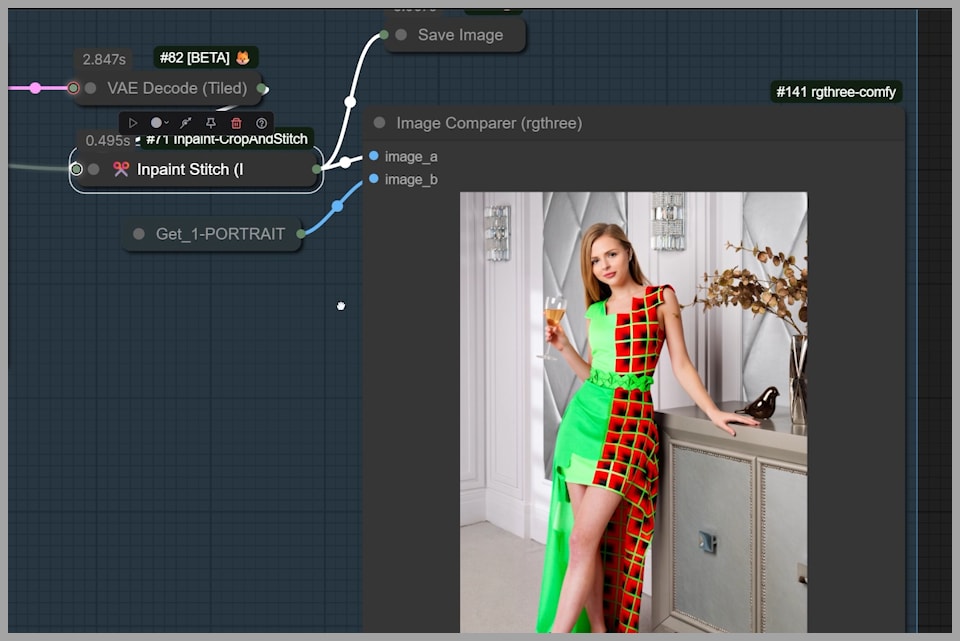
At this point, you’ll have the final output with the woman wearing the new dress, maintaining perfect alignment and preserving all the facial and clothing details.
Conclusion
By following this workflow, you can achieve seamless image edits like clothing swaps with ComfyUI, ensuring high-quality results every time. The key to success is using the right combination of nodes and models to keep the subject in place, enhance image resolution, and maintain sharpness in all the crucial areas.
If you’d like to try this workflow yourself, feel free to join our community to download it.
Gain exclusive access to advanced ComfyUI workflows and resources by joining our community now!