Beyond PDFs: Explore How to Upload Any File/Document to ChatGPT
In the ever-evolving digital world, the ability to process, interact with, and manage various file formats is becoming increasingly important.
Whether you’re a ChatGPT free user or a ChatGPT Plus member, the 4 methods provided by this article can revolutionize the way you handle documents.
In this comprehensive guide, we will explore how you can upload any type of document to ChatGPT—whether it’s a simple PDF, an Excel sheet, an image, or even an audio file.
So buckle up, and prepare to dive deep into the world of ChatGPT, where you’ll discover how to leverage its power and make document processing a breeze!
Using Google Chrome Extension
The ChatGPT File Uploader Extended is a Google Chrome extension that lets both free and Plus users of ChatGPT upload files easily.
Install it on Chrome and you can upload PDFs, Word files, Excel sheets, and even images with a single click.
This extension cleverly extracts content from your documents and images, readying them for ChatGPT. It supports a wide range of file formats, including .txt, .js, .py, .html, .cs, .java, .go, .php, .xml, .yml, .yaml, .toml, .ini, .cfg, .conf, .sh, .bat, .css, .json, .csv, .md, .ts, .tsx, .jsx, .pdf, .doc, .docx, .xls, .xlsx, .zip, .png, .jpg, .jpeg, .bmp, and .webp.
Uploading multiple documents or pictures? No problem. Simply put them into a compressed file. The plugin will unpack and upload each file in turn. This bypasses any issues with the token limit as it splits long texts into manageable parts for ChatGPT. After each upload, the plugin also summarizes the text for you automatically..
To get started, follow these two steps.
Go to this URL: https://chrome.google.com/webstore/detail/chatgpt-file-uploader-ext/becfinhbfclcgokjlobojlnldbfillpf?hl=en-US.
Click “Add to Chrome”, and the plugin will be added to your extension list.
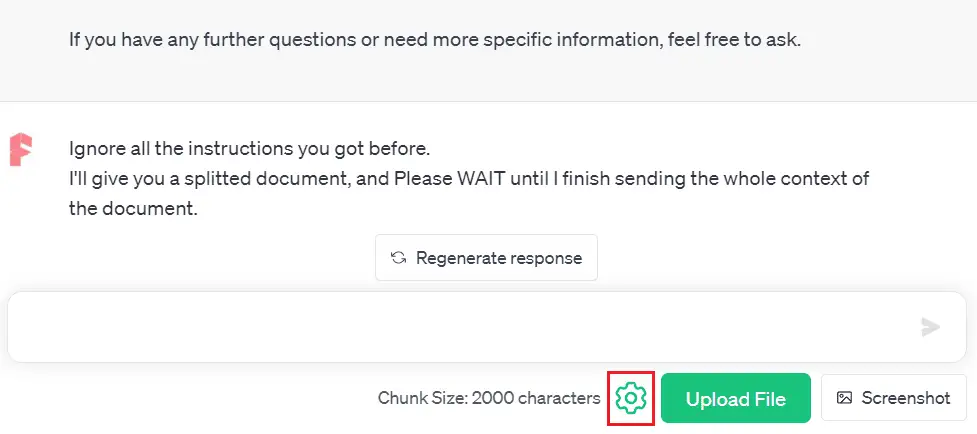
Refresh ChatGPT and you’ll see an “Upload File” button. I’m using ChatGPT Plus account for this demo, but it works just as well for free users.
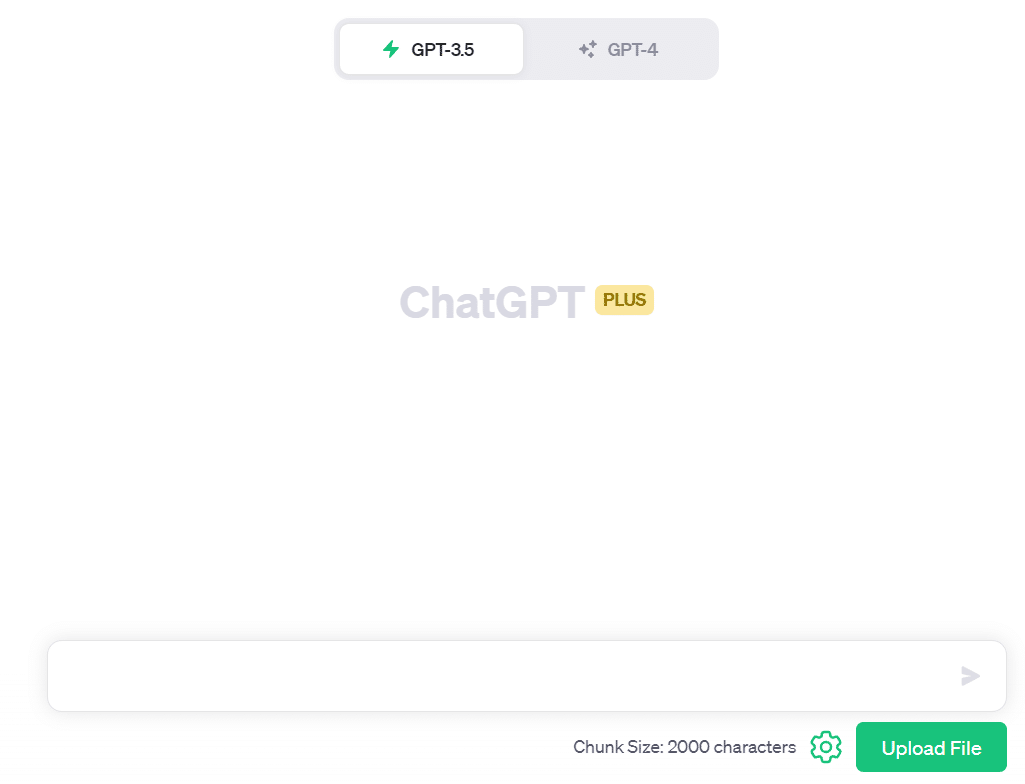
Click the button to open your local file browser and choose the file you want to upload. The plug-in then takes the text from your file, breaks it down into manageable chunks, and submits these to ChatGPT one by one.
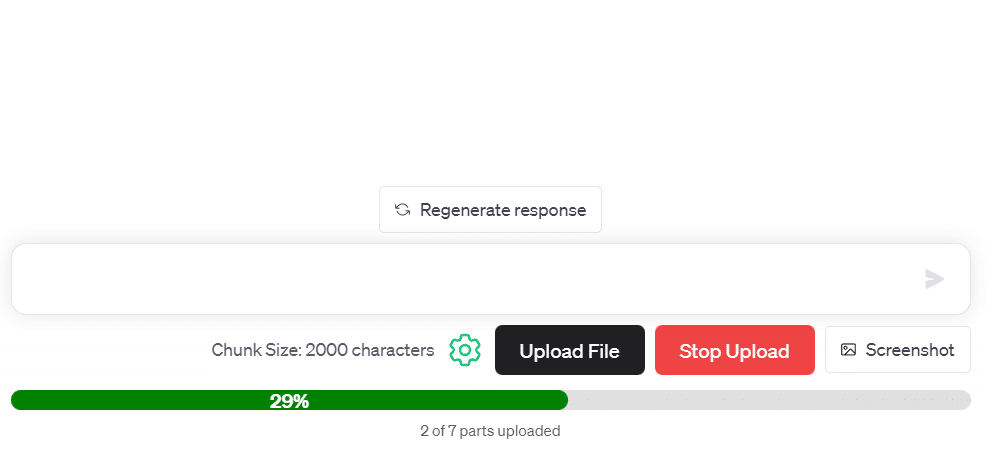
The image below shows the default text block size of 2000 characters. My file was split into 7 parts by this plug-in and uploaded in sequence. You can track the upload progress with a bar or click “Stop Upload” to cancel at any time.
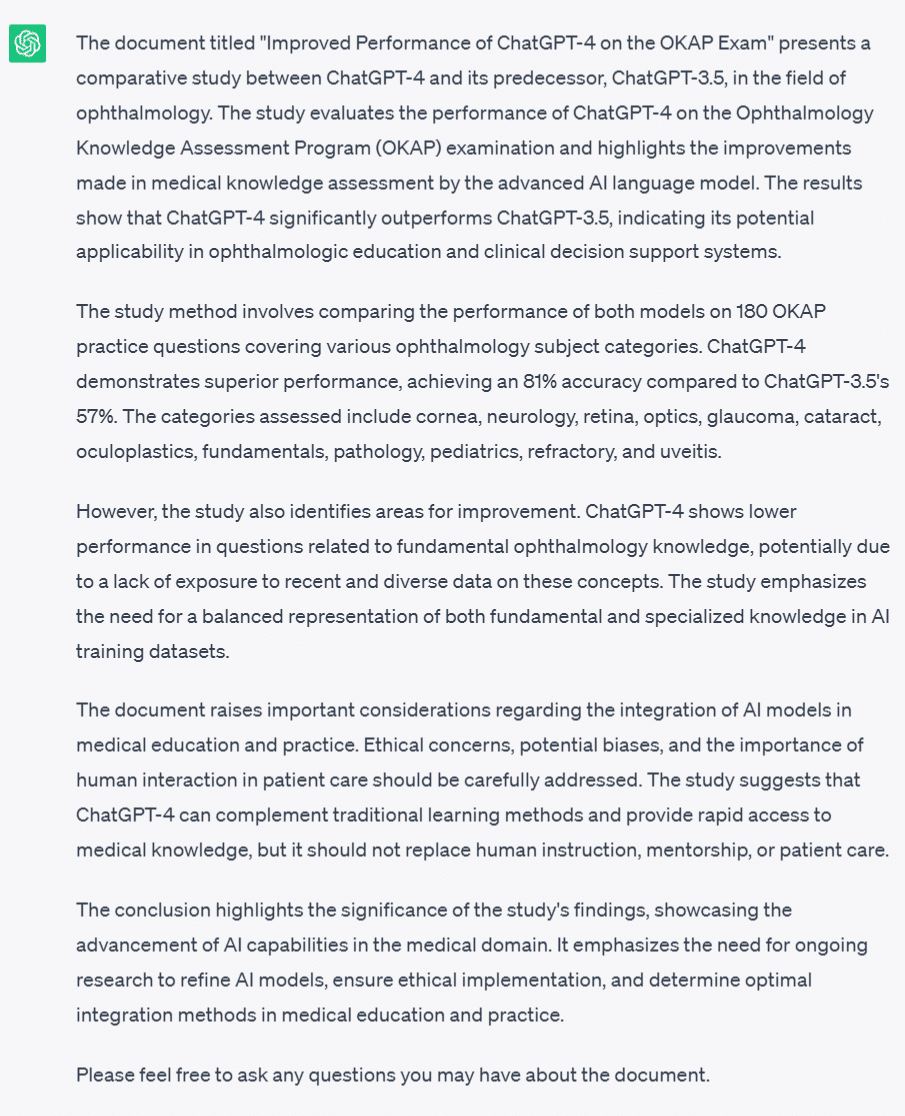
I uploaded a PDF called “Improved Performance of ChatGPT-4 on the OKAP Exam”. Once all the text was submitted to ChatGPT, the plug-in provided a summary of the PDF content and signaled that ChatGPT was ready for questions.
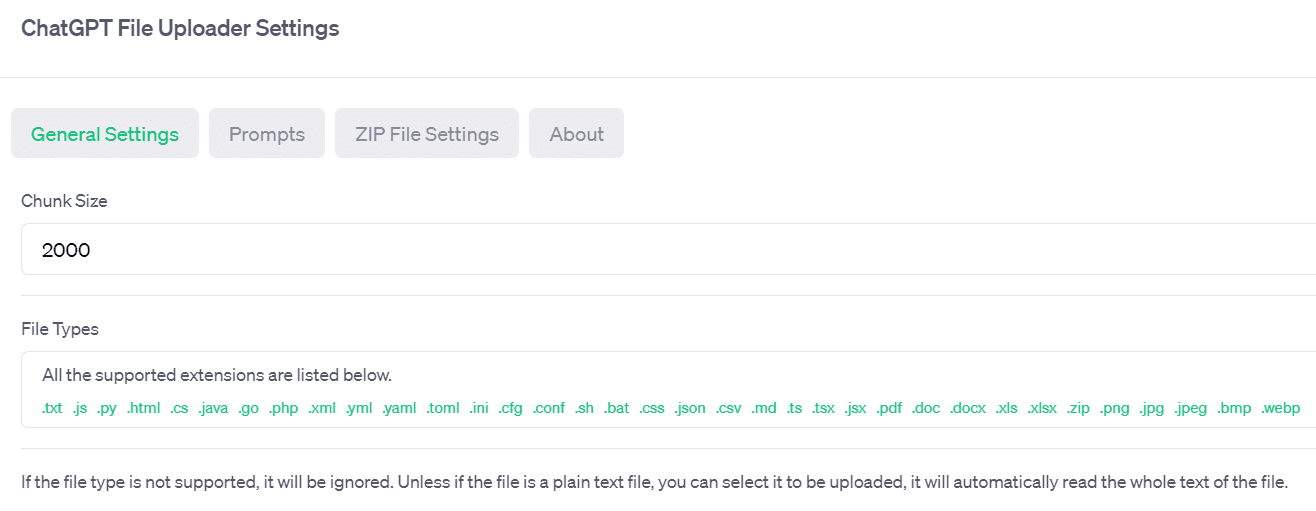
You’re able to adjust the text block size to suit your needs. Click the gear icon next to the “Upload File” button to open the ChatGPT File Uploader Extended settings page.
On the settings page, find the “Chunk Size” input box. Type in your preferred size and the system will adjust accordingly.
Now, let’s discuss AskYourPDF.
AskYourPDF
AskYourPDF is a document assistant based on GPT. It makes reading PDFs more efficient. With AskYourPDF, lengthy PDFs become less daunting. ChatGPT assists you by querying, summarizing, and pulling information from the PDFs.
Some of its features include:
- Summarizing the entire document or specific sections.
- Extracting key points, conclusions, statistics, and references.
- Searching documents for keywords, data, tables, or images.
- Asking questions about specific pages and content.
Interact with PDFs via AskYourPDF in two ways:
Option 1: Upload a local PDF
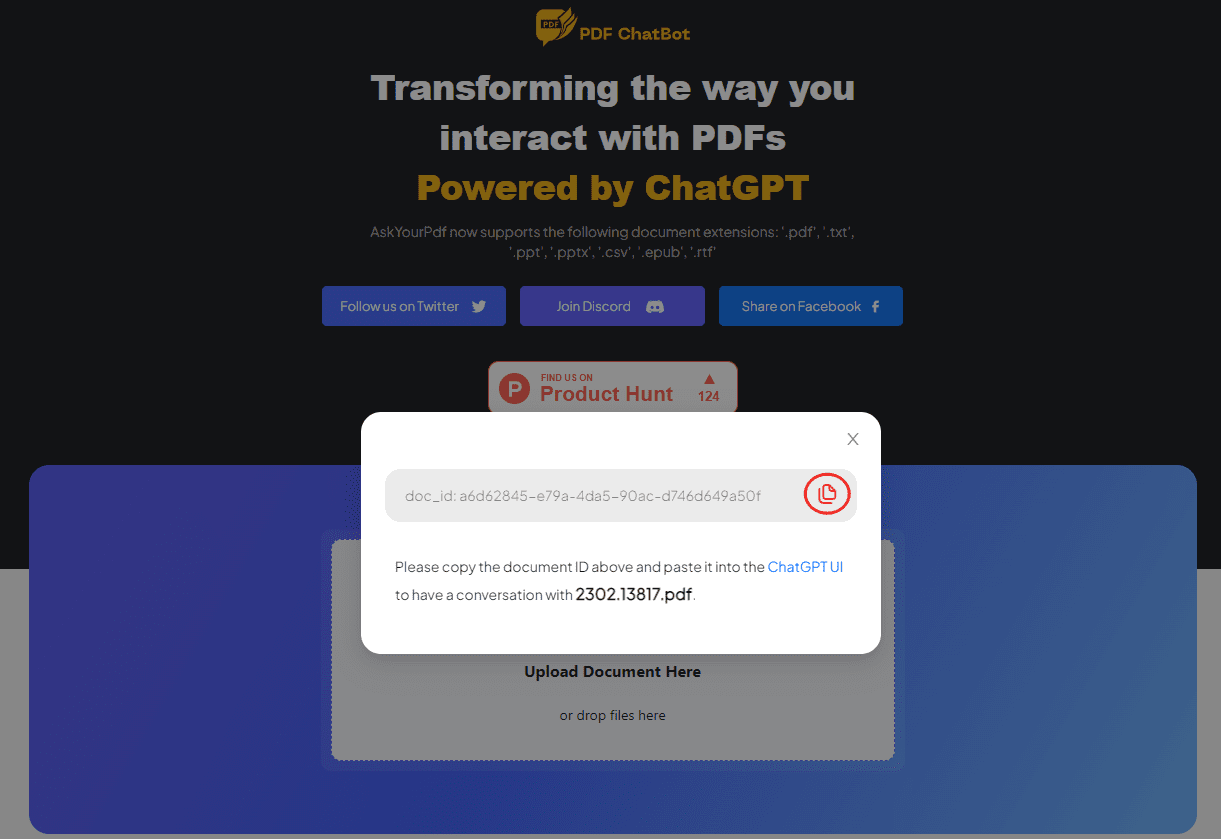
Free ChatGPT users can go to AskYourPDF’s official website (www.askyourpdf.com) and upload a local PDF document.
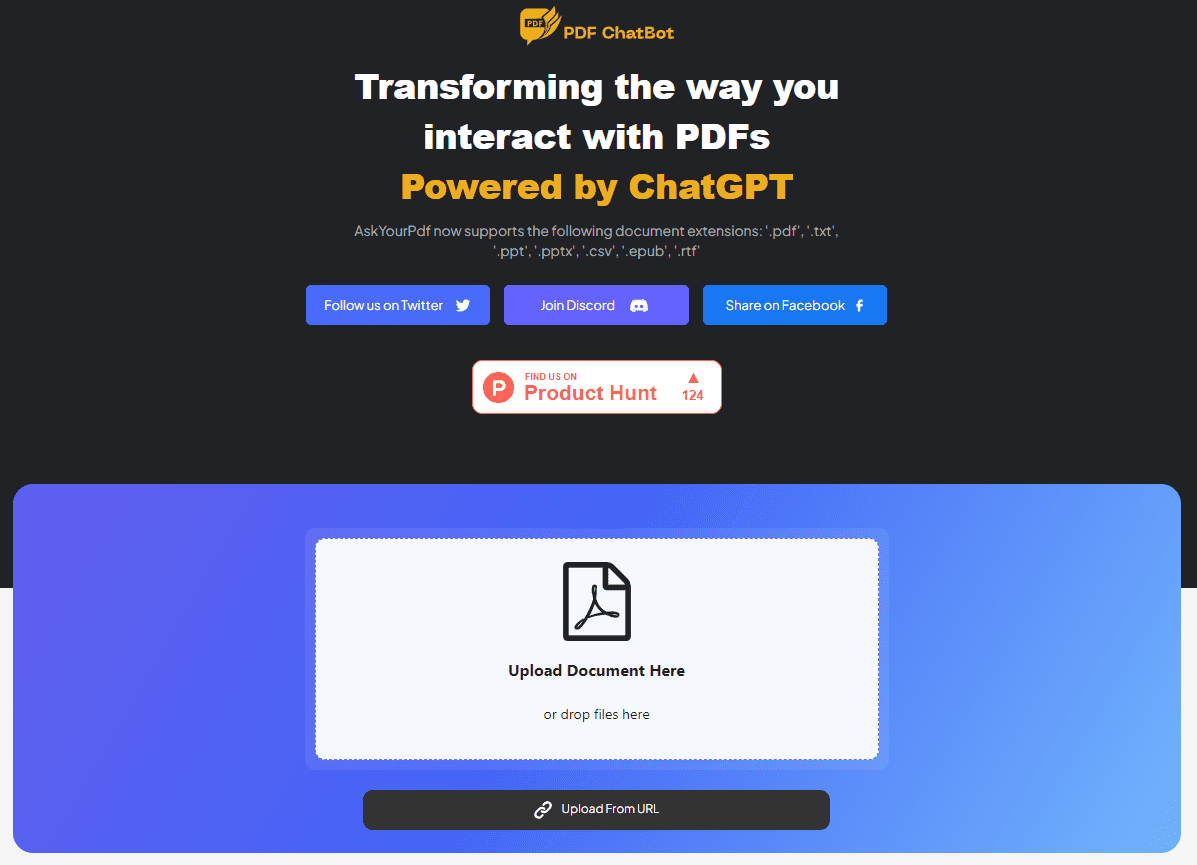
Click “Upload Document Here” or simply drag the file into the box. AskYourPDF then summarizes your document and generates questions for you.
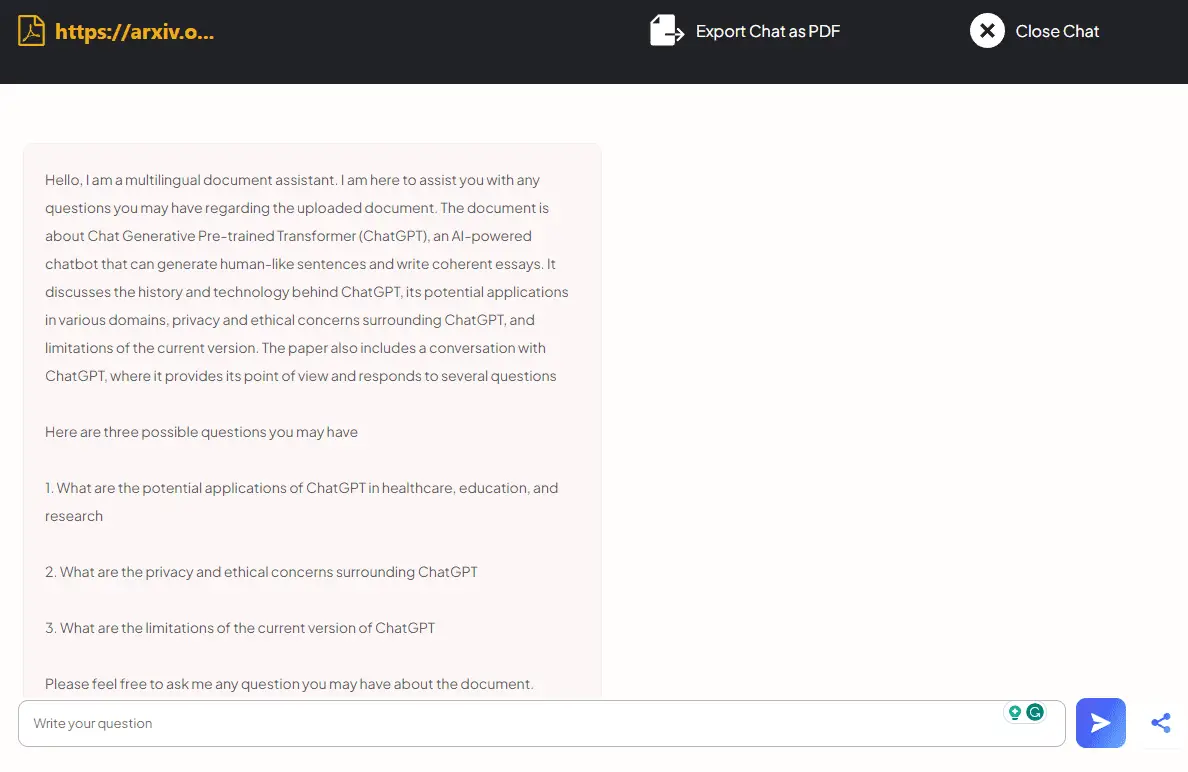
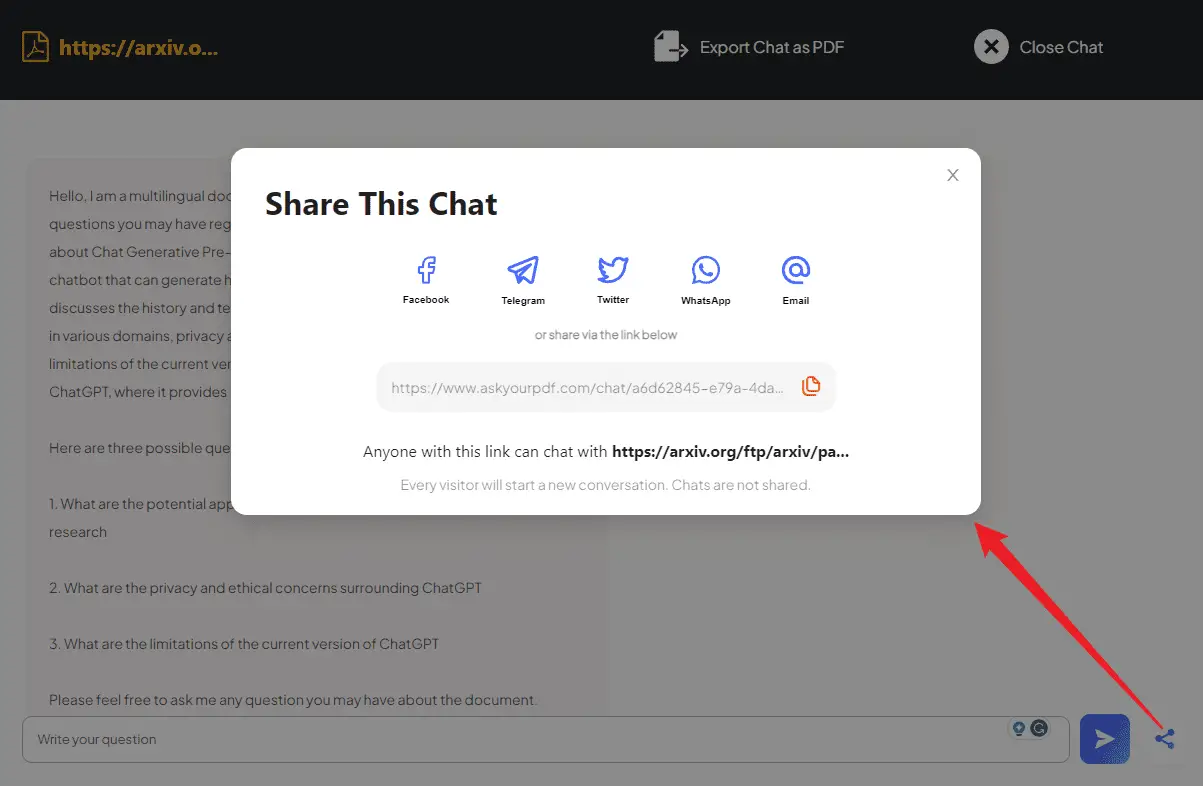
Once you’ve done that, you can ask any questions about the PDF directly on the AskYourPDF website. You also have the option to save your chat as a PDF or share your PDF by clicking the share button. Whoever gets the link can start a new chat.
AskYourPDF uses GPT-3.5 for interacting with PDFs on the site.
ChatGPT Plus users should consider installing the AskYourPDF plugin and using GPT-4 for PDF chats.
To use this plugin, make sure you’ve activated the ChatGPT plugin.
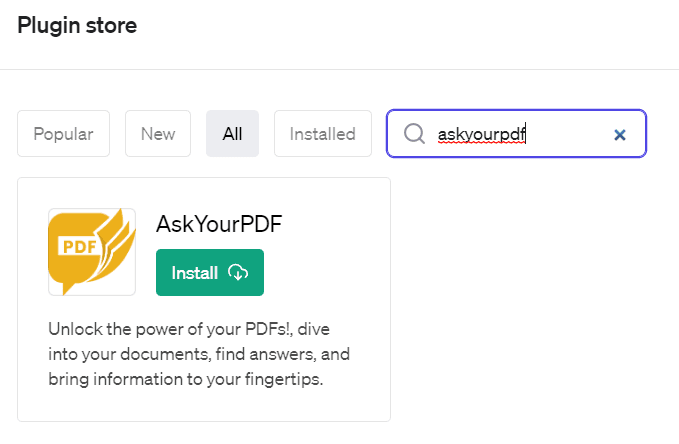
Then, head to the ChatGPT plugin store and find the AskYourPDF plugin to install it.
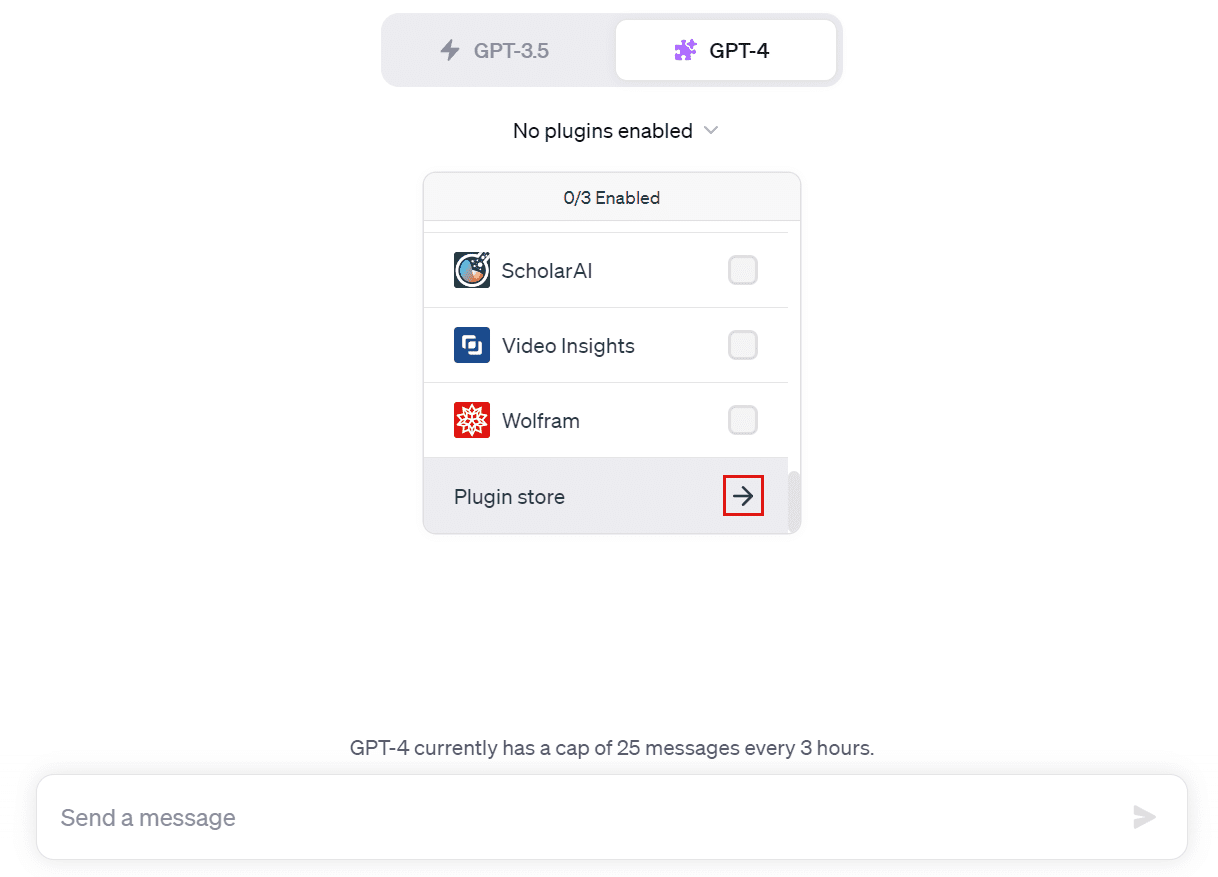
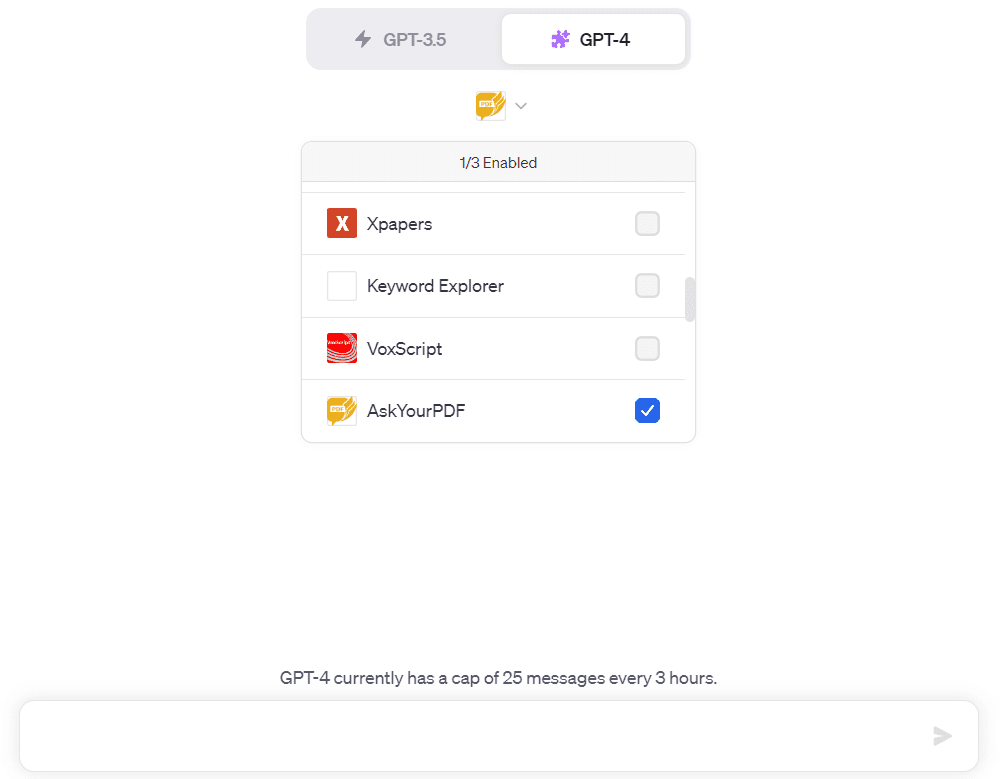
After it’s installed, make sure it has been selected from the options.
You’ll then enter the following prompt:
Upload PDF
Then, ChatGPT will give you a link to upload the document in the response.
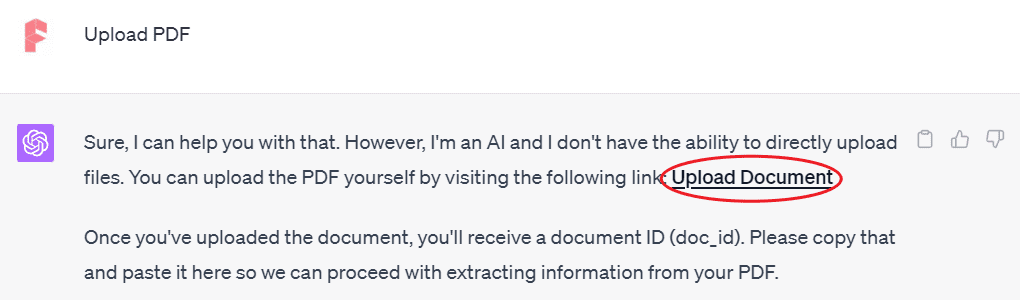
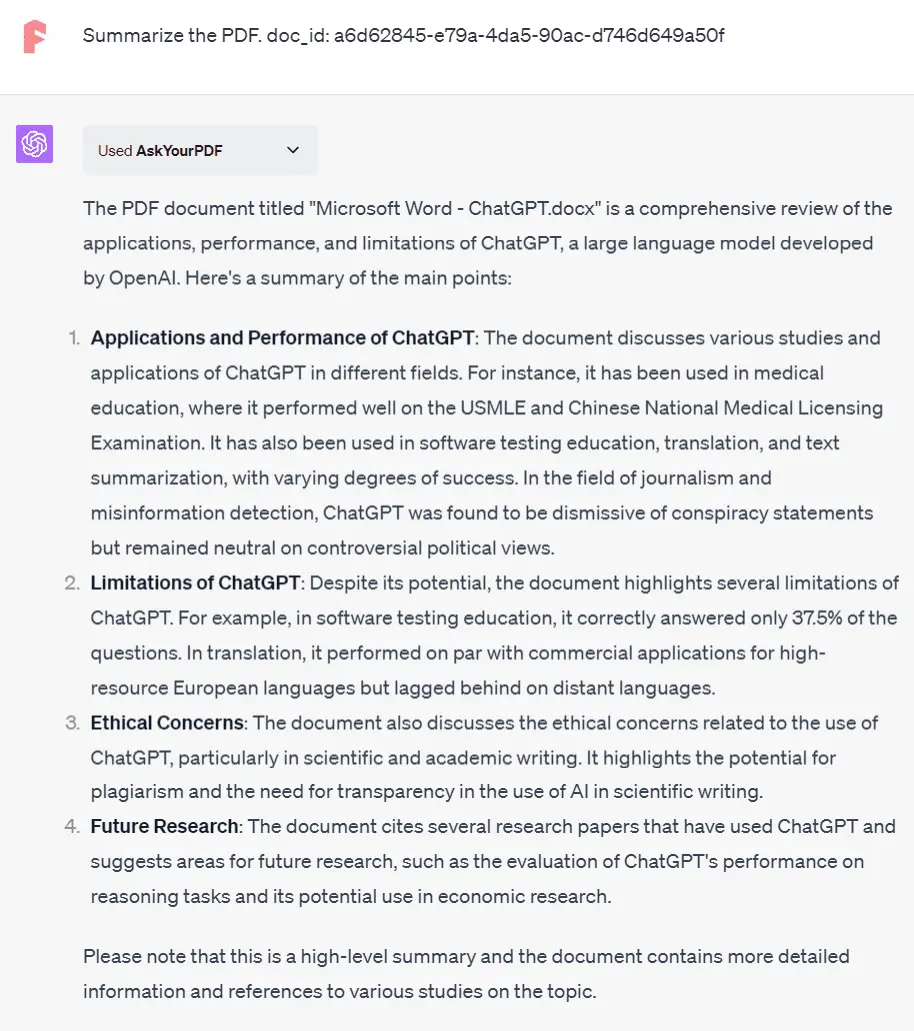
Click the link that ChatGPT provides to go to the AskYourPDF site and upload your document. AskYourPDF will give your document an ID that you’ll copy and use in ChatGPT.
Submitting this ID to ChatGPT allows it to access the PDF content.
Head back to the ChatGPT interface, input your prompt or question as usual, and paste the document ID you received earlier.
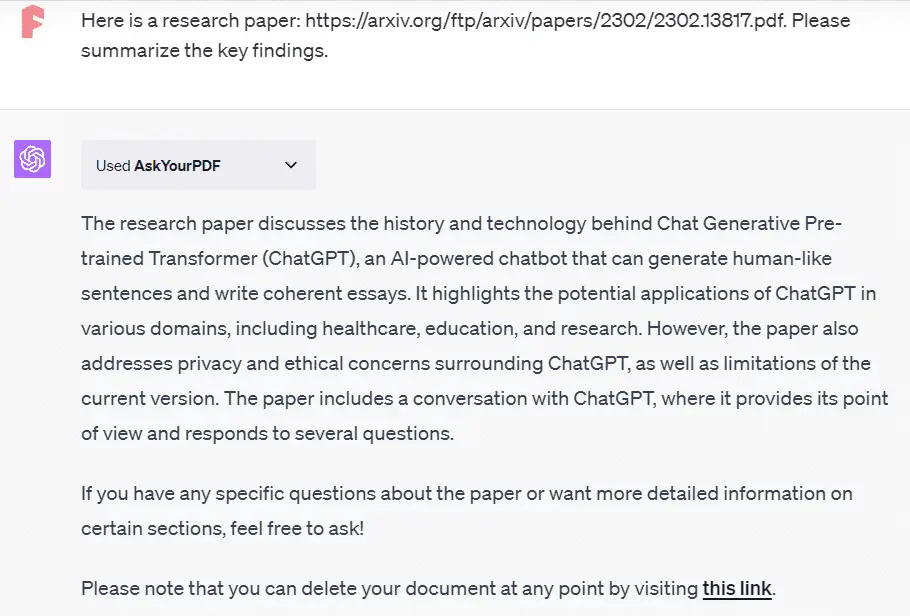
Option 2: Use URLs
ChatGPT Plus users who have activated the AskYourPDF plugin can interact with PDFs by submitting the URL of an online PDF. I have shown the activation steps earlier in the article.
After the activation, follow these steps:
- Type your prompt or question in the ChatGPT input box as usual.
- Paste the full URL into the dialog box after the prompt or question you entered.
- Press Enter or click “Send message”.
- ChatGPT will fetch the PDF and use the AskYourPDF plugin to respond.
There you have it! With AskYourPDF, you can make your PDF reading experience even better.
ChatGPT Code Interpreter
The code interpreter in ChatGPT is an incredible feature available to ChatGPT Plus users.
Developed by OpenAI, this tool simplifies batch processing and conversion across multiple documents. From extracting text and images from files, splitting or merging PDFs, to converting file formats, the Code Interpreter lets you do it all using a simple ChatGPT prompt.
Here are examples of document processing tasks using the Code Interpreter:
- Batch watermarking PDFs
- Merging and splitting PDFs
- Extracting tables and images from PDFs
- Password-protecting PDFs
- Summarizing PDF content
- Generating word clouds from PDFs
- Extracting information from PDFs
- Conducting OCR recognition
- Converting file formats in bulk
These tasks go beyond what the Chrome extension previously mentioned can do. For more details, refer to this article:
The code interpreter supports a wide range of file formats, including:
- Archive: 7Z, TAR, ZIP, RAR, GZ, BZ2, XZ, LZMA
- Audio: MP3, WAV, FLAC, AAC, OGG, M4A, AIFF, WMA, AMR
- Documentation: DOC, DOCX, PDF, RTF, HTML, TXT, ODT, EPUB, CSV, XLS, XLSX, PPT, PPTX, Markdown, LaTeX
- Form: XLSX, CSV
- Images: PNG, JPG, JPEG, BMP, TIFF, GIF, SVG, ICO, WEBP, RAW, HEIC, EPS, PSD
- Video: MP4, AVI, MOV, FLV, MKV, WMV, 3GP, WebM, MPEG, VOB
- Code files: PY, JS, JAVA, C, CPP, CS, R, Swift, PHP, Ruby, Go, Kotlin, Lua, Shell
- Data files: JSON, XML, YAML, SQL, HDF5, PICKLE, Parquet, Protobuf
- Subtitles: SRT, ASS, SSA, VTT
- Fonts: TTF, OTF, WOFF, EOT
- 3D files: STL, OBJ, FBX, COLLADA, 3DS, IGES, STEP
- Geospatial data: GeoJSON, SHP, KML, GPX, GeoTIFF
- Scientific data formats: FITS, VTK, NetCDF, DICOM
- CAD files: DWG, DXF
- eBooks: EPUB, MOBI, AZW3
- Email: EML, MSG
- Web: HTML, CSS, JS, WebAssembly
- Other: LOG
One popular use is uploading data files like CSV or Excel for data analysis and visualization. For more on this, you can check this article:
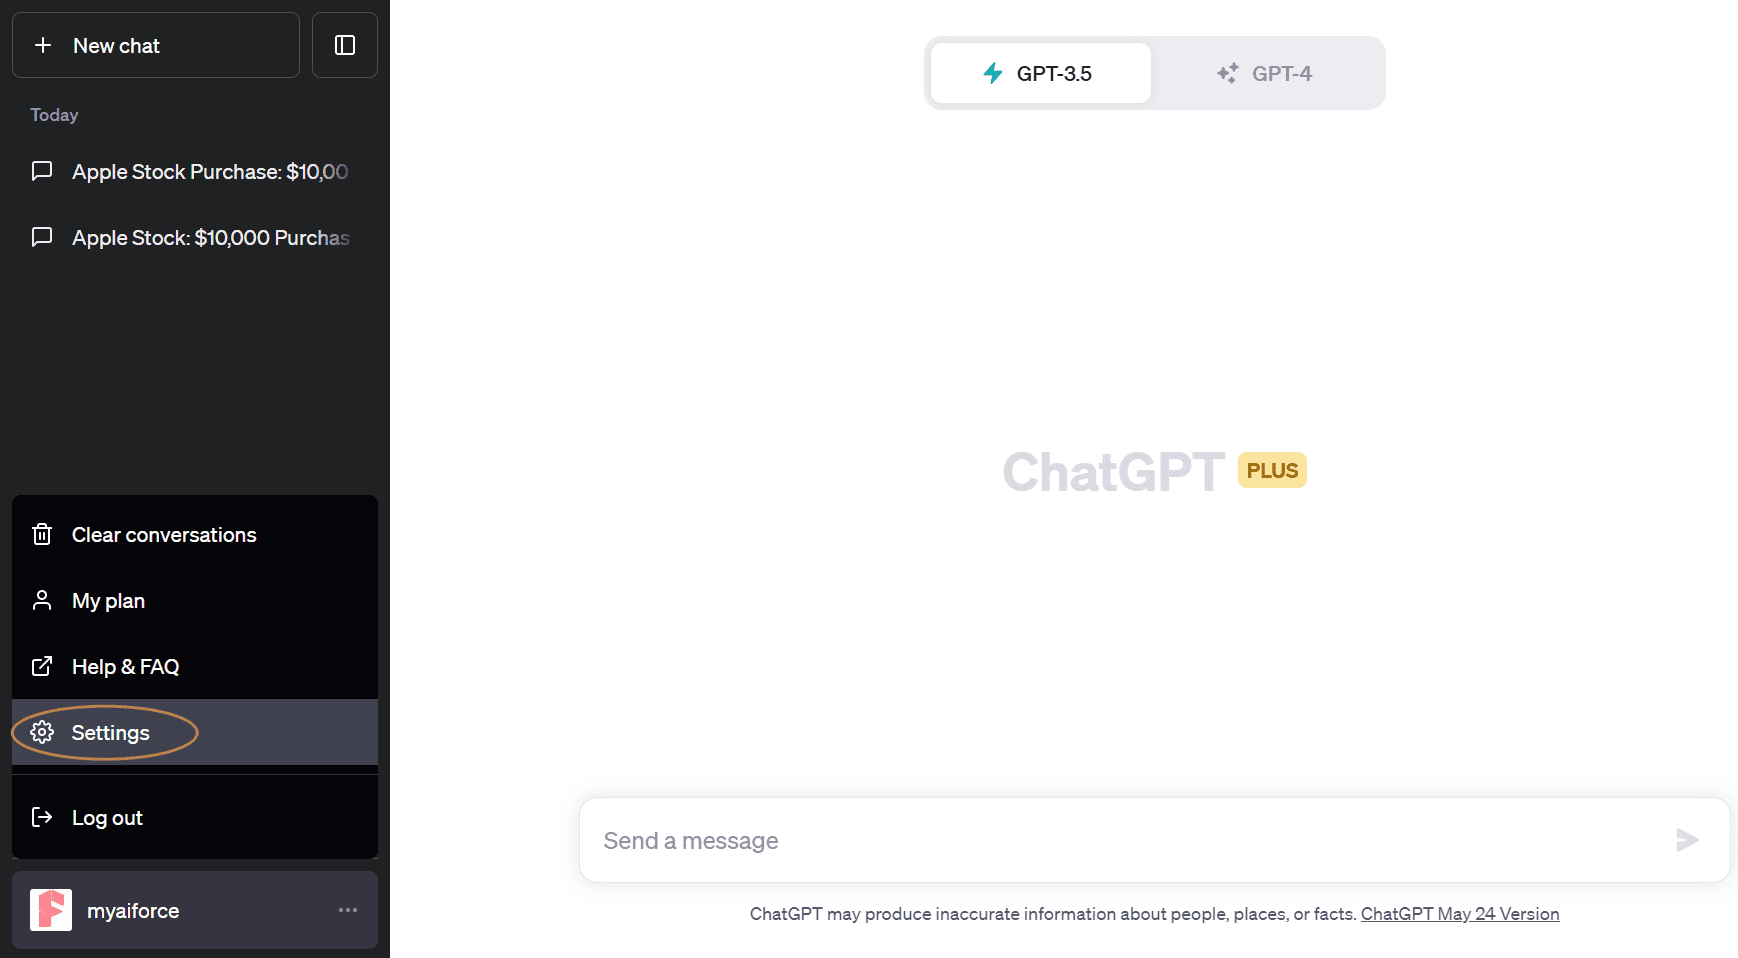
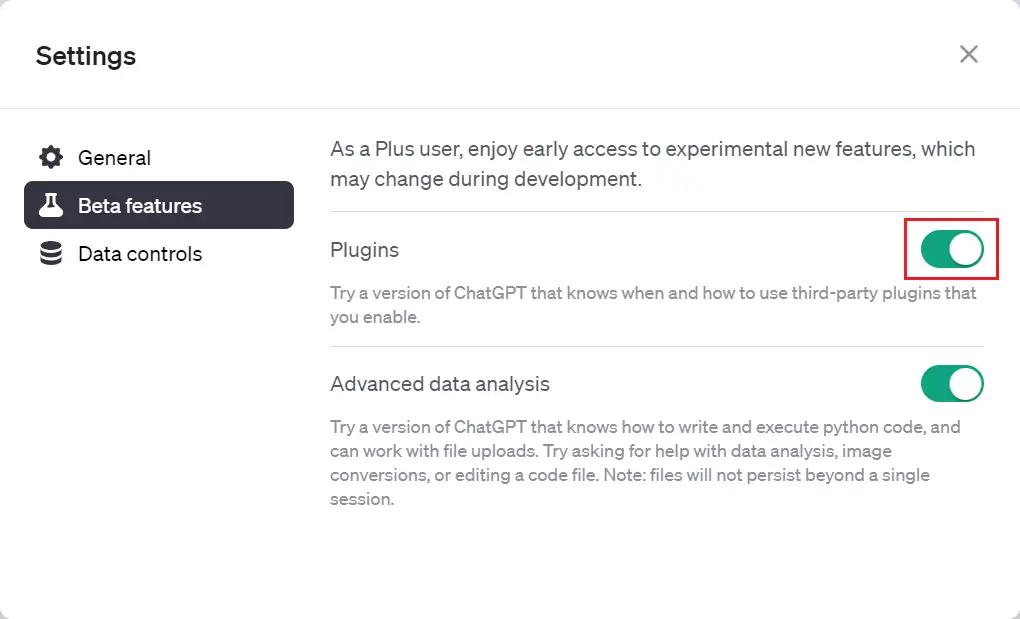
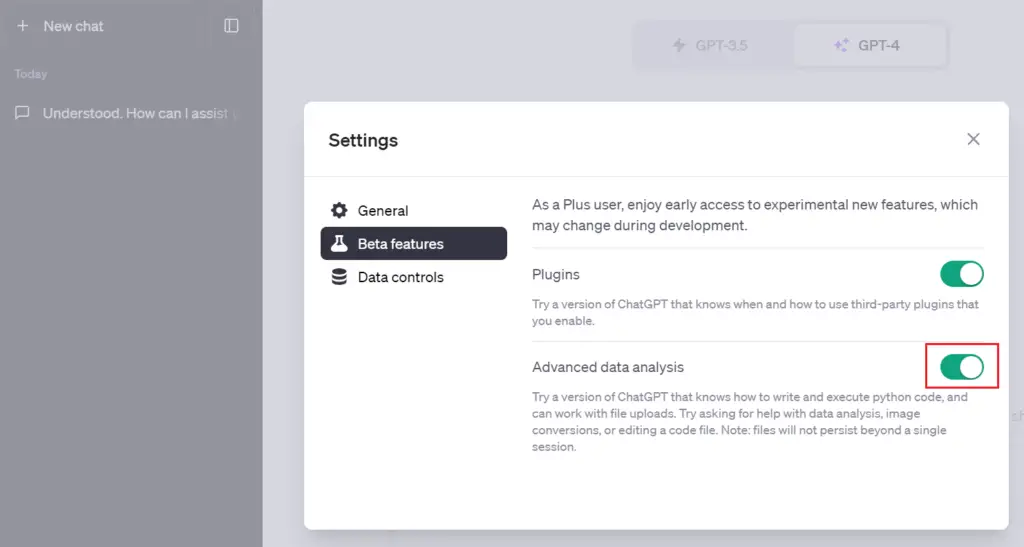
To use the Code Interpreter, log in to ChatGPT and activate it. Click the three-dot button next to your username in the bottom-left corner. This opens the ChatGPT settings.
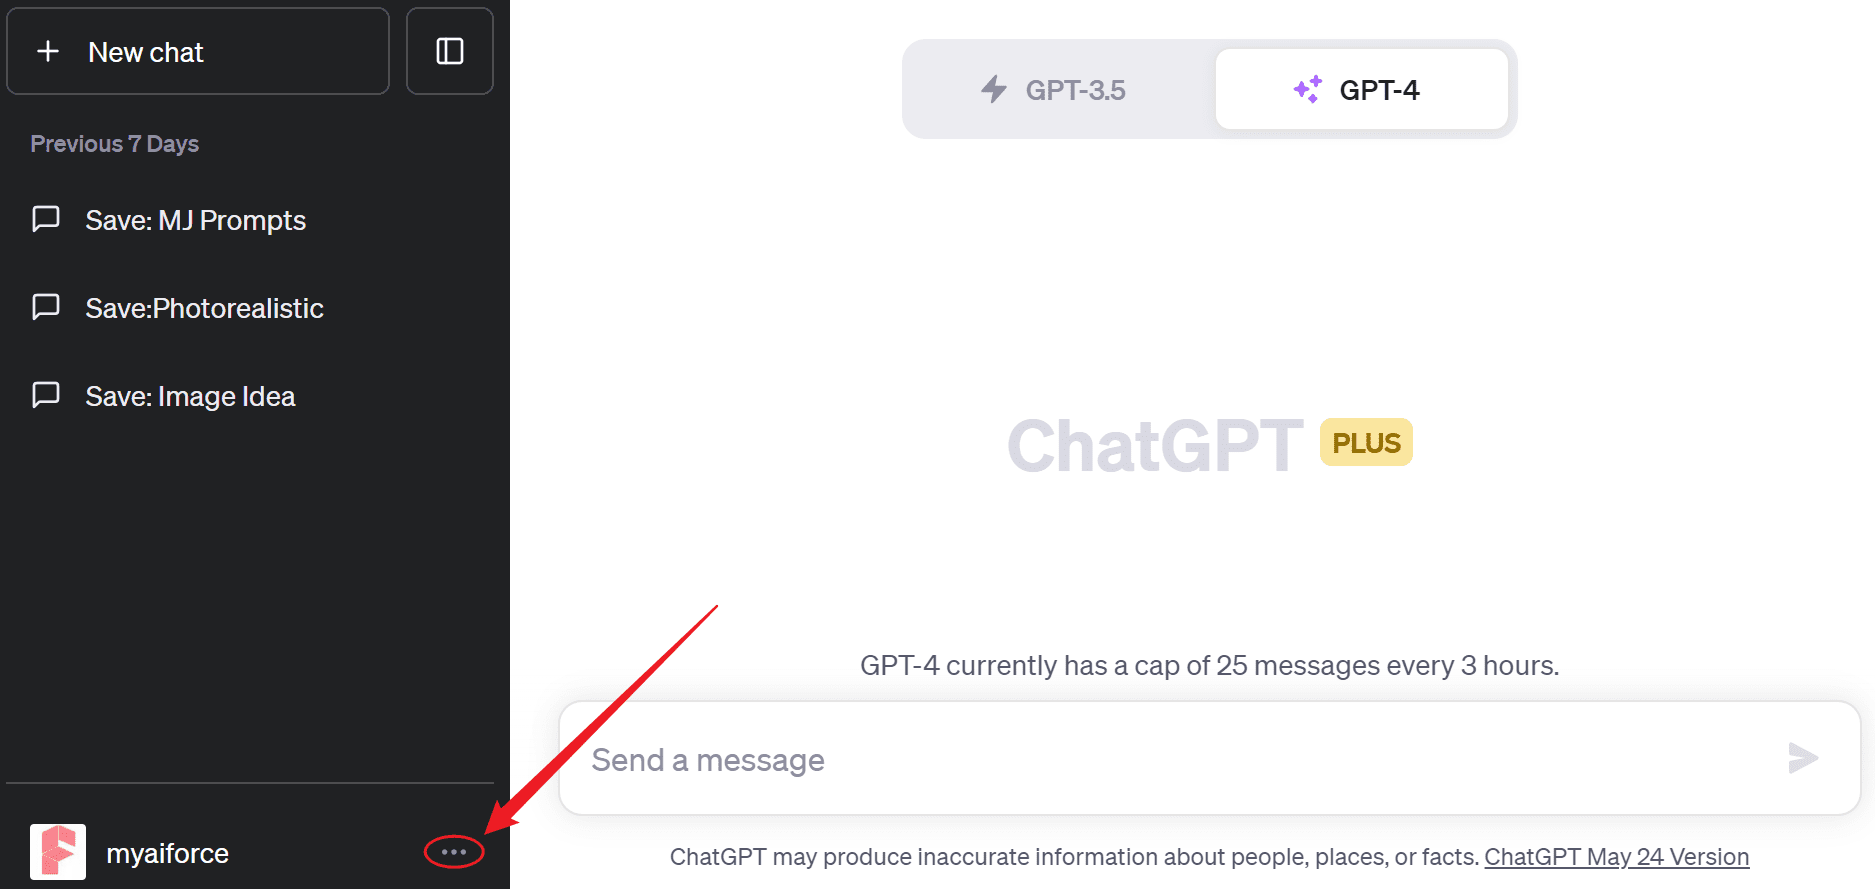
Select “Beta features” on the left, then toggle the Code Interpreter switch to “on” in the bottom-right.
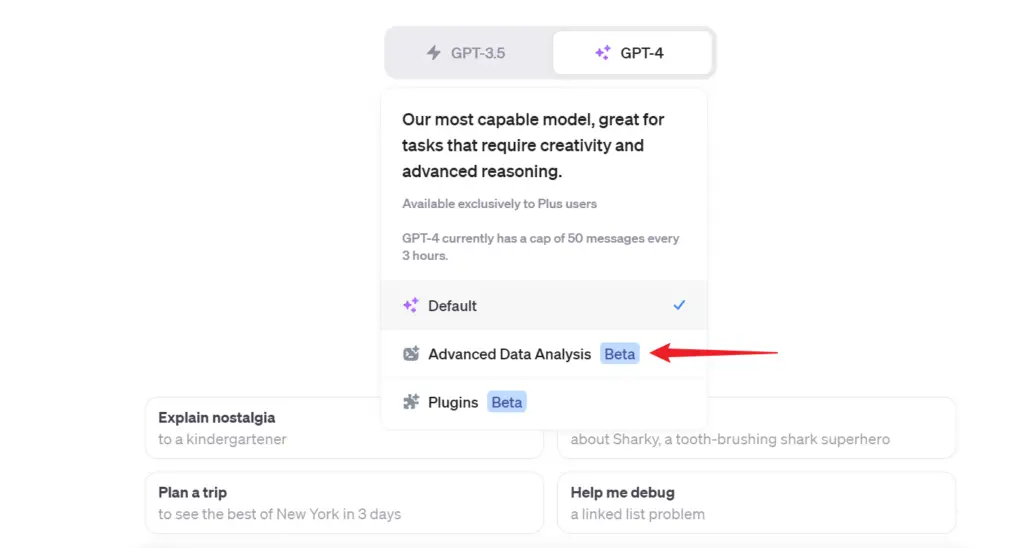
Close the window and hover over the “GPT-4” button above the main ChatGPT interface. From the dropdown menu, select “Code interpreter” to activate it.
Once activated, you can upload data files directly. A plus sign will appear on the left side of the chat input box.
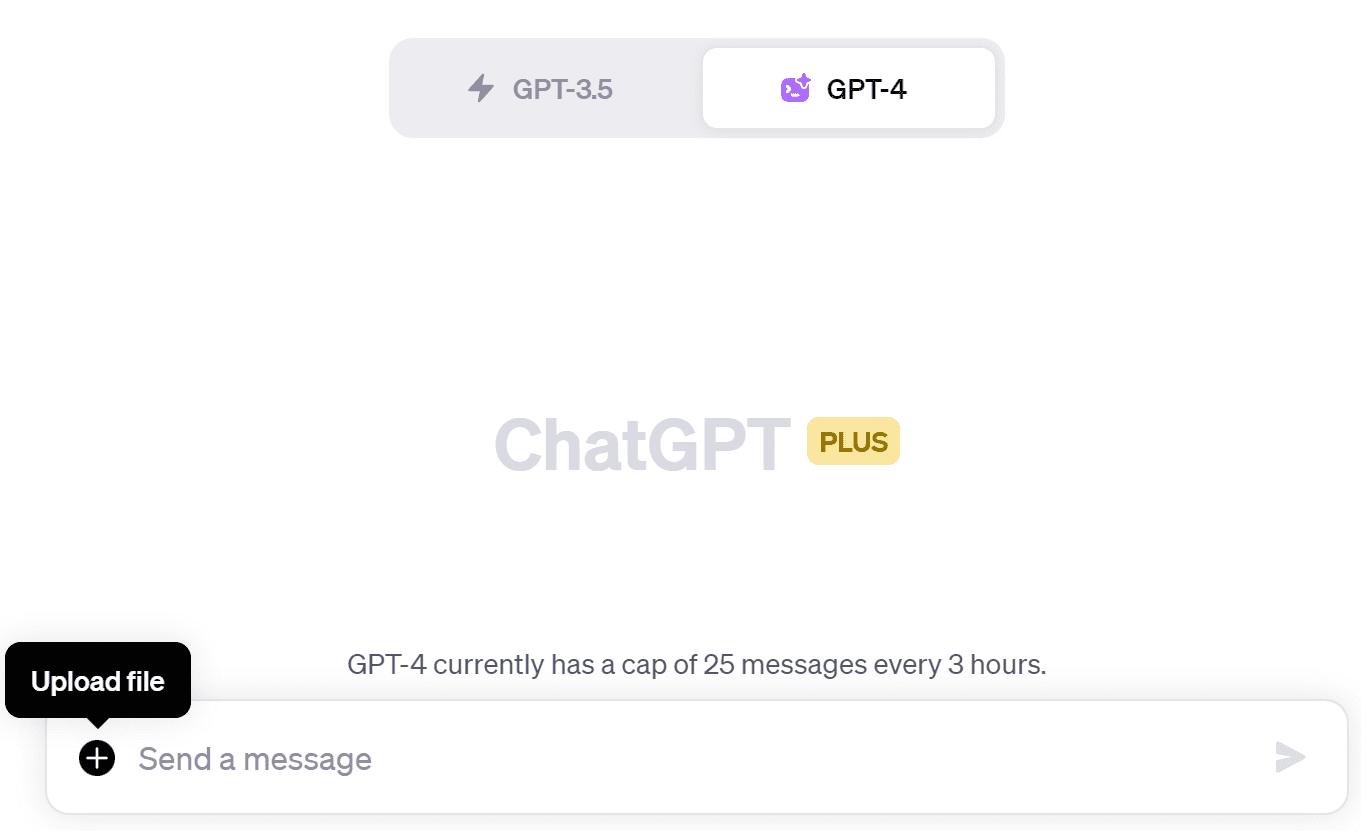
Click it to open your local file browser. If uploading multiple files, it’s recommended to compress them first to speed up the process.
Quivr
Unlike the tools mentioned earlier, Quivr serves as a second brain for users. It allows you to upload files like documents, pictures, websites, audio, video, and more.
Quivr is an open-source project on GitHub with a web service for beginners. It lets you upload files to the cloud. Developers can customize its functionalities, integrate it with other tools, and benefit from new features added by the open-source community.
Thanks to large language models like GPT, users can ask questions, obtain summaries, generate new content, and more.
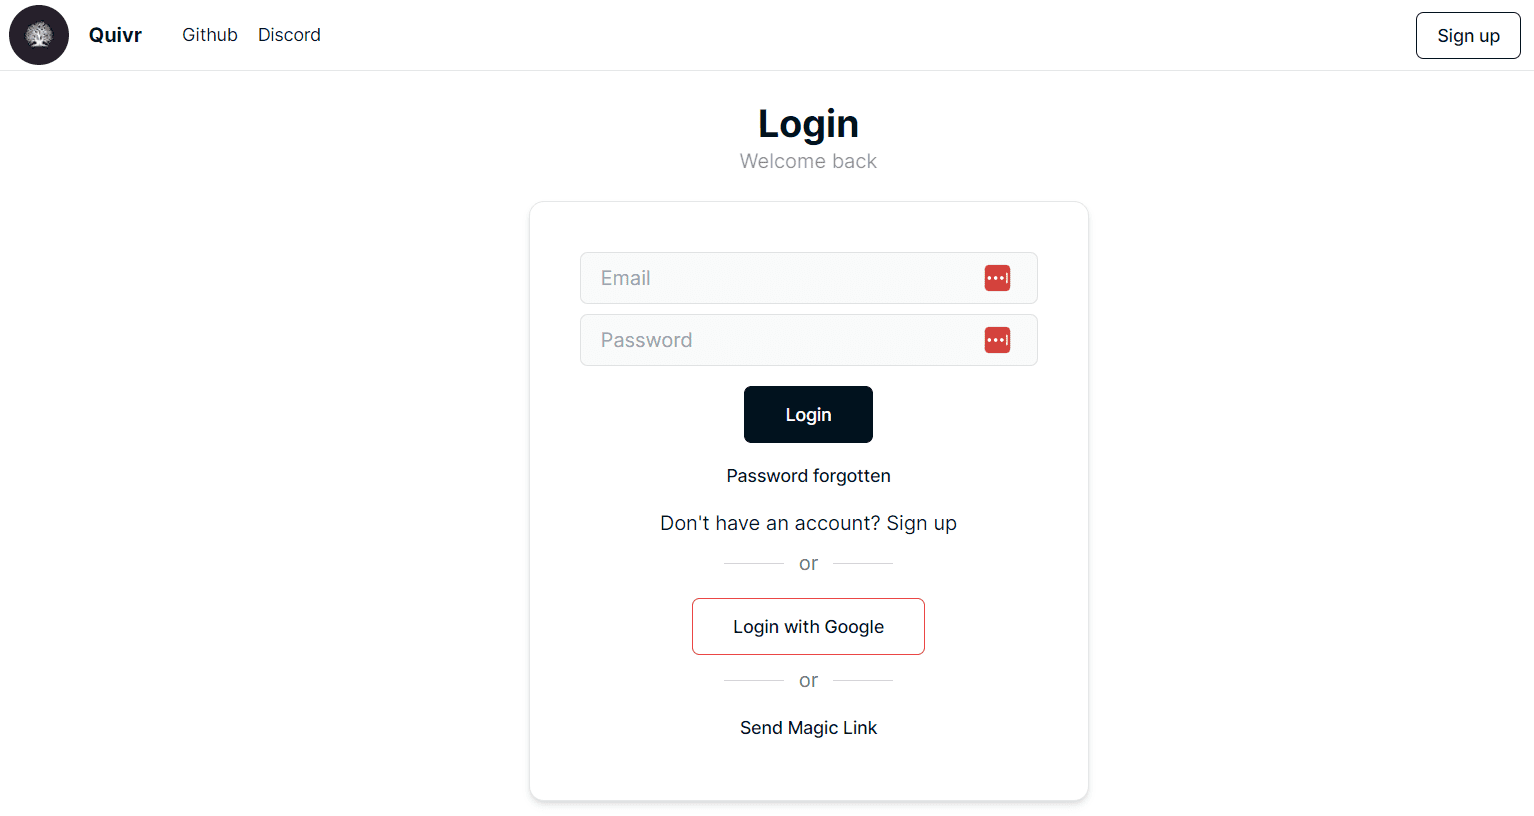
To use Quivr, visit quivr.app, create an account and log in.
Click “Upload” to upload your files.
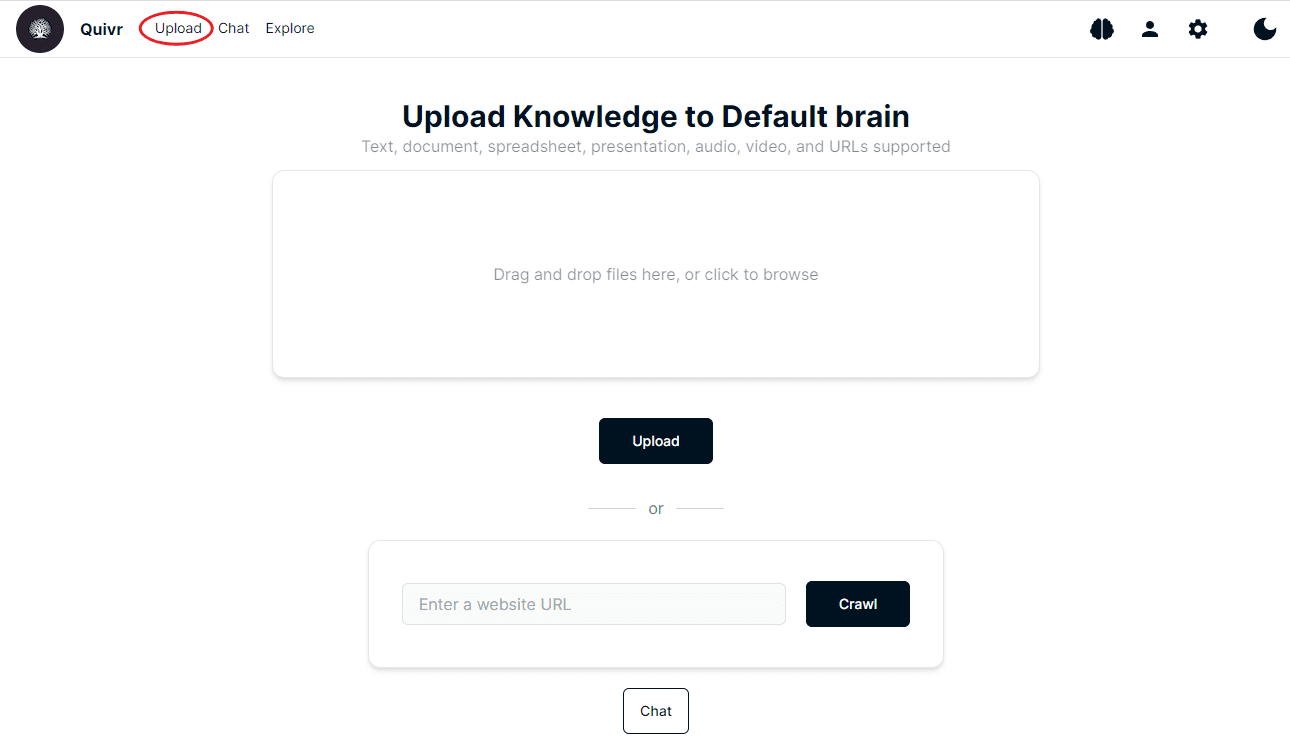
Once uploaded, access the AI chat interface by clicking “Chat” on the menu bar. Since the web version of Quivr uses OpenAI’s API for smart answers and document summaries, you’ll need to set up your OpenAI API key before chatting.
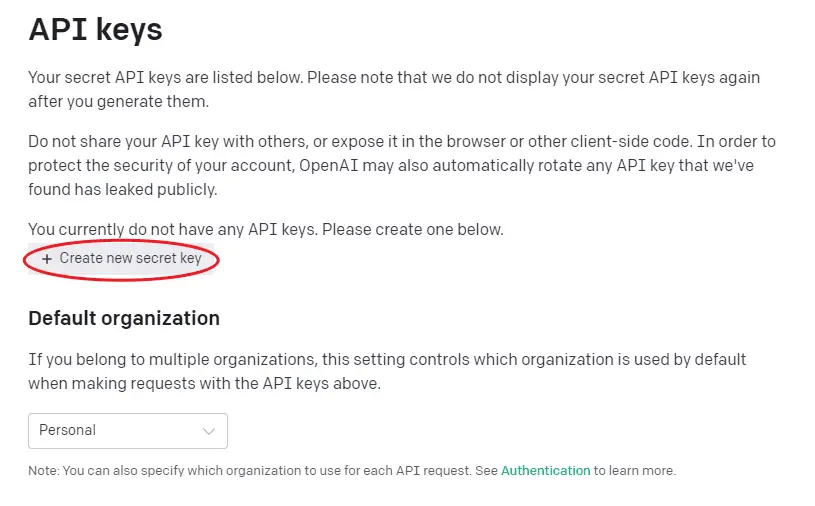
Here’s how to set up the OpenAI API key.
Go to the official OpenAI website: https://platform.openai.com/account/api-keys. Click “Create new secret key” to generate a key.
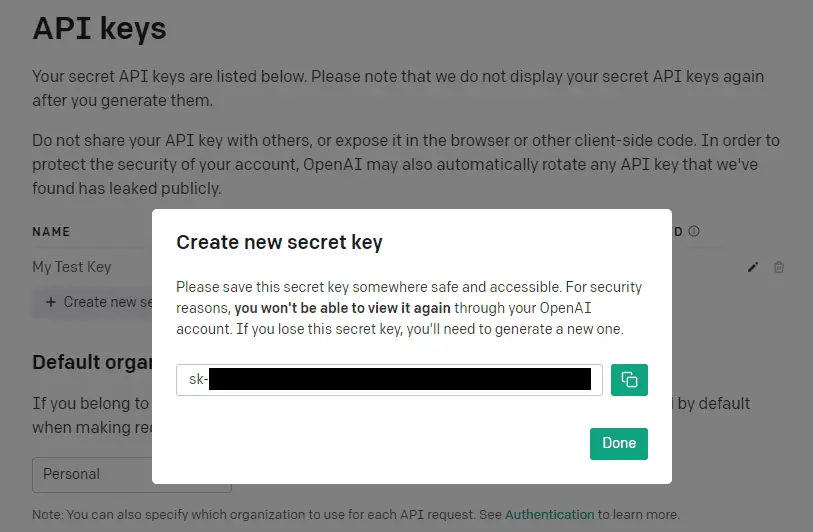
Copy the new API key. Keep it safe and don’t share it with anyone.
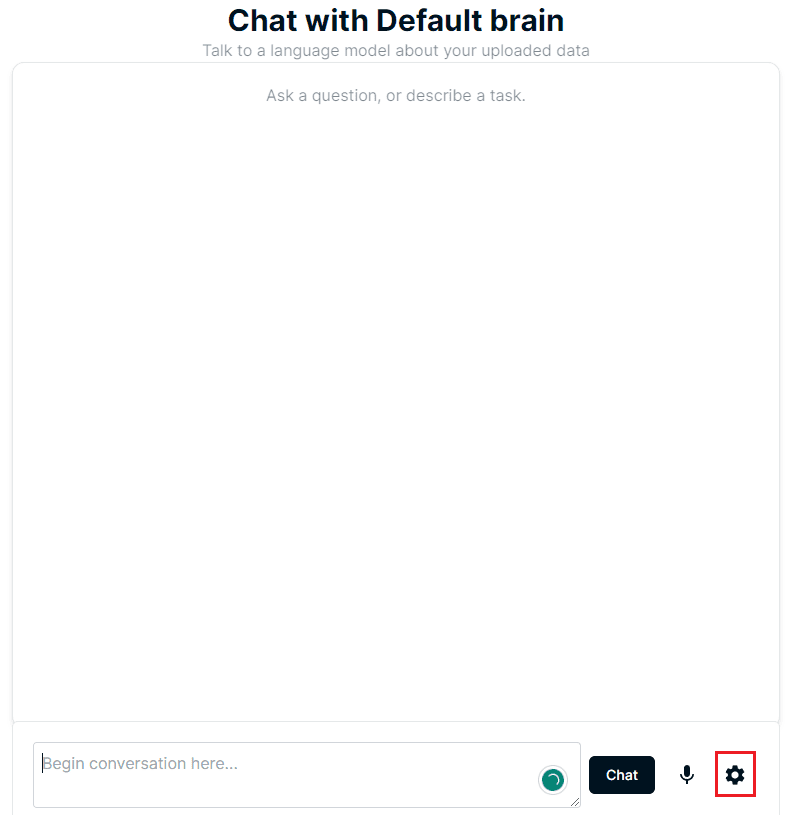
Go back to the Quivr chat interface and click the gear button next to the “Chat” button to open the Quivr settings.
Paste your API key into the text box labeled “Open AI Key.”
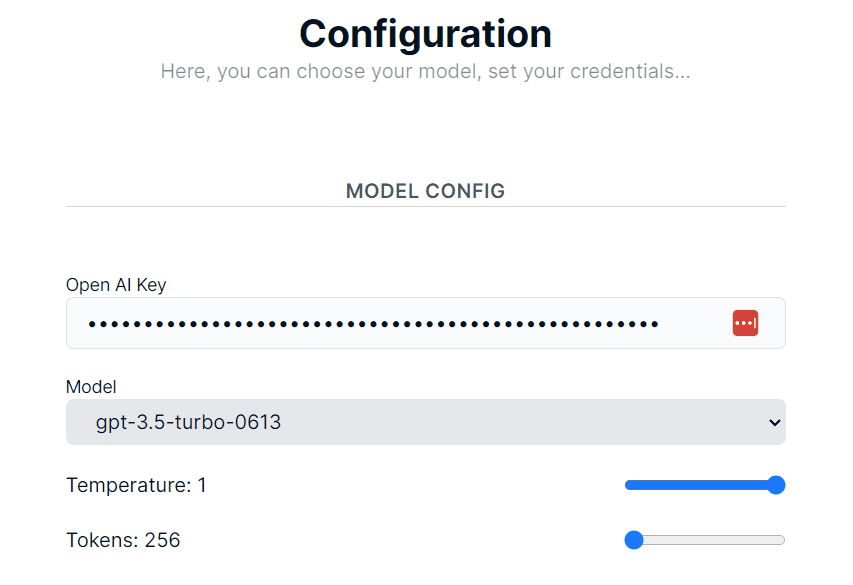
Choose a GPT model from the dropdown menu under “Model.” Note that GPT-4 is costlier than GPT-3.5, so pick the right model for you.
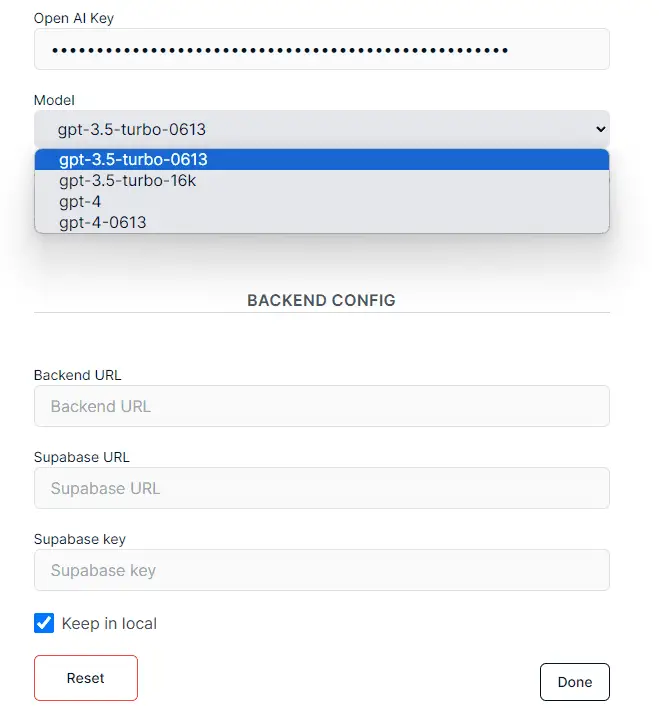
Click “Done” to finish the basic setup.
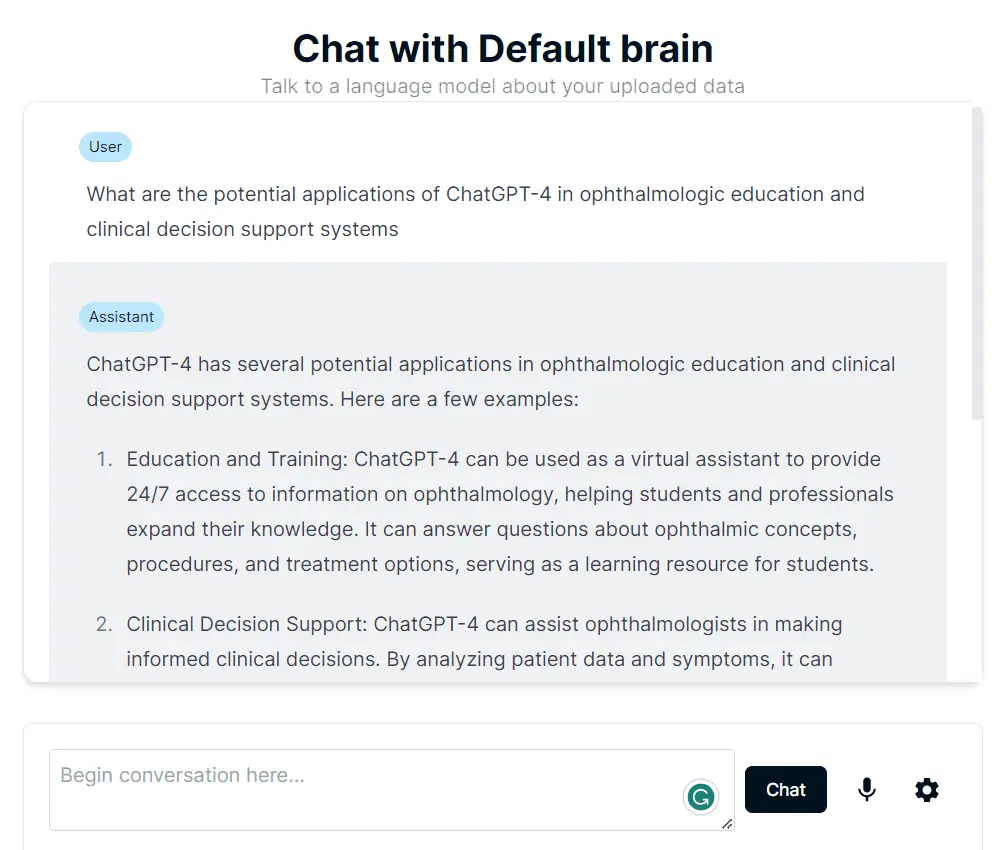
Once your setup is complete, you can start chatting. For example, with a PDF document about ChatGPT-4, I asked Quivr this question and received the responses.
Summary
In conclusion, the dawn of AI has revolutionized the way we interact with documents and files, making once laborious tasks a breeze. This transformative wave has the potential to reshape our day-to-day activities, streamlining our work, and making us more productive.
Imagine a future where our interactions with information are no longer passive, but deeply engaging and intuitive. A future where AI serves as our personal assistant, turning walls of text into meaningful conversation.
Embrace this exciting journey as we continue to redefine what’s possible, leveraging AI to unlock the true potential of our digital documents.