Upscale with Realistic Detail Using Flux 2 Klein + SeedVR2 in ComfyUI
Did you know the Flux 2 Klein model is not just good for generation, but also surprisingly strong at adding realistic fine detail during upscaling? In this article, I’ll walk you through a ComfyUI workflow that boosts resolution while enhancing micro-texture—without falling into that common “AI plastic” look.
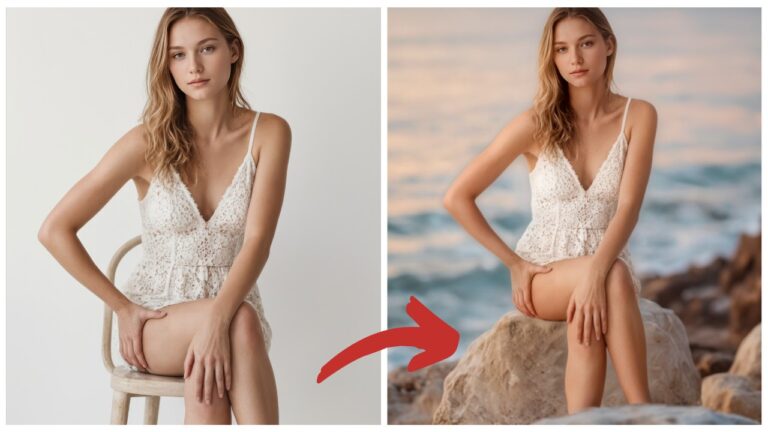
This workflow is especially useful when you have an image that’s a bit soft, low-res, or lacking texture, and you want to bring out believable detail in places like eyes, lips, hands, and skin.
What This Workflow Fixes (and What You’ll Get)
Some models are excellent at editing images or shifting style (for example, certain Qwen-based approaches), but the tradeoff is often texture quality. You may get:
- Rough or smeared surfaces
- Over-smooth “plastic” skin
- Weird artificial sharpness that doesn’t resemble real detail
With this workflow, the goal is different: add detail that looks natural.
It also works well for upscaling low-resolution images, because it’s designed to increase resolution and enrich detail in a controlled way.
Setup and Models (Flux 2 Klein FP8, GGUF Option)
For the main model:
- Flux 2 Klein (FP8) is the primary choice in this workflow.
- If you don’t have enough VRAM, you can use GGUF versions instead.
The key idea is: use Flux 2 Klein for the first upscale pass where detail is introduced carefully, then use SeedVR2 to push the final resolution higher via tiling.
The Workflow Overview: Two-Stage Upscale to 4096×4096
Here’s the overall plan:
- You start with an input image (any size is fine).
- The workflow upscales in two stages:
- Stage 1: Bring the image up to 2048×2048 using Flux 2 Klein.
- Stage 2: Bring it from 2048×2048 to 4096×4096 using SeedVR2 tiling.
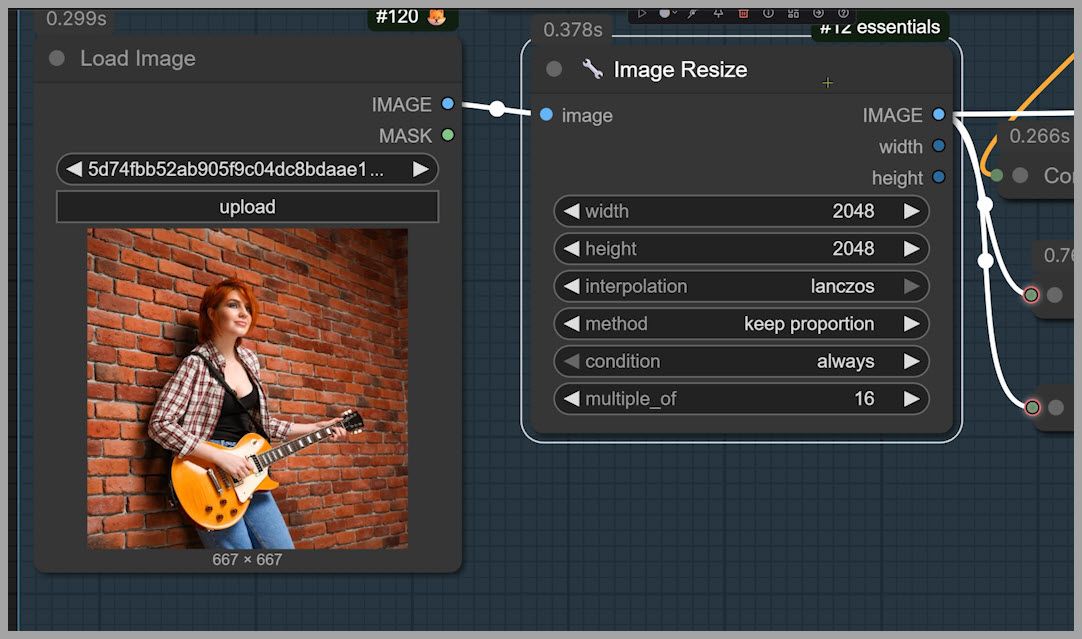
Example from the workflow:
- Input image: 667×667
- After Stage 1: 2048×2048
- After Stage 2: 4096×4096
Important note: you can upload any image size here. It can even be larger than 2048×2048—and the workflow can still help if the image looks soft and you want to add more detail.
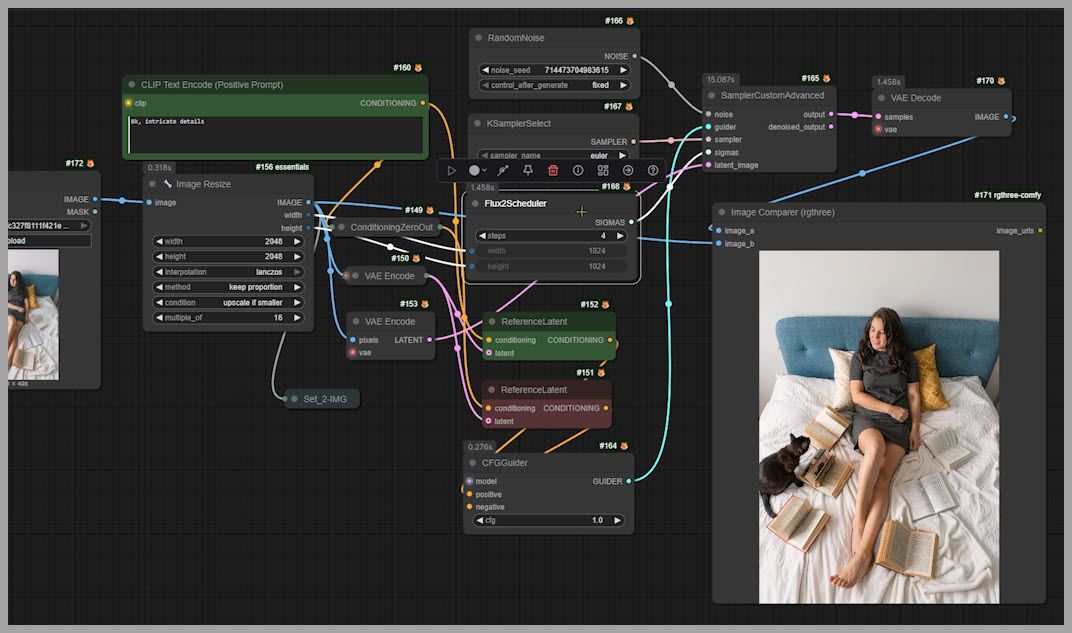
Stage 1: Flux 2 Klein Upscale to 2048 (The Non-Standard but Better Setup)
This first stage is where most of the “realistic detail” gets injected. But the way we run Flux 2 Klein here is not the “standard” configuration.
Why the standard Flux setup can fail for upscaling
The ComfyUI team’s commonly recommended Flux setup uses:
- SamplerCustomAdvanced for sampling
- Flux2Scheduler (a scheduler designed specifically for Flux models)
In many cases, Flux2Scheduler performs really well—often better than other schedulers when using Flux 2 Klein.
But for upscaling, there’s one big problem:
- When using Flux2Scheduler, the denoise strength stays locked at 1.0
- You can’t lower it to something gentler like 0.8
And for upscaling, denoise = 1.0 is too aggressive, because it changes the image too much.
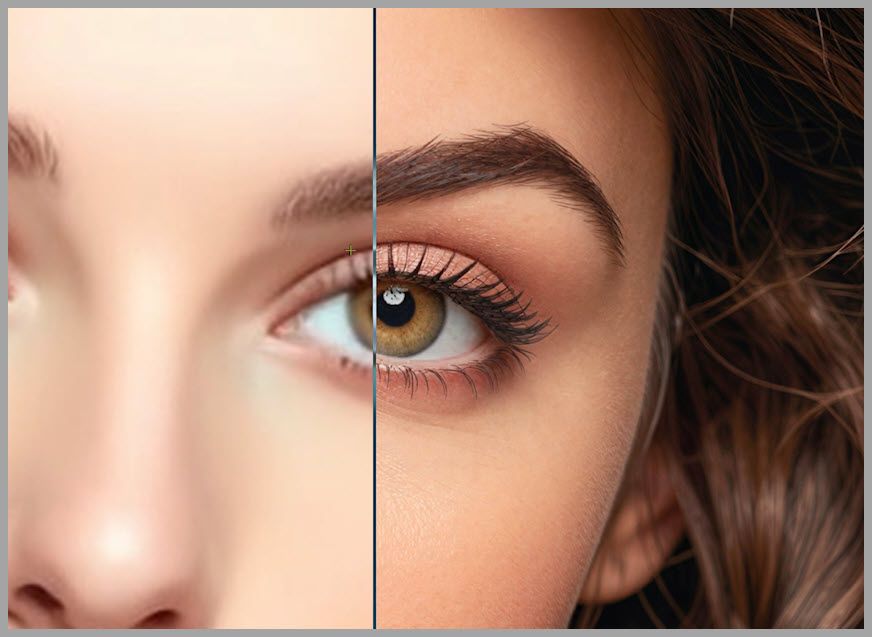
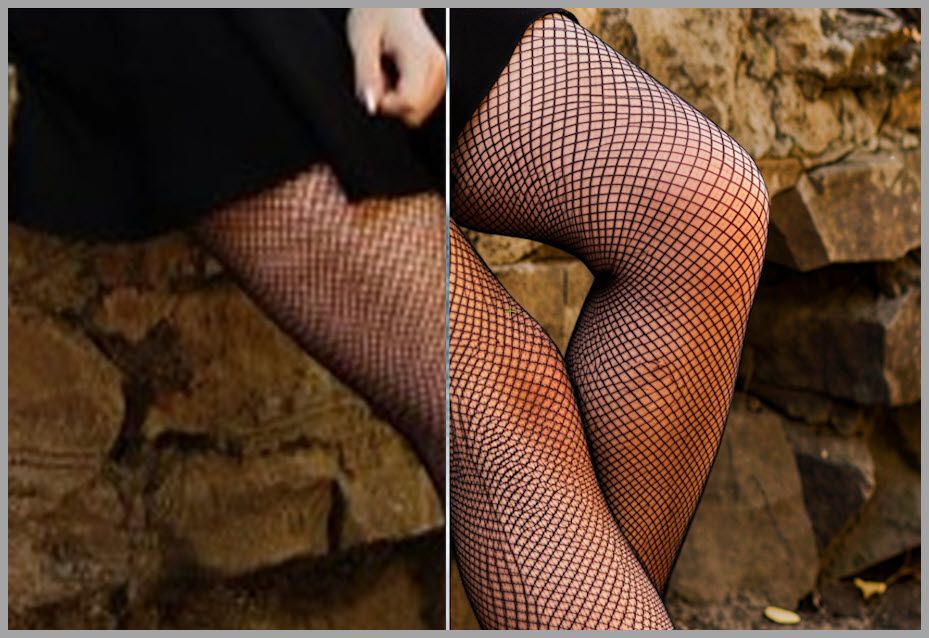
What “too aggressive” looks like
Here’s the kind of inconsistency you can get:
- In the original image, you can still tell the subject’s eyes are open, looking somewhere (maybe out a window).
- In the upscaled result with denoise = 1, the subject’s eyes become closed, and the gaze shifts—now looking at the cat.
So even if the upscaled image looks “detailed,” it’s no longer faithfully aligned with the original.

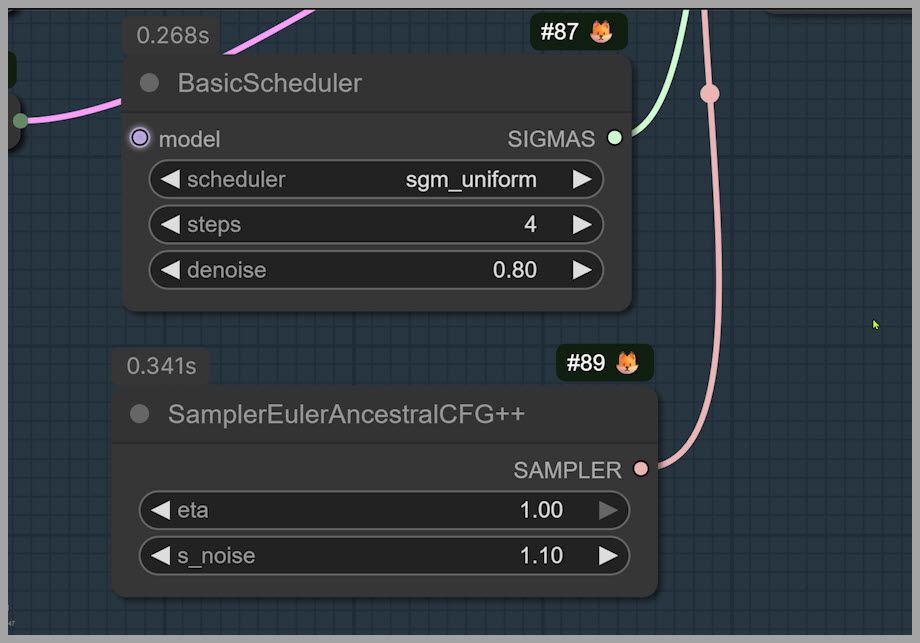
The fix: Basic Scheduler + denoise control
To solve this, the workflow switches to:
- Basic Scheduler (instead of Flux2Scheduler)
- Denoise strength set to 0.8
With that change, the upscaled result stays much more consistent. For example, the direction of the eyes tends to remain closer to the original image instead of being “reimagined.”
Recommended denoise range
From testing, a great working range is:
- 0.75 to 0.85
- 0.8 is a solid default for most images
Scheduler recommendation
For the scheduler setting:
- sgm_uniform is the best option in this workflow
- You can usually leave it at the default
Detail Tuning: Sampler, Noise, and Prompt Strategy
Stage 1 quality depends heavily on a few key controls: sampler choice, noise behavior, and prompt wording.
Sampler: EulerAncestralCFG++
This workflow uses a special sampler:
- Sampler Euler Ancestral CFG Plus Plus
In practice, this sampler tends to produce:
- More detail
- Fewer artifacts (compared to other choices in similar setups)
Eta setting
- Keep eta = 1 (maximum)
- It’s a simple “leave it alone” parameter here
s_noise: more detail vs more risk
- If you want more detail, try s_noise = 1.2
- Warning: 1.2 can introduce artifacts in the final image sometimes
If your output starts showing weird texture patches, crunchy noise, or unnatural speckles, s_noise is one of the first things I’d reduce.
Prompt strategy: two phrases that consistently help
Prompting matters a lot. After testing many options, two phrases stood out as reliably producing strong detail without causing problems in most cases.
Use those two phrases as your “detail backbone” in the prompt.
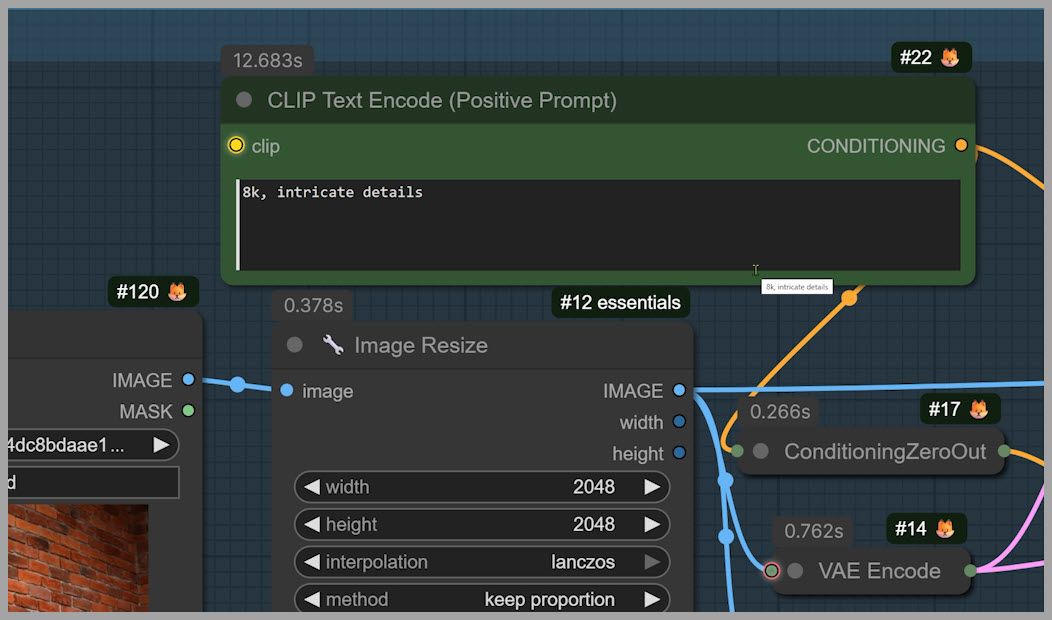
If detail becomes too strong, dial it back like this:
- Remove “intricate details”
- Keep only “8K”
That simple change often tones down the intensity while keeping the upscale crisp.
Optional add-ons
You can also guide the workflow with additional prompt words, for example:
- Add freckles
- Ask for smoother skin
These are useful when you want to push the workflow toward a specific look while still keeping the base pipeline unchanged.
Image Resize Node: Preparing the 2048-Long-Side Input
The workflow includes an Image Resize node that:
- Resizes your original image so the longest side becomes 2048
Most uploads are smaller than that, so it usually enlarges the image for Stage 1.
But even if you upload something larger than 2048 on the long side, the workflow can still help—because the goal isn’t only “make it bigger,” it’s also:
- add more realistic detail
- sharpen a soft image
- improve micro-texture without losing the original structure
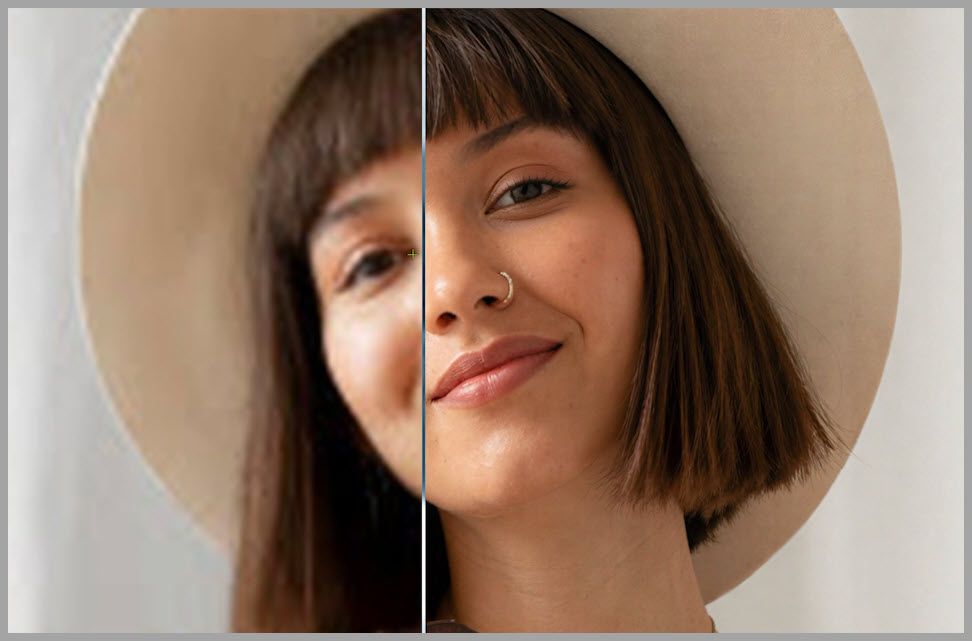
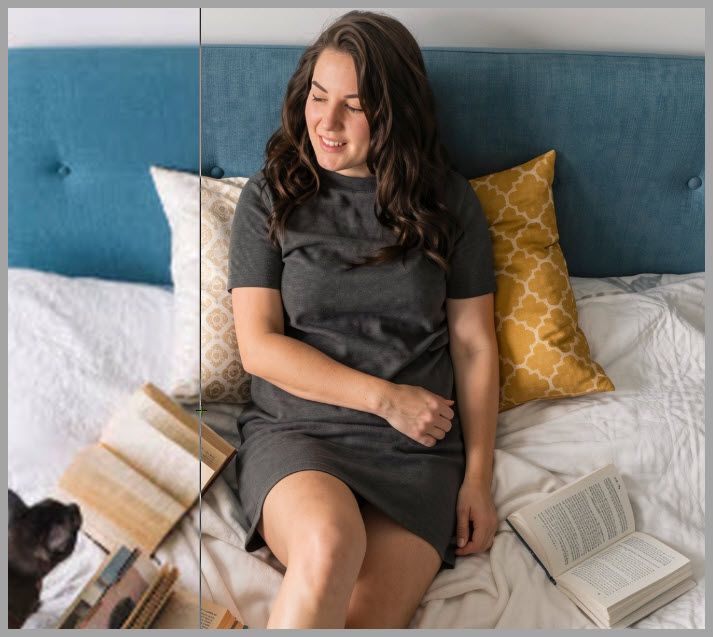
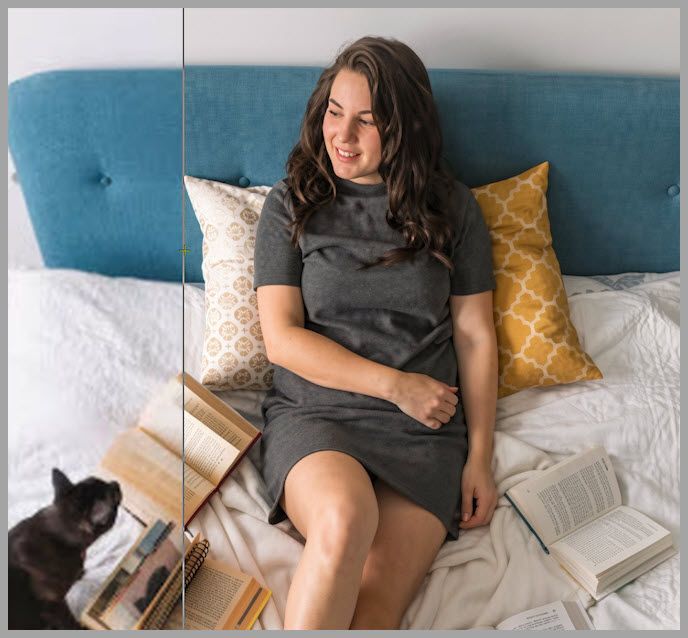
Stage 1 Output Check
After Stage 1 (Flux 2 Klein to 2048), you should see something like:
- noticeably improved sharpness
- better micro-texture
- more realistic detail in facial features and skin
- and strong consistency with the original composition
If Stage 1 already looks too “different,” the first knobs to revisit are:
- Denoise (move closer to 0.75)
- Prompt intensity (remove “intricate details”)
- s_noise (reduce if you used 1.2)
Once Stage 1 looks good, you’re ready for the final upscale.
Stage 2: SeedVR2 Tile Upscale to 4096 (Crop → Upscale Tiles → Merge)
Stage 2 uses SeedVR2 to scale the 2048 image up to 4096. Instead of trying to upscale a huge image all at once, the workflow does something smarter:
- Take the Stage 1 image
- Crop it into tiles
- Upscale each tile with SeedVR2
- Merge all tiles back together
- Output a final 4096×4096 image
If you’ve seen workflows that generate extremely large images (like million-megapixel approaches), this tiling idea will feel familiar—same concept, different goal.

SeedVR2 settings: defaults are fine (usually)
SeedVR2 has many adjustable parameters. If you want the full depth, the GitHub documentation and tutorial cover every setting.
But if you don’t want to go deep:
- keep the defaults
- focus only on tile layout (because that directly affects tile size and performance)
The two tile settings you may want to change
In the workflow’s third group, there are two important settings:
- Rows
- Columns
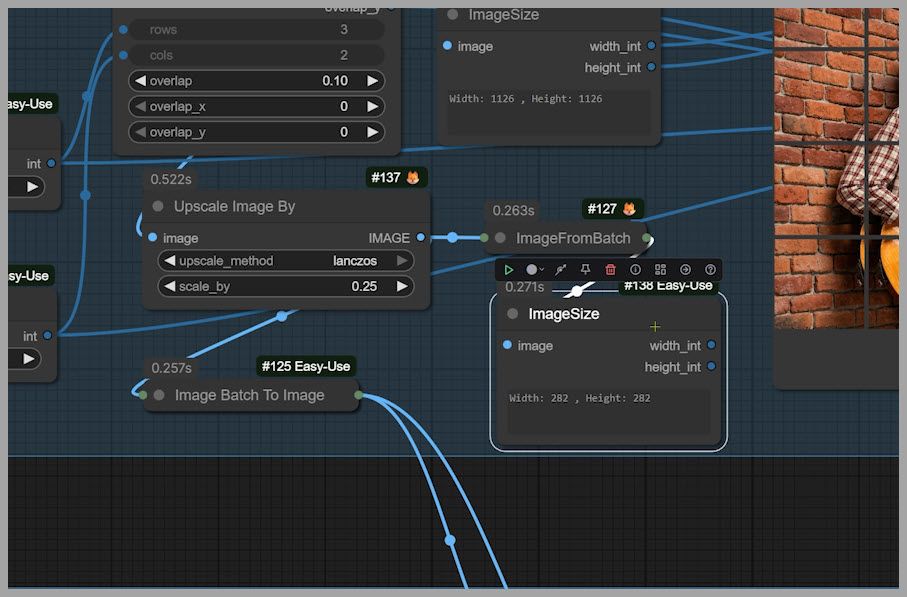
Because the Stage 1 output is square, the workflow uses:
- 4 rows × 4 columns = 16 tiles
If your image is not square, adjust to something like:
- 4 rows × 3 columns, or
- 3 rows × 4 columns
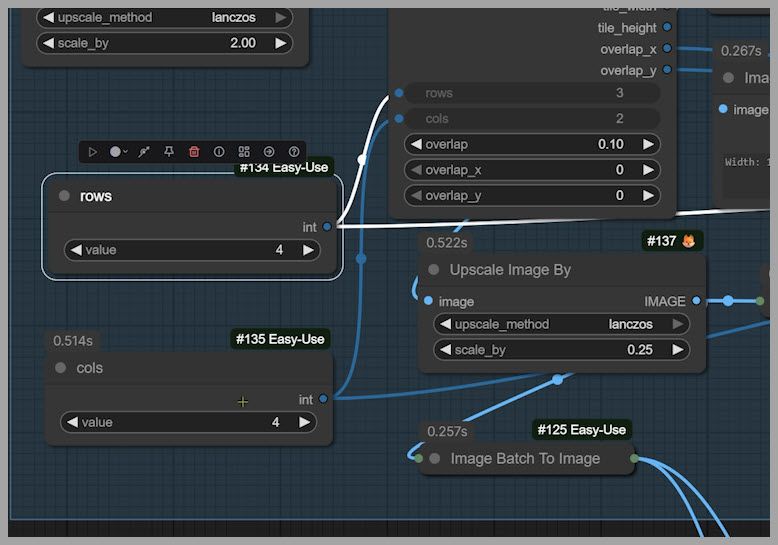
The goal: tiles around 256×256
The rule of thumb is simple:
- aim for each tile to be roughly 256×256
- then SeedVR2 upscales tiles one by one
- merging produces the final full-resolution output
Closing Notes
That’s the full workflow:
- Flux 2 Klein adds realistic micro-detail while preserving the original (Stage 1)
- SeedVR2 completes the high-res upscale efficiently through tiling (Stage 2)
And if you’re part of a community that shares workflows, it can be easier to discuss there—because you can exchange screenshots or even short clips to diagnose settings and results.