Character Swapping with Z Image Turbo
Character consistency is one of the biggest challenges when creating AI-generated images. Whether you want to place your original character into different scenes, recreate a fictional character in new poses, or maintain a consistent identity across multiple images, a well-designed character swapping workflow can save a tremendous amount of time.
In this article, I will walk through a character swapping workflow built with Z Image Turbo and ComfyUI. The workflow works with character LoRAs trained using either Z Image Base or Z Image Turbo, making it flexible for a wide range of projects. Even if character swapping is not your primary goal, the workflow can also serve as a powerful ControlNet-based inpainting system.
By the end of this guide, you will understand how the workflow generates prompts, preserves poses, performs inpainting, and refines the final image to achieve cleaner and more convincing results.
What This Workflow Can Do
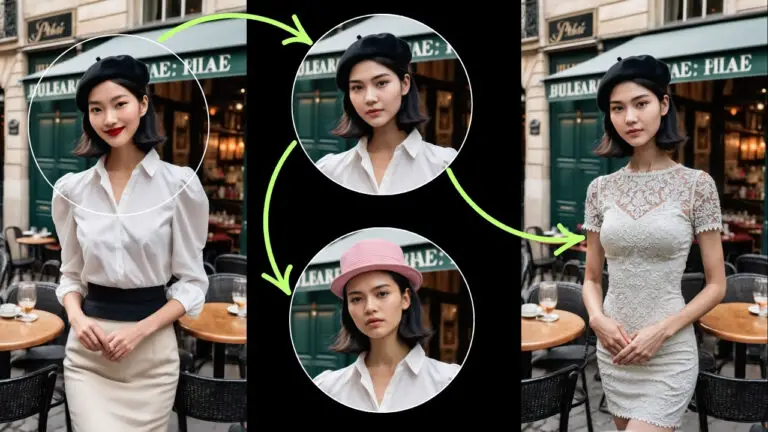
The purpose of this workflow is to replace the person in a reference image with a character defined by a LoRA while keeping much of the original scene intact.
The workflow is capable of:
- Swapping a person in a reference image with a custom character
- Preserving the background of the original image
- Maintaining the overall pose and composition
- Adapting clothing to fit the new character
- Handling significant body shape differences
- Refining facial and hand details in a final enhancement stage
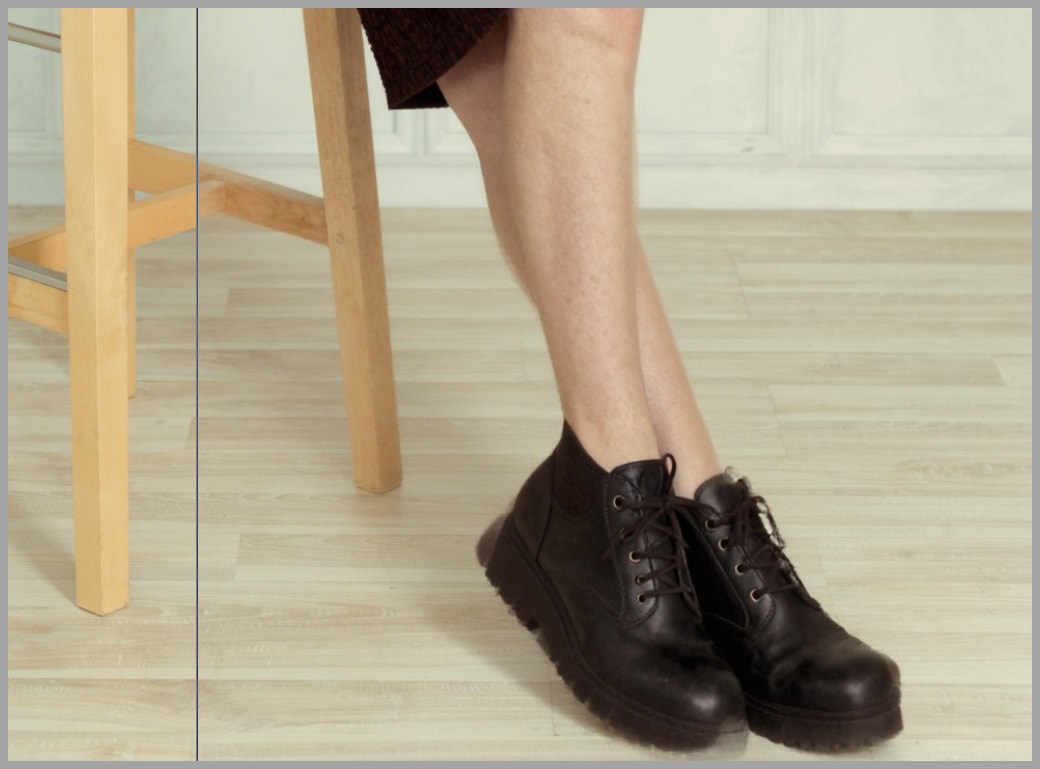
One of the most impressive aspects of the workflow is its flexibility. The reference image and the target character do not need to share the same body type. The workflow can still produce convincing results even when there are major differences between them.
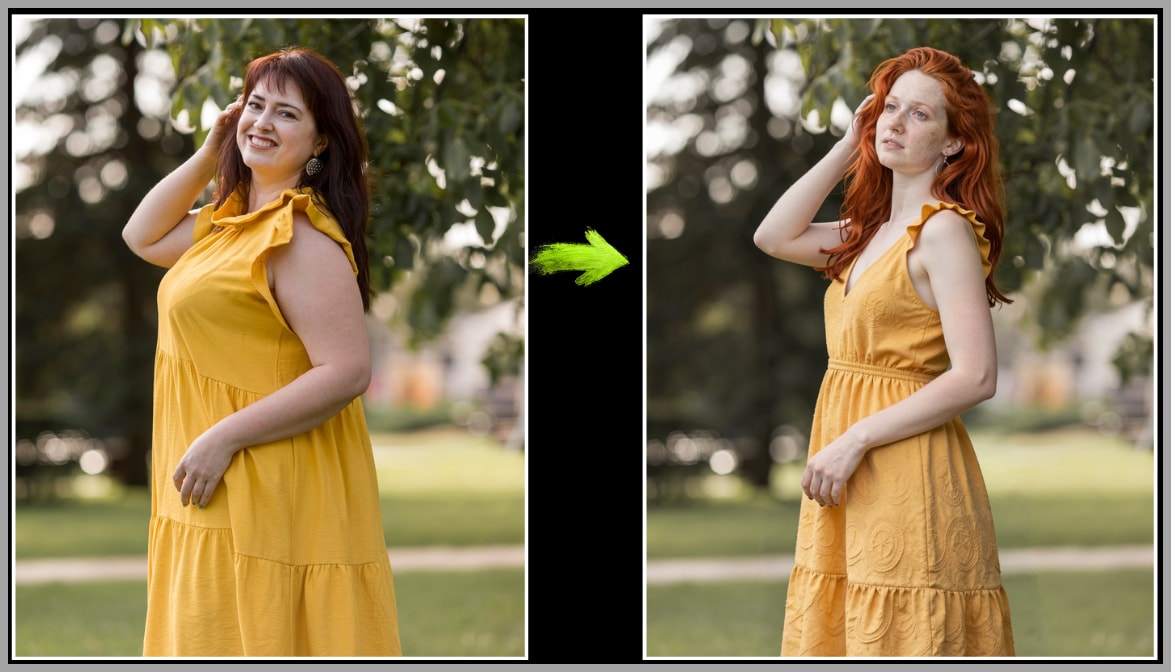
For example, a thin person in the reference image can be transformed into a character with a very different body shape while preserving the environment and overall composition.
YouTube Tutorial:
Gain exclusive access to advanced ComfyUI workflows and resources by joining our community now!
Step 1: Generating the Character Swap Prompt
A successful character swap begins with a strong prompt.
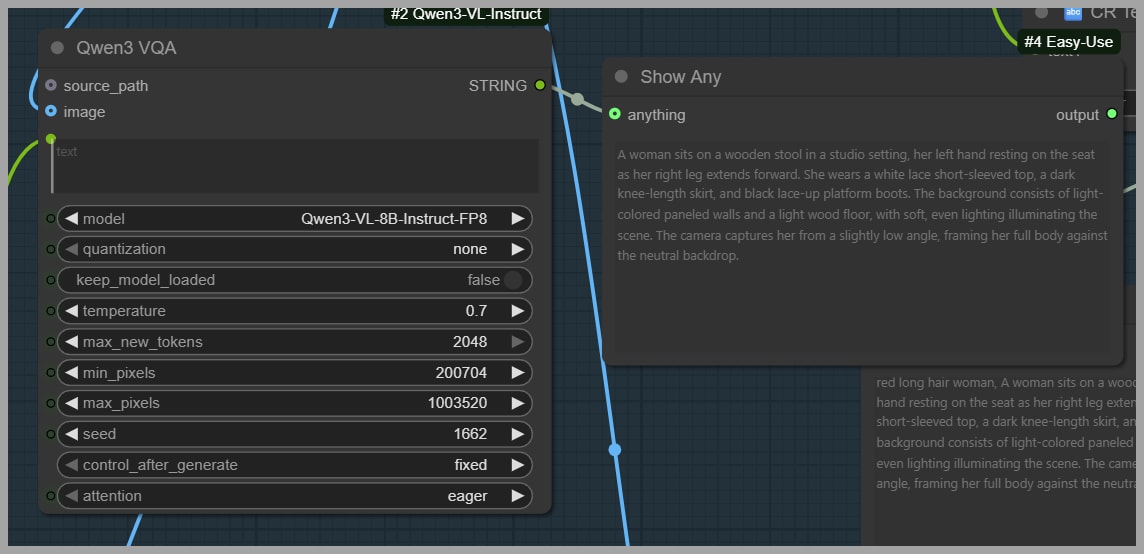
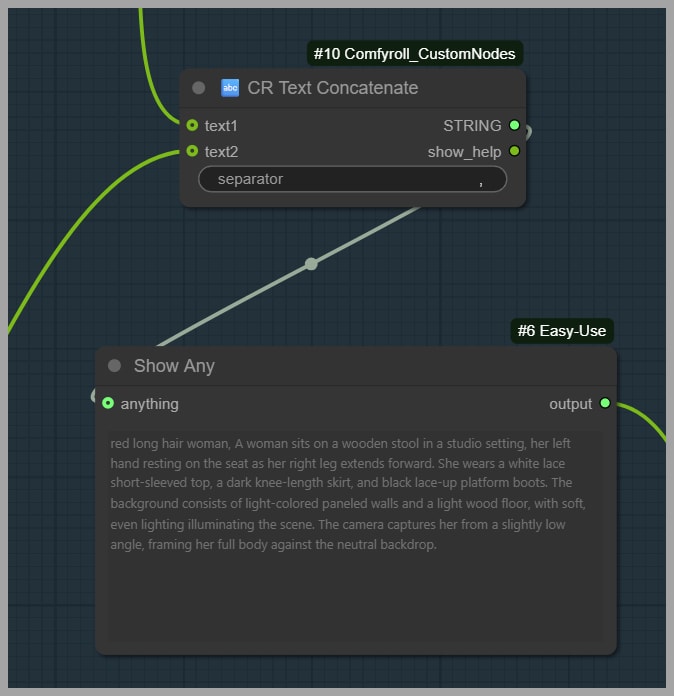
Instead of manually describing every aspect of the reference image, this workflow automatically analyzes the image and generates a detailed description.
The image description model extracts information such as:
- Clothing
- Pose
- Background
- Lighting
- Composition
- General scene details
This automatically generated description forms the foundation of the final prompt.
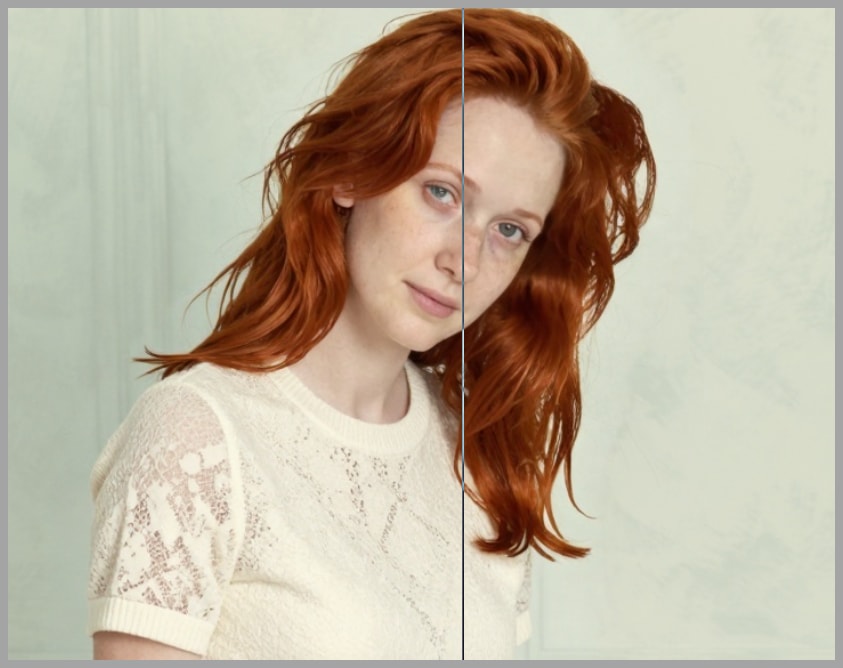
Next, character-specific keywords are added. These keywords describe the target character represented by the LoRA.
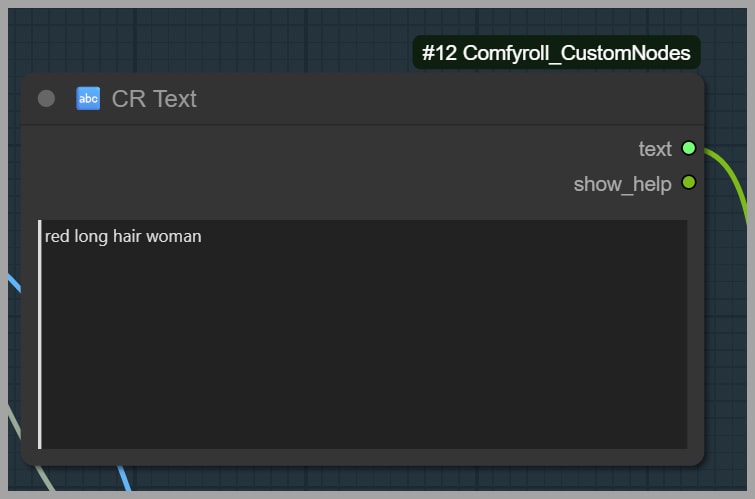
For example, the demonstration character is a fictional red-haired woman with freckles. By combining the automatically generated scene description with character-related information, the workflow creates a prompt that simultaneously preserves the original scene while introducing the new character identity.
This approach offers two major advantages:
- It reduces manual prompt writing.
- It helps maintain consistency across different reference images.
Step 2: Generating Pose Information
After creating the prompt, the workflow extracts pose information from the reference image.
This is accomplished by generating a pose skeleton image.
The skeleton image is then passed to ControlNet, which guides the generation process and helps preserve the original pose.
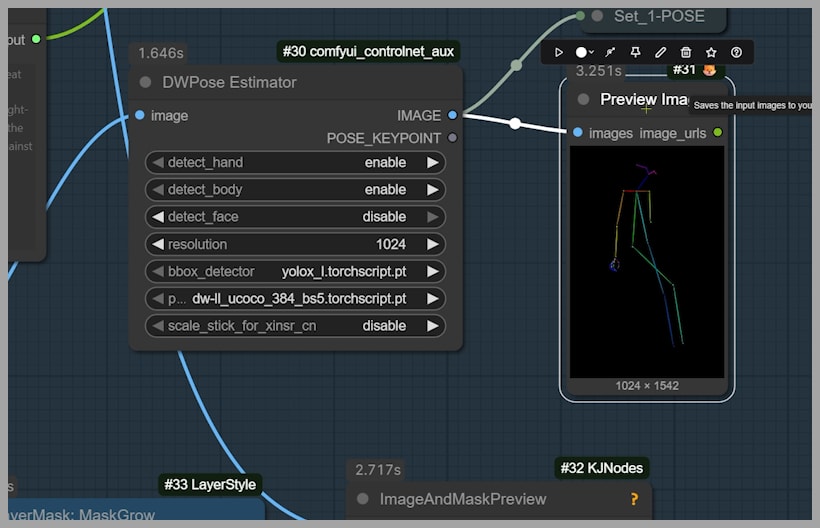
Without pose control, the generated image may drift significantly from the original composition. By supplying the pose skeleton, the workflow encourages the new character to occupy a similar position and maintain a similar body posture.
Although some pose variation may still occur, the overall structure remains much closer to the original image.
Step 3: Creating the Inpainting Mask
The next stage involves creating an inpainting mask.
The mask determines which portions of the image will be modified during generation.
Typically, the character area is selected while the surrounding background remains untouched.
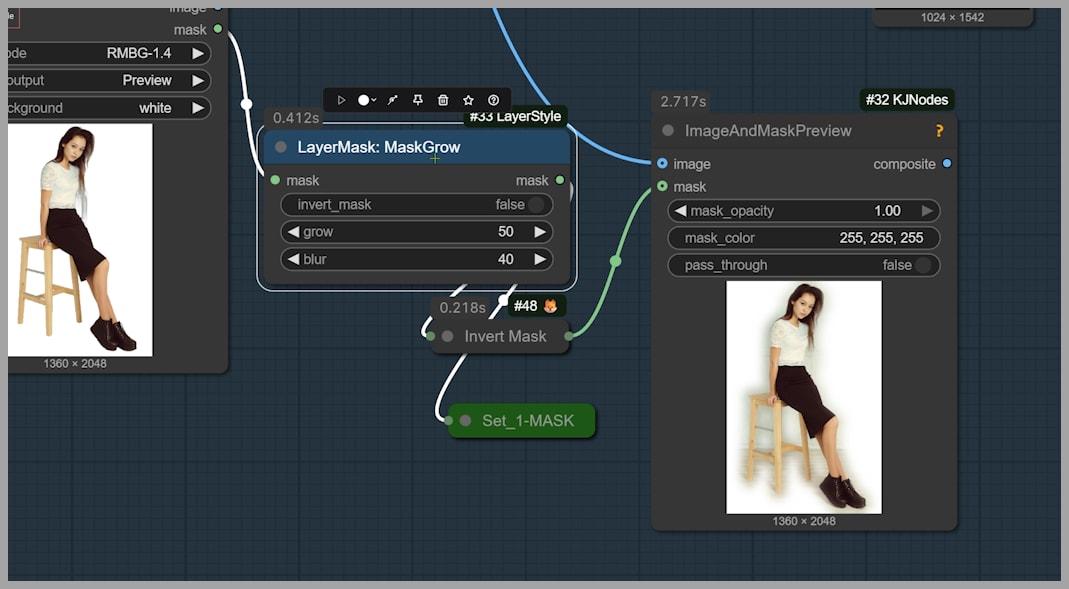
A key setting in this stage controls mask expansion.
Increasing mask expansion:
- Allows more surrounding pixels to be modified
- Provides additional flexibility during generation
- Can help accommodate large body shape changes
Reducing mask expansion:
- Preserves more of the original image
- Limits modification to a smaller region
- Helps maintain scene integrity
Finding the right balance depends on the amount of transformation required.
Step 4: Loading Z Image Turbo and Character LoRA
Once the prompt, pose information, and mask are ready, the workflow loads the primary generation components.
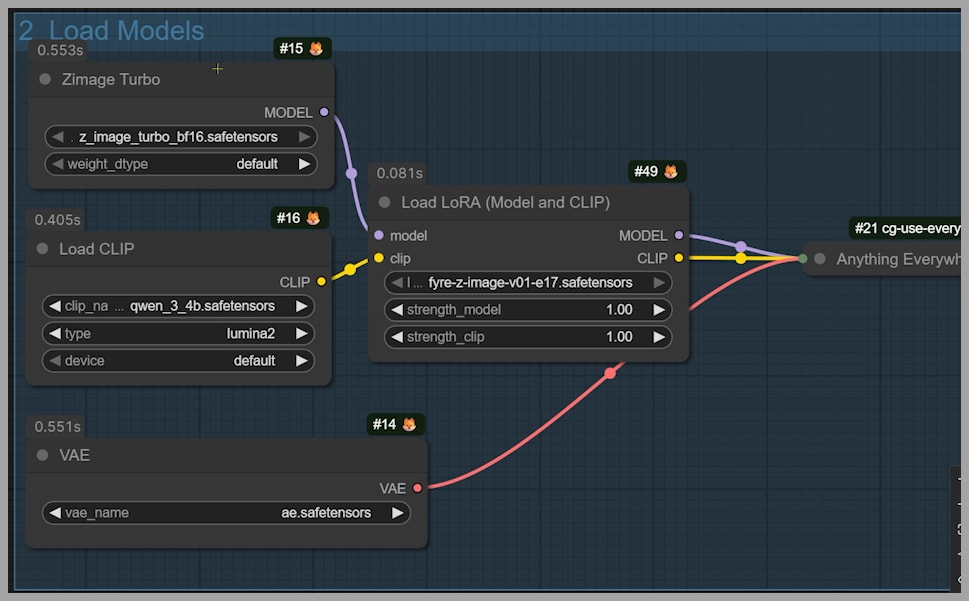
Loading the Base Model
The workflow uses Z Image Turbo as the main image generation model.
This model is optimized for fast image generation while maintaining strong visual quality.
Loading the Character LoRA
Next, the workflow loads a character LoRA.
You can replace the example LoRA with your own character LoRA as long as it was trained using:
- Z Image Base
- Z Image Turbo
The LoRA serves as the identity anchor for the character, ensuring that facial features and other defining characteristics remain consistent.
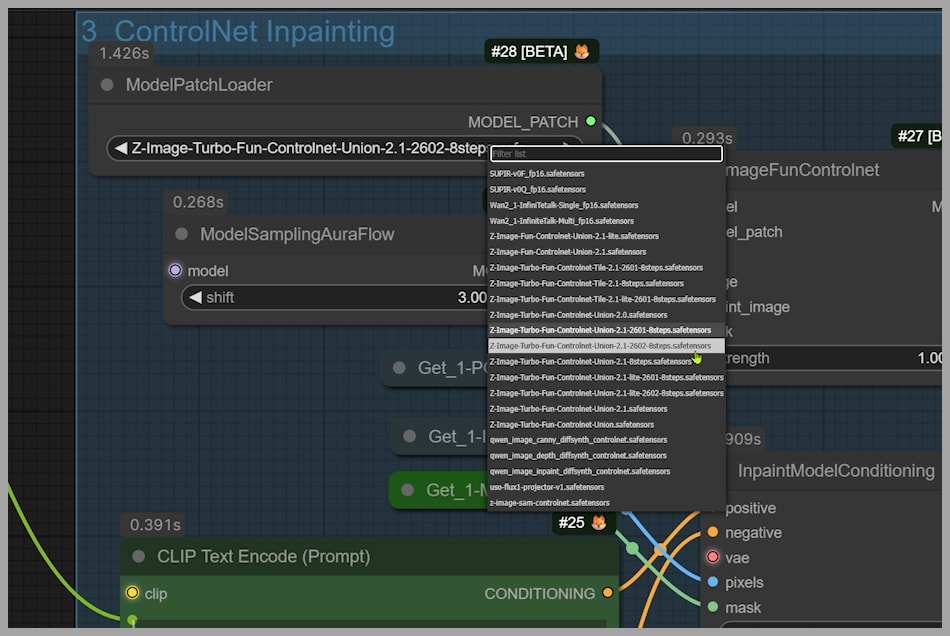
Loading the ControlNet Model
The workflow also loads the latest ControlNet model designed for Z Image Turbo.
ControlNet receives the pose skeleton generated earlier and uses it to guide image generation.
Together, the model, LoRA, and ControlNet create the foundation for character swapping.
Step 5: Image Generation with the Standard KSampler
The workflow includes two different generation approaches.
The first approach uses a standard KSampler.
In most situations, this sampler performs well and generates images quickly.
The benefits include:
- Faster generation speed
- Good overall image quality
- Broad compatibility with different settings
However, there is one drawback.
Occasionally, small artifacts or incorrect pixels may appear around the edges of the character. These defects are usually minor but can become noticeable in certain images.
You are also free to experiment with different sampler and scheduler combinations. Different configurations can produce different visual characteristics, and some combinations may work better for specific projects.
Step 6: Adjusting Denoising Strength
Denoising strength is one of the most important parameters in this workflow.
It determines how strongly the generated image diverges from the original reference image.
Recommended Starting Value
In most cases, a denoising strength of approximately 0.5 provides a good balance between preservation and transformation.
At this level:
- The original composition remains recognizable.
- The character identity is successfully transferred.
- The image remains stable.
Increasing Denoising Strength
Sometimes larger changes are necessary.
In the demonstration, the reference image contains a much thinner woman than the target character. To accommodate the substantial body shape difference, the denoising strength is increased to 0.65.
Higher values allow:
- Greater body shape modification
- More extensive character transformation
- Increased creative flexibility
However, higher values can also increase the likelihood of generation errors and unwanted deviations.
For this reason, denoising strength should be adjusted carefully.
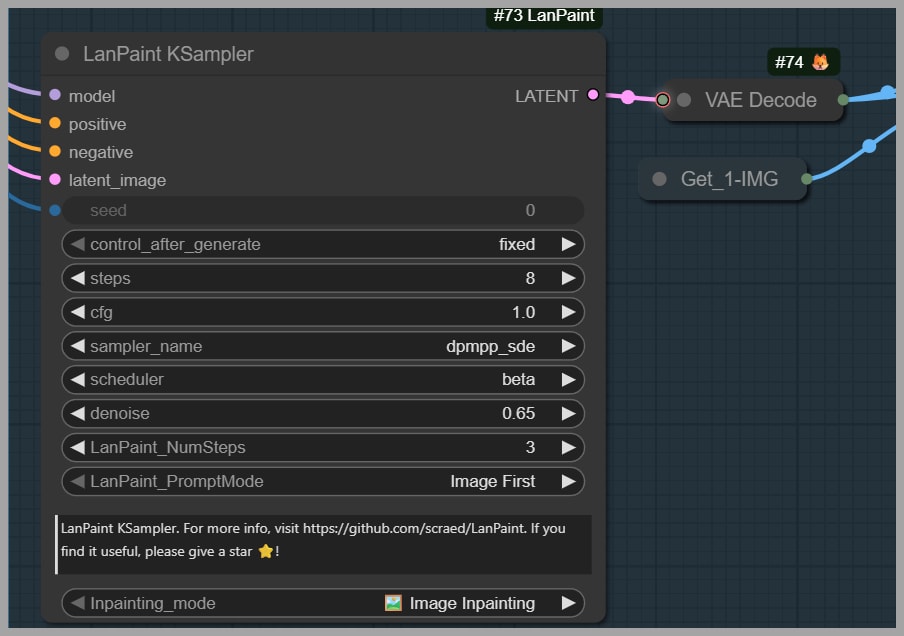
Step 7: Using the Inpainting KSampler
The second generation approach uses a KSampler specifically designed for inpainting.
Compared with the standard KSampler, this version generally produces cleaner results around the character boundaries.
One of its main advantages is the elimination of broken pixels and edge artifacts that occasionally appear with the standard sampler.
The improvement in image quality is often immediately noticeable.
The Trade-Off
The primary disadvantage is speed.
The inpainting KSampler performs a more intensive denoising process, which increases generation time.
As a result, you may need to wait significantly longer for each image.
Understanding LanPaint NumSteps
A particularly important parameter in this setup is LanPaint NumSteps.
This value directly affects denoising complexity.
Higher values:
- Increase image processing quality
- Improve difficult generations
- Require longer generation times
Lower values:
- Generate faster results
- Use fewer computational resources
- May struggle with challenging images
For most situations, a value of 3 is sufficient.
If visual issues remain after generation, increasing this value can help improve the output.
Step 8: Choosing the Best Result
After generating multiple candidate images, the workflow uses an image switch node to determine which result proceeds to the final stage.
This node acts as a simple selector.
For example:
- Input 1 may correspond to the standard KSampler result.
- Input 2 may correspond to the inpainting KSampler result.
You can compare the outputs and choose whichever image looks better.
In the demonstration, the second image is selected because it produces cleaner character edges and fewer visual artifacts.
This flexibility allows you to combine the speed of the standard sampler with the quality of the inpainting sampler.
Step 9: Refining Faces and Hands
The final stage focuses on image refinement.
Even highly capable image models occasionally struggle with:
- Facial details
- Finger placement
- Hand anatomy
- Small facial features
To address these issues, the workflow employs two FaceDetailer nodes.
Face Refinement
The first FaceDetailer enhances:
- Facial structure
- Eyes
- Skin details
- Overall facial clarity
This helps the character appear more realistic and consistent.
Hand Refinement
The second FaceDetailer is dedicated to improving hands.
Because hands are among the most challenging elements for AI image generation, this extra processing stage can dramatically improve image quality.
Together, these refinement passes elevate the image from a good character swap to a polished final result.
Conclusion
This character swapping workflow demonstrates how Z Image Turbo, character LoRAs, ControlNet, and inpainting can be combined to create highly flexible and reliable character transformations.
The workflow begins by automatically describing the reference image, extracts pose information for ControlNet guidance, generates an inpainting mask, loads the appropriate model and LoRA, and then produces candidate images using two different KSampler approaches.
The final refinement stage improves facial and hand details, resulting in a cleaner and more convincing image.
What makes this workflow particularly valuable is its ability to handle substantial differences between the reference subject and the target character while preserving much of the original scene. Whether you are creating consistent characters for storytelling, generating concept art, or simply experimenting with AI image workflows, this setup provides a powerful foundation for high-quality character swapping.
Gain exclusive access to advanced ComfyUI workflows and resources by joining our community now!