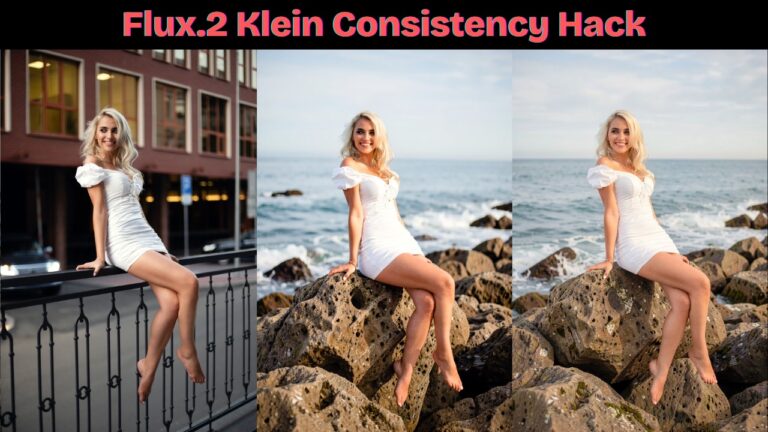
Pose Transfer Using Flux 2 Klein and LoRA
Pose transfer is one of the most exciting creative workflows you can build inside ComfyUI. The ability to take the pose from one image and apply it to another character opens up countless possibilities for portrait generation, fashion concepts, character redesigns, and cinematic compositions.
However, if you have worked with Flux 2 Klein for a while, you probably already know one of its biggest weaknesses: anatomy consistency.
In many situations, Flux 2 Klein can generate:
- Distorted limbs
- Unnatural hand placements
- Incorrect body proportions
- Awkward body posture
- Inconsistent poses
Because of these issues, Flux 2 Klein was not always the ideal choice for pose transfer workflows.
Fortunately, recent LoRA models have changed that.
With the right combination of LoRA adapters and a carefully structured workflow, Flux 2 Klein can now perform surprisingly accurate pose transfer while preserving character identity, facial features, clothing style, and overall visual consistency.
In this article, I will walk through the complete ComfyUI workflow step by step. By the end, you will understand:
- How the workflow works internally
- Why mannequin conversion is important
- Which LoRAs are responsible for pose accuracy
- How to preserve clothing and identity
- How to improve your results with better prompts
Let’s dive in.
YouTube Tutorial:
Gain exclusive access to advanced ComfyUI workflows and resources by joining our community now!
Understanding the Common Anatomy Problems in Flux 2 Klein
Before discussing the solution, it is important to understand the original problem.
Flux 2 Klein is capable of generating highly detailed portraits and artistic imagery, but it often struggles when dealing with complex human poses. This becomes especially obvious during pose transfer tasks.
For example, when directly using a human reference image as a pose source, the model may:
- Misinterpret limb positions
- Generate duplicated arms or legs
- Produce twisted anatomy
- Lose proper body proportions
- Mix pose information with clothing or background details
This happens because the model attempts to interpret too much information from the reference image simultaneously.
A typical human photograph contains:
- Pose information
- Facial identity
- Clothing details
- Background elements
- Lighting conditions
- Stylistic features
When all of this information is fed into Flux 2 Klein at once, the pose signal becomes noisy and inconsistent.
The workflow in this article solves that issue by simplifying the pose reference into a much cleaner representation.
How LoRA Improves Pose Transfer Accuracy
The key improvement in this workflow comes from two specialized LoRA adapters.
Instead of forcing Flux 2 Klein to interpret a fully detailed human reference image, the workflow separates the process into two stages:
- Convert the pose reference into a simplified mannequin
- Transfer the mannequin pose onto the target character
This separation dramatically improves stability.
The mannequin acts as a clean structural guide that contains only:
- Pose
- Limb positions
- Body proportions
At the same time, it removes:
- Identity
- Clothing
- Accessories
- Background distractions
As a result, Flux 2 Klein can focus entirely on pose reconstruction without becoming confused by unrelated visual information.
This is the reason the final generations look much more anatomically correct than standard pose transfer attempts.
What This Workflow Can Achieve
This workflow supports multiple creative scenarios.
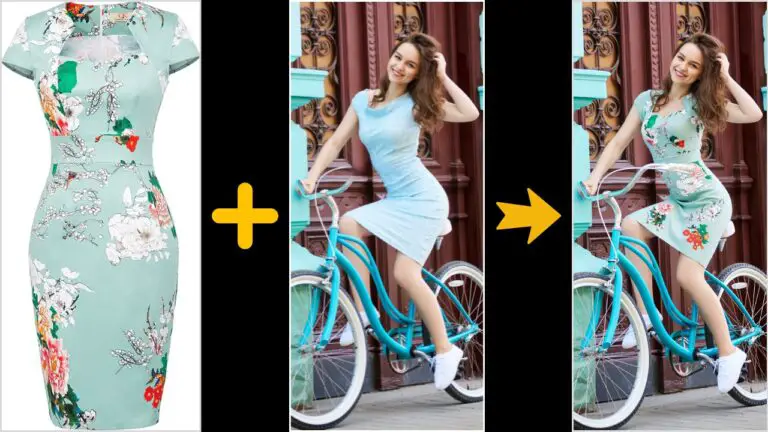
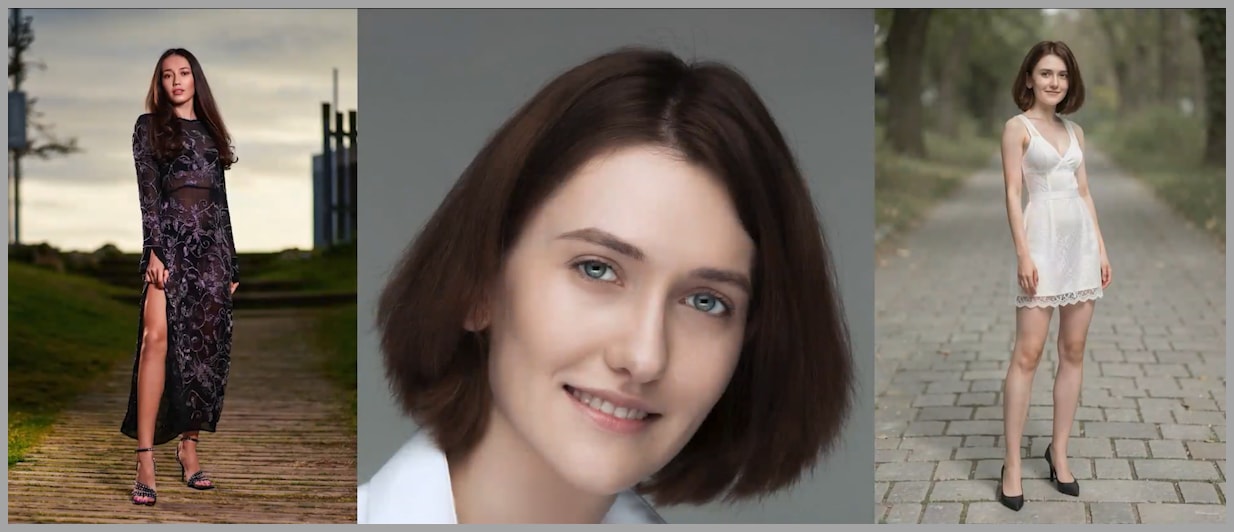
Transferring a Full-Body Pose to a Different Subject
One of the most powerful use cases is combining:
- A full-body pose reference image
- A separate facial reference image
In this setup:
- The full-body image provides the pose
- The headshot provides the identity
- The prompt controls clothing and background
The result is a newly generated portrait that preserves the identity of the headshot subject while adopting the pose from the full-body reference.
For example, you could:
- Take a fashion pose from a magazine image
- Apply it to a different character
- Redesign the outfit entirely
- Generate a new background environment
This creates enormous flexibility for character design and portrait generation.
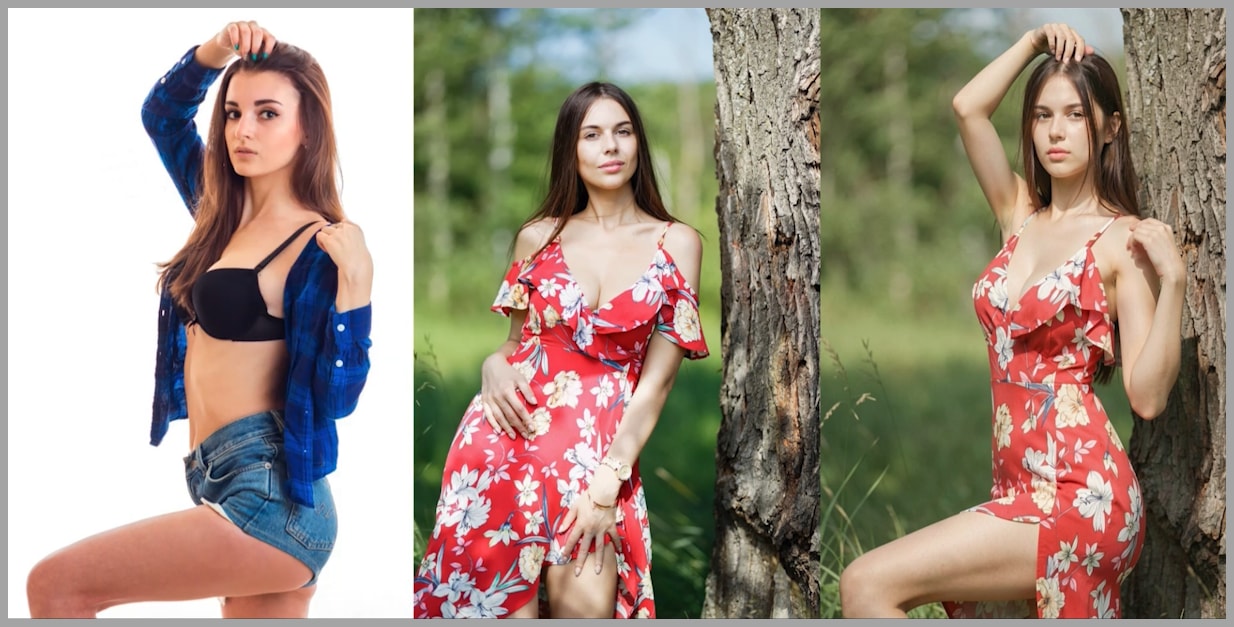
Changing Only the Pose While Preserving Identity and Style
The workflow can also be used more subtly.
Instead of redesigning the entire character, you can keep:
- The same clothing
- The same visual style
- The same background
- The same identity
while changing only the body pose.
This is extremely useful for:
- Fashion photography variations
- Character animation concepts
- Social media portrait edits
- Consistent AI influencer generation
- Stylized portrait refinement
The workflow is flexible enough to support both dramatic transformations and minimal adjustments.
Overview of the ComfyUI Workflow
The complete workflow is divided into two major stages.
Stage 1 — Pose Simplification
The first stage converts the original human pose reference into a faceless mannequin.
This stage removes:
- Clothing
- Background
- Identity information
- Distracting visual details
What remains is a clean representation of:
- Body posture
- Limb orientation
- Human proportions
This simplified mannequin becomes the primary pose guide.
Stage 2 — Final Character Generation
The second stage combines:
- The mannequin pose reference
- The facial reference image
- The text prompt
Flux 2 Klein then generates the final portrait.
In this step:
- The mannequin controls the pose
- The headshot controls identity
- The prompt controls styling
This separation is what makes the workflow significantly more stable.
Stage 1 — Converting the Pose Reference into a Mannequin
The mannequin conversion stage is one of the most important parts of the workflow.
Flux 2 Klein does not perform reliably when directly copying poses from ordinary human photographs. The model becomes distracted by too many visual elements.
To solve this, the workflow first transforms the pose reference into a simplified mannequin.
Why the Mannequin Conversion Is Important
The mannequin acts as a purified pose representation.
Instead of analyzing:
- Fabric folds
- Clothing textures
- Hair
- Facial identity
- Accessories
- Background clutter
Flux 2 Klein only needs to focus on:
- Joint placement
- Limb angles
- Body balance
- Overall pose structure
This dramatically reduces anatomical errors.
The cleaner the pose signal becomes, the easier it is for the model to reconstruct believable human anatomy.
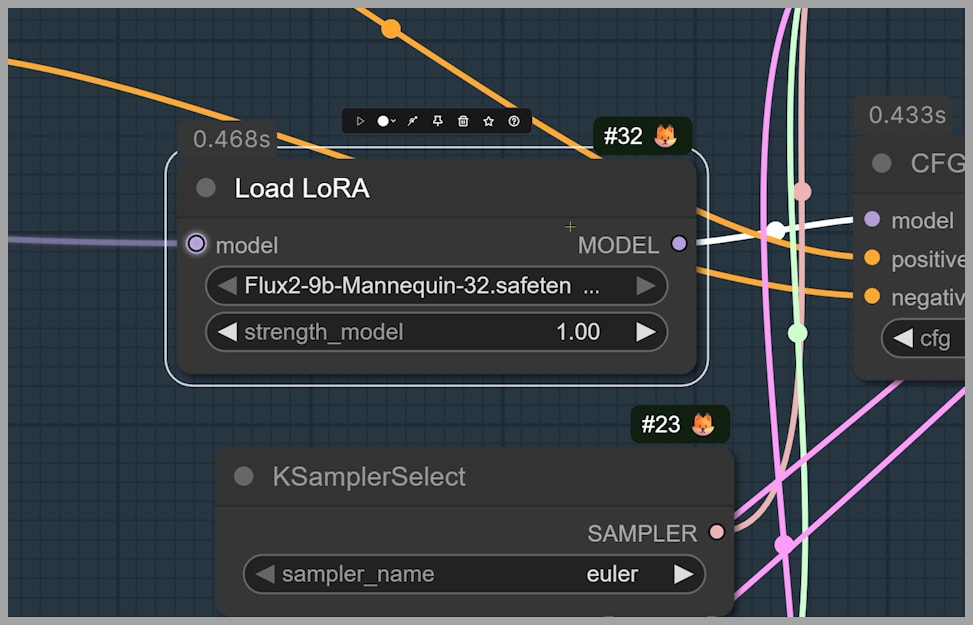
Using the Mannequin LoRA
The workflow uses a dedicated LoRA trained specifically for mannequin generation.
This LoRA converts ordinary humans into:
- Faceless glossy mannequins
- Simplified body representations
- Clean pose references
At the same time, it preserves:
- Pose accuracy
- Body proportions
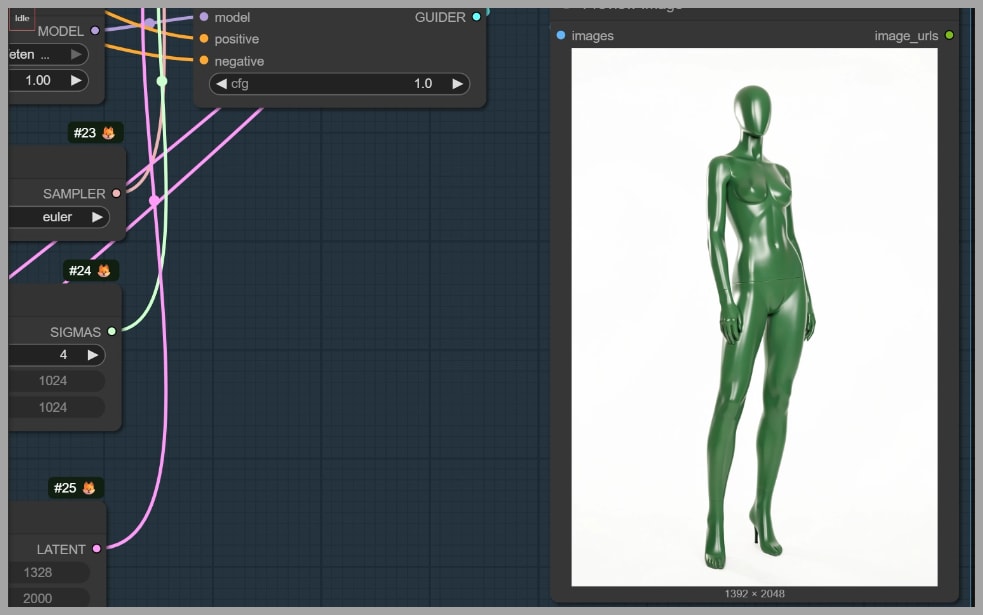
- Limb positioning
The resulting image usually resembles a smooth green mannequin with minimal distractions.
The goal is not realism.
The goal is structural clarity.
Once the identity and clothing information are removed, the model can focus almost entirely on pose interpretation.
Removing the Background and Clothing Details
To further clean the reference image, the workflow removes the original background before mannequin generation.
This is done using the Image Remove Bg node.
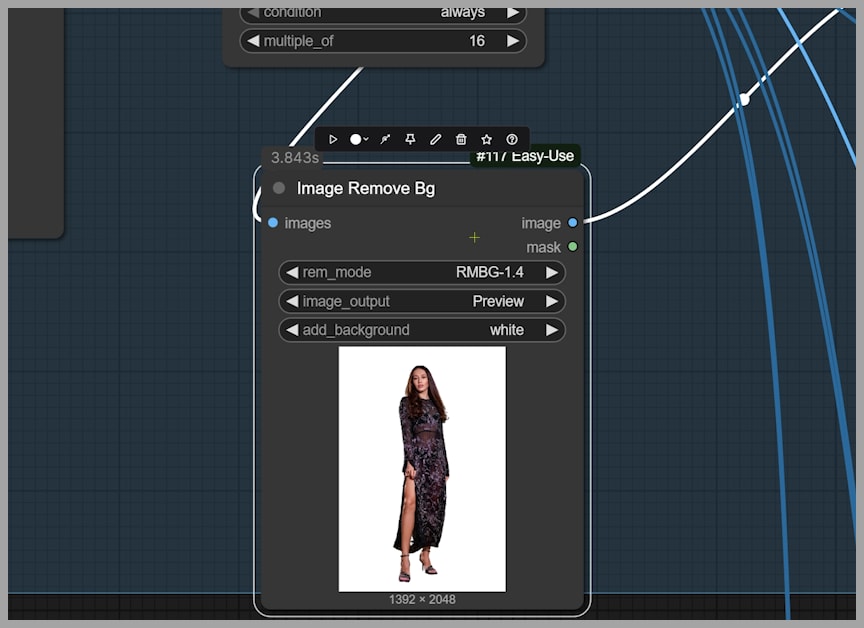
After background removal, additional prompt instructions are used to eliminate clothing information.
The prompt includes phrases such as:
- “remove garments”
- “remove shoes”
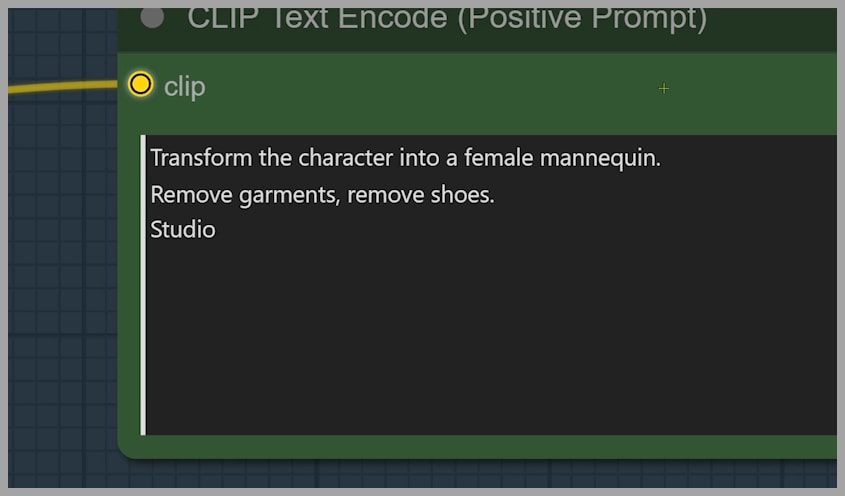
These instructions help produce a clean mannequin without:
- Fashion details
- Shoe shapes
- Clothing folds
- Background distractions
The cleaner the mannequin becomes, the better the pose transfer quality.
Stage 2 — Generating the Final Portrait
Once the mannequin reference is ready, the workflow moves into the final image generation stage.
This stage combines:
- The mannequin pose reference
- The headshot identity reference
- A descriptive text prompt
Flux 2 Klein then generates a completely new image.
The result:
- Uses the pose from the mannequin
- Preserves the identity from the headshot
- Applies the clothing and background described in the prompt
The final output is often surprisingly accurate, especially compared to traditional pose transfer workflows.
Using the Companion Pose Transfer LoRA
The second LoRA in the workflow was trained specifically as a companion model for the mannequin LoRA.

Its purpose is simple:
Transfer mannequin poses onto character subjects.
This LoRA interprets the mannequin as a structural pose guide and reconstructs a realistic human subject around it.
Because the mannequin already contains clean pose information, the final generation becomes far more stable.
This is the step that significantly reduces:
- Anatomy distortion
- Incorrect limbs
- Broken poses
- Awkward body positioning
Writing the Prompt for Better Results
The text prompt plays a major role in the final quality.
The prompt controls:
- Clothing
- Environment
- Visual style
- Mood
- Accessories
- Background details
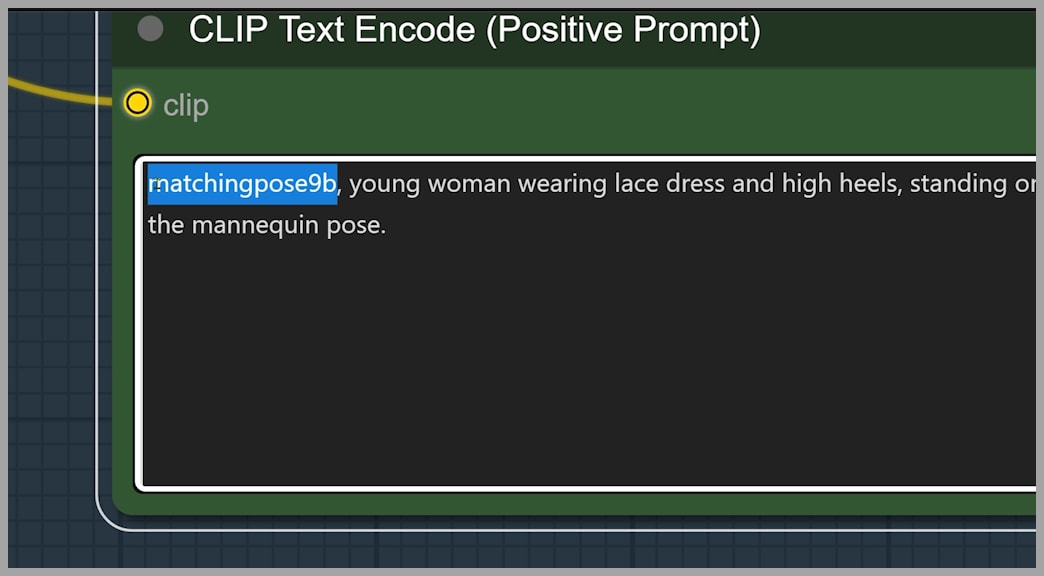
The workflow also requires a specific trigger word:
matchingpose9b
This trigger activates the pose transfer behavior of the companion LoRA.
A good prompt might include:
- Clothing descriptions
- Background atmosphere
- Fashion details
- Camera style
- Lighting information
For example, instead of writing:
elegant dress
You could write:
long satin evening dress with off-shoulder neckline, soft fabric folds, silver high heels, cinematic lighting
The more clearly you describe the important details, the more likely the model is to preserve them.
Preserving Clothing, Style, and Character Identity
One of the most impressive parts of this workflow is its ability to preserve identity consistency.
In many pose transfer systems, changing the pose also changes:
- The clothing design
- The hairstyle
- Facial structure
- Shoes
- Fabric details
This workflow introduces additional tools to reduce those inconsistencies.
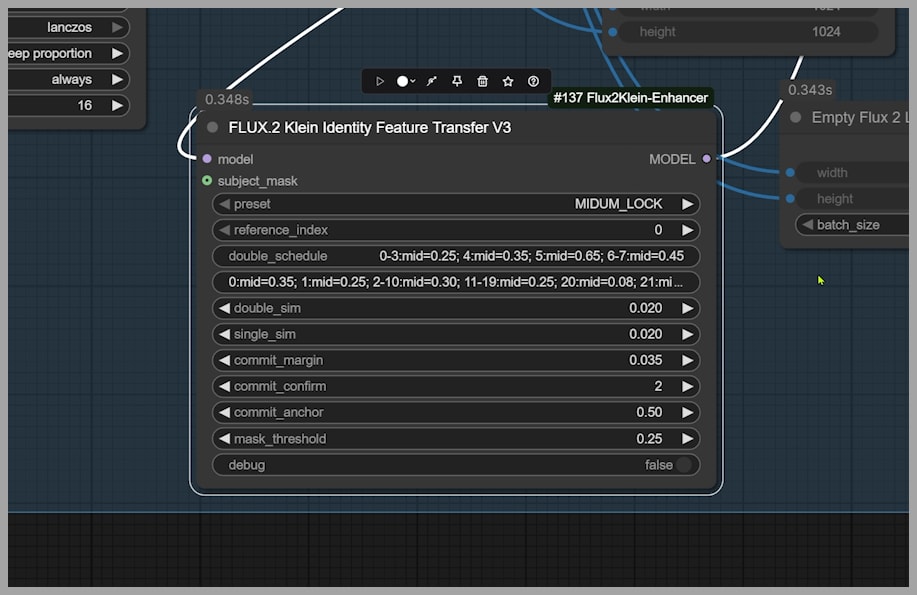
Using the Identity Preservation Node
A specialized node is used to preserve:
- Dress details
- Character identity
- Styling consistency
- Visual coherence
This node helps maintain important elements that might otherwise drift during generation.
For example, it can preserve:
- Neckline shape
- Sleeve style
- Fabric appearance
- Shoe design
- Outfit silhouette
This becomes especially useful when you want the character to remain visually consistent across multiple poses.
What Happens Without the Preservation Node
When the preservation node is bypassed, inconsistencies become much more noticeable.
Common problems include:
- Different necklines
- Altered shoes
- Modified dress cuts
- Missing accessories
- Style inconsistencies
Even if the pose transfer works correctly, the identity details may drift.
This demonstrates how important identity preservation tools are in advanced AI workflows.
Improving Results with Better Prompt Descriptions
Sometimes the preservation node alone is not enough.
In those cases, prompt engineering becomes extremely important.
If a visual detail disappears, describe it explicitly.
Useful details include:
- Neckline shape
- Sleeve design
- Fabric type
- Dress length
- Material texture
- Color palette
- Jewelry
- Footwear
For example:
Instead of writing:
black dress
Write:
black velvet evening dress with deep V neckline, long sleeves, floor-length skirt, subtle silk texture, elegant high heels
The more specific the description becomes, the easier it is for the model to preserve those features.
Tips for Experimentation and Workflow Optimization
Like most advanced ComfyUI workflows, experimentation is essential.
Small changes can dramatically improve results.
Here are several practical optimization tips.
1. Test Multiple Pose References
Some poses naturally transfer better than others.
Clean references with:
- Visible limbs
- Balanced posture
- Minimal occlusion
usually perform best.
2. Keep the Pose Reference Simple
Busy backgrounds and complicated outfits can confuse the mannequin conversion stage.
Whenever possible:
- Remove clutter
- Use clear body silhouettes
- Avoid heavy occlusions
3. Improve Prompt Specificity
Detailed prompts consistently outperform vague prompts.
Describe:
- Fabrics
- Textures
- Lighting
- Camera framing
- Mood
- Accessories
This improves identity preservation.
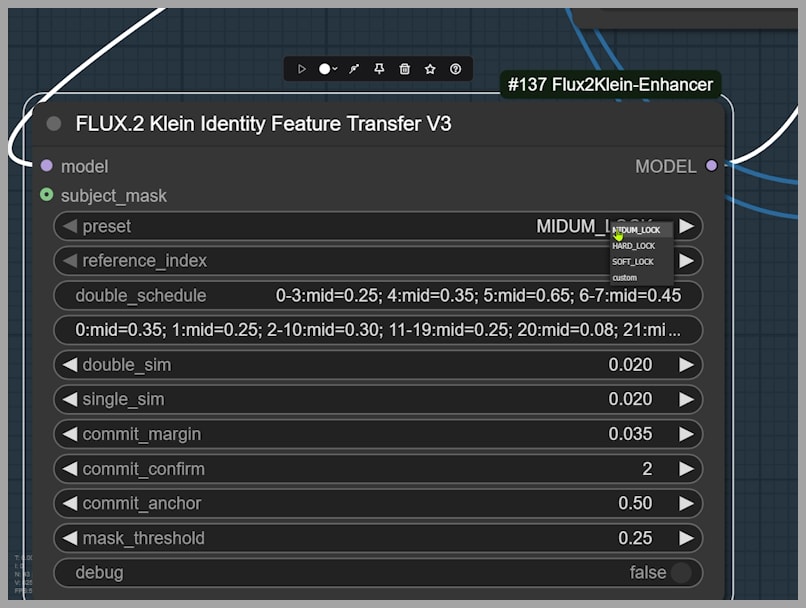
4. Experiment with Identity Preservation Presets
The preservation node may behave differently depending on the image.
Try:
- Different presets
- Different strengths
- Alternative configurations
Some images benefit greatly, while others may work better without it.
5. Bypass Nodes When Necessary
Not every image needs every node.
If a node introduces artifacts or unnecessary changes, bypass it and rely more heavily on prompt engineering.
Flexibility is one of the strengths of ComfyUI.
Final Thoughts
This workflow demonstrates how powerful Flux 2 Klein becomes when paired with the right LoRA adapters.
By separating pose extraction from character generation, the workflow solves one of the biggest weaknesses in AI pose transfer: anatomy inconsistency.
Download the workflow:
https://drive.google.com/drive/folders/1ZDzzEWk5wAHb8ypP04zvzlRn6-rbcmSf
Gain exclusive access to advanced ComfyUI workflows and resources by joining our community now!