From White to Wow: Crafting Captivating Scenes with Stable Diffusion
Stable Diffusion is rapidly gaining acclaim as the premier AI tool for image, especially lauded for its exceptional control capabilities.
In the dynamic realm of e-commerce, creating product photos can be tough and time-consuming. It often means you have to hire professionals, rent a studio, buy expensive equipment, and edit images. But even with all that effort, the final results might not meet your expectations.
Now, enter the game-changing prowess of Stable Diffusion. This tool simplifies the creation of diverse scenarios, streamlining the entire process to be conducted virtually. Remarkably, it requires just a basic white background photograph.
In this tutorial, we’ll explore this innovative workflow, employing Stable Diffusion alongside Photoshop Beta to add a scene to a perfume bottle set against a white backdrop.
1. Generating Scenes in Stable Diffusion
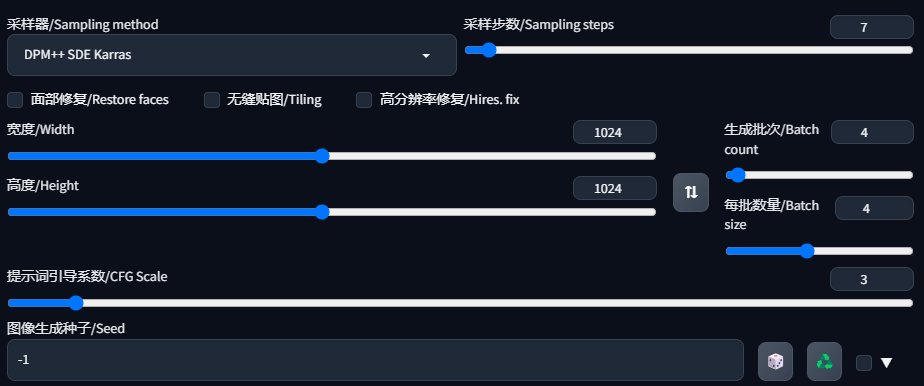
For this task, I selected the DreamShaperXL Turbo model, a variant of the SDXL model known for its rapid image creation and superb image quality. Remarkably, it required no negative prompt.
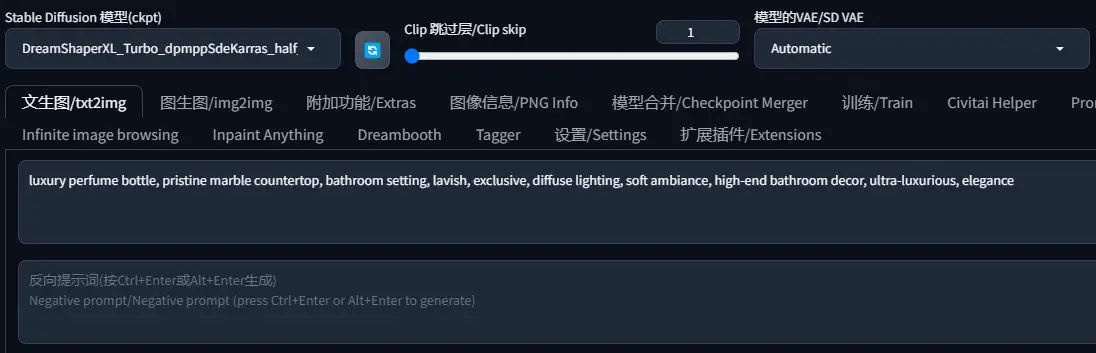
Generating the image was a swift 7-step process, employing the “DPM++ SDE Karras” sampling method.
To maintain the original shape and composition of the perfume bottle within the scene, I uploaded its white background image to ControlNet. Then, using the Canny model, I generated its silhouette. The parameters were mostly unaltered, and selecting the Pixel Perfect option enhances the photo’s clarity.
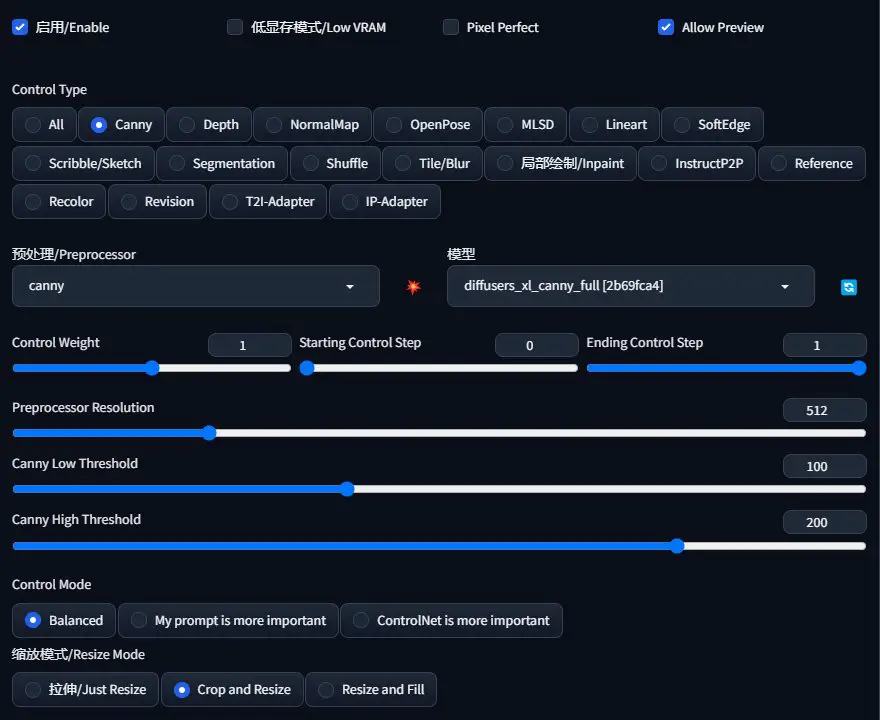
Stable Diffusion, upon clicking the explosion-shaped button, crafted an outline of the perfume bottle.
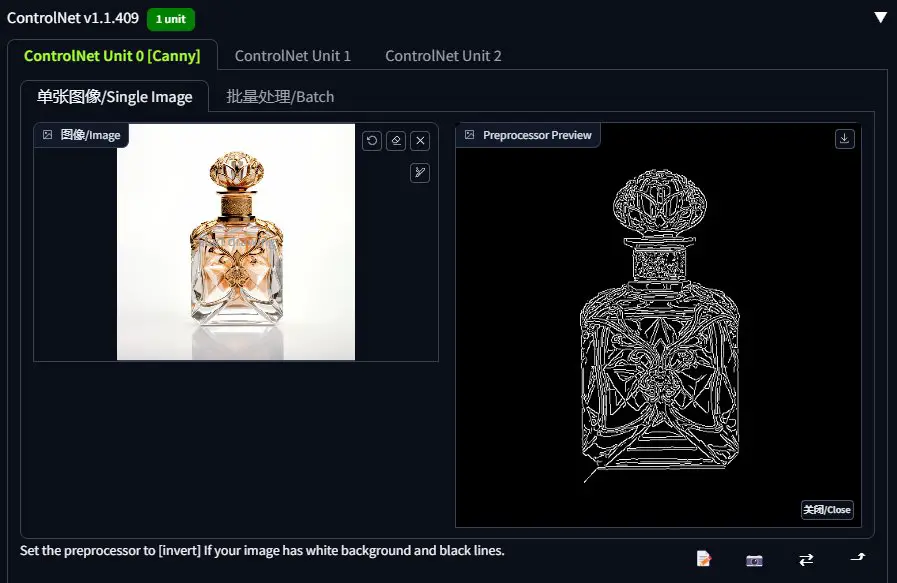
After some experimentation and batch generation, I chose an image that resonated with me. The perfume bottle appeared slightly blurry, but this was inconsequential as it was slated for replacement with the original.
2. Replacing the Perfume Bottle in Photoshop
The next step involved substituting the perfume bottle in the Stable Diffusion-generated scene with the original image.
This required just two layers in Photoshop (PS). The top layer held the white background image of the perfume bottle, and the bottom layer displayed the scene image.
1️⃣Using Photoshop Beta, I selected the Object Selection Tool.
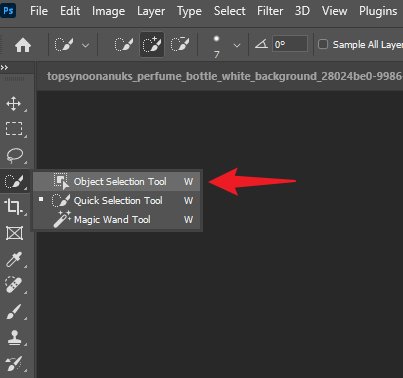
2️⃣I then dragged a rectangular selection box around the perfume bottle.
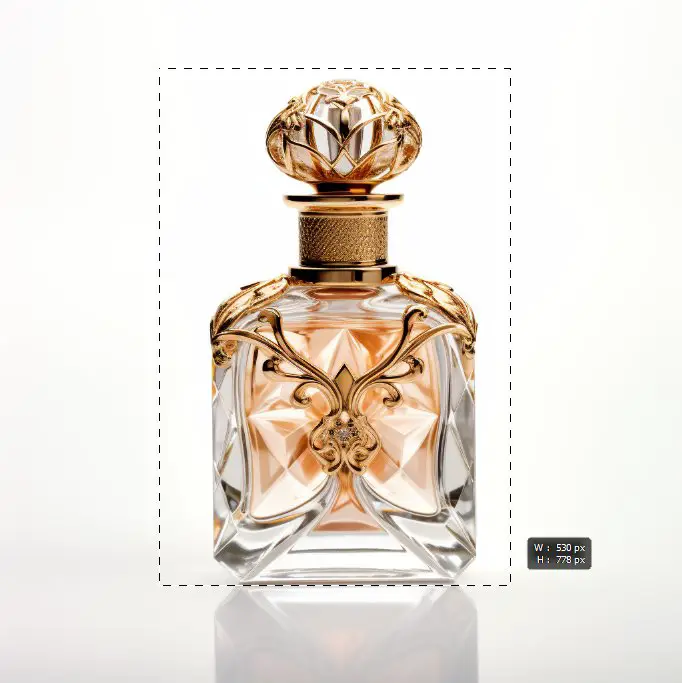
3️⃣ This action precisely selected the perfume bottle.
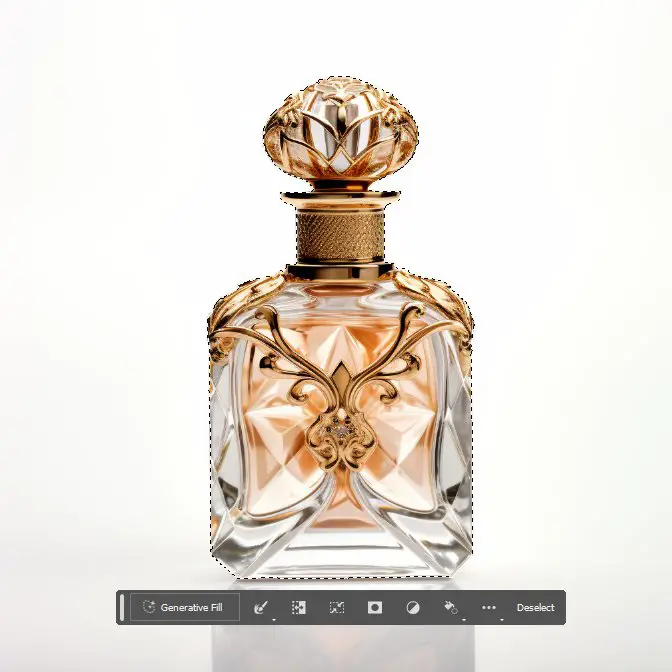
4️⃣ Creating a mask in the next step allowed the scene on the lower layer to show through.

4️⃣ Upon close examination of the composite image, a slight blemish is noticeable on the edge of the perfume bottle.
3. Refining the Image in Stable Diffusion
Addressing the aforementioned flaw proved challenging in Photoshop, hence the re-introduction of Stable Diffusion. By inputting the flawed image into the img2img and setting a low Denoising strength, I was able to redraw and refine it. If this redrawing altered certain details, minor adjustments in Photoshop rectified these changes.
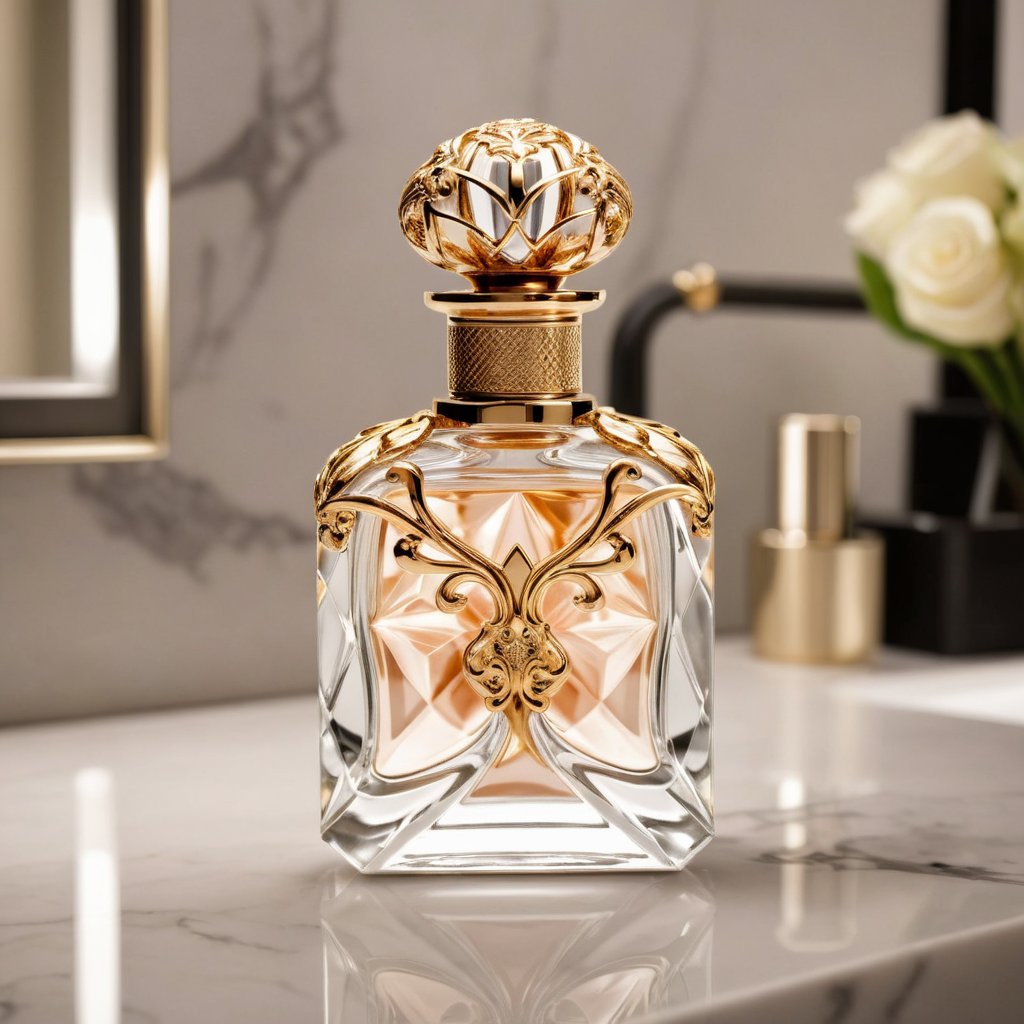
The resultant image was striking, showcasing the perfume bottle’s reflection on the marble countertop and its shadow. These intricate details, challenging to replicate in Photoshop, were effortlessly rendered by Stable Diffusion, illustrating its remarkable capability in generating naturalistic scenes, reflections, and shadows.