Best Way to Use LoRA: A Detailed Guide on LoRA + ADetailer Face Swap
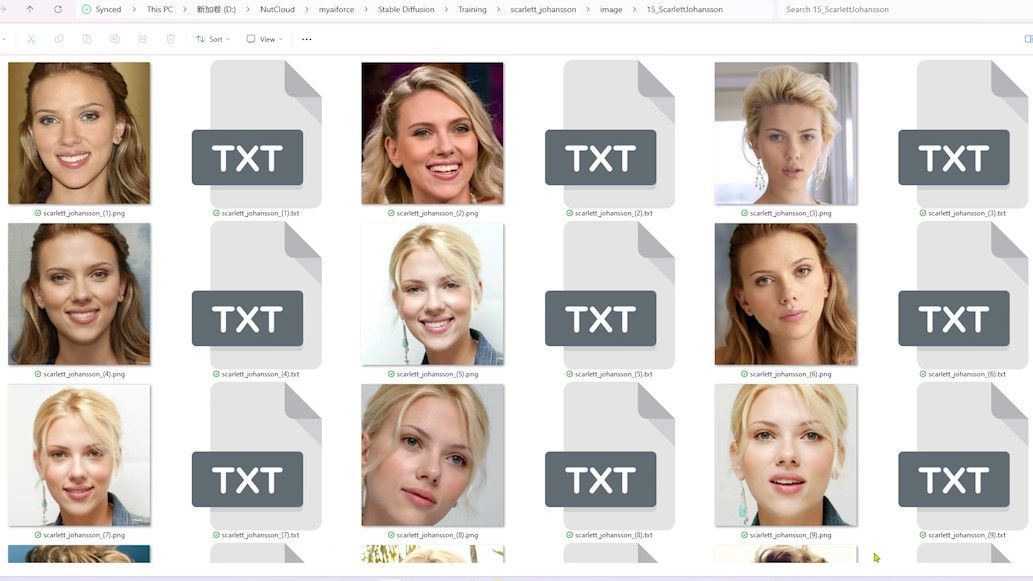
In my previous exploration (Real-Life LoRA Training), I embarked on a fascinating journey to train a LoRA model, closely resembling the Hollywood icon, Scarlett Johansson.
By focusing on her headshots, I aimed to equip the AI with the prowess to intricately learn her facial features, enabling it to generate images that mirror her appearance remarkably.
Despite achieving a semblance in facial features, I encountered hurdles when generating half or full-body shots. Adding LoRA to these prompts, unfortunately, led to images that strayed from capturing Scarlett Johansson’s essence.
Complicating matters further, my training on the SD1.5 base model restricted me to this specific version for image generation.
To navigate these challenges, I introduce the ADetailer extension, a tool that liberates your trained LoRA model, allowing it to utilize any base model for generating diverse photo styles.
ADetailer works by isolating faces from the image, employing the headshot generated by LoRA for a seamless face swap.
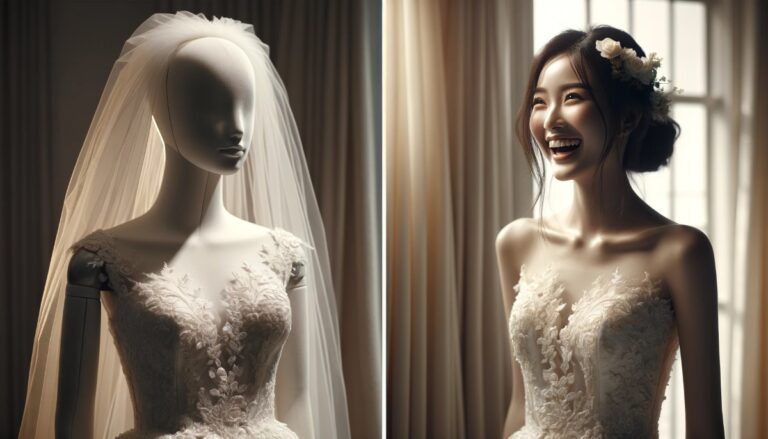
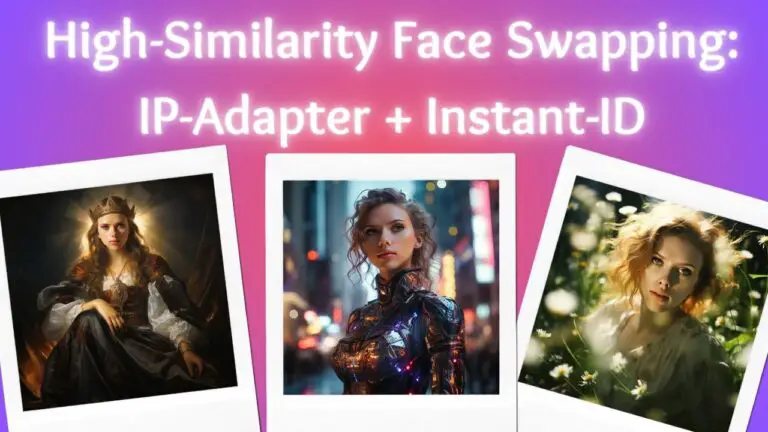
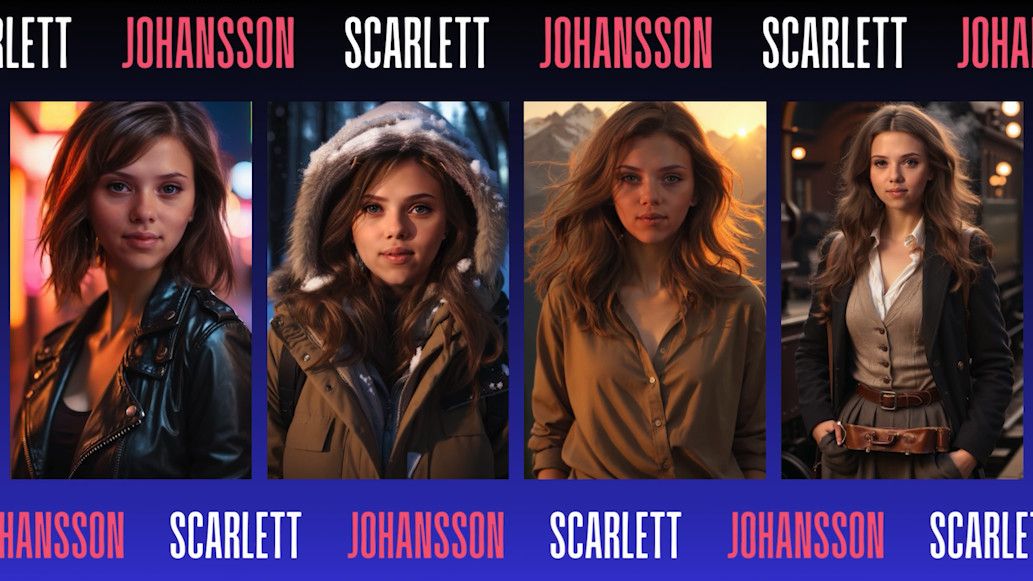
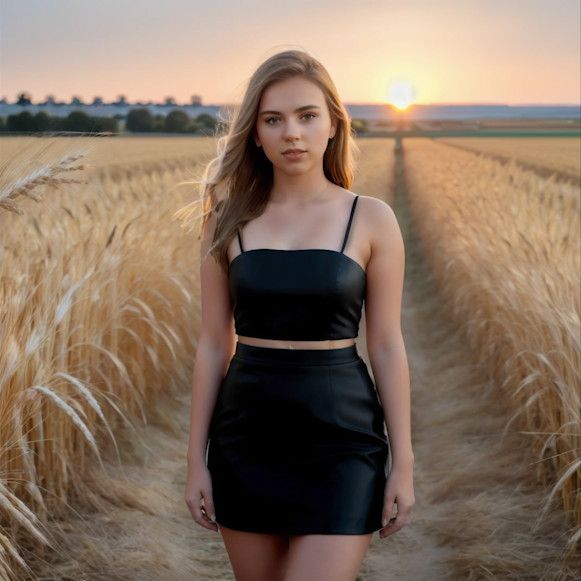
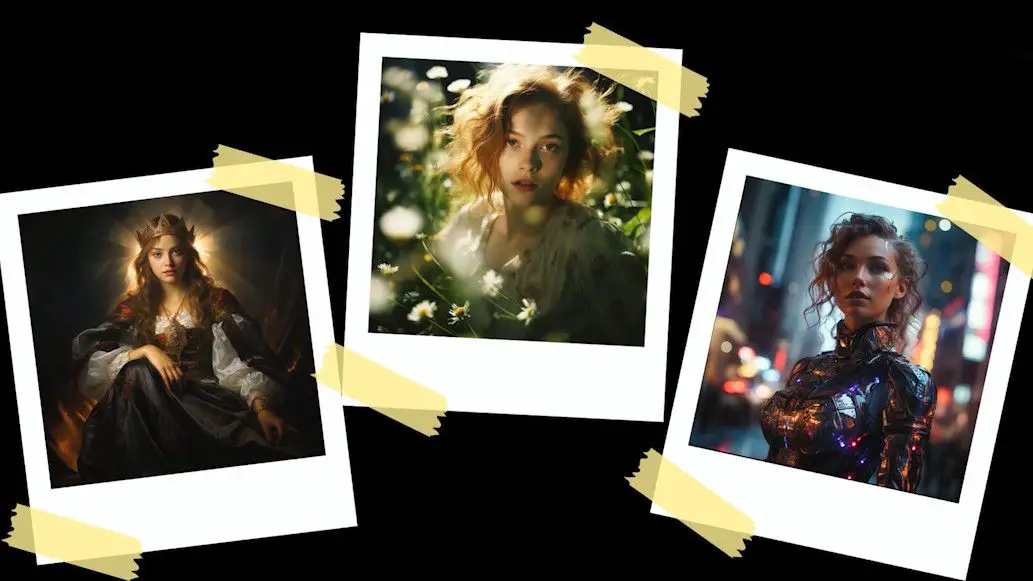
Here are three original images used for face swapping:
And the astonishing result after applying Scarlett Johansson’s LoRA model for the face swap:
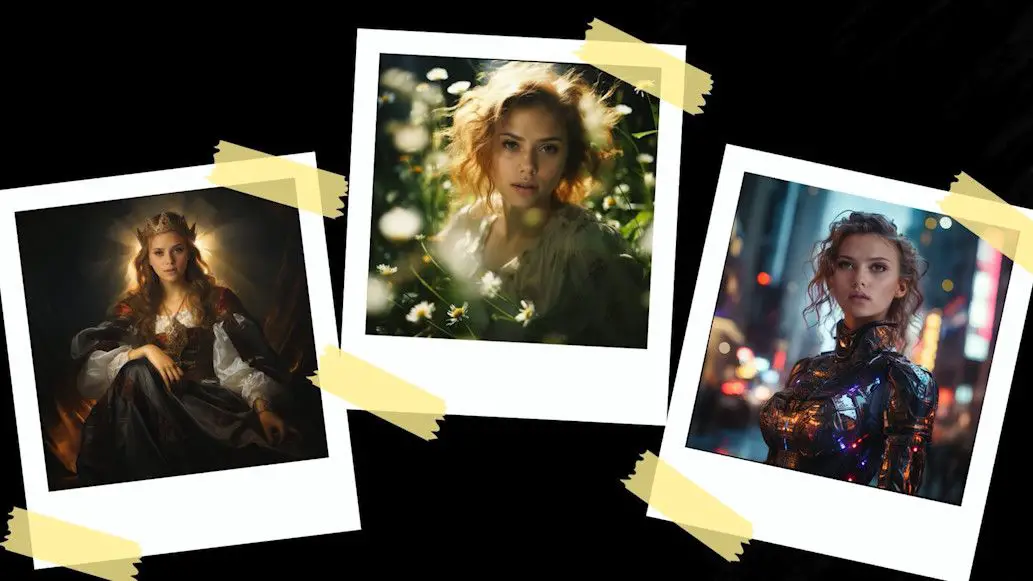
The transformation is impressive. Let’s delve into how you can achieve similar results with ADetailer and LoRA.
For those who love diving into Stable Diffusion with video content, you’re invited to check out the engaging video tutorial that complements this article:
Gain exclusive access to advanced ComfyUI workflows and resources by joining our community now!
LoRA + ADetailer Face Swap: A Step-by-Step Guide
Embark on a journey to master the art of face swapping using the ADetailer extension alongside LoRA models, through a straightforward process.
I. Preparation Stage
Before anything else, ensure the ADetailer extension is installed. If unfamiliar with the process, refer to the comprehensive guide in my previous article (Stable Diffusion & ADetailer Guide).
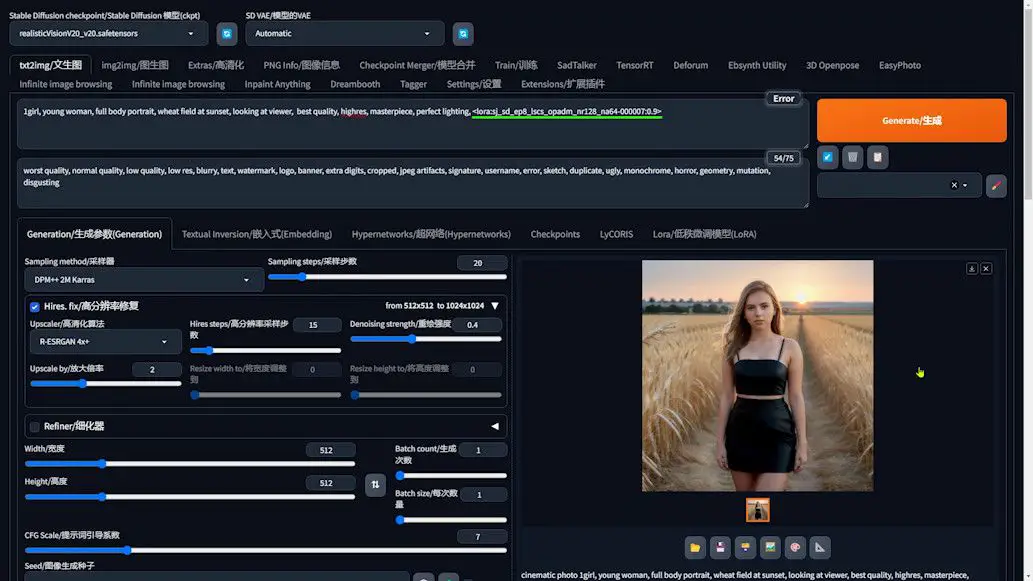
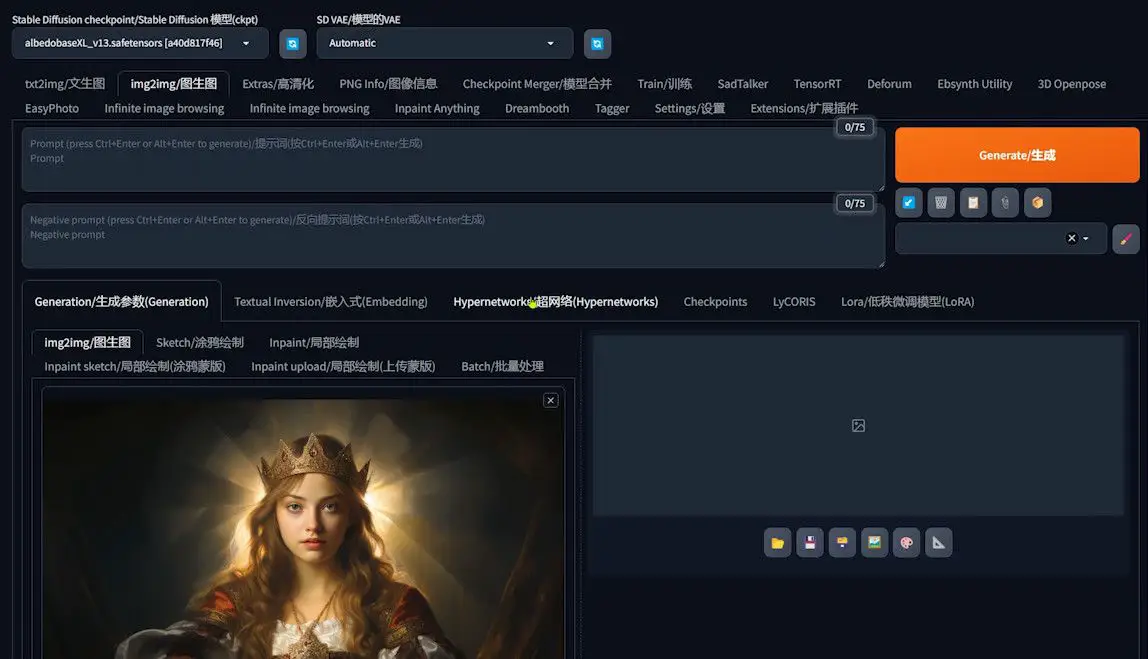
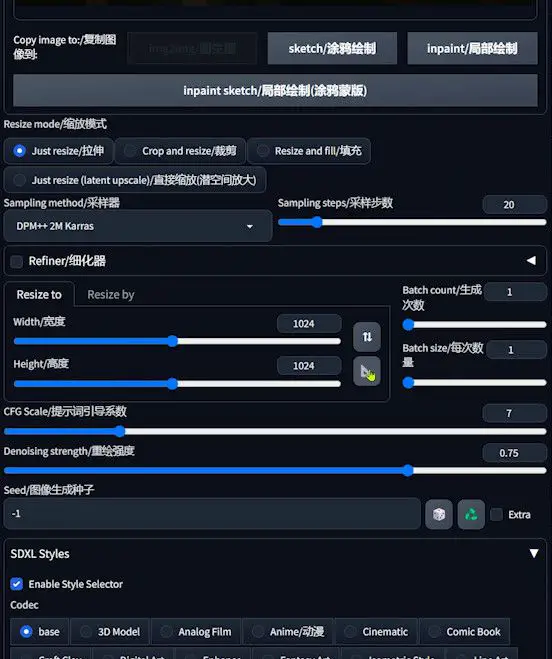
II. Upload and Configuration
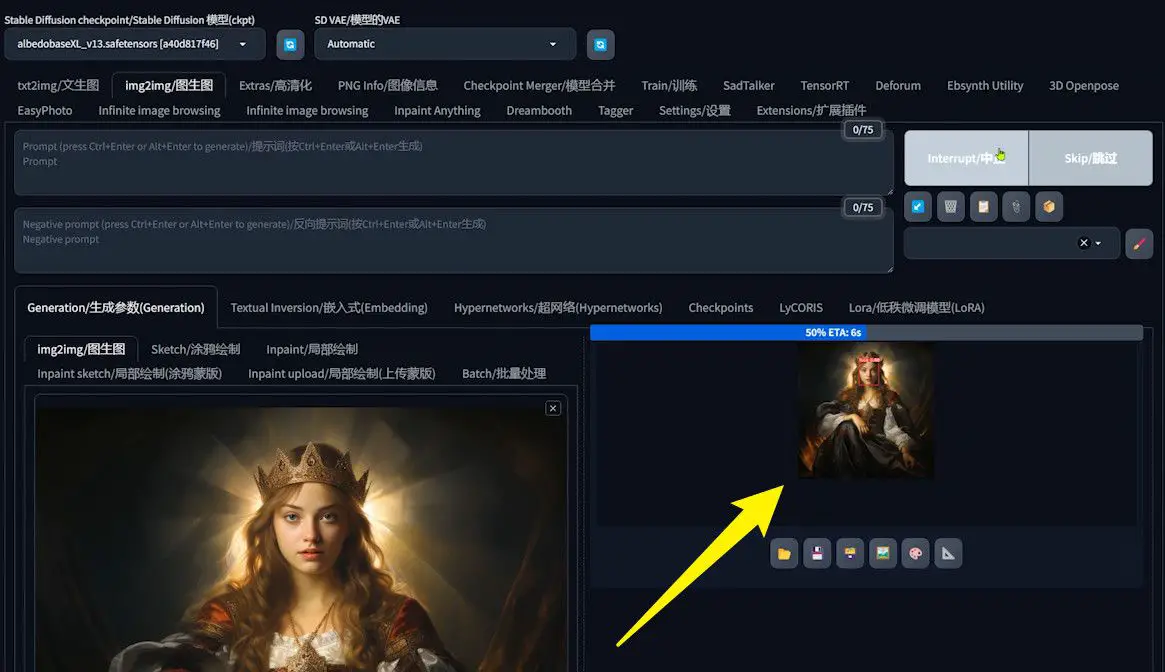
Navigate to the img2img interface on A1111 to begin the face swap operation:
- Upload the base image for face swapping.
- Select any base model; the choice here is flexible, thanks to ADetailer’s adaptability.
- Leave the prompt area blank, letting ADetailer manage the intricacies of the face swap.
III. Sampling Method and Steps
- Choose a Sampling method based on your specific needs; each method slightly influences the outcome.
- Adjust the Sampling steps to balance between detail richness and processing time.
IV. Image Adjustment and Parameters
- Use the “Triangle Ruler” to automatically set the image dimensions to the original size for authenticity.
- Set “CFG Scale” and “Denoising strength” according to preference; these parameters won’t impact the ADetailer-powered face swap effect. A “Denoising strength” of 0 can simplify ADetailer configuration.
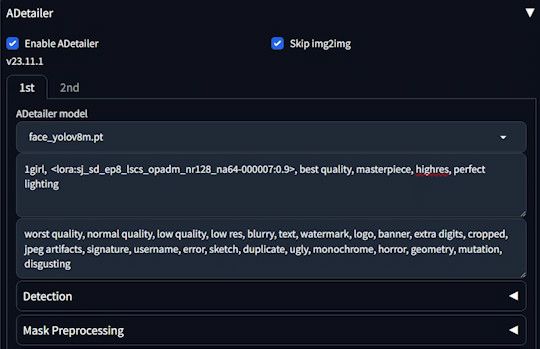
V. Configuring the ADetailer Extension
- Begin by navigating to the ADetailer extension section on the interface. Once found, expand this section to view all available options.
- Activate ADetailer by enabling it. This is crucial. Additionally, select the option to bypass the img2img step. This strategic move ensures that modifications are exclusively applied to the facial region of the image, significantly enhancing the process’s efficiency by not altering other parts of the image unnecessarily.
- Choose an appropriate ADetailer model for your project. The models, such as
face_yolov8morface_yolov8n, are designed to cater to different needs and preferences. - To ensure the face swap aligns perfectly with your intentions, it’s essential to specify the name of your LoRA model in the prompt section. This inclusion guarantees the face swap’s accuracy, as the system will utilize the specified LoRA model for generating the swap.
VI. Fine-Tuning and Generation
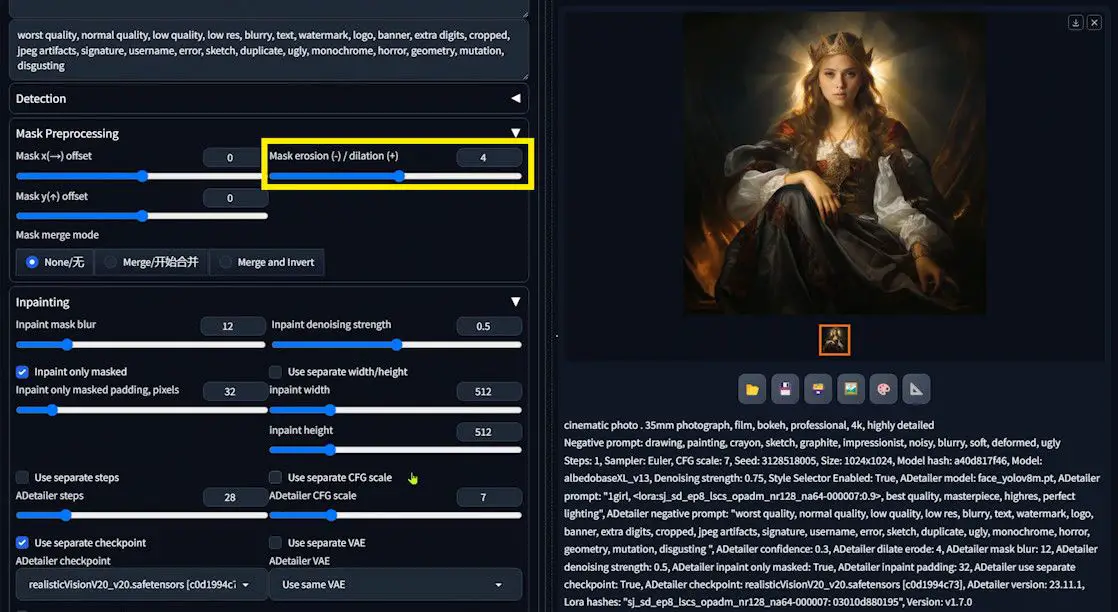
- Start by accessing the “Inpainting” tab. This section allows you to manipulate the “inpaint mask blur.” A gentle increase in the blur level is a strategic move to blend the swapped face more naturally with the original image, effectively minimizing any harsh or noticeable seams that could disrupt the visual flow.
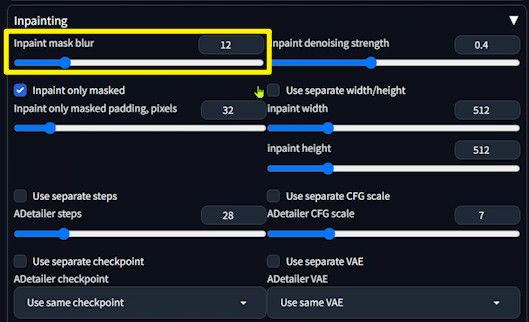
- An equally pivotal parameter is the “Inpaint denoising strength.” This setting plays a critical role in determining the extent to which the original face area is modified. Opting for a medium value is a wise starting point. From there, you can make incremental adjustments based on the observed effects on the resulting image. A balanced approach is key here; setting the denoising strength too high may lead to unintended distortions, potentially disfiguring the face in the process.

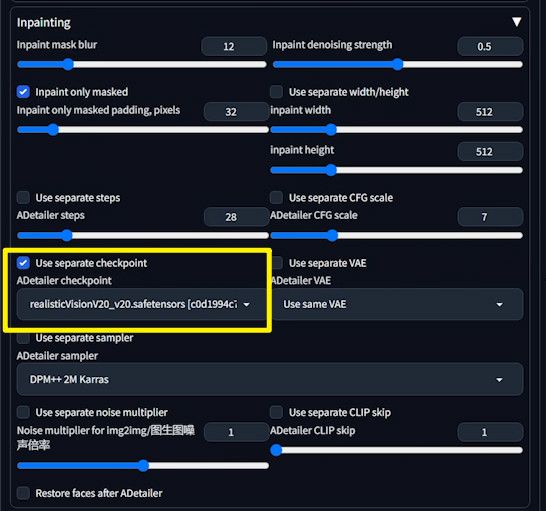
VII. Diverse Base Model Application
- Enable “Use separate checkpoint” to select a different base model from the original LoRA model, enriching face swapping possibilities.
- Match the base model with the version your LoRA model was trained on for compatibility.
VIII. Generating and Refining Face Swap Images
Finalize ADetailer settings and hit “Generate” to commence the face swap process. The preview will reveal the area designated for face swapping, allowing for adjustments to achieve a perfect blend.
Preview and Adjustment
To ensure the face swap aligns perfectly with your vision, a two-step process allows for the preview and adjustment of the swap area. Let’s dive into this critical phase:
1️⃣ Generate Preview: Initiate this process by clicking the “Generate” button. The system will then process the image based on your configured settings. Upon completion, the preview window will display the image, highlighting the face swap area with a distinctive box. This visual cue marks the specific region designated for the face swap, providing a clear reference for any necessary adjustments.
2️⃣ Adjust the Size of the Face Swap Region: Sometimes, the initially outlined face swap area might not align precisely with your expectations, whether it be too large or too small. Adjustments are made simple and intuitive. By expanding the “Mask Preprocessing” section, you’ll find a specific slider designed to modify the face swap area’s dimensions. Through this functionality, you can fine-tune the size of the swap region, enhancing the natural integration and achieving a more harmonious outcome.
Optimizing the Face Swap
Upon reviewing the initial face swap results, you might notice areas that could benefit from refinement to achieve a seamless blend. An effective way to enhance the integration of the swapped face with the original image is through the careful adjustment of the “Inpaint denoising strength” in the ADetailer settings.
Modulating this parameter can significantly smooth the transition between the swapped face and the original background, ensuring a more cohesive and natural appearance.
Expanding Creative Horizons with txt2img and ADetailer
An exciting facet of the ADetailer extension is its versatility across different Stable Diffusion environments. Notably, ADetailer isn’t confined to img2img operations; it also extends its capabilities to txt2img.
This adaptability means you can conceive an image entirely from text descriptions and subsequently apply the ADetailer for a face swap directly within the txt2img framework. This method maintains the intuitive and effective process characteristic of img2img, while broadening the scope for creative expression.
Conclusion
Navigating through this guide, you’ve equipped yourself with the knowledge to leverage ADetailer and LoRA models for exceptional face swaps. This technique not only transcends the original confines of your LoRA model but also unveils a spectrum of creative possibilities. Thank you for journeying through this tutorial with me.