How to Reduce Color Saturation Shifts using Qwen Image Edit and Flux 2 Klein
Hello creators and creative friends. In this article, we are going to look at a common problem that appears when using image editing models in ComfyUI: unexpected color shifts.
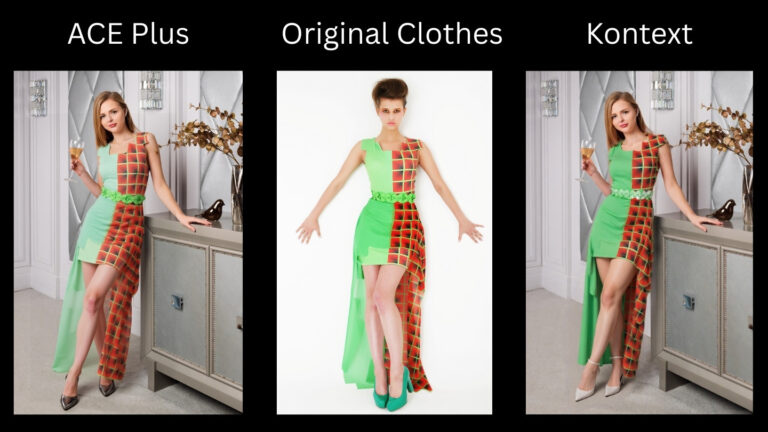
More specifically, we will focus on clothing swap workflows using Qwen Image Edit and Flux 2 Klein. Clothing swaps are a very practical example because they make color differences easy to notice. The model may preserve the shape, texture, and style of the clothing quite well, but the final color can become more saturated than the original reference.
By the end of this article, you will understand how to reduce that saturation shift and make your clothing swap results look more natural and closer to the original garment.
YouTube Tutorial:
Why Color Shifts Happen in Image Editing Workflows
When working with image editing models like Qwen Image Edit or Flux 2 Klein, you may notice that the edited area does not always keep the exact color from the reference image.
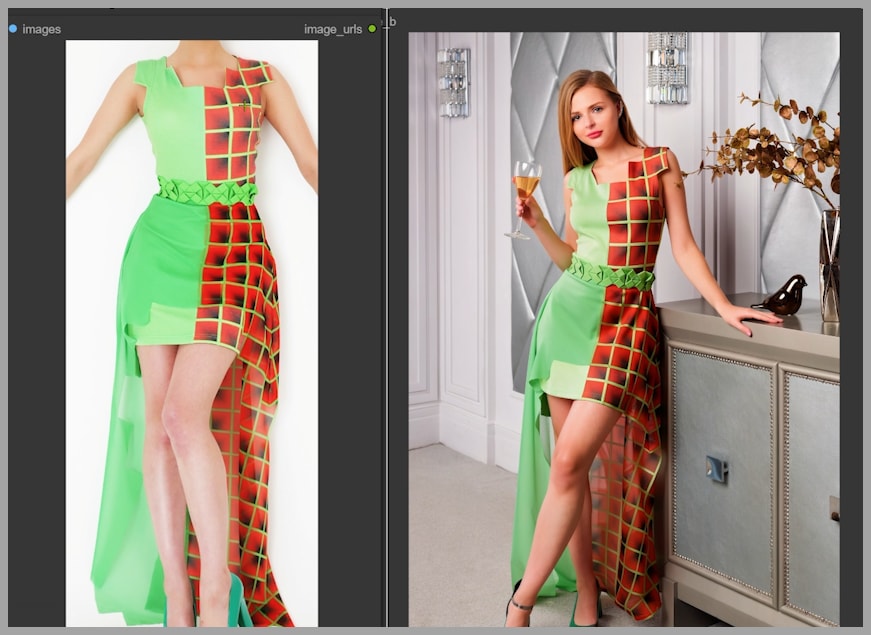
For example, imagine transferring a dress from one woman onto another woman. The generated result may look good at first glance:
- The dress shape is preserved.
- The style looks similar.
- The clothing swap works as expected.
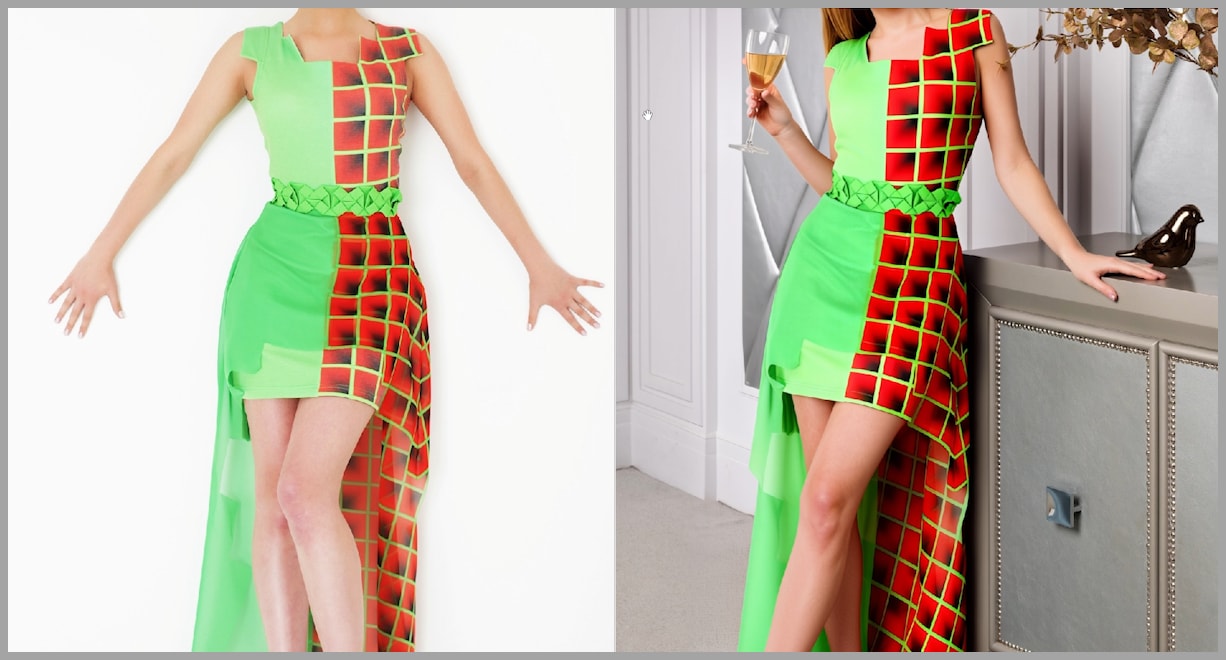
However, when you place the original dress next to the generated result, the color may look different. In many cases, the new dress becomes more saturated than the original.
This is especially noticeable in clothing swaps because clothing usually has clear visual features such as:
- Color
- Fabric texture
- Pattern
- Shape
- Shadow and lighting
When the model changes the color too much, the result can feel less accurate, even if the overall edit is successful.
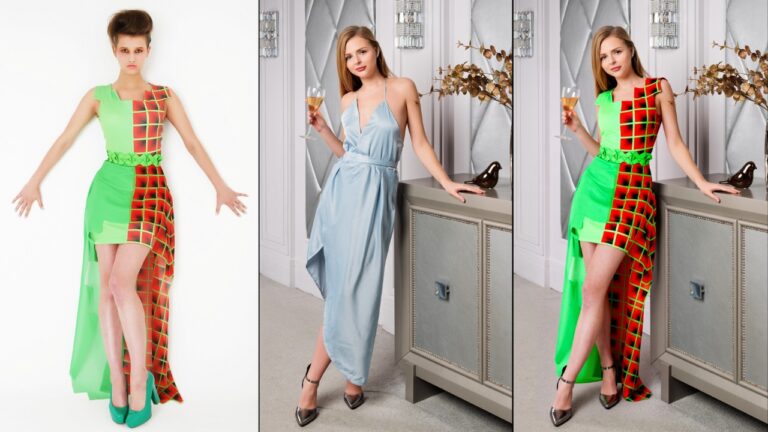
The Clothing Swap Example
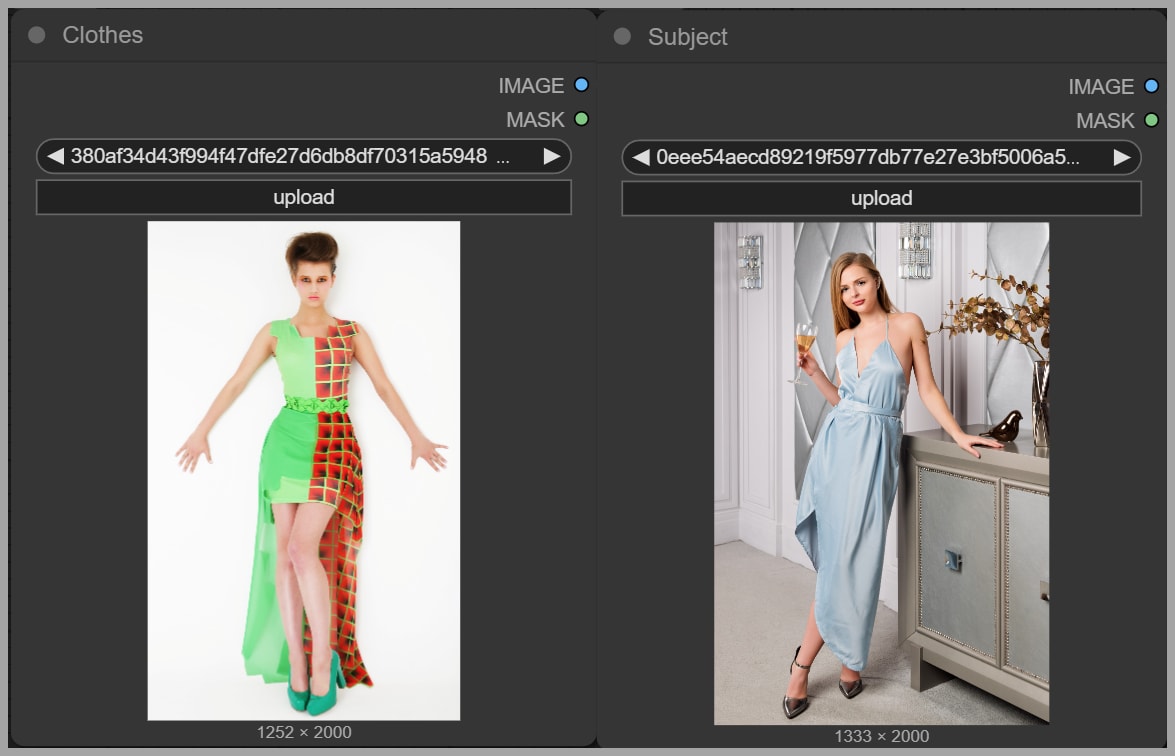
In this workflow, we are using two reference images:
- The clothing reference image This is the image containing the dress we want to transfer.
- The target portrait image This is the image of the woman who will wear the dress in the final result.
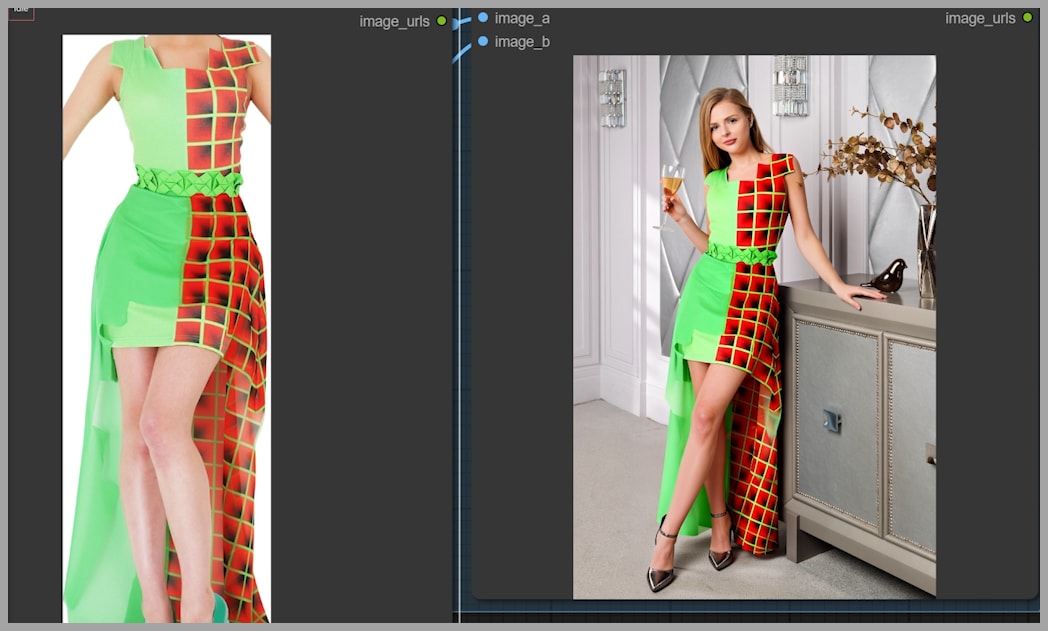
The goal is simple: transfer the dress from the reference image onto the target person while keeping the dress color as close as possible to the original.
At first, the generated image does preserve the dress style quite well. But after comparing it with the original dress, the problem becomes clear: the new dress color is noticeably more saturated.
So the main question is:
How can we reduce this color saturation problem while still keeping a clean clothing swap result?
Let’s start with the Qwen Image Edit workflow.
Part 1: Fixing Color Saturation in Qwen Image Edit
Overview of the Qwen Image Edit Clothing Swap Workflow
This workflow is designed specifically for clothing swaps. An older version of the workflow was shared previously, and the updated version improves the way color and inpainting are handled.
The main issue in the older workflow was that the model could successfully transfer the dress, but the final output often made the dress color too saturated.
Reviewing the Older Workflow Result
The generated result looked good in terms of structure. The dress was placed onto the target person, and the overall style was preserved.
However, once the original dress was placed next to the output, the difference became obvious. The generated dress had stronger, richer color than the source dress.
This is the type of color shift we want to reduce.
Adjustment 1: Lowering the CFGNorm Strength
The first important change is inside the CFGNorm node.
In the older workflow, the CFGNorm strength value was set to:
1
In the updated workflow, the value was lowered to:
0.9
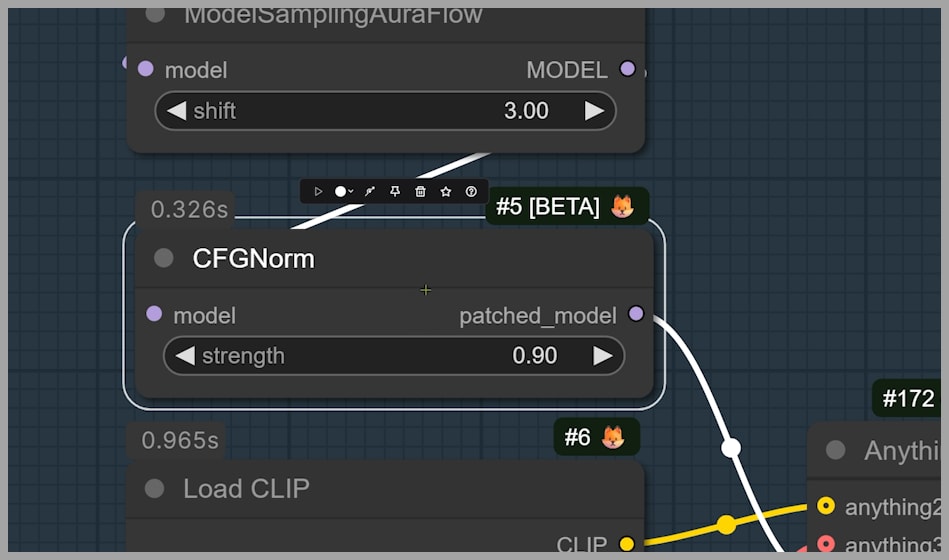
This small adjustment helps reduce the intensity of the generated color. Instead of pushing the edit too strongly, lowering the CFGNorm strength gives the model a little more flexibility and helps the final dress color stay closer to the original reference.
Recommended CFGNorm Range
You can experiment with this value depending on your image and workflow, but a good range is:
0.9 to 1
In my testing, keeping the value between 0.9 and 1 works best.
A value of 1 may produce a stronger edit, but it can also make the color more saturated. A value of 0.9 helps soften the effect while still keeping the clothing swap stable.
Adjustment 2: Improving the Inpainting Mask
The second major improvement is the inpainting area.
In the older workflow, the inpainting area was created using a simple rectangular mask. This approach works, but it is not very precise.
The problem with a rectangle is that it can include areas outside the actual dress. That means the model may edit pixels that should not be changed, such as:
- Skin
- Background
- Hair
- Nearby body parts
- Shadows around the clothing
When the inpainting region is too broad, the model has more freedom to alter parts of the image unnecessarily. This can make the color shift more noticeable.
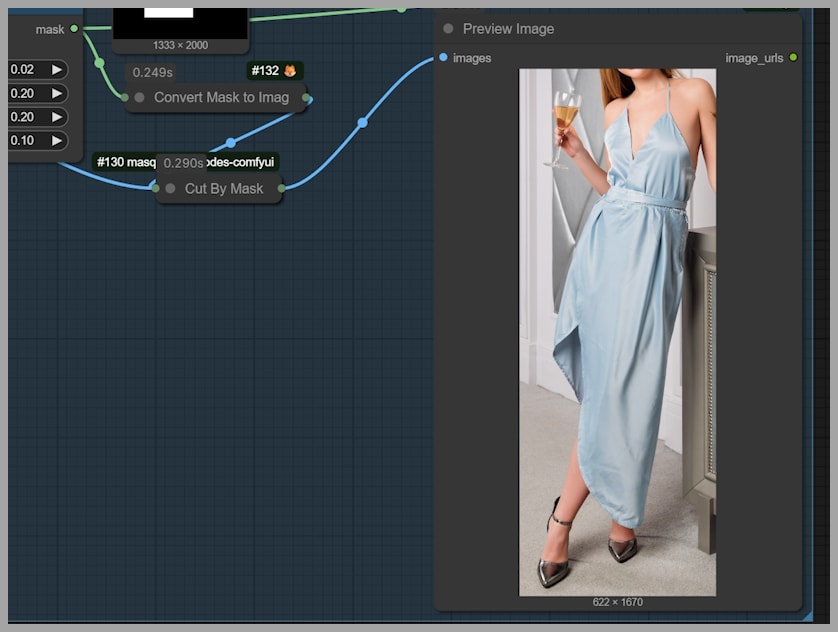
Creating a More Precise Inpainting Area
In the updated workflow, the inpainting area is created more carefully.
Instead of using only a simple rectangle, the workflow detects the relevant regions more precisely:
- Detect the dress area One node is used to identify the area of the clothing.
- Detect part of the body Another node is used to detect the body area connected to the clothing.
- Combine the detected areas The two areas are combined using a Mask Add node.
This creates a better mask for the inpainting process.
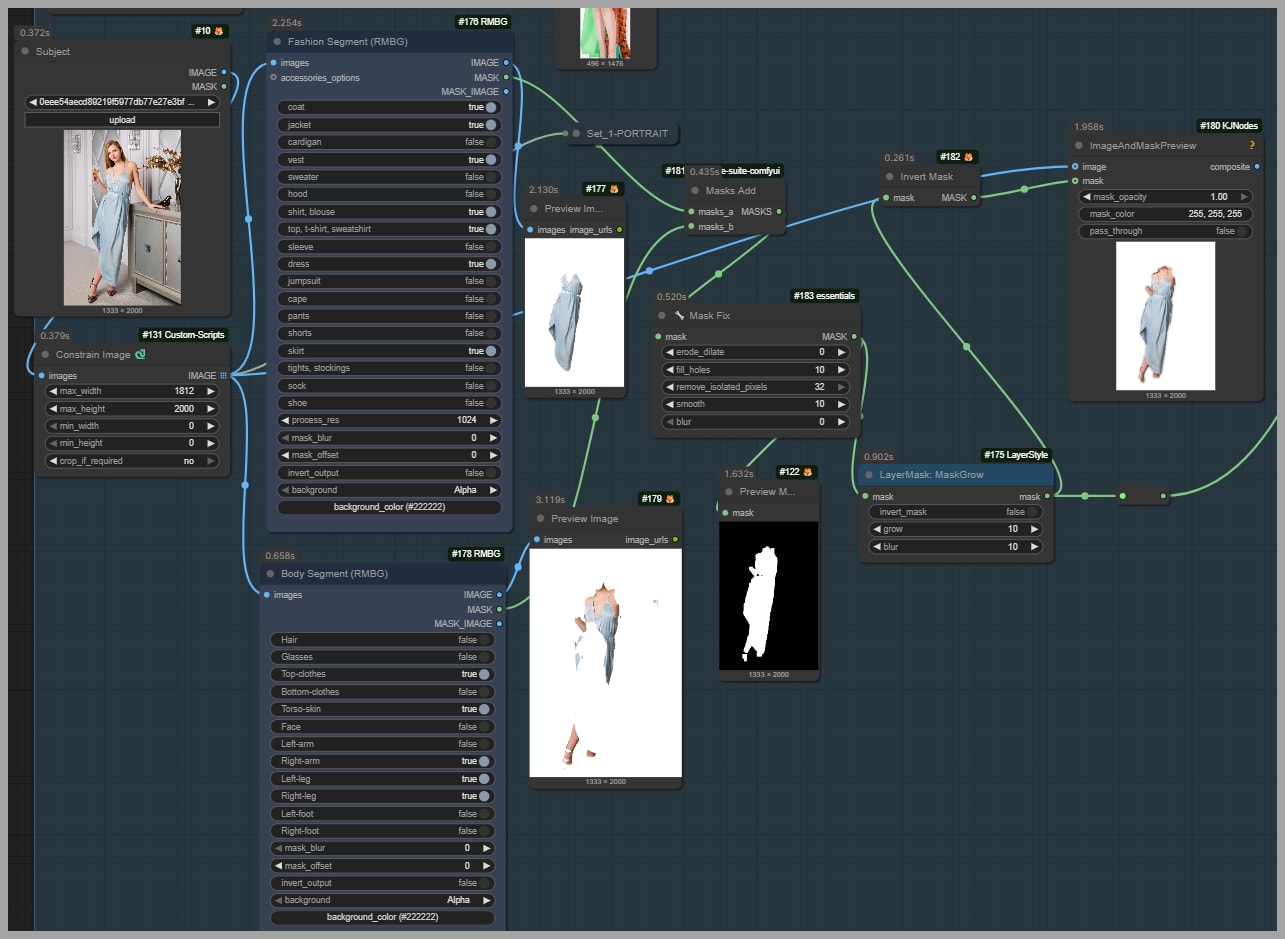
The key advantage is that the model now focuses more directly on the area that actually needs to be changed. By reducing unnecessary edits outside the dress region, the final output becomes more controlled.
Final Qwen Image Edit Result
After lowering the CFGNorm strength and improving the inpainting mask, the final Qwen Image Edit result looks much better.
The dress color is now:
- Less saturated
- Closer to the original reference
- More natural on the target person
- Better integrated with the overall image
The dress still keeps its style, but the color no longer feels overly intense.

This shows that even small workflow changes can make a big difference. A slight CFGNorm adjustment combined with a more accurate mask can noticeably improve color consistency.
Where to Find the Updated Qwen Image Edit Workflow
The updated Qwen Image Edit workflow is stored in the same folder as the older version.
So, if you already accessed the previous workflow, you can find the new version there as well.
Part 2: Fixing Color Saturation in Flux 2 Klein
Overview of the Flux 2 Klein Clothing Swap Test
Next, let’s look at Flux 2 Klein.
For this test, we use the same reference images:
- The dress image
- The portrait image of the woman
This makes it easier to compare how both workflows handle the same clothing swap task.
The goal is still the same: transfer the dress while keeping the final color close to the original dress.
Initial Flux 2 Klein Output
When running the first Flux 2 Klein output, the clothing swap works, but the dress color changes quite a lot.
Compared with the original dress, the generated dress does not match the reference as closely as we want.
This tells us that Flux 2 Klein also needs some color correction support when handling this kind of edit.
The style and placement may be acceptable, but the color needs improvement.
Activating the Color Matching Nodes
To fix the color issue in Flux 2 Klein, we activate several nodes in the workflow.

After enabling these nodes and rerunning the workflow, the output becomes much closer to the original dress color.
This step is important because the color correction nodes help guide the generated image toward the reference image instead of allowing the model to freely reinterpret the colors.
The improvement is very visible: the dress no longer appears as heavily shifted, and the final result feels more faithful to the source.
Key Setting: Channel Match Mode
The most important setting in this part of the workflow is the mode.
For better color matching, set the mode to:
channel match
When using channel match, the workflow pushes the generated image color closer to the reference image color.
This is especially useful when the model changes the overall tone, saturation, or color balance of the clothing. By matching the channels, the workflow can bring the output back toward the look of the original dress.
In simple terms, this setting tells the workflow:
“Keep the generated clothing color closer to the reference image.”
That makes it very useful for clothing swaps.
Adjusting Strength When the Effect Is Too Strong
Sometimes, the color matching effect may be too strong.
When that happens, you can lower the strength value.
For example, in this workflow, the strength was lowered to:
A lower strength value makes the correction softer. This can help avoid an overcorrected result, where the color match becomes too aggressive or unnatural.
A good approach is to adjust the value gradually:
- Start with the default or current value.
- Compare the output with the original dress.
- Lower the strength if the effect is too strong.
- Rerun the workflow.
- Repeat until the color looks natural.
The goal is not always to create a perfect mathematical match. The goal is to make the clothing look believable, natural, and visually close to the source image.
Learning More About the Node Parameters
The color matching nodes include parameters that can affect the final output in different ways.
To understand them more deeply, it is useful to visit the node author’s GitHub page. There, you can learn what each parameter does and how it affects the generated image.
This is especially helpful if you want more control over:
- Color matching strength
- Channel behavior
- Reference image influence
- Output consistency
Understanding these settings gives you more flexibility when building or modifying your own ComfyUI workflows.
Where to Find the Updated Qwen Image Edit Workflow
The updated Flux 2 Klein workflow is stored in the same folder as the older version.
So, if you already accessed the previous workflow, you can find the new version there as well.
Conclusion
Color shifts are a common issue in ComfyUI clothing swap workflows, especially when using powerful image editing models like Qwen Image Edit and Flux 2 Klein.
The good news is that this problem can be reduced with a few practical adjustments.
For Qwen Image Edit, lowering the CFGNorm strength and creating a more precise inpainting mask can help reduce oversaturation.
For Flux 2 Klein, activating the color matching nodes and using channel match mode can bring the generated dress color much closer to the original reference.
The key is to compare your output with the source image and adjust the workflow step by step. With careful tuning, your clothing swaps can look more natural, more accurate, and more faithful to the original garment.