Enhancing Clothing Details with DeepFashion (ADetailer) in Stable Diffusion
In my previous article, I explored the fascinating world of ADetailer, a powerful extension for Stable Diffusion.
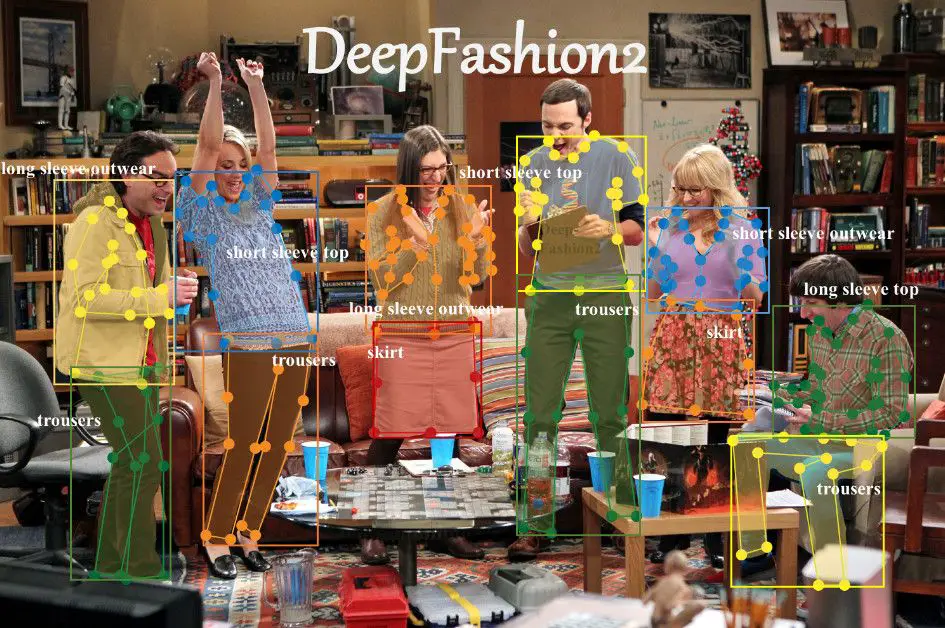
Primarily focused on refining facial features and hands, ADetailer encompasses 14 distinct models, each serving a unique function. While I have delved into most of these models, one, in particular, stands out due to its unique capabilities – the DeepFashion model.
Let’s embark on a detailed exploration of DeepFashion and its transformative impact on AI-generated imagery.
For those who love diving into Stable Diffusion with video content, you’re invited to check out the engaging video tutorial that complements this article:
Gain exclusive access to advanced ComfyUI workflows and resources by joining our Patreon now!
Unveiling DeepFashion’s Core Capabilities
At the heart of the DeepFashion model lies its proficiency in processing clothing. Boasting a dataset exceeding 800,000 garments spanning 13 major clothing categories, DeepFashion, when integrated with ADetailer, can astutely identify and individually refine garments within an image.
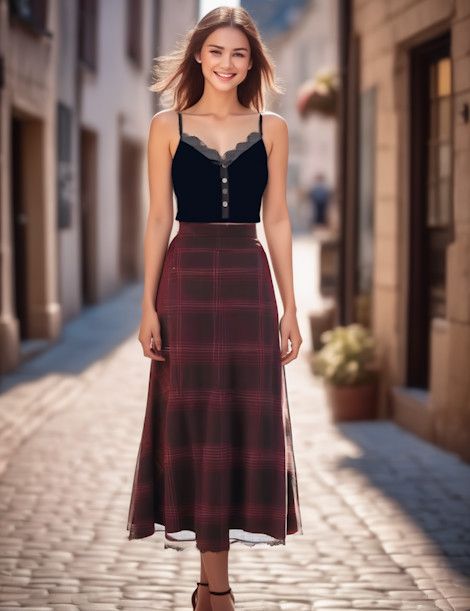
A known limitation of Stable Diffusion, especially when compared to counterparts like DALL-E and Midjourney, is its less robust natural language understanding. Consider an image created using the SDXL model with the prompt: “1 girl, smiling, morning light on her face, black silk camisole with delicate lace trim at the neckline, burgundy plaid high-waisted bustier, full-body shot, sandals, quaint cobblestone street, depth of field, bokeh”. Despite the detailed prompt, the plaid pattern on the girl’s skirt is notably absent.
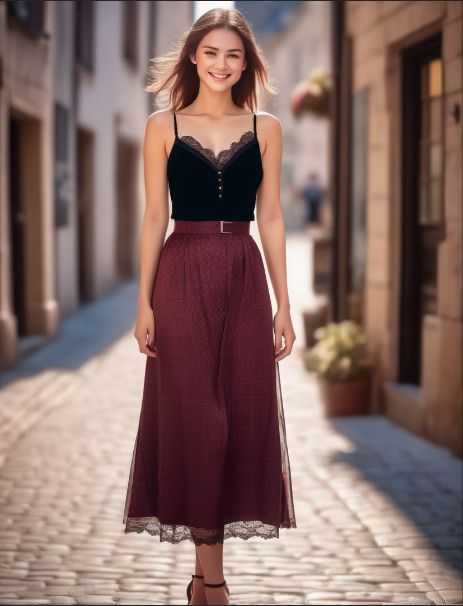
Enter DeepFashion, which remarkably enhances the accuracy, clearly depicting the plaid on the skirt.
DeepFashion also addresses the challenge of prompt pollution. For instance, if an image with a lemon yellow background leads Stable Diffusion to erroneously integrate a lemon pattern onto the girl’s skirt, as shown below:
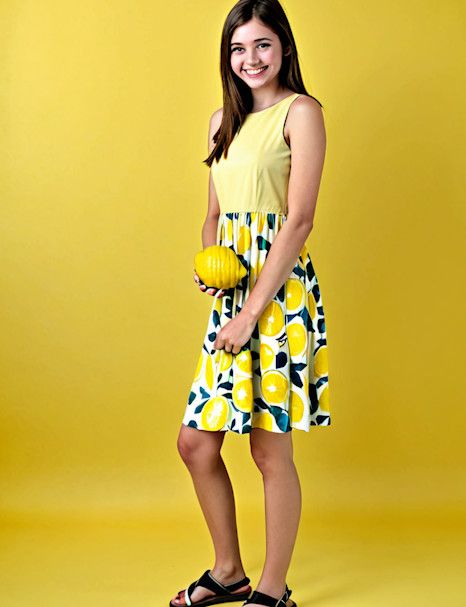
DeepFashion effectively isolates the skirt, applying a specialized prompt that ensures accurate representation without unintended patterns.
Installing DeepFashion: A Step-by-Step Guide
1️⃣ Installing ADetailer Extension
Begin by ensuring the ADetailer extension is installed. Refer to my earlier post for installation guidance. This is a prerequisite for using DeepFashion.
2️⃣ Downloading the DeepFashion Model
Post-ADetailer installation, the DeepFashion model doesn’t automatically appear in the model list. Manually download it from: https://huggingface.co/Bingsu/adetailer/tree/main.
3️⃣ Navigating to the Download Page
Accessing the provided URL takes you to HuggingFace’s download page. Locate DeepFashion at the top of the model list and click the download button.
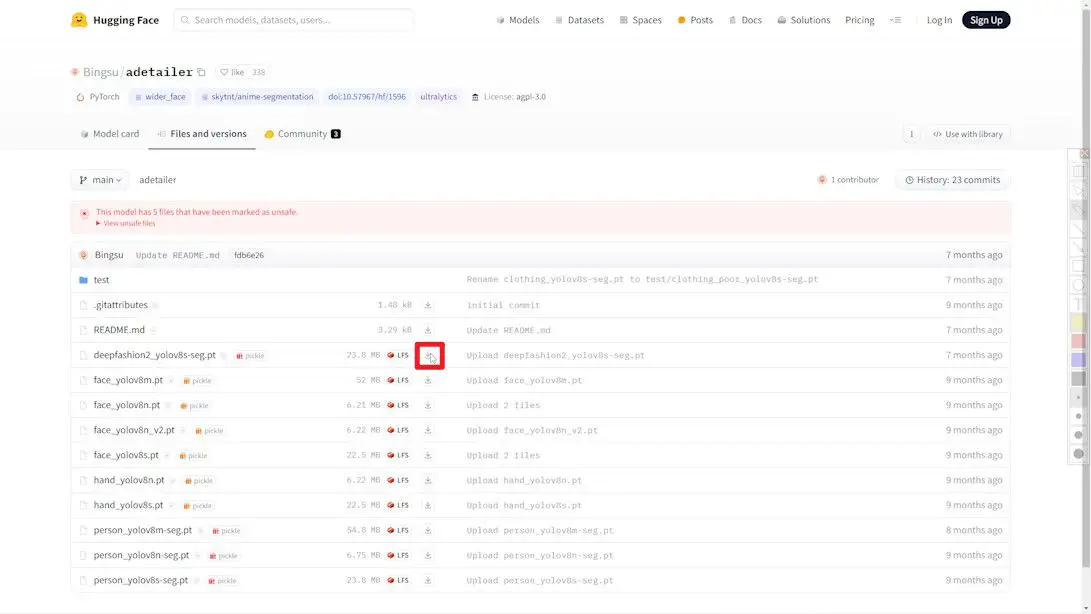
4️⃣ Transferring the Model File
Post-download, move the model files to the “webui/models/adetailer” folder within Stable Diffusion for correct recognition and loading by WebUI.
5️⃣ Restarting WebUI
After moving the files, restart WebUI. The DeepFashion model should now be listed under ADetailer’s models, indicating readiness for use.
Let’s dive into two illustrative cases to experience DeepFashion’s capabilities.
Case 1: Addressing Clothing Pattern Challenges with DeepFashion
1️⃣ Generating the Initial Image:
- Launch the WebUI interface.
- Choose “MajicmixRealistic” model (SDXL in subsequent cases).
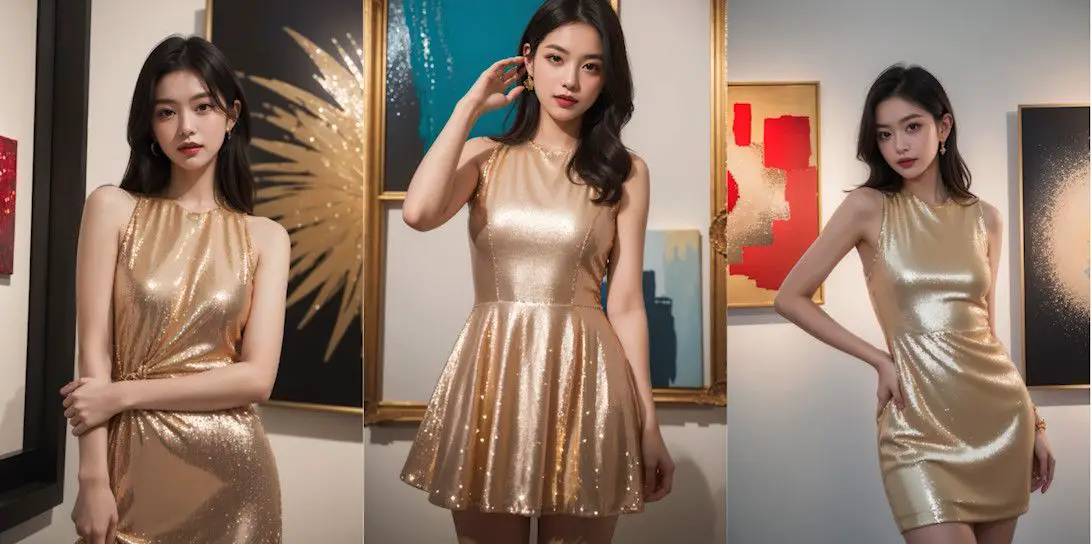
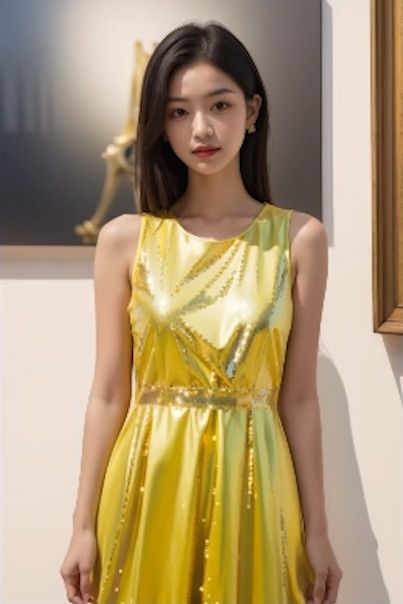
- Set prompt: “Girl in sequin dress in a modern art gallery”.
- Adjust other parameters accordingly.
- Click “Generate”.
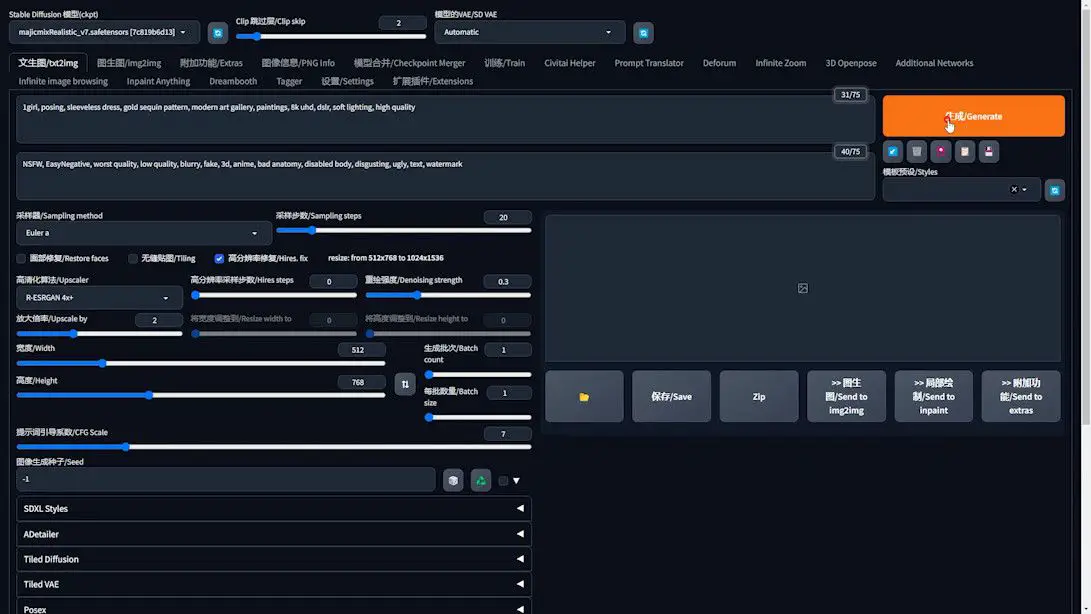
- Notice in the generated images, the sequin or gold part of the dress incorrectly merges with the background.
2️⃣ Rectifying with DeepFashion:
- First, create a base image sans sequin pattern.
- Specify dress color as yellow to prevent black dress generation where sequins aren’t visible.
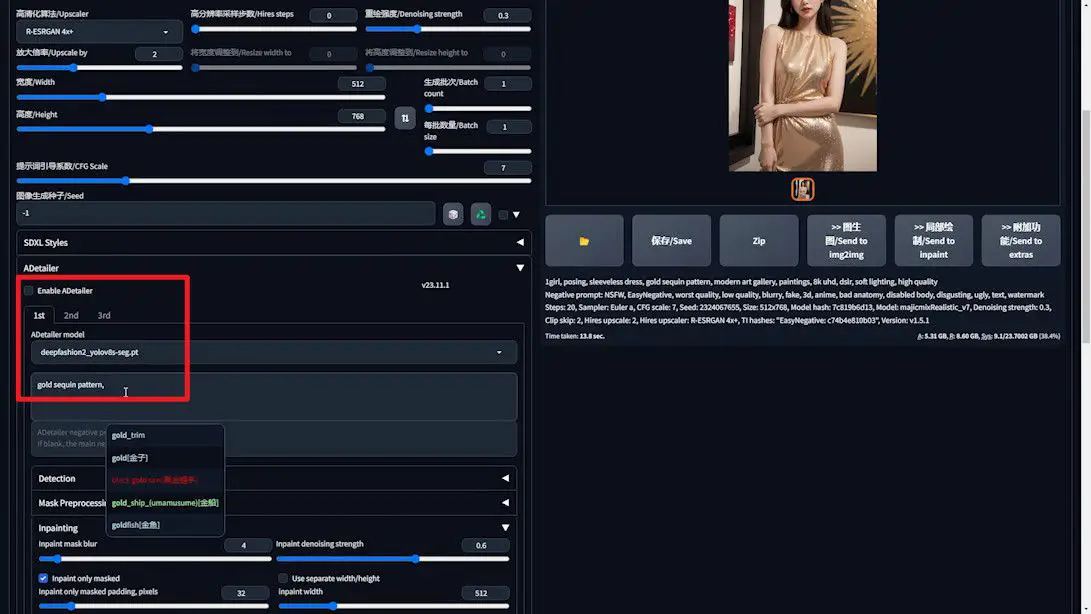
- Reserve “gold sequin pattern” from the prompt for later use in ADetailer.
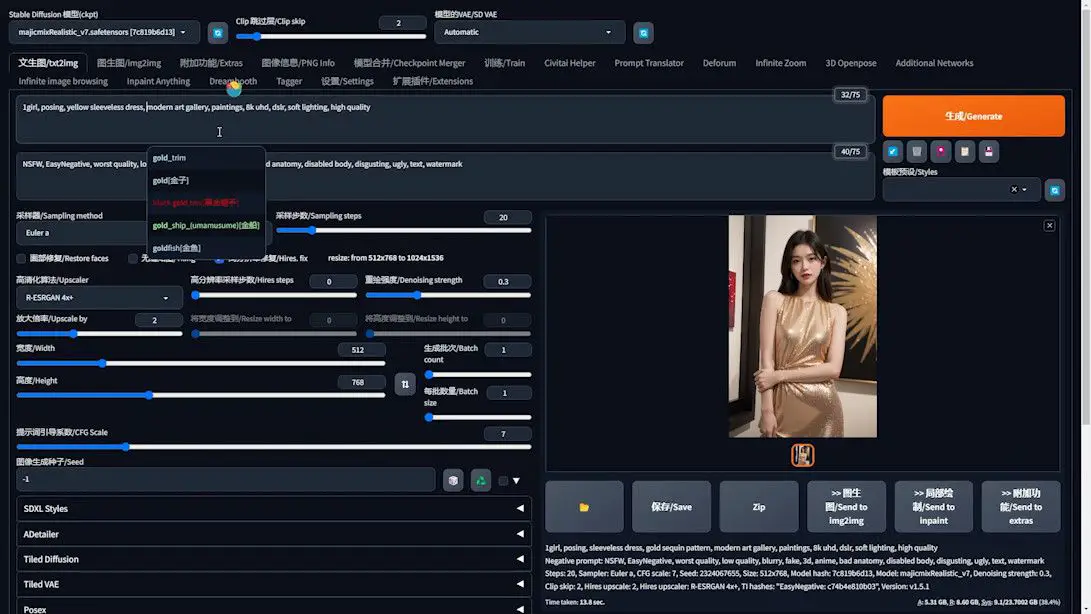
- Temporarily bypass the ADetailer extension.
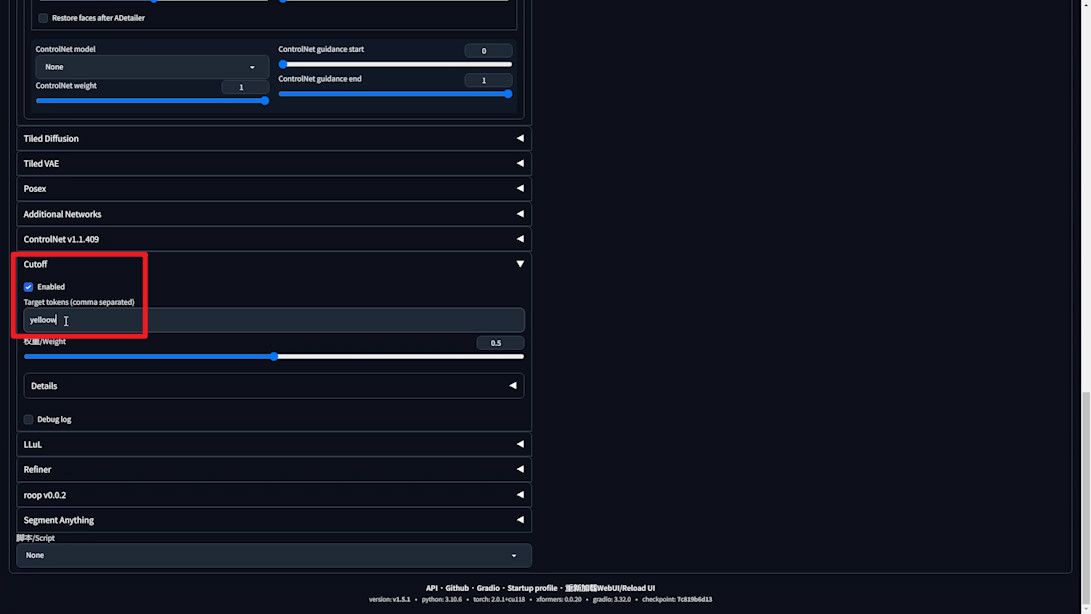
- Utilize the Cutoff extension to ensure gold sequins don’t bleed into the background, addressing prompt pollution.
- Generate the base image.
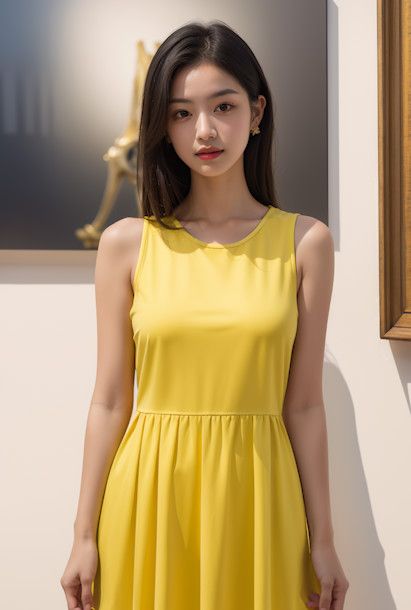
3️⃣ Applying the Sequin Effect:
- Fix the seed number and ADetailer extension, selecting DeepFashion.
- Utilize the reserved “gold sequin pattern” prompt.
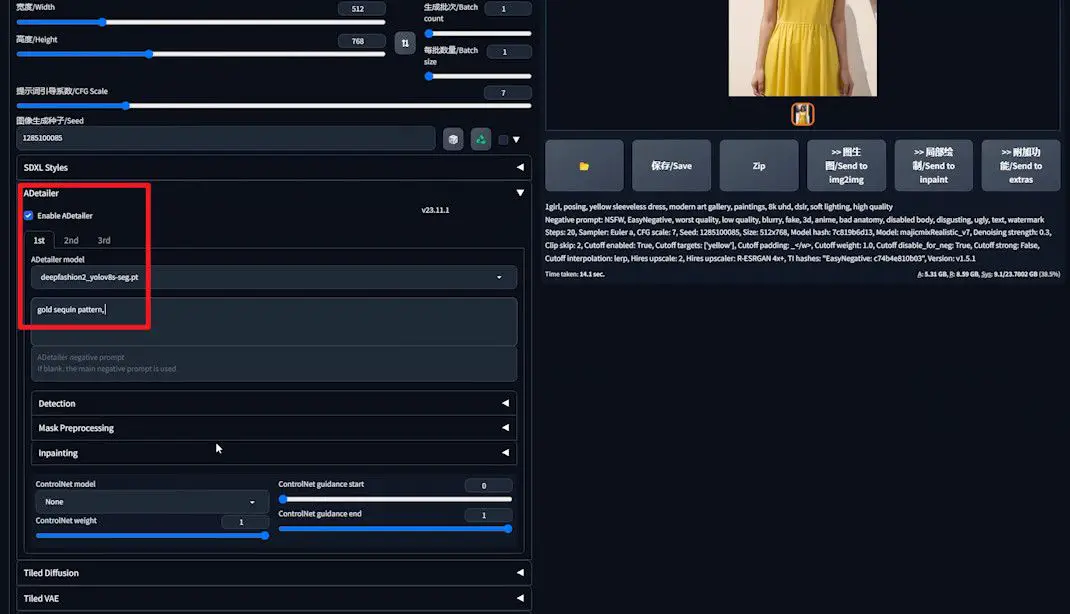
- Under “Inpainting”, set “Inpaint denoising strength” to 0.6.
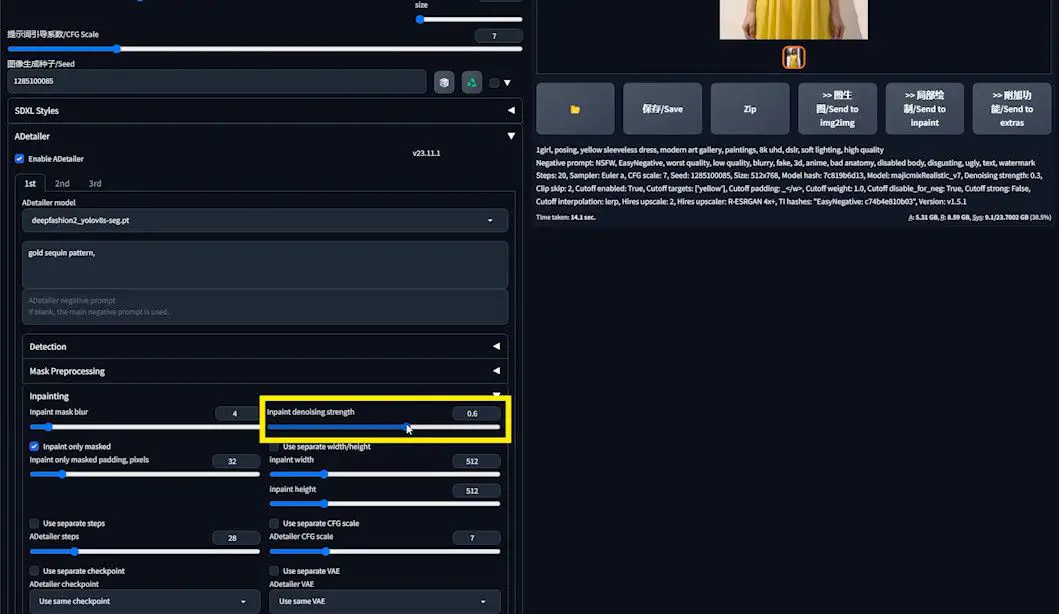
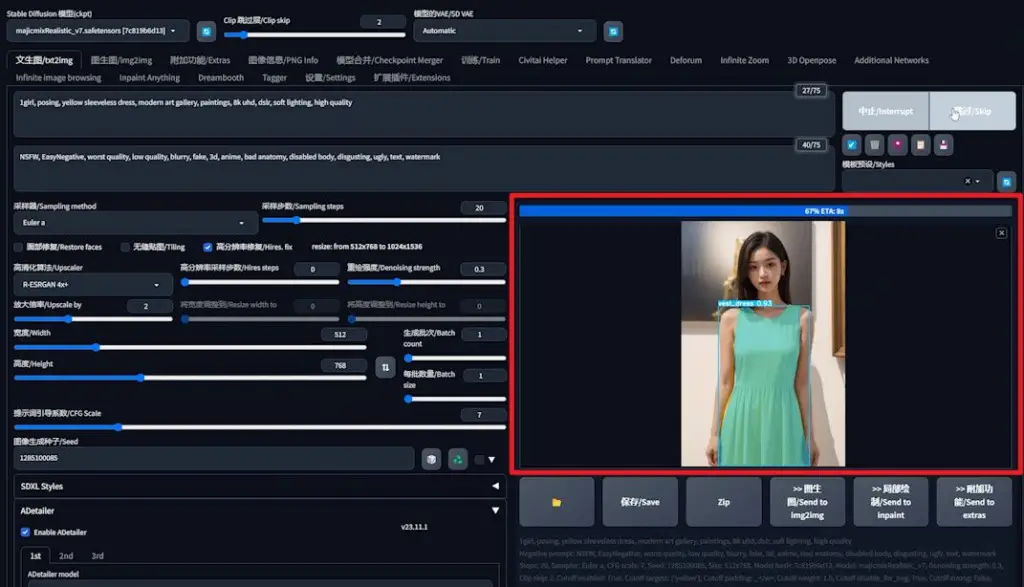
- Observe the generation process:
- Initially, Stable Diffusion crafts a base image.DeepFashion then identifies and processes the skirt.
4️⃣ Adjusting Denoising Intensity for Enhanced Results:
- If sequin effect is suboptimal, increment denoising strength to 0.7, then 0.8, observing the changes.
Case Summary
DeepFashion excels in segregating garments for individualized enhancement, adeptly resolving prompt pollution issues. This is especially beneficial in complex scenarios where Stable Diffusion’s interpretation may falter.
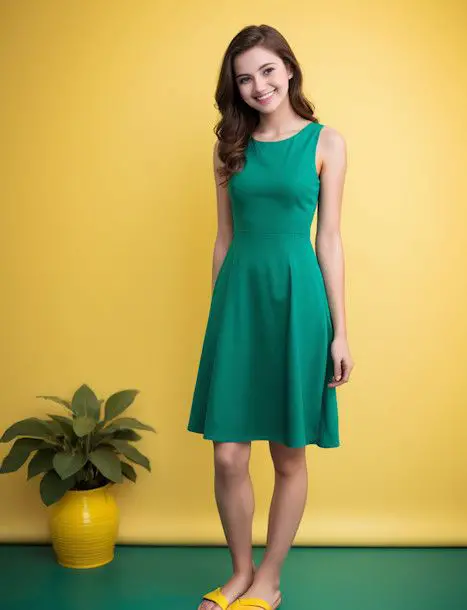
For instance, the generated image using the albedobaseXL model perfectly distinguished between the green dress and the lemon yellow background.
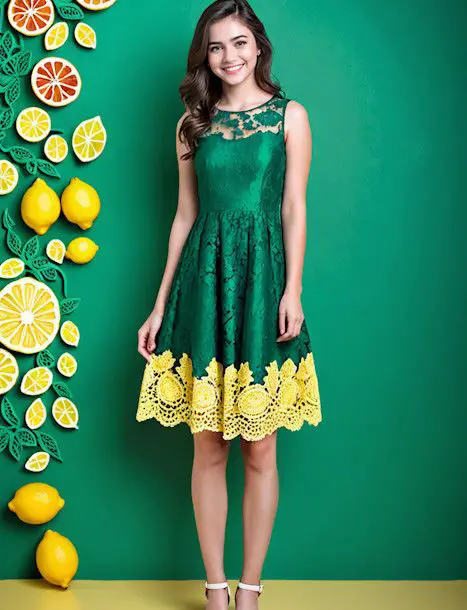
Conversely, the dreamshaperXL-Turbo model struggled, incorrectly transferring the lemon yellow background onto the skirt.
DeepFashion’s precision in optimizing clothing details in images is unparalleled, enhancing both the quality and creative control in Stable Diffusion’s image generation.
Case 2: Refining Color Processing in SDXL Models
Stable Diffusion, particularly with the SDXL model, often encounters prompt pollution challenges, especially concerning color. Let’s delve into how DeepFashion can address these issues with a practical example.
1️⃣ Initial Setup & Image Generation:
- SWITCH TO SDXL model.
- Set prompt: “Young model, fashion photography, sleeveless emerald A-line dress with floral lace trim, lemon yellow background, floating white balloons”.
- Define resolution: 832×1216.
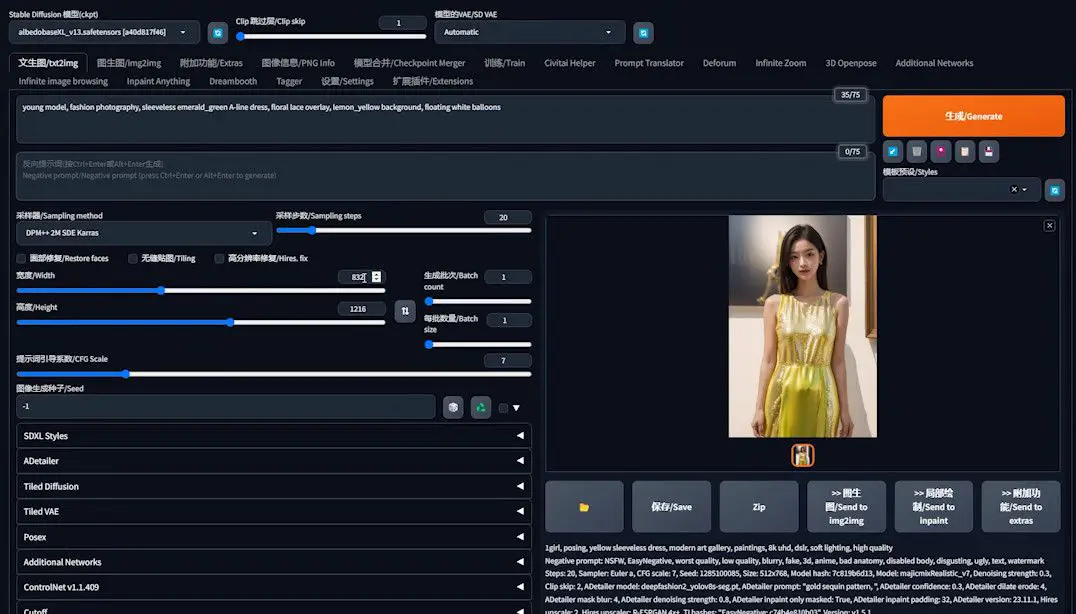
- Outcome: Instead of white balloons, yellow and green variants appear.
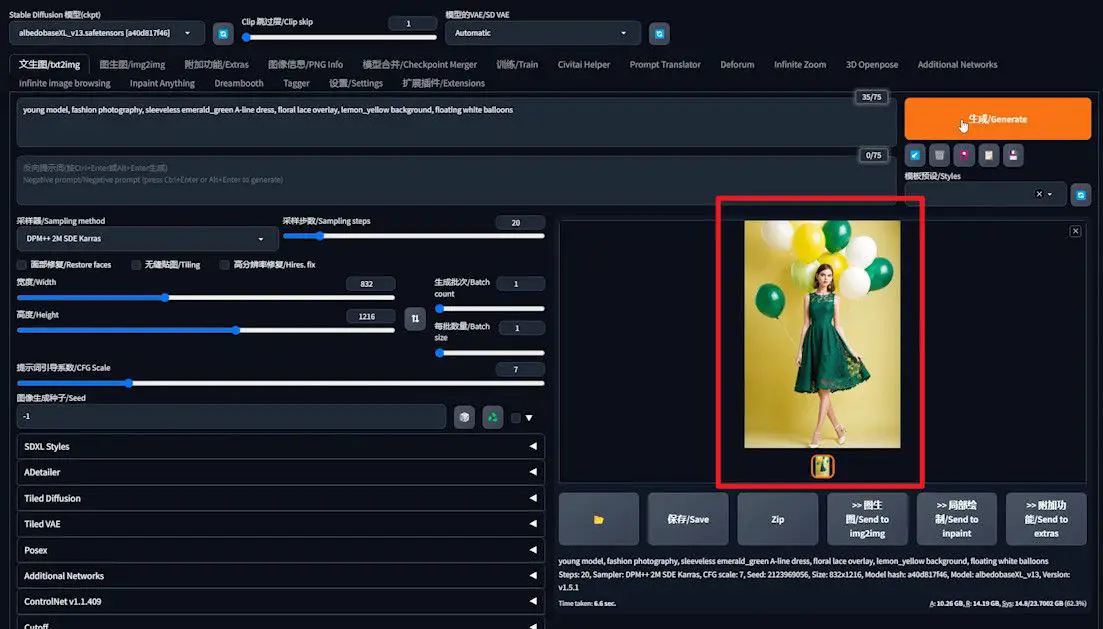
2️⃣ Iterative Generation for Refinement:
- First re-generation: eliminates green but retains yellow balloons.
- Second attempt: exacerbates issues, introducing flowers on the dress.
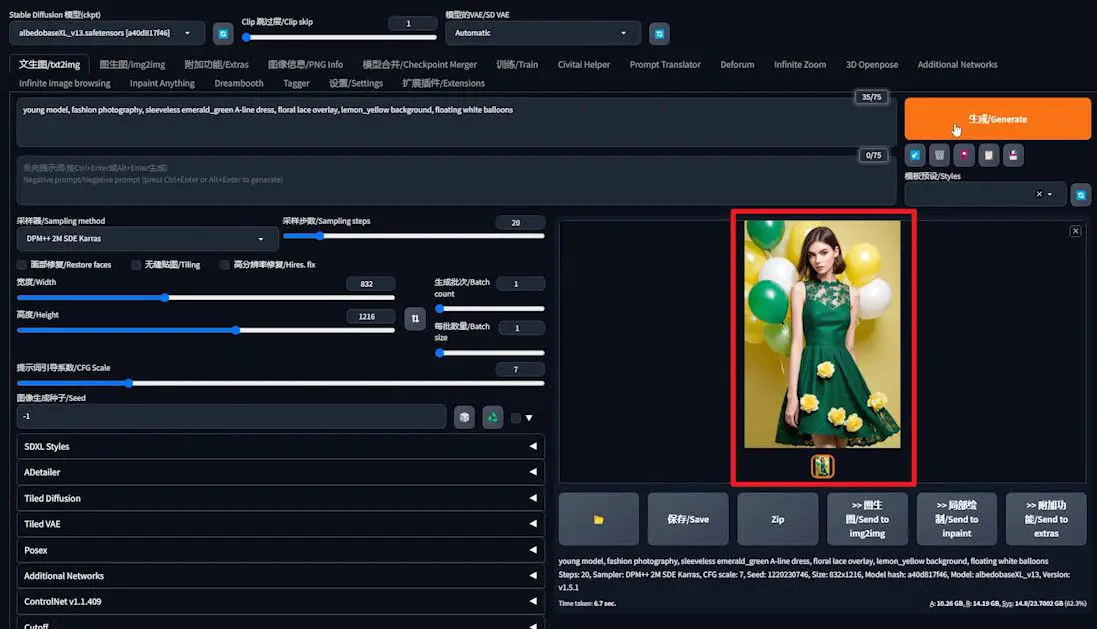
- Despite SDXL’s capabilities, specific color and element control remains a challenge. Repeated generation offers some improvement, but results are inconsistent. Here, DeepFashion’s role becomes crucial, as we’ll soon explore.
3️⃣ Experimenting with “BREAK” Keyword:
- Simplify the prompt, removing “lace trim”.
- Insert “BREAK” after “skirt” and “lemon yellow background”.
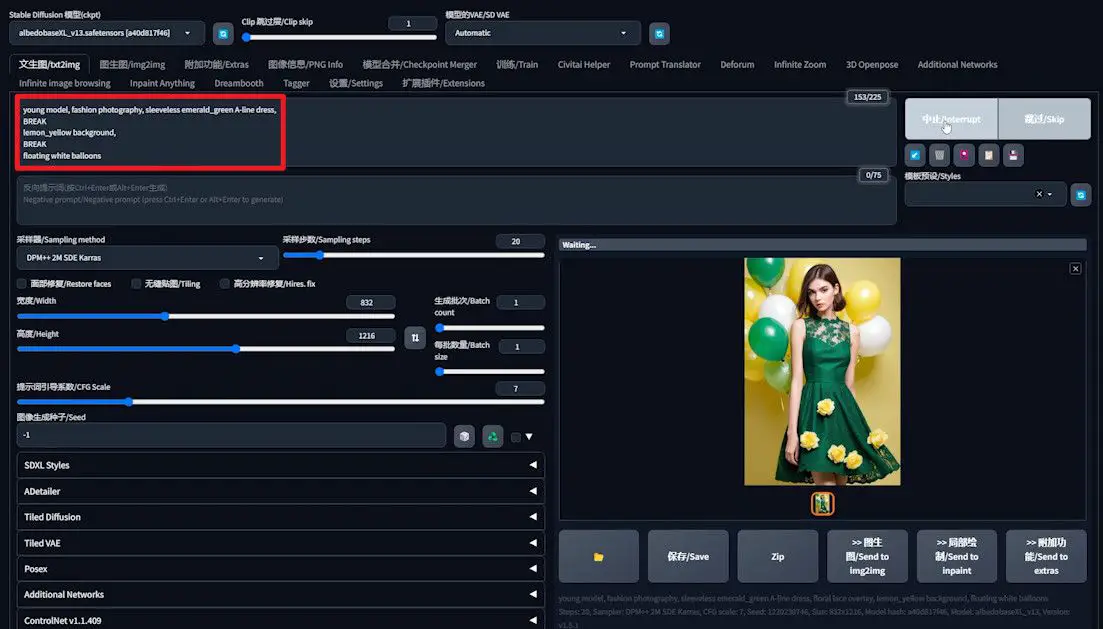
- Result: Black balloons and incorrect background color.
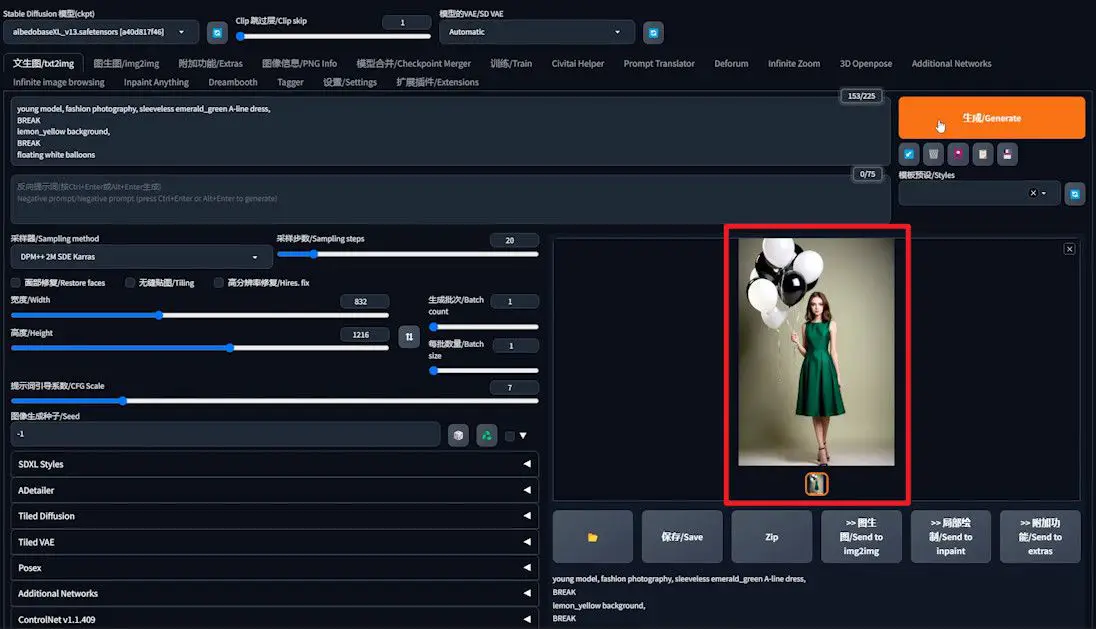
2️⃣ Multiple Attempts for Enhanced Results:
- Further generations yield correct skirt and balloon colors, but background remains off.
- Final try: accurate colors achieved, but method proves unreliable.
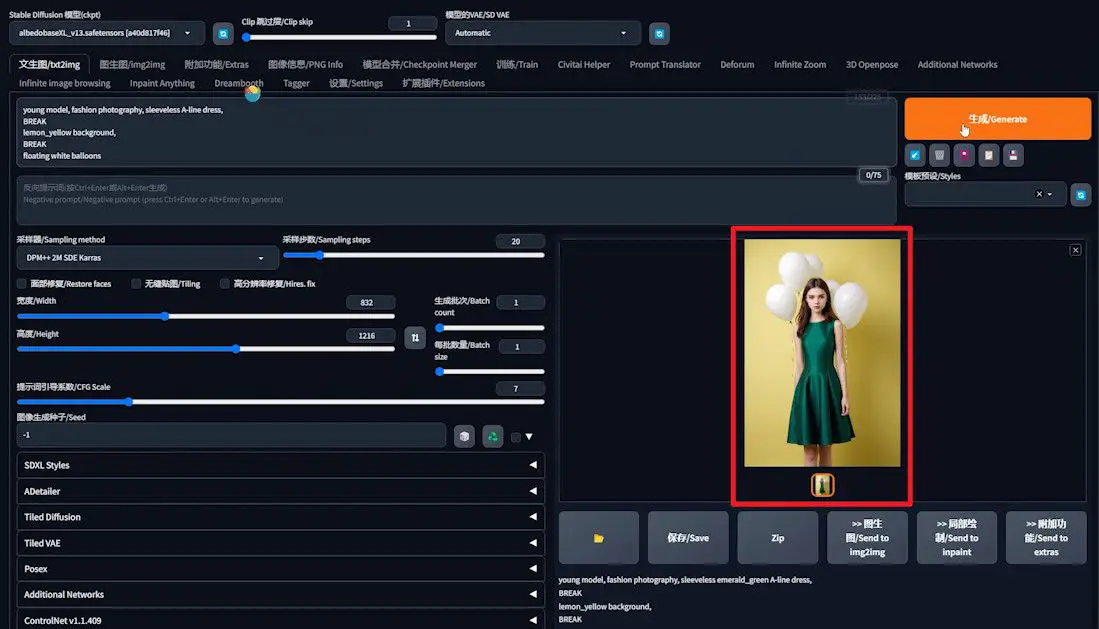
Despite the random success, let’s now utilize DeepFashion for a more controlled effect.
1️⃣ Preparation Phase:
- Omit “emerald” from the prompt, preparing for DeepFashion adjustments.
- Generate an image ensuring correct background and balloon colors.
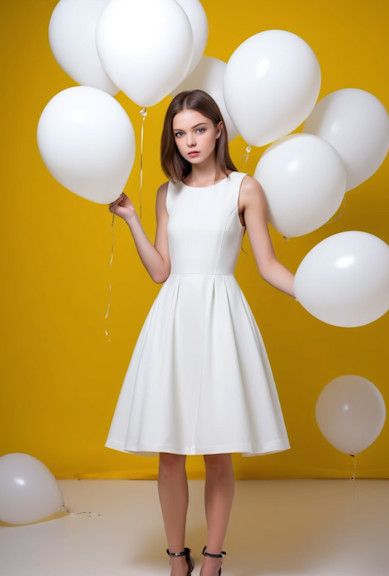
2️⃣ Applying DeepFashion to the Dress:
- Fix the seed number.
- Activate ADetailer extension, selecting DeepFashion.
- Add prompt: “Emerald green sleeveless A-line dress with floral lace”.
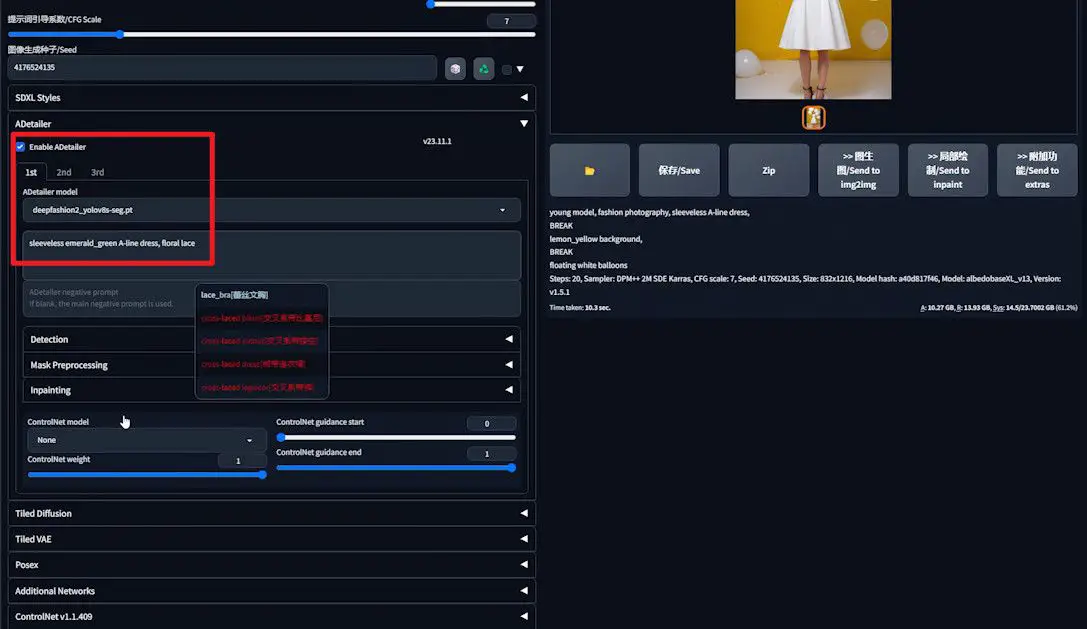
- Set “Inpaint denoising strength” to 0.7 and generate.
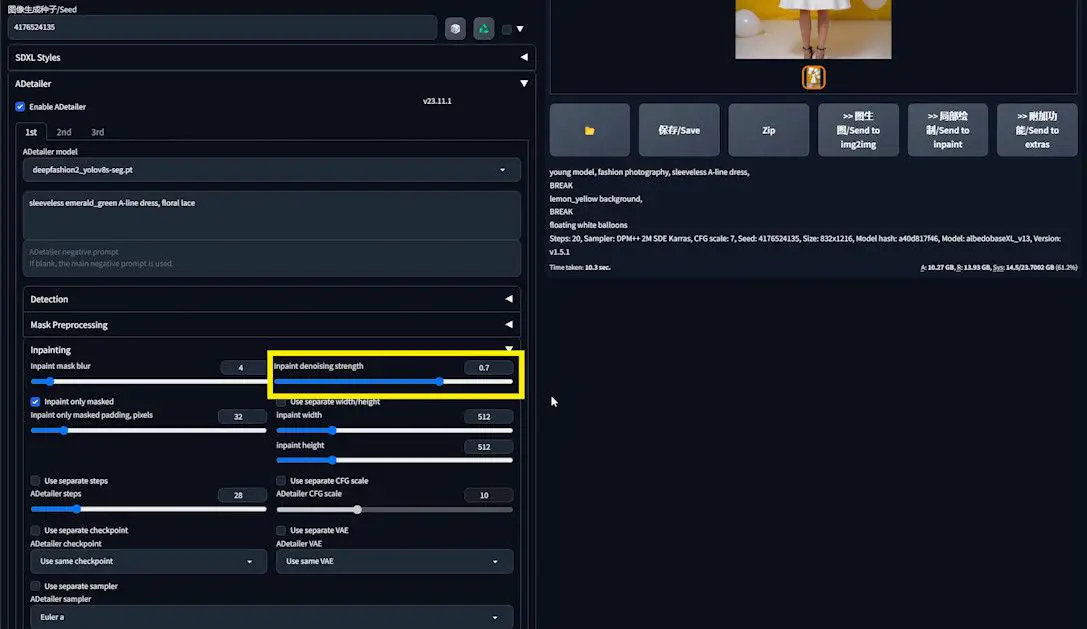
- Observe the predominantly white dress color.
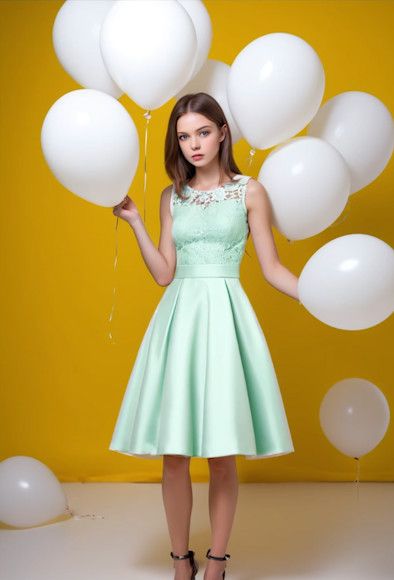
3️⃣ Enhancing the Effect:
- Increase “Inpaint denoising strength” to 0.8 and re-generate.
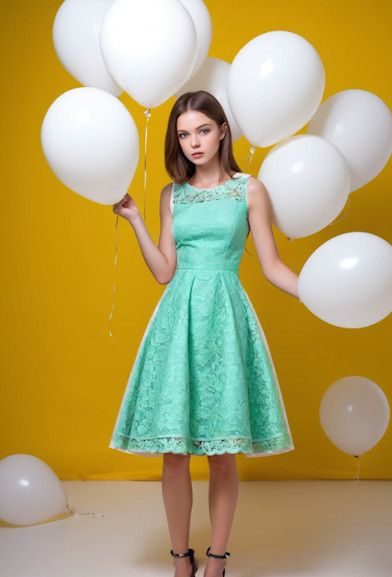
- Experimenting with 0.9, the dress turns emerald green, albeit with some white residue.
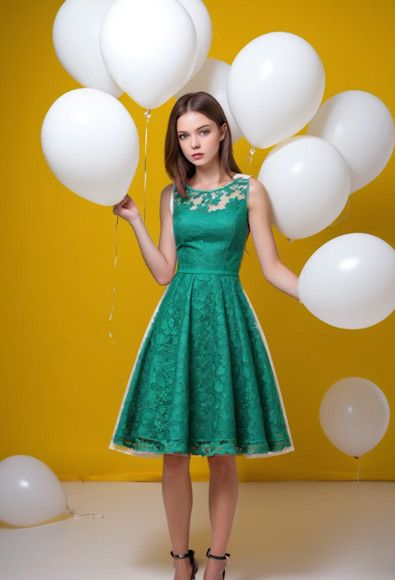
4️⃣ Refining Mask Processing:
- Adjust “Mask erosion/dilation” in “Mask Preprocessing”.
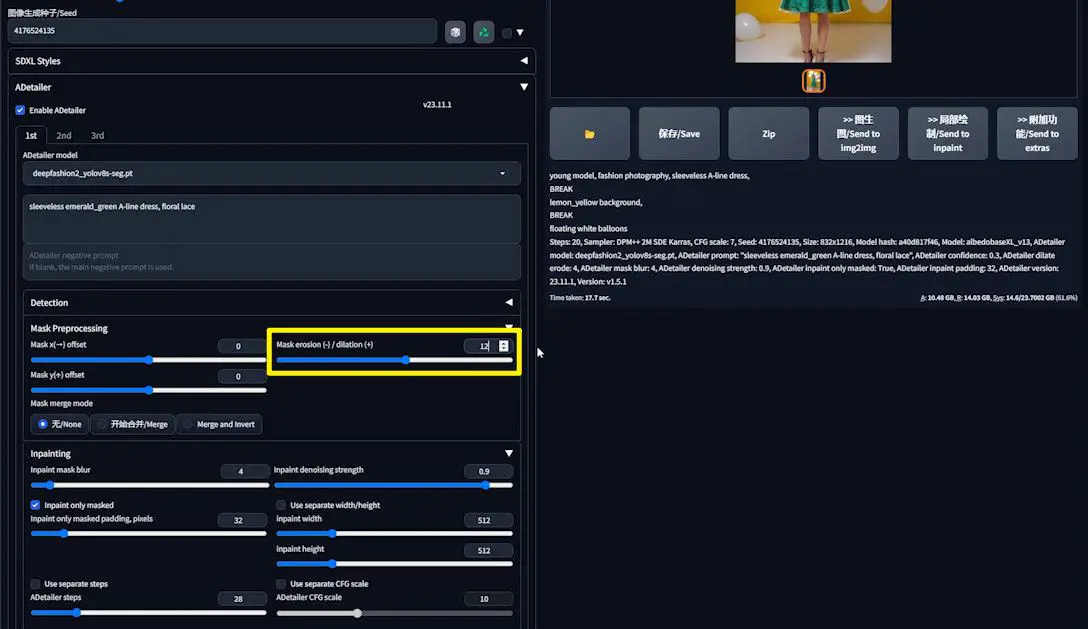
- A “Mask dilation” of 12 reduces white edges.
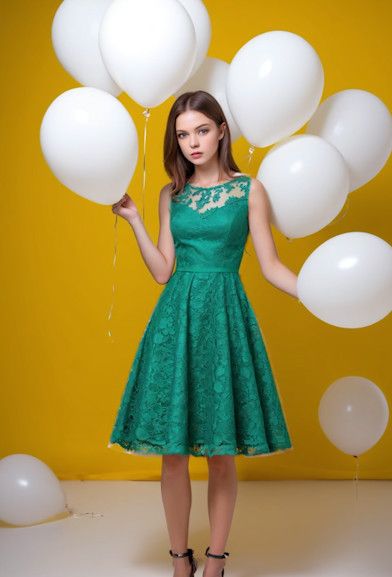
- Further fine-tuning to 16 nearly eradicates all white edges.
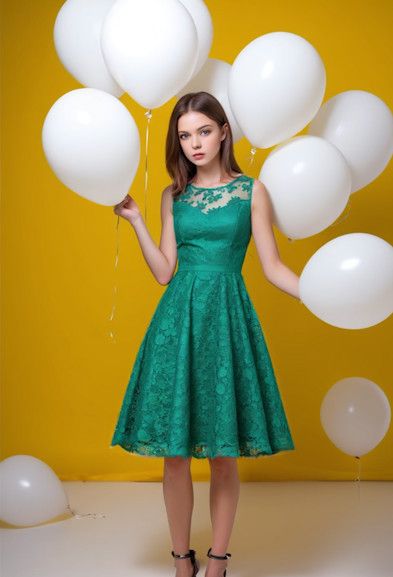
Conclusion
DeepFashion, a standout in the ADetailer suite, skillfully processes garments independently, circumventing prompt pollution while enriching garment details. Compatible with both SD1.5 and SDXL models, it offers a reliable solution for garment processing in AI imagery.
I hope you found this exploration enlightening and inspiring. If so, I’d be delighted to receive your like as a token of appreciation for this journey into the possibilities of AI-enhanced fashion imagery.

