Flexible Outpainting in Stable Diffusion with Dedicated Checkpoint for Inpainting
Hello everyone! Today, I’m excited to show you how to use Stable Diffusion to implement a generative fill feature similar to Photoshop’s.
Photoshop’s generative fill is quite powerful. For instance, it uses AI to automatically extend new content on the left and right sides of a landscape photo.
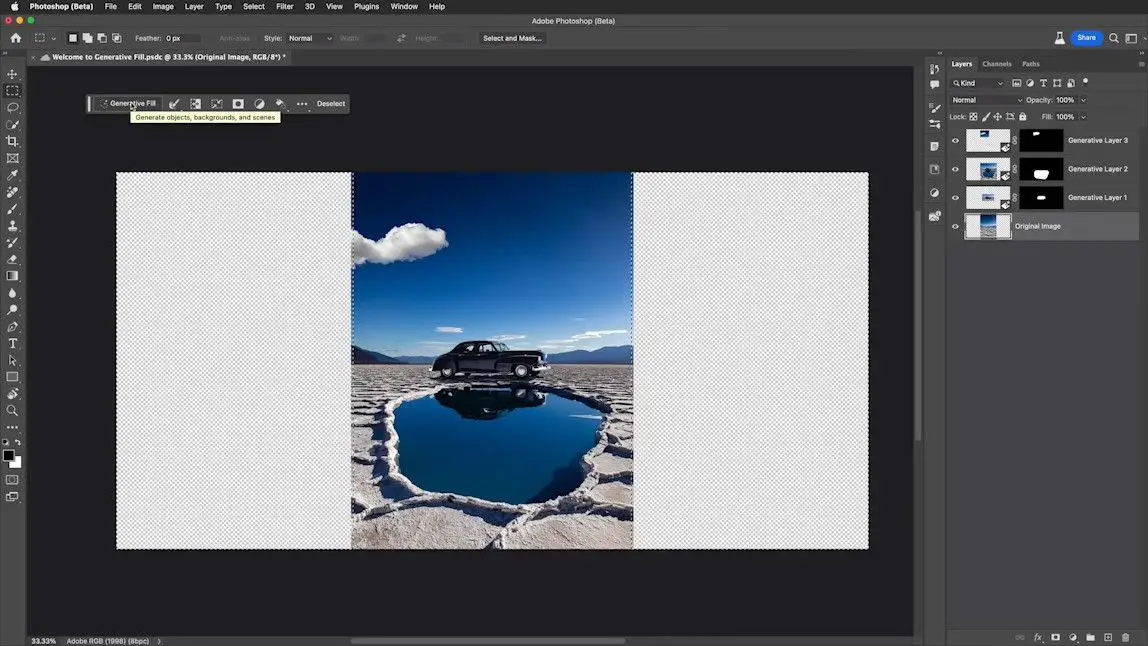
Just select the area to be filled, and even without a detailed prompt, Photoshop can effectively expand the picture.
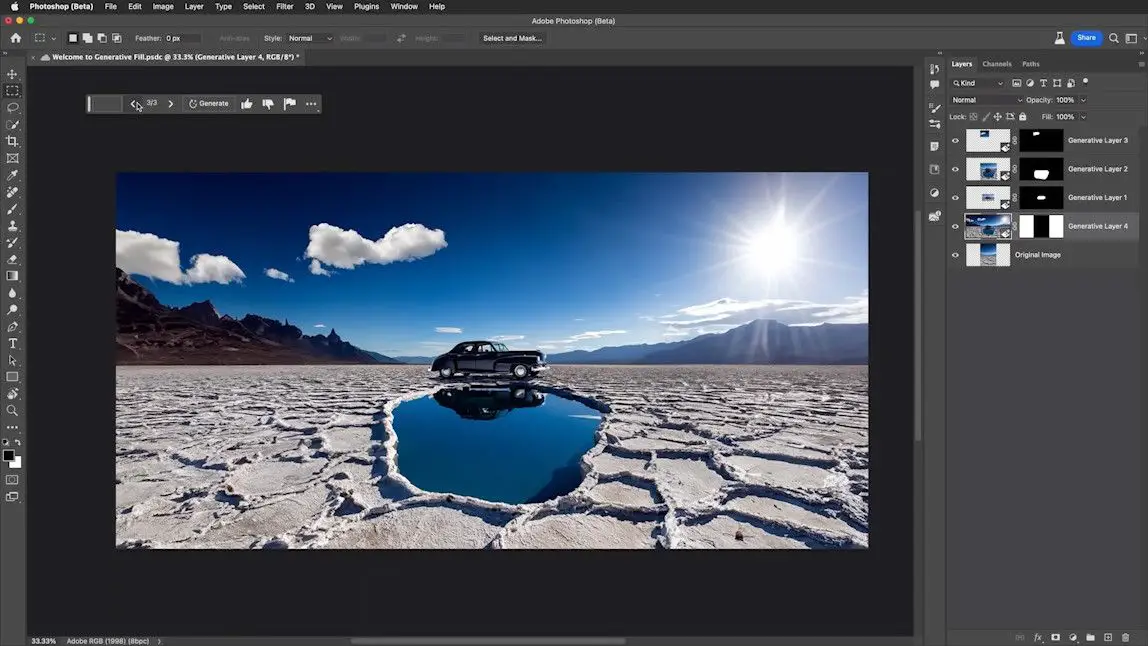
However, this feature is available for a fee.
Today, we’ll explore how to achieve a similar effect using the free Stable Diffusion.
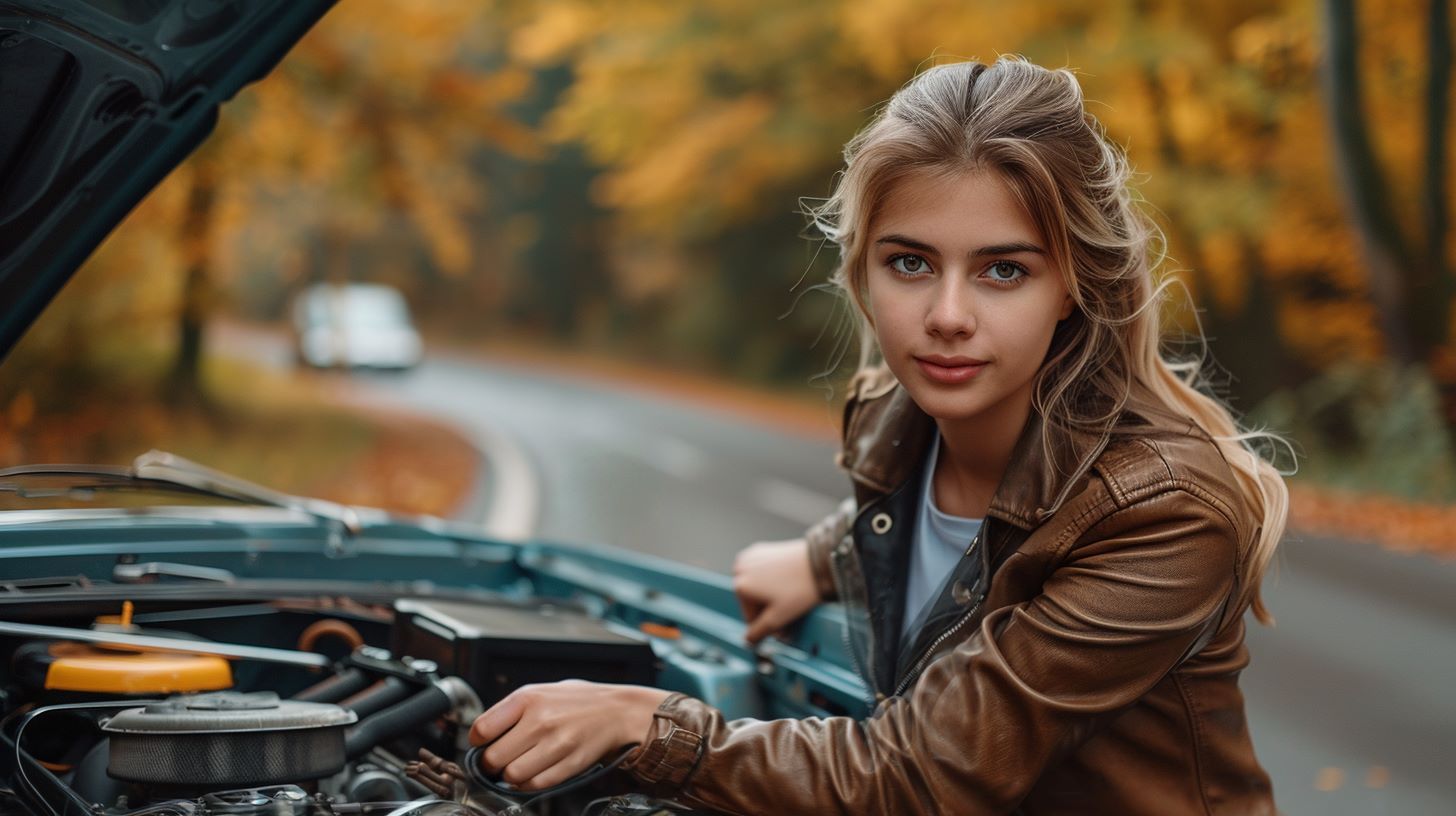
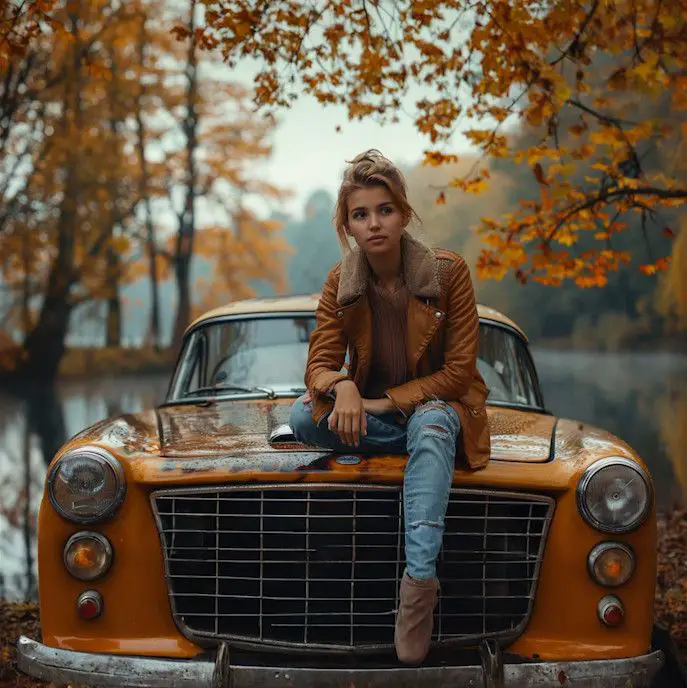
Here’s a 16:9 image I generated using Midjourney.
With A1111, we can expand the image content upwards and downwards. The direction and extent of the expansion are entirely flexible, ensuring the fill blends seamlessly with the original image.

For those who love diving into Stable Diffusion with video content, you’re invited to check out the engaging video tutorial that complements this article:
Gain exclusive access to advanced ComfyUI workflows and resources by joining our community now!
Dependency on Checkpoint Implementation
Implementing this effect with Stable Diffusion relies heavily on the Checkpoint feature. In this section, we’ll illustrate the importance of checkpoint in Stable Diffusion by removing a person from an image.
Step-by-Step Instructions
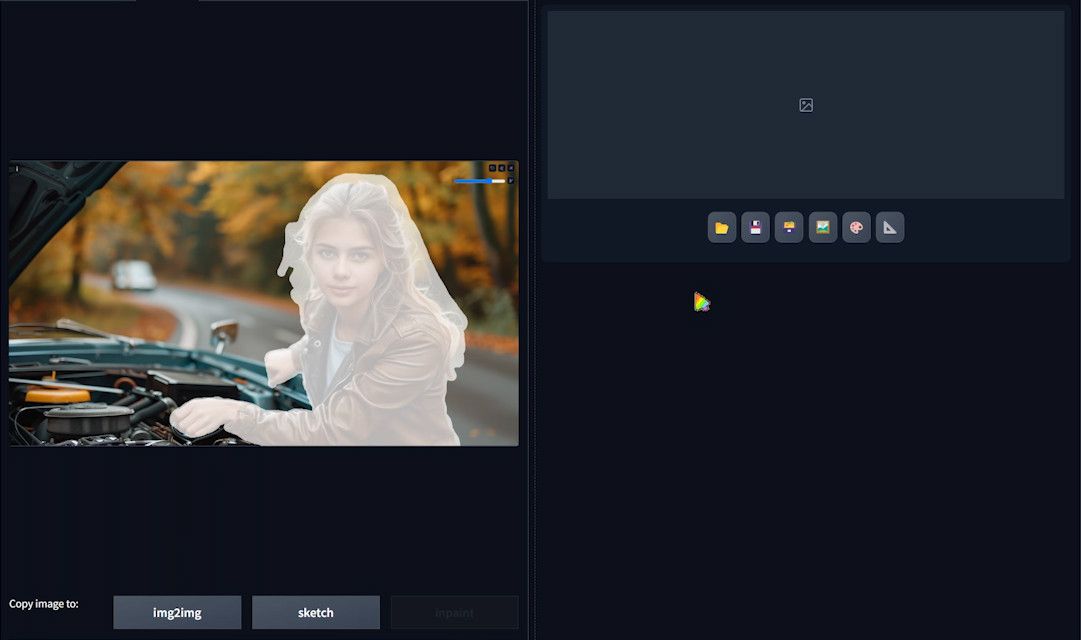
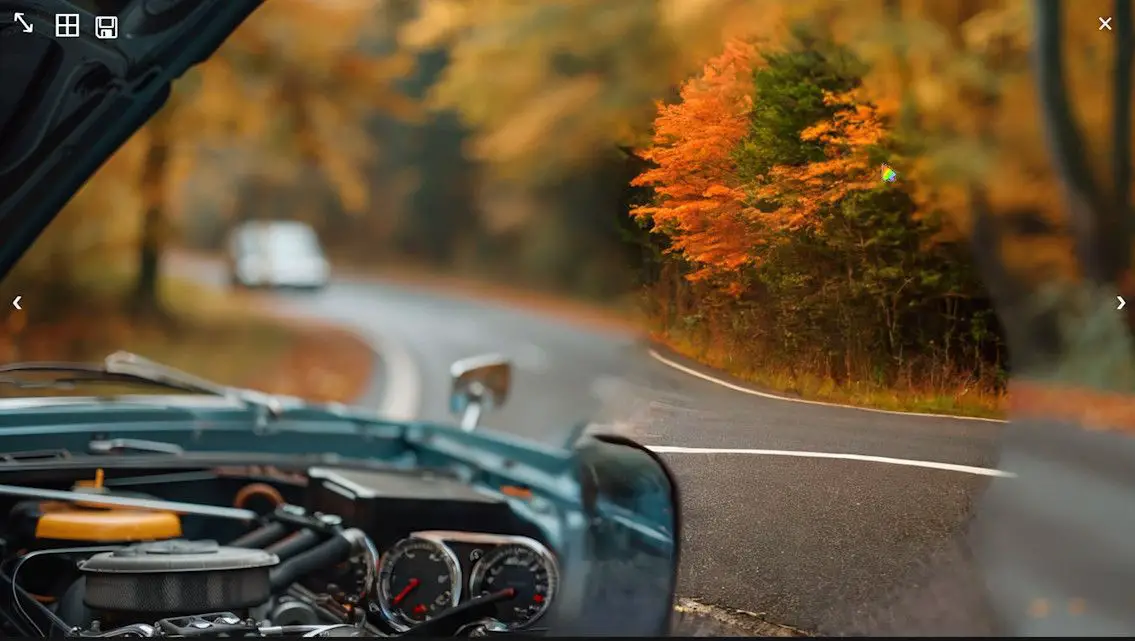
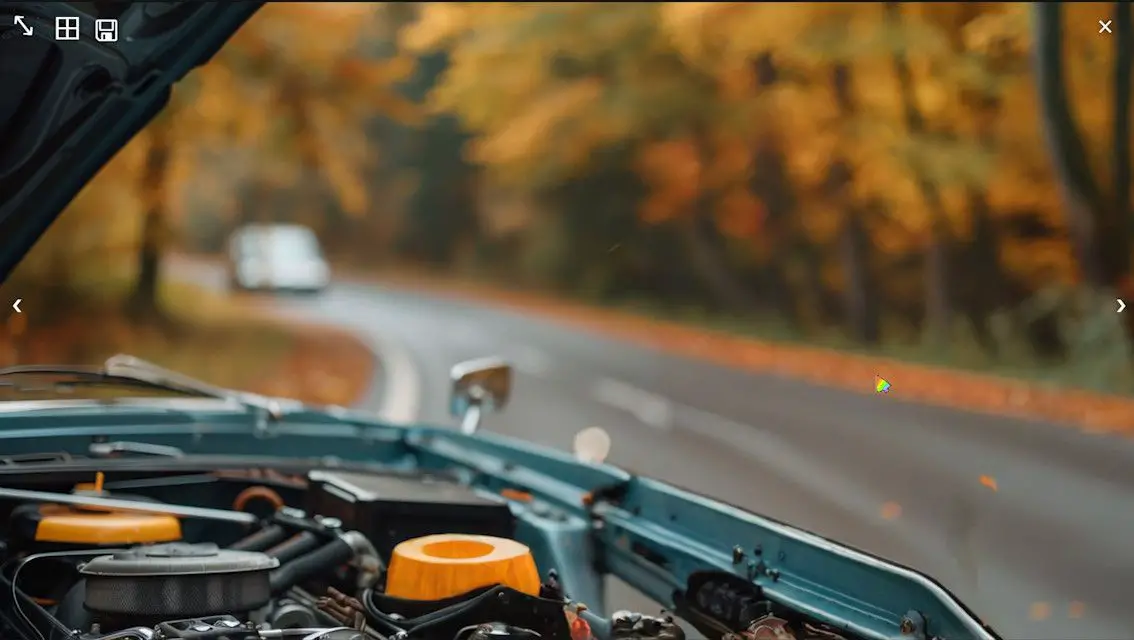
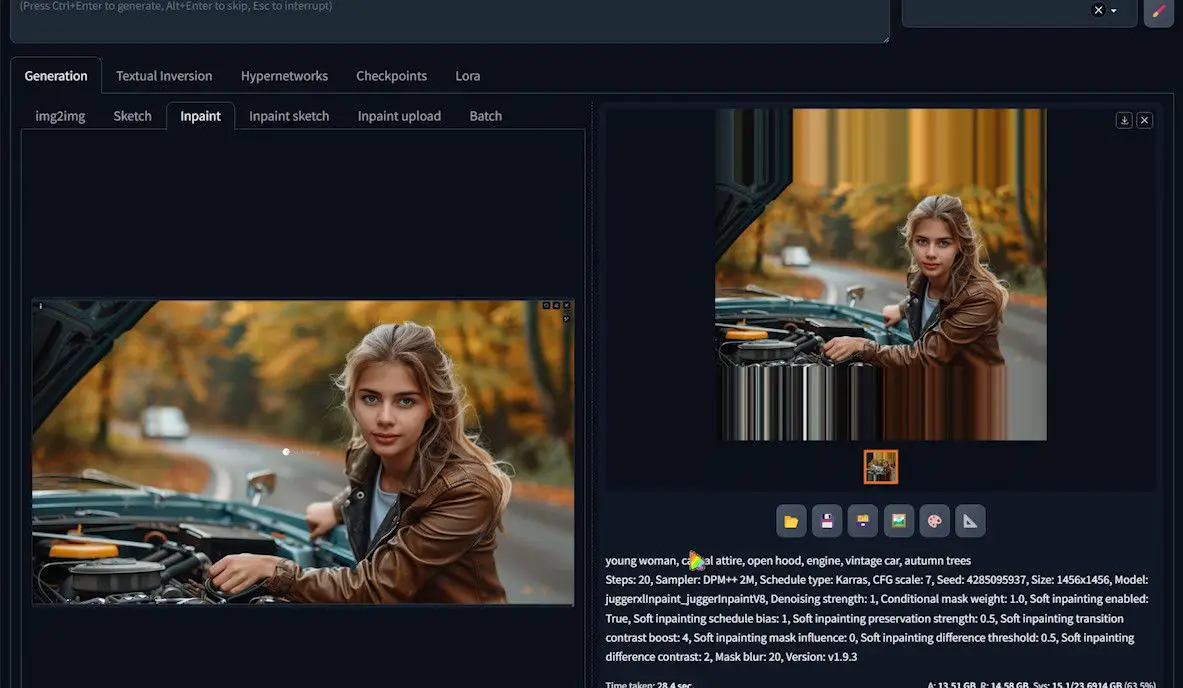
1️⃣Import Image: Load the previously generated image into the “inpaint” function of A1111.
2️⃣Paint Mask: Paint over the person in the image to create a mask.
3️⃣Adjust Mask Blur: Increase the “Mask blur” to avoid seams at the edges after repainting.
4️⃣Enable Soft Inpainting: Check the “Soft inpainting” option to further reduce the likelihood of seams.
5️⃣Maintain Consistent Size: Ensure the repainted image size matches the original.
6️⃣Adjust Denoising Strength: Maximize the “Denoising strength” setting.
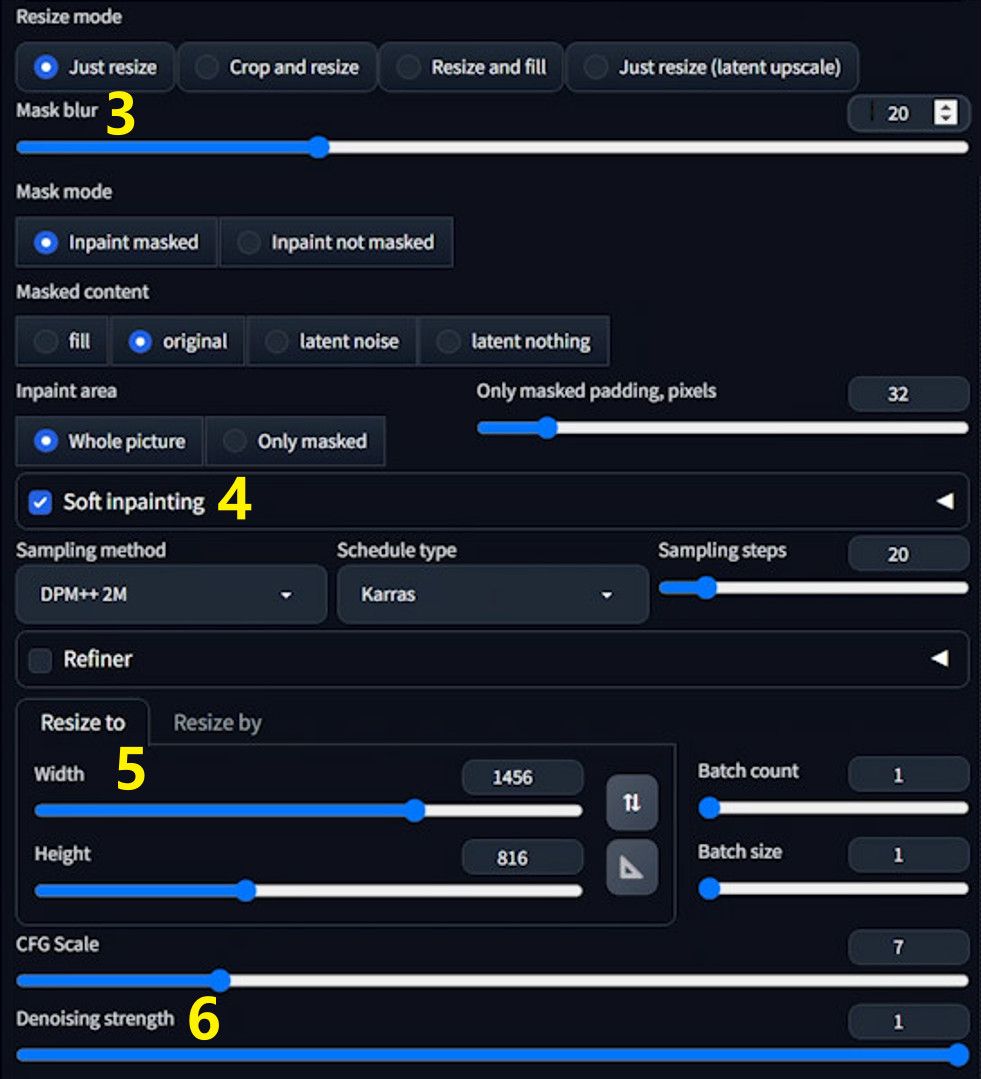
7️⃣Select Checkpoint: Choose a checkpoint for SDXL; we selected “juggernautXL”. Wait for the checkpoint to load.
8️⃣Add Prompt: Write specific prompts to control the content of the repainted area more precisely.
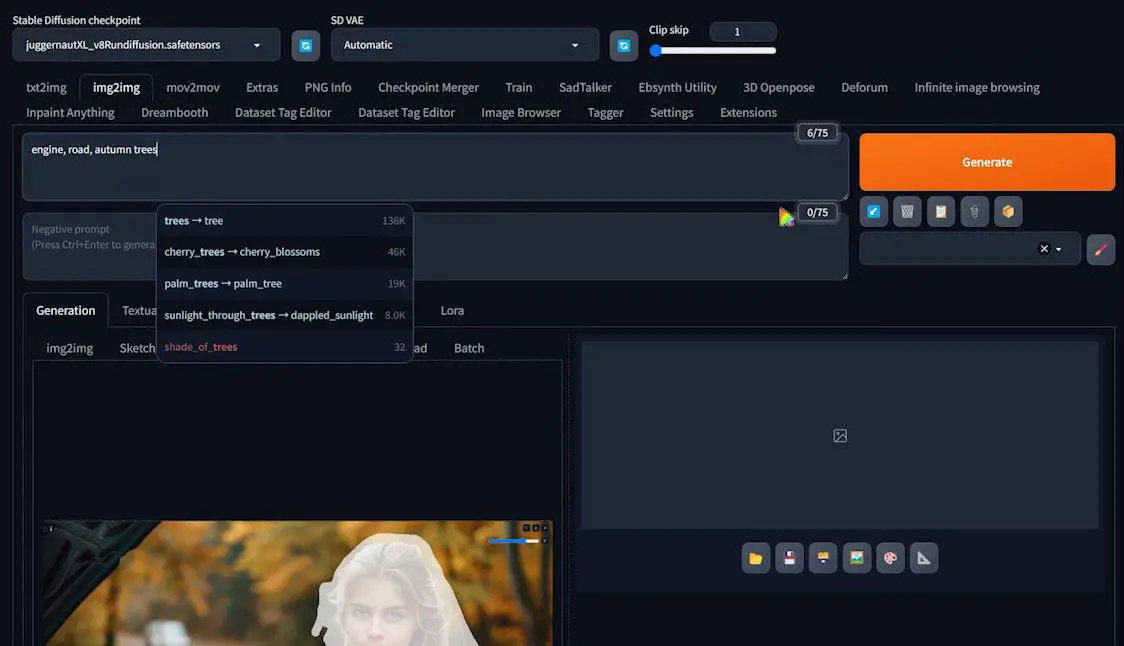
9️⃣Generate Image: Run the generate operation.
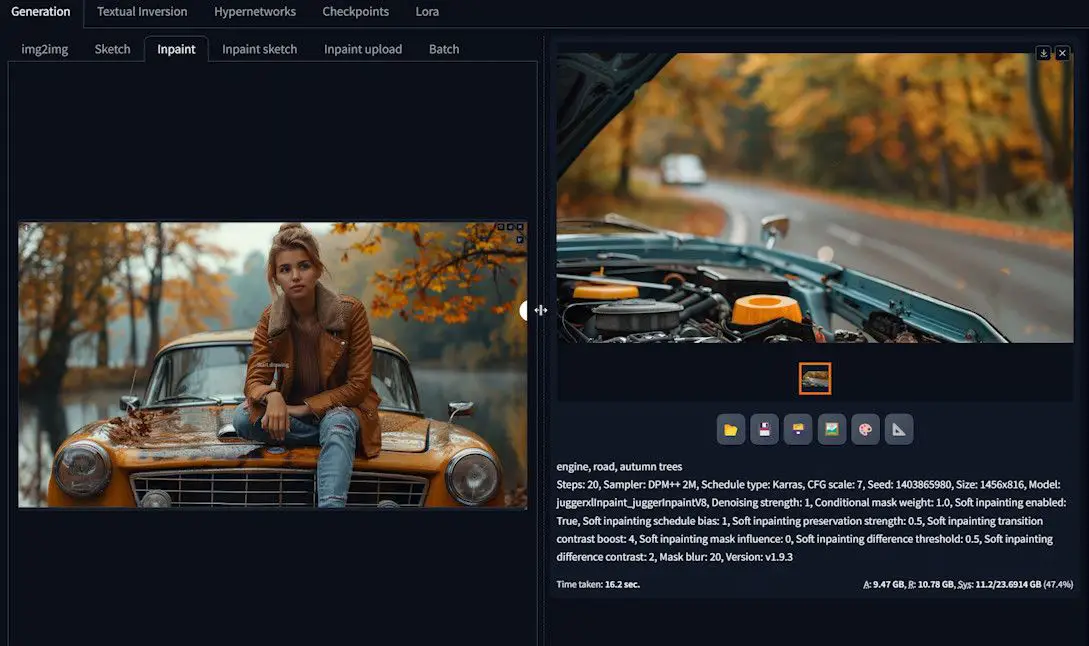
Comparison of Checkpoint Effects
The initial generated image may not be ideal, so try changing the Checkpoint.
1️⃣Replace Checkpoint: Select another checkpoint, such as “juggerxl Inpaint.” This is a specialized model for inpainting, available at Civitai.
2️⃣Keep Other Parameters the Same: To compare the effects of different checkpoints, keep all other parameters unchanged and generate the image again.
Observe the Effect
The second generated image will likely be much better. This comparison highlights the importance of choosing the right checkpoint to achieve the desired repainting effect.
Once we have a suitable checkpoint, we can start using it to expand the image.
Simple Outpainting Example
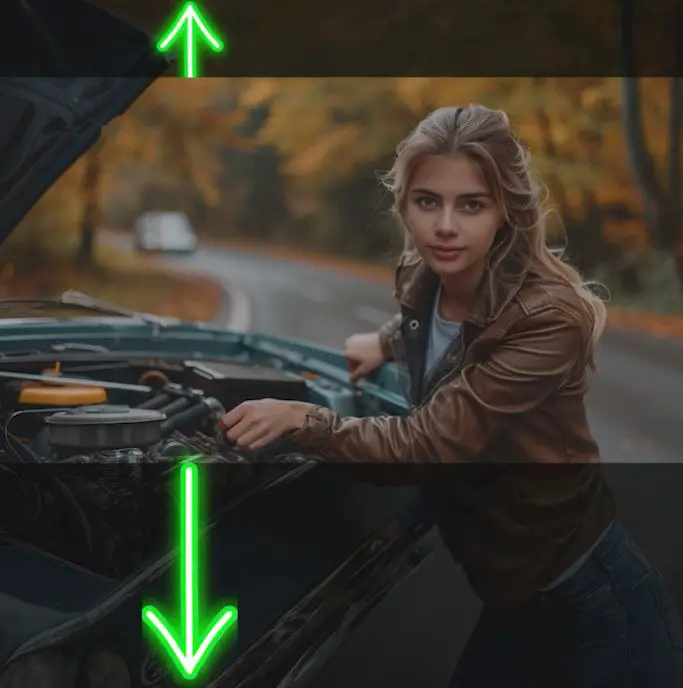
Next, we’ll expand a new image into a square.
Setting the Initial Parameters
1️⃣Select Resize Mode: In A1111, choose the “Resize and fill” mode.
2️⃣Adjust Height: Set the height to 1456 to create a square image. You can also choose other sizes.
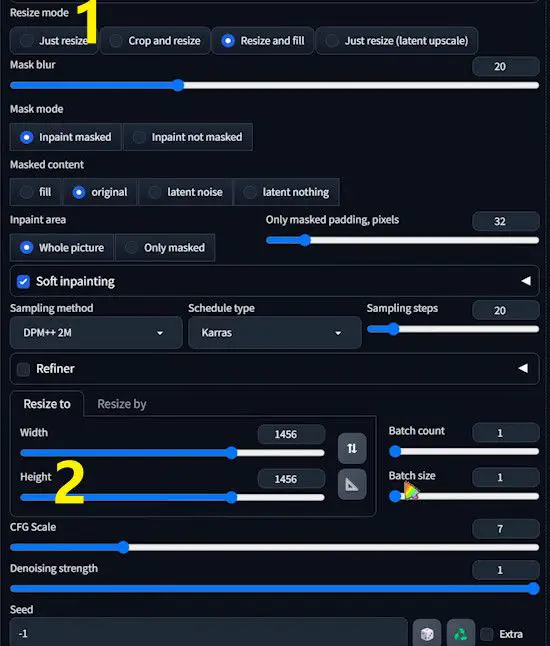
3️⃣Modify Prompt: Since we have a new image, adjust the prompt accordingly.
4️⃣Generate Image: Run the generate operation to see the result.
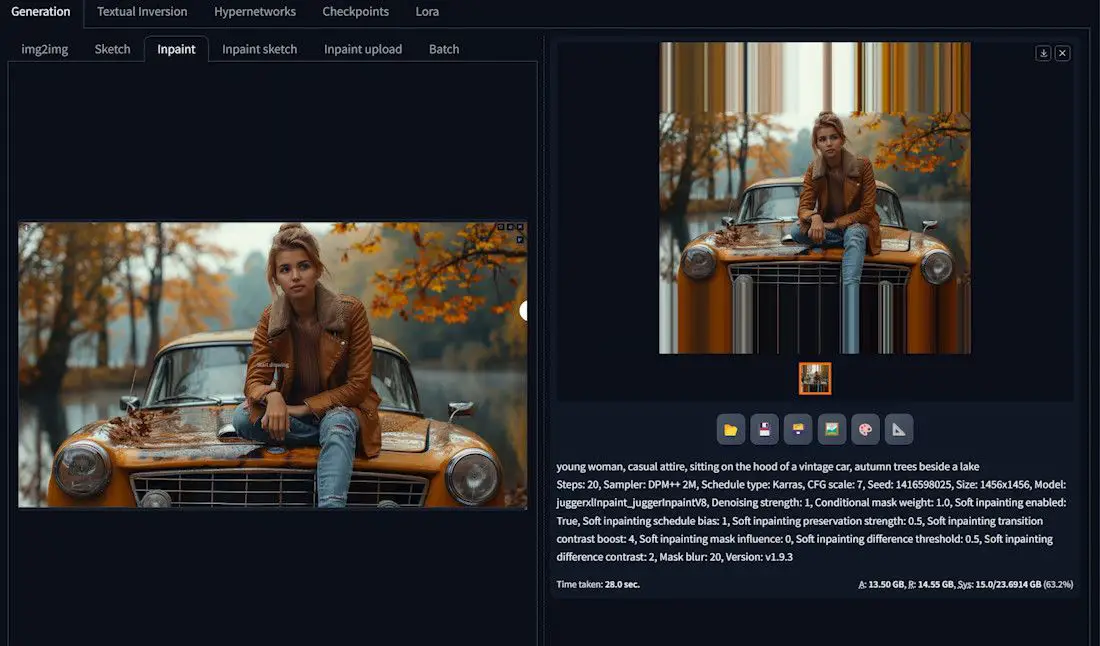
The first generated image might be stretched and lack substantial content. We need to go further.
Run Inpaint Again
1️⃣Drag into Inpaint: Drag the image into the “inpaint” function. If the upload gets stuck, close the image waiting to be uploaded and try again.
2️⃣Paint Repainting Area: Paint the area in the upper part of the image that needs repainting and generate the image again.
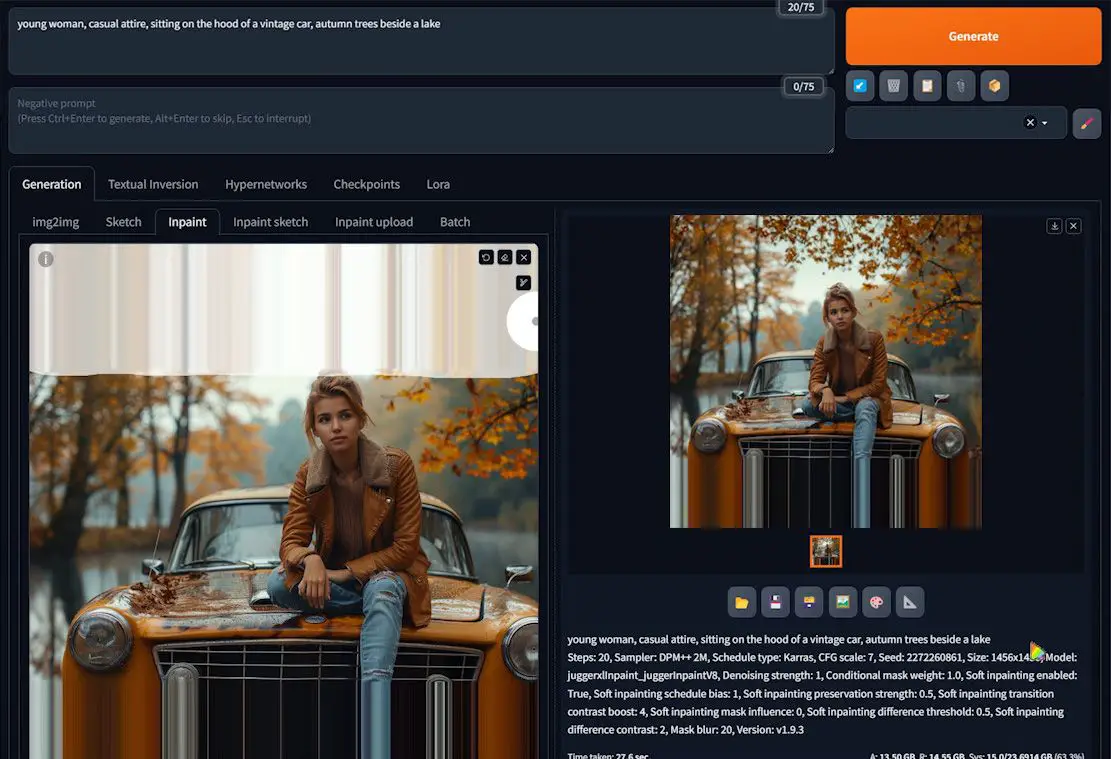
Processing the Second Half
Next, we’ll process the lower half:
1️⃣Drag Back to Inpaint: Drag the generated image back into inpaint.
2️⃣Paint Lower Half: Paint the lower half that needs repainting and generate the image again.
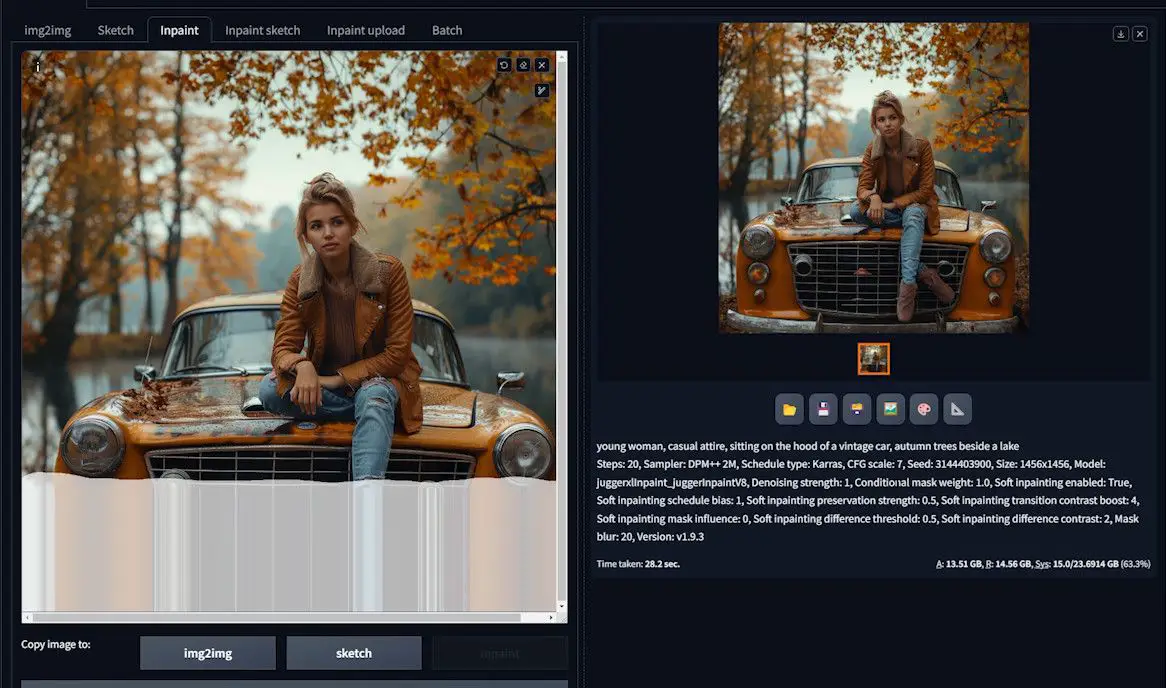
Handling the Details
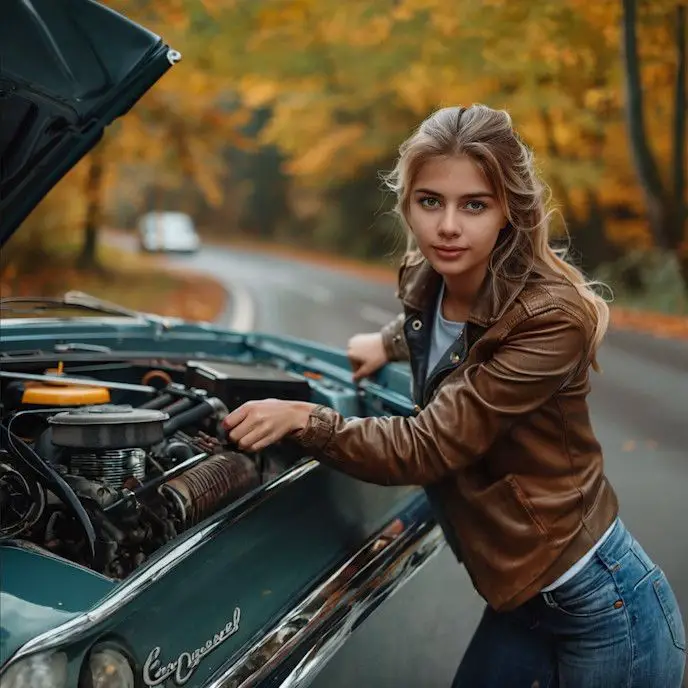
Expanding this image can be challenging, especially with complex elements like the car’s head and human limbs.
Gradually, we can solve these small problems through multiple attempts.
The final version of the inpainting effect is almost complete, although there may still be issues with the rearview mirror.
You can use Photoshop to refine the mirrors, and then inpaint them for a better look. I won’t show this step here.
Complex Outpainting Case
In this scenario, we will address how to expand an image where the upper and lower areas have different heights.
While Stable Diffusion does not offer a direct option to set varying heights, we can achieve this through a combination of techniques.
Steps for Expanding with Different Heights
1️⃣ Import Image: Begin by loading the image you need to process into A1111.
2️⃣ Modify Prompt: Adjust the prompt to describe the new content accurately, reflecting the new areas to be filled.
3️⃣ Set Resize Mode: Select the “Resize and fill” mode, ensuring the image size matches the previous setting, which is square.
4️⃣ Generate Initial Image: Run the generate operation to produce the initial image and save it.
Photoshop Processing
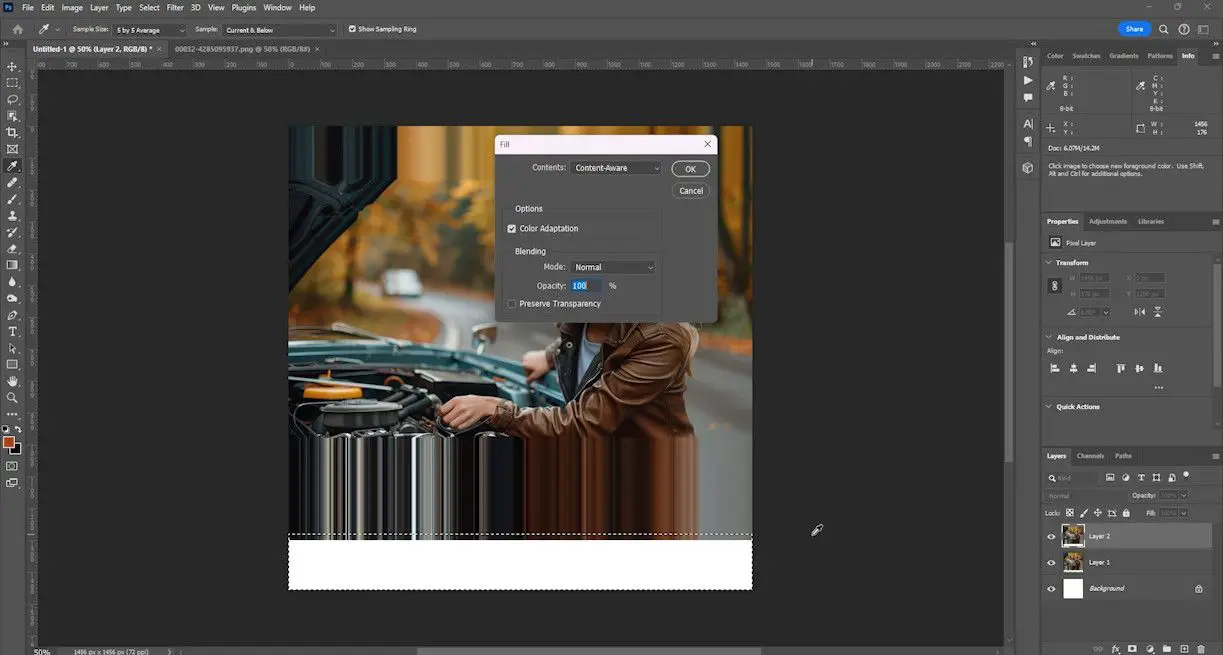
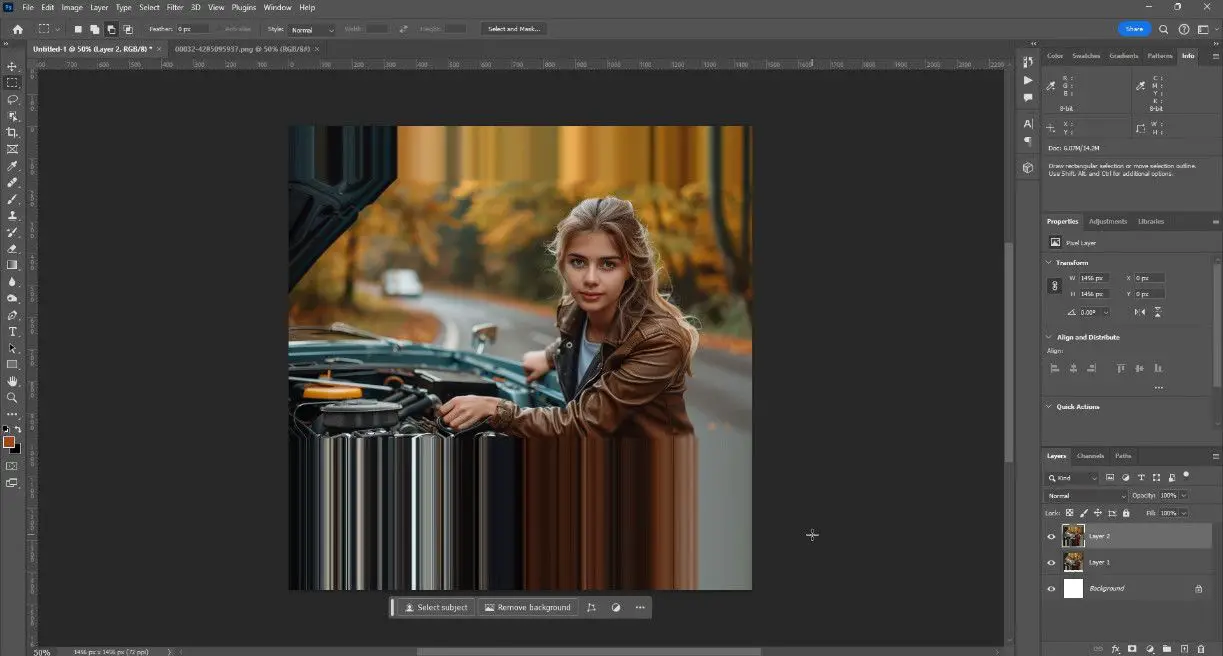
1️⃣ Open Photoshop: Create a new file with the same dimensions set in A1111.

2️⃣ Import Initial Image: Drag the saved initial image onto the blank layer. Move the layer upward to increase the height of the area that needs to be filled below.
3️⃣ Merge Layers: Press “Ctrl+E” to merge the layers.
4️⃣ Select the White Area: Use a selection tool to box the white filled area.
5️⃣ Content Aware Fill: Press “Shift+F5” to open the fill dialog box and select “Content Aware”.
6️⃣ Export Processed Image: Save the processed image.
A1111 Further Repainting
1️⃣ Re-import Image: Load the processed image back into A1111.
2️⃣ Repaint Upper and Lower Areas: Apply repainting to the upper and lower areas as needed.
3️⃣ Refine Details: Drag the improved image back into inpaint to further refine the details. Continue adjusting the prompt and repainting area to enhance the final result.
After several attempts and careful adjustments, you should achieve a successful generative fill with a smooth and coherent expansion.
Summary
By combining the capabilities of Stable Diffusion and Photoshop’s Content Aware Fill, you can tackle complex generative fill tasks where different areas of an image require varied heights.
Although this process may present challenges, persistence and iterative adjustments will yield impressive results.